1
Help
Ver 1.1
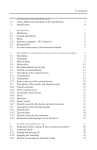
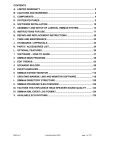
ALS Training .................................................................................................................................. 3
ECG Rhythm selection. .............................................................................................................. 3
Manikin Functions. ..................................................................................................................... 8
Menu Editing. ........................................................................................................................... 12
Run ALS Scenario. ....................................................................................................................... 13
Make ALS Scenario...................................................................................................................... 14
Actions ...................................................................................................................................... 17
Events........................................................................................................................................ 21
CPR Training. ............................................................................................................................... 25
ECG Simulator.............................................................................................................................. 27
Rhythm Selection...................................................................................................................... 27
ECG Monitor ............................................................................................................................ 30
ECG Recognition. ......................................................................................................................... 33
V.fib Recognition.......................................................................................................................... 36
Run ECG Sequence....................................................................................................................... 39
HeartSim 4000 Ver 1.1 Help Laerdal Medical 1998
page 2 of 39
ALS Training
ECG Rhythm selection.
Running Rhythm.
The Running Rhythm field shows the ECG that is currently running on the ECG monitor, the Link and the
Manikin. At start-up the system will always display a Sinus rhythm with HR 80 , BP120/80.
The Running Rhythm can be modified directly :
Extrasystole.
Pull down the Extrasyst. listbox and select an Extrasystole type from the list.
With the Remote Control when there is no Waiting rhythm selected: press one of the Extrasystole keys .
Pressing the key again will clear the Extrasyst. selection except for the "Unifocal PVC" key which will toggle
from <Unifocal PVC> to <PVCs RonT> to <
>.
Available Extrasystole types vary with Basic Rhythm.
Heart Rate
Increase or Decrease clicking on the HR UP/Down buttons
With the Remote Control when there is no Waiting rhythm selected: Press the "HR" Button ( the on screen
HR field shows the Remote Control focus by becoming green)
corresponding UP/Down keys on the Remote Control.
. Adjust the Heart Rate with the
Blood Pressure
Increase or Decrease clicking on the BP UP/Down buttons
With the Remote Control when there is no Waiting rhythm selected: Press the "BP" Button (the on screen
BP field shows the Remote Control focus by becoming green). Adjust the Blood Pressure with the
corresponding UP/Down keys on the Remote Control.
HeartSim 4000 Ver 1.1 Help Laerdal Medical 1998
page 3 of 39
Artifacts.
By clicking the appropriate box, Muscular and Electrical artifacts can be selected. Clicking on the box again
deselects the artifact.
With the Remote Control Press the "Artifact" Button. The first press will select Muscular
, the next press will select 50/60 Hz
and the next
press deselects all.
Extrasyst Rate (/min):
This allows you to vary the frequency of Extrasystoles (if selected). Extrasystoles occur randomly, at
approximately the rate selected. Click on the UP/Down buttons
to vary the rate.
With the Remote Control: Press the "Extrasyst. Rate" Button (the on screen field shows the Remote
Control focus by becoming green). Adjust the Extrasyst. Rate with the corresponding UP/Down keys on the
Remote Control.
Pulse
This is an information window and confirms the strength of the pulse, which is linked directly to the BP.
EMD/PEA
By clicking on this box the Pulse is switched off and Blood Pressure is set to 0/0, simulating EMD/PEA.
With the Remote Control press the "EMD/PEA" Button. Press the key again to deselect.
Manual Extrasyst
By clicking on this button an Extrasystole of the selected type is immediately generated. If no extrasystoles are
selected as part of the running rhythm a unifocal PVC will be seen.
With the Remote Control Press the "Manual Extrasyst" key.
Waiting Rhythm
The Waiting rhythm section allows you to select all parameters of a rhythm before it is activated, and to select a
new rhythm that will be activated when a defibrillation shock is given. Once a Waiting rhythm is selected the
Remote Control can only adjust Extrasyst. HR and BP for the Waiting rhythm, as it has no control functions
over the running rhythm any longer.
To select a Waiting rhythm when there is none selected, select a Basic Rhythm or a QRS type.
HeartSim 4000 Ver 1.1 Help Laerdal Medical 1998
page 4 of 39
QRS type.
Alters the type of waveform seen allowing you to present Infarct patterns etc.
Select a new QRS type by pulling down the QRS list box and select the desired type. Available QRS types vary
with the Basic Rhythm.
Selecting a QRS type when there was no Waiting rhythm selected will give a new Waiting rhythm with the
same Basic rhythm as the Running rhythm with default HR and BP and no Extrasystoles.
With the Remote Control: Press the "QRS" key repeatedly until the desired QRS type is displayed.
Basic Rhythm.
Select a new Basic rhythm by pulling down the Basic Rhythm list box and select the desired type. The Waiting
rhythm will appear with default HR and BP and no Extrasystoles.
With the Remote Control: Press the desired Basic Rhythm key.
If V.Fib or Pacemaker rhythms are selected, the HR Up/Down keys on the Remote Control
can be used to select the desired type of V.Fib or Pacemaker rhythms. This is indicted with the Remote Control
Focus being moved to the "Basic Rhythm" field when the HR key is pressed on the Remote Control.
Extrasystole.
Pull down the Extrasyst. listbox and select an Extrasystole type from the list.
With the Remote Control: press one of the Extrasystole keys. Pressing the key again will clear the
Extrasyst. selection except for the "Unifocal PVC" key which will toggle from <Unifocal PVC> to <PVCs
RonT> to <
>.
Available Extrasystole types vary with Basic Rhythm.
Heart Rate
Pull down the HR listbox and select the desired Heart Rate from the list.
With the Remote Control: Press the "HR" Button (the on screen HR field shows the Remote Control focus
by becoming green).
Control.
. Adjust the Heart Rate with the corresponding Up/Down keys on the Remote
Blood Pressure
Pull down the BP listbox and select the desired Blood Pressure from the list.
With the Remote Control: Press the "BP" Button (the on screen BP field shows the Remote Control focus
by becoming green). Adjust the Blood Pressure with the corresponding Up/Down keys on the Remote Control.
HeartSim 4000 Ver 1.1 Help Laerdal Medical 1998
page 5 of 39
Activating the Waiting Rhythm
There are three ways of activating the waiting rhythm:
By clicking on the Activate button or pressing the Activate key on the Remote Control, the
Waiting rhythm is becomes the Running rhythm and the Waiting rhythm section is cleared
.By clicking on the Paroxysmal button or pressing the Paroxysmal key on the Remote Control, the
Waiting rhythm is exchanged for the Running rhythm. The previous Running rhythm can be re-activated by
clicking on the paroxysmal button again.
A defibrillation shock to the manikin will also activate the Waiting rhythm - see below.
Defibrillation:
This function allows you to activate or disable the "ignore shock" function. At start-up defibrillation is enabled.
With the defibrillation button "Enabled" a defibrillation shock of 5 joules or more will convert the Running
rhythm to the Waiting rhythm, providing a Waiting rhythm has been selected.
By clicking on this button the "Ignore shock" function will become active. All defibrillation shocks will be
ignored and the running rhythm maintained.
With the Remote Control: Press the "Ignore Shock" key to toggle Defibrillation Enabled or Ignored.
Cardioversion will only occur when a Waiting rhythm is available.
To achieve cardio-version it is essential that a waiting rhythm is selected - this is the rhythm that will become
active on cardioversion.
A Defibrillation shock is indicated with a defibrillation symbol
defibrillation is enabled or not.
HeartSim 4000 Ver 1.1 Help Laerdal Medical 1998
on the manikin picture regardless of whether
page 6 of 39
Pacing: This function allows you to enable or disable the pacing function and to alter the pacing threshold. At
start-up Pacing is enabled and the pacing threshold is set to 80 mA.
When Pacing is Enabled the HeartSim will detect pacing pulses on the manikin. If they are above the set Pacing
Threshold level capture will be seen.
Clicking on the Pacing Threshold Up or Down buttons alters the pacing threshold for external pacing .
By selecting "Ignore Pacing" all external pacing stimuli will be ignored.
With the Remote Control: Press the "Pacing Threshold" key (the on screen Pacing Threshold field shows
the Remote Control focus by becoming green).
Adjust the Pacing Threshold with the
corresponding Up/Down keys on the Remote Control.
To disable / enable pacing, toggle the "Pacing Threshold" key.
External Pacing is indicated with a pacing symbol
enabled or not.
on the manikin picture regardless of whether pacing is
ECG Monitor.
The on screen monitor shows the Running ECG rhythm.
Display mode.
This button allows you to select between sweep or scroll mode. This function will only affect the on-screen
monitor display not the patient monitors. At start-up the display mode is sweep.
HeartSim 4000 Ver 1.1 Help Laerdal Medical 1998
page 7 of 39
Manikin Functions.
This part of the page allows you to select and alter the manikin functions.
Airway Obstruction
By clicking on the on screen green boxes you can enable complete airway obstruction of one or both lungs
allowing simulation of events such as foreign body obstruction, tension pneumothorax etc. By clicking on the
box again the airway obstruction is removed. Airway obstruction functions whether the manikin is intubated or
not (including left or right Main Bronchus intubation).
Sounds.
The manikin has an in-built speaker and can "respond" at your prompt with a variety of sounds.
•
Breathing. When this box is ticked, the manikin will make breathing sounds. By clicking on the box
you can toggle breathing On/Off.
The "Breathing key on the Remote Control will toggle breathing On/Off.
At start-up breathing will be on. Breathing is automatically turned off if the blood pressure becomes
zero.
•
•
Vomit. When this button is clicked or the "Vomit" key on the Remote Control is pressed, the manikin
will make a vomiting sound.
Moaning. When this button is clicked or the "Moaning" key on the Remote Control is pressed, the
manikin will make a moaning sound.
Actions on the Manikin.
During the running of a training scenario the HeartSim will detect, indicate and log a number of actions
performed on the manikin.
The manikin has built in sensors for the following actions:
•
Airway opened (Jaw thrust and/or head tilt).
manikin picture.
HeartSim 4000 Ver 1.1 Help Laerdal Medical 1998
. Indicated by changing head position on the
page 8 of 39
•
Pulse check (Carotid pulse check on either side).
•
Ventilations.
The lung volume for the individual lungs is indicated in the lung display.
•
Precordial Thump.
•
Chest compressions.
•
Defibrillation (detects shock of above 5 joules).
•
Pacing (detects external pacing).
Manual Logging of Events.
In addition to the sensorized input you can log additional events via the three event log
menus.
By selecting any one of the above you can then click on any event within the drop down menu to log it.
With the Remote Control, select the desired menu box. by pressing "ABC", "Misc." or "Medication". The
selected box will become green to indicate Remote Control Focus. Then use the corresponding Up/Down keys
to make the desired selection within a menu, press the "OK" key to select it.
The Contents of these three event log menus are user definable via the
button.
Certain Instructor entered events also give a visual display on the manikin picture,:
- Oxygen
, - IV line
, Suction
HeartSim 4000 Ver 1.1 Help Laerdal Medical 1998
, Intubation
page 9 of 39
View Event Log.
By clicking this button the manikin picture is replaced with the event log showing the most recent actions.
By clicking on the
button the manikin picture returns.
Event Log Control
The event log is timed and starts as soon as the ALS Training page is opened. Elapsed time from the start of the
session is displayed in the time display.
Clicking on the "Pause" button will pause the event log and stop the elapsed time. The button now changes to
"Start". By clicking on "Start" Event logging the elapsed timer will resume.
Clicking on the "Restart" button will clear the Event Log and the timing begins afresh. "Restart" will also
remove indicated Events such as Intubation and IV-line from the manikin picture.
With the Remote Control : The "Start/Pause" key will toggle Event logging On/Off.
Remote Control Enable - Disable.
By clicking on this button the input from the Remote Control unit is ignored. This function is useful if
another Skillmaster ALS Interactive Training System is being used in close proximity.
By clicking on the button again the Remote Control unit is re-activated.
HeartSim 4000 Ver 1.1 Help Laerdal Medical 1998
page 10 of 39
Access Buttons
The ALS Training Page contains a number of access buttons that on activation take you to another page or
function.
Edit menus.
By clicking on this button you will go to the edit page for the Event Log menus:
This page allows you to create your own drop down menus - see the Help function on this page for more
information.
Print Event Log.
By clicking on this button you are able to print event logs - either the current one or previously saved logs.
After having selected the desired log to print, the log will be presented as a Print Preview page.
Click on the Print button
in the Print Preview to select printer and print the log.
Save Event Log.
By clicking on this button you are able to save the current event log. You can select a "file name" for the log,
this can be your students name, course date or any combination you may wish to choose. Click on "save" to
initiate the save function and return automatically to the ALS Training page.
Run Scenario.
By clicking on this button you can select a Scenario made by the "Make Scenaro" function and run it as a
standard training session.
See the Help page on the Run Scenario page.
Make Scenario.
By clicking on this button you can prepare, save and edit your own scenarios which you can later run in the Run
Scenario function.
See the Help page on the Make Scenario page.
HeartSim 4000 Ver 1.1 Help Laerdal Medical 1998
page 11 of 39
Menu Editing.
The Edit Menu functions let you enter new items into the "ABC-action", "Miscellaneous" and "Medication" list
boxes.
The new items will appear in the Eventlog when selected.
List items, which are included in the original installation of HeartSim 4000, can not be deleted.
Adding an item to a Menu.
Type inn the new item in the corresponding entry box. Then click on the corresponding "Add" button.
The new item will appear in the list above.
Deleting an item from a Menu.
Select the item you want to delete in the list. Then click on the corresponding "Delete" button.
The deleted item will be removed from the list.
HeartSim 4000 Ver 1.1 Help Laerdal Medical 1998
page 12 of 39
Run ALS Scenario.
Run Scenario will start with a "Open Scenario" dialog. Select the Scenario you want to run, and click "OK"
The scenario page will then start, executing the scenario from Frame0
The Run Scenario page is almost identical to the ALS Training page. All the controls of the ALS Training page
are available and can be used to override the current frame of the Scenario. Be aware that if the scenario changes
frame, it may again override the manual selections.
The Run Scenario page has Scenario controls instead of the Event Log Control on the ALS Training page.
Scenario Control.
Frame name. The name of the current frame is shown at the top of the scenario control.
Patient time. The patient time is shown to the left, below the frame name. This time is counting down and is
updated every 2 seconds.
Frame time. Time spent in the current frame is shown to the right, below the frame name. This time is counting
up and is updated every 2 seconds.
Pause. Clicking on the Pause button will pause the scenario. Patient time and frame time will be frozen, and the
scenario will not accept inputs which are done while the scenario is paused. Event logging will also pause.
When the Start (the Pause button changes to "Start") button is clicked, scenario execution will resume.
Restart. Clicking on the "Restart" button will restart the scenario from Frame0.
The Event Log and the timing begins afresh. "Restart" will also remove indicated Events such as Intubation and
IV-line from the manikin picture.
All other functions on this page are identical to the ALS training page.
Note: You can edit scenarios to follow local protocols with the addition of events you enter yourself. To do this,
first go to the ALS Training page and select Edit Menu to add in your own events. Once these are entered go to
Make Scenario and include the new events in your scenario.
Note: Be aware that you can have the Make Scenario page and the Run Scenario page running at the same time.
This eases the making and testing of scenarios since you can edit and run a scenario simultaneously.
HeartSim 4000 Ver 1.1 Help Laerdal Medical 1998
page 13 of 39
Make ALS Scenario
This is a graphical editing tool, which allows you to make and edit scenarios that can be run under the "Run
Scenario" and "Run Sequence" functions.
Load Scenario.
Allows you to load and edit an existing scenario.
Selecting the default "newFile" will present a blank scenario with a blank Frame0 .
On the top of the scenario page the filename of the scenario currently being edited, is displayed.
Save Scenario.
Allows you to save a scenario.
Scenarios used by the HeartSim 4000 are saved in, and must reside in the folder: Heartsim4000/scenario:
HeartSim 4000 Ver 1.1 Help Laerdal Medical 1998
page 14 of 39
Print Scenario.
To print a Scenario, select "Print" on the Menu bar, and then "Print Scenario"
Select print mode in the "Select Print Mode" dialog and click "OK".
"Reduced size", will print the whole scenario over one A4 / Letter page. "Full size" will print the
scenario over 2 A4 / Letter pages.
Frames.
A Frame represents a state in the scenario.
The upper large field of the frame, the "Actions field", contains the name of the frame "Frame0" and the state
descriptions. Frame 0 is always the start frame.
The 3 bottom fields are "Event Fields", which describe 3 events that will make the scenario go to another frame.
The state descriptions can be set by the various actions that you can put into a frame. If an action is not specified
in a frame, the action will remain from the previous frame. (i.e. if the ECG rhythm is not changed in Frame1,
then the ECG from the previous frame(s) will still be running.
and Frame
When running the Scenario the Frame name together with Patient
time is displayed on the Run Scenario page.
HeartSim 4000 Ver 1.1 Help Laerdal Medical 1998
time
page 15 of 39
Creating a Frame
To create a frame click on the "Create Frame" button, then click on the place where you want to place the frame.
The frame will automatically receive a name, which will be displayed in the actions field.
Note that the frame names do not indicate order of execution. They are reference names for programming only.
Connecting Frames.
You can only have one connection from each Event filed. You can have multiple connections to a Frame.
To connect frames first click on the "Connect Frames" button. Frames can now be connected in 3 different
ways:
1. Connection with a line.
- click the mouse down in the Event Field you want to connect.
- drag the mouse to the Action Field you want to connect to and release the mouse button.
2. Connecting through a node.
- click the mouse down in the Event Field you want to connect.
- drag the mouse outside the frame and release the mouse button.
- select the frame you want to connect to from the connection dialog.
3. Connecting back to the current frame .
- click the mouse down in the Event Field you want to connect.
- drag the mouse to the Action Field of the same frame and release the mouse button.
HeartSim 4000 Ver 1.1 Help Laerdal Medical 1998
page 16 of 39
Moving Frames .
To move a frame, click on the "Select Frame" button
.
Click on the border of the frame you want to move, drag it to where you want it to be placed and release the
mouse button.
Deleting Frames, Connections and Frame Items.
To delete a frame, click on the "Select Frame" button
.
- Select the Whole frame by clicking on the border of the frame. (The frame border will be highlighted)
- Click on the "Delete Item" button
and the whole frame will be deleted with all its connections.
Connections and other frame items can be deleted in the same manner. Click on the item you want to delete (it
will be highlighted), then click on the "Delete Item" button .
Actions
To add or edit actions in a frame:
- click on the desired Action Button.
- then click on the action field of the frame that you want to edit.
- edit the dialog that appears, and click on the OK button.
- the programmed action will now appear in the action field of the frame.
Available Actions:
ECG and Blood pressure.
Allows you to set the ECG and Blood pressure, together with other ECG related parameters.
If the "Extrasyst. Rate" is set to blank (default), Extrasystole Rate will not be changed from the previous state.
HeartSim 4000 Ver 1.1 Help Laerdal Medical 1998
page 17 of 39
Defibrillation.
Defibrillation Enable / Ignore. This has the same function as in the HeartSim 4000 ALS page, in that it will
prevent the system changing to the Waiting rhythm when a defibrillatory shock is given. The Scenario has no
Waiting rhythm. This function has no effect on the Scenario execution of the Defibrillation Performed Event.
Clear Shock Count. In the Defibrillation Performed Event, you can set the event to be executed when a
certain number of shocks are given. The number of shocks are accumulative over the whole scenario, so for
instance "3 Shocks" means 3 shocks given from Frame 0 where the Scenario started, or from the Frame where
the shock counter was reset. You can use the function "Clear Shock Count" to reset the shock counter to zero in
any Frame.
Pacing Enable - Ignore.
Pacing Enable. Enables Pacing capture and allows you to set a Pacing threshold.
Pacing Ignored. Disables Pacing Capture. The "Pacing Capture started" and the "Pacing with Capture" events
can not occur if "Pacing Ignored" is set.
HeartSim 4000 Ver 1.1 Help Laerdal Medical 1998
page 18 of 39
Sounds.
This function allows you to set sounds. Only one sound can be set in each frame.
Be aware that Breathing is also controlled by the blood pressure. Setting "Breathing" with a non-perfusing
rhythm will have no effect.
Airway.
This function allows you to set Airway obstructions. You can obstruct the left and right airway independently.
Be aware that Airway obstruction controls are only active if the manikin head is in the backward position or if
Jaw thrust is performed, or if "Intubation" is selected.
HeartSim 4000 Ver 1.1 Help Laerdal Medical 1998
page 19 of 39
Patient time.
This function allows you to set, add to or subtract from the patient time.
The patient time is counted down in every frame of the scenario. It will count down and stop at 0. You can use
the value of the patient time as an event to move to another frame.
When running the Scenario the Patient time is displayed as the leftmost
time information in the Frame section.
Example: In this example the Patient time is set to 90 seconds in Frame0. If no CPR is given the patient will go
from V.fibr. to Asystole in 90 seconds. If CPR is started, the patient is given 15 more seconds, and for every 10
seconds of CPR given, the patient is given back 15 seconds in Patient time.
HeartSim 4000 Ver 1.1 Help Laerdal Medical 1998
page 20 of 39
Events.
Each frame can have 3 events that will bring the scenario to an other frame. Unspecified event fields will never
occur even if they are connected. Unconnected Event fields which are specified will connect back to the current
frame.
With exception from "Intubation" and "IV-Line" all events has to happen in the frame where the events are
specified.
Example: In this example Pulse checked will bring the scenario from Frame0 to Frame1. The pulse has to be
checked again in Frame1 to bring the scenario back to Frame 0. Frame1 has no memory of the event also
happening in Frame 0.
To add or edit events in a frame:
- click on the desired Events Button.
- then click on the desired event field of the frame that you want to edit.
- edit the dialog that appears, and click on the OK button. ("Pulse checked" and "Precordial Thump
have no dialogs).
- the programmed event will now appear in the selected event field of the frame.
Available Events:
Pulse checked.
When Pulse is checked on the manikin, the event has occurred. This event has no dialog and will be displayed
directly into the event field.
HeartSim 4000 Ver 1.1 Help Laerdal Medical 1998
page 21 of 39
CPR performed.
This function allows you to set one of the following CPR related events.
CPR started. Either compressions or ventilations are started on the manikin.
CPR stopped. There is more than 5 seconds since the last compression / ventilation on the manikin.
CPR performed. CPR (time between CPR stated and stopped) has been performed for more than a set period of
time in this frame. You can set this time. If CPR is started and stopped several times within the same Frame,
the time of the CPR sequences are accumulated.
Precordial Thump.
When a Precordial thump is performed on the manikin, the event has occurred. This event has no dialog and will
be displayed directly into the event field.
Defibrillation performed.
This function allows you to set the event to be executed when a certain number of shocks are given.
The number of shocks are accumulative over the whole scenario, so for instance "3 Shocks" means 3 shocks
given from Frame 0 where the Scenario started, or from the Frame where the shock counter was reset. You can
use the function "Clear Shock Count" to reset the shock counter in any Frame.
HeartSim 4000 Ver 1.1 Help Laerdal Medical 1998
page 22 of 39
Pacing performed.
This function allows you to set one of the following Pacing related events.
Pacing started. Pacing is performed on the manikin. Capture may not necessarily occur.
Pacing capture started. Pacing is performed on the manikin with a current level over the set threshold. This
event can not happen if pacing is disabled. Se also the "Pacing Enable - Ignore" action.
Pacing capture stopped. Pacing capture has occurred, and has now stopped.
Pacing with capture for. Pacing (time between Pacing Capture stated and Pacing stopped) has been performed
for more than a set period of time in this frame. You can set this time. If pacing is started and stopped several
times within the same Frame, the time of the pacing sequences are accumulated.
ABC action.
Any of the ABC actions, included actions added by the Edit Menu function can be programmed as events. ABC
actions that are preprogrammed in the Heartsim 4000 are language independent.
"Intubation " and "IV-line" differ from the other events in that they do not have to happen in the same frame that
the event is specified. The scenario will remember that "Intubation " and "IV-line" has occurred and the events
will be true in any frame after the occurrence.
HeartSim 4000 Ver 1.1 Help Laerdal Medical 1998
page 23 of 39
Miscellaneous.
Any of the Misc. actions, included actions added by the Edit Menu function can be programmed as events.
Misc. actions that are preprogrammed in the Heartsim 4000 are language independent.
Medication.
Any of the Medications, included medications added by the Edit Menu function can be programmed as events.
Medications that are preprogrammed in the HeartSim 4000 are language independent.
Time Events.
This function allows you to set events based on "Patient
time" or Frame time (time in the current frame).
Patient Time. The Patient time is equal to or less than the set number of seconds.
Time in this Frame. The time since the scenario entered this frame is equal to the set number of seconds.
HeartSim 4000 Ver 1.1 Help Laerdal Medical 1998
page 24 of 39
CPR Training.
This page allows you to assess an individuals CPR performance against set performance criteria.
The CPR log can be saved and printed.
When on this page, the manikin ECG is always V.fib. Airway obstruction valves are controlled by the
Neck/Jaw position.
The Remote Control can not be used on this page..
Real time CPR view.
This section is a 20 seconds real time image of CPR performance. There are two areas to the section, the upper
being ventilation and the lower chest compressions. Recording will automatically start when CPR activity is
started and will automatically stop when no CPR activity has been registered for 5 seconds. A
indicates a recording break.
symbol
The scroll bar gives access to the last 60 seconds of graphs.
Setting Protocol limits.
Both the ventilation and compression graphs have red and blue lines across the body of the graph to indicate the
upper and lower limits of acceptable performance. These indications are user definable so that you can set the
limits in accordance with your local national or international resuscitation guidelines. Simply place the mouse
cursor on the arrow to be moved, click and drag the arrow to the new setting. The new setting will remain in the
system as the default setting.
HeartSim 4000 Ver 1.1 Help Laerdal Medical 1998
page 25 of 39
Overview of CPR.
This section gives a 4 minute record of CPR and defibrillation. Episodes of ventilation, chest compressions and
defibrillation are blocked together with a numerical record of ventilations, compressions and shocks given
within that block.
Recording Control.
A 60 minute timer runs from the beginning of the session.
By clicking on "Pause" the recording is stopped and when "start" is clicked the recording starts again from
where it was interrupted.
By clicking on "Restart" the clock is zeroed and recording begins again from zero. Previous recordings will be
lost unless they are saved with the
function.
Print CPR log.
By clicking on this button you are able to print event logs - either the current one or previously saved logs. The
printed log will give you summary information and give you graphical representation of the last 60 seconds CPR
curves and previous 10 minutes CPR and defibrillation history.
After having selected the desired log to print, the log will be presented as a Print Preview page.
Click on the Print button
in the Print Preview to select printer and print the log.
Save CPR Log.
By clicking on this button you are able to save the current CPR log. You can select a "file name" for the log, this
can be your students name, course date or any combination you may wish to choose. Click on "Save" to initiate
the save function.
HeartSim 4000 Ver 1.1 Help Laerdal Medical 1998
page 26 of 39
ECG Simulator
Rhythm Selection
Running Rhythm.
The Running Rhythm field shows the ECG that is currently running on the ECG monitor. At start-up the system
will always display Sinus rhythm, HR 80.
The Running Rhythm can be modified directly:
Extrasystole.
Pull down the Extrasyst. list box and select an Extrasystole type from the list.
With the Remote Control when there is no Waiting rhythm selected: press one of the Extrasystole keys .
Pressing the key again will clear the Extrasyst. selection except for the "Unifocal PVC" key which will toggle
from <Unifocal PVC> to <PVCs RonT> to <
>.
Available Extrasystole types vary with Basic Rhythm.
Heart Rate
Pull down the HR listbox and select the desired Heart Rate from the list.
With the Remote Control when there is no Waiting rhythm selected: Press the "HR" Button ( the on screen
HR field shows the Remote Control focus by becoming green)
corresponding UP/Down keys on the Remote Control.
. Adjust the Heart Rate with the
Artifacts.
By clicking the appropriate box, Muscular and Electrical artifacts can be selected. Clicking on the box again
deselects the artifact.
With the Remote Control: Press the "Artifact" Button . The first press will select Muscular
, the next press will select 50/60 Hz
and the next
press deselects all.
HeartSim 4000 Ver 1.1 Help Laerdal Medical 1998
page 27 of 39
Extrasyst Rate (/min)
This allows you to vary the frequency of Extrasystoles (if selected). Extrasystoles occurs randomly, at
approximately the rate selected. Click on the UP/Down buttons
to vary the rate.
With the Remote Control : Press the "Extrasyst. Rate" Button (the on screen field shows the Remote
Control focus by becoming green). Adjust the Extrasyst. Rate with the corresponding UP/Down keys on the
Remote Control.
Manual Extrasyst
By clicking on this button an Extrasystole of the selected type is immediately generated. If no extrasystoles are
selected as part of the running rhythm a unifocal PVC will be seen.
With the Remote Control Press the "Manual Extrasyst" key .
Waiting Rhythm
The Waiting rhythm section allows you to select all parameters of a rhythm before it is activated. Once a
Waiting rhythm is selected the Remote Control can only adjust Extrasyst. and HR for the Waiting rhythm, as it
has no control functions over the Running rhythm any longer.
To select a Waiting rhythm when there is none selected, select a Basic Rhythm or a QRS type.
QRS type.
Alters the type of waveform seen allowing you to present Infarct patterns etc.
Select a new QRS type by pulling down the QRS list box and select the desired type. Available QRS types vary
with the Basic Rhythm.
Selecting a QRS type when there was no Waiting rhythm selected will give a new Waiting rhythm with the
same Basic rhythm as the Running rhythm with default HR and BP and no Extrasystoles.
With the Remote Control: Press the "QRS" key repeatedly until the desired QRS type is displayed.
Basic Rhythm.
Select a new Basic rhythm by pulling down the Basic Rhythm list box and select the desired type. The Waiting
rhythm will appear with default HR and BP and no Extrasystoles.
HeartSim 4000 Ver 1.1 Help Laerdal Medical 1998
page 28 of 39
With the Remote Control: Press the desired Basic Rhythm key.
If V.fib or Pacemaker rhythms are selected, the HR Up/Down keys on the Remote Control
can be used to select the desired type of V.fib or Pacemaker rhythms. This is indicted with the Remote Control
Focus being moved to the "Basic Rhythm" field when the HR key is pressed on the Remote Control.
Extrasystole. Pull down the Extrasyst. list box and select an Extrasystole type from the list.
With the Remote Control : press one of the Extrasystole keys. Pressing the key of the selected Extrasystole
will clear the Extrasyst. selection except for the "Unifocal PVC" key which will toggle from <Unifocal PVC> to
<PVCs RonT> to <
>.
Available Extrasystole types vary with the type of Basic Rhythm.
Heart Rate: Pull down the HR listbox and select the desired Heart Rate from the list.
With the Remote Control : Press the "HR" Button ( the on screen HR field shows the Remote Control focus
by becoming green)
Remote Control.
. Then adjust the Heart Rate with the corresponding Up/Down keys on the
Activating the Waiting Rhythm
There are two ways of activating the waiting rhythm:
By clicking on the Activate button or pressing the Activate key on the Remote Control, the
Waiting rhythm is becomes the Running rhythm and the Waiting rhythm section is cleared
.By clicking on the Paroxysmal button or pressing the Paroxysmal key on the Remote Control, the
Waiting rhythm is exchanged for the Running rhythm. The previous Running rhythm can be re-activated by
clicking on the paroxysmal button again.
Hide Rhythm Selections.
Clicking on this button will remove the rhythm selections section from the screen. Rhythm selections will then
have to be done from the remote control without visible feedback to the operator. Clicking the "Show" button
will display the rhythm selections again.
HeartSim 4000 Ver 1.1 Help Laerdal Medical 1998
page 29 of 39
ECG Monitor
The on screen HeartScope ECG monitor shows the Running ECG rhythm.
ECG Size.
By clicking on this button you can toggle the ECG size between 1X (default) and 2X.
Display Speed.
By clicking on this button you can toggle between Normal (approximately 25mm/sec depending on screen size
and resolution) and Fast (50mm/sec) ECG draw speeds.
Display mode.
This button allows you to select between sweep or scroll mode. This function will only affect the on-screen
monitor display not the patient monitors. At start-up the display mode is sweep.
Freeze.
By clicking on this button you freeze the ECG display on a 0.2 sec by 0.5 mV grid. In sweep mode the ECG will
be rearranged so that the most recent ECG is on the right edge of the display. In Freeze mode Cursor, Scroll and
Zoom functions will become available.
By clicking on the "Continue" button, the ECG returns to real time monitoring with a dynamic display.
With the Remote Control: The "Start/Pause" button will toggle Freeze On/Off.
HeartSim 4000 Ver 1.1 Help Laerdal Medical 1998
page 30 of 39
Cursors.
The cursors can be used for measuring distances between relevant landmarks on the ECG. The time difference
between the two cursors will be displayed to the Right of the screen as will the heart rate.
Both cursors can be "dragged and dropped" using the mouse - place the mouse pointer anywhere on the cursor
to be moved, click and hold down the left mouse button to drag the cursor to its’ new position. When the cursors
are repositioned the Time and Rate are updated.
The Time display shows the time between the two cursors. The Rate display shows the corresponding Heart rate
in Beats per Minute (bpm).
With the Remote Control: Press the "Cursor" key to select a cursor. The Selected cursor will become a full
line instead of a dotted line. Use the "OK" key to toggle between cursors. Use the Right and Left arrow keys to
move the selected cursor.
Scroll bar.
By moving the Horizontal scroll bar, the past 20 seconds of ECG can be reviewed. The time of the ECG in the
display is shown on the bottom of the ECG display window.
With the Remote Control : Use the gray Right and Left arrow keys to move the scroll bar. If one of the
cursors is selected, press the "Cursor" key to de-select cursors and select scrollbar.
Zoom bar.
Using the Zoom bar the size of the ECG on the display can be adjusted between 1X and 4X.
With the Remote Control : Use the gray Up/Down arrow keys to move the scroll bar.
HeartSim 4000 Ver 1.1 Help Laerdal Medical 1998
page 31 of 39
Remote Control Enable - Disable.
By clicking on this button the input from the Remote Control unit is ignored. This function is useful if
another Skillmaster ALS Interactive Training System is being used in close proximity.
By clicking on the button again the Remote Control unit is re-enabled.
Access Buttons
The ECG Training Page contains a number of access buttons that on activation take you to another page or
function.
Rhythm Recognition.
The Rhythm Recognition page will present rhythms at random from the HeartSim's rhythm library which
contains over 2500 different rhythm combinations. You must suggest Basic Rhythm and Extrasystole type. The
HeartSim will keep track of your score.
See Help in the Rhythm Recognition page for further information.
V.fib. Recognition.
The V.fib Recognition page will present rhythms at random from a library of field recorded rhythms of which
50% are V.fib. You must then determine whether it is a V.fib or not. The HeartSim will keep track of your
score.
See Help in the V.fib Recognition page for further information.
Run ECG Sequence.
By clicking on this button you run an ECG sequence made with the "Make Scenario" function.
See the Help page on the Run ECG Sequence page.
HeartSim 4000 Ver 1.1 Help Laerdal Medical 1998
page 32 of 39
ECG Recognition.
The ECG Recognition function will present rhythms at random from the rhythm library. Your task is to identify
the Basic Rhythm and any Extrasystoles. When both selections are answered correctly a new rhythm will be
presented after a few seconds.
Basic Rhythm.
Enter the Basic rhythm by pulling down the Basic rhythm list box and select the desired type.
If your selection is correct the selection will appear in the answer field above the list box.
Extrasystole.
Enter the Extrasystole by pulling down the Extrasyst. list box and select the desired type.
If your selection is correct the selection will appear in the answer field above the list box.
Next.
By clicking this button you can see the answer and a new rhythm will be presented after a few seconds.
Using "Next" will reduce your score.
Hint.
By clicking on this button, the characteristics of the running rhythm will be presented. Your score will not be
affected.
If no Basic rhythm has been correctly selected, the Hint will be for the Basic rhythm.
If a Basic rhythm has been correctly selected, the Hint will be for the Extrasystole.
HeartSim 4000 Ver 1.1 Help Laerdal Medical 1998
page 33 of 39
Time.
Time presented in the "Rhythm?" section is the time used to recognize the current rhythm.
Score.
The program presents an accumulated score. Pressing the "Reset" key will reset the score.
ECG Monitor.
The on screen HeartScope ECG monitor shows the Running ECG rhythm.
ECG Size.
By clicking on this button you can toggle the ECG size between 1X (default) and 2X.
Display Speed.
By clicking on this button you can toggle between Normal (approximately 25mm/sec depending on screen size
and resolution) and Fast (50mm/sec) ECG draw speeds.
Display mode.
This button allows you to select between sweep or scroll mode. This function will only affect the on-screen
monitor display not the patient monitors. At start-up the display mode is sweep.
HeartSim 4000 Ver 1.1 Help Laerdal Medical 1998
page 34 of 39
Freeze.
By clicking on this button you freeze the ECG display on a 0.2 sec by 0.5 mV grid. In sweep mode the ECG will
be rearranged so that the most recent ECG is on the right edge of the display. In Freeze mode Cursor, Scroll and
Zoom functions will become available.
By clicking on the "Continue" button, the ECG returns to real time monitoring with a dynamic display.
Cursors.
The cursors can be used for measuring distances between relevant landmarks on the ECG. The time difference
between the two cursors will be displayed to the Right of the screen as will the heart rate.
Both cursors can be "dragged and dropped" using the mouse - place the mouse pointer anywhere on the cursor
to be moved, click and hold down the left mouse button to drag the cursor to its’ new position. When the cursors
are repositioned the Time and Rate are updated.
The Time display shows the time between the two cursors. The Rate display shows the corresponding Heart rate
in Beats per Minute (bpm).
Scroll bar.
By moving the Horizontal scroll bar, the past 20 seconds of ECG can be reviewed. The time of the ECG in the
display is shown on the bottom of the ECG display window.
Zoom bar.
Using the Zoom bar the size of the ECG on the display can be adjusted between 1X and 4X.
HeartSim 4000 Ver 1.1 Help Laerdal Medical 1998
page 35 of 39
V.fib Recognition.
The V.Fib. Recognition function will present different field recorded rhythms at random. Your task is to identify
which should be defibrillated and which should not. About 50% of the rhythms are V.Fib. The rest are other
rhythms.
For the purpose of the Recognition Module, V.Tachs. with rate above 180 bpm. should be defibrillated.
Click on the "Yes" button if the rhythm should be defibrillated. Click on the "No" button if the rhythm should
not be defibrillated.
Next.
By clicking this button you can reveal the rhythm and a new rhythm will be presented after a few seconds.
Using "Next" will affect the score.
Time.
Time presented in the "Rhythm?" section is the time used to recognize the current rhythm.
Score.
The program presents an accumulated score. Pressing the "Reset" key will reset the score.
HeartSim 4000 Ver 1.1 Help Laerdal Medical 1998
page 36 of 39
ECG Monitor.
The on screen HeartScope ECG monitor shows the Running ECG rhythm.
ECG Size.
By clicking on this button you can toggle the ECG size between 1X (default) and 2X.
Display Speed.
By clicking on this button you can toggle between Normal (approximately 25mm/sec depending on screen size
and resolution) and Fast (50mm/sec) ECG draw speeds.
Display mode.
This button allows you to select between sweep or scroll mode. This function will only affect the on-screen
monitor display not the patient monitors. At start-up the display mode is sweep.
Freeze.
By clicking on this button you freeze the ECG display on a 0.2 sec by 0.5 mV grid. In sweep mode the ECG will
be rearranged so that the most recent ECG is on the right edge of the display. In Freeze mode Cursor, Scroll and
Zoom functions will become available.
By clicking on the "Continue" button, the ECG returns to real time monitoring with a dynamic display.
HeartSim 4000 Ver 1.1 Help Laerdal Medical 1998
page 37 of 39
Cursors.
The cursors can be used for measuring distances between relevant landmarks on the ECG. The time difference
between the two cursors will be displayed to the Right of the screen as will the heart rate.
Both cursors can be "dragged and dropped" using the mouse - place the mouse pointer anywhere on the cursor
to be moved, click and hold down the left mouse button to drag the cursor to its’ new position. When the cursors
are repositioned the Time and Rate are updated.
The Time display shows the time between the two cursors. The Rate display shows the corresponding Heart rate
in Beats per Minute (bpm).
Scroll bar.
By moving the Horizontal scroll bar, the past 20 seconds of ECG can be reviewed. The time of the ECG in the
display is shown on the bottom of the ECG display window.
Zoom bar.
Using the Zoom bar the size of the ECG on the display can be adjusted between 1X and 4X.
HeartSim 4000 Ver 1.1 Help Laerdal Medical 1998
page 38 of 39
Run ECG Sequence.
Run ECG sequence will start with a "Open Scenario" dialog. Select the Scenario you want to run, and click
"OK"
The Run ECG Sequence page will then start, executing the scenario from Frame0
The Run ECG Sequence is almost identical to the ECG Simulator page. All the controls of the ECG Simulator
page are available and can be used to override the current frame of the Scenario. Be aware that if the scenario
changes frame, it may again override the manual selections.
The Run ECG Sequence page has Scenario controls in addition to the controls of the ECG Simulator page.
Scenario Control.
Frame name. The name of the current frame is shown at the top of the scenario control.
Patient time. The patient time is shown to the left, below the frame name. This time is counting down and is
updated every 2 seconds.
Frame time. Time spent in the current frame is shown to the right, below the frame name. This time is counting
up and is updated every 2 seconds.
Restart. Clicking on the "Restart" button will restart the scenario from Frame0.
All other functions on this page are identical to the ECG Simulator page.
Note: Be aware that you can have the Make Scenario page and the Run ECG Sequence page running at the
same time. This eases the making and testing of sequences since you can edit and run a sequence
simultaneously.
HeartSim 4000 Ver 1.1 Help Laerdal Medical 1998
page 39 of 39