1
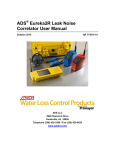
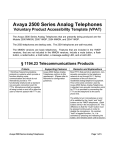
® ADS Mikron User Manual October 2009 QR 775014 A0 ADS LLC 4940 Research Drive Huntsville, Alabama 35805 Telephone: (800) 430-3366 / Fax: (800) 430-6633 www.adsenv.com ADS Mikron User Manual Copyright © 2009 ADS® LLC. All rights reserved. ADS® is a registered trademark of ADS LLC. All other brand and product names are trademarks or registered trademarks of their respective holders. Notice of Proprietary Information The information contained herein represents the latest information available at the time of publication. ADS reserves the right to make any changes or modifications to the content of this document, without notice, to reflect the latest changes to the equipment. No part of this document may be reproduced in any form without the written consent of ADS. ii ADS Mikron User Manual Table of Contents Chapter 1 System Overview.............................................................................. 1 Principle of Acoustic Leak Listening ..........................................................2 Minimum Noise Level Indication..........................................................3 ADS No-Hassle Warranty and Return Policy..............................................4 New Product Warranty ..........................................................................4 Replacement or Loaner Equipment .......................................................4 Shipping .................................................................................................4 Product Returns......................................................................................5 Chapter 2 Systems and Components .............................................................. 6 Mikron Systems ...........................................................................................7 Mikron – Alpha (Acoustic Probe System).............................................7 Mikron - Gamma (Ground Microphone System) ..................................8 Mikron – Alpha + Gamma (Combination System) ...............................8 Components ...............................................................................................10 Ground Microphone.............................................................................10 Hand Probe...........................................................................................10 Probe Handle........................................................................................11 Rods .....................................................................................................11 Ground Contact Tripod ........................................................................11 Ground Spike .......................................................................................11 Magnet Attachment..............................................................................11 Headphones..........................................................................................12 Battery Charger....................................................................................12 Rugged Carrying Case .........................................................................12 Handheld Amplifier ...................................................................................13 Sensor / Charger Connector .................................................................13 Headphone Connector..........................................................................13 Control Buttons....................................................................................13 Display Description .............................................................................14 Battery and Charging ...........................................................................17 Chapter 3 Operational Procedure................................................................... 18 Chapter 4 Index… ............................................................................................ 19 iii ADS Mikron User Manual CHAPTER 1 System Overview The ADS® Mikron is an advanced leak listening system. The design is based upon a very high-performance sensor and incorporates low-noise processing electronics to give excellent acoustic performance over a wide frequency range. Mikron incorporates a minimum noise level detection system and is simple to use. Mikron enables the operator to listen to leak noise at available pipe fittings and transmitted through the ground, taking measurements at regular intervals. This method allows the operator to identify successive locations with the greatest noise to ultimately determine the closest point to the leak. The Mikron system offers the following benefits: Very high acoustic sensitivity Hand probe or ground microphone options Advanced ground microphone with wind-noise isolation Simple-to-use, lightweight amplifier Minimum noise level indication Using a Mikron in the field 1 ADS Mikron User Manual Principle of Acoustic Leak Listening The principle of leak noise listening is to determine the location with the greatest leak noise. The path of the pipeline under investigation must be known and other potential sources of noise interference must be acknowledged. Because sound travels much better through the pipe, the first step involves listening directly at each accessible fitting (e.g., valve or hydrant) along the pipe. This enables the operator to identify the pipe section where the leak noise is greatest. The next step involves using the ground microphone to listen to the leak noise transmitted through the ground, taking measurements at regular intervals along the ground surface above the selected section of the pipe. This method should enable the operator to identify the location with greatest leak noise. Filters are used to reduce the effects of noise interference and maximize the reception of leak noise. Harder materials generally transmit sound better. Therefore, iron and steel pipes coupled with paved surfaces tend to transmit higher frequencies and higher levels of noise. Plastic pipes and soft ground give poorer performance. Listening on 3 hydrant/valve positions 2 ADS Mikron User Manual Surface Listening Minimum Noise Level Indication To assist in leak location, the Mikron displays the Minimum Noise Level. This represents the level of background noise without transient noise, such as traffic noise. The Minimum Noise Level may also include leak noise. The Mikron also displays the two previous Minimum Noise Level measurements so that the user can determine whether he or she is moving closer to or further away from the leak. 3 ADS Mikron User Manual ADS No-Hassle Warranty and Return Policy The following sections detail the hassle-free warranty and return policy for the ADS Mikron. New Product Warranty ADS will repair or replace any Mikron equipment (supplied by ADS) that is defective in materials and/or workmanship for up to two (2) years following the date of shipment from ADS. To make a warranty claim, the customer should simply call ADS at (256) 430-3366 or contact the ADS Support Center toll-free at (877) 237-9585. The ADS Client Services Agent will assign a Return Materials Authorization (RMA) to the customer’s claim immediately. The customer shall return a defective unit or part to ADS for troubleshooting and repair or replacement within 10 days with the RMA. Replacement or Loaner Equipment For a defective part, ADS will ship a replacement part immediately once the customer makes an initial claim. However, if ADS does not receive the defective part within 30 days or testing concludes that the part experienced excessive wear and tear or abuse for the period of use, ADS will bill the customer for the replacement part. For a defective unit, at the customer’s request, ADS will ship a temporary (loaner) unit to the customer at the time of the initial claim. However, if ADS does not receive the temporary unit from the customer within 15 days of receiving the repaired or replacement unit or testing concludes that the unit experienced excessive wear and tear or abuse for the period of use, ADS will bill the customer for the temporary unit. Shipping The customer must pay to ship defective equipment to ADS for repair or replacement. However, ADS will incur the costs for shipping the repaired or replacement equipment back to the customer using the same priority shipment procured by the customer upon returning the defective equipment to ADS. 4 ADS Mikron User Manual Product Returns If the customer is not satisfied with the performance of the Mikron, the customer may return the equipment within 30 days for a full refund, provided the condition of the equipment is in the same condition as sold, except for expected or normal wear and tear for the period of use. 5 ADS Mikron User Manual CHAPTER 2 Systems and Components Three Mikron systems are available: Mikron – Alpha (Acoustic Probe System) Mikron – Gamma (Ground Microphone System) Mikron – Alpha + Gamma (Combination System) This chapter lists the components included with each system and provides a description of each component. ADS offers an optional vehicle battery charge cable that is compatible with all three systems. 6 ADS Mikron User Manual Mikron Systems The following sections list the components included in each Mikron system. Mikron – Alpha (Acoustic Probe System) The Alpha version includes the following components: Acoustic sensor Sensor handle and rods (three parts) Ground contact tripod Ground spike Magnet attachment Handheld amplifier (including neck strap) High-quality headphones Battery charger Rugged carrying case Mikron – Alpha 7 ADS Mikron User Manual Mikron - Gamma (Ground Microphone System) The Gamma version includes the following components: Ground microphone sensor Microphone handle (two parts) Handheld amplifier (including neck strap) High-quality headphones Battery charger Rugged carrying case Mikron – Gamma Mikron – Alpha + Gamma (Combination System) The Alpha + Gamma version includes the following components: Acoustic sensor Ground microphone sensor 8 ADS Mikron User Manual Handle and rods (four parts) Ground contact tripod Ground spike Magnet attachment Handheld amplifier (including neck strap) High-quality headphones Battery charger Rugged carrying case Mikron – Alpha + Gamma 9 ADS Mikron User Manual Components The following sections provide a general description of the system components. Ground Microphone The ground microphone is a precision unit containing a high-performance sensor that is suspended, drastically reducing wind noise or other sources of airborne noise. Ground Microphone Hand Probe The user can configure the hand probe system as an electronic listening stick or ground microphone. It includes a tripod for use on hard ground surfaces and a spike for use on soft ground. When used as a ground microphone, the hand probe offers good performance but does not include the suspended sensor that reduces wind noise and other sources of airborne noise. 10 ADS Mikron User Manual Hand Probe with Ground Spike attached Probe Handle The probe handle consists of two rods, one with a handle at the end. The two pieces screw together and into the top of the ground microphone or hand probe. If necessary, the holes in the rods can be used during disassembly if the rods are too tight to unscrew by hand. Rods (three parts) Three rods can be screwed into the base of the hand probe to create an electronic listening stick. Ground Contact Tripod The tripod can be attached to the end of the hand probe for use as a base on hard surfaces. Ground Spike The ground spike screws into the base of the hand probe to secure the unit in soft ground. Magnet Attachment The magnet attachment allows the hand probe to be mounted onto a ferrous surface. 11 ADS Mikron User Manual Headphones Each Mikron system includes high-quality headphones. Aviation grade headphones are also available for reducing ambient background noise. The headphones connect to the top of the amplifier unit. Battery Charger This component charges the amplifier when connected to the sensor connector on the right side of the unit and a mains power supply. Rugged Carrying Case The Mikron comes in a rugged carrying case for protection during storage and transportation. ADS recommends keeping the system in the case when not in use. Mikron (Ground Sensor Version) in Rugged Carrying Case 12 ADS Mikron User Manual Handheld Amplifier The small, lightweight amplifier unit can be held in one hand. It is powered by a rechargeable battery, has two military-grade connectors, and a loop for the neck strap. Sensor / Charger Connector The sensor attaches to the connector on the right-side at the top of the amplifier. The amplifier must be off when connecting or disconnecting the sensor. The sensor connector also receives the battery charger. Headphone Connector The connector on the left side of the unit is for connecting the headphones. Control Buttons The front of the amplifier unit has several control buttons. The following table provides a brief description of each button: Button Function Press-to-listen Hold down this button to display the current minimum noise level in the right-hand box (largest) and provide sound to the headphones. Release this button to store the minimum value in the right-hand box in memory. Decrease Press this button to decrease the volume in the headphones or adjust the contrast on the screen when in screen contrast mode. Increase Press this button to increase the volume in the headphones or adjust the contrast on the screen when in screen contrast mode. Store Press and release this button to store the current value of the minimum sound level (shown in the right-hand box) in the middle box and to move the contents of the middle box to the left-hand box, discarding the contents of the left-hand box. This feature allows the unit to display the last 3 saved values on the screen. Holding down this button for approximately 3 seconds deletes the data displayed in the boxes. 13 ADS Mikron User Manual Button Function Filters Press and release this button to cycle through the filter options. When a new filter is selected, the amplifier requires a few seconds to stabilize. If a user operates the Press-to-listen button during this period, the current sound level figure will flash to indicate it is unreliable. When the figure stops flashing, normal operation will resume. Turning the Unit On/Off Turn on the amplifier by pressing any key. However, make sure the sensor and headphones are connected before turning on the amplifier. Turn off the unit by pressing the Increase and Decrease buttons simultaneously. The amplifier will turn off automatically if no button is pressed for 5 minutes. Note: Turning off the unit deletes all recorded data. Display Description Typical screen indication Minimum Noise Level Display During operation, the Mikron displays the Minimum Noise Level and the two previous Minimum Noise Level measurements simultaneously to indicate whether the user is moving toward or away from the leak. The main display has three boxes. When the amplifier is turned on, these boxes are empty. Pressing the Press-to-listen button displays the current Minimum Noise Level in the right-hand (largest) box. Releasing the Press-toListen button permanently displays the current level in the right-hand box. 14 ADS Mikron User Manual Each time the user presses the store button, the values move to the left and the right-hand value clears (the left-hand stored value is lost). This allows the user to compare the latest displayed value with the two previous values. Volume Level Holding down the Press-to-listen button shows a speaker symbol on the left side of the display. Releasing the button crosses out the speaker symbol. Sound volume display A triangle graphic representing the volume of the sound in the headphones displays below the speaker symbol. When the unit is on, the minimum volume is set in the headphones. The user can change the volume using the Decrease and Increase buttons. Changing the volume in the headphones does not change the noise level displays. Real-Time Noise Level The unit displays a progress bar showing the current sound level detected in the sensor. This is not the Minimum Noise Level. 15 ADS Mikron User Manual Sensor Failure If a sensor failure occurs while the user is pressing down the Press-to-listen button, the display replaces the volume display with a flashing failed sensor icon. If failure occurs while powering up the unit, the icon will flash (without requiring the user to press down the Press-to-listen button). Failed sensor icon Filter Display The lower part of the display shows the selected filters. In the following example, the filters have been set to allow a listening range of 75Hz to 1500Hz. Press the Filters button to select the filter. The following filters are available: Recommended Use Filter Range Ground listen, metallic pipe 75Hz – 1500Hz Ground listen, plastic pipe Direct contact, metallic pipe Direct contact, plastic pipe Wideband noise 75Hz – 750Hz 600Hz – 2500Hz 200Hz – 1500Hz 30Hz – 4000Hz Note: Changing the filter range deletes the stored data. Backlight To turn the backlight on or off, hold the Filters button for more than two seconds. Each time the user holds the button, the backlight will cycle through on and off. 16 ADS Mikron User Manual Contrast Enter contrast mode by pressing the store and filter buttons together. To adjust the contrast, press the decrease and increase buttons as necessary. After accessing the desired level, press the filter button to return the unit to normal operation. Contrast bar Battery and Charging The amplifier contains a non-removable, rechargeable battery. Typical battery life provides 35 hours of operational use with the backlight off and 17 hours with the backlight on. The battery display shows the current charge of the battery. The following example represents a fully charged battery. To charge the battery, connect the battery charger to the amplifier unit (right-hand connector) and to a suitable mains power supply. Battery display 17 ADS Mikron User Manual CHAPTER 3 Operational Procedure ADS recommends using the following procedure to operate the system: 1. Attach the required handle to the sensor (ground microphone or hand probe). Another option is to attach the rods to the hand probe. 2. Connect the ground microphone or hand probe to the amplifier unit. 3. Connect the headphones to the amplifier unit. 4. Connect the neck strap (if required). 5. Switch on the amplifier unit (by pressing any button). 6. Select the filters as required. 7. Position the sensor as required. 8. Press and hold the listen button to monitor the sound. Adjust the headphone level as required. 9. When the noise level has settled (to the Minimum Noise Level) and no transient noise exists (e.g., from passing traffic), release the Press-tolisten button. 10. Press the Store button to store the current (Minimum Noise Level) measurement. 11. Move to a new location and position the sensor. 12. Press the Press-to-listen button. Allow the sound level to settle (to the Minimum Noise Level), release the Press-to-listen button as required, and then store the level (if required). 13. Move to further locations and repeat the listen-and-store procedure to determine the highest Minimum Noise Level. The highest Minimum Noise Level indicates the closest position to the leak. 14. At the end of listening operations, turn off the unit, disconnect the headphones and sensor, and return the equipment to its case. Recharge the battery if required. 18 ADS Mikron User Manual CHAPTER 4 Index Acoustic Probe System ............. 7 Alpha + Gamma........................ 8 Backlight ................................. 16 Battery and Charging .............. 17 Battery Charger....................... 12 Carry ....................................... 12 Carrying Case.............................. See Rugged Carrying Case Case............................................. See Rugged Carrying Case Charger Connector ...................... See Sensor/Charger Connector Combination System................. 8 Components ............................ 10 Contrast ................................... 17 Control Buttons....................... 13 Decrease.................................. 13 Display Contrast.......................... See Contrast Display Description ................ 14 Failure of Sensor ......................... See Sensor Failure Filter Display .......................... 16 Filters ...................................... 14 Ground Contact Tripod ........... 11 Ground Microphone............ 8, 10 Ground Microphone System ..... 8 Ground Spike .......................... 11 Hand Probe.............................. 10 Handheld Amplifier ................ 13 Headphone Connector............. 13 Headphones............................. 12 Increase ................................... 13 Light............................................ See Backlight Magnet Attachment................. 11 Minimum Noise Level Display .............................. 14 Minimum Noise Level Indication ............................ 3 On See Turn On Operational Procedure ............ 18 Press-to-Listen ........................ 13 Principle of Operation............... 2 Probe Handle........................... 11 Real-Time Noise Level ........... 15 Rods ........................................ 11 Rugged Carrying Case ............ 12 Sensor / Charger Connector .... 13 Sensor Connector ........................ See Sensor/Charger Connector Sensor Failure ......................... 16 Store ........................................ 13 System Components.................. 6 Turn On................................... 14 Volume Level.......................... 15 19