1
<Replace this page with user22cv.doc, the cover page>
Introduction
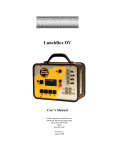
The Video LunchBox™ is a pencil test/reference test frame grabber capable
of recording individual frames or full motion video, and playing them back, full
screen, at a user selectable 15, 24, or 30 frames per second.
The Video LunchBox is designed to be easy to use. Most users learn all they
need to know about the Video LunchBox by using it for a few minutes. But
since there are some useful features which are not so obvious, you might
want to scan the Table of Contents to help you decide which sections of this
User's Manual are worth reading.
If you need to contact Animation Toolworks, we can be reached at:
Animation Toolworks, Inc.
18484 Parrett Mountain Road
Sherwood, Oregon, 97140
(503)625-6438
© 1997 Animation Toolworks, Inc. All rights reserved
First printing, April 1997
Trademarks
Video LunchBox, Animation Toolworks, and the Animation Toolworks logo are
trademarks of Animation Toolworks, Inc. Other brands or products are the trademarks or
registered trademarks of their respective holders and should be treated as such.
Copyright
i
Table Of Contents
Caring for the Video LunchBox
•
•
•
•
page 1
Operating conditions
How to operate the latch
How to remove the cover
How to clean the Video LunchBox
Setting Up The Video LunchBox
page 2
• How to choose cameras, monitors, and cables for use with the Video LunchBox.
• How to set up your Video LunchBox with your camera, monitor, and (optional) video tape
recorder.
page 7
Two- Minute Tutorial
A good first introduction to the Video LunchBox-- you'll be operating it in less than two
minutes
page 8
How To
Step-by-step instructions on how to use the Video Lunchbox in common animation scenarios:
• replacing a bad frame
• accurate replacement/ repositioning
• saving images to video tape
• loading images from video tape
• shooting a live-motion reference
• animating to a live-motion reference
• key frame animation
• setting custom loop boundaries
• changing a loop boundary
• erasing custom loop boundaries
• shoot time lapse video
• recovering from a power glitch
• switching to high resolution mode
Video Lunchbox Reference
page 13
Key by key detail of all functions of the Video LunchBox.
• Basic Mode
• Special Mode 1- programming loop boundaries
• Special Mode 2- the intervalometer
• Special Mode 3- advanced features
Troubleshooting
page 18
Here are common problems other Video LunchBox users have encountered, along with step
by step solutions.
Specifications
page 21
Details about the Video LunchBox's electrical characteristics.
Warranty Information
page 22
What's covered, and how to get service.
ii
Caring for the Video LunchBox
Operating Conditions
Operating conditions for the Video LunchBox are the same as for most electronic
equipment. It should not be operated in a damp or hot environment. Care should be
taken not to cover the vent holes on the sides of the Video LunchBox.
The Video Lunchbox must only be operated on 60 Hz, 110 volt AC power. Make sure the
power cord is fully inserted into its socket in the side of the Video LunchBox.
The Video LunchBox is not user serviceable-- if it needs servicing, it must be returned to
Animation Toolworks for service.
How to operate the latch
The draw latch on the front of the Video LunchBox can be a little tricky to operate. Flip
out the clasp so you can grip it, then rotate it counter-clockwise to release it, or clockwise
to tighten it.
How to remove the cover
The cover of the Video LunchBox can be completely removed to reduce clutter in your
workspace.
1) Open the front latch
2) One at a time, retract the hinge pins by grasping the plastic loop, squeezing it tightly,
then rotating it upward until it points straight out.
Replacing the cover
Before you replace the cover, make sure the hinge pins are retracted as described
above. Then simply place the cover on the Video LunchBox, and flip the plastic loops on
the hinges downward until they are flat against the side of the Video LunchBox.
How to clean the Video LunchBox
Disconnect the power cord, then wipe it with a dry or slightly damp sponge or cloth.
1
Setting Up the Video Lunchbox
Choosing components
Camera:
The camera will usually be the component which limits the resolution of the Video
LunchBox system, so it's important to choose the right camera for your needs. If you
require higher quality output, you will need a high resolution camera. If you are doing
reference tests with a low resolution monitor, almost any camera will do.
The Video LunchBox will work with CCD based cameras. These include most
camcorders or video cameras built since 1990. While camcorders will work for most
uses, they have some limitations:
•
•
•
some camcorders turn off after a few minutes of not recording
some camcorders have low video resolution and poor lenses. Manufacturers
put the money into a tape transport mechanism and battery power system
which you will not use while animating with the Video LunchBox
Few camcorders have interchangeable lenses
The alternative to a camcorder is a video camera. For the same price, you can usually
get higher resolution in a video camera than in a camcorder. Low resolution
monochrome cameras can be found for about $150; high resolution color cameras can
cost up to $1000 or more. Many animators like to use cameras with a C mount lens
system, since this is the same system used on some 16mm film cameras, such as the
Bolex.
Video cameras today have either 1/3 inch or 1/2 inch CCD arrays. 1/2 CCD arrays are
usually higher resolution cameras, and are more expensive. Just as with film, the
different format cameras produce different results with the same lens. In our experience,
the following lens choices offer good results:
camera
1/3 inch CCD
1/2 inch CCD
2-D on copy stand
3-D stop motion set
8 mm fixed focal length
12 mm fixed focal length
8-75 mm zoom
8-75 mm zoom
Animation Toolworks offers a selection of cameras and lenses which have been tested
with the Video LunchBox. Call for more information.
Monitor:
You will need a video monitor with a "video" or "line" input. If your monitor only has an
"Antenna" or "Cable" input, you will not be able to connect it directly to the Video
LunchBox.
Most consumer or professional video monitors will work well with the Video LunchBox.
We have encountered a few monitors on which the colors flicker when used with the
Video LunchBox. If this occurs with your monitor, please refer to the Troubleshooting
section (“When viewing a captured frame, the color flickers on and off”, page 19.)
If you plan to frequently connect and disconnect the Video LunchBox and the monitor, we
recommend you find a monitor with BNC connectors instead of RCA jacks. RCA
2
connectors do not handle the stress of repeated use very well, and may start to fail after
a few hundred connections.
Animation Toolworks has a selection of monitors available for purchase. Call for more
information.
Cables:
Don't skimp on cables. If you've ever wasted an hour because a cable was defective you
know what we mean. We recommend using 75 ohm RG59 BNC video cables. You can
also use good quality RCA jack type video cables, but the connectors will wear out faster
and you will need an adapter on the Video LunchBox end of the cables. Do not use 50
ohm RG58 computer cables. Do not use RCA jack type audio cables.
Power Strips:
A good power strip makes setup easier and can reduce problems with the video
equipment. Look for a power strip with a 15 Amp circuit breaker. Consider using a
power strip with a surge protector built in-- they are inexpensive, and can protect all your
video equipment at once.
3
Attaching Components
The Basic Setup
Equipment:
• Power strip
• Video Camera
• Video LunchBox
• Video Monitor
• Two 75 ohm BNC video cables
1) Plug the Camera, Video Lunchbox, and Monitor into the same power strip.
2) Attach a 75 ohm video cable from the
connector on the Video LunchBox to the
"Video out" connector on the camera. You may need a BNC to RCA adapter if your
camera has an RCA type connector.
3) Attach a 75 ohm BNC cable from the
connector on the Video LunchBox to the
"Video in" or "line" or "aux" connector on the monitor.
Note: Do not attempt to attach the BNC cable to the monitor’s antenna connection.
4) Set the monitor to the correct video input mode. Frequently, the monitor will have a
"Video" mode, or a selection for "line" or "aux", instead of the video tuner. For example,
say you have attached the cable to the monitor’s “Video 3 In” connector. Use the
monitor’s buttons or menus for “Input”, or “Line In”, to select “Video 3” as the Input.
If you encounter any difficulties, refer to the Troubleshooting section (“The frame number
display is on, the red light is not flashing, but there is no video on the monitor,” page 18.)
4
The Recording Setup (Allows recording to video tape)
Equipment:
• Power strip
• Camera
• Video LunchBox
• Monitor
• Video Tape Recorder
• Three 75 ohm BNC video cables
1) Plug the Camera, Video Lunchbox, and Monitor, and Video Tape Recorder (VTR) into
the same power strip.
2) Attach a 75 ohm video cable from the
connector on the Video LunchBox to the
"Video out" connector on the camera. You may need a BNC to RCA adapter if your
camera has an RCA type connector.
3) Attach a 75 ohm BNC cable from the
connector on the Video LunchBox to the
"Video in" or "line in" or "aux" connector on the video tape recorder. You may need a
BNC to RCA adapter if your video tape recorder has an RCA type connector.
4) Attach a 75 ohm BNC cable from the "video out" or "monitor" connector on the video
tape recorder to the "Video in" or "line" or "aux" connector on the monitor.
5) Set the monitor to the correct video input mode. Frequently, the monitor will have a
"Video" mode, or a selection for "line" or "aux", instead of the video tuner. For example,
say you have attached the cable to the monitor’s “Video 3 In” connector. Use the
monitor’s buttons or menus for “Input”, or “Line In”, to select “Video 3” as the Input.
6) Select the Video LunchBox as the source input for the VTR. Most VTRs have an
"input", "input select", or "input source" selector switch. Select "line" or "aux" or "L1". On
some VTRs, this is done by changing the channel until “line" or "aux" or "L1" appears.
7) Operate as described in “Scenario 3: Saving images to video tape” on page 8.
5
Download setup (Allows you to load frames from a video tape into the
Video LunchBox)
Equipment:
• Power strip
• Video LunchBox
• Monitor
• Video Tape Recorder
• Three 75 ohm BNC video cables
1) Plug the Camera, Video Lunchbox, and Monitor, and Video Tape Recorder (VTR) into
the same power strip.
2) Attach a 75 ohm video cable from the
connector on the Video LunchBox to the
"video out" or "monitor" connector on the video tape recorder. You may need a BNC to
RCA adapter if your VTR has an RCA type connector.
3) Attach a 75 ohm BNC cable from the
connector on the Video LunchBox to the
"Video in" or "line" or "aux" connector on the monitor.
4) Set the monitor to the correct video input mode. Frequently, the monitor will have a
"Video" mode, or a selection for "line" or "aux", instead of the video tuner.
6) Operate as described in “Scenario 4: Loading images from video tape” on page 9.
6
Two- Minute Tutorial
1) Attach your video camera to the
input of the Video LunchBox.
2) Attach your video monitor to the
input of the Video LunchBox
3) Make sure your camera, monitor, and the Video LunchBox are all plugged in and turned
on. For best results, plug all three into the same outlet or power strip.
4) You should see a "live" image from the camera on the monitor. The green light next to the
numeric display lets you know the Video Lunchbox is passing through the live image. If
you don’t see the live image, click the
key .
5) Click the
key. You've captured the image.
6) Click the
image.
key to see the captured image. Click
7) Animate a few frames, clicking the
indicates your frame number.
8) Click the
or
again to return to the live
key after each frame. The numeric display
keys. This plays your loop at 30 fps or 24 fps.
9) Click the
and
keys to move backwards or forwards through your frames.
Advance to the last frame you shot. Advance again and the Video LunchBox
automatically switches to "live" mode.
key. Now the Video LunchBox rapidly toggles between the live camera
10) Click the
feed and your last frame. This is called "flip-flop" mode. Start moving your character to
see how this works.
key while in flip-flop mode. The image is instantly captured, and you are
11) Click the
ready to shoot again. Animate a few more frames.
12) Click the
key to exit flip-flop mode.
key for three seconds. Now you see your loop continuously. Click
13) Hold down the
any other key to stop it.
14) Hold down the
or
keys. You will go forwards or backwards at 15 fps.
key. After a moment it will start capturing in real-time (30 frames
15) Hold down the
per second). You can use this mode to shoot reference film for lip-sync.
That's all! You've mastered the basic operation of the Video LunchBox.
7
How To
1) Click the
or
are at the bad frame
Scenario 1: Replacing a bad
frame
I accidentally hit
keys until you
key to back up one frame
2) Click the
before the bad frame
before I was ready
Scenario 2: Accurate replacement
or repositioning
I need to place a character back on my set
in the same position it was in for frame 17
3) Click the
frame
key to overwrite the bad
1) Click the
are at frame 17
or
keys until you
to enter flip flop mode. The
2) Click
monitor will flicker between the stored frame
with the character in position, and the live
video feed. As the character approaches
the correct position, the flickering is less and
less.
3) If the flip-flop mode changes too fast for
you, hold down the
slow down.
Scenario 3: Saving images to
video tape
key and it will
1) Set up the Video LunchBox with the
video tape recorder as described in
“Recording Setup” on page 4.
I want to save a pencil test for future
reference
2) Select the Video LunchBox as the source
input for the Video Tape Recorder (VTR).
Most VTRs have an "input", "input select", or
"input source" selector switch. Select "line"
or "aux" or "L1". On some VTRs, this is
done by changing the channel until line" or
"aux" or "L1" appears. When you are
successful, the Video LunchBox image will
appear on your monitor.
3) Insert a tape in the VTR and cue it as
desired.
4) Cue the Video LunchBox to the last
frame of the loop.
8
5) Click
feed.
to switch to a live video
6) Place a lens cap on the camera to get a
nice black leader (optional).
7) press "RECORD" on the VTR to start
the recording.
8) wait a few moments for the VTR to finish
recording a leader. (Most VTR's don't
record cleanly for the first few seconds)
or
. You may want to
9) Click
do this a few times, pausing between each
for some black space between recordings.
10) Stop the VTR.
Scenario 4: Loading images from
video tape
1) Connect a cable from the
connector of the Video LunchBox to the
"monitor out" or "video out" connector of the
VTR.
I want to examine a live reference film frame
by frame
[Note: depending on the quality of the video
tape and the Video Tape Recorder (VTR),
the image quality may be degraded when it
is loaded onto the Video LunchBox.
Scenario 5 may be a better option if you
need better image quality]
2) Connect a cable from the
connector of the Video LunchBox to the
"video in" connector of the monitor.
3) cue the VTR to slightly before the
desired segment, and press "Play".
4) A few seconds before the desired
segment, press and hold the
the Video LunchBox.
key on
5) When you see the end of the desired
segment, release the
9
key.
1) Use the "basic setup" with a camera as
the source to the Video LunchBox.
Scenario 5: Shooting live- motion
reference
I want to shoot the mouth of a reference
actor for lip-synch
2) Hold down the
speaks the line.
key while the actor
key immediately
3) Release the
when the actor finished the line.
Scenario 6: Animating to a livemotion reference
or
keys until you
1) Click the
are at a frame you wish to replace.
I have filled the Video LunchBox with live
motion as in scenario 4 or 5, and now wish
to animate to it.
key or the
2) Use either the
key to let you compare the position of your
character with your reference.
3) When your character is in position, click
the
key to back up one frame. (If you
are in flip flop mode you will need to click it
twice-- once to exit flip flop, and once to
back up).
key to overwrite the
4) Click the
reference with the animated frame.
5) Proceeding in this manner, frame by
frame, replaces the live motion reference
with your animated character.
Scenario 7: Key frame animation
1) Place a lens cap on the camera
I want to set up key frames first, then fill in
with additional frames
for a few seconds
2) Hold down the
until all frames are filled with a black image.
or
keys go to the
3) Use the
frame before each keyframe.
4) Shoot each key frame using the
key.
5) Fill in the other frames as usual.
10
1) Hold down the
key until the green
light flashes and 1 shows on the display.
Scenario 8: Setting custom loop
boundaries
2) Use the
frame 10.
I have 50 frames in the Video LunchBox,
and want to examine a cycle from frames
10-30.
3) Press the
loop start.
4) Use the
or
key to mark this as the
key to get to frame 30.
5) Press the
loop end.
6) Press the
mode.
key to get to
key to mark this as the
key to return to basic
or
to view the
7) Press either
loop. Hold either key down for three
seconds to view the cycle continuously.
Scenario 9: Changing a loop
boundary
1) Re-enter special mode 1 by holding
key until the green light
down the
flashes and 1 shows on the display.
I've extended the cycle in Scenario 8 to
frame 40, and want to view it:
2) Use the
frame 40.
3) Press the
loop end.
4) Press the
mode.
5) Press either
loop.
Scenario 10: Erasing custom loop
boundaries
or
key to get to
key to mark this as the
key to return to basic
or
to view the
1) Re-enter special mode 1 by holding
key until the green light
down the
flashes and 1 shows on the display.
I'm finished examining a cycle, and wish to
restore the Video LunchBox to normal
operation.
11
2) Press the
start and end.
key to clear the loop
3) Press the
mode.
key to return to basic
key until the yellow
1) Hold down the
light flashes and 2 shows on the display.
Scenario 11: Shooting time lapse
video
2) Use the
"15" seconds.
I want to shoot a time lapse video of the
clouds moving by my window. I choose to
shoot a frame every 15 seconds, so 1 hour
of weather will be viewed in 8 seconds.
or
key to choose
key to start shooting.
3) Press the
4) Come back in an hour, and the frame
counter should say "240".
5) Press the
mode.
6) Press either
loop.
key to return to basic
or
to view the
Scenario 12: Recovering after a
power glitch
1) Hold down the
key until the red
light flashes and 3 shows on the display.
The power was accidentally disconnected
for a fraction of a second after I shot 175
frames.
2) Press the
Video LunchBox.
key to "unreset" the
3) Press the
mode.
key to return to basic
Note: This technique will not always be
successful
4) You may now have recovered the "lost"
frames. They may be slightly damaged, or
they may be unusable. The Video
LunchBox will not know the difference
between the 175 frames you shot and the
81 frames which are empty, so you may
want to use some of the special mode 1
features to lock out these empty frames.
If you cannot risk losing frames in a
power outage, consider using a UPS
(Uninteruptable power supply). An
inexpensive UPS can keep the Video
Lunchbox images safe for 30 minutes or
more. Computer stores sell UPS's-- contact
Animation Toolworks for recommendations
of UPS models.
Scenario 13: Switching to high
resolution mode
1) Hold down the
key until the red
light flashes and 3 shows on the display.
The Video Lunchbox's normal resolution
(256X512) is usually adequate for shooting
reference or pencil test, but sometimes you
notice horizontal lines flicker. Switching to
high resolution (512X512) mode will give
you a rock-solid image, but will reduce the
frame capacity of the Video LunchBox to
half the number of frames in normal
resolution. Do not switch to hi-res mode
in the middle of a session-- all images
will be lost!
2) Press the
key to set the Video
LunchBox to high resolution mode.
3) Press the
mode.
key to return to basic
4) The number of frames available will now
be reduced to half the number you had in
normal resolution. E.g., if you had 256
available in normal resolution, you will now
have 128 high resolution frames available.
12
Video Lunchbox Reference
The Video LunchBox front panel has 7 push-button keys. Each key has one function when it
is depressed momentarily, and another when it is held down. Many of the keys also have
special functions when the Video LunchBox is in one of the three "special modes".
Basic Key functions:
Shoot
Backward
Forward
Mode
The shoot key advances frame counter by one frame,
and then captures a single frame of video. If it is held
down for more than two seconds, it starts to capture
frames in real-time (30 fps).
The backward key displays the previous stored frame
and decrements the frame counter by one frame.
When it reaches zero, it moves the frame counter to
the last frame which has been recorded. When the
backward key is held down for more than two
seconds, the display of frames accelerates to 15 fps.
The forward key displays the next stored frame and
increments the frame counter by one frame. When it
reaches the last frame shot, it changes the mode to
"live" (camera) mode. If you hit the forward key
again, it wraps around to frame 0. When the forward
key is held down for more than two seconds, the
display of frames accelerates to 15 fps.
The mode key toggles the Video LunchBox between
displaying the "live" video feed from the camera or
the stored frame. When the video output is from the
"live" camera, the green lamp next to the frame
counter will be lit. If the mode key is held down, the
Video LunchBox switches into one of three "special"
modes. If you release the key when the number "1"
is on the display and the green lamp is flashing, you
will enter special mode 1. If you release the key
when the number "2" is on the display and the yellow
lamp is flashing, you will enter special mode 2. If you
release the key when the number "3" is on the
display and the red lamp is flashing, you will enter
special mode 3. Operation in these special modes is
described below.
13
Flip-flop
30 fps
24 fps
The flip-flop key puts the Video LunchBox in a
special mode where it switches quickly between the
"live" camera input and the frame stored at the
current frame number. If you hold down the flip-flip
key, the rate of the flip-flop slows down. While you
are in flip-flop mode, you can use the shoot key to
shoot the current scene, and then return to flip-flop
mode. Many animators will leave the Video
LunchBox in this mode most of the time. To leave
the flip-flop mode, hit any key besides the shoot or
flip-flop keys.
The 30 fps key plays a loop of all frames, starting and
ending at the current frame. If the 30 fps key is held
down for more than three seconds, the Video
LunchBox loops continuously until another key is
pressed. A portion of all frames can be played, see
“Loop Programming” on page 15.
The 24 fps key plays a loop of all frames, starting and
ending at the current frame, at a simulated 24 frames
per second. If the 24 fps key is held down for more
than three seconds, the Video LunchBox loops
continuously until another key is pressed. A portion of
all frames can be played, see “Loop Programming”
on page 15.
Numeric Display:
The numbers on the frame counter let you know what
frame number is being viewed on the monitor.
frame 21
(Flashing)
mode 2
frame 1021
A flashing number indicates you are in a special
mode, see “Loop Programming,” “Intervalometer” and
“Special Functions” on the following pages.
If your Video LunchBox can store more than 1000
frames: a leading “0” indicates the frame counter is
on a frame larger than 1000. For example, “21” is
frame 21, while “021” is frame 1021.
14
Loop Programming
Special mode 1 (flashing green):
Special mode 1 lets you customize the looping behavior of the Video LunchBox. It lets
you set special boundaries so you only see a portion of your frames when you play a
loop. It also lets you set aside a special frame as a "lockdown": a frame which cannot be
overwritten accidentally.
You enter special mode 1 by holding down the "mode'" key until the number 1 is on the
display and the green light is flashing.
The following keys have actions in special mode 1:
Loop Reset
Backward
This key clears all the special loop functions you may
have set in special mode 1. It removes the protection
from the lockdown frame, and removes the special
loop start and end frame markers.
The backward key acts the same as in the basic
mode
The forward key acts the same as in the basic mode
Forward
Mode
Lockdown
Frame
Loop Start
Loop End
The mode key returns the Video LunchBox to basic
mode, where the loop start and end markers and the
lockdown frame will have an effect
This key marks the current frame as the lockdown
frame. The lockdown frame can be used as a
reference frame for a start, end, or other special
place in your animation. You cannot accidentally
overwrite the lockdown frame-- the shoot key will skip
over it and write to the next frame. Also, when you
play a loop the lockdown frame will not appear.
However, the lockdown frame will appear normally if
you go to it using the forward or backward key.
This key marks the current frame as the starting
frame of the loop. After you return to basic mode,
any time you press either loop key the Video
LunchBox will jump to this frame to start.
This key marks the current frame as the ending
frame of the loop. After you return to basic mode,
any time you press either loop key the Video
LunchBox will only play frames up to this marked
frame.
15
Intervalometer
Special mode 2 (flashing yellow):
Special mode 2 turns the Video Lunchbox in to an intervalometer. This lets you shoot
time lapse video. You can set the shooting interval to between 1 and 255 seconds, and
then leave the Video LunchBox to capture frames unattended. It will continue to capture
key. If left uninterrupted, it will continue
frames until you interrupt it by clicking the
to capture frames and overwrite previously stored frames.
You enter special mode 2 by holding down the "mode'" key until the number 2 is on the
display and the yellow light is flashing.
The following keys have actions in special mode 2:
Start Shooting
The shoot key starts the intervalometer running. It
will continue to capture frames at the specified
interval until you press the
normal mode.
Reduce
Interval
Increase
Interval
Mode
key to return to
This key reduces the frame capture interval by one
second.
This key increases the frame capture interval by one
second, up to 255 seconds.
The mode key returns the Video LunchBox to basic
mode. All the frames captured in intervalometer
mode are available to view using the normal loop
functions
16
Special Functions
Special mode 3 (flashing red):
Special mode 3 lets you reset the Video LunchBox in some special ways.
Special mode three has the following functions:
• reset the Video LunchBox without cycling the power
• "open up" all frame for viewing, whether or not they have any images in them
• set the Video LunchBox to either normal (256X512) or high resolution (512X512)
Warning!
You should never enter special mode 3 if you have frames you want to keep
(exception-- "unreset") .
If you accidentally enter special mode 3, click on
damage.
to get out without doing any
The following keys have actions in special mode 3:
Reset All
Mode
Unreset
Reset to
Normal Resolution
Reset to
High Resolution
This key resets the Video LunchBox. It has the same
effect as interrupting the power. Existing frames will be
lost.
The mode key returns the Video LunchBox to basic
mode. If you accidentally enter special mode 3, this
is the key to use to get out without doing any
damage.
"Unreset" the Video LunchBox. Normally, you can only
view frames which have been "shot" previously. This
key lets you view all frames, whether or not there is any
image stored there. This key is useful if you have had a
very brief power outage. It is possible that your frames
are still usable, but you can't see them because the
Video LunchBox has been reset-- so use this function to
unlock all frames
This key sets the Video LunchBox to normal resolution
(256X512). Existing frames will be lost.
This key sets the Video LunchBox to high resolution
(512X512). Existing frames will be lost. High
resolution mode stores both fields of a frame separately.
If there is any movement during the 1/30th of a second
that this frame is being recorded, you will see a "flicker"
between the two fields of the frame when you view the
frame. Therefore, do not use high resolution mode to
capture in real-time (30 fps).
17
Troubleshooting:
The Video Lunchbox appears dead-- no light, no fan
1) Check the power cord-- it must be securely and completely inserted into the
socket on the left side of the Video LunchBox.
2) Check the electrical outlet-- attach another device to it to make sure it is
working
3) Contact Animation Toolworks for help!
I have no video output and the red light is flashing
Something is wrong with the video input:
1) Make sure the camera or video source is connected to the
connector
2) Wiggle the cables. If the video flickers, replace the cable.
3) Make sure the camera power is on and the camera is producing a signal. You
can check the camera by attaching it directly to the "video in" on the monitor.
4) The Video Lunchbox will not work reliably with a tube based video camera (for
example-- a surveillance camera that is more than 10 years old). Use a CCD
based camera (any modern camcorder or video camera). Contact Animation
Toolworks for a recommendation.
The video output disappears after a few minutes and the red light is
flashing
Some camcorders turn themselves off after a few minutes. Check the camcorder
manual to see of you can disable this feature. With some cameras you disable
this feature by removing the video tape.
The frame number display is on, the red light is not flashing, but
there is no video on the monitor
1) Check the cable between the Video LunchBox and the monitor. It should
connector on the Video Lunchbox, and the "Video In" or
connect to the
"Line" connector on the monitor. It should not be connected to the "Antenna"
or "CATV" or "Cable" connector on the monitor.
2) Wiggle the cable between the Video LunchBox and the monitor. Replace it if
the video flickers.
3) Make sure the monitor is set to accept its signal from the "Video In" or "Line"
connector. This may involve going into the monitor’s program mode and
selecting the input source for the monitor. The video source you need to
select will usually be called "line" or "aux". Other monitors have a "Video"
mode switch which switches between the video jack and the internal TV tuner.
The video output has a line or ripple moving slowly up or down the
screen
18
1) All video equipment used with the Video Lunchbox should be connected to the
same branch circuit. The easiest way to do this is to have the camera,
monitor, Video LunchBox, and the Video Tape Recorder (VTR). all share a
common power strip.
2) Keep video cables as short as possible. Replace long, coiled up cables with
shorter cables.
3) Try moving video cables and power cables which drape across different pieces
of video equipment.
4) Try moving components which are close to each other. Move the Video
Lunchbox away from the monitor, or move the monitor away from the VTR.
Some horizontal edges or lines in the image appear to flicker up and
down a small amount
1) Change the Video LunchBox to high resolution mode. Do not do this in the
middle of a shoot-- you will lose your frames!
Some stationary objects on camera appear to move between frames
1) Your camera is compensating for varying light levels by changing the exposure
time. If your camera lets you disable the automatic exposure compensation,
try it.
2) The contrast of the image is different than the previous image. With many
video monitors this will cause the image to grow or shrink slightly, making it
seem like objects at the edge of the screen are moving. A different monitor
may reduce the problem.
The video image is grainy; there are speckles in the dark regions
Your camera doesn't have enough light:
1) Open the aperture on the lens
2) Chose a slower exposure time if your camera has manual exposure
3) Use more lights
When viewing a captured frame, the color flickers on and off
The Video LunchBox works with most video monitors, but a few have trouble
displaying its images in color
1) Try a different monitor. We can recommend inexpensive monitors which work
very nicely with the Video Lunchbox
2) Reduce the color saturation on the monitor. Usually there is an adjustment for
"color" or "saturation"
The red, green, or yellow light is flashing and the Video Lunchbox
keys don't seem to do the right things
You've accidentally entered a "special mode" by holding down the .
19
key.
1) Press the
key to return to normal mode.
20
Specifications
Product Name: Video LunchBox
Model Number: VLB256, VLB512, VLB1024
(specifications apply to all models unless explicitly stated
otherwise)
Description:
The Video LunchBox is a pencil test/reference test frame grabber capable of recording
individual frames or full motion video, and playing them back, full screen, at a user selectable
15, 24, or 30 frames per second.
System Requirements:
Video Input:
NTSC video (e.g., a camera, video tape player, or computer
NTSC output device)
Video Output:
NTSC video (e.g., a monitor, video tape recorder, or computer
NTSC input device)
Electrical Input:
110 V, 60 Hz AC
Video Connectors: 75 ohm BNC
Operating System: none required
Computer Platform: none required
Operating Characteristics:
Color or Black and White
Capacity:
Number of frames
Normal resolution
High resolution
VLB256
256
128
VLB512
512
256
VLB1024
1024
512
Resolution:Normal: 256 TV lines of 512 elements
High:
512 TV lines of 512 elements
Time to capture one frame: 1/30th second for a single frame. Realtime capture at 30 fps
Playback: single frame steps, 15 fps, 24 fps, 30 fps. Subloops are user selectable.
Output modes: single frame; playback of frames; live input feed;
Flip-Flop between single frame and live input feed (2 speeds)
User Input Device: 7 buttons
User Output Device: 3 digit frame number display, 3 color coded indicator lamps
Intervalometer Range: 1-255 seconds duration between capturing frames
Size:
9.88” x 6” x 10”
Weight:
3.5 pounds
Removable Top
Warranty: 12 months
21
Limited Warranty
Note: Peripheral products (e.g., video cameras, video monitors, lenses, etc.) not
manufactured by Animation Toolworks are warranted separately by their manufacturers.
Warranty information for these products accompanied them at the time of delivery.
Animation Toolworks, Inc. warrants the Video LunchBox against defects in material or
workmanship. Warranty duration for the Video LunchBox is one year from the date of
purchase. Animation Toolworks will repair, or at our option, replace any part that
becomes defective for products purchased within the United States of America.
Conditions:
• If you need to ship the Video LunchBox, please pack it in its original carton,
and send it prepaid and insured, to
Within the US:
Animation Toolworks, Inc.
18484 SW Parrett Mountain Road
Sherwood, Oregon 97140
Outside the US:
ship to your local dealer
• Proof of the date of purchase is the burden of the product owner.
• This Warranty only applies for products under normal use
• This Warranty does not apply to any part(s) of the Video LunchBox that have
been installed, altered, repaired, or misused, or if serial numbers have been
altered or removed.
• Replacement parts supplied under this Warranty carry the unexpired portion of
the original Warranty. Batteries are not covered under this Warranty.
• The liability of Animation Toolworks, Inc., if any, and purchaser’s exclusive
remedy for damages, shall not be greater than the actual purchase price of the
product with respect to which such claim is made. In no event shall Animation
Toolworks, Inc. be liable for any special, indirect, or consequential damages of
any kind.
22
Index
2
H
24 fps key, 14
High resolution
Reset to, 17
Switching to, 12
3
I
30 fps key, 14
Intervalometer, 12, 16
A
K
Animating
Key frame, 10
to a live-motion reference, 10
Key frame animation, 10
B
L
Backward key, 13
Basic Operation, 7
Latch, how to operate, 1
Live-motion reference, 10
Loading frames from video tape. See Setup,
Download
Loading images from video tape, 9
Lockdown Frame, 15
Loop boundaries
Changing, 11
Erasing, 11
Loop End, 15
Loop Start, 15
Setting, 11
Loop Programming, 15
C
Cables
Choosing, 3
Connecting. See Setup
Camera
Choosing, 2
Lenses, 2
Capturing a frame. See Shoot key
Connections. See Setup
Cover, removing, 1
Cover, replacing, 1
M
Mode key, 13
Monitor
Choosing, 3
F
Flip-Flop
Repositioning, 8
Flip-flop key, 14
Forward key, 13
Frames
Replacing, 8
N
Normal Resolution
Reset to, 17
O
G
Operating Conditions, 1
Overwriting frames. See Replacing a bad frame
Green flashing light, 19. See Loop Programming
23
Subloops, 11
P
Power failure recovery, 12
Power Strips, 3
T
Time lapse, 12
Top, removing. See Cover
Troubleshooting, 18
Tutorial. See Basic Operation
R
Real-time capture, 10
Recording to Video Tape
Connections. See Setup
Saving images, 8
Recovering after a power glitch, 12
Red flashing light, 18, 19. See Special Functions
Replacing a bad frame, 8
Repositioning, 8
Reset, 17
U
Unreset, 17
V
Video Tape. See Recording to video tape
S
W
Setup
Basic, 4
Download, 6
Recording, 5
Shoot key, 13
Special Functions, 17
Special Mode 1. See Loop Programming
Special Mode 2. See Intervalometer
Special Mode 3. See Special Functions
Specifications, 21
Warranty, 22
Y
Yellow flashing light, 19. See Intervalometer
24




![en:users:manual:0.4.3b:index [Pencil Wiki ]](http://vs1.manualzilla.com/store/data/005878085_1-1fc748767abf1b25ff52dda6bda51fd8-150x150.png)