1
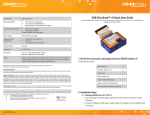
USB DriveDock™ v4
USER’S MANUAL
Revised (ovember 2, 2007
7eatures
! USB2 port allows attachment to all hosts, including PCs,
Macs and Linux
! (atively connects to the four most common drive types
(2.5” I 3.5” SATA or PATA drives)
! Two options for power inputN Use the included AC
adapter, or use a 4-wire connector from a computer’s
power supply
! Power status LED verifies that unit is switched on (or off)
! Small size allows you to take it anywhere
9nstallat'on 9nstru+t'ons
6: C<e+, t<e a++essor'es pa+,a>ed @'t< Aour U"# %r'(e%o+,: Please contact WiebeTech if any items are
missing or damaged. The box should containN
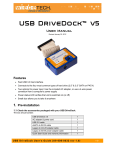
USB DriveDock
AC adapter I power cord
USB Cable
SATA power/data cable
Metal drive plate
Hard drive screws
Rubber bumpers
Manual and Warranty information
1
1
1
1
1
4
6
(on CD)
B: Atta+< bottom plate to Aour F:GH <ard dr'(e: I<'s step 's opt'onal but
re+ommended: The purpose of the bottom plate is to provide protection to your
drive electronics and aid heat dissipation. Attach the bottom plate to your drive using
the four screws supplied. Attach a rubber bumper to each corner. Extra bottom
plates are available from WiebeTech (p/n BPLATE).
U"# %r'(e%o+, (4 User’s Manual
565
J'ebeIe+< KKC
F:
Ia,e a moment to Lam'l'ar'Me AourselL @'t< t<e parts oL Aour ne@ U"# %r'(e%o+,: This will aid you in the
remaining steps.
A DC [12V/[5V optional power input from a 4-wire
power connector
# 4-pin DC power input
C Power switch (]0” ^ OFF, ]I” ^ O()
% Mini USB 2.0 port
N 4-wire power output, connects to drive
7 IDE ribbon cable, connects to 3.5! drive
O 2.5! drive port
P SATA input for 2.5! and 3.5! drives
6 Drive Access LED
B USB connectivity LED
F Power LED
4: 9L +onne+t'n> an 9%NQRAIA dr'(eS +onL'>ure t<e Tumpers: The drive must be set to the Master setting.
Consult the instructions for your drive (some drives display configuration information on the drive’s label). A few
drives have both ]Master with Slave Present” and ]Master without Slave” options. Choose the latter in this case. In
rare cases, if the Master setting does not work then try Cable Select.
Uear oL <ard dr'(e
(Example)
IDE interface
G:
Conne+t t<e <ard dr'(e to t<e do+,:
Vumper
R'ns
Power
F:G! 9%NQRAIAW Attach the free end of
the IDE ribbon cable to the back of the
hard drive. The connector is keyed to
insert only one way. The IDE pins on the
hard drive are fragile, so be very careful
when inserting or removing the IDE
connector
Attach the 4-pin power connector from
the dock (]b” above) into the back of the
hard drive. As with the IDE cable, the
power connector will only fit one way.
F:G! X B:G! "AIAW Take the SATA
power/data cable and attach the 4-wire
power input to the 4-wire power output.
Attach the SATA data cable to the SATA
slot on USB DriveDock. Plug the SATA
data/power connector into the drive.
B:G! 9%NQRAIAW Lift up the
ribbon cable and attach the
2.5! IDE/PATA drive to the
connector underneath.
U"# %r'(e%o+, (4 User’s Manual
5B5
J'ebeIe+< KKC
Y:
Conne+t t<e U"# +able Lrom Aour +omputer 'nto t<e U"# port on t<e %r'(e%o+,:
Z:
Conne+t po@er to t<e U"# %r'(e%o+,: Use either the 4-pin DC input or, optionally, you can connect a 4-wire
power cable from inside a computer case. This is useful if you wish to access a drive inside a computer without
removing it first.
cour USB DriveDock is now ready to use! Turn on the unit by moving the power switch to the ]I” position. The red
drive access indicator will light briefly after the unit is powered up, indicating that the bridge has successfully
established communication with the drive. Thereafter, it will light whenever the drive is accessed. If your hard drive is
already formatted, you can begin using it right away. (ew hard drives will need to be formatted before they can be
used.
[oteW If using an AC adapter other than the one that shipped with
USB DriveDock, make sure it has [5V I [12V pins in the same
positions in the connector. The adapter must also supply at least
2A. Look for the Regulated Switching Power specification. Do
not use unregulated adapters, as damage may occur to the USB
DriveDock or the attached drive.
Usa>e @'t< Ma+'ntos< Computers
Compat'b'l'tA
The USB DriveDock is Plug-and-Play compatible under Mac OS 9.2 and OS X. (o drivers are needed. The USB2
port is USB 1.1 compatible.
Mount'n> and NTe+t'n> Volumes
If the hard drive attached to the USB DriveDock is already formatted, an icon representing the
drive’s volume will appear (mount) on the desktop. cou can begin using the volume right away.
If the drive is unformatted, a message will appear on the desktop saying that the disk is
unreadable. cou can use OS X’s Disk Utility to format the drive.
Egect the volume before powering down the unit by dragging the volume’s icon to the trash bin, or
by selecting the volume then pressing Command-E. Shutting down the unit without first egecting
the volume can result in data loss.
Usa>e @'t< J'ndo@s ]perat'n> "Astem
Compat'b'l'tA
The USB DriveDock v4 is Plug-and-Play compatible with Windows 2000, XP, Server 2003, and Vista. (o drivers are
needed on these operating systems. The USB2 port is USB 1.1 compatible.
Mount'n> and NTe+t'n> Volumes
If the hard drive attached to the dock is already formatted, you can begin using the volume right away. When the
dock and drive are properly connected and turned on, a window may open to allow you access to the volume. If no
window appears, you can find the volume by double-clicking the ]My Computer” icon.
Egect the volume before powering down or disconnecting the unit by single-clicking the
green arrow icon on the task bar, then selecting ]Safely removeh.” Windows will indicate
when it is safe to disconnect the dock. Shutting down the unit without first egecting the
volume can result in data loss.
U"# %r'(e%o+, (4 User’s Manual
(Windows XP)
5F5
J'ebeIe+< KKC
Ie+<n'+al "pe+'L'+at'ons
Rrodu+t Code
Post 9nterLa+e
%e('+e 9nterLa+es
Ro@er Adapter ^'n+luded_
]perat'n> Iemperature
]perat'n> Pum'd'tA
Compat'b'l'tA
]perat'n> "Astem
Ue`u'rements
"<'pp'n> Je'><t
%'mens'ons
JarrantA
USBDV4
USB 2.0 (up to 480Mbps)
! 2.5” IDE/PATA interface
! 3.5” IDE/PATA interface
! SATA interface (for both 2.5” I 3.5” drives)
[5V/[12V 2A/2A AC adapter (part j PWR-10)
50 – 85° Fahrenheit (10 – 30° Celsius)
5% to 95%, noncondensing
2.5” I 3.5” SATA and IDE/PATA hard disk drives
! Windows 2000, XP, Server 2003, Vista
! Macintosh 9.2, OS X
! Linux distributions supporting USB
2 pounds
3.2” x 2.2” x 0.95” (81mm x 56mm x 24mm)
Dimensions are exclusive of attached plates, drives, and cables.
1-year limited warranty. See warranty statement for details and limitations.
WiebeTech offers free phone support for 90 days after purchase (1-866-7448722). Email support is available at [email protected].
USB DriveDock v4 is a trademark of WiebeTech LLC. Other marks are the property of their respective owners.
© 2007 WiebeTech LLC. All rights reserved.
7CC Compl'an+e "tatementW ]This device complies with Part 15 of the FCC rules. Operation is subgect to the following two conditionsN (1) This
device may not cause harmful interference, and (2) this device must accept any interference received, including interference that may cause undesired
operation.”
Tested to comply
with FCC standards
FOR HOME OR OFFICE USE
In the event that you experience Radio Frequency Interference, you should take the following steps to resolve the problemN
1)
Ensure that the bottom plate and case of your attached drive is grounded, either to the USB DriveDock case or to an Earth ground.
2)
Use a FireWire cable with RFI reducing ferrites on each end.
3)
Use a power supply with an RFI reducing ferrite approximately 5 inches from the DC plug.
If you have any questions or problems, please contact [email protected] for technical support. If you are
interested in purchasing more WiebeTech products, check our website or contact [email protected]. We
appreciate being able to serve you!
U"# %r'(e%o+, (4 User’s Manual
545