1
Projector
CP-AX2503/CP-AX3003/CP-AX3503/
CP-AW2503/CP-AW3003
User's Manual (detailed)
Network Guide
Thank you for purchasing this product.
This manual is intended to explain only the network function. For proper use of this
product, please refer to this manual and the other manuals for this product.
WARNING Ź%HIRUHXVLQJWKLVSURGXFWEHVXUHWRUHDGDOOPDQXDOVIRUWKLV
product. After reading them, store them in a safe place for future reference.
Features
This projector has the network function that brings you the following main features.
9 Network Presentation : allows the projector to project computer images transmitted
through a network. (74)
9 Web Control : allows you to monitor and control the projector through a network from a
computer. (36)
9 My Image : allows the projector to store up to four still images and project them. (78)
9 Messenger : allows the projector to display text sent from a computer through a network.
(80)
9 Network Bridge DOORZV\RXWRFRQWURODQH[WHUQDOGHYLFHWKURXJKWKHSURMHFWRUIURPD
computer. (83)
NOTE 7KHLQIRUPDWLRQLQWKLVPDQXDOLVVXEMHFWWRFKDQJHZLWKRXWQRWLFH
7KHLOOXVWUDWLRQVLQWKLVPDQXDODUHIRULOOXVWUDWLYHSXUSRVHV7KH\PD\GLIIHU
slightly from your projector.
7KHPDQXIDFWXUHUDVVXPHVQRUHVSRQVLELOLW\IRUDQ\HUURUVWKDWPD\DSSHDULQ
this manual.
7KHUHSURGXFWLRQWUDQVIHURUFRS\RIDOORUDQ\SDUWRIWKLVGRFXPHQWLVQRW
permitted without express written consent.
1
Contents
Contents
Caution .......................................................................................... 4
1. Network Function ..................................................................... 5
1.1 Web Control ................................................................................................ 5
1.2 Network Presentation . ................................................................................ 6
1.3 My Image Function ..................................................................................... 7
1.4 Messenger Function ................................................................................... 8
1HWZRUN%ULGJH)XQFWLRQ ............................................................................. 9
1.6 Other Functions ......................................................................................... 10
1.6.1 E-mail Alerts ................................................................................................................... 10
1.6.2 Projector Management using SNMP .............................................................................. 10
(YHQW6FKHGXOLQJ ........................................................................................................... 10
&RPPDQG&RQWUROYLDWKH1HWZRUN ................................................................................ 10
2. Connection to the network .................................................... 11
2.1 System requirements ...............................................................................
2.2 &RQQHFWLRQYLDZLUHG/$1 .........................................................................
2.3 &RQQHFWLRQVHWXSRI:LUHG/$1 ...............................................................
2.4 &RQQHFWLRQYLDZLUHOHVV/$1 ....................................................................
11
12
12
14
2.4.1 Connection in Ad Hoc Mode .......................................................................................... 15
2.4.2 Connection in Infrastructure Mode ................................................................................. 16
2.5 Applications .............................................................................................. 18
2.6 NETWORK Menu . .................................................................................... 20
3. Web Control ............................................................................ 36
3.1 Projector Web Control ............................................................................... 38
/RJLQ .............................................................................................................................. 38
3.1.2 Network Information ....................................................................................................... 39
3.1.3 Network Settings ............................................................................................................ 40
3.1.4 Port Settings .................................................................................................................. 44
3.1.5 Mail Settings .................................................................................................................. 46
3.1.6 Alert Settings .................................................................................................................. 47
3.1.7 Schedule Settings .......................................................................................................... 49
3.1.8 Date/Time Settings ......................................................................................................... 53
3.1.9 Security Settings ............................................................................................................ 55
3.1.10 Projector Control .......................................................................................................... 56
3.1.11 Remote Control ............................................................................................................ 61
3.1.12 Projector Status ........................................................................................................... 62
3.1.13 Network Restart ........................................................................................................... 63
3.1.14 Connection Test ........................................................................................................... 64
2
Contents
3.2 Crestron e-Control® .................................................................................. 65
3.2.1 Main window .................................................................................................................... 67
3.2.2 Tools window ................................................................................................................... 69
3.2.3 Info window ..................................................................................................................... 71
3.2.4 Help Desk window ........................................................................................................... 72
3.2.5 Emergency Alert .............................................................................................................. 73
4. Network Presentation ............................................................. 74
4.1 Outline ...................................................................................................... 74
4.2 Display Mode . ........................................................................................... 75
4.2.1 Single PC mode ............................................................................................................. 75
4.2.2 Multi PC mode ............................................................................................................... 75
4.3 Multi Projector Mode . ............................................................................... 76
4.4 Moderator Control Mode . ......................................................................... 76
4.5 Port Number . ............................................................................................ 77
5. My Image Function ................................................................. 78
6. Messenger Function ............................................................... 80
6.1 Outline ...................................................................................................... 80
6XSSRUWHG/DQJXDJHV .............................................................................. 81
6.3 Display Style ............................................................................................. 81
7. Network Bridge Function ....................................................... 83
&RQQHFWLQJGHYLFHV ..................................................................................
7.2 Communication setup ...............................................................................
7.3 Communication port .................................................................................
7.4 Transmission method ...............................................................................
83
84
84
85
+$/)'83/(; .............................................................................................................. 85
)8//'83/(; ............................................................................................................... 86
8. Other Functions ...................................................................... 87
8.1 E-mail Alerts ............................................................................................. 87
8.2 Projector Management using SNMP ........................................................ 90
(YHQW6FKHGXOLQJ ..................................................................................... 92
&RPPDQG&RQWUROYLDWKH1HWZRUN .......................................................... 95
8.5 Crestron RoomView® .............................................................................. 100
9. Troubleshooting ................................................................... 101
10. Warranty and after-sales service ...................................... 109
3
Caution
Caution
7RXVHWKHZLUHOHVVQHWZRUNIXQFWLRQRIWKLVSURMHFWRUWKHGHVLJQDWHG86%ZLUHless adapter sold as an option is required. For precautions according to the standards and laws, refer to the documents that come with the adapter.
[Restriction on plugging and unplugging the USB wireless adapter]
%HIRUH\RXLQVHUWRUSXOORXWWKH86%ZLUHOHVVDGDSWHUIURPWKHSURMHFWRUWXUQRII
the power of the projector and pull out the power cord’s plug from the outlet. Do
QRWWRXFKWKH86%ZLUHOHVVDGDSWHUWKDWLVFRQQHFWHGWRWKHSURMHFWRUZKLOHWKH
SURMHFWRULVUHFHLYLQJ$&SRZHU
'RQRWXVHDQ\H[WHQVLRQFDEOHRUGHYLFHZKHQFRQQHFWLQJWKHDGDSWHUWRWKHSURMHFWRU
[Security precautions when using wireless LAN]
It is recommended that security settings, such as SSID and ENCRYPTION, are
VSHFL¿HGZKHQXVLQJZLUHOHVV/$1FRPPXQLFDWLRQ,IWKHVHFXULW\VHWWLQJVDUHQRW
VSHFL¿HGWKHFRQWHQWVPD\EHLQWHUFHSWHGRULWPD\FDXVHXQDXWKRUL]HGDFFHVV
WRWKHV\VWHP)RUGHWDLOVRQZLUHOHVV/$1VHFXULW\VHWWLQJVUHIHUWR3.1 Projector
Web Control.
CAUTION
Ź7KHRSWLRQDO,(((EJQ86%ZLUHOHVVDGDSWHUXVHVWKH*+]UDGLR
frequency band. You do not need a radio license to use the adapter, but you
should be aware of the following:
'212786(1($57+()2//2:,1*
0LFURZDYHRYHQV
,QGXVWULDOVFLHQWL¿FRUPHGLFDOGHYLFHV
'HVLJQDWHGORZSRZHUUDGLRVWDWLRQV
3UHPLVHVUDGLRVWDWLRQV
8VLQJWKH86%ZLUHOHVVDGDSWHUQHDUWKHDERYHPD\FDXVHUDGLRLQWHUIHUHQFH
which would result in a decrease in transmission speed or interruption, and
HYHQOHDGWRPDOIXQFWLRQLQJRIGHYLFHVVXFKDVSDFHPDNHUV
'HSHQGLQJRQWKHORFDWLRQZKHUHWKH86%ZLUHOHVVDGDSWHULVXVHGUDGLRZDYH
interference may occur, which may result in a decrease in transmission speed
or interruption in communication. In particular, please be aware that using the
86%ZLUHOHVVDGDSWHUDWORFDWLRQVZKHUHWKHUHLVUHLQIRUFHGVWHHORWKHUW\SHVRI
PHWDOVRUFRQFUHWHLVOLNHO\WRFDXVHUDGLRZDYHLQWHUIHUHQFH
$YDLODEOH&KDQQHOV
7KH86%ZLUHOHVVDGDSWHUXVHVWKH*+]UDGLRIUHTXHQF\EDQGEXW
depending on the country or region you are in, the channels that you can use
might be limited. Please consult your dealer for information on the usable
channels.
%ULQJLQJWKHRSWLRQDO86%ZLUHOHVVDGDSWHURXWRIWKHFRXQWU\RUUHJLRQ\RX
UHVLGHLQDQGXVLQJLWWKHUHFRXOGOHDGWRDYLRODWLRQRIWKHUDGLRODZVRIWKDW
country or region.
4
1. Network Function
1. Network Function
This chapter describes the outline of network function.
1.1 Web Control
&RQQHFWLQJWKHSURMHFWRUDQGWKHFRPSXWHUYLDWKHQHWZRUNUHPRWHFRQWURODQG
status monitoring of the projector can be performed by Web browser.
Two types of interface, ”Projector Web Control” and “Crestron e-Control”, are
DYDLODEOHIRUWKLVSURMHFWRU36)
Projector Web Control
Crestron e-Control
5
1. Network Function
1.2 Network Presentation
The projector can display or play back the computer screen images and audio
data that are transmitted through the network.
7RXVH1HWZRUN3UHVHQWDWLRQDQH[FOXVLYHDSSOLFDWLRQ/LYH9LHZHULVUHTXLUHG
The following application is required to use Network Presentation.
OS
Windows
0DF26;
iOS(iPhone/iPad)
6
Application
/LYH9LHZHU
/LYH9LHZHU
Projector Quick Connection
1. Network Function
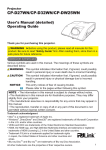
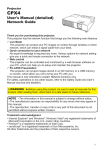
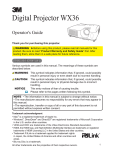
1.3 My Image Function
7KHSURMHFWRUFDQGLVSOD\VWLOOLPDJHVWUDQVIHUUHGYLDWKHQHWZRUN
,WLVSRVVLEOHWRDOORFDWHXSWRLPDJH¿OHV
0<,0$*(WUDQVPLVVLRQUHTXLUHVDQH[FOXVLYHDSSOLFDWLRQIRU\RXUFRPSXWHU
8VHWKHDSSOLFDWLRQWRWUDQVIHUWKHLPDJHGDWD
Transfer image data
1
2
3
4
Display image data (ex.
)
7
1. Network Function
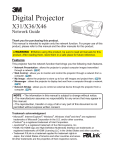
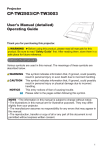
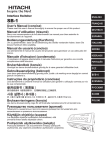
1.4 Messenger Function
7KHSURMHFWRUFDQGLVSOD\WH[WGDWDWUDQVIHUUHGYLDWKHQHWZRUNRQWKHVFUHHQDQG
play back audio data inside the projector.
It is possible to store up to 12 text data.
Transfer text data
1
2
3
4
12
Display text data (ex.
8
)
1. Network Function
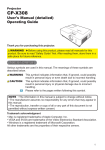
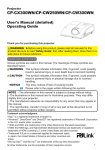
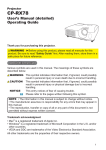
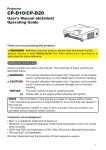
1.5 Network Bridge Function
7KLVSURMHFWRULVHTXLSSHGZLWKWKH1(7:25.%5,'*(IXQFWLRQWRSHUIRUP
PXWXDOFRQYHUVLRQRIDQHWZRUNSURWRFRODQGDVHULDOLQWHUIDFH
%\PDNLQJXVHRIWKH1(7:25.%5,'*(IXQFWLRQDFRPSXWHUFRQQHFWHGWRWKH
SURMHFWRUYLDZLUHOHVVRUZLUHG/$1LVDEOHWRFRQWURODQH[WHUQDOGHYLFHYLD
RS-232C communication using the projector as a network terminal.
TCP/IP data
Protocol change
:LUHG/$1
/$1FDEOH
Computer
Wireless
/$1
Serial data
RS-232C
RS-232C cable
USB TYPE A port
([WHUQDOGHYLFH
LAN port
CONTROL port
9
1. Network Function
1.6 Other Functions
1.6.1 E-mail Alerts
7KHSURMHFWRUFDQDXWRPDWLFDOO\VHQGDQDOHUWPHVVDJHWRWKHVSHFL¿HGHPDLO
addresses when the projector detects a certain condition that is requiring
maintenance or detected an error. (87)
1.6.2 Projector Management using SNMP
The SNMP (Simple Network Management Protocol) enables to manage the
projector information, which is a failure or warning status, from the computer on
the network. The SNMP management software will be required on the computer
to use this function. (90)
1.6.3 Event Scheduling
7KHVFKHGXOLQJIXQFWLRQHQDEOHVWRVHWXSVFKHGXOHGHYHQWVLQFOXGLQJ
power on / power off. It enables to be “self-management” projector.
7KHVFKHGXOHFDQEHVHWLQ3URMHFWRU:HE&RQWURORU237,216&+('8/(PHQX
in the projector. (92)
1.6.4 Command Control via the Network
<RXFDQFRQ¿JXUHDQGFRQWUROWKHSURMHFWRUYLDWKHQHWZRUNXVLQJ56&
commands. (95)
10
2. Connection to the network
2. Connection to the network
2.1 System requirements
The following equipments are required to connect the projector to your computer
through the network.
Ŷ&RPPRQ The projector: 1 unit, Computer: 1 or more sets
Ŷ&RQQHFWLQJGHYLFHIRUWKHSURMHFWRUDQGWKHFRPSXWHU
1) For the wired connection *1
/$1FDEOH&$7HRUJUHDWHUSLHFH
2) For the wireless connection *2
- Projector side
IEEE802.11b/g/n 86%ZLUHOHVVDGDSWHU (option : 86%:/1): 1 unit *3
- Computer side
,(((EJQZLUHOHVV/$1HTXLSPHQWXQLWIRUHDFKFRPSXWHU*4
*1: The system for using the network function of the projector requires
FRPPXQLFDWLRQHQYLURQPHQWFRQIRUPLQJWR%DVH7;RU%DVH7
*2:$QDFFHVVSRLQWLVUHTXLUHGZKHQWKHZLUHOHVV/$1FRQQHFWLRQLVXVHGDV
Infrastructure mode.
*3:$YDLODEOHHQFU\SWLRQPHWKRGVDUHDVIROORZV7KLVSURGXFWFDQQRWEH
connected to the wireless network using other encryption method.
WPA2-PSK (AES)
WPA2-PSK (TKIP)
WPA-PSK (AES)
WPA-PSK (TKIP)
WEP 128bit
WEP 64bit
*4:'HSHQGLQJRQWKHW\SHRIZLUHOHVVQHWZRUNGHYLFHDQGFRPSXWHU\RXDUHXVLQJ
the projector may not be able to communicate properly with your computer,
HYHQLIWKHFRPSXWHULVHTXLSSHGZLWKDEXLOWLQZLUHOHVV/$1IXQFWLRQ
7RHOLPLQDWHFRPPXQLFDWLRQSUREOHPVXVHD:L)LFHUWL¿HGZLUHOHVVQHWZRUN
GHYLFH
Ŷ:HEEURZVHU
Web browser is required to be installed in your computer to use Web control.
Ŷ$SSOLFDWLRQ
([FOXVLYHDSSOLFDWLRQVDUHUHTXLUHGWREHLQVWDOOHGLQ\RXUFRPSXWHUWRXVH
Network Presentation, My Image and Messenger. Refer to (18).
For Mac users: Mac OS does not support some applications. Refer to System
Requirements for Applications (18¿UVWEHIRUHVHWWLQJXSWKHFRQQHFWLRQ
NOTE 7KHQHWZRUNIXQFWLRQLVQRWDYDLODEOHZKHQ67$1'%<02'(LVVHW
WR6$9,1*DQGWKHSURMHFWRULVLQVWDQGE\PRGH&RQQHFWWKHSURMHFWRUWRWKH
QHWZRUNDIWHUVHWWLQJ67$1'%<02'(WR1250$/6(783PHQXLQWKH
2SHUDWLQJ*XLGH
11
2. Connection to the network
2.2 Connection via wired LAN
7KHFRQQHFWLRQYLDZLUHG/$1LVDYDLODEOH6HWZLUHG/$1IRUWKHSURMHFWRUE\
following the instructions of your network administrator when connecting to the
existing network.
hub
2.3 Connection setup of Wired LAN
&RQQHFWWKHSURMHFWRUWRWKHFRPSXWHUYLDDKXE
ZLWKD/$1FDEOH&$7HRUKLJKHU
2) Press the MENU button on the remote control or the
control panel of the projector.
7KH0(18\RXODVWXVHGZLOODSSHDU
8VHWKHFXUVRUEXWWRQWRVHOHFWWKHIROORZLQJ
($6<0(18!$'9$1&('0(18!1(7:25.!:,5('6(783
6HWWKHIROORZLQJLWHPVLQ:,5('6(783
䡡㻌㻌DHCP
䡡㻌IP ADDRESS
䡡㻌68%1(70$6.
䡡㻌'()$8/7*$7(:$<
䡡㻌DNS SERVER
As for setting an IP address, refer to “About IP address”. (13)
6HOHFW$33/<WKHQSUHVVWKHENTEREXWWRQWRUHÀHFWWKHVHWWLQJV
12
2. Connection to the network
[About IP address]
Ŷ6HWWLQJPDQXDOO\
The Network address portion of the IP address setting on your computer must
be the same as the setting on the projector. Also, the entire IP address on the
FRPSXWHUPXVWQRWRYHUODSZLWKWKDWRIWKHRWKHUGHYLFHVRQWKHVDPHQHWZRUN
including the projector.
The projector’s settings are as follows.
IP address: 192.168.1.254
Subnet mask: 255.255.255.0
(Network address: 192.168.1 in this case)
Therefore, specify the computer’s IP address as follows.
IP address: 192.168.1.xxx (xxx shows decimal number.)
Subnet mask: 255.255.255.0
(Network address: 192.168.1 in this case)
For example
Select from 1 to 254 for “xxx” not duplicating with any other equipments.
In this case, since the IP address of the projector is “192.168.1.254”, specify a
setting between 1 to 253 for the computer.
Ŷ6HWWLQJDXWRPDWLFDOO\
:KHQD'+&3VHUYHUH[LVWVLQWKHFRQQHFWHGQHWZRUNLWDVVLJQVDQ,3DGGUHVV
WRWKHSURMHFWRUDQGWKHFRPSXWHUDXWRPDWLFDOO\,I'+&3VHUYHULVQRWDYDLODEOH
VHW,3$''5(6668%1(70$6.DQG'()$8/7*$7(:$<
NOTE
7KHVDPHQHWZRUNDGGUHVVFDQQRWEHXVHGIRUERWKZLUHOHVV/$1DQGZLUHG/$1
If the projector and the computer exist in the same network (i.e., same network
DGGUHVV\RXFDQOHDYHWKHGHIDXOWJDWHZD\¿HOGEODQN
:KHQWKHSURMHFWRUDQGWKHFRPSXWHUH[LVWLQGLIIHUHQWQHWZRUNVWKHGHIDXOW
gateway must be set. Consult to the network administrator in detail.
13
2. Connection to the network
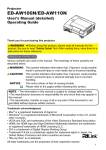
2.4 Connection via wireless LAN
&RQQHFWLRQYLDZLUHOHVV/$1LVDYDLODEOHZLWKRSWLRQSDUWV86%ZLUHOHVVDGDSWHU
86%:/1
:LUHOHVV/$1KDVWZRW\SHVRIFRQQHFWLRQ$G+RFDQG,QIUDVWUXFWXUH
Fig. 2.4.a Without an access point communication (Ad Hoc)
Fig. 2.4.b With an access point communication (Infrastructure)
$G+RFLVRQHRIWKHZLUHOHVV/$1FRPPXQLFDWLRQPHWKRGVZLWKRXWKDYLQJDQ
access point to communicate.
,QIUDVWUXFWXUHLVRQHRIWKHZLUHOHVV/$1FRPPXQLFDWLRQPHWKRGVZLWKKDYLQJ
an access point to communicate. If communicating with existing network, consult
with your network administrator.
NOTE
1HWZRUNVHWWLQJVFDQDOVREHFKDQJHGLQ1HWZRUN6HWWLQJVRI3URMHFWRU:HE
Control㻚
:LUHOHVV/$1LQLWLDOVHWWLQJVIRUWKHSURMHFWRUDUHDVIROORZV
Mode: Ad Hoc
DHCP: Off
IP address: 192.168.10.254
Subnet Mask: 255.255.255.0
'HIDXOW*DWHZD\
SSID: wireless
Encryption: Off
Channel: 1
7KHVDPHQHWZRUNDGGUHVVFDQQRWEHXVHGIRUERWKZLUHOHVV/$1DQGZLUHG/$1
14
2. Connection to the network
2.4.1 Connection in Ad Hoc Mode
Set the following when connecting the projector and the computer in Ad Hoc mode.
Projector setting
>5HVWULFWLRQRQSOXJJLQJDQGXQSOXJJLQJWKH86%ZLUHOHVVDGDSWHU@
%HIRUH\RXLQVHUWRUSXOORXWWKH86%ZLUHOHVVDGDSWHUIURPWKHSURMHFWRUWXUQRII
the power of the projector and pull out the power cord’s plug from the outlet. Do
QRWWRXFKWKH86%ZLUHOHVVDGDSWHUWKDWLVFRQQHFWHGWRWKHSURMHFWRUZKLOHWKH
SURMHFWRULVUHFHLYLQJ$&SRZHU
'RQRWXVHDQ\H[WHQVLRQFDEOHRUGHYLFHZKHQFRQQHFWLQJWKHDGDSWHUWRWKH
projector.
$WWDFKWKH86%ZLUHOHVVDGDSWHUWRWKHUSB TYPE A port of the projector.
2) Turn on the projector.
3) Press the MENU button on the remote control or the
control panel of the projector.
7KH0(18\RXODVWXVHGZLOODSSHDU
8VHWKHFXUVRUEXWWRQWRVHOHFWWKHIROORZLQJ
($6<0(18!$'9$1&('0(18!1(7:25.!:,5(/(666(783
6HWWKHIROORZLQJLWHPVLQ:,5(/(666(783
䡡㻌MODE: ADHOC
䡡㻌㻌DHCP
䡡㻌IP ADDRESS
䡡㻌68%1(70$6.
䡡㻌SSID
䡡㻌ENCRYPTION
䡡㻌CH
As for setting an IP address, refer to “About IP address”. (13)
6HOHFW$33/<WKHQSUHVVWKHENTEREXWWRQWRUHÀHFWWKHVHWWLQJV
Computer setting
6HW,3$''5(66DQG68%1(70$6.IRUWKHFRPSXWHUDFFRUGLQJWR,3
$''5(66DQG68%1(70$6.VHWIRUWKHSURMHFWRU6HWWKHSURMHFWRUDQGWKH
FRPSXWHUVRWKDWWKH\FDQKDYHWKHVDPHQHWZRUNDGGUHVV
2) Select SSID set for the projector by following the procedure of wireless
connection of the computer. Enter encryption key by following the computer’s
instruction if it is encrypted.
NOTE $VIRUWKHSURFHGXUHRIVHWWLQJQHWZRUNDQGZLUHOHVVFRQQHFWLRQIRUWKH
FRPSXWHUUHIHUWRWKHPDQXDORIFRPSXWHURUZLUHOHVV/$1GHYLFH
15
2. Connection to the network
2.4.2 Connection in Infrastructure Mode
Set the following when connecting the projector and the computer in Infrastructure
mode.
>5HVWULFWLRQRQSOXJJLQJDQGXQSOXJJLQJWKH86%ZLUHOHVVDGDSWHU@
%HIRUH\RXLQVHUWRUSXOORXWWKH86%ZLUHOHVVDGDSWHUIURPWKHSURMHFWRUWXUQRII
the power of the projector and pull out the power cord’s plug from the outlet. Do
QRWWRXFKWKH86%ZLUHOHVVDGDSWHUWKDWLVFRQQHFWHGWRWKHSURMHFWRUZKLOHWKH
SURMHFWRULVUHFHLYLQJ$&SRZHU
'RQRWXVHDQ\H[WHQVLRQFDEOHRUGHYLFHZKHQFRQQHFWLQJWKHDGDSWHUWRWKH
projector.
$WWDFKWKH86%ZLUHOHVVDGDSWHUWRWKHUSB TYPE A port of the projector.
2) Turn on the projector.
3) Press the MENU button on the remote control or the
control panel of the projector.
7KH0(18\RXODVWXVHGZLOODSSHDU
8VHWKHFXUVRUEXWWRQWRVHOHFWWKHIROORZLQJ
($6<0(18!$'9$1&('0(18!1(7:25.!:,5(/(666(783
6HWWKHIROORZLQJLWHPVLQ:,5(/(666(783
䡡㻌02'(,1)5$6758&785(
䡡㻌㻌DHCP
䡡㻌IP ADDRESS
䡡㻌68%1(70$6.
䡡㻌'()$8/7*$7(:$<
䡡㻌DNS SERVER
䡡㻌SSID
䡡㻌ENCRYPTION
䡡㻌CH
As for setting an IP address, refer to “About IP address”. (13)
6HOHFW$33/<WKHQSUHVVWKHENTEREXWWRQWRUHÀHFWWKHVHWWLQJV
16
2. Connection to the network
Connection in Infrastructure Mode (continued)
SSID SCAN LIST function
7KHFRQQHFWLRQFDQEHVHWXSE\VHOHFWLQJIURP66,'6&$1/,67ZLWKRXWVHWWLQJ
66,'DQG(1&5<37,21LQ:,5(/(666(7837KHSURFHGXUHRIFRQQHFWLQJE\
66,'6&$1/,67LVDVIROORZV
6HOHFW66,'6&$1/,67LQ:,5(/(666(783RQ1(7:25.PHQX
The list of SSID in wireless network is displayed.
6HOHFW66,'LQZLUHOHVVQHWZRUNWKDW\RXZDQWWRFRQQHFWLQ66,'6&$1/,67
The display to enter the encryption key appears if it is encrypted.
Enter the encryption key by using software keyboard.
3) The icon indicating “connected” ( LVGLVSOD\HGLQ66,'6&$1/,67VFUHHQ
when the connection is complete.
NOTE
㻌Transmission speed may be slow depending on the settings of an access point.
If the projector and the computer exist in the same network (i.e., same network
DGGUHVV\RXFDQOHDYHWKHGHIDXOWJDWHZD\¿HOGEODQN
:KHQWKHSURMHFWRUDQGWKHFRPSXWHUH[LVWLQGLIIHUHQWQHWZRUNVWKHGHIDXOW
gateway must be set. Consult with the network administrator in detail.
6HWZLUHOHVV/$1IRUWKHSURMHFWRUE\IROORZLQJWKHLQVWUXFWLRQVRI\RXUQHWZRUN
administrator when connecting to the existing network.
2SHQ6\VWHP$XWKHQWLFDWLRQLVXVHGIRU:(3HQFU\SWLRQDQG6KDUHG.H\
Authentication is not supported. The authentication with an access point succeeds
DQGLWLVUHJDUGHGWKDWWKHFRQQHFWLRQLVHVWDEOLVKHGQRUPDOO\HYHQZKHQ entering
illegal encryption key due to Open System Authentication, but data cannot actually
be transmitted.
17
2. Connection to the network
2.5 Applications
7KHODWHVWYHUVLRQRIWKHDSSOLFDWLRQVRIWZDUHFDQEHGRZQORDGHGIURPWKHZHEVLWH
below.
http://www.hitachi-america.us/digitalmedia/
http://www.hitachidigitalmedia.com/
http://www.hitachi-dm.cn/
http://www.hitachi.co.jp/proj/
)RUL261HWZRUN3UHVHQWDWLRQVRIWZDUHUHIHUWRWKH85/EHORZIRUGHWDLOVDQG
downloads of Projector Quick Connection.
KWWSZZZKLWDFKLFRMS3URGYLPVSURMHQLQGH[KWPO
KWWSZZZKLWDFKLFRMS3URGYLPVSURMMSLQGH[KWPO
[System Requirements for Applications]
Application
/LYH9LHZHU
Hardware and Software
[Windows]
OS:
Windows®;3
Windows Vista®6HUYLFH3DFNRUODWHU
Windows 7
Windows 8
*UDSKLFFDUG
9*$[RUKLJKHUUHFRPPHQGHG;*$[
&38
3HQWLXP*+]RUKLJKHU
Hard disk space:
0%RUKLJKHU
18
2. Connection to the network
[System Requirements for Applications] (continued)
Application
Hardware and Software
/LYH9LHZHU
[Mac]
0DF26;
0DF26;
0DF26;
0DF26;
Hard disk space:
0%RUKLJKHU
NOTE
2QO\IRU,QWHOYHUVLRQ3RZHU0DFLVQRWVXSSRUWHG
/LYH9LHZHU for MAC is not included in the bundled
CD-ROM. Download it from the website.
Projector Quick
Connection
Projector Image Tool
(PJImg)
iOS 5.1.1 or later
iPad, iPad2, New iPad
iPhone4/4S/5
OS:
Windows®;3
Windows Vista®
Windows 7
Windows 8
&38
3HQWLXP0+]RUKLJKHU
Projector Messenger
Tool (PJMessenger)
Hard disk space:
0%RUKLJKHU
OS:
Windows®;3
Windows Vista®
Windows 7
Windows 8
&38
3HQWLXP0+]RUKLJKHU
Hard disk space:
0%RUKLJKHU
19
2. Connection to the network
2.6 NETWORK Menu
Remember that incorrect network settings on this
SURMHFWRUPD\FDXVHWURXEOHRQWKHQHWZRUN%HVXUH
to consult with your network administrator before
connecting to an existing access point on your network.
Select “NETWORK” from the main menu to access to
the following functions.
6HOHFWDQLWHPXVLQJWKHŸźFXUVRUEXWWRQVRQWKH
SURMHFWRURUUHPRWHFRQWURODQGSUHVVWKHŹFXUVRUEXWWRQRQWKHSURMHFWRURU
remote control, or ENTER button on the remote control to execute the item. Then
perform it according to the following table.
NOTE 7RXVHWKHZLUHOHVVQHWZRUNIXQFWLRQRIWKLVSURMHFWRUWKHGHVLJQDWHG
86%ZLUHOHVVDGDSWHUVROGDVDQRSWLRQLVUHTXLUHG'RQRWXVHDQ\H[WHQVLRQ
FDEOHRUGHYLFHZKHQFRQQHFWLQJWKHDGDSWHUWRWKHSURMHFWRU
7KHSURMHFWRUGRHVQRWDOORZERWKZLUHOHVVDQGZLUHG/$1WREHFRQQHFWHGWR
the same network.
'RQRWVHWWKHVDPHQHWZRUNDGGUHVVIRUERWKZLUHOHVVDQGZLUHG/$1
,I\RXGRQRWXVH6173WKHQ\RXPXVWVHWWKH'$7($1'7,0(GXULQJWKH
initial installation.
7KHQHWZRUNIXQFWLRQLVQRWDYDLODEOHZKHQ67$1'%<02'(LVVHWWR
6$9,1*DQGWKHSURMHFWRULVLQVWDQGE\PRGH&RQQHFWWKHSURMHFWRUWRWKH
QHWZRUNDIWHUVHWWLQJ67$1'%<02'(WR1250$/6(783PHQXLQWKH
2SHUDWLQJ*XLGH
20
2. Connection to the network
Item
Description
Any name can be set to the projector to identify it on the
network.
PROJECTOR
NAME
(1) Select the PROJECTOR
NAME and press the Ź
button. The PROJECTOR
NAME dialog will be displayed.
8VHGLVSOD\HGVRIWZDUHNH\ERDUGWRHQWHU352-(&725
NAME.
'(/(7('HOHWHVRQHFKDUDFWHU
&/($5$//'HOHWHVDOOFKDUDFWHUV
&$1&(/*RHVEDFNWRQHWZRUNPHQXDIWHUGLVFDUGLQJ
the entered characters.
2.*RHVEDFNWRQHWZRUNPHQXDIWHUVDYLQJWKHHQWHUHG
characters.
(2) The current PROJECTOR NAME will be displayed on the
¿UVWOLQHVParticular projector name is pre-assigned by
default.
8VHWKHENTER or INPUT button to select and enter
characters.
To erase 1 character at one time, press the RESET button
RUSUHVVWKHŻDQGINPUT button at the same time. Also if
\RXPRYHWKHFXUVRUWR'(/(7(RU&/($5$//RQVFUHHQ
and push the ENTER or INPUT button, 1 character or
DOOFKDUDFWHUVZLOOEHHUDVHG8SWRFKDUDFWHUVFDQEH
input for the PROJECTOR NAME.
(3) To change an already inserted
FKDUDFWHUPRYHWKHFXUVRU
WRRQHRIWKH¿UVWOLQHV
DQGPRYHWKHFXUVRURQWKH
character to be changed.
After pressing the ENTER or
INPUT button, the character is
selected. Then, follow the same
procedure as described at the
LWHPDERYH
7R¿QLVKHQWHULQJWH[WPRYHWKHFXUVRUWRWKH2.RQ
VFUHHQDQGSUHVVWKHŹENTER or INPUT button. To
UHYHUWWRWKHSUHYLRXV352-(&7251$0(ZLWKRXWVDYLQJ
FKDQJHVPRYHWKHFXUVRUWRWKH&$1&(/RQVFUHHQDQG
SUHVVWKHŻENTER or INPUT button.
(continued on next page)
21
2. Connection to the network
Item
Description
&RQ¿JXUHVZLUHOHVVQHWZRUN
6HWWLQJYDOXHVDUHVDYHGDIWHU
VHOHFWLQJ$33/<
NOTE
6HWWLQJYDOXHVDUHQRWVDYHG
if Menu dissapears before
selecting Apply.
SSID SCAN
LIST
WIRELESS
SETUP
6HDUFKHVDYDLODEOHZLUHOHVVQHWZRUNDQGGLVSOD\V
the list of SSID.
You can select SSID to connect from the list.
66,'RQDYDLODEOHZLUHOHVVQHWZRUNLV
GLVSOD\HGDIWHUVHOHFWLQJ6&$1/,67DQGSUHVV
WKHŹEXWWRQ
NOTE
The wireless network using the encryption
method not supported by the projector is
not displayed in the search list.
(continued on next page)
22
2. Connection to the network
Item
Description
㻌㻌㻌㻌Icon
Description
The projector is connecting to the wireless
network.
The wireless network is encrypted.
7KHLQWHQVLW\RIUDGLRZDYH
'HYLFHVHWIRU$G+RF
WIRELESS
SETUP
(continued)
SSID SCAN
LIST
(continued)
(2) Select SSID that you want to connect and
SUHVVWKHŹRUENTER button. The display
to enter the encryption key appears if SSID
is encrypted. Enter the characters by using
software keyboard.
0RYHWKHFXUVRUWR2.DQGSUHVVWKHŹENTER
or INPUT button after entering.
NOTE
If you select the [HIDE THE CHARACTERS]
checkbox, the characters are hidden.
(continued on next page)
23
2. Connection to the network
Item
Description
㻔㻟㻕㻌The OSD below is displayed while the
connection is in progress.
The keys other than Reset button are not
DYDLODEOHZKLOHWKHFRQQHFWLRQLVLQSURJUHVV
The connection process is interrupted when
pressing the Reset button.
The OSD below is displayed when the connection
process is complete.
䠖 Connection succeeded
The message below is displayed when the
connection is not established correctly.
䠖 Connection failed
WIRELESS
SETUP
(continued)
SSID SCAN
LIST
(continued)
䠖 (QFU\SWLRQ/RFNHQDEOHG
NOTE ・ Encryption settings cannot be
changed when encryption lock is enabled
in Network Settings – Wireless Setup in
Projector Web Control. Refer to Encryption
/RFN41)
2SHQ6\VWHP$XWKHQWLFDWLRQLVXVHGIRU:(3
encryption, and Shared Key Authentication
is not supported. The authentication with an
access point is succeeded and it is regarded
that the connection is established normally
HYHQZKHQHQWHULQJLOOHJDOHQFU\SWLRQNH\
due to Open System Authentication, but data
cannot actually be transmitted.
㻔㻠㻕㻌The icon indicating the connection status
( LVGLVSOD\HGLQ66,'6&$1/,67ZKHQWKH
connection is complete.
(continued on next page)
24
2. Connection to the network
Item
Description
SSID SCAN
LIST
(continued)
WIRELESS
SETUP
(continued)
6ZLWFKHVEHWZHHQ$'+2&DQG,1)5$6758&785(
Select the mode of the network communication
system. Select according to the settings of your
computer.
ADHOC Ù,1)5$6758&785(
7RVDYHWKHVHWWLQJSUHVVWKHŹEXWWRQ
MODE
NOTE :KHQ$'+2&LVVHOHFWHG,(((Q
cannot be used.
,I$'+2&LVVHWWR02'(ZKLOH:3$36.RU
WPA2-PSK is selected in ENCRYPTION, the
ENCRYPTION (27) setting switches to OFF
automatically.
DHCP
IP
ADDRESS
&RQ¿JXUHVZKHWKHU,3DGGUHVVLVDXWRPDWLFDOO\
obtained or not.
8VHWKHŸźEXWWRQVWRWXUQ'+&3RQRII
ON Ù OFF
&RQ¿JXUHVWKH,3DGGUHVVZKHQ'+&3LVGLVDEOHG
Enter the IP ADDRESS.
This function can only be used when DHCP is set
to OFF.
(continued on next page)
25
2. Connection to the network
Item
WIRELESS
SETUP
(continued)
Description
SUBNET
MASK
&RQ¿JXUHVWKHVXEQHWPDVNZKHQ'+&3LV
disabled.
(QWHUWKH68%1(70$6.
This function can only be used when DHCP is set
to OFF.
DEFAULT
GATEWAY
&RQ¿JXUHVWKHGHIDXOWJDWHZD\ZKHQ'+&3LV
disabled.
(QWHUWKH'()$8/7*$7(:$<DGGUHVV
This function can only be used when DHCP is set
to OFF.
DNS
SERVER
&RQ¿JXUHVWKH'16VHUYHUDGGUHVV
(QWHUWKH'16VHUYHUDGGUHVV
NOTE
This setting cannot be obtained automatically.
&RQ¿JXUHV66,'IRUZLUHOHVVQHWZRUN
SSID
6HOHFWRQHRIWKH'()$8/7aDQGSUHVVŹ
or ENTER button.
To adjust CUSTOM
3UHVVWKHŹRUENTEREXWWRQZKHQWKH
&86720LVVHOHFWHG7KH66,'&86720
menu will be appeared.
Enter SSID by using software keyboard. Refer
to PROJECTOR NAME (21) for how to use
software keyboard.
(continued on next page)
26
2. Connection to the network
Item
Description
Select the encryption method to be used.
WPA2-PSK(AES) Ù WPA2-PSK(TKIP)
Ú
Ú
OFF
WPA-PSK(AES)
Ú
Ú
WEP 64bitÙWEP 128bitÙWPA-PSK(TKIP)
It is required to enter the encryption key when
selecting the encryption method other than
2))DQGSUHVVLQJWKHŹEXWWRQ
ENCRYPTION
WIRELESS
SETUP
(continued)
CH
NOTE 2QO\:(3ELWRU:(3ELWFDQEH
selected when Ad Hoc is set.
:3$36.$(6LVUHFRPPHQGHGIRUHQFU\SWLRQ
method of IEEE802.11n. Transmission speed in
IEEE802.11n may be slow when other encryption
method (WEP, WPA-PSK (TKIP), WPA2-PSK
(TKIP)). Change the setting to “AES” if encryption
other than “AES” is set.
(QFU\SWLRQPHWKRGQRWLQFOXGHGLQWKHVHOHFWHG
LWHPFDQQRWEHDYDLODEOH
6HOHFWWKHFKDQQHORIWKHZLUHOHVV/$1WREH
used while MODE (25) is set to ADHOC.
Select according to the settings of your computer.
7KHFKDQQHOVWRDUHDYDLODEOH7RVDYHWKH
VHWWLQJSUHVVWKHŹEXWWRQ
7KHDYDLODEOHFKDQQHOVYDU\GHSHQGLQJRQD
country.
(continued on next page)
27
2. Connection to the network
Item
Description
&RQ¿JXUHVZLUHG
network.
6HWWLQJYDOXHVDUHVDYHG
DIWHUVHOHFWLQJ$33/<
NOTE
6HWWLQJYDOXHVDUHQRWVDYHGLI0HQXGLVDSSHDUVEHIRUHVHOHFWLQJ
$33/<
WIRED
SETUP
DHCP
8VHWKHŸźEXWWRQVWRWXUQ'+&3RQRII
ON Ù OFF
IP
ADDRESS
&RQ¿JXUHVWKH,3DGGUHVVZKHQ'+&3LVGLVDEOHG
Enter the IP ADDRESS.
This function can only be used when DHCP is set
to OFF.
SUBNET
MASK
&RQ¿JXUHVWKHVXEQHWPDVNZKHQ'+&3LVGLVDEOHG
(QWHUWKH68%1(70$6.
This function can only be used when DHCP is set
to OFF.
(continued on next page)
28
&RQ¿JXUHVZKHWKHU,3DGGUHVVLVDXWRPDWLFDOO\
obtained or not.
2. Connection to the network
Item
Description
DEFAULT
GATEWAY
WIRED
SETUP
(continued)
&RQ¿JXUHVWKHGHIDXOWJDWHZD\ZKHQ'+&3LV
disabled.
(QWHUWKH'()$8/7*$7(:$<DGGUHVV
This function can only be used when DHCP is set
to OFF.
&RQ¿JXUHVWKH'16VHUYHUDGGUHVV
(QWHUWKH'16VHUYHUDGGUHVV
DNS
SERVER
NOTE
This setting cannot be obtained automatically.
(continued on next page)
29
2. Connection to the network
Item
Description
6HOHFWLQJWKLVLWHPGLVSOD\VWKHGLDORJIRUYLHZLQJWKHZLUHOHVV
DQGZLUHG/$1VHWWLQJV8VHWKHŸźEXWWRQVWRVZLWFKWKHSDJH
7KH¿UVWSDJHVKRZVWKHZLUHOHVV/$1VHWWLQJV7KHVHFRQGSDJH
LVIRUWKHZLUHG/$1VHWWLQJVDQGWKHWKLUGSDJHLVIRUFRPPRQ
setting item.
The following information is displayed.
䡡㻌PASSCODE
䡡㻌MODE
䡡㻌IP ADDRESS
䡡㻌68%1(70$6.
䡡㻌'()$8/7*$7(:$<
䡡㻌DNS SERVER
䡡㻌MAC ADDRESS
䡡㻌SSID
䡡㻌ENCRYPTION
䡡㻌CH
䡡㻌SPEED
NETWORK
INFORMATION
WIRELESS
INFORMATION Passcord supports the connection between the
projector and the computer when using Network
Presentation. Refer to Network Presentation (74)
for the details.
NOTE ,3$''5(6668%1(70$6.DQG
'()$8/7*$7(:$<LQGLFDWH³´LQWKH
following condition.
7KH86%ZLUHOHVVDGDSWHULVQRWLQVHUWHG
into the projector.
(2) DHCP is ON and the projector does not get
DGGUHVVIURP'+&3VHUYHU
Nothing (blank) is shown in the CH and SPEED
¿HOGVLIWKH86%ZLUHOHVVDGDSWHULVQRWLQVHUWHG
(continued on next page)
30
2. Connection to the network
Item
Description
The following information is displayed.
䡡㻌PASSCODE
䡡㻌IP ADDRESS
䡡㻌68%1(70$6.
䡡㻌'()$8/7*$7(:$<
䡡㻌DNS SERVER
䡡㻌MAC ADDRESS
NETWORK
INFORMATION
(continued)
WIRED
INFORMATION Passcord enables the projector and the computer
to be connected to the network easily when
using Network Presentation. Refer to Network
Presentation (74) for details.
NOTE ,3$''5(6668%1(70$6.DQG
'()$8/7*$7(:$<LQGLFDWH³´ZKHQ
DHCP is ON and the projector has not gotten
DGGUHVVIURP'+&3VHUYHU
The following information is displayed.
䡡㻌PROJECTOR NAME
䡡㻌DATE AND TIME
OTHER
䡡㻌SNTP SERVER
INFORMATION 䡡㻌TIME DIFFERENCE
PROJECTOR NAME and SNTP SERVER may
appear truncated if they are too long.
(continued on next page)
31
2. Connection to the network
Item
Description
SNTP
SERVER
SNTP
SETUP
:KHQ\RXJHWWKHWLPHYLDWKHQHWZRUNVSHFLI\
6173VHUYHUZLWK,3DGGUHVVRUGRPDLQQDPH
8SWRFKDUDFWHUVFDQEHHQWHUHGIRUGRPDLQ
name.
They are entered by using software keyboard.
Refer to PROJECTOR NAME(21) for how to use
software keyboard.
NOTE
Set the time difference when using SNTP.
Enter the time difference.
Set the same time difference as the one set on
your computer. If unsure, consult your network
TIME
DIFFERENCE administrator.
8VHWKHŹEXWWRQWRUHWXUQWRWKHPHQXDIWHU
setting the TIME DIFFERENCE.
(continued on next page)
32
2. Connection to the network
Item
Description
Selecting this item displays the MY
,0$*( menu.
8VHWKHDSSOLFDWLRQWRWUDQVIHUWKH
image data. It can be downloaded
from the Hitachi web site.
Refer to 5. My Image Function (78) for the details of MY
,0$*(
MY IMAGE
6HOHFWDQLWHPRIVWLOOLPDJHE\WKH0<,0$*(DQGWKHŹRU
ENTER button to display the image.
7KHLWHPZLWKRXWVWRUHGLPDJHFDQQRWEHVHOHFWHG
(DFKLPDJHQDPHLVGLVSOD\HGLQFKDUDFWHUVRUOHVV
To switch the image displayed
8VHWKHŸźEXWWRQV
To return to the menu
3UHVVWKHŻEXWWRQRQWKHUHPRWHFRQWURO
7RHUDVHWKHGLVSOD\HGLPDJHDQGLWVVRXUFH¿OHLQWKH
projector.
(1) Press the RESET button on the
remote control while displaying an
LPDJHWRGLVSOD\WKH0<,0$*(
'(/(7(PHQX
3UHVVWKHŹEXWWRQWRHUDVH
7RVWRSHUDVLQJSUHVVWKHŻEXWWRQ
AMX D.D.
(AMX Device
Discovery)
8VHWKHŸźEXWWRQVWRWXUQWKH$0;'HYLFH'LVFRYHU\RQRII
ON Ù OFF
When ON is selected, the projector can be detected by
FRQWUROOHUVRI$0;FRQQHFWHGWRWKHVDPHQHWZRUN)RUWKH
GHWDLOVRI$0;'HYLFH'LVFRYHU\YLVLWWKH$0;ZHEVLWH
85/KWWSZZZDP[FRP
(continued on next page)
33
2. Connection to the network
Item
Description
7RXVH1HWZRUN3UHVHQWDWLRQDQH[FOXVLYHDSSOLFDWLRQLV
required. It can be installed from the bundled application
&'<RXFDQDOVRGRZQORDGWKHODWHVWYHUVLRQDQGUHOHYDQW
information from the Hitachi website.
Refer to 4. Network Presentation (74) for the details of
Network Presentation.
If you set a computer to the Presenter mode while
its image is projected, the projector is occupied by
the computer and access from any other computer is
blocked.
QUIT
8VHWKLVIXQFWLRQWRTXLWWKH3UHVHQWHUPRGHDQG
PRESENTER
allow other computers to access the projector.
MODE
Select this item to display a dialog.
3UHVVWKHŹEXWWRQWRFKRRVH2.LQWKHGLDORJ
The Presenter mode is cancelled and a message is
displayed indicating the result.
PRESENTATION
MULTI PC
MODE
(continued on next page)
34
If you set one or more computers to the Multi PC
mode and send their images to the projector, you can
select the display mode on the projector from two
options below.
- Single PC mode: displays the image of the selected
computer on full screen.
- Multi PC mode: displays the images sent from up to
IRXUFRPSXWHUVRQVFUHHQWKDWLVGLYLGHGLQWRTXDUWHU
sections.
Select this item to display a dialog.
8VHWKHGLDORJWRFKDQJHWKHGLVSOD\PRGHDV
explained below.
7RFKDQJHIURP0XOWL3&PRGHWR6LQJOH3&PRGH
select one of computers in the dialog using the
ŸźŻŹEXWWRQVDQGSUHVVWKHENTER or INPUT
button.
3UHVVWKHŹEXWWRQWRFKRRVH2.DQGWKHQSUHVV
ENTER or INPUT again. The image for the selected
computer is displayed on full screen.
(continued on next page)
2. Connection to the network
Item
PRESENTATION
(continued)
Description
MULTI PC
MODE
(continued)
7RFKDQJHIURP6LQJOH3&PRGHWR0XOWL3&
PRGHSUHVVWKHŹEXWWRQWRFKRRVH2.LQWKH
dialog and press the ENTER or INPUT button.
The display mode is changed.
7KH3UHVHQWHUPRGHVHWWLQJ
of the selected computer
EHFRPHVYDOLGZKHQWKH
display mode is changed to
Single PC mode. Also, the
3UHVHQWHUPRGHVHWWLQJEHFRPHVLQYDOLGZKHQ
the display mode is changed to Multi PC mode,
regardless of the setting on the computers.
Selecting this item displays the user name. This
DISPLAY
function helps you identify from which computer
USER NAME
the current image is sent.
35
3. Web Control
3. Web Control
<RXFDQDGMXVWRUFRQWUROWKHSURMHFWRUYLDDQHWZRUNIURPDZHEEURZVHURQD
computer connected to the same network.
Ŷ3URMHFWRU:HE&RQWURO
㻌㻌You can control the projector, collect
the status such as lamp time, and set
e-mail or schedule, etc. in Projector
Web Control.
Recommended web browser
・ Internet Explorer® 6/ 7/ 8/ 9/ 10
NOTE :HEEURZVHUVRWKHUWKDQUHFRPPHQGHGRQHVPD\QRWZRUN
,QWHUQHW([SORUHU® 6.0 or later is required.
,I-DYD6FULSW®LVGLVDEOHGLQ\RXUZHEEURZVHUFRQ¿JXUDWLRQ\RXPXVWHQDEOH
-DYD6FULSW®LQRUGHUWRXVHWKHSURMHFWRUZHESDJHVSURSHUO\6HHWKH+HOS¿OHV
IRU\RXUZHEEURZVHUIRUGHWDLOVRQKRZWRHQDEOH-DYD6FULSW®.
,WLVUHFRPPHQGHGWKDWDOOZHEEURZVHUXSGDWHVDUHLQVWDOOHG
,IGDWDLVWUDQVIHUUHGYLDZLUHOHVVDQGZLUHG/$1DWWKHVDPHWLPHWKH
projector may not process the data correctly.
Ŷ&UHVWURQH&RQWURO
䚷Crestron e-Control® is a control
LQWHUIDFHXVLQJDZHEEURZVHUSURYLGHG
by Crestron Electronics, Inc..
Crestron e-Control® can control and
monitor the projector.
(continued on next page)
36
3. Web Control
NOTE &UHVWURQH&RQWURO® is created using Flash®. You need to install
Adobe® Flash® Player on your computer to use Crestron e-Control®. Crestron
e-Control® is not displayed in a web browser that does not support Flash®.
,I&UHVWURQH&RQWURO® in the Network Settings (43) is set to Disable, the
VHOHFWLRQZLQGRZGRHVQRWDSSHDUEXWWKH/RJLQZLQGRZRIWKH3URMHFWRU:HE
Control is displayed.
5HIHUWRWKHIROORZLQJIRUFRQ¿JXULQJRUFRQWUROOLQJWKHSURMHFWRUYLDDZHEEURZVHU
0DNHVXUHWKDW\RXUFRPSXWHUDQGWKHSURMHFWRULVFRQQHFWHGYLDQHWZRUNDQG
then start Web browser.
(QWHUWKHSURMHFWRU
V,3DGGUHVVLQWR85/LQSXWER[RIWKH:HEEURZVHUDVWKH
button.
example below, and then press the Enter key or
Example: If the IP address of the projector is set to 192.168.1.10:
Enter “http://192.168.1.10/” into the address bar of the web browser
and press the Enter key or click
button.
,IDFRUUHFW85/LVLQSXWDQGWKH
projector and your computer are
connected to the same network
correctly, the selection window will be
displayed.
NOTE 'RQRWFRQWUROWKHSURMHFWRUZLWKWKHSURMHFWRU
VPHQXRUUHPRWH
FRQWURODQGYLD:HE&RQWURODWWKHVDPHWLPH,WPD\FDXVHVRPHRSHUDWLRQDO
errors in the projector.
7KHODQJXDJHXVHGRQWKH3URMHFWRU:HE&RQWUROLVWKHVDPHDVWKDWRIWKH
OSD on the projector. If you want to change it, you need to change the OSD
language on the projector. (6&5((1PHQXLQWKH2SHUDWLQJ*XLGH
37
3. Web Control
3.1 Projector Web Control
3.1.1 Login
To use the Projector Web Control function, you need
to login with your user name and password.
%HORZDUHWKHIDFWRU\GHIDXOWVHWWLQJVIRUXVHU
name and password.
User name
Administrator
Password
EODQN!
/RJLQZLQGRZ
Enter your user name and password, and then click the [OK].
If you login successfully, the screen below will be displayed.
Main menu
&OLFNWKHGHVLUHGRSHUDWLRQRUFRQ¿JXUDWLRQLWHPRQWKHPDLQPHQX
38
3. Web Control
3.1 Projector Web Control (continued)
3.1.2 Network Information
Displays the projector’s current network
FRQ¿JXUDWLRQVHWWLQJV
Item
Common Information
Projector Name
Wireless Information
Description
'LVSOD\VLQIRUPDWLRQFRPPRQWRERWKZLUHOHVVDQGZLUHG/$1
Displays the projector name settings.
'LVSOD\VWKHFXUUHQWVHWWLQJVRIZLUHOHVV/$1
Mode
'LVSOD\VWKHPRGHRIZLUHOHVV/$1FRPPXQLFDWLRQ
DHCP
Displays the DHCP setting.
IP Address
Displays the IP address.
Subnet Mask
Displays the subnet mask.
Default Gateway
Displays the default gateway.
DNS Server Address
'LVSOD\VWKH'16VHUYHUDGGUHVV
MAC Address
Displays the MAC address.
Ch
'LVSOD\VWKHFKDQQHOXVHGIRUZLUHOHVV/$1
Encryption
Displays the data encryption setting.
SSID
Displays the SSID used by the projector.
Speed
'LVSOD\VWKHFXUUHQWZLUHOHVV/$1WUDQVPLVVLRQVSHHG
Wired Information
'LVSOD\VWKHFXUUHQWZLUHG/$1VHWWLQJV
DHCP
Displays the DHCP setting.
IP Address
Displays the IP address.
Subnet Mask
Displays the subnet mask.
Default Gateway
Displays the default gateway.
DNS Server Address
'LVSOD\VWKH'16VHUYHUDGGUHVV
MAC Address
Displays the MAC address.
39
3. Web Control
3.1 Projector Web Control (continued)
3.1.3 Network Settings
'LVSOD\VDQGFRQ¿JXUHVQHWZRUNVHWWLQJV
Item
Common Setup
Projector Name
&RQ¿JXUHVWKHQDPHRIWKHSURMHFWRU
The length of the Projector Name can be up to 64
alphanumeric characters. Only alphabets, numbers and
following symbols can be used.
!"#>?@ABC^_`aDQGVSDFH
Particular projector name is pre-assigned by default.
sysLocation (SNMP)
&RQ¿JXUHVWKHORFDWLRQWREHUHIHUUHGWRZKHQXVLQJ6103
7KHOHQJWKRIWKHV\V/RFDWLRQFDQEHXSWRDOSKDQXPHULF
characters. 2QO\QXPEHUVµ¶DOSKDEHWµD]¶DQGµ$=¶FDQ
be used.
sysContact (SNMP)
&RQ¿JXUHVWKHFRQWDFWLQIRUPDWLRQWREHUHIHUUHGWRZKHQ
using SNMP.
The length of the sysContact can be up to 255 alphanumeric
characters. 2QO\QXPEHUVµ¶DOSKDEHWµD]¶DQGµ$=¶FDQ
be used.
AMX D.D.
(AMX Device
Discovery)
&RQ¿JXUHVWKH$0;'HYLFH'LVFRYHU\VHWWLQJWRGHWHFWWKH
SURMHFWRUIURPWKHFRQWUROOHUVRI$0;FRQQHFWHGWRWKHVDPH
QHWZRUN)RUWKHGHWDLOVRI$0;'HYLFH'LVFRYHU\YLVLWWKH
$0;ZHEVLWH
85/KWWSZZZDP[FRP
(continued on next page)
40
Description
&RQ¿JXUHVWKHVHWWLQJVFRPPRQWRZLUHOHVVDQGZLUHG/$1
3. Web Control
3.1 Projector Web Control - Network Settings (continued)
Item
Wireless Setup
Description
&RQ¿JXUHVWKHZLUHOHVV/$1VHWWLQJV
Mode
6HOHFW$G+RFRU,QIUDVWUXFWXUH
,3&RQ¿JXUDWLRQ
&RQ¿JXUHVQHWZRUNVHWWLQJV
DHCP ON
Enables DHCP.
DHCP OFF
Disables DHCP.
IP Address
&RQ¿JXUHVWKH,3DGGUHVVZKHQ'+&3LVGLVDEOHG
Subnet Mask
&RQ¿JXUHVWKHVXEQHWPDVNZKHQ'+&3LVGLVDEOHG
Default
Gateway
&RQ¿JXUHVWKHGHIDXOWJDWHZD\ZKHQ'+&3LVGLVDEOHG
DNS Server Address
&RQ¿JXUHVWKH'16VHUYHUDGGUHVV
Select from “1” to “11”, a channel to use in the Ad Hoc mode.
NOTE 7KHFKDQQHOVPD\YDU\GHSHQGLQJRQWKH
Ch
Encryption Lock
country. In addition, depending on the country or region,
it may be required to use a wireless network card that
FRQIRUPVWRWKHVWDQGDUGVLQWKHUHVSHFWLYHFRXQWU\RU
region.
Permits or inhibits changes of the following settings related to
wireless connection.
䡡㻌Mode
䡡㻌Encryption
䡡㻌Encryption key (WEP key, WPA passphrase)
䡡㻌SSID
:KHQ(QFU\SWLRQ/RFNLVVHWWR21WKHVHVHWWLQJVFDQQRWEH
changed by the menu of the projector.
NOTE ,I(QFU\SWLRQ/RFNLV21ZLUHOHVVFRQQHFWLRQ
is performed only when it can be connected without
changing the current settings.
Encryption
Select data encryption method.
(continued on next page)
41
3. Web Control
3.1 Projector Web Control - Network Settings (continued)
Item
Wireless Setup
WEP Key
Description
&RQ¿JXUHVWKHZLUHOHVV/$1VHWWLQJV
Input the WEP key.
Either ASCII characters or hexadecimal numbers can be
XVHGGXULQJ:(3NH\LQSXW+RZHYHU\RXFDQQRWXVHD
FRPELQDWLRQRIERWK7KHOHQJWKRIWKHNH\LVGH¿QHGDV
follows according to the WEP and character formats.
Encryption
WEP 64bit
WEP 128bit
+(;QXPEHUV
10 characters
26 characters
WPA Passphrase
Input WPA Passphrase.
$YDLODEOHQXPEHURILQSXWFKDUDFWHUVLVWR2QO\
alphabets, numbers and the following symbols can be used.
!"#>?@ABC^_`aDQGVSDFH
SSID
Select an SSID from the list.
If you require to set your unique SSID, select [Custom], then
set your own SSID following the rules below.
The maximum number of input characters is 32.
Only alphabets, numbers and the following symbols can be
used.
!"#>?@ABC^_`aDQGVSDFH
(continued on next page)
42
ASCII characters
5 characters
13 characters
3. Web Control
3.1 Projector Web Control - Network Settings (continued)
Item
Wired Setup
,3&RQ¿JXUDWLRQ
Description
&RQ¿JXUHVWKHZLUHG/$1VHWWLQJV
&RQ¿JXUHVQHWZRUNVHWWLQJV
DHCP ON
Enables DHCP.
DHCP OFF
Disables DHCP.
IP Address
&RQ¿JXUHVWKH,3DGGUHVVZKHQ'+&3LVGLVDEOHG
Subnet Mask
&RQ¿JXUHVWKHVXEQHWPDVNZKHQ'+&3LVGLVDEOHG
Default
Gateway
&RQ¿JXUHVWKHGHIDXOWJDWHZD\ZKHQ'+&3LVGLVDEOHG
DNS Server Address
Other Setup
Crestron e-Control
&RQ¿JXUHVWKH'16VHUYHUDGGUHVV
&RQ¿JXUHVRWKHUQHWZRUNVHWWLQJV
Set whether or not to use Crestron e-Control®.
,I\RXFKRRVH'LVDEOHQRWWKHVHOHFWLRQZLQGRZEXWWKH/RJLQ
ZLQGRZRI3URMHFWRU:HE&RQWUROZLOOEHGLVSOD\HGDW¿UVW
Click the [Apply]EXWWRQWRVDYHWKHVHWWLQJV
NOTE 7KHQHZFRQ¿JXUDWLRQVHWWLQJVDUHDFWLYDWHGDIWHUUHVWDUWLQJWKH
QHWZRUNFRQQHFWLRQ:KHQWKHFRQ¿JXUDWLRQVHWWLQJVDUHFKDQJHG\RXPXVW
restart the network connection. You can restart the network connection from
Network Restart on the main menu. (63)
,I\RXFRQQHFWWKHSURMHFWRUWRDQH[LVWLQJQHWZRUNFRQVXOWDQHWZRUN
DGPLQLVWUDWRUEHIRUHVHWWLQJVHUYHUDGGUHVVHV
7KH:(3.H\:3$SDVVSKUDVHDQG66,'VHWWLQJVZLOOQRWEHVHWLIWKHLQYDOLG
characters are used.
7KHSURMHFWRUGRHVQRWDOORZERWKZLUHOHVVDQGZLUHG/$1WREHFRQQHFWHGWR
the same network. Do not set the same network address for both wireless and
ZLUHG/$1
43
3. Web Control
3.1 Projector Web Control (continued)
3.1.4 Port Settings
'LVSOD\VDQGFRQ¿JXUHVFRPPXQLFDWLRQSRUW
settings.
Item
Network Control Port1
(Port:23)
&RQ¿JXUHVFRPPDQGFRQWUROSRUW3RUW
Port open
Click the [Enable] check box to use port 23.
Authentication
Click the [Enable] check box when authentication is required
for this port.
Network Control Port2
(Port:9715)
&RQ¿JXUHVFRPPDQGFRQWUROSRUW3RUW
Port open
Click the [Enable] check box to use port 9715.
Authentication
Click the [Enable] check box when authentication is required
for this port.
PJLink TM Port
(Port:4352)
&RQ¿JXUHVWKH3-/LQN TM port (Port:4352).
Port open
Click the [Enable] check box to use port 4352.
Authentication
Click the [Enable] check box when authentication is required
for this port.
My Image Port
(Port:9716)
&RQ¿JXUHVWKH0\,PDJH3RUW3RUW
Port open
Click the [Enable] check box to use port 9716.
Authentication
Click the [Enable] check box when authentication is required
for this port.
Messenger Port
(Port:9719)
&RQ¿JXUHVWKH0HVVHQJHU3RUW3RUW
Port open
Click the [Enable] check box to use port 9719.
Authentication
Click the [Enable] check box when authentication is required
for this port.
(continued on next page)
44
Description
3. Web Control
3.1 Projector Web Control - Port Settings (continued)
Item
SNMP Port
Description
&RQ¿JXUHVWKHPLE¿OHSRUW
Port open
Click the [Enable] check box to use SNMP.
Trap address
&RQ¿JXUHVWKHGHVWLQDWLRQRIWKH61037UDSLQ,3IRUPDW
7KHDGGUHVVDOORZVQRWRQO\,3DGGUHVVEXWDOVRGRPDLQ
QDPHLIWKHYDOLG'16VHUYHULVVHWXSLQWKHNetwork
Settings. The maximum length of host or domain name is up
to 255 characters.
'RZQORDG0,%¿OH
'RZQORDGVD0,%¿OHIURPWKHSURMHFWRU
Network Bridge Port
Port number
&RQ¿JXUHVWKH%ULGJHSRUWQXPEHU
Input the port number.
Except for 41794, 9715, 9716, 9719, 9720, 5900, 5500, 4352
between 1024 and 65535 can be set up. It is set to 9717 as
the default setting.
Click the [Apply]EXWWRQWRVDYHWKHVHWWLQJV
NOTE 7KHQHZFRQ¿JXUDWLRQVHWWLQJVDUHDFWLYDWHGDIWHUUHVWDUWLQJWKH
QHWZRUNFRQQHFWLRQ:KHQWKHFRQ¿JXUDWLRQVHWWLQJVDUHFKDQJHG\RXPXVW
restart the network connection. You can restart the network connection from
Network Restart on the main menu. (63)
45
3. Web Control
3.1 Projector Web Control (continued)
3.1.5 Mail Settings
'LVSOD\VDQGFRQ¿JXUHVHPDLODGGUHVVLQJ
settings.
Item
Description
Send Mail
Click the [Enable] check box to use the e-mail function.
&RQ¿JXUHWKHFRQGLWLRQVIRUVHQGLQJHPDLOXQGHUWKHAlert
Settings.
SMTP Server Address
&RQ¿JXUHVWKHDGGUHVVRIWKHPDLOVHUYHULQ,3IRUPDW
7KHDGGUHVVDOORZVQRWRQO\,3DGGUHVVEXWDOVRGRPDLQ
QDPHLIWKHYDOLG'16VHUYHULVVHWXSLQWKHNetwork
Settings. The maximum length of host or domain name is up
to 255 characters.
Sender E-mail address
&RQ¿JXUHVWKHVHQGHUHPDLODGGUHVV
The length of the sender e-mail address can be up to 255
alphanumeric characters.
Recipient E-mail address
&RQ¿JXUHVWKHHPDLODGGUHVVRIXSWR¿YHUHFLSLHQWV<RX
can also specify the [to] or [cc] for each address. The
length of the recipient e-mail address can be up to 255
alphanumeric characters.
Send Test Mail
Sends a test e-mail to the set address.
Click the [Apply]EXWWRQWRVDYHWKHVHWWLQJV
0DLOVHWWLQJVDUHLQLWLDOL]HGZKHQFOLFNLQJWKH[Reset] button.
NOTE <RXFDQFRQ¿UPZKHWKHUWKHPDLOVHWWLQJVZRUNFRUUHFWO\E\XVLQJWKH
[Send Test Mail] button. Enable Send Mail setting before clicking the [Send
Test Mail].
,I\RXFRQQHFWWKHSURMHFWRUWRDQH[LVWLQJQHWZRUNFRQVXOWDQHWZRUN
DGPLQLVWUDWRUEHIRUHVHWWLQJVHUYHUDGGUHVVHV
46
3. Web Control
3.1 Projector Web Control (continued)
3.1.6 Alert Settings
'LVSOD\VDQGFRQ¿JXUHVIDLOXUHDOHUWVHWWLQJV
1RWL¿FDWLRQVXFKDVHPDLODQG6103WUDSFDQEHVHWUHJDUGLQJWKHIROORZLQJ
errors/warnings.
䚷䡡&RYHU(UURU
䚷䡡Fan Error
䚷䡡/DPS(UURU
䚷䡡Temp Error
䚷䡡Air Flow Error
䚷䡡Cold Error
䚷䡡Filter Error
䚷䡡Other Error
䚷䡡Schedule Execution Error
䚷䡡/DPS7LPH$ODUP
䚷䡡Filter Time Alarm
䚷䡡Cold Start
䚷䡡Authentication Failure
5HIHUWR&KDSWHUIRUWKHGHWDLOVRIWKHDERYHHUURUVZDUQLQJV㻔87㻕
47
3. Web Control
3.1 Projector Web Control - Alert Settings (continued)
The Alert Items are shown below.
Item
Alarm Time
Description
&RQ¿JXUHVWKHWLPHWRDOHUW
(Only Lamp Time Alarm and Filter Time Alarm.)
SNMP Trap
Click the [Enable] check box to enable SNMP Trap alerts.
Send Mail
Click the [Enable] check box to enable e-mail alerts.
(Except Cold Start and Authentication Failure.)
Mail Subject
&RQ¿JXUHVWKHVXEMHFWOLQHRIWKHHPDLOWREHVHQW
The length of the subject line can be up to 100 alphanumeric
FKDUDFWHUV8VLQJDQ\RWKHUFKDUDFWHUPD\VKRUWHQWKH
subject line.
(Except Cold Start and Authentication Failure.)
Mail Text
&RQ¿JXUHVWKHWH[WRIWKHHPDLOWREHVHQW
The length of the text is up to 1024 alphanumeric characters.
8VLQJDQ\RWKHUFKDUDFWHUPD\VKRUWHQWKHWH[W
(Except Cold Start and Authentication Failure.)
Click the [Apply]EXWWRQWRVDYHWKHVHWWLQJV
7KHVHWWLQJVDUHLQLWLDOL]HGZKHQFOLFNLQJWKH[Reset] button.
48
3. Web Control
3.1 Projector Web Control (continued)
3.1.7 Schedule Settings
'LVSOD\VDQGFRQ¿JXUHVVFKHGXOHVHWWLQJV
NOTE %HVXUHWRVHWWKHGDWHDQGWLPH
EHIRUHHQDEOLQJVFKHGXOHGHYHQWV53)
5HIHUWR(YHQW6FKHGXOLQJIRUWKHGHWDLOV
of schedule settings. (92)
1) Schedule Management
Item
Description
Sunday
Monday
Tuesday
Wednesday
Schedule settings executed on each day of the week.
Thursday
Friday
Saturday
6SHFL¿FGDWH1R
6SHFL¿FGDWH1R
6SHFL¿FGDWH1R
6SHFL¿FGDWH1R
6FKHGXOHVHWWLQJVH[HFXWHGRQVSHFL¿HGGD\8SWRGD\V
FDQEHVSHFL¿HG
6SHFL¿FGDWH1R
49
3. Web Control
3.1 Projector Web Control - Schedule Settings (continued)
Item
Schedule
Program
Date (Month/Day)
Description
Select the checkbox of the schedule to execute.
6HOHFWWKHSURJUDP7KHGHWDLORIWKHHYHQWUHJLVWHUHGLQHDFK
SURJUDPFDQEHFRQ¿UPHGLQWKHSURJUDPOLVWGLVSOD\HGDW
the bottom of the screen.
Input the date (month/day) when the schedule is executed for
6SHFL¿FGDWHa
Click the [Apply]EXWWRQWRVDYHWKHVHWWLQJV
Click the [Refresh] button to update the screen to the latest status.
Click the [Program Edit] button to display the program edit of the selected
program.
Click the [Copy to] button to copy the content of the program from which you
copy (the list on the left) to the program to which you copy (the list on the right).
The same program No. cannot be selected for both the program from which and
the program to which you copy.
50
3. Web Control
3.1 Projector Web Control - Schedule Settings (continued)
2) Program Edit
7KHFXUUHQWHYHQWVHWWLQJVDUHGLVSOD\HGRQWKH
OLVW7RDGGDGGLWLRQDOIXQFWLRQVDQGHYHQWVVHW
the following items.
NOTE $PD[LPXPRISURJUDPVRI
VFKHGXOHFDQEHVHW$PD[LPXPRIHYHQWV
can be registered in 1 program.
Item
Description
Time
&RQ¿JXUHVWKHWLPHWRH[HFXWHHYHQWV
Event [Parameter]
&RQ¿JXUHVWKHHYHQWVWREHH[HFXWHG
Power
STANDBY
&RQ¿JXUHVWKHSDUDPHWHUVIRUSRZHUFRQWURO
ON
Input Source
COMPUTER IN1
COMPUTER IN2
LAN
USB TYPE A
&RQ¿JXUHVWKHSDUDPHWHUVIRUVZLWFKLQJLQSXW
USB TYPE B
HDMI 1
HDMI 2
VIDEO
My Image
IMAGE-OFF
IMAGE-1
IMAGE-2
&RQ¿JXUHVWKHSDUDPHWHUVIRU0\,PDJHGDWDGLVSOD\
IMAGE-3
IMAGE-4
51
3. Web Control
3.1 Projector Web Control - Schedule Settings (continued)
Item
Description
Messenger
TEXT-OFF
TEXT-1
TEXT-2
TEXT-3
TEXT-4
TEXT-5
TEXT-6
&RQ¿JXUHVWKHSDUDPHWHUVIRU0HVVHQJHUGDWDGLVSOD\
TEXT-7
TEXT-8
TEXT-9
TEXT-10
TEXT-11
TEXT-12
Eco Mode
NORMAL
ECO
&RQ¿JXUHVWKHSDUDPHWHUVIRUHFRPRGHVZLWFKLQJ
INTELLIGENT
ECO
SAVER
Blank
OFF
&RQ¿JXUHVWKHSDUDPHWHUVIRUEODQNVFUHHQRQRIIFRQWURO
ON
Slideshow
START
&RQ¿JXUHVWKH6WDUW6WRSSDUDPHWHUVIRUWKH6OLGHVKRZ
STOP
Click the [Register]EXWWRQWRDGGQHZHYHQWVWRWKHSURJUDP
Click the [Delete]EXWWRQWRGHOHWHHYHQWVIURPWKHSURJUDP
Click the [Delete All]EXWWRQWRFOHDUDOOWKHHYHQWVUHJLVWHUHGLQWKHFXUUHQW
selected program.
Click the [Back] button to go back to the schedule management screen.
52
3. Web Control
3.1 Projector Web Control (continued)
3.1.8 Date/Time Settings
'LVSOD\VDQGFRQ¿JXUHVWKHGDWHDQGWLPH
settings.
Item
Description
&RQ¿JXUHVWKHFXUUHQWGDWHLQyear/month/day format.
Current Date
Current Time
&RQ¿JXUHVWKHFXUUHQWWLPHLQhour:minute:second format.
Daylight Savings Time
Click the [ON]FKHFNER[WRHQDEOHGD\OLJKWVDYLQJVWLPHDQG
set the following items.
&RQ¿JXUHVWKHGDWHDQGWLPHGD\OLJKWVDYLQJVWLPHEHJLQV
Start
Month
&RQ¿JXUHVWKHPRQWKGD\OLJKWVDYLQJVWLPHEHJLQVa
Week
&RQ¿JXUHVWKHZHHNRIWKHPRQWKGD\OLJKWVDYLQJVWLPH
EHJLQV)LUVW/DVW
Day
&RQ¿JXUHVWKHGD\RIWKHZHHNGD\OLJKWVDYLQJVWLPHEHJLQV
(Sun, Mon, Tue, Wed, Thu, Fri, Sat).
Time
hour
&RQ¿JXUHVWKHKRXUGD\OLJKWVDYLQJVWLPHEHJLQVa
minute
&RQ¿JXUHVWKHPLQXWHGD\OLJKWVDYLQJVWLPHEHJLQVa
&RQ¿JXUHVWKHGDWHDQGWLPHGD\OLJKWVDYLQJVWLPHHQGV
End
Month
&RQ¿JXUHVWKHPRQWKGD\OLJKWVDYLQJVWLPHHQGVa
Week
&RQ¿JXUHVWKHZHHNRIWKHPRQWKGD\OLJKWVDYLQJVWLPHHQGV
)LUVW/DVW
Day
&RQ¿JXUHVWKHGD\RIWKHZHHNGD\OLJKWVDYLQJVWLPHHQGV
(Sun, Mon, Tue, Wed, Thu, Fri, Sat).
Time
hour
&RQ¿JXUHVWKHKRXUGD\OLJKWVDYLQJVWLPHHQGVa
minute
&RQ¿JXUHVWKHPLQXWHGD\OLJKWVDYLQJVWLPHHQGVa
(continued on next page)
53
3. Web Control
3.1 Projector Web Control - Date/Time Settings (continued)
Item
Time difference
SNTP
Description
&RQ¿JXUHVWKHWLPHGLIIHUHQFH6HWWKHVDPHWLPHGLIIHUHQFH
as the one set on your computer. If unsure, consult your IT
manager.
SNTP Server
Address
&RQ¿JXUHVWKH6173VHUYHUDGGUHVVLQ,3IRUPDW
7KHDGGUHVVDOORZVQRWRQO\,3DGGUHVVEXWDOVRGRPDLQ
QDPHLIWKHYDOLG'16VHUYHULVVHWXSLQWKH1HWZRUN
Settings. The maximum length of host or domain name is
up to 255 characters.
Cycle
&RQ¿JXUHVWKHLQWHUYDODWZKLFKWRUHWULHYH'DWHDQG7LPH
LQIRUPDWLRQIURPWKH6173VHUYHUhour:minute).
Click the [Apply]EXWWRQWRVDYHWKHVHWWLQJV
NOTE 7KHQHZFRQ¿JXUDWLRQVHWWLQJVDUHDFWLYDWHGDIWHUUHVWDUWLQJWKH
QHWZRUNFRQQHFWLRQ:KHQWKHFRQ¿JXUDWLRQVHWWLQJVDUHFKDQJHG\RXPXVW
restart the network connection. You can restart the network connection from
Network Restart on the main menu. (63)
,I\RXFRQQHFWWKHSURMHFWRUWRDQH[LVWLQJQHWZRUNFRQVXOWDQHWZRUN
DGPLQLVWUDWRUEHIRUHVHWWLQJVHUYHUDGGUHVVHV
7RHQDEOHWKH6173IXQFWLRQWKHWLPHGLIIHUHQFHPXVWEHVHW
7KHSURMHFWRUZLOOUHWULHYH'DWHDQG7LPHLQIRUPDWLRQIURPWKHWLPHVHUYHUDQG
RYHUULGHWLPHVHWWLQJVZKHQ6173LVHQDEOHG
7KHLQWHUQDOFORFN¶VWLPHPD\QRWUHPDLQDFFXUDWH8VLQJ6173LVUHFRPPHQGHG
to maintain accurate time.
7KHLQWHUQDOEDWWHU\LVUHTXLUHGWREHUHSODFHGZKHQWKHWLPHLVRIIVRRQDIWHU
setting date and time.
54
3. Web Control
3.1 Projector Web Control (continued)
3.1.9 Security Settings
'LVSOD\VDQGFRQ¿JXUHVSDVVZRUGVDQGRWKHU
security settings.
Item
User Account
Description
&RQ¿JXUHVWKHXVHUQDPHDQGSDVVZRUG
User name
&RQ¿JXUHVWKHXVHUQDPH
The length of the text can be up to 32 alphanumeric
characters.
Password
&RQ¿JXUHVWKHSDVVZRUG
The length of the text can be up to 255 alphanumeric
characters.
Re-enter Password
5HHQWHUWKHDERYHSDVVZRUGIRUYHUL¿FDWLRQ
Network Control
&RQ¿JXUHVWKH$XWKHQWLFDWLRQSDVVZRUGIRUNetwork Control
Port1 (Port: 23), Network Control Port2 (Port: 9715),
3-/LQN3RUW3RUW0\,PDJH3RUW3RUWDQG
Messenger Port (Port: 9719). (44)
Authentication
Password
&RQ¿JXUHVWKH$XWKHQWLFDWLRQSDVVZRUG
The length of the text can be up to 32 alphanumeric
characters.
Re-enter
Authentication
Password
5HHQWHUWKHDERYHSDVVZRUGIRUYHUL¿FDWLRQ
SNMP
Community name
&RQ¿JXUHVWKHFRPPXQLW\QDPHLI6103LVXVHG
&RQ¿JXUHVWKHFRPPXQLW\QDPH7KHOHQJWKRIWKHWH[WFDQ
be up to 64 alphanumeric characters.
Click the [Apply@EXWWRQWRVDYHWKHVHWWLQJV
NOTE 7KHQHZFRQ¿JXUDWLRQVHWWLQJVDUHDFWLYDWHGDIWHUUHVWDUWLQJWKH
QHWZRUNFRQQHFWLRQ:KHQWKHFRQ¿JXUDWLRQVHWWLQJVDUHFKDQJHG\RXPXVW
restart the network connection. You can restart the network connection from
Network Restart on the main menu. (63)
2QO\QXPEHUVµ¶DOSKDEHWµD]¶DQGµ$=¶FDQEHXVHG
55
3. Web Control
3.1 Projector Web Control (continued)
3.1.10 Projector Control
Operations of the projector can be performed
with the items on the screen.
The categories of the items are shown in the
main menu.0RVWRIWKHLWHPVKDYHDVXEPHQX
Refer to the table below for details.
NOTE 7KHVHWWLQJYDOXHPD\QRWPDWFKZLWKWKHDFWXDOYDOXHLIWKHXVHU
FKDQJHVWKHYDOXHPDQXDOO\,QWKDWFDVHUHIUHVKWKHSDJHE\FOLFNLQJWKH
[Refresh] button.
56
3. Web Control
3.1 Projector Web Control - Projector Control (continued)
Item
MAIN
POWER
INPUT SOURCE
PICTURE MODE
BLANK ON/OFF
MUTE
FREEZE
MAGNIFY
MAGNIFY POSITION V
MAGNIFY POSITION H
TEMPLATE
MY IMAGE
MY IMAGE DELETE
(continued on next page)
57
3. Web Control
3.1 Projector Web Control - Projector Control (continued)
Item
BRIGHTNESS
CONTRAST
HDCR
ACCENTUALIZER
GAMMA
PICTURE COLOR TEMP
COLOR
TINT
SHARPNESS
ACTIVE IRIS
MY MEMORY
ASPECT
The selected parameter cannot be set depending on the input signal.
OVER SCAN
V POSITION
IMAGE
H POSITION
H PHASE
H SIZE
AUTO ADJUST EXECUTE
PROGRESSIVE
VIDEO NR
COLOR SPACE
VIDEO FORMAT
INPUT
HDMI FORMAT
HDMI RANGE
COMPUTER IN
FRAME LOCK
(continued on next page)
58
3. Web Control
3.1 Projector Web Control - Projector Control (continued)
Item
INPUT
D-ZOOM
D-SHIFT V
D-SHIFT H
PICTURE POSITION (CP-AX2503, CP-AX3003, CP-AX3503)
PICT.POSIT.H (CP-AW2503, CP-AW3003)
KEYSTONE V
KEYSTONE
KEYSTONE H
Corner Position
PERFECT FIT
Line Distortion
AUTO ECO MODE
ECO MODE
INSTALLATION
STANDBY MODE
NOTE 7KHQHWZRUNIXQFWLRQLVQRWDYDLODEOHZKHQ67$1'%<
02'(LVVHWWR6$9,1*DQGWKHSURMHFWRULVLQVWDQGE\PRGH
&RQQHFWWKHSURMHFWRUWRWKHQHWZRUNDIWHUVHWWLQJ67$1'%<
02'(WR1250$/
AUDIO
SCREEN
MONITOR OUT
VOLUME
SPEAKER
AUDIO SOURCE
MIC VOLUME
LANGUAGE
Click the [Apply] button to switch the language on the Web screen
according to the setting of the selected language in the projector.
MENU POSITION V
MENU POSITION H
BLANK
AUTO BLANK
START UP
MyScreen Lock
MESSAGE
TEMPLATE
C.C. - DISPLAY
C.C. - MODE
C.C. - CHANNEL
(continued on next page)
59
3. Web Control
3.1 Projector Web Control - Projector Control (continued)
Item
OPTION
SERVICE
60
AUTO SEARCH
DIRECT POWER ON
AUTO POWER OFF
USB TYPE B
MY BUTTON – 1 / 2
REMOTE RECEIV.
REMOTE FREQ.
Quit Presenter Mode
Quit compulsorily from the Presenter mode.
Refer to Chapter 4 for the details of Presenter Mode.㻌㻔75㻕
3. Web Control
3.1 Projector Web Control (continued)
3.1.11 Remote Control
The functions on the bundled remote control are
assigned to the Web Remote Control screen.
Do not control the projector with the projector's
UHPRWHFRQWURODQGYLD:HE5HPRWH&RQWURODW
the same time. It may cause some operational
errors in the projector.
67$1'%<21
COMPUTER IN1
COMPUTER IN2
LAN
86%7<3($
86%7<3(%
HDMI 1
HDMI 2
VIDEO
AV MUTE
FREEZE
ŸźŻŹ
ENTER
MENU
RESET
3$*(83
3$*('2:1
6/,'(6+2:
NOTE One operation can be executed only with one click. The button should
be clicked repeatedly to operate continuously.
When clicking the button repeatedly, some commands may not be sent
FRUUHFWO\&OLFNLWDWLQWHUYDOV
When the [ ]EXWWRQLVSXVKHGDPHVVDJHZLQGRZFRPHVXSWRFRQ¿UPWKH
operation. To control the power, push [OK], otherwise push [Cancel].
61
3. Web Control
3.1 Projector Web Control (continued)
3.1.12 Projector Status
Displays the current settings and status of the
projector.
Item
Description
Error Status
Displays the error status.
Lamp Time
Displays the usage time for the lamp.
Filter Time
'LVSOD\VWKHXVDJHWLPHIRUWKH¿OWHU
Power Status
Displays the power status.
Input Status
Displays the input signal source.
Blank On/Off
'LVSOD\VWKH%ODQNVFUHHQRQRIIVWDWXV
Mute
Displays the Mute on/off status.
Freeze
'LVSOD\VWKH)UHH]HVWDWXV
62
3. Web Control
3.1 Projector Web Control (continued)
3.1.13 Network Restart
Restarts the projector’s network connection.
Item
Restart
Description
Restarts the projector’s network connection in order to
DFWLYDWHQHZFRQ¿JXUDWLRQVHWWLQJV
NOTE 5HVWDUWLQJUHTXLUHV\RXWRUHORJLQLQRUGHUWRIXUWKHUFRQWURORU
FRQ¿JXUHWKHSURMHFWRUYLDDZHEEURZVHU:DLWVHFRQGVRUPRUHDIWHU
clicking the [Restart] button to log on again.
63
3. Web Control
3.1 Projector Web Control (continued)
3.1.14 Connection Test
Checks if the network is connecting to DNS
VHUYHURU6173VHUYHUHWF
Item
Destination IP Address
Description
Click the [Execute] button to test the connection after
entering IP address to connect to.
Display example of the connection succeeded 䠖
Display example of the connection failed 䠖
NOTE &RQ¿UPLQIRUPDWLRQRIWKHWDUJHW,3DGGUHVVZLWKQHWZRUNDGPLQLVWUDWRU
&RQQHFWLRQWHVWPD\UHVXOWLQDQHUURUHYHQLIWKHFRQQHFWLRQLVSHUIRUPHG
properly when the packets for checking the connection are discarded before
DUULYLQJDWWKHWDUJHWGHSHQGLQJRQWKHVHWWLQJVRI¿UHZDOORUSDFNHW¿OWHULQJHWF
7KHUHVXOWRIWKHFRQQHFWLRQWHVWLVGLVSOD\HGRQO\LQ(QJOLVK
64
3. Web Control
3.2 Crestron e-Control®
Tab
7KH0DLQZLQGRZDVVKRZQDERYHLV
GLVSOD\HGDW¿UVW+RZHYHULI\RXKDYH
HQDEOHG8VHU3DVVZRUGRQWKH7RROVZLQGRZ
(69), a dialog prompting you to enter
the password as shown on the right will be
displayed, and no operation is enabled until
\RXKDYHHQWHUHGWKHSDVVZRUG$IWHUHQWHULQJ
the preset password, the dialog disappears
and the Main window will be displayed.
As shown below, you can open a window by
clicking the corresponding tab at the top right
of the window.
Tab
8VHU3DVVZRUGGLDORJ
Description
/RJVRXWIURPH&RQWURO .
7KLVWDEDSSHDUVRQO\ZKHQ8VHU3DVVZRUGRIWKH7RROVZLQGRZLV
enabled.
Opens Tools window. (69)
Opens Info window. (71)
Opens Help Desk window. (72)
®
Logout
Tools
Info
Contact IT Help
65
3. Web Control
3.2 Crestron e-Control® (continued)
NOTE ,I&UHVWURQH&RQWURO® in the Network Settings (43) is set to Disable,
Crestron e-Control® cannot be used to operate the projector. Enable Crestron
e-Control® and close the web browser. Next, restart the web browser, followed
by entering the projector's IP address.
2QO\(QJOLVKLVVXSSRUWHGRQ&UHVWURQH&RQWURO®.
,IWKHFRQQHFWLRQLVWHUPLQDWHGWKH/RDGLQJVFUHHQZLOODSSHDU&KHFNWKH
connection between the projector and the computer, then return or refresh the
Web page.
7KHFRQWUROIURP&UHVWURQH&RQWURO®LVVXSSRUWHGRQO\YLDZLUHG/$1
66
3. Web Control
3.2 Crestron e-Control® (continued)
3.2.1 Main window
1
4
2
3
You can operate the basic controls of the projector on this screen.
NOTE ,IWKHSURMHFWRULVLQWKHVWDQGE\PRGHRQO\WKH[Power] button can
be operated.
1. Click a button and operate as follows.
Button
Power
Vol -/ Vol +
Mute
Description
Turns the power on/off.
$GMXVWVWKHYROXPHVHWWLQJ
Turns Mute on/off.
2. Sources List
<RXFDQFOLFNDEXWWRQWRVZLWFKWKHLQSXWFKDQQHO7KHFXUVRUZLOOPRYH
according to the currently selected input port.
Button
Computer in1
Computer in2
LAN
USB Type A
USB Type B
HDMI 1
HDMI 2
Video
Description
Selects input from COMPUTER IN1 port.
Selects input from COMPUTER IN2 port.
Selects input from LAN port.
Selects input from USB TYPE A port.
Selects input from USB TYPE B port.
Selects input from HDMI 1 port.
Selects input from HDMI 2 port.
Selects input from VIDEO port.
67
3. Web Control
3.2 Crestron e-Control® - Main window (continued)
&OLFNDEXWWRQDQGRSHUDWHDVIROORZV7RVKRZWKHKLGGHQEXWWRQVFOLFNWKHŻ
ŹLFRQVDWWKHOHIWDQGULJKWHQGV
Button
Freeze
Contrast
Brightness
Color
Sharpness
Magnify
Auto
Blank
Description
7XUQV)UHH]HRQRII
Adjusts the contrast setting.
Adjusts the brightness setting.
Adjusts the color setting.
Adjusts the sharpness setting.
&RQWUROVWKHPDJQL¿FDWLRQVHWWLQJXVLQJWKH>@>@EXWWRQV
8VHWKH>Ÿ@>ź@>Ż@>Ź@EXWWRQVWRPRYHWRWKHDUHD\RXZDQW
to magnify.
Performs the automatic adjustment.
7XUQVWKH%/$1.VFUHHQRQRII
4. Click the button and operate in the same way as the bundled remote control.
Button
Menu
Enter
Reset
Ÿ
ź
Ż
Ź
68
Description
Assigned the same operation as MENU button.
Assigned the same operation as ENTER button.
Assigned the same operation as RESET button.
Assigned the same operation as Ÿ button.
$VVLJQHGWKHVDPHRSHUDWLRQDVźEXWWRQ
$VVLJQHGWKHVDPHRSHUDWLRQDVŻEXWWRQ
$VVLJQHGWKHVDPHRSHUDWLRQDVŹEXWWRQ
3. Web Control
3.2 Crestron e-Control® (continued)
3.2.2 Tools window
2
1
4
5
3
&RQ¿JXUHVWKHVHWWLQJVbetween the projector and Crestron® control system.
Click the [Exit] button to return to the Main window.
NOTE ,IWZRE\WHFKDUDFWHUVDUHXVHGWKHLQSXWWH[WRUQXPEHUVFDQQRWEH
set correctly.
$Q\LWHPVRQWKLVZLQGRZFDQQRWEHOHIWEODQN
1. Crestron Control
&RQ¿JXUHVWKHVHWWLQJVRI&UHVWURQ®FRQWUROV\VWHPGHYLFHV
Item
IP Address
IP ID
Port
Description
&RQ¿JXUHVWKH,3DGGUHVVRIWKHFRQWUROV\VWHP
&RQ¿JXUHVWKH,3,'RIWKHFRQWUROV\VWHP
6SHFL¿HVWKHSRUWQXPEHUXVHGIRUFRPPXQLFDWLRQE\WKH
control system.
To apply the settings, click the [Send] button.
2. Projector
&RQ¿JXUHVWKHQHWZRUNVHWWLQJVRIWKHSURMHFWRU
Item
Projector Name
Location
Assigned To:
Description
&RQ¿JXUHVWKHQDPHRIWKHSURMHFWRU7KHOHQJWKRIWKH
Projector Name can be up to 64 alphanumeric characters.
&RQ¿JXUHVWKHORFDWLRQQDPHRIWKHSURMHFWRU<RXFDQVSHFLI\
D/RFDWLRQQDPHXSWRDOSKDQXPHULFFKDUDFWHUV
&RQ¿JXUHVWKHXVHUQDPHIRUWKHSURMHFWRU<RXFDQVSHFLI\D
user name up to 32 alphanumeric characters.
The usable symbols are space and the following:
!"#>?@ABC^_`a
To apply the settings, click the [Send] button.
69
3. Web Control
3.2 Crestron e-Control® - Tools window (continued)
3. Projector (continued)
&RQ¿JXUHVWKHQHWZRUNVHWWLQJVRIWKHSURMHFWRU
Item
DHCP
IP Address
Description
Enables DHCP.
&RQ¿JXUHVWKH,3DGGUHVVZKHQ'+&3LVGLVDEOHG
Subnet Mask
&RQ¿JXUHVWKHVXEQHWPDVNZKHQ'+&3LVGLVDEOHG
Default Gateway
DNS Server
&RQ¿JXUHVWKHGHIDXOWJDWHZD\ZKHQ'+&3LVGLVDEOHG
&RQ¿JXUHVWKH'16VHUYHUDGGUHVVZKHQ'+&3LVGLVDEOHG
To apply the settings, click the [Send] button.
4. User Password
&RQ¿JXUHVWKH8VHU3DVVZRUG7RSURPSWWKHHQWU\RI8VHU3DVVZRUGEHIRUH
starting e-Control®, select the checkbox.
Item
New Password
&RQ¿UP
Description
&RQ¿JXUHVWKHSDVVZRUG
You can specify a password up to 26 alphanumeric characters.
The usable symbols are space and the following:
!"#>?@ABC^_`a
5HHQWHUWKHDERYHSDVVZRUGIRUYHUL¿FDWLRQ,IWKHSDVVZRUGLV
incorrect, an error message is displayed.
To apply the settings, click the [Send] button.
5. Admin Password
&RQ¿JXUHVWKH$GPLQ3DVVZRUG7RSURPSWWKHHQWU\RI$GPLQ3DVVZRUGEHIRUH
displaying the Tools window, select the checkbox.
Item
New Password
&RQ¿UP
Description
&RQ¿JXUHVWKHSDVVZRUG
You can specify a password up to 26 alphanumeric characters.
The usable symbols are space and the following:
!"#>?@ABC^_`a
5HHQWHUWKHDERYHSDVVZRUGIRUYHUL¿FDWLRQ,IWKHSDVVZRUGLV
incorrect, an error message is displayed.
To apply the settings, click the [Send] button.
70
3. Web Control
3.2 Crestron e-Control® (continued)
3.2.3 Info window
1
2
Displays the current settings and status of the projector.
Click the [Exit] button to return to the Main window.
1. Projector Information
Item
Projector Name
Location
MAC Address
Resolution
Lamp Hours
Assigned To:
Description
Displays the projector name settings.
Displays the location name of the projector.
'LVSOD\VWKHZLUHG/$10$&DGGUHVVRIWKHSURMHFWRU
'LVSOD\VWKHUHVROXWLRQDQGYHUWLFDOIUHTXHQF\RIWKHVLJQDOLQSXW
selected on the projector.
Displays the usage time for the lamp.
Displays the user name for the projector.
2. Projector Status
Item
Description
Power Status
Displays the power status.
Input Source
Displays the input signal source.
Picture Mode
Displays the picture mode setting.
Installation
Displays the installation setting.
Eco Mode
Displays the eco mode setting.
Error Status
Displays the error status.
NOTE 3URMHFWRU1DPH/RFDWLRQDQGWKHXVHUQDPHIRU$VVLJQHG7RPD\
appear truncated if they are too long.
71
3. Web Control
3.2 Crestron e-Control® (continued)
3.2.4 Help Desk window
6HQGVUHFHLYHVPHVVDJHVWRIURPWKHDGPLQLVWUDWRUIRU&UHVWURQ5RRP9LHZ®
Express.
Button
Send
72
Description
Sends a message.
&KHFNVWKHUHFHLYHGPHVVDJH
3. Web Control
3.2 Crestron e-Control® (continued)
3.2.5 Emergency Alert
When the administrator for Crestron RoomView® Express sends out an alert
message, it will be displayed on the screen.
<RXFDQUHSO\WRWKHDOHUWPHVVDJHYLDDFKDWIRUPDWInput a message in the box
below the alert message, and click the [Send] button.
NOTE )RUGHWDLOVRI(PHUJHQF\$OHUWUHIHUWRWKHPDQXDORI&UHVWURQ
RoomView® Express.
7KHDOHUWPHVVDJHIURP&UHVWURQ5RRP9LHZ® is displayed on the screen of
the projector in the way similar to the real-time text of the Messenger function.
(80,IDQRWKHUUHDOWLPHWH[WLVGLVSOD\HGRQWKHVFUHHQLWZLOOEHRYHUZULWWHQ
E\WKHDOHUWPHVVDJH+RZHYHULIWKHSULRULW\RIWKHUHDOWLPHWH[WLVVHWWRKLJK
the alert message does not appear on the screen. For details, refer to the
manual for the application of the Messenger.
73
4. Network Presentation
4. Network Presentation
4.1 Outline
The projector can display or play back the computer screen images and audio
data that are transmitted through the network. This Network Presentation feature
helps you to smoothly make your presentations and conduct conferences.
7RXVH1HWZRUN3UHVHQWDWLRQDQH[FOXVLYHDSSOLFDWLRQ/LYH9LHZHULVUHTXLUHG
It can be installed from the bundled application CD.
)RUGHWDLOVRI1HWZRUN3UHVHQWDWLRQDQGLQVWUXFWLRQVWRLQVWDOOWKH/LYH9LHZHU
UHIHUWRWKHPDQXDOIRU/LYH9LHZHU
NOTE 㻌7KHXVHRI/LYH9LHZHUIXQFWLRQGHSHQGVRQWKHPRGHO\RXDUH
XVLQJ,I\RXZDQWWRXVHWKHODWHVW/LYH9LHZHUSOHDVHUHIHUWRWKHDSSURSULDWH
JURXSLWHPLQWKH/LYH9LHZHU8VHU
V0DQXDO7KLVPRGHOZLOOEHLQWKH*URXS
RI*
)RU0DFXVHUGRZQORDGWKHVRIWZDUHIURPWKHZHEVLWH
Refer to 2-5. Applications.
74
4. Network Presentation
4.2 Display Mode
/LYH9LHZHUKDVWZRGLVSOD\PRGHV6LQJOH3&PRGHDQG0XOWL3&PRGH
4.2.1 Single PC mode
The Single PC mode can display images in full screen from one computer to the
SURMHFWRUVZLWFKHUYLDZLUHOHVV/$1RUZLUHG/$1
Ŷ3UHVHQWHU0RGH
In the Single PC mode, the projector can be occupied by one computer and
can block access from any other computers (if Presenter Mode is set to ON in
/LYH9LHZHU:KLOHPDNLQJ\RXUSUHVHQWDWLRQ\RXGRQ¶WQHHGWRZRUU\WKDWWKH
image on screen will be unexpectedly switched to an image sent by another
FRPSXWHU3UHVHQWHU0RGHFDQEHVHWWR21LQWKHRSWLRQPHQXLQWKH/LYH9LHZHU
4.2.2 Multi PC mode
The projector can display images of up to four computers connected at the same
time.
75
4. Network Presentation
4.3 Multi Projector Mode
In the Multi Projector/Multi Display mode, up to 12 projectors or switchers
FRQQHFWHGWRSURMHFWRUVFDQFRQQHFWZLWKWKHFRPSXWHUYLDZLUHOHVVRUZLUHG/$1
simultaneously.
This function is for Windows users only.
4.4 Moderator Control Mode
One computer can be assigned as Moderator (Host) to control all other computers
&OLHQWVRUWKHVZLWFKHUVFRQQHFWHGZLWKWKHSURMHFWRUYLDZLUHOHVV/$1RUZLUHG
/$16LQFH&OLHQWVFDQQRWFRQWUROWKH/LYH9LHZHUDQGWKHSURMHFWRUWKH+RVWFDQ
proceed with the program as arranged smoothly and safely.
Moderator (Host)
Moderator
(Host)
LAN
LA
Clients
Clien
This function is for Windows users only.
76
4. Network Presentation
4.5 Port Number
7KHSRUWQXPEHUVXVHGIRU/LYH9LHZHUDUHVKRZQEHORZ
Port No.
5500
5900
9720
Protocol
TCP
TCP
TCP
NOTE
:KHQRWKHUDSSOLFDWLRQXVHVWKHSRUWVDERYH/LYH9LHZHUDQG3URMHFWRU4XLFN
Connection may not work.
77
5. MyImage Function
5. My Image Function
7KHSURMHFWRUFDQGLVSOD\VWLOOLPDJHVWUDQVIHUUHGYLDWKHQHWZRUN
,WLVSRVVLEOHWRDOORFDWHXSWRLPDJH¿OHV
0<,0$*(WUDQVPLVVLRQUHTXLUHVDQH[FOXVLYHDSSOLFDWLRQIRU\RXUFRPSXWHU
8VHWKHDSSOLFDWLRQWRWUDQVIHUWKHLPDJHGDWD
For information on the necessary settings and operations for the computer and
projector, refer to the manual for the application.
7RGLVSOD\WKHWUDQVIHUUHGLPDJHVHOHFWWKH0<,0$*(LWHPLQWKH1(7:25.
PHQX)RUPRUHLQIRUPDWLRQSOHDVHVHHWKHGHVFULSWLRQRIWKH0<,0$*(LWHPRI
the NETWORK menu.
78
5. MyImage Function
NOTE 8VLQJ0<%87721UHJLVWHUHGDV0<,0$*(FDQGLVSOD\WUDQVIHUUHG
image. (237,21PHQXLQWKH2SHUDWLQJ*XLGH
7KHLPDJH¿OHDOVRFDQEHGLVSOD\HGE\XVLQJVFKHGXOHIXQFWLRQIURPWKHZHE
browser.(92)
,I\RXGLVSOD\0<,0$*(GDWDRQVFUHHQZKLOH\RXDUHXVLQJWKH86%'LVSOD\
IXQFWLRQWKHDSSOLFDWLRQIRUWKH86%'LVSOD\ZLOOEHFORVHG7RUHVWDUWWKH
DSSOLFDWLRQH[LWWKH0<,0$*(IXQFWLRQDQGWKHQWKHVRIWZDUHLQWKHSURMHFWRU
/LYH9LHZHU/LWH)RU86%H[HZLOOUXQDJDLQ86%'LVSOD\LQWKH2SHUDWLQJ
*XLGH
,IGDWDLVWUDQVIHUUHGYLDZLUHOHVVDQGZLUHG/$1DWWKHVDPHWLPHWKHSURMHFWRU
may not be able to process the data correctly.
79
6. Messenger Function
6. Messenger Function
6.1 Outline
7KHSURMHFWRUFDQGLVSOD\WH[WGDWDWUDQVIHUUHGYLDWKHQHWZRUNRQWKHVFUHHQDQG
play back audio data inside the projector.
The text data can be displayed on the screen in two ways. One is to display the
text transferred from the computer on real time, and the other is to choose the text
data stored in the projector and display it.
It is possible to store up to 12 text data.
Transfer text data
1
2
3
4
12
Display text data (ex.
80
)
6. Messenger Function
0HVVHQJHUIXQFWLRQUHTXLUHVDQH[FOXVLYHDSSOLFDWLRQIRU\RXUFRPSXWHU7RHGLW
transfer and display the text data, use the application.
For information on the necessary settings and operations for the computer and
projector, refer to the manual for the application.
6.2 Supported Languages
The languages that can be displayed by Messenger function are shown below.
(QJOLVK)UHQFK*HUPDQ6SDQLVK,WDOLDQ1RUZHJLDQ'XWFK3RUWXJXHVH
6ZHGLVK)LQQLVK'DQLVK%UDVLOHLUR,QGRQHVLDQ/LWKXDQLDQ(VWRQLDQ/DWYLDQ
3ROLVK&]HFK+XQJDULDQ6ORYHQLDQ&URDWLDQ5XVVLDQ7XUNLVK*UHHN
-DSDQHVH6LPSOL¿HG&KLQHVH7UDGLWLRQDO&KLQHVH.RUHDQ9LHWQDPHVH
6.3 Display Style
There are 4 types of message display style. The following is the description of
each type.
1) Scroll
The message scrolls to the left in the message
display area.
Today’s
The chemical class
%R[6FUROOXS
The message scrolls upwards in the square
message display area.
81
6. Messenger Function
3) Pop on
7KHPHVVDJHLVGLVSOD\HGLQIXOOYLHZLQWKH
square message display area.
4) Picture Side
The message is displayed in the message
display area on the right or left.
7KLVVW\OHLVDYDLODEOHRQO\IRU:;*$DQG
:8;*$PRGHOSURMHFWRU
NOTE 8VLQJMY BUTTONUHJLVWHUHGDV0(66(1*(5FDQWXUQWKH
displaying messenger text on/off. (237,21PHQXLQWKH2SHUDWLQJ*XLGH
7KHWH[W¿OHDOVRFDQEHGLVSOD\HGE\XVLQJVFKHGXOHIXQFWLRQYLDWKHZHE
browser. (92)
,IGDWDLVWUDQVIHUUHGYLDZLUHOHVVDQGZLUHG/$1DWWKHVDPHWLPHWKHSURMHFWRU
may not process the data correctly.
82
7. Network Bridge Function
1HWZRUN%ULGJH)XQFWLRQ
7KLVSURMHFWRULVHTXLSSHGZLWKWKH1(7:25.%5,'*(IXQFWLRQWRSHUIRUP
PXWXDOFRQYHUVLRQRIDQHWZRUNSURWRFRODQGDVHULDOLQWHUIDFH
%\PDNLQJXVHRIWKH1(7:25.%5,'*(IXQFWLRQDFRPSXWHUFRQQHFWHGWRWKH
SURMHFWRUYLDZLUHOHVVRUZLUHG/$1LVDEOHWRFRQWURODQH[WHUQDOGHYLFHYLD56
232C communication using the projector as a network terminal.
TCP/IP data
:LUHG/$1
/$1FDEOH
Computer
Protocol change
USB TYPE A port
Serial data
RS-232C
RS-232C cable
([WHUQDOGHYLFH
Wireless
/$1
LAN port
CONTROL port
7.1 Connecting devices
1) Connect the projector’s LANSRUWWRWKHFRPSXWHU¶V/$1SRUWZLWKD/$1FDEOH
RULQVHUWWKH86%ZLUHOHVVDGDSWHULQWRWKHUSB TYPE A port.
2) Connect the projector’s CONTROL SRUWDQGWKHGHYLFH¶V56&SRUWZLWKDQ
RS-232C cable, for RS-232C communication.
NOTE %HIRUHFRQQHFWLQJWKHGHYLFHVUHDGWKHPDQXDOVIRUWKHGHYLFHVWR
ensure the connection. )RU56&FRQQHFWLRQFKHFNWKHVSHFL¿FDWLRQVRI
each port and use the suitable cable. (Connection to the ports in the Operating
*XLGH7HFKQLFDO
83
7. Network Bridge Function
7.2 Communication setup
7RFRQ¿JXUHWKHVHWXSRIWKHFRPPXQLFDWLRQXVLQJ1(7:25.%5,'*(IRU
WKHSURMHFWRUXVHLWHPVLQWKH&20081,&$7,21PHQX2SHQWKHPHQXRI
WKHSURMHFWRUDQGVHOHFWWKH237,216(59,&(&20081,&$7,21PHQX
(OPTION menu ! SERVICE !&20081,&$7,21LQWKH2SHUDWLQJ*XLGH)
,QWKH&20081,&$7,217<3(PHQXVHOHFW1(7:25.%5,'*(
:,5(/(66RU:,5('GHSHQGLQJRQWKHW\SHRIFRQQHFWLRQ\RXXVHIRUWKH
CONTROL port.
8VLQJWKH6(5,$/6(77,1*6PHQXVHOHFWWKHSURSHUEDXGUDWHDQGSDULW\
for the CONTROLSRUWDFFRUGLQJWRWKHVSHFL¿FDWLRQRIWKH56&SRUWRI
WKHFRQQHFWHGGHYLFH
Item
%$8'5$7(
PARITY
Condition
4800bps/9600bps/19200bps/38400bps
NONE/ODD/EVEN
Data length
ELW¿[HG
Start bit
ELW¿[HG
Stop bit
ELW¿[HG
8VLQJWKH75$160,66,210(7+2'PHQXVHWXSWKHSURSHUPHWKRGIRUWKH
CONTROL port according to your use.
NOTE 7KH2))LVVHOHFWHGIRUWKH&20081,&$7,217<3(DVWKHGHIDXOW
setting.
8VLQJWKH&20081,&$7,21PHQXVHWXSWKHFRPPXQLFDWLRQ5HPHPEHU
that an unsuitable setup could cause malfunction of communication.
:KHQHLWKHURQHRIWKH1(7:25.%5,'*(VHWWLQJVLVVHOHFWHGLQWKH
&20081,&$7,217<3(PHQX56&FRPPDQGVFDQQRWEHUHFHLYHGIURP
the CONTROL port.
7.3 Communication port
)RUWKH1(7:25.%5,'*(IXQFWLRQVHQGWKHGDWDIURPWKHFRPSXWHUWRWKH
SURMHFWRUZLWKXVLQJWKH1HWZRUN%ULGJH3RUWFRQ¿JXUHGLQWKH3RUW6HWWLQJVRI
web browser. (45)
NOTE ([FHSWIRU
EHWZHHQDQGFDQEHVHWXSDVWKH1HWZRUN%ULGJH3RUWQXPEHU,W
is set to 9717 as the default setting.
84
7. Network Bridge Function
7.4 Transmission method
The transmission method can be selected from the menus, only when the
1(7:25.%5,'*(LVVHOHFWHGIRUWKH&20081,&$7,217<3(
(OPTION menu ! SERVICE !&20081,&$7,21LQWKH2SHUDWLQJ*XLGH)
+$/)'83/(;)8//'83/(;
7.4.1 HALF-DUPLEX
This method lets the projector make two way communication, but only one
GLUHFWLRQHLWKHUWUDQVPLWWLQJRUUHFHLYLQJGDWDLVDOORZHGDWDWLPH
7KHPHWKRGGRHVQRWDOORZWKHSURMHFWRUWRUHFHLYHWKHGDWDIURPWKHFRPSXWHU
ZKLOHZDLWLQJIRUUHVSRQVHGDWDIURPDQH[WHUQDOGHYLFH$IWHUWKHSURMHFWRU
UHFHLYHVWKHUHVSRQVHGDWDIURPDQH[WHUQDOGHYLFHRUWKHUHVSRQVHOLPLWWLPHLV
SDVWWKHSURMHFWRUFDQUHFHLYHWKHGDWDIURPWKHFRPSXWHU
7KDWPHDQVWKDWWKHSURMHFWRUFRQWUROVWUDQVPLWWLQJDQGUHFHLYLQJWKHGDWDWR
V\QFKURQL]HWKHFRPPXQLFDWLRQ
7RXVHWKH+$/)'83/(;PHWKRGVHWXSWKH5(63216(/,0,77,0(IROORZLQJ
the instructions below.
TCP/IP data
:LUHG/$1
/$1FDEOH
Protocol change
Serial data
RS-232C
RS-232C cable
Computer
([WHUQDOGHYLFH
:LUHOHVV/$1
Transmitting data
Transmitting data
Discarding data
Response limit
time
Response data
Response data
Discarding data
8VLQJWKH5(63216(/,0,77,0(PHQXVHWWKHZDLWLQJWLPHIRUUHVSRQVHGDWD
IURPDQH[WHUQDOGHYLFH(OPTION menu ! SERVICE !&20081,&$7,21LQ
the 2SHUDWLQJ*XLGH)
OFF 1s 2s 3s ( OFF)
85
7. Network Bridge Function
7.4 Transmission method (continued)
NOTE :LWKXVLQJWKH+$/)'83/(;PHWKRGWKHSURMHFWRUFDQVHQGRXW
254 byte data at the maximum at a time.
,ILWLVQRWUHTXLUHGWRPRQLWRUWKHUHVSRQVHGDWDIURPDQH[WHUQDOGHYLFHDQG
WKH5(63216(/,0,77,0(LVVHWWR2))WKHSURMHFWRUFDQUHFHLYHWKHGDWD
IURPWKHFRPSXWHUDQGVHQGLWRXWWRDQH[WHUQDOGHYLFHFRQWLQXRXVO\
The OFF is selected as the default setting.
7.4.2 FULL-DUPLEX
This method lets the projector make two way communication, transmitting and
UHFHLYLQJGDWDDWWKHVDPHWLPHZLWKRXWPRQLWRULQJUHVSRQVHGDWDIURPDQ
H[WHUQDOGHYLFH
:LWKXVLQJWKLVPHWKRGWKHFRPSXWHUDQGDQH[WHUQDOGHYLFHZLOOVHQGWKHGDWD
RXWRIV\QFKURQL]DWLRQ,ILWLVUHTXLUHGWRV\QFKURQL]HWKHPVHWWKHFRPSXWHUWR
PDNHWKHV\QFKURQL]DWLRQ
NOTE
:KHQWKHFRPSXWHUFRQWUROVWKHV\QFKURQL]DWLRQRIUHFHSWLRQVDQGWUDQVPLVVLRQV
WKHH[WHUQDOGHYLFHPD\QRWEHFRQWUROOHGSURSHUO\GHSHQGLQJRQWKHVWDWXVRIGDWD
processing of the projector.
86
8. Other Functions
8. Other Functions
8.1 E-mail Alerts
7KHSURMHFWRUFDQDXWRPDWLFDOO\VHQGDQDOHUWPHVVDJHWRWKHVSHFL¿HGHPDLO
addresses when the projector detects a certain condition that is requiring
maintenance or detected an error.
NOTE 8SWR¿YHHPDLODGGUHVVHVFDQEHVSHFL¿HG
7KHSURMHFWRUPD\EHQRWDEOHWRVHQGHPDLOLIWKHSURMHFWRUVXGGHQO\ORVHV
power.
7KLVIXQFWLRQLVQRWDYDLODEOHLI\RXXVHDPDLOVHUYHUUHTXLULQJDXWKHQWLFDWLRQ
to send a mail.
0DLOVPD\QRWEHVHQWFRUUHFWO\GHSHQGLQJRQWKHPDLOHQYLURQPHQW\RXDUH
using.
$OHUWVDYDLODEOHWR(PDLODOHUWVDUHDVIROORZV
Item
Cover Error
Fan Error
Lamp Error
Temp Error
Air Flow Error
Cold Error
Filter Error
Other Error
Schedule Execution
Error
Lamp Time Alarm
Filter Time Alarm
Description
7KHODPSFRYHUKDVQRWEHHQSURSHUO\¿[HG
The cooling fan is not operating.
The lamp does not light, and there is a possibility that
interior portion has become heated.
There is a possibility that the interior portion has become
heated.
The internal temperature is rising.
There is a possibility that the interior portion has
EHFRPHRYHUFRROHG
)LOWHUWLPHRYHU
(UURUVRWKHUWKDQWKHDERYH
If this error is displayed, please contact your dealer.
)DLOHGWRH[HFXWHVFKHGXOHGHYHQWV
/DPS7LPHKDVH[FHHGHGWKHVSHFL¿HGDODUPOLPLW
)LOWHU7LPHKDVH[FHHGHGWKHVSHFL¿HGDODUPOLPLW
(continued on next page)
87
8. Other Functions
NOTE 7KHWLPLQJRIUHFHLYLQJ)LOWHU(UURUHPDLOLVGHSHQGLQJRQWKH
),/7(50(66$*(VHWWLQJLQWKH6(59,&(LWHPRIWKH237,21 menu which
GHWHUPLQHVWKHSHULRGXQWLOWKH¿OWHUPHVVDJHLVGLVSOD\HGRQWKHSURMHFWRU
VFUHHQ$QHPDLOZLOOEHVHQWZKHQWKHXVDJHWLPHRIWKH¿OWHUH[FHHGVWKHVHW
WLPHOLPLW1RQRWL¿FDWLRQHPDLOZLOOEHVHQWLIWKH),/7(50(66$*(LVVHWWR
78512))237,21PHQXLQWKH2SHUDWLQJ*XLGH
Lamp Time AlarmLVDWKUHVKROGIRUHPDLOQRWL¿FDWLRQRIWKHODPSWLPH
:KHQWKHVHWWLPHH[FHHGVWKHOLPLWFRQ¿JXUHGLQWKH3URMHFWRU:HE&RQWURO
an e-mail will be sent.
Filter Time Alarm LVDWKUHVKROGIRUHPDLOQRWL¿FDWLRQRIWKH¿OWHUWLPH:KHQ
WKHVHWWLPHH[FHHGVWKHOLPLWFRQ¿JXUHGLQWKH3URMHFWRU:HE&RQWURODQHPDLO
will be sent.
88
8. Other Functions
7RXVHWKHSURMHFWRU¶VHPDLODOHUWIXQFWLRQSOHDVHFRQ¿JXUHWKHIROORZLQJLWHPV
through a web browser.
Mail Settings (46)
1) Select [Mail Settings] on main menu in Projector Web Control.
&RQ¿JXUHHDFKLWHPLQ0DLO6HWWLQJVSDJH5HIHUWRLWHP0DLO6HWWLQJV
(46) for further information.
3) Click the [Apply]EXWWRQWRVDYHWKHVHWWLQJV
4) Click the [Send Test Mail]EXWWRQWRFRQ¿UPWKDWWKHHPDLOVHWWLQJVDUH
correct.
7KHIROORZLQJPDLOZLOOEHGHOLYHUHGWRWKHVSHFL¿HGDGGUHVVHV
6XEMHFWOLQH7HVW0DLO3URMHFWRUQDPH!
Text : Send Test Mail
'DWH 7HVWLQJGDWH!
7LPH 7HVWLQJWLPH!
,3$GGUHVV
3URMHFWRU,3DGGUHVV!
0$&$GGUHVV
3URMHFWRU0$&DGGUHVV!
Alert Settings (47)
1) Select [Alert Settings] on main menu in Projector Web Control.
6HOHFWDQGFRQ¿JXUHHDFKDOHUWLWHP5HIHUWRLWHP$OHUW6HWWLQJV47)
for further information.
3) Click the [Apply] EXWWRQWRVDYHWKHVHWWLQJV
Failure/Warning e-mails are formatted as follows:
6XEMHFWOLQH0DLOWLWOH!3URMHFWRUQDPH!
7H[W 0DLOWH[W!
'DWH )DLOXUH:DUQLQJGDWH!
7LPH )DLOXUH:DUQLQJWLPH!
,3$GGUHVV
3URMHFWRU,3DGGUHVV!
0$&$GGUHVV
3URMHFWRU0$&DGGUHVV!
89
8. Other Functions
8.2 Projector Management using SNMP
The SNMP (Simple Network Management Protocol) enables to manage the
projector information, which is a failure or warning status, from the computer on
the network.
NOTE ,WLVUHFRPPHQGHGWKDW6103IXQFWLRQVDUHH[HFXWHGE\DQHWZRUN
administrator.
6103PDQDJHPHQWVRIWZDUHPXVWEHLQVWDOOHGRQWKHFRPSXWHUWRPRQLWRU
WKHSURMHFWRUYLD6103
Standard MIB (MIB-2)
<RXFDQUHIHUWKHIROORZLQJLWHPVGH¿QHGLQV\VWHPJURXSRI6WDQGDUG0,%0,%
Item
sysName
V\V/RFDWLRQ
sysContact
Description
Projector name is set.
The information on where it is located. It has character string
VHWLQV\V/RFDWLRQ6103LQ3URMHFWRU:HE&RQWURO>1HWZRUN
Settings] - [Common Setup].
The information on the administrator's contact information. It
has character string set in sysContact (SNMP) in Projector
Web Control - [Network Settings] - [Common Setup].
Enhanced MIB
<RXFDQJHWFRQ¿JXUDWLRQLQIRUPDWLRQE\XVLQJ(QKDQFHG0,%IRUSURMHFWRUV
(QKDQFHG0,%IRUSURMHFWRUVFDQEHGRZQORDGHGIURP>3RUW6HWWLQJV@SDJHLQ
Projector Web Control.
Trap
:KHQDQHUURURUZDUQLQJRFFXUVLQWKHSURMHFWRUDQRWL¿FDWLRQFDQEHVHQWWRWKH
VSHFL¿HGDGGUHVV
In addition to e-mail alert shown in 8.1 Email Alerts (87), the following
QRWL¿FDWLRQFDQEHVHQW
Item
Cold Start
Authentication Failure
90
Description
When the projector is supplied with the power, it works as
below.
,IWKH67$1'%<02'(LVVHWWRWKH1250$/WKHSURMHFWRU
V
power status changes from “OFF” to “Standby state”.
,IWKH67$1'%<02'(LVVHWWRWKH6$9,1*WKHSURMHFWRU
V
power status changes from “Standby state” to “ON (lamp is
turned on)”.
(6(783PHQXLQWKH2SHUDWLQJ*XLGH
7KH6103DFFHVVLVGHWHFWHGIURPWKHLQYDOLG6103
community.
8. Other Functions
6HWXSWKHIROORZLQJIXQFWLRQVWKURXJK:(%EURZVHULI\RXZDQWWRPDQDJHWKH
projector by SNMP.
Port Settings (44)
1) Select [Port Settings] on main menu in Projector Web Control.
2) Click the >'RZQORDG0,%¿OH@WRGRZQORDGD0,%¿OH
3) Click the [Enable] check box to open the SNMP Port. Set the address to send
the SNMP trap to when a Failure/Warning occurs.
Security Settings (55)
1) Select [Security Settings] on main menu in Projector Web Control.
2) Click the [SNMP] and set the community name on the screen that is displayed.
Alert Settings (47)
&RQ¿JXUHWKHVHWWLQJVIRU7UDSWUDQVPLVVLRQRI)DLOXUHV:DUQLQJV
1) Select [Alert Settings] on main menu in Projector Web Control.
6HOHFWWKH)DLOXUH:DUQLQJLWHPWREHFRQ¿JXUHG
3) Click the [Enable] check box to send out the SNMP trap for Failures/Warnings.
Clear the [Enable] check box when SNMP trap transmission is not required.
4) Click the [Apply]EXWWRQWRVDYHWKHVHWWLQJV
NOTE 5HJLVWHUWKHGRZQORDGHG0,%¿OHWR6103PDQDJHUSURJUDPWREHXVHG
%HVXUHWRH[HFXWH1HWZRUN5HVWDUWZKHQWKHVHWWLQJVRI[Port Settings] or
[Security Settings] is changed.
91
8. Other Functions
8.3 Event Scheduling
7KHVFKHGXOLQJIXQFWLRQHQDEOHVWRVHWXSVFKHGXOHGHYHQWVLQFOXGLQJSRZHURQ
power off. It enables to be “self-management” projector.
Installing the battery is required if you want to use under the conditions that
67$1'%<02'(LVVHWWR6$9,1*5HIHUWR2SHUDWLQJ*XLGH±237,21RU
the AC power is turned off. (5HIHUWR8VHU
V0DQXDOFRQFLVH
Note the following before setting the schedule.
NOTE 6FKHGXOHFDQDOVREHVHWLQ237,216&+('8/(PHQXRIWKH
projector. (5HIHUWR2SHUDWLQJ*XLGH±237,21
$PD[LPXPRISURJUDPVRIVFKHGXOHFDQEHVHW$PD[LPXPRIHYHQWV
can be registered in 1 program.
1RHYHQWVDUHUHJLVWHUHGLQSURJUDP±ZLWKIDFWRU\GHIDXOWVHWWLQJV7KH
SURJUDPLVUHTXLUHGWREHVHWLQDGYDQFHZKHQXVLQJWKHVFKHGXOHIXQFWLRQIRU
WKH¿UVWWLPH
7KHSULRULW\IRUVFKHGXOHGHYHQWVLVDVIROORZVVSHFL¿FGDWHZHHNO\
8SWR¿YHVSHFL¿FGDWHVDUHDYDLODEOHIRUVFKHGXOHGHYHQWV3ULRULW\LVJLYHQWR
WKRVHZLWKWKHORZHUQXPEHUVZKHQPRUHWKDQRQHHYHQWKDVEHHQVFKHGXOHG
IRUWKHVDPHGDWHDQGWLPHHJµ6SHFL¿FGDWH1R¶KDVSULRULW\RYHUµ6SHFL¿F
date No. 2’ and so on.
7KHSRZHURQHYHQWKDVWKHORZHVWSULRULW\DPRQJDOOWKHHYHQWVWKDWDUHVHW
at the same time.
%HVXUHWRVHWWKHGDWHDQGWLPHEHIRUHHQDEOLQJVFKHGXOHGHYHQWV53)
$IWHUWKHSURMHFWRULVPRYHGFKHFNWKHGDWHDQGWLPHVHWIRUWKHSURMHFWRU
EHIRUHFRQ¿JXULQJWKHVFKHGXOHV
7KHLQWHUQDOFORFN¶VWLPHPD\QRWUHPDLQDFFXUDWH8VLQJ6173LVUHFRPPHQGHG
to maintain accurate time.
&HUWDLQHUURUVWDWHLQWKHSURMHFWRUVXFKDVWHPSHUDWXUHHUURUODPSHUURUZLOO
SUHYHQWWKHSURMHFWRUIURPDSSURSULDWHH[HFXWLRQRIVFKHGXOHGIXQFWLRQVHYHQWV
(YHQWV³My Image” and “Messenger” will not be executed appropriately and
result in “schedule execution error” status when the lamp does not light and/or
data to be displayed are not stored in the projector at the time when scheduled
HYHQWLVH[HFXWHG
(YHQWV³Input Source” and “My Image” is not executed if security function is
enabled and the projector is locked due to the function.
,IQR86%PHPRU\GHYLFHLVLQVHUWHGWRWKHSURMHFWRURUQRLPDJHGDWDIRU
GLVSOD\H[LVWVDWWKHVFKHGXOHGHYHQWWLPHDVFKHGXOHH[HFXWLRQHUURURFFXUV
DJDLQVWWKHVFKHGXOHG6OLGHVKRZHYHQW
:KHQ\RXVWDUWWKH6OLGHVKRZLQSXWVRXUFHZLOOEHDXWRPDWLFDOO\VZLWFKHGWR
the USB TYPE A port.
,PDJH¿OHVVWRUHGLQWKHURRWGLUHFWRU\RIWKH86%PHPRU\GHYLFHZLOOEH
displayed for the scheduled Slideshow.
92
8. Other Functions
The procedure to set the schedule in Projector Web Control is described in the
following.
6HWWLQJWKHSURJUDPLVQHFHVVDU\WRXVHWKHVFKHGXOHIXQFWLRQ9DULRXVHYHQWV
VXFKDVSRZHURQRIIRUVZLWFKLQJLQSXWVRXUFHDQGWKHWLPHWRH[HFXWHWKHHYHQWV
DUHWREHUHJLVWHUHGLQWKHSURJUDP1RHYHQWVDUHUHJLVWHUHGLQSURJUDP±
with factory default settings. Set the program following the steps below.
In the case that the program has already been set, skip to step 6).
1) Select [Schedule Settings] on main menu in Projector Web Control.
6HOHFWWKHSURJUDPQXPEHULQGURSGRZQOLVWXQGHU3URJUDP/LVWDQGFOLFNWKH
[Program Edit] button to display the following program edit display. The display
for editing Program-1 is shown below.
$IWHUVHWWLQJWKHWLPHHYHQWVDQGSDUDPHWHUVFOLFNWKH[Register] to add the
QHZHYHQW
Click the [Delete]EXWWRQZKHQ\RXZDQWWRGHOHWHDQHYHQW
Click the [Delete All]EXWWRQZKHQ\RXZDQWWRGHOHWHDOOWKHHYHQWVLQWKHFXUUHQWO\
selected program.
93
8. Other Functions
4) When you want to edit the program with other number continuously, select the
program you want to edit in dropdown list and click the [Select] button to display
the display for editing the selected program.
5) Click the [Back] button to go back to schedule management screen after
¿QLVKLQJWKHSURJUDPVHWWLQJ
7KHSURFHGXUHWRDVVLJQWKHSURJUDPVHWLQWKHVWHSaWRWKHVFKHGXOHLV
described in the following.
6) Click the checkbox of the schedule to be executed (e.g. Click the checkbox of
“Monday”, when it is to be executed on Mondays) in the schedule management
screen.
6HOHFWWKHSURJUDPWREHH[HFXWHGLQGURSGRZQOLVW<RXFDQFRQ¿UPWKHHYHQW
information registered in each program in the program list on the bottom of the
screen.
:KHQVHWWLQJWKH6SHFL¿FGDWH1RaHQWHUWKHGDWHPRQWKGD\
8) Click the [Apply]EXWWRQWRVDYHWKHVFKHGXOHVHWWLQJVLQWKHSURMHFWRU
5HSHDWVWHSaVLPLODUO\WRVHWWKHVFKHGXOH\RXZDQWWRH[HFXWH
The schedule settings are now complete.
)LQDOO\FRQ¿UPWKHWLPHVWRUHGLQWKHSURMHFWRULVFRUUHFWO\VHW
Ŷ+RZWRFRS\WKHSURJUDP
When you copy the currently selected program to other program, click the
checkbox under
icon. Click the [Copy to] button after selecting the program
to which you want to copy in dropdown list.
7KHVDPHSURJUDPDVWKHFXUUHQWO\VHOHFWHGRQHFDQQRWEHVSHFL¿HGDVWKH
program to which you want to copy.
94
8. Other Functions
8.4 Command Control via the Network
<RXFDQFRQ¿JXUHDQGFRQWUROWKHSURMHFWRUYLDWKHQHWZRUNXVLQJ56&
commands.
Communication Port
The following two ports are assigned for the command control.
7&3(Network Control Port1 (Port: 23))
7&3(Network Control Port2 (Port: 9715))
NOTE &RPPDQGFRQWUROLVDYDLODEOHRQO\YLDWKHVSHFL¿HGSRUWDERYH
Command Control Settings (44)
&RQ¿JXUHWKHIROORZLQJLWHPVIURPDZHEEURZVHUZKHQFRPPDQGFRQWUROLVXVHG
Example: If the IP address of the projector is set to 192.168.1.10:
1) Enter “http://192.168.1.10/” into the address bar of the web browser, and select
Projector Web Control from the selection window.
2) Enter your user name and password, and then click the [OK].
3) Click the [Port Settings] on the main menu.
4) Click the [Enable] check box to open Network Control Port1 (Port: 23) to use
7&3&OLFNWKH[Enable] check box for the [Authentication] setting when
authentication is required, otherwise clear the check box.
5) Click the [Enable] check box to open Network Control Port2 (Port: 9715) to
XVH7&3&OLFNWKH[Enable] check box for the [Authentication] setting
when authentication is required, otherwise clear the check box.
6) Click the [Apply]EXWWRQWRVDYHWKHVHWWLQJV
95
8. Other Functions
8.4 Command Control via the Network (continued)
When the authentication setting is enabled, the following settings are required.
(55)
7) Click the [Security Settings] on the main menu.
8) Click the [Network Control] and enter the desired authentication password.
* See NOTE.
9) Click the [Apply]EXWWRQWRVDYHWKHVHWWLQJV
NOTE 7KH$XWKHQWLFDWLRQ3DVVZRUGZLOOEHWKHVDPHIRUNetwork Control
Port1 (Port: 23), Network Control Port2 (Port: 9715), PJLink™ Port (Port:
4352), My Image Port (Port: 9716) and Messenger Port (Port: 9719).
7KHQHZFRQ¿JXUDWLRQVHWWLQJVDUHDFWLYDWHGDIWHUUHVWDUWLQJWKHQHWZRUN
FRQQHFWLRQ:KHQWKHFRQ¿JXUDWLRQVHWWLQJVDUHFKDQJHG\RXPXVWUHVWDUW
the network connection. You can restart the network connection from Network
Restart on the main menu. (63)
96
8. Other Functions
8.4 Command Control via the Network (continued)
Command Format
Command formats differ among the different communication ports.
Ɣ7&3
You can use the RS-232C commands without any changes. The reply data
format is the same as the RS-232C commands. (RS-232C Communication in
WKH2SHUDWLQJ*XLGH7HFKQLFDO
+RZHYHUWKHIROORZLQJUHSO\ZLOOEHVHQWEDFNLQWKHHYHQWRIDXWKHQWLFDWLRQ
failure when authentication is enabled.
5HSO\LQWKHHYHQWRIDQDXWKHQWLFDWLRQHUURU!
Reply
0x1F
Error code
0x04
0x00
Ɣ7&3
Send Data format
The following formatting is added to the header (0 x 02), Data length (0 x 0D),
Checksum (1 byte) and Connection ID (1 byte) of the RS-232C commands.
Header
Data length
RS-232Ccommand
Check Sum
Connection
ID
0x02
0x0D
13 bytes
1 byte
1 byte
+HDGHU
ĺ [)L[HG
'DWDOHQJWK
ĺ 56&FRPPDQGVE\WHOHQJWK[')L[HG
56&FRPPDQG ĺ 56&FRPPDQGVWKDWVWDUWZLWK[%([()
(13 bytes)
&KHFN6XP
ĺ 7KLVLVWKHYDOXHWRPDNH]HURRQWKHDGGLWLRQRIWKH
lower 8 bits from the header to the checksum.
&RQQHFWLRQ,'
ĺ 5DQGRPYDOXHIURPWR7KLVYDOXHLVDWWDFKHG
to the reply data)
97
8. Other Functions
8.4 Command Control via the Network (continued)
Reply Data format
The connection ID (the data is same as the connection ID data on the sending
data format) is attached to the RS-232C commands reply data.
$&.UHSO\!
Reply
Connection
ID
0x06
1 byte
1$.UHSO\!
Reply
Connection
ID
0x15
1 byte
(UURUUHSO\!
Reply
Error code
Connection
ID
0x1C
2 bytes
1 byte
Reply
Data
Connection
ID
0x1D
2 bytes
1 byte
'DWDUHSO\!
3URMHFWRUEXV\UHSO\!
Reply
Status code
Connection
ID
0x1F
2 bytes
1 byte
$XWKHQWLFDWLRQHUURUUHSO\!
98
Reply
Authentication
Error code
0x1F
0x04
0x00
Connection
ID
1 byte
8. Other Functions
8.4 Command Control via the Network (continued)
Automatic Connection Break
The TCP connection will be automatically disconnected after there is no
communication for 30 seconds after being established.
Authentication
The projector does not accept commands without authentication success
when authentication is enabled. The projector uses a challenge response type
authentication with an MD5 (Message Digest 5) algorithm.
:KHQWKHSURMHFWRULVXVLQJD/$1DUDQGRPE\WHVZLOOEHUHWXUQHGLI
DXWKHQWLFDWLRQLVHQDEOHG%LQGWKLVUHFHLYHGE\WHVDQGWKH$XWKHQWLFDWLRQ
Password and digest this data with the MD5 algorithm and add this in front of the
commands to send.
Following is a sample if the Authentication Password is set to “password” and the
random 8 bytes are “a572f60c”.
1) Connect the projector.
5HFHLYHWKHUDQGRPE\WHV³DIF´IURPWKHSURMHFWRU
%LQGWKHUDQGRPE\WHV³DIF´DQGWKH$XWKHQWLFDWLRQ3DVVZRUG
“password” and it becomes “a572f60cpassword”.
4) Digest this bind “a572f60cpassword” with MD5 algorithm.
It will be “e3d97429adffa11bce1f7275813d4bde”.
5) Add this “e3d97429adffa11bce1f7275813d4bde” in front of the commands
and send the data.
6HQG³HGDGIIDEFHIGEGH´FRPPDQG
6) When the sending data is correct, the command will be performed and the
reply data will be returned. Otherwise, an authentication error will be returned.
NOTE $VIRUWKHWUDQVPLVVLRQRIWKHVHFRQGRUVXEVHTXHQWFRPPDQGVWKH
authentication data can be omitted when the same connection.
99
8. Other Functions
8.5 Crestron RoomView®
Crestron RoomView®LVDPXOWLXVHUUHVRXUFHPDQDJHPHQWSURJUDPSURYLGHG
by Crestron Electronics, Inc. It is an application for managing and controlling the
SURMHFWRUDQGRWKHU$9GHYLFHVFROOHFWLYHO\
For details of Crestron RoomView®, refer to the Crestron® website.
85/http://www.crestron.com
The following communication interfaces can be used to manage the entire facility.
1) Crestron RoomView® Express / Crestron RoomView®6HUYHU(GLWLRQ
RoomView® Express and RoomView®6HUYHU(GLWLRQDUHVRIWZDUHSURYLGHG
E\&UHVWURQ(OHFWURQLFV,QF7KH\DUHXVHGIRUPDQDJLQJDOOWKH$9GHYLFHV
and are also able to communicate with the help desk as well as send out alert
messages.
For details of the software, refer to the following website.
85/KWWSZZZFUHVWURQFRPJHWURRPYLHZ
2) Crestron e-Control®
Crestron e-Control®LVDV\VWHPFRQWUROOHUWKDWFDQEHRSHUDWHGYLDDZHE
browser. (65)
100
9. Troubleshooting
9. Troubleshooting
Phenomenon: Cannot communicate with the projector. (Wired network)
Item to be checked
,VWKHSURMHFWRUWXUQHGRQ"
Solutions
Turn on the projector.
,VWKHQHWZRUNGHYLFHVXFKDVD 7XUQRQWKHQHWZRUNGHYLFH
URXWHUHWFWXUQHGRQ"
,V67$1'%<02'(VHWWR
6$9,1*"
7KHQHWZRUNIXQFWLRQLVQRWDYDLODEOHZKHQ
67$1'%<02'(LVVHWWR6$9,1*,I\RX
want to use the network function in the standby
PRGHVHWWR1250$/
,V/$1FDEOHFRQQHFWHG"
&RQQHFWWKH/$1FDEOH
Contact your dealer when MAC address on
Is MAC address displayed
the label put on the projector does not match
correctly in the NETWORK
,1)250$7,21±:,5('PHQX" MAC address displayed in the NETWORK
INFORMATION – WIRED menu.
Are the network settings such as Check the network settings in the NETWORK
,3DGGUHVVVHWFRUUHFWO\"
INFORMATION – WIRED menu. Consult with
your network administrator for details.
,V¿UHZDOORUSDFNHW¿OWHULQJVHWLQ Consult with your network administrator.
DURXWHUHWF"
Is the same network address set The same network address cannot be used
IRUZLUHOHVV/$1DQGZLUHG/$1 IRUZLUHOHVV/$1DQGZLUHG/$16HWGLIIHUHQW
QHWZRUNDGGUHVVIRUZLUHOHVV/$1DQGZLUHG
RIWKHSURMHFWRU"
/$1
Is the wired network adapter of
WKHFRPSXWHUHQDEOHG"
Refer to the user’s manual for the computer
and enable the wired network adapter.
101
9. Troubleshooting
Phenomenon: Cannot communicate with the projector. (Wireless network)
Item to be checked
,VWKHSURMHFWRUWXUQHGRQ"
Solutions
Turn on the projector.
,VWKHQHWZRUNGHYLFHVXFKDVDQ 7XUQRQWKHQHWZRUNGHYLFH
DFFHVVSRLQWHWFWXUQHGRQ"
,V67$1'%<02'(VHWWR
6$9,1*"
7KHQHWZRUNIXQFWLRQLVQRWDYDLODEOHZKHQ
67$1'%<02'(LVVHWWR6$9,1*,I\RX
want to use the network function in the standby
PRGHVHWWR1250$/
Are the network settings such as Check the network settings in the NETWORK
,3DGGUHVVVHWFRUUHFWO\"
INFORMATION 䠉:,5(/(66PHQX&RQVXOW
with your network administrator for details.
,VWKH86%ZLUHOHVVDGDSWHU
,QVHUWWKH86%ZLUHOHVVDGDSWHU
RSWLRQDOSDUWV86%:/1
inserted into USB TYPE A port of
WKHSURMHFWRU"
,VDQRSWLRQDO86%ZLUHOHVV
DGDSWHUXVHG"
7KH86%ZLUHOHVVDGDSWHUDYDLODEOHWRWKLV
SURMHFWRULVRSWLRQDO86%:/1RQO\
Is MAC address displayed
correctly in the NETWORK
INFORMATION 䠉:,5(/(66
PHQX"
When MAC address displayed in NETWORK
,1)250$7,21±:,5(/(66PHQXGRHVQRW
PDWFK0$&DGGUHVVHQJUDYHGRQWKH86%
ZLUHOHVVDGDSWHUSXOORXWDQGLQVHUWWKH86%
wireless adapter again.
,IWKHSUREOHPSHUVLVWVWKH86%ZLUHOHVV
adapter may be broken. Contact your dealer.
,V/('RIWKH86%ZLUHOHVV
DGDSWHUEOLQNLQJ"
:KHQ/('RIWKH86%ZLUHOHVVDGDSWHUGRHV
QRWEOLQNLQRYHUPLQXWHDIWHULQVHUWLQJSXOO
RXWDQGLQVHUWWKH86%ZLUHOHVVDGDSWHUDJDLQ
,IWKHSUREOHPSHUVLVWVWKH86%ZLUHOHVV
adapter may be broken. Contact your dealer.
102
9. Troubleshooting
Phenomenon: Cannot communicate with the projector. (Wireless network) (continued)
Item to be checked
Solutions
,V¿UHZDOORUSDFNHW¿OWHULQJVHWLQ Consult with your network administrator.
DQDFFHVVSRLQWHWF"
Is the wireless network to
FRQQHFWHQFU\SWHG"
Set the encryption settings of the projector
again and reconnect.
Is an encryption method which
The followings are encryption methods
is not supported by the projector supported by the projector:
XVHG"
䡡㻌WPA2-PSK(AES)
䡡㻌WPA2-PSK(TKIP)
䡡㻌WPA-PSK(AES)
䡡㻌WPA-PSK(TKIP)
䡡㻌WEP128bit
䡡㻌WEP64bit
This projector cannot be connected to the
wireless network using the encryption methods
RWKHUWKDQWKHDERYH
Is signal strength of wireless
network displayed in the SSID
6&$1/,67PHQXZHDN"
䡡㻌3XWWKHSURMHFWRUFORVHWRWKHZLUHOHVVGHYLFH
䡡㻌When the projector is near the steel door,
WKHUDGLRZDYHPD\QRWUHDFKWRWKHZLUHOHVV
GHYLFH,QWKDWFDVHNHHSWKHSURMHFWRUDZD\
from the door.
䡡㻌Consult with your network administrator
because there may be an interfering wireless
GHYLFH
,V*+]UDGLRZDYHXVHG"
7KH86%ZLUHOHVVDGDSWHU86%:/1
GRHVQRWVXSSRUW*+]EXWRQO\*+]
Is the same network address set The same network address cannot be used
IRUZLUHOHVV/$1DQGZLUHG/$1 IRUZLUHOHVV/$1DQGZLUHG/$16HWGLIIHUHQW
QHWZRUNDGGUHVVIRUZLUHOHVV/$1DQGZLUHG
RIWKHSURMHFWRU"
/$1
Is the wireless network adapter
RIWKHFRPSXWHUHQDEOHG"
Refer to the user’s manual for the computer
and enable the wireless network adapter.
103
9. Troubleshooting
3KHQRPHQRQ&DQQRWXVHZLUHOHVV/$1DQGZLUHG/$1DWWKHVDPHWLPH
Item to be checked
Is the same network address set
IRUZLUHOHVV/$1DQGZLUHG/$1
RIWKHSURMHFWRU"
Solutions
The same network address cannot be used
IRUZLUHOHVV/$1DQGZLUHG/$16HWGLIIHUHQW
QHWZRUNDGGUHVVIRUZLUHOHVV/$1DQGZLUHG
/$1
Are you trying to access to
GLIIHUHQWQHWZRUNYLDDURXWHU"
(LWKHUZLUHG/$1RUZLUHOHVV/$1FDQDFFHVV
to different network.
6HWGHIDXOWJDWHZD\RIHLWKHUZLUHG/$1RU
ZLUHOHVV/$1WR
Phenomenon: Web(Projector Web Control) is not displayed correctly.
Item to be checked
,VWKHFRUUHFW85/HQWHUHGLQ
:HEEURZVHU"
Solutions
Enter the IP address of the projector in Web
browser.
,V-DYD6FULSWHQDEOHG"
(QDEOH-DYD6FULSW
How to set is different depending on the Web
browser. Refer to Help of Web browser, etc. for
details.
Is recommended Web browser
XVHG"
Recommended Web browsers are Internet
Explorer 6/7/8/9/10.
Projector Web Control may not displayed
correctly except in recommended browser.
Is the cache of the screen
GLVSOD\HGHDUOLHUUHPDLQLQJ"
Clear the cache.
How to set is different depending on the Web
browser. Refer to Help of Web browser, etc. for
details.
104
9. Troubleshooting
Phenomenon: Crestron e-Control® is not displayed.
Item to be checked
Has Adobe® Flash® Player been
LQVWDOOHG"
Solutions
Adobe® Flash® Player is required to display
Crestron e-Control®.
Install Adobe® Flash® Player.
Is Web browser that does not
support Adobe® Flash® Player
XVHG"
8VHD:HEEURZVHUWKDWVXSSRUWV$GREH®
Flash® Player.
Are Crestron e-Control® settings Enable Crestron e-Control® settings on
on Network Settings – Other
Network Settings – Other Setup screen of the
Setup screen of the Projector
Projector Web Control.
:HE&RQWUROGLVDEOHG"
Phenomenon: Cannot send an e-mail correctly.
Item to be checked
,VDWHVWHPDLOVHQWFRUUHFWO\"
Solutions
Check if a test e-mail is sent correctly by
pressing the [Send Test Mail] button on the
Mail Settings screen of the Projector Web
Control.
$UHHPDLOVHWWLQJVFRUUHFW"
Check the settings on the Mail Settings screen
of the Projector Web Control.
Are the settings of Sender E-mail 6HWYDOLGHPDLODGGUHVV
$GGUHVVFRUUHFW"
Is only e-mail regarding the
VSHFL¿F(UURU:DUQLQJQRWVHQW
FRUUHFWO\"
&KHFNLIWKHVSHFL¿F(UURU:DUQLQJLVVHWWR
be sent on the Mail Settings screen of the
Projector Web Control.
105
9. Troubleshooting
3KHQRPHQRQ$QHPDLOGRHVQRWUHDFKRQO\WRWKHVSHFL¿FDGGUHVV
Item to be checked
,VHPDLODGGUHVVVHWFRUUHFWO\"
Solutions
Check the settings on the Mail Settings screen
of the Projector Web Control.
,V¿OWHULQJRUIRUZDUGLQJVHWIRU
the e-mail address in the mail
VHUYHU"
Consult with your network administrator.
Phenomenon: The schedule is not executed correctly.
Item to be checked
,VWKHSURMHFWRUWXUQHGRQ"
Solutions
Turn on the projector.
,V67$1'%<02'(VHWWR
6$9,1*"
7KHVFKHGXOHIXQFWLRQLVQRWDYDLODEOHZKHQ
67$1'%<02'(LVVHWWR6$9,1*,I\RXZDQW
to use the schedule function in the standby
PRGHVHWWR1250$/
,VWKHWLPHVHWFRUUHFWO\"
Check the settings of Date and Time.
Is the image data to be displayed Register the image data to be displayed with
in the schedule function
WKHSURMHFWRUE\XVLQJH[FOXVLYHDSSOLFDWLRQ
UHJLVWHUHG"
software.
:KHQWKHHYHQWRI0\,PDJHLV
set.)
Is the message data to be
Register the message data to be displayed with
displayed in the schedule
WKHSURMHFWRUE\XVLQJH[FOXVLYHDSSOLFDWLRQ
IXQFWLRQUHJLVWHUHG"
software.
:KHQWKHHYHQWRI0HVVHQJHULV
set.)
Is the lamp of the projector
OLJKWLQJ"
106
7KHHYHQWRI0\,PDJH0HVVHQJHUDQG%ODQN
are not executed when the lamp is not lighting.
Set the program of the schedule function so
WKDWWKHHYHQWRI0\,PDJH0HVVHQJHUDQG
%ODQNFDQEHH[HFXWHGZKHQWKHODPSLV
lighting.
9. Troubleshooting
Item to be checked
Is the program to be executed
VHWFRUUHFWO\"
Solutions
Check the settings of Schedule Settings of the
Projector Web Control.
$UHWKHUHDQ\HYHQWVVHWDWWKH
VDPHWLPH"
6RPHHYHQWVFDQQRWEHH[HFXWHGDWWKHVDPH
time.
Set them to be executed at the different time or
change the order.
* The schedule function may not operate correctly depending on the status of the
projector.
Phenomenon: The time settings are not correct.
Item to be checked
,VEDWWHU\VHW"
Solutions
Set the battery.
The battery is considered to be exhausted if
the time is off soon after setting date and time.
In that case, replace the battery.
,VWKHGDWHDQGWLPHVHWFRUUHFWO\" Check the settings of Date/Time Settings menu
of the Projector Web Control or DATE AND
TIME menu of the projector.
Is the projector connected to the Connect to the network.
network correctly when getting
WKHWLPHYLDWKHQHWZRUN"
,V6173VHUYHUVHWFRUUHFWO\
ZKHQJHWWLQJWKHWLPHYLDWKH
QHWZRUN"
&KHFNWKHVHWWLQJVRI6173VHUYHU
Consult with your network administrator
UHJDUGLQJWKHVHWWLQJVRI6173VHUYHU
Is the time difference set correctly :KHQJHWWLQJWKHWLPHYLDWKHQHWZRUN
the correct time is not displayed if the time
ZKHQJHWWLQJWKHWLPHYLDWKH
difference is not set.
QHWZRUN"
Set the time difference.
107
9. Troubleshooting
Phenomenon: &DQQRWFRQWUROWKHH[WHUQDOGHYLFHE\XVLQJ1HWZRUN%ULGJH
Item to be checked
,V1HWZRUN%ULGJHVHWWLQJV
HQDEOHG"
Solutions
Check the settings in OPTION – SERVICE
±&20081,&$7,21±&20081,&$7,21
TYPE menu.
,V67$1'%<02'(VHWWR
6$9,1*"
7KH1HWZRUN%ULGJHLVQRWDYDLODEOHZKHQ
67$1'%<02'(LVVHWWR6$9,1*6HW
67$1'%<02'(WR1250$/DQGVHW
1(7:25.%5,'*(:,5(/(66:,5('LQ
WKH&20081,&$7,217<3(PHQX
Are the serial settings set
FRUUHFWO\"
Check the serial settings of the projector and
WKHH[WHUQDOGHYLFH
108
10. Warranty and after-sales service
:DUUDQW\DQGDIWHUVDOHVVHUYLFH
,IDQDEQRUPDORSHUDWLRQVXFKDVVPRNHVWUDQJHRGRURUH[FHVVLYHVRXQG
should occur, stop using the projector immediately.
,IWKLVGRHVQRWUHVROYHWKHSUREOHPSOHDVHFRQVXOW\RXUGHDOHURUVHUYLFH
company. They will tell you what warranty condition is applied.
3OHDVHFKHFNWKHIROORZLQJZHEDGGUHVVZKHUH\RXPD\¿QGWKHODWHVWLQIRUPDWLRQ
for this projector.
http://www.hitachi-america.us/projectors
http://www.hitachiserviceeu.com/support/guides/userguides.htm
Trademark acknowledgment
0LFURVRIW® and Internet Explorer®, Windows®, Windows Vista® are registered trademark of
0LFURVRIW&RUSRUDWLRQLQWKH86DQGRURWKHUFRXQWULHV
$GREH® and Flash® are registered trademarks of Adobe Systems Incorporated.
3HQWLXP® is a registered trademark of Intel Corporation.
-DYD6FULSW® is a registered trademark of Sun Microsystems, Inc.
+'0,TMWKH+'0,ORJRDQG+LJK'H¿QLWLRQ0XOWLPHGLD,QWHUIDFHDUHWUDGHPDUNVRU
UHJLVWHUHGWUDGHPDUNVRI+'0,/LFHQVLQJ//&LQWKH8QLWHG6WDWHVDQGRWKHUFRXQWULHV
&UHVWURQ®, Crestron e-Control®, e-Control®, Crestron RoomView® and RoomView® are
trademarks or registered trademarks of Crestron Electronics, Inc. in
WKH8QLWHG6WDWHVDQGRWKHUFRXQWULHV
7UDGHPDUN3-/LQNLVDWUDGHPDUNDSSOLHGIRUWUDGHPDUNULJKWVLQ
-DSDQWKH8QLWHG6WDWHVRI$PHULFDDQGRWKHUFRXQWULHVDQGDUHDV
$OORWKHUWUDGHPDUNVDUHWKHSURSHUWLHVRIWKHLUUHVSHFWLYHRZQHUV
109