1
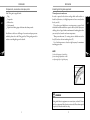
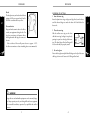
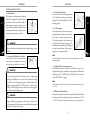
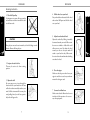
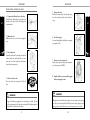
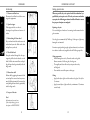
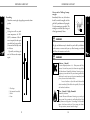
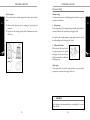
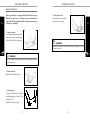
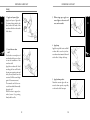
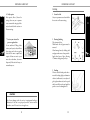
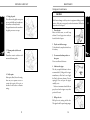
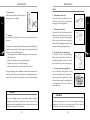
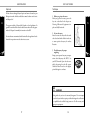
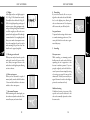
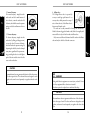
DRY SUIT USER’S MANUAL
WARNING!
Read this manual before
using this suit.
Retain the manual in a
safe place for the lifetime
of the garment. Contact
the manufacturer if any
aspect of the information
given in this manual is
unclear, or you require
further information.
INTRODUCTION
Welcome to this User’s Manual. It is intended for users of Viking dry
suits. All procedures described in this manual require adequate skill
and knowledge in the use of dry suits through training by a qualified
and certified instructor. In the manual, risks to persons or equipment
are indicated by the following types of notices:
WARNING!
A warning notice indicates a potentially hazardous situation which, if
not avoided, may cause injury or death. Warning notices are designed
in the style of this notice.
CAUTION!
A cautionary notice indicates a situation which may cause damage or
malfunction to material or equipment. Cautionary notices are designed
in the style of this notice.
WARNING!
Diving with a dry suit can be extremely dangerous. Do not attempt
to use this dry suit without prior training and certification by a qualified and certified instructor, and use of all necessary and appropriate
equipment.
I
1
INTRODUCTION
INTRODUCTION
Table of Contents
1 INTRODUCTION
1
6 CONTAMINATED WATER DIVING
Safety instructions _____________________________
Description __________________________________
Description of marking in the suit_________________
European (CE) approval ________________________
IV
VI
VII
VIII
2 DRESSING
Components, accessories and spare parts ____________
Insulating clothing and equipment ________________
Installation of cuff rings ________________________
Pre-dive equipment checks ______________________
Dressing instruction ___________________________
Check before entering the water __________________
Undressing __________________________________
1
2
4
5
7
9
11
Foreword____________________________________
Suggested diving systems ________________________
Gloves ______________________________________
Decontamination - Recommendations
and considerations_____________________________
Inspection ___________________________________
EN 14225-2 chemical hazard protection approval data _
Customer information to be provided at point of sale __ 44
12
16
17
19
22
4 MAINTENANCE
Storage and maintenance________________________ 24
Valves ______________________________________ 26
Disposal ____________________________________ 27
5 DRY SUIT DIVING
Technique ___________________________________ 28
Valves ______________________________________ 32
Hose _______________________________________ 35
II
39
40
43
APPENDIX
3 REPAIRING A DRY SUIT
Gluing, general rules ___________________________
Pressure testing _______________________________
Gluing preparations ___________________________
Gluing _____________________________________
Patching ____________________________________
36
37
38
III
1
INTRODUCTION
1
INTRODUCTION
Safety instructions
Safety instructions
These guidelines are recommended by Viking. Follow them for your
safety and incorporate them in your routine as a mandatory pre-dive
check list.
If your equipment fails to work as intended:
DO NOT USE IT; HAVE THE PROBLEMS CORRECTED BY A
QUALIFIED DIVE SHOP.
6 Use the correct amount of insulation for the water conditions
you are diving in and your exercise rate.
1 Complete a dry suit diving course led by a certified instructor and
maintain proficiency by regular dives.
2 Use a buoyancy compensator device for surface flotation and for
your safety.
3 Know your equipment and emergency procedures. Read the User’s
Manuals for all your equipment.
4 Practice your dry suit diving skills under controlled conditions until
they become second nature.
5 Never dive alone. Dive with a buddy who has a thorough understanding of your dry suit system. Do always have people on land
or in a boat that are able to help you in case of emergency.
7 Your weighting should allow you to make a decompression at ten
feet at the completion of your dive with a tank containing 500 psi
of air or less. Determine the appropriate weight needed to attain
neutral buoyancy by for example a pool dive. Weight yourself at
neutral buoyancy with an empty tank. An increased salinity in the
water requires more weight.
8 Check your valves, hose, zipper and seals before each dive.
9 Perform preventive maintenance and repairs on the suit regularly.
At least once a year have the suit, valves and hose serviced by a
qualified dealer service, but more frequently if the suit is in heavy
or extraordinary use.
10 Know your limitations and do not exceed them.
WARNING!
Risk of skin irritation and allergic reactions. The dry suit materials can
cause skin irritation and allergic reactions to individuals sensitive to
these materials. Consult medical advise if in doubt.
WARNING!
WARNING!
Risk of injury due to reduced body functions when diving in cold
water. Water or air temperatures below 70°F (21°C) constitute cold
water diving. Water or air temperatures below 40°F (5°C) constitute
ice diving. Ice diving is dangerous and requires special equipment,
training, preparation and procedures.
Diving with a dry suit can be extremely dangerous. Do not attempt
to use this dry suit without prior training and certification by a qualified and certified instructor, and use of all necessary and appropriate
equipment.
IV
V
1
INTRODUCTION
Description of marking in the suit
Description
1
INTRODUCTION
A dry suit is a suit which protects its wearer by the exclusion of water
and contaminants when underwater. Latex seals are attached to the
body of the suit at the neck and cuffs to prevent water from entering
whilst submerged.
Various types of underwear can be worn under the suit depending on
water temperature, depth and diver activity. The conservation of body
heat using thermal protection, in cold, deep water is vitally important
to the safety and efficiency of divers, professional and amateur alike.
The following chapters describe in detail, how to use, maintain and
carry out certain repairs to your dry suit.
1
12
2
1
3
4
5
6
7
8
WARNING!
9
10
The suit itself does not have a depth limit but all diving at large depths
is potentially dangerous and requires special training, skills and knowhow.
WARNING!
Do not use other gas than air for inflation of the suit. Using oxygen
enriched gas for inflation one is in risk of fire and explosion. Using
argon there is a risk of this gas getting into a full face mask and the
breathing system through the hood. This has to be avoided because
the effect of breathing argon is more narcotic than what nitrogen is
when under increased partial pressure.
WARNING!
Risk of injury due to reduced body functions when diving in cold
water. Water or air temperatures below 70°F (21°C) constitute cold
water diving. Water or air temperatures below 40°F (5°C) constitute
ice diving. Ice diving is dangerous and requires special equipment,
training, preparation and procedures.
VI
11
Field 1: Brand name
Field 2: Model.
Field 3: CE-approval, number of notified body (see page VIII).
Field 4: Size.
Field 5: Pictogram with measurements in centimetres.
Field 6: Request to read instructions
in User’s Manual.
Field 7: Washing instructions.
Field 8: Article number of suit.
Field 9: The suit’s individual batch
number.
Field 10: Suit manufacturer.
Field 11: Address suit manufacturer.
Field 12: Warning text. (see page IX)
VII
INTRODUCTION
European (CE) approval
1
INTRODUCTION
WARNING!
The Viking suits have been tested and approved by notified body
no. 0403; Finnish Institute of Occupational Health, Department
of Physics, Topeliuksenkatu 41 a A, FIN-00250, Helsinki, Finland.
The suits are CE marked and have EC type approval under the
Council Directive 89/686/EEC on personal protective equipment.
The Viking HDS has been tested and approved to the European
standard on drysuits, EN 14225-2:2005. This approval includes the
additional requirements for chemical protection. See page 43 for
further information.
IMPROPER MAINTENANCE, USE OR MISUSE OF THIS DRY
SUIT COULD RESULT IN SERIOUS INJURY OR DEATH.
Follow established diving safety practice. Do not dive over the limits of
your ability and training. Do not use this suit without being familiar
with diving equipment and having had prior qualified training.
Do not use this dry suit until you have practised and mastered practical
dry suit skills, including emergency skills in a controlled environment
under supervision of a dive instructor certified by a nationally recognised
instructional organisation and knowledgeable in the use of dry suits.
Do not use this suit without evaluating the conditions before every dive
and making sure they fit your personal capabilities. Regularly service
and maintain the suit and its parts! Check equipment before and during
every dive.
Improper maintenance, use or misuse of this dry suit could cause loss
of buoyancy control and exposure to thermal hazards, including uncontrolled descents and uncontrolled rapid ascents, body overheating
or overcooling, resulting in drowning, decompression sickness, air
embolism, stroke or seizure.
Do not use this dry suit until you have read, understood and followed
all instructions and safety precautions in the User´s Manual.
Never dive without accepting your own responsibility for safety on
every dive.
If the User´s Manual is unavailable or lost, another copy can be
obtained by writing the manufacturer or be downloaded from
www.vikingdiving.com.
VIII
IX
1
DRESSING
2
DRESSING
Components, accessories and spare parts
Insulating clothing and equipment
Each Viking suit is supplied with:
Bag
Suspenders
Inflator hose
User’s manual
Repair kit including zipper lubricant and talcum powder.
Thermal protection underwear
In order to protect the diver from cooling, which could result in reduced body functions, it is highly important to dress correctly under
the dry suit (A).
The neck area and shoulders are very important to protect. Each
individual has different abilities to preserve the body heat. Adjust your
clothing, choice of type, thickness and amount of insulating layers after
your activity level, weather and water temperature.
Wear sports underwear (C) covering wrist to shoulder next to the
body (B) and over this an insulating dress (D).
It is of vital importance to have the right buoyancy for maximum
insulating protection.
In addition to the above a full range of accessories and spare parts are
available, please refer to the Viking price list, Viking catalogue and/or
website www.vikingdiving.com for details.
NOTE!
See also the chapter on dry suit diving
for more thorough information on how
to adjust weights for the right buoyancy.
WARNING!
Diving with defective equipment can cause injury or death. Do not
dive if any equipment fails to function as intended. Have them repaired
or replaced at an authorised dive shop.
1
2
2
DRESSING
2
Hoods
The hood protects your head and neck from
getting cold. Choose a proper hood, best fitted for the conditions where you dive.
Gloves and mitts
Keep your hands warm in order to be able to
control your equipment during the dive. Use
dry gloves or mittens, with separate liners,
that together with cuff rings can connect to
the suit.
Gloves with wool liners will protect down to approx. +10°C.
In colder water mittens or better insulated gloves are recommended.
DRESSING
Installation of cuff rings
1 Insert the inner ring
Insert the plastic inner ring, with grooved edge first, down the sleeve
until the forward edge rests under the latex cuff a little below the
sleeve end.
2 Place the outer ring
Slide the rubber outer ring over the latex
cuff and inner ring, locking it into place by
pressing it up and over the edge of the inner
ring. The distal edges of both cuff rings will
be even when they are properly seated.
3 Put on the gloves
Put on the latex gloves and pull the rolled edge over the lip of the outer
cuff ring to form a seal. Secure with a Viking rubber band.
WARNING!
Diving with new and unfamiliar equipment can be extremely dangerous. Always practise your dry suit diving skills with new equipment
under controlled conditions, supervised by a qualified and certified
instructor.
3
4
2
DRESSING
Pre-dive equipment checks
2
1 Trim the seals
The neck-seal on a new suit must be adjusted
to fit the diver (approx 20% smaller than the
circumference of the neck). Trim carefully in
small increments using a long, sharp pair of
scissors. Lubricate the seals with pure, unscented talcum powder when donning the suit so
as to reduce friction against your skin.
WARNING!
Failure to trim the neck-seal may result in choking, leading to injury
or death.
2 Connect the inflator hose to the valve
Check visually to make certain that there
is no damage or contamination to the connector house, valve head, hose or O-rings.
WARNING!
Do not use other gas than air for inflation of the suit. Using oxygen
enriched gas for inflation one is in risk of fire and explosion. Using
argon there is a risk of this gas getting into a full face mask and the
breathing system through the hood. This has to be avoided because
the effect of breathing argon is more narcotic than what nitrogen is
when under increased partial pressure.
WARNING!
Diving with defective equipment can cause injury or death. Do not
dive if any equipment fails to function as intended. Have them repaired
or replaced at an authorised dive shop.
5
DRESSING
3 Check the valve function
Connect air to the inlet valve and operate the
valve. Check that the valve opens and closes
properly. The suit will inflate if the valve is
working properly.
4 Check the zipper
Check that the zipper opens and closes properly and that no material, such as underwear
fiber or lint, is caught in the zipper’s teeth.
Check that the zipper is free from dirt and
sand. Lubricate the zipper if necessary. Use
only lubricant recommended by Viking and
the zipper manufacturer. Silicon spray is
dangerous to your zipper and suit.
Note!
See also the chapter on maintenance for more thorough information on how to
lubricate the zipper.
5 Assembly of hose to low pressure port
The inflator hose must be connected to a LOW pressure port on the
regulator’s first stage or to another source of low pressure air. Maximum
working pressure is 15 BAR (225 psi.). The inflator hose is manufactured with UNF 3/8” coupling.
Note!
Avoid sharp bends in the hose: Do not bend the hose below a minimum radius of
4 cm (1.5”)
6 Stiff latex in cold weather use
Cold and low temperatures make the latex parts stiff and brittle. Warm
them up gently with something that keeps a temperature of +37°C
to +40°C to make them smooth and easy to put on, just before use.
6
2
DRESSING
DRESSING
Dressing instruction
2
1 Take off all jewellery
It is important to remove all rings, watches
and necklaces and other items which could
tear the latex seals.
CAUTION!
Sharp objects can tear the suit material, with risk of leakage or malfuntion. Remove all sharp objects.
2 Step into the suit feet first
This may be easier to do from a sitting
position.
3 Adjust the cuffs
Put your arms, one at a time, through the
sleeves and slide your hands into the latex
cuffs so the seals are smoothly seated on your
wrist. Pull the suit material if necessary, but
avoid pulling directly on the latex, particularly with the finger nails.
7
4 Pull the hood over your head
Put your hands from the outside of the hood
and neckseal. Pull apart and slide the hood
onto your head.
5 Adjust the neckseal and hood
Adjust the neckseal by folding it smoothly
downwards around your neck. Make certain
there are no wrinkles or folds which could
allow water to enter. Also adjust the hood
around your face so that your mask will
attach to your face skin only. Make certain
there is no hair or thermal innerhood sticking
out under the hood.
6 Close the zipper
Make sure that the person who closes your
zipper is careful not to catch any underwear
material in the zipper teeth.
7 Connect the inflator hose
Make certain that the inflator hose does not
interfere with the operation of or access to
any other equipment.
8
2
DRESSING
Check before entering the water
2
1 Connect the inflator hose to the valve
Check that the inflator hose is properly connected to the valve. Check for damage and
contamination.
2 Inflate the suit
Inflate the suit so you feel air entering the
suit.
3 Vent exhaust air
Open the outlet valve by turning the valve lid
counter clockwise, and bend down to force
excess air out of the outlet valve and ensure
that it functions properly.
4 Close the outlet valve
Close the valve by turning the lid clockwise.
DRESSING
5 Depress the valve
Release air from outlet valve by depressing
the valve, to make sure the valve is functioning.
6 Check the zipper
Let your diving buddy check that your zipper
is properly closed.
7 Always wear a buoyancy aid
Always wear a separate buoyancy compensator, or buoyancy aid (BCD).
8 Finally check the water condition again
before entering the water
WARNING!
WARNING!
Diving with defective equipment can cause injury or death. Do not
dive if any equipment fails to function as intended. Have them repaired
or replaced at an authorised dive shop.
Falling into water with the dry suit open can cause injury or drowning,
since the dry suit will quickly be filled by water. Always keep the suit
zipper properly closed when you are near deep water or on a boat.
9
10
2
DRESSING
2
REPAIRING A DRY SUIT
Undressing
Gluing, general rules
1 Disconnect inflator hose
Disconnect the inflator hose before removing other equipment.
Wherever possible, dry suit repairs should be undertaken by a
qualified dry suit repair service. If the dry suit owner undertakes
any repairs, the following procedures should be followed to ensure
that proper techniques are employed.
2 Open the zipper
If the zipper sticks do not force it.
Investigate the problem and remove obstacles.
3 Before taking off a latex hood
Put your hands inside the suit between the
neckseal and your neck. Push out the latex
and pull over your head.
4 Take off the hood
Grasp the neckseal through the face opening and pull hood and neckseal over the
head. Pull the suit material but avoid pulling the latex directly, particularly with the
finger nails.
5 Release latex cuffs
Release cuffs by gripping the material of the
suit and pull in a smooth and easy movement. Pull the suit material, if necessary, but
avoid pulling the latex directly, particularly
with the finger nails.
Repairing a drysuit
Do not inhale glue or hardener. See warnings in this manual and on
glue container.
Use only glue recommended by Trelleborg. Other types of glue may
damage the suit material.
For minor repair (patching) use glue (polyurethane suits) or vulcanisation solution (rubber suits) supplied with the Trelleborg repair kit.
Gluing preparation
Ensure damaged area is dry. Clean the surface to be glued.
Remove remains of old loose glue, oil and grease.
Thoroughly sand down all new dry suit parts where they
will be glued.
Clean sanded area with heptane or white gas.
Gluing
Apply a thin layer of glue on both surfaces to be glued. Let dry for
15 minutes.
Apply a second layer of glue and let dry a minimum of 15 minutes
or until tacky.
6 Step out of the suit
Note!
Information on how to take care
of the suit after diving is given in
the chapter on MAINTENANCE.
11
12
3
REPAIRING A DRY SUIT
REPAIRING A DRY SUIT
3
Neutralizing
Neutralize excessive glue by applying unscented talcum
powder.
Curing
Curing time will vary with
room temperature. At 20°C
(68°F) a minimum of 60 minutes is required, but the repair
area should not be stressed for
3 hours and will be fully cured
in 24 hours.
If possible, avoid using the
suit for 24 hours after a major
repair.
WARNING!
The glue and hardener may be harmful to your health by inhalation
or skin contact or contact with your eyes. Read warning note below
and follow the instructions on the kit.
WARNING!
2
1
Hardener – Harmful
3
1
2
3
4
Cloth tape
Suit material coated side
Fabric
Latex
How to mix the Trelleborg 2-component glue
Immediately before use, the hardener
should be mixed thoroughly with the
glue. Add 1 part hardener to 10 parts glue.
(Use the measuring cup provided.) The
mixed glue can be used only as long as it
is fluid, approximately 2 hours.
Contains Diphenylmethane - 4,4 - Diisocyanate and Ethylacetate. Contains Isocyanates; See information supplied by
the Manufacturer. Harmful by inhalation. Irritating to eyes,
respiratory system and skin. May cause burning sensation by
inhalation. In case of contact with eyes rinse immediately with
plenty of water end seek medical advice.
In case of accident or if you feel unwell seek medical
advice immediately. (Show label where possible.) Use only in
well ventilated conditions.
Glue – Harmful – Highly flammable
4
13
Harmful by inhalation.
Contains Toluene and Butanone. Irritating to eyes and respiratory system. Keep container in a well ventilated place. Keep
away from sources of ignition – No smoking. Do not breathe
fumes. Avoid contact with eyes. Do not empty into drains.
Take precautionary measures static discharges.
14
3
REPAIRING A DRY SUIT
REPAIRING A DRY SUIT
Pressure testing
3
Tools for repairs
These wooden tools are handy equipment for major repairs of latex
parts:
Pressure testing
To determine the position of a leak/damaged area of the suit, carry out
a pressure test as follows:
A. Cylinder with spherical top: for exchange of latex hoods and
neckseals.
B. Topped cone: for exchange of latex cuffs. All measurements in cm
and inches.
1 Seal openings
Seal neck opening, by for example placing a suitable-sized ball in the
neck-seal. Make sure the seal stretches and grips the ball.
Seal cuffs, by for example placing an empty plastic bottle in each of
the cuffs making sure the latex grips the bottles.
2 Inflate and find leaks
Inflate the suit and locate the leak
by using soapy water or by partial
submergence of the suit in water.
Mark the leak with a chalk before
deflating the suit.
Verify repairs
After repairs, allow 3 hours for curing, and then carry out another
pressure test to ascertain the integrity of the suit.
CAUTION!
Risk of damage to the suit material due to over inflating. Do not over
inflate the suit.
15
16
3
REPAIRING A DRY SUIT
REPAIRING A DRY SUIT
Gluing preparations
3
Wherever possible, dry suit repairs should be undertaken by a qualified dry suit repair service. If the dry suit owner undertakes any
repairs, the following procedures should be followed to ensure proper
techniques are employed.
4 Clean with solvent
Clean all surfaces to be glued.
Use heptane or white gas.
3
1 Remove the tape
On suits with tape around the latex
cuffs, remove tape by using cleaning
solvents. Use heptane or white gas.
WARNING!
Risk of eye injury from contact with solvent. Wear proper eye covers
to protect your eyes.
WARNING!
Risk of eye injury from contact with solvent. Wear proper eye covers
to protect your eyes.
2 Remove the cuff
Pull latex until old glue releases.
3 Sand new latex
Sand new latex 20 mm (3/4”) on inside,
and when using tape, 12 mm (1/2”) on
outside as well.
Sand also suit sleeve 25 mm.
17
18
REPAIRING A DRY SUIT
REPAIRING A DRY SUIT
Gluing
3
1 Apply two layers of glue
Apply two layers of glue with
15 minutes drying time for each
layer, both on the inside of the
new latex cuff and on the outside
of the sleeve.
3 When using tape, apply two
coats of glue to the area it will
cover, on the outside.
4 Apply tape
Apply the tape half on suit and half
on latex cuff to cover the joint between latex and suit material. Smooth
with a roller. Overlap cloth tape.
2 Attach the new latex
cuff
Use a bottle or a round piece of
wood inside the sleeve as a form
to ease the installation of the
new latex cuffs.
Apply the new latex cuff. Avoid
streching the latex cuff. Attach
by using two opposite points and
work your way around one side
at a time. (Pull it loose and begin
again if it becomes uneven).
There must be no folds or creases, the latex should lie smoothly
along the cuff.
When the latex is properly attached, secure it by pressing
firmly with the roller.
5 Apply talcum powder
Neutralize excessive glue with unscented talcum powder, especially
on the inside of the latex part.
19
20
3
REPAIRING A DRY SUIT
REPAIRING A DRY SUIT
Patching
3
6 Verify repairs
After repairs, allow 3 hours for
curing, then carry out a pressure
test to ascertain the integrity of the
suit, as described in the section on
Pressure testing.
1 Locate the leak
Carry out a pressure test as described in
the section on Pressure testing.
7 Service your suit and its
parts on regular basis
Let an authorised Viking dealer
service your dry suit, valves, inflator
hose, zipper and seals on regular
basis and for more complicated
repairs. At least one service a year
must be undertaken, but more
frequently if the suit is in heavy or
extraordinary use.
2 Cleaning/Sanding
The suit must be dry.
Wash hands: oil and grease must be
removed.
Clean damaged area by rubbing with
sand paper and remove loose particles.
Apply three layers of glue, allowing
15 minutes drying time per layer.
3 Patching
Choose a suitable sized patch and remove the backing. Apply vulcanisation
solution (rubber suits) or two layers of
glue (polyurethane suits) on the patch
and the suit. Allow to dry and apply the
patch to cover the damaged area.
CAUTION!
Risk of severe damage to the dry suit or its equipment leading to
malfunction, if the suit is not properly serviced. Service must be
undertaken, even if the suit is not in regular use.
21
22
3
MAINTENANCE
REPAIRING A DRY SUIT
Storage and maintenance
3
4 Fixing the patch
Use a roller over the glued area to press
out any air bubbles and to make sure
the surfaces are firmly bonded.
Pay special attention to the areas where
the glued parts cross over tape.
5 Talcum powder (rubber suits
only)
Neutralize excessive solution with
unscented talcum powder.
6 Verify repairs
After repairs, allow 3 hours for curing,
then carry out a pressure test to ascertain the integrity of the suit, as
described in the section on Pressure
testing.
CAUTION!
Risk of severe damage to the dry suit or its equipment leading to malfunction, if the suit is not properly stored and maintained. Follow the
instructions in this chapter.
1 Clean the suit
Rinse with fresh water, or a mild soap
solution. Do not forget to rinse valves, as
described in this chapter.
2 Dry the suit before storage
To dry the inside, wrap the suit inside out,
if necessary.
3 Use unscented talcum powder on
latex parts
Do not use silicone lubricants.
4 Lubricate the zipper
The only acceptable lubricant is the one
recommended by Viking and the zipper
manufacturer, a fluid and a wax. Apply
the fluid to the inner elements. Use wax
sparingly. Close and open the zipper
carefully, twice.
Under no circumstance should silicone
spray be used on the zipper or any other
portion of the suit.
5 Roll up the suit
Roll up the suit, starting with the feet.
The zipper should be open during storage.
23
24
SILICONE
4
MAINTENANCE
MAINTENANCE
Valves
6 Store the suit
Fold sleeves around the suit. Put the suit in
the bag and close it carefully.
4
7 Inspection
For suits kept in storage and not in use we recommend annual inspections.
The inspection can either be performed by an authorised Viking dealer
or by the user/owner of the suit. In the latter case, the inspection should
at least consist of the following steps:
Visual inspection for any kind of damage to suit material, seams
and components.
Make sure all components are properly attached.
Perform a pressure test (see Pressure testing).
Check valve function (see clause 3 under Valves below.)
Any sign of damage, leak or malfunction means the suit must not be
used. Any suit that does not pass the inspection completely must be repaired or, if not possible to repair, taken out of service and discarded.
1 Maintenance outlet valve
After each dive rinse with fresh water to
make sure no salt, sand or other particles
are trapped in the sealing surface.
2 Maintenance inlet valve
After each dive rinse the inlet valve and the
inflator hose with fresh water. Keep the
valve and hose connected and pressurised
while rinsing with fresh water. Inspect the
valve and hose, making sure no dirt is stuck
between the housing and push button.
3 Check that valves are functioning
To check if the valves are functioning,
inflate suit with inlet valve and release air
manually through the outlet valve. Check
that each valve opens and closes properly.
4 Service your suit on a regular basis
Let an authorised Viking dealer service
your suit and its parts, valves, inflator hose,
zipper and seals on a regular basis. At least
one annual service must be undertaken, but
more frequently if the suit is in heavy or
extraordinary use.
CAUTION!
CAUTION!
Risk of severe damage to dry suit parts made of rubber, leading to
leakage and taring, if the suit is exposed to ozone or solvents. The dry
suit must be stored away from light, with no ozone generators (electrical
equipment) or chemical solvents present.
Risk of severe damage to the dry suit or its equipment leading to
malfunction, if the suit is not properly serviced. Service must be
undertaken, even if the suit is not in regular use.
25
26
4
MAINTENANCE
Technique
Disposal
All suits that are damaged beyond repair and cannot be made to pass
all inspections and checks described above must be taken out of service
and disposed of.
4
DRY SUIT DIVING
The proper method of disposal will depend on local regulations. In
general the suit should be treated as rubber waste and as such the proper
method of disposal is normally incineration or landfill.
For suits that are contaminated with chemicals local regulations for the
chemicals in questions must be taken into account.
1 Before you go into the water
Before you go into the water, put on the
dry suit as described in the chapter on
Dressing. Make sure all equipment is in
place and fully functional.
2 Go into the water
Enter the water feet first, with the outlet
valve closed and with a little air in the suit
to assure positive buoyancy for surface
flotation.
3 Check buoyancy for proper
weighting
Empty your separate bouyancy compensation device/buoyancy aid (BCD). See
your BCD manual. Open the valve completely by turning the valve lid counter
clockwise. Raise the valve to the highest
point allowing air to exhaust.
WARNING!
Diving with a dry suit can be extremely dangerous. Do not attempt
to use this dry suit without prior specialized training and certification
by a qualified and certified diving instructor. Use all necessary and
appropriate equipment.
27
28
5
DRY SUIT DIVING
5
DRY SUIT DIVING
4 Weights
Add weight until you are slightly negative
(0.5-1.0 kg (1-2 lbs) heavier than neutral).
Normally the diver will need 8-14 kg (1830 lbs) of weight depending on the type of
underwear worn, diving equipment used,
and type of diving being done. Remember
to add the weight you will need to compensate for the weight you will lose through
consumed tank air. Your weighting should
allow you to make a decompression at ten
feet at the completion of your dive with a
tank containing 500 psi of air or less. You
should now be properly weighted.
8 Descending
If you wish to descend, roll over on your
right side so the outlet valve (and left shoulder) is at the highest point, allowing the
valve to exhaust some air. Your buoyancy
will decrease and you will slowly sink.
5 Allowing you to descend
When you are ready to descend, open the
outlet valve (turn the lid counter clockwise). Raise your upper left arm so the
outlet valve is at the highest point allowing
suit air to exhaust.
Slow your ascent
While ascending, or swimming towards
shallow water, the outlet valve will release
expanding suit air in proportion to the
decrease in ambient pressure. If you are
properly weighted, you should be able to
control your rate of ascent simply by raising
or lowering your upper left arm and the
exhaust valve. To slow your ascent, lift your
upper left arm so the valve is at the highest
point and can exhaust air freely.
6 Relieve suit squeeze
When you have descended a couple of
metres (yards), turn the valve lid clockwise
1/4 turn and add as little air to the suit as
needed to relieve suit squeeze.
7 Gain neutral buoyancy
While swimming at the same depth, you
do not have to adjust the outlet valve. Gain
neutral buoyancy and swim relaxed.
29
Stop your descent
To prevent further venting of suit air return
to normal swimming position and, if necessary, add a little air to the suit to regain
neutral buoyancy.
9 Ascending
Additional venting
If additional venting is necessary, fully
open the valve counter clockwise or the
valve can be manually depressed to obtain
the same result.
30
5
DRY SUIT DIVING
5
Extra lift during ascent
If you want extra lift during ascent, simply lower the valve by bringing
your upper left arm to your side. If further lift is needed, turn the valve
lid slightly clockwise.
Inflator valve free flowing
If the inflator valve starts to free flow at an uncontrolled rate, disconnect the inflator hose.
Emergency ascent
If you are unable to inflate the suit or if the suit is leaking air, dump
the weight belt to gain positive buoyancy.
10 On the surface
On the surface immediately close the outlet
valve by turning it clockwise and add a little air
to the suit for flotation. In rough conditions
you may need buoyancy aid on the surface.
Use your separate buoyancy compensator/aid,
rather than adding extra air to the suit.
DRY SUIT DIVING
Valves
1 Outlet valve
Our patented outlet valve is located on the
upper left arm of the suit within easy reach
of the right hand for adjustment, as well as
for automatic air dumping when the diver
is upright. It is located well out of the way
of harnesses and other equipment.
On ascent, providing the diver is properly
weighted and the valve is properly adjusted,
the outlet valve dumps air automatically
to maintain perfect buoyancy control and
helps to prevent an uncontrolled ascent.
A properly adjusted valve will give you
handsfree buoyancy control.
The outlet valve can be adjusted to
maintain the positive pressure inside the
suit. Air can also be dumped at any time
by depressing the valve lid.
WARNING!
WARNING!
Do not use other gas than air for inflation of the suit. Using oxygen
enriched gas for inflation one is in risk of fire and explosion. Using
argon there is a risk of this gas getting into a full face mask and the
breathing system through the hood. This has to be avoided because
the effect of breathing argon is more narcotic than what nitrogen is
when under increased partial pressure.
WARNING!
The outlet valve is critical to safety. Risk of valve malfunction which
may result in unability to ascend during dive, if the valve is tampered
with. The outlet valve does not contain any user serviceable parts.
Replacement should be made by your authorised dealer.
WARNING!
Risk of fatal injury from air embolism or decompression sickness, due
to rapid ascent. Do not attempt to use your suit as a lifting device.
Dropping the load may cause uncontrolled and rapid ascent.
Diving with defective equipment can cause injury or death. Do not
dive if any equipment fails to function as intended.
Have them repaired or replaced at an authorised dive shop.
31
32
5
DRY SUIT DIVING
5
2 Increase Buoyancy
To increase buoyancy - simply lower the
outlet valve and add a small amount of
air to the suit, or turn the outlet valve lid
clockwise, which will increase the pressure
setting, and add a small amount of air to
the suit.
3 Decrease buoyancy
To decrease buoyancy, simply raise the
outlet valve (by lifting yor left upper arm),
or turn the valve lid counter clockwise,
which will reduce the pressure setting. By
depressing the valve lid, air can be dumped
at any time, regardless of the pressure setting, providing the valve is at the highest
point of the suit and the suit air has free
access to the outlet valve.
DRY SUIT DIVING
4 Inflator valve
The Viking inflator valve is operated by
an easy to reach large push button. It is a
one-way valve, which prevents the escape of
suit air from the suit, if the inflator hose is
disconnected from the valve.
The valve can be easily removed for cleaning and maintenance.
Should it become clogged with mud or salt, flush it thoroughly with
water and blow it dry with air from the suit inflator hose.
Only non aerosol silicone lubricants should be used on the inflator
valve and only in the hole of the male connector.
CAUTION!
The manufacturer does not guarantee the function of the valve mounted in other types of suits. The valves and hoses are designed to work
together, and cannot be used separately or together with other valve
types.
WARNING!
Diving with defective equipment can cause injury or death. Do not
dive if any equipment fails to function as intended.
Have them repaired or replaced at an authorised dive shop.
CAUTION!
The manufacturer does not guarantee the function of the valve mounted in other types of suits. The valves and hoses are designed to work
together, and cannot be used separately or together with other valve
types.
33
34
5
DRY SUIT DIVING
5
CONTAMINATED WATER DIVING
Hose
Foreword
1 Assembly of hose to low pressure port
The inflator hose must be connected to a LOW pressure port on the
regulator’s first stage or to another
source of low pressure air.
Maximum working pressure is
15 Bar (225 psi). The inflator hose
is manufactured with UNF 3/8”
coupling.
Our goal with this chapter is to provide you with the information on
Viking dry suits needed to make informed decisions to help ensure
protection for the diver in contaminated water diving environments.
In certain circumstances, your best decision may be not to dive.
2 Storage of hose
Avoid bending the hose too sharply. Do not bend the hose below
the minimum radius of 4 cm
(1.5”).
WARNING!
When possible, diving in contaminated water should be avoided. If you
are not trained for this type of diving operation, do not attempt it.
The information in this chapter does not provide all the information
or training needed to plan a dive operation. The diving supervisor and
the diver must take responsibility for the safety of the diver based on
a risk assessment of the actual conditions at the dive site.
The data contained here has been developed from tests conducted under
controlled laboratory conditions, not in actual diving environments.
The user must determine the applicability of these test results for the
actual exposure anticipated.
The test results are specific for Viking materials and components. Comparisons to the performance of other manufacturers’ diving equipment
cannot be made.
35
36
6
CONTAMINATED WATER DIVING
6
CONTAMINATED WATER DIVING
Suggested diving systems
Gloves
The following diving systems offer varying amounts of protection.
There are uses, environments and chemicals for which these systems
are unsuitable. It is the responsibility of the diving supervisor and the
diver to review the available data and verify that the system is appropriate for the intended use.
For contaminated water diving the HDS rubber mittens (2-finger and
3-finger rubber mittens) are recommended. Being made from the same
material, they offer the same protection as the Viking HDS suit.
6
Viking HDS 1000 suit
Attached vulcanized rubber dry hood (Magnum or Turbo)
Attached cuff ring system or Viking Bayonet glove system
Attached dry gloves (see below)
Full-face mask with positive pressure system and double exhaust
valves
Viking HDS 1500 suit with attached helmet yoke and valves
Attached cuff ring system or Viking Bayonet glove system
Attached dry gloves (see below)
Demand helmet and double exhaust valves in the suit
Viking HDS 1500 suit with attached helmet yoke (no neck seal or
valves)
Attached cuff ring system or Viking Bayonet glove system
Attached dry gloves (see below)
Free Flow helmet (air hat)
37
38
CONTAMINATED WATER DIVING
6
CONTAMINATED WATER DIVING
Decontamination - Recommendations and considerations
Inspection
Decontamination shall be performed on the scene when a dry suit
has been exposed to, or potentially exposed to, hazardous materials.
On scene decontamination shall be performed while the suit is still
being worn to minimize potential contamination of the wearer during
removal.
An assessment of the need for additional decontamination shall be
made if the dry suit is to be reused after it has been exposed to hazardous materials and initially decontaminated. A close visual inspection
of any diving equipment used in contaminated water is essential once
the gear has been decontaminated.
Due to the vast number of chemicals and their different properties, no
guaranteed decontamination procedure exists. The best way to decontaminate must be decided for the specific chemical encountered. This
decision may only be made by people educated for this task and with
a good working knowledge in chemistry.
During the inspection, the diver should look for any of the following:
Brittleness of the material
Colour changes in the material
Swollen material
In the absence of such knowledge, the minimum decontamination
shall consist of rinsing or spraying the garment with water and scrubbing lightly with a soft bristled brush using Simple Green (10:1 water
+ Crystal Simple Green or Simple Green All-purpose Cleaner). This
process shall be repeated at least twice.
The health and safety of the diver, both during and after the decontamination process, and the health and safety of the personnel applying
the decontamination agent, must be taken into consideration.
After removal, the drysuit must be placed in a suitable container
for subsequent cleaning, additional decontamination, inspection or
disposal.
39
Any of the above conditions should make you immediately suspect
the equipment may have been damaged and should not be used again
without further examination by Trelleborg/Viking. However, just
because a piece of equipment visually appears to be in good condition
the performance cannot be guaranteed.
WARNING!
Damage of diving equipment due to exposure to contaminants cannot always be identified by visual inspection. Caution must always be
used before reusing equipment that has previously been exposed to
chemical environments.
40
6
6
CONTAMINATED WATER DIVING
CONTAMINATED WATER DIVING
The assessment shall consider the severity of the chemical exposure
including such factors as:
Duration of the exposure
Concentration of the hazardous materials
Toxicity of the hazardous materials
IDLH, PEL, TLV* recommendations
Skin absorption and cancer notations
Acute and systemic toxicity (poison, suspect carcinogen, carcinogen,
teratogen)
Data contained in this chapter has been developed from tests conducted
under controlled laboratory conditions, not in actual diving environments. The user must determine the applicability of these test results
for the actual exposure anticipated.
The assessment shall consider the chemical affinity between the hazardous materials and the dry suit including:
Breakthrough times
Permeation rates
Discoloration or other manifestations of the contamination
Degradation
The test results are specific for Viking materials and components. Comparisons to the performance of other manufacturers’ diving equipment
cannot be made.
There are uses, environments and chemicals for which these systems
are unsuitable. It is the responsibility of the user to review available
data and verify the system for the intended use.
If there is any question if the dry suit can continue to be used, Trelleborg Protective Products AB should be contacted for advice. Please
call to obtain an authorization before returning any suits.
* IDLH: Immediately dangerous to life and health. Environments
that pose an immediate threat to life or health.
PEL: Personal exposure limit.
TLV: Threshold limit value. Specifies the ceiling limit of a toxic
substance an ”average” person in reasonable health may be exposed
to repeatedly on a daily basis with no ill effects. These benchmarks
are set and revised on an annual basis by the American Conference
of Governmental Industrial Hygienists.
WARNING!
When possible, diving in contaminated water should be avoided. If you
are not trained for this type of diving operation, do not attempt it.
41
42
6
CONTAMINATED WATER DIVING
6
APPENDIX
EN 14225-2 chemical hazard protection approval data
Customer information to be provided at the point of sale
EN 14225-2 contains requirements for dry diving suits offering protection from chemical hazards. The Viking HDS is approved to these
requirements. Test data are given below. For further information see
EN 14225-2 or consult an authorized Viking dealer or Trelleborg
Protective Products AB.
In accordance with EN 14225-2 we provide the following information
which is intended to be made available at the point of sale.
EN 14225-2 test chemicals
CATEGORY
SYMBOL CHEMICAL
CAS-NR
CHEMICAL
FAMILY
Acids
Ac
H2SO4 50% (aqueous)
7664-93-9
Inorganic acid
Bases
Bs
NaOH 50% (aqueous)
1310-73-2
Alkaline
solution
Polar solvent
Ps
Isopropanol
67-63-0
Alcohol
Hydrocarbon
Hc
Toluene 0.05% (aqueous)
108-88-3
Aromatic
hydrocarbon
Fuel oils
F
Liquid B - 70% iso-octane/
Petroleum
30% toluene
Liquid F - 80% paraffin oil/
Diesel/
20% 1-methyl naphthalene
aviation fuel
Note: The fuel oils B and F are as described in ISO 1817:1999
Risks, conditions and limitations of use
Please see the information in following sections:
WARNING! on page IX of this manual
� Safety instructions on page IV of this manual
� Warning on allergic reactions on page V of this manual.
Size designations
For sizes see the marking in the suit which is explained on page VII of
this manual. Charts of available sizes are available at www.vikingdiving.
com.
Compatibility
Diving suits with latex neck seal and cuffs may be combined with a hood
and gloves of your choice. Fixed gloves and hoods must be Viking.
The inflator hose is manufactured with UNF 3/8” coupling and is
compatible with all major diving breathing apparatuses. See also page 5
and 35 of this manual.
Viking HDS test result
CHEMICAL
PERMEATION BT* TIME
(MINUTES)
EN 14225-2
PROTECTION
INDEX
Material
Seam
Zipper
Sulphuric acid, H2SO4 50% (aqueous)
> 480
> 480
> 480
High
Sodium hydroxide, NaOH 50% (aqueous)
> 480
> 480
> 480
High
Isopropanol
> 480
> 480
> 480
High
Toluene 0.05% (aqueous)
> 480
> 480
> 480
High
Liquid B
127
126
48
High/low
Liquid F
> 480
> 480
> 480
High
*BT=Breakthrough
43
44
© Trelleborg Protective Products AB. 0710
Trelleborg Protective Products AB, Johan Kocksgatan 10, SE-231 81 Trelleborg, Sweden
Tel: +46 (0)410-510 00, Fax: +46 (0)410-518 50
[email protected], www.vikingdiving.com