1
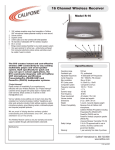
Wireless Receiver
1. Set the volume controls on both the UHF receiver and the mic to 10 o’clock.
2. If using only neckband or clip on mics, it is recommended that the mic volume on the M319
Belt Pack Transmitter (not the UHF receiver) is turned to maximum. The volume control on the
Belt Pack Transmitter can then be used to adjust the mic volume.
3. If using mics which DO NOT have individual volume controls it is recommended that the
microphone volume control be set at 10 o’clock and then re-adjusted to the desired volume
as required.
4. It is very important to ensure that the channel number selected on the PA159 is the same as
the channel number selected on the mic. The channel indicator can be found on the Belt Pack
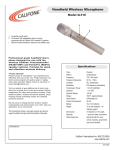
Transmitter (M319) in the case of neckband & clip on wireless mics & on the handle of the
wireless handheld mic.
5. It is advisable to ALWAYS have spare batteries handy for the Belt Pack Transmitters and
Handheld radio mic.
6. Nothing is more embarrassing than to have them wear out during a presentation & not having
spares on hand.
7. If a mic is being used within 4 to 6 feet from the front of the speaker this will produce what is
known as “feedback “ - a shrill screeching sound. Ensure the operator is far enough away to
prevent this (read more on page 4).
8. The wireless microphones can be used up to 150 feet from the main unit. N.B. The channel
numbers are preset at the factory so unless anyone tampers with them there is no need to
worry.
9. If using the wireless receiver, make sure the frequency is set on the Califone wireless mic or
transmitter to the same matching frequency on the PA159.
Volume Control
1. When the main power switch is turned on, the Volume Control is at the lowest level to
prevent accidental damage to the amplifier.
2. The volume can be controlled by using the Vol+/Vol- buttons on the rear panel or the RC-300
Infrared remote volume control. Volume is adjusted (+/- 4.5dB) with each push of one of the
volume control buttons. Maximum volume is reached after approximately ten pushes.
NOTE: The remote control must be used in front of the speaker as the sensor is behind the
speaker grill. The volume control effects the loudness of both wired and wireless microphones.
Line Inputs
The line-level RCA input jacks can be used with audio sources such as computers, DVD players,
LCD projectors, CD players or connecting another wired PresentationPro. (The L+R stereo outputs
to a mono signal without the need for adapters.)
Line Out
The ¼” line out is used to connect to the input of another piece of equipment such as a another
amplified speaker. The outputs are monaural and volume level will depend on the volume of the
source. For example, the tape or CD player level is controlled by the tape/CD volume control. Line out
is independent of the Volume Control.
Tone Controls
The separate base and treble controls provide a wide range of adjustment for increasing or decreasing
either the bass or treble from “flat” frequency response. The center or “12 o’clock” position is flat.
Mic Input (Unbalanced)
An unbalanced, low impedance microphone input. For use with standard dynamic microphones that have
a 1/4” phone plug.
Mic Input (Balanced)
Use this input for a dynamic (low impedance) microphone with an XLR plug or condenser/electret
(high impedance) microphones which may need phantom (polarizing) voltage.
Mic Impedance Switch
This switch is used to compensate for mic impedance differences. It assures full amplifier output
regardless of the microphone used. Note: All connections must be made with shielded cable to avoid
hum, buzzing, or radio interference.
LED
There are 3 LED indicator lights behind the speaker grill to give visual assurance of power, RF and
audio reception.
Feedback Information
What is Feedback? Feedback is a ringing, howling, or shrill sound that is self-generated by the sound
system when using a microphone. It is the result of sound from the speakers being picked up by the
microphone(s) in use and then re-amplified by the system. This can form a self-sustaining loop that
can damage the sound system if allowed to continue, not to mention annoyance to persons nearby.
How to prevent feedback
ALWAYS STAND BEHIND THE SPEAKER WHEN USING A MICROPHONE. If feedback does occur,
immediately reduce the volume. Always plug in the microphone before turning on the power.
Reducing the “treble” control may also help.
NOTE: For wireless microphone operation, the wireless receiver audio output can be plugged
into “Line-In”.
3
PA159 Manual - JH 2010.03.18.indd 6-7
4
3/19/2010 9:58:50 AM