1
Step 1
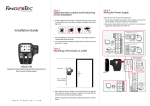
Determine the Location and Position
of the Installation
• Avoid installing the terminals in locations that have contact with
B. FLEXI-KIT
a strong light source (e.g direct sunlight, spotlight, fluorescent
light, etc)
TA500
1
2ABC
4GHI
5JKL
6MNO
7PQRS
8TUV
9WXYZ
3DEF
/
0
ESC
M/OK
[email protected]
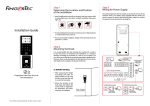
Installation Guide
• Avoid installing the terminals in locations prone to high moisture
or condensation levels in the air
• The recommended installation height of the terminals from the
ground is 1.2 meter.
FingerTec offers flexi-kit for all its time attendance models. Attach
the terminal on the flexi-kit for convenience.
Step 3
Wiring for Power Supply
Step 2
Mounting Terminals
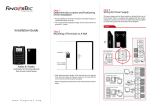
It is recommended that the terminals be mounted to a wall in
to ease the process of enrolment and verification. In a situation
whereby mounting the terminals on a wall is not an option, you
can choose to use flexi kit to convert the terminals to desktop units.
However, there are limited options for the flexi kit and some terminals might not be suitable to be placed on flexi kits.
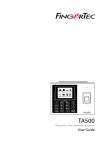
TA500
Biometrics Time Attendance System
• After measuring the height
• Attach the terminal to the
back plate and tighten the
screws. Refer to Appendix I
for dimensions and measurements of installation.
© 2015 Timetec Computing Sdn Bhd. All rights reserved.• 092015
........
TCP/IP PORT
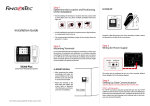
Please use the power adaptor provided in the package or alternatively you can opt for a linear power supply with specifications of
5VDC 2A. Plug one point of the power adapter to the terminal and
the other end to the power outlet. Don’t exceed the recom-mended
voltage or current to avoid damaging the terminal.
A. MOUNT ON WALL
accordingly and make relevant marking on the wall,
drill the screws into the wall
to secure the back plate.
POWER PORT
TA500
1
2ABC
4GHI
5JKL
6MNO
7PQRS
8TUV
9WXYZ
/
0
3DEF
ESC
M/OK
[email protected]
Step 4
Setting Up Data Communication
(Skip this step if you are using USB flash disk to transfer data)
4 feet / 1.2 meter
(recommended)
TCP/IP – LAN Connection
For TCP/IP connection, plug the special RJ45 jack into the TCP/IP
(LAN) Port of the terminal. Connect the other end (normal RJ45 jack)
to the local area network hub or a PC. Configure the device ID, IP address, subnet mask and Gateway in the terminal (refer to the hardware user manual for details).
Step 5
Finalizing the Installation
Appendix I
Terminal Dimensions and Measurements
1. Check that all cable connections are done correctly.
2. Attach the terminal to the corresponding back plates and
tighten the screws to secure the terminal on the wall.
3. Switch on the power to the terminal.
4. Start using the terminal.
44 mm
40 mm
40 mm
60 mm
Other Accessories
FingerTec offers complementing accessories which can be used with
your terminals. These optional accessories are available at
http://accessory.fingertec.com
AdapTec Plus
AdapTec Plus adalah catu daya
12VDC termasuk daya liner pengubah
110~ 240VAC. AdapTec Plus memasok
daya 12VDC ke terminal FingerTec dan
sistem pengunci pintu dan secara bersamaan mengisi satu baterai
cadangan 12VDC 7.0Ah. Apabila listrik mati, baterai cadangan secara
otomatis memasok daya ke terminal dan sistem penguncian pintu.
AdapTec Plus juga berfungsi mencegah agar pintu yang dirusak
tidak bisa dibuka
39mm
41mm
134 mm
70mm
68mm
Mini UPS
Mini UPS 12VDC is a mini portable backup power supply with 12VDC output, supplying 12VDC power for
FingerTec Time Attendance terminals.meddled with by
unauthorized persons.
Enclosures
An acrylic-made enclosure that protects your terminal from the risk
of meddling by unauthorized individuals. Our custom made enclosure are specially designed to fit your terminal perfectly with specific
openings for fingerprint scanner and buttons. Our enclosure can be
used to mitigate surrounding mild environmental hazards and help
lengthen the lifespan of the terminals. However, do note that the enclosure is not dust-resistant and waterproof if subjected to extreme
weather conditions.
Flexi Kit
A simple stand which can be used to support your terminal. You can
use Flexi-Kit and convert your terminal into a desktop unit. By installing the terminals onto a Flexi-Kit, you do not need to go through the
process of mounting your terminals on a wall. The simplicity of the
Flexi-Kit’s design ensures that it is portable and easy to set up, making it ideal as a demonstration prop too.
25mm
84 mm
100 mm
184 mm
Front View of Back Plate