Download manual
Transcript
Keymaker_for_ML.
1.
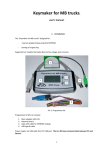
Main purpose – transponder keys programming (based on PCF 7935) in to Mercedes Benz
ML(WDB163…). Also you can program new original remote keys based on PCF 7930. If you’d like to
program used remote key you have to change transponder inside it. The software works with according
ECU dumps too.
This user manual can contain some old details because the software is updating permanently. So use
please HELP directly in the software too.
Connect adapter to USB port of your PC and install drivers. Find it on CD.
ML models cars contain key information in AAM unit up to 11/1999. Location: in engine compartment under the fuse and relay module. Radio remote control information is in the same unit too.
ML models made after 11/1999 contain key information in EAM unit (exactly in FBS module cartridge). Location: under steering column. Radio remote control information still in AAM unit located
in engine compartment.
Device has OBD2 cable. Plug it in diagnostic connector of the car.
On the other end of the device you саn see a socket for outer antennae connection to read & write transponders, USB socket and a socket to connect outer source of power (12 B, 0,5A, “plus” in the centre).
Note that outer source of power should be connected only when you connect the removed from the
vehicle units in laboratory conditions. In normal conditions (which means right in the car) there is
no need of outer power.
1
2. Run the program.
If you see the following window
It means that the adapter is not connected to the computer or the drivers are not installed. If the adaptor is
connected and the drivers are installed then you see
You see that the Connect button is active. Connect the cable to the device diagnostics socket, turn on the
ignition and press Connect button.
It is necessary to point that the choice of a connection ECU(AAM, EAM or FBS) is done automatically.
The mechanism of choosing is based on a supposition that you deal with a working vehicle and there is
communication with all the ECUs.
2
3.
Working with FBS. Let’s assume you have connected the device to a vehicle of 2001 year of production.
When you press Connect you see the following
At the top you see the name of the ECU, its number according to Mercedes catalogue, hardware and
software support.
Lower you can see Used keys window. The keys positions are ticked – they are the active keys.
Then you can see Blocked keys windows and Blocked always keys. These are DAS terms. In our program
you can both bock and unblock even the “blocked always keys” which is different from DAS.
Next you can see Write key number where you mark the key position. The key chosen for wroting.
Open Chip button is used to “open” previously written transponder. Later you can again use the transponder .
Note that the used original keys cannot be “opened” in this way! Their transponder is locked!
You can see that there are “active” keys positions from 1 to 3. In fact if there are more than 3 “active”
keys it means that some additional keys have been written. We can also see that there are no blocked
keys.
3
4. Checking the key number.
Let’s assume a client wants to have an additional key written while he has one original key. You have to
know the original key number.
Put the original key on the outer antennae like this
Press Rd Key N.
You see the window
It means that the only original key is written by number 2. We make a decision to write an additional key
by number 3 to replace the lost one! It is necessary to say that you can write a new key to any other position from 4 to 8 and block the key at position 3 by ticking the necessary boxes.
4
5. Writing a new key.
Press connect then place the clear transponder(key) on the outer antennae in the following way
or
Choose the key number for writing (in our example it’s number 3) and press WR KEY.
5
When OK appears in the bottom left window the window looks like this
When the writing is finished we recommend some testing – press Connect then Rd Key N and make sure
that the new key has number 3
6
Press Connect and tick the absent key you want to block(key number 1 in our example)
You can see that Apply button has become active – press it!
7
6. Repair button.
Sometimes when the accumulator is low the key which was placed in the ignition lock to start the engine
stops normal functioning. Start Error message appears on the dashboard when you start the ignition. It’s a
common case with older vehicles (AAM keys). It’s less common with newer vehicles (FBS keys (a cartridge inside an EAM ECU). When you press Repair button the relevant ECU’s EEPROM is corrected
automatically and this “lost” key starts its normal functioning! This button is efficient both for older and
newer types of vehicles.
7. AAM work.
Let’s assume you deal with a vehicle up to 11/1999 year of production. Connect the cable to the diagnostics socket of the car and press Connect. You see the following.
Here you additionally see Valid radio window, according to the information in the window you can make
a conclusion that there are two keys (of all the three “active” keys) positioned 2 and 3 which have remote
control programming of the central lock radiochannel.
Otherwise your work with AAM is identical to FBS work described above.
8
8. EEPROM bookmark. Choosing this bookmark you can see the following window
The interface is quite simple and hardly requires explanation. When the ECU you want to read is chosen
you can read EEPROM field, as well as write and verify it. You can stop the reading process at any moment by pressing Esc button on your computer. After you press Read Full all the data from the processor
is read which takes a lot of time!
9. Radio Code bookmark.
To write the radio channel you must have a written transponder. Then you simply follow the instructions
on the screen.
9


