1
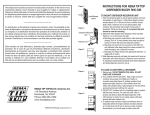
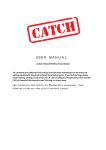
®
Proline
Käyttöohje
Bruksanvisning
Instruction Manual
Proline
®
Käyttöohje.....................................................1
Bruksanvisning ...........................................23
Instruction Manual ......................................45
Specifications .............................................67
CONTENTS
1. INTENDED USE ..................................................................................46
2. YOUR NEW BIOHIT PROLINE ELECTRONIC PIPETTE .................46
2.1.
Biohit Proline single-channel electronic pipettes ..................46
2.2.
Biohit Proline multichannel electronic pipettes ..................... 47
2.3.
Biohit tips ................................................................................ 47
3. UNPACKING & PREPARING THE PIPETTE FOR USE ...................48
3.1.
Biohit Proline Charging Stands and Carousels .....................48
3.2.
Charging of the Pipette ...........................................................49
3.3.
Electrical Specifications .........................................................49
4. PIPETTE MATERIALS ........................................................................50
5. PIPETTE DESCRIPTION ....................................................................51
5.1.
Controls ................................................................................... 51
5.2.
START Button.......................................................................... 51
5.3.
Direction Symbols................................................................... 51
5.4.
Display ..................................................................................... 51
5.5.
Sealing and Ejecting tips ........................................................52
5.6.
Optional Filters ........................................................................52
6. PROGRAMMING THE PIPETTOR ....................................................53
6.1.
Mode Selection and Mode Recall ..........................................53
6.2.
Setting Speeds .......................................................................53
6.3.
Pipetting Mode (P) ..................................................................54
6.4.
Reverse Pipetting Mode (rP) ...................................................54
6.5.
Multi-Dispensing Mode (d) .....................................................55
6.6.
Diluting Mode (dd) ...................................................................56
6.7.
Mixing Mode with Pipetting or Diluting (*) ..............................56
6.8.
Sequenced Dispensing Mode (sd) .........................................58
6.9.
Multi-Aspirating Mode (SA) ....................................................58
7. PIPETTING RECOMMENDATIONS ..................................................59
7.1.
Dispensing with Blow-out.......................................................59
7.2.
Dispensing without Blow-out .................................................60
7.3.
Other Recommendations .......................................................60
8. STORAGE ............................................................................................60
9. CALIBRATION .....................................................................................61
9.1.
Testing the Performance.........................................................62
10. MAINTENANCE ..................................................................................62
10.1. Cleaning the tip cone ..............................................................63
10.2. Battery Replacement ..............................................................63
11. TROUBLE-SHOOTING .......................................................................64
12. WARRANTY INFORMATION .............................................................66
13. RECYCLING INSTRUCTION (WEEE) ...............................................66
45
1.
INTENDED USE
This liquid handling device is designed and manufactured to be used with
the IVD-product as an IVD-accessory and as a stand alone laboratory
equipment.
2.
YOUR NEW BIOHIT PROLINE ELECTRONIC PIPETTE
Your new Biohit Proline Electronic pipette has been designed for maximum
performance and accuracy with ergonomic and user-friendly operation.
The microprocessor controlled system reduces the possibility for human
error and instrument contamination by controlling all piston movements.
Also selected models offer replaceable tip cone filters to help prevent
contamination and damage.
Its light-weight and ergonomic controls take the effort out of pipetting to
help reduce the risk of repetitive strain injuries (RSI) that are frequent in
manual pipetting. All Biohit Proline Electronic pipettes operate on the air
displacement principle and use disposable tips.
2.1. Biohit Proline single-channel electronic pipettes
Cat. No.
Volume Range
Increment
Tip
710520
0.2 -10 μl
0.1 μ
10 μl
710010
5 - 100 μl
1 μl
300 μl, 350 μl
710030
10 - 250 μl
5 μl
300 μl, 350 μl
710100
10 - 500 μl
5 μl
1000 μl
710020
50 - 1000 μl
10 μl
1000 μl
710040
50 - 1200 μl
5 μl
1200 μl
710500
100 - 5000μl
50 μl
5000 μl
46
2.2. Biohit Proline multichannel electronic pipettes
Cat. No.
Volume Range
Increment
Tip
710410
4-kan 5 -100 μl
1 μl
300 μl, 350 μl
710420
4-kan 25 - 250 μl
5 μl
350 μl
710200
8-kan 0.2 - 10 μl
0.1 μl
10 μl
710210
8-kan 5 - 100 μl
1 μl
300 μl, 350 μl
710220
8-kan 25 - 250 μl
5 μl
350 μl
710800
8-kan 50 - 1200 μ
10 μl
1200 μl
710300
12-kan 0.2 - 10 μl
0.1 μl
10 μl
710310
12-kan 5 - 100 μl
1 μl
300 μl, 350 μl
710320
12-kan 25 - 250 μl
5 μl
350 μl
710810
12-kan 50 - 1200 μl
10 μl
1200 μl
2.3. Biohit tips
The full range of Biohit tips are recommended
for use with Biohit pipettes. These detachable,
disposable tips are made of natural colour
polypropylene. Biohit also offers a full range
of filter tips. Biohit standard tips are available
as bulk packages, space saving refill systems
and autoclavable (121°C, 20 min, 1 atm) trays.
Presterilized tips in trays are also available.
(Fig. 1).
Note: Never pipette liquid without attaching
a tip to the pipette.
Fig. 1
47
3.
UNPACKING & PREPARING THE PIPETTE FOR USE
The Biohit Proline Electronic pipette package contains the following items:
•
•
•
•
•
•
•
Pipette
Tips
Grease
Filters and filter forceps (selected models, see page 8)
Instructions for use
Quick reference card
Performance certificate in accordance with ISO 8655-6
Make sure that all items are included and that no damage has occured
during shipment.
Note: The pipette can only be charged with the Biohit Proline charging
stand or carousel (Fig. 2 and 3).
3.1. Biohit Proline Charging Stands and Carousels
Cat. No.
Product
51000X
Biohit Proline Charging Stand
51160X
Biohit Proline Charging Carousel
X: 1=Euro, 2=U.S., 3=U.K., 4=Jpn
Fig. 2
48
Fig. 3
3.2. Charging of the Pipette
The charging stand or carousel operates via a contactless system which is
free from maintenance and sensitive metal contacts. The pipette features
an ON/OFF switch located at the top of the grip of the pipette (Fig. 4). This
switch protects the battery from discharging during long storage periods.
Fig. 4
Fig. 5
1. Switch the pipette ON (the far left position) (Fig. 4).
2. Place the pipette into the charging stand. The top of the pipette will fit
snugly into the head of the charging stand or carousel. The magnetic
mount will lock the pipette into the proper charging position (Fig. 5).
3. If the pipette is new or the battery is low keep the pipette in the stand
for 12 hours to fully charge the pipette before continuing use.
4. Display shows
. Press the START button twice and the pipette
is ready for the default pipetting at maximum volume or for program
changes.
Note: The pipette will charge in both the ON and OFF positions. Leave
the pipette ON in the charging stand to retain user-selected settings as
switching OFF will reset the unit to default settings.
Note: If the pipette is left in the ON position uncharged for several days
the display will be empty and there will be no response from the keyboard,
or START button, as the battery voltage will be below the operating level.
3.3. Electrical Specifications
Battery
• Rechargeable NiMH battery
• Charging time max 12 hours for empty battery
AC-Adaptor
• Input voltage and main plug according to local requirements
• Output voltage 9 VDC
49
4.
PIPETTE MATERIALS
Accu cover
(ASA/PC)
Display
(glass)
Keyboard
(silicon)
Finger
support
(back)
(ASA/PC)
Start
button
(POM)
Handle
(ASA/PC)
Tip ejector
level (POM)
Display
(glass)
Tip ejector
collar (PP)
Finger
support
(back)
(ABS)
Tip cone
10 μl (PVC)
100-1000 μl (SS)
1200 μl (PPS)
5000 μl (PE)
Tip ejector
level (POM)
Level support
(PETP)
Tip cone, soft-sealing
10-250 μl (sealing: TPU)
10-250 μl (PVDF)
1200 μl (PPS)
Hard tip cone
(PC)
50
Accu cover
(ASA/PC)
Keyboard
(silicon)
Start
button
(POM)
Handle
(ASA/PC)
Tip cone
housing
(ASA/
PC)
Tip ejector
bar (PETP)
5.
PIPETTE DESCRIPTION
The control and programming of the Proline electronic pipette are done
using the keyboard and display shown in detail below.
5.1. Controls
Battery Compartment
Power Switch
Changes speeds
Moves to Next Mode
Increases volume or speed
Decreases volume or speed
Confirms setting changes
Switches Mixing on - off
START BUTTON Triggers all mechanical operations
TIP EJECTOR LEVER Squeezed to remove pipette
tip(s)
5.2. START Button
The START button triggers the aspiration and dispensing operations
according to selected operating mode. Only a quick click is required to
operate the button. If the START button is kept down, the piston will stop in
the lowest position until the button is released. This feature is applicable to
all modes of operation, except for multiple dispensing (d).
5.3. Direction Symbols
These symbols indicate the direction in which the piston moves upon
pressing the START button. The small RIGHT ARROW in the display means
that the next function is to aspirate the liquid. The small LEFT ARROW
in turn indicates the dispensing function in accordance to the selected
operating mode.
5.4. Display
The left display is the status indicator. It informs the user about parameters
to be programmed, functions to be performed and the number of
dispensings available.
The right display is used for programming and displaying the various
volumes needed in different operating modes.
51
5.5. Sealing and Ejecting tips
Biohit tips are recommended for use with Proline
pipettes. Before fitting a tip make sure that the
pipette tip cone is clean. Press the tip onto the
cone of the pipette firmly to ensure an airtight seal.
The seal is tight when a visible sealing ring forms
between the tip and the tip cone (Fig. 6).
Fig. 6
Biohit Proline Electronic pipettes are designed for
simple and light attachment and ejection of the tips.
To eject the tip, simply place the pipette over the
discard container and squeeze the tip ejector lever
(Fig. 7).
Fig. 7
5.6. Optional Filters
The new tip cones of selected Biohit Proline
Electronic pipettes allow the use of a removable
filter as an option. The filter prevents liquids and
liquid vapours from entering the pipette. The filter
does not affect the calibration of the pipette. Biohit
filter forceps should be used to avoid touching the
dirty filters by hand. (Fig. 8).
Cat. No
Channels Volym Range
710520
710010
710030
710100
710020
710040
710500
1-kan
1-kan
1-kan
1-kan
1-kan
1-kan
1-kan
710410
710420
Fig. 8
Standard
Filter
Plus Filter
0.2 - 10 μl
5 - 100 μl
10 - 250 μl
10 - 500 μl
50 - 1000 μl
50 - 1200 μl
100-5000 μl
721006
721006
721006
721006
721016
721016
721016
721016
4-kan
4-kan
5 - 100 μl
25 - 250 μl
721014
721014
-
710200
710210
710220
710800
8-kan
8-kan
8-kan
8-kan
0.2 - 10 μl
5 -100 μl
25 - 250 μl
50 - 1200 μl
721014
721014
721006
N/A
N/A
721016
710300
710310
710320
710810
12-kan
12-kan
12-kan
12-kan
0.2 - 10 μl
5 - 100 μl
25 - 250 μl
50 - 1200 μl
721014
721014
721006
721016
52
N/A =
Not
available
6.
PROGRAMMING THE PIPETTOR
Programming is done using the six-button keyboard and the LC-display.
There are four to six different operating modes, offering special functions
and varying speeds for your selection.
6.1. Mode Selection and Mode Recall
1. Press
repeatedly to view the available modes of the pipette.
2. Press
when the desired mode is displayed. The pipette is ready
for use in the mode selected.
Note: Mode can only be activated when the piston is in its home position
(arrow right sign is lit), not in the middle of aspiration or dispensing actions.
6.2. Setting Speeds (all models)
1. Press
to display the current aspiration speed.
2. Press
or
until desired aspiration speed is displayed (”5”
Fast and ”1” Slow).
3. Press
to confirm speed selection. Display shows the current
dispense speed.
4. Press
or
until desired dispense speed is displayed
(”5” being Fast and ”1” Slow).
5. Press
to confirm speed selection.
Note: The speed may not be changed in the middle of the aspiration or
dispensing cycles.
Note: The default speed is 3 for all speed settings.
53
6.3. Pipetting Mode (P) (all models)
The pipette performs ordinary pipetting with blow-out.
1. Press
to display
2. Press
to confir the mode change.
.
3. Select the desired pipetting volume by using
to increase, and
to decrease.
Note: when holding down
or
, the volume display starts to
scroll faster.
4. Press
to confirm selection.
5. Position the tip to aspirate and press the
START button.
6. Position the tip to dispense. Press the START
button. The tip is emptied with the blow-out
and is ready for next pipetting.
Step 5.
Step 6.
6.4. Reverse Pipetting Mode (rP)
(all models, except 710040, 710500, 710800 och 710810)
A Selected volume plus an excess is aspirated into the tip. After delivery, the
excess volume remains in the tip and is discarded.
1. Press
until
2. Press
to confirm mode change.
3. Use
4. Press
and
is displayed.
to select the desired pipetting volume.
to confirm selection.
Step 5.
5. Position the tip to aspirate and press the START button.
6. Position the tip to dispense. Press the START button.
7. Position the tip to discard excess liquid and press START
twice.
Note: Upon delivering the programmed volume, it is also
possible to continue to aspirate and dispense the same
volume without the empty function. To continue, keep the
START volume without the empty function. To continue, keep
the START button pressed down and within one second the
direction of the arrow will change. Keeping the button down,
place the tip into the liquid again and the sample is aspirated
into the tip by releasing the START button.
54
Step 6.
Step 7.
6.5. Multi-Dispensing Mode (d)
(all models)
The pipette performs repetitive dispensings of a selected volume. During
this operation, the desires volume plus and automatically selected excess
volume is aspirated into the tip. The excess volume is needed to ensure
equal operating conditions for each dispensing.
1. Press
to display
.
2. Press
to confirm the mode change.
3. Press
or
until the multi-dispense volume is displayed.
4. Press
to confirm selection.
5. Press
or
6. Press
to confirm selection.
until the desired number of aliquots is displayed.
7.
Position the tip to aspirate and press the START button.
The * sign and ARROW LEFT are lit to indicate the reset function.
8. Position the tip to discard priming excess and press the START button.
9. To dispense, position the tip, press the START button and repeat unti
the cycle is complete.
10. Finally, position the tip to discard any remaining excess and press the
START button twice.
Note: Upon delivering the programmed volume, it is also possible to
continue to aspirate and dispense the same volume without the empty
function (excl. 710500). To continue, keep the START button pressed down
and within one second the direction of the arrow will change. Keeping the
button down, place the tip into the liquid again and the sample is aspirated
into the tip by releasing the START button.
Step 7.
Step 8.
Step 9.
Step 10.
55
6.6. Diluting Mode (dd)
(all models, except 710800 and 710810)
Two different solutions separated by an air gap are aspirated and then
dispensed together with automatic blow-out. The purpose of the air gap is
to avoid contamination when aspirating the second volume but it will not
prevent the two liquids from mixing in the tip.
1. Press
to display
.
2. Confirm the mode change by pressing
.
3. Select the desired diluent volume (volume 1) by using
4. Confirm by pressing
5. Press
and
and
.
.
to select the sample volume (volume 2) on the
display.
6. Press
to confirm selection.
7. Position the tip to aspirate volume 1 and then press the START button.
8. With the tip in the air press the START button again to aspirate an air
gap.
9. Position the tip to aspirate volume 2 and press the START button.
10. Finally, position the tip to dispense and press the START button.
Step 7.
Step 9.
Step 8.
Step 10.
6.7. Mixing Mode with Pipetting or Diluting (*)
(all models)
The piston is automatically moved up and down to mix the liquid in the
delivery vessel. The mixing time is controlled by the START button.
1. Use
to select either
2. Press
or
onto the display.
to switch on mixing. The display should read either
. Please note that selecting
will alternately switch mixing
on and off.
3. Confirm the mode change by pressing the
56
or
button.
For Pipetting:
1. Press
to increase, and
2. Press
to confirm selection.
to decrease.
3. Position the tip to aspirate and press START button.
4. Position to dispense and press the START button.
For Diluting:
1. Select the desired diluent volume (volume 1) by using
2. Confirm selection by pressing
3.
4.
5.
6.
7.
8.
and
.
.
Press
and
to select the sample volume (volume 2) .
Confirm selection by pressing
.
Position the tip to aspirate volume 1 and then press the START button.
With the tip in the air, press the START button to aspirate an air gap.
Position the tip to aspirate volume 2 and press the START button.
Finally, position the tip to dispense and press the START button.
To Mix:
1. Position the tip in the solution, then press and hold the START button.
The mixing is done automatically as long as the START button is held
down.
2. Position the tip to dispense. Press the START button twice.
Step 1.
Step 2.
Note: The mixing is done with about 70 % of the total volume.
57
6.8. Sequenced Dispensing Mode (sd)
(models 710500, 710040 and 710800 only)
A series of different volumes can be delivered in any desired order.
1. Press
to display
.
2. Confirm the mode change by pressing
.
3. Select the first desired dispense volume onto the display by using
and
4. Press
.
to confirm the dispense volume.
5. To select the following dispense volumes (up to 12) use
and
always remembering to confirm each selection by pressing
6. To confirm your final selection press
.
.
7. Position the tip to aspirate and press the START button.
8. Position the tip to discard priming excess and press the START button
again.
9. Position the tip to dispense and press the START button. Repeat the
action until the cycle is complete.
10. Position the tip to discard any remaining excess and press the START
button twice.
Step 7.
Step 8.
Step 10.
Step 9.
6.9. Multi-Aspirating Mode (SA)
(models 710040, 710800 and 710810)
The pipette performs consecutive aspiration operations of the programmed
volume. This mode allows e.g. emptying a microwell plate and other
special applications.
1. Set the display to
by pressing
2. Confirm the mode change by pressing
.
.
3. Select the desired multi-aspiration volume by using
58
or
.
4. Confirm selection by pressing
5. Press
and
to select the number of aspirations desired.
6. Confirm your selection by pressing
7.
.
.
Position the tip to aspirate and press the START button, repeating the
action until the cycle is complete. The total volume is displayed.
8. Position the tip to dispense and press the START button.
Step 7.
Step 8.
. An ARROW
Note: The aspiration can be interrupted by pressing
and E appear in the display. Pressing the START button will empty the tip.
7.
PIPETTING RECOMMENDATIONS
By using the different operating modes and various special functions,
several different liquid handling procedures are made possible. Two of
the modes (P and dd) feature an automatic blow-out and others leave an
excess liquid in the tip. The user should follow the recommendations below
to ensure optimal performance.
7.1. Dispensing with Blow-out
The pipetting and diluting mode have an automatic blow-out function,
followed by an immediate return of the piston to the ”home” position. To
avoid accidental aspiration of the liquid back into the tip, it is recommended
that the dispensing is always done above the liquid surface.
By holding the START button down during dispensing the piston will stop
in the lowest position. This allows the tip to be placed against the bottom
or the wall of the container. Once the liquid is dispensed, the tip can be
removed from the container and the START button released.
59
7.2. Dispensing without Blow-out
The pipette will not perform the blow-out function when using the reverse
pipetting and dispensing modes. Therefore, it is recommended that
dispensing is always performed with the tip set against the wall or the
bottom of the container. The use of the reverse pipetting mode is especially
useful when pipetting small volumes or solutions that have a tendency to
foam or have a high viscosity.
7.3. Other Recommendations
•
•
•
•
•
•
•
•
•
•
•
•
•
8.
Hold the pipette vertically when aspirating the liquid and place the tip
only a few millimetres into the liquid.
Pre-rinse the tip before aspirating the liquid by filling and emptying the
tip for three to five times. This is important especially when dispensing
liquids with a viscosity and density greater than water or liquids with
high vapor pressure (e.g. ethanol).
When pipetting liquids with temperatures different to the ambient
temperature do not pre-rinse the tip and change the tip after each
pipetting.
Check the pipette, tip and liquid are at room temperature.
Avoid contaminating the tip cone, do not rest the pipette on its side.
Always place the pipette in the charging stand or carousel when it is
not in use.
Never strike the tip cone against the tip tray when mounting tips as this
can damage several internal components.
Do not drop the pipette, the charging stand, carousel or AC-adaptor as
this may cause excessive shock.
Avoid exposing the unit to extreme temperature changes, humidity and
dust (operating temperature from 15°C to 40°C).
Avoid rough handling, moderate pressure is all that is required when
using the keyboard.
Avoid leaving the pipette on its side with liquid in the tip which might
seep back into the mechanism.
Always pipette against the inside wall of the receiving vessel. Remove
the tip by drawing it up against the inside wall.
Change the filter on the tip cone regularly (after 50-250 pipettings).
STORAGE
When not in use it is recommended that the pipettor is stored in the ON
position in the Biohit Proline charging stand or carousel.
60
9.
CALIBRATION
Each Biohit Proline Electronic pipette’s calibration has been factory
checked and certified at 22°C using distilled water according to ISO 86556. Pipette specifications are guaranteed only with genuine Biohit tips.
Note: Biohit offers full calibration and accredited calibration service. Please
contact your local Biohit representative.
The length of the piston stroke is electronically monitored and the pipette
does not normally need recalibration. However, all models (excl. 710500) can
be recalibrated in P-mode for one selected volume (one-point calibration)
at a time as follows:
1. Press
to display
.
2. Confirm the mode change by pressing
.
3. Select the desired pipetting volume to be calibrated by using
increase and
4. Press
to
to decrease.
to confirm the selection.
5. Press
and
simultaneously to display the volume to be
calibrated.
Note: When pressing both buttons the display will be blank except for the
μl sign. Releasing the buttons will display the volume to be calibrated.
6. Use
to increase or
to decrease the steps (in one increment
steps, see increments on p. 2) for the selected volume (e.g. for 1000 μl
volume in display program the pipette to give out 1010 μl or 990 μl).
7.
Press
to confirm the selection.
8. Display will show
and the original volume (which is now calibrated
to give out the new volume).
9. Start the pipetting.
Note: Changing the volume or mode will reset the calibration to default
settings!
61
9.1. Testing the Performance
It is recommended to check the performance of your electronic pipettes regularly
(e.g. every 3 months) and alwayys after in-house maintenance. However, users
should establish a regular testing routine for their pipettes depending upon the
accuracy requirements of the application, frequency of use, number of operators
using the pipette, nature of the liquid dispensed and the acceptable maximum
permissable errors establishes by the user. (ISO 8655-1).
Performance test should take place in a draught-free room at 15-30°C, constant
to ±0.5°C and relative humidity above 50%. The pipette, tips and the test water
should have stood in the test room a sufficient time (at least 2 hours) to reach the
equilibrium with the room conditions. Use distilled or deionised water (grade 3)
and analytical balance with a readability of 0.01 mgs. (ISO 8655-6).
1.
2.
3.
4.
Carefully fit the tip onto the tip cone.
Prewet the tip with test water by pipetting the selected volume 5 times.
Replace the tip and prewet the new tip once.
Aspirate the test water, immersing the tip only 2-3 mm below the surface
of the water and keeping the pipette vertical. Withdraw the pipette
vertically and touch the tip against the side wall of the container.
5. Pipette the water into the weighing vessel, touching the tip against the
inside wall just above the liquid surface at an angle of 30°-45°. Withdraw
the pipette by drawing the tip 8-10 mm along the inner wall. Read the
weight in mgs.
6. Repeat ten times and record each result.
7. Convert the recorded masses to volumes by multiplying the mass with
the correction factor Z (at 22°C and 101.3 kPa: Z=1.0033).
Note: Users should establish their own perfomance specifications based
on the field of use and the accuracy, requirements set on the pipette (ISO
8655-1). This method is based on ISO 8655.
10. MAINTENANCE
Biohit Proline Electronic pipettes require regular cleaning to ensure troublefree operation. To clean and decontaminate the pipette lightly spray the
outside of the pipette with Biohit Proline Biocontrol (cat.no. 724004, 5l) or
ethanol. Wipe dry with a soft cloth. DO NOT AUTOCLAVE. Change the tip
cone filter regularly.
Note: The pipette must be turned off prior to servicing!
62
10.1. Cleaning the tip cone
1. Remove the ejection collar: Gently twist it anticlockwise and slide off (Fig. 9). Remove filter i
fitted.
2. Using Biohit Proline Biocontrol or ethanol and
soft lintfree cloth, disinfect the tip ejector collar
and the tip cone.
3. Unscrew, anti-clockwise, the nose cone and
remove it, exposing the piston (Fig.10). If the
piston is sticked to the tip cone remove it with a
pair of tweezers.
4. To avoid scratching the surface of the piston
use Biohit Proline Biocontrol or ethanol and a
lint-free tissue when cleaning the piston. Let the
parts dry.
5. Grease the piston thinly with the grease provided.
Do not use any other grease. Check that no lint or
particles are on the surface of the piston. Avoid
excess grease, especially at the bottom of the
piston.
Fig. 9
Fig. 10
Note: For complete decontamination place the tip
cone, tip ejector collar, piston, O-ring and spring into a beaker containing
Biohit Proline Biocontrol and leave for at least 30 minutes, rinse the parts
with distilled water, then dry preferably with warm air.
6. Reassemble the pipette by screwing the piston in its place and replace
the tip ejector collar allowing the ejector handle connection to snap into
the attachment notch of the ejector collar. Replace new filter i fitted.
7. Test the pipette by pressing the START-button severel times. Test the
tip ejector operation.
Note: Check the performance of your Biohit Proline pipette regularly e.g.
every 3 months and always after in-house service or maintenance.
10.2. Battery Replacement
If the battery does not hold a sufficient charge for proper operation of the
pipette, follow these steps for replacement of the battery.
1. Switch the unit “OFF”.
2. Remove the top two screws on the back of the pipette and remove the
battery cover (Fig. 11).
3. Carefully remove the battery by lifting it straight out of the holder.
63
4. Install the new NiMH-battery by pressing the positive (+) end against
the contact spring at the bottom of the holder (Fig. 12).
5. Replace the cover and the screws. Do not overtighten the screws.
6. Dispose of battery appropriately.
11. TROUBLE-SHOOTING
Biohit Proline pipettes have a built-in monitoring program to control the
performance of each pipetting action. If the error message Er1 appears
on the display, this means the pipette has been unable to perform the
attempted action properly. If you receive the error message please do the
following:
Note: As this procedure will empty the tip, it is recommended that you
remove the tip before resetting the pipette.
1. Place the pipette in the charging stand for 15 minutes.
2. Clear the error message from the display by pressing
.
3. Press START button, which will set the pipette to its home position.
•
•
64
Occasional Er1 situations can be caused by electrical outlets that have
been switched off or if the pipette has been in the OFF position during
charging.
Repeated occurence of the the Er1 message is caused by an internal
error failing to complete the execution of the pipetting. The pipette will
need to be returned to your local Biohit representative for repair.
Trouble
Possible cause
Solution
Droplets left inside
the tip
Unsuitable tip
Use original tips
Leakage or pipetted
volume too small
Non-uniform wetting of
the plastic
Attach new tip
Tip incorrectly attached
Attach firmly
Unsuitable tip
Use original tips
Foreign particles
between tip and cone
Clean the tip cone,
attach new tip
Instrument contaminated
Clean and grease
piston and tip cone
Insufficient amount of
grease on piston and
O-ring
Instrument damaged
Grease accordingly
Send for service
Pipette blocked,
aspirated volume
too small
Liquid has penetrated tip
cone and dried
Clean and grease
piston and tip cone
Tip ejector jammed
or moves erratically
Tip cone contaminated
Remove ejector
collar, clean with
Biohit Proline
Biocontrol or ethanol
Continuous error
message
Instrumentet skadat
Send for service
65
12. WARRANTY INFORMATION
Biohit Proline Electronic pipettes are warranted for two years (except the
battery) against defects in materials and workmanship. Should it fail to
function in any period of time, please contact your local representative
immediately.
ANY WARRANTY WILL, HOWEVER, BE DEEMED AS VOID IF FAULT
IS FOUND TO HAVE BEEN CAUSED BY MALTREATMENT, MISUSE,
UNAUTHORIZED MAINTENANCE OF SERVICE OR NEGLIGENCE
OF INCORRECT STORAGE OR USE OF THE PRODUCTS FOR
OPERATIONS OUTSIDE THEIR SPCIFIED LIMITATIONS, OUTSIDE
THEIR SPECIFICATIONS, CONTRARY TO THE INSTRUCTIONS GIVEN
IN THIS MANUAL OR WITH OTHER THAN THE MANUFACTURER’S
ORIGINAL TIPS.
Each Biohit Proline Electronic pipette is tested before shipping by the
manufacturer. The Quality Assurance Procedure is your guarantee that
the Biohit Proline Electronic pipette you have purchased is ready for use.
All Biohit Proline electronic pipettes and charging stands are CE-marked,
fulfilling the requirements of the EN 55014, 1993/ EN 55104, 1995/ ISO
13485: 2003 and IVD Directive (98/79/EC).
13. RECYCLING INSTRUCTION (WEEE)
In compliance with European Directive, WEEE (2002/96EC) on
waste and reducting of hazardous substances in electrical and
electronic equipments, this device must not be recycled as
unsorted municipal waste. Instead this device must be collected
separately in accordance the local recycling regulations. The
solid bar used in conjunction with the crossed-out wheeled bin
indicates that the product was put on the European market after
13 August 2005.
66
SPECIFICATIONS
Note: The manufacturer’s specifications below should be used as
guidelines when establishing your own performance specifications in
accordance with ISO 8655.
Cat. No.
Ch.
Volume
Range
Test
Volume
Inaccuracy
Imprecision
Number of
Dispensings
710520
1-ch.
0.2-10 μl
10 μl
5 μl
1 μl
0.2 μl
0.90%
1.00%
2.50%
12.00%
0.50%
0.80%
1.80%
10.00%
2 - 50
710010
1-ch.
5-100 μl
100 μl
50 μl
10 μl
5 μl
0.40%
0.70%
2.00%
2.50%
0.15%
0.30%
1.00%
1.80%
2 - 20
710030
1-ch.
10-250 μl
250 μl
125 μl
25 μl
10 μl
0.40%
0.60%
2.00%
2.00%
0.15%
0.20%
1.00%
1.00%
2 - 25
710100
1-ch.
10-500 μl
500 μl
250 μl
50 μl
10 μl
0.40%
0.70%
1.50%
9.00%
0.15%
0.20%
0.80%
2.00%
2 - 25
710020
1-ch.
50-1000 μl
1000 μl
500 μl
100 μl
50 μl
0.60%
0.80%
2.00%
2.00%
0.15%
0.20%
0.60%
0.60%
2 - 20
710040
1-ch.
50-1200 μl
1200 μl
600 μl
120 μl
50 μl
0.40%
0.70%
2.00%
2.00%
0.15%
0.20%
0.60%
1.00%
1 - 24
710500
1-ch.
1005000μl
5000 μl
2500 μl
500 μl
0.50%
0.80%
0.80%
0.15%
0.25%
0.60%
1 - 48
67
Cat. No.
Ch.
Volume
Range
Test
Volume
Inaccuracy
Imprecision
Number of
Dispensings
710410
4-ch.
5-100 μl
100 μl
50 μl
10 μl
5 μl
0.50%
0.80%
1.50%
4.00%
0.20%
0.30%
1.50%
2.50%
2 - 20
710420
4-ch.
25-250 μl
250 μl
125 μl
25 μl
0.40%
0.70%
1.50%
0.15%
0.20%
1.00%
2 - 10
710200
8-ch.
0.2-10 μl
10 μl
5 μl
1 μl
0.90%
1.50%
4.00%
0.50%
0.80%
4.00%
2 - 50
710210
8-ch.
5-100 μl
100 μl
50 μl
10 μl
5 μl
0.50%
0.70%
2.50%
4.00%
0.20%
0.30%
1.50%
2.50%
2 - 20
710220
8-ch.
25-250 μl
250 μl
125 μl
25 μl
0.40%
0.60%
1.50%
0.15%
0.20%
1.00%
2 - 10
710800
8-ch.
50-1200 μl
1200 μl
600 μl
120 μl
50 μl
0.50%
1.00%
3.00%
8.00%
0.15%
0.20%
1.20%
1.50%
1 - 24
710300
12-ch.
0.2-10 μl
10 μl
5 μl
1 μl
0.90%
1.50%
4.00%
0.50%
0.80%
4.00%
2 - 50
710310
12-kan
5-100 μl
100 μl
50 μl
10 μl
5 μl
0.50%
0.80%
2.50%
4.00%
0.20%
0.40%
1.50%
2.50%
2 - 20
710320
12-ch.
25-250 μl
250 μl
125 μl
25 μl
0.40%
0.60%
1.50%
0.15%
0.20%
1.00%
2 - 10
710810
12-ch.
50-1200 μl
1200 μl
600 μl
120 μl
50 μl
0.80%
1.00%
3.00%
8.00%
0.15%
0.20%
1.20%
1.50%
1 - 24
68
CHINA
Biohit Healthcare Suzhou Co Ltd.
Tel: +86-21-6248 5589
Fax: +86-21-6248 7786
E-mail: [email protected]
FRANCE
Biohit SAS
Tel: +33-1-3088 4130
Fax: +33-1-3088 4102
E-mail:
[email protected]
GERMANY
Biohit Deutschland GmbH
Tel: +49-6003-82820
Fax: +49-6003-828222
E-mail: [email protected]
JAPAN
Biohit Oyj
Biohit Japan Co., Ltd.
Tel: +81-3-5822 0021
Fax: +81-3-5822 0022
E-mail: [email protected]
RUSSIA
Biohit OOO.
Tel: +7-812-327 5327
Fax: +7-812-327 5323
E-mail: [email protected]
®
Proline
U.K.
Biohit Ltd.
Tel: +44-1803-315 900
Fax: +44-1803-315 530
E-mail: [email protected]
Käyttöohje
U.S.A.
Biohit Inc.
Tel: +1-732-922-4900
Toll Free: 800-922 0784
Fax: +1-732-922-0557
E-mail: [email protected]
Instruction Manual
Bruksanvisning
Headquarters
Laippatie 1,
00880 Helsinki,
Finland
Tel: +358-9-773 861
Fax: +358-9-773 86200
E-mail: [email protected]
www.biohit.com
Johtuen Biohit Oyj:n jatkuvasta tuotekehityksestä spesifikaatiot voivat
muuttua ilman erillistä ilmoitusta. Biohit Proline innovaatiot on suojattu
useilla patenteilla ja patenttihakemuksilla. Biohit Proline® on Biohit Oyj:n
rekisteröity tavaramerkki.
På grund av kontinuerling utveckling, förbehåller sig Biohit rätten till
förändringar av specifikationer utan separat anmälan. Biohit Proline
produkter är skyddade av flera patent och patentansökningar. Biohit
Proline® är ett registrerat varumärke.
Due to Biohit’s continuing R&D effort, specifications may change without
prior notice. Biohit Proline innovations are covered by multiple patents and
patents pending. Biohit Proline® is a registered trademark of Biohit Plc.
400145.05 • 10/2010 • © Biohit Oyj