1
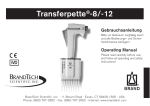
Liquid Handling · Easy Handling!
Transferpette
-8/-12 electronic
®
F I R S T
3
Gebrauchsanleitung
35
Operating Manual
67
Mode d'emploi
99
Instrucciones
de manejo
C L A S S · B R A N D
English
Table of Contents
Page
Safety Instructions
36
Functions and Limitations of Use
37
Operating Exclusions
37
Operating Elements
38
The First Steps
39
Setting the Volume
40
Setting the Aspiration and Discharging Speed
41
Correct Pipetting
42
The Pipetting Programs
43
- PIP mode
44
- PIPmix mode
46
- revPIP mode
48
- Electrophoresis (GEL) mode
50
- DISP mode
52
Checking the Volume
54
Accuracy Table
55
Easy Calibration
TM
(adjustment)
56
Autoclaving
58
Reference Run (rEF)
58
Servicing and Cleaning
59
Disassembling the Manifold
60
Charging and Replacing the Battery
62
Battery Regeneration Function
63
Troubleshooting
64
Ordering Information · Accessories · Spare Parts
65
Repairs
66
35
Safety Instructions
This instrument may sometimes be used with hazardous materials, operations, and equipment. It is
beyond the scope of this manual to address all of the safety problems associated with its use in such
applications. It is the responsibility of the user of this pipette to consult and establish appropriate
safety and health practices and determine the applicability of regulatory limitations prior to use.
! Please read the following carefully!
1. Every user must read and understand this
operating manual prior to using the pipette
and observe these instructions during use.
2. Follow general instructions for hazard
prevention and safety instructions; e.g. wear
protective clothing, goggles and gloves.
When pipetting infectious or other hazardous
samples, all appropriate regulations and
precautions must be followed.
3. Only use the instrument for pipetting only
liquids that conform to the specifications
defined in the operating exclusions and
limitations (see page 37).
4. Observe all safety precautions provided by
reagent manufacturers.
5. Only pipette liquids that do not react with
polypropylene (PP) and polycarbonatepolybutyleneterephthalate (PC/PBT).
6. Never use force on the instrument!
7. Operate only with tips attached (see page 42).
Do not lay the instrument down horizontally
when the tips are attached.
8. Avoid touching the tip orifices when working
with hazardous samples.
9. Always work in a way which neither endangers
the user nor any other person. When emptying
the tips, the sample must never spray or
splatter into the surrounding area. Discharge
into suitable collecting vessel.
Warning!
36
10. Only press the pipetting key after ensuring
that discharging the sample will not result in
any danger. Only dispense liquids into a
suitable collecting vessel.
11. Do not use the instrument in potentially
explosive environments or with explosive
samples.
12. Only use AC adapter indoors. Protect from
moisture.
13. To charge the NiMH battery pack, use only the
original AC adapter.
14. Do not replace the original battery pack with
other battery packs, or cells. Use only original
manufacturer’s replacement battery packs.
15. Confirm battery pack is completely discharged
prior to disposal. Observe relevant disposal
regulations for your facility.
16. Use only original manufacturer’s accessories
and spare parts. Do not modify the instrument
in any way, other than specifically described by
the manufacturer.
17. In case of malfunction, immediately stop
pipetting. Consult the “Troubleshooting”
section of this manual, and contact the
manufacturer if needed.
Improper use of the instrument or the batteries (short circuit, mechanical
damage, overheating, incorrect AC adapter, etc.) can lead to battery
explosion.
The Transferpette®-8/-12 electronic is a microprocessor-controlled, battery-operated pistonstroke multichannel pipette which uses the airdisplacement principle for the pipetting of aqueous
solutions with an average density and viscosity.
Limitations of use
The Transferpette ®-8/-12 electronic is intended
for the pipetting of liquids within the following
limitations:
- Temperature of both the instrument and solution
should be between 15 °C to 40 °C (59 °F to
104 °F) for the instrument and the reagent.
Consult the manufacturer for use in temperatures outside of this range.
- Vapor pressure up to 500 mbar
- Viscosity: 260 mPa s (260 cps)
Battery and power supply unit
specifications
English
Functions and Limitations of Use
When the instrument is used properly, the sample
only comes into contact with the tips and not with
the Transferpette ®-8/-12 electronic.
Operating exclusions
Never use the instrument for pipetting liquids,
that react adversely with polypropylene (PP: shaft)
or polycarbonate/polybutyleneterephthalate (PC/
PBT: handgrip). Avoid reactive vapors due to the
danger of corrosion.
Do not use use aggressive cleaning agents (e.g.,
bleach) to clean the instrument. Distilled water or
a mild soap solution is recommended.
The pipetting of highly dense or viscous liquids
as well as the pipetting of liquids, which react with
polypropylene (PP) or polycarbonate/polybutyleneterephthalate (PC/PBT) is only possible within
limitations.
Battery
Nickel-metal hydride battery,
3 cylindrical individual cells with size AAA,
3.6 V, 700 mAh
Power supply unit
Output voltage 6.5 V DC, 200 mA
37
Operating Elements
The Transferpette®-8/-12 electronic is a microprocessorcontrolled, battery-operated, piston-stroke multichannel
pipette, which has been optimized for ergonomic operation and ease of use.
Charging jack
Display
Program keys
Battery compartment
Pipetting key
Tip ejection key
Finger rest
The Transferpette ®-8/-12
electronic rests easily and
ergonomically in your hand.
The finger rest is height
adjustable with a screw, which
allows fine-tuning of the hand
position for effortless operation
of the function buttons.
Handgrip
Manifold
Key Functions
Up key (+)
Nose cone
Menu
selection
key
Entry
confirmation/
Power 'On'*
Down key (-)
Pipetting key
*) The instrument is activated by pressing the ENTER
key. After pressing the pipetting key next, the
instrument is ready for pipetting.
The Transferpette ®-8/-12 electronic shuts off 10 min
after the last instrument operation (Auto-Power-Off).
38
The First Steps
English
Is everything in the package?
Confirm that your package includes: Transferpette®-8 or -12 electronic
pipette, battery, power supply unit with battery charging cable,
1 Tip-Box SL filled, 1 Tip-Rack for refill, 1 instrument stand, 1 reagent
reservoir, silicone oil, operating manual and 1 set of V-rings made of Viton ®.
Initializing the Transferpette ®-8/-12 electronic
1. Insert the
a) Open the cover of the battery compartment.
A
b) Insure that the plug for the battery is firmly
connected to the pipette. Insert the battery.
B
battery
c) Replace the battery compartment.
2. Activate the
instrument
The Transferpette ®-8/-12
electronic automatically
requests a reference run
directly after the battery is
inserted. After the pipetting
key is pressed, the reference
run is carried out and the
instrument is now ready for
pipetting.
The display shows the
standard factory setting
(pipetting mode/PIP);
and the nominal volume
(for example, 100.0 µl).
Default aspiration and discharging speeds are at maximum. The adjustment of
volume and speed is described on the following
pages.
C
1x
Pipetting mode
Battery charge
indicator
Up arrow,
indicating
aspiration
Volume setting
39
Setting the Volume
The volume for the Transferpette®-8/-12 electronic is set at the factory to the nominal volume
of the instrument and can be changed quickly and easily.
What to do
How to do it
1. Activate volume
setting
Keys to press
Press one of the arrow
keys to activate volume
selection. 'VOL' blinks.
2. Change the volume
Reduce volume
Increase volume
Press the up arrow key (+)
to increase the volume.
Holding the arrow key
down accellerates the rate
of change.
'VOL' continues to blink.
3. Confirm volume
Press the ENTER key.
The display now shows the
new volume setting, in this
case, 102.8 µl in the PIP
mode.
setting
Important:
40
Press the down arrow key
(-) to reduce the volume.
Holding the arrow key
down accellerates the rate
of change.
'VOL' continues to blink.
–
+
1x
By pressing the MENU key any procedure can be cancelled!
The display then moves to the next setting or back to the
initial display (depending on actual selection.)
Display readout
Setting the Aspiration and Discharging Speed
What to do
How to do it
Keys to press
English
The aspiration and discharging speeds can be individually adjusted. When the menu is called up, the last
speed setting is shown. Five speed levels are available.
Display readout
Setting the aspiration speed
1. Bring up the menu
2. Change the
aspiration speed
3. Confirm speed
level
Press the MENU key once
to bring up the aspiration
speed menu.
'Speed' blinks.
1x
+
Press one of the arrow
keys (+/-) to select the
desired speed (in this
case, level 5).
'Speed' continues to
blink.
–
Press the ENTER key. The
display returns to the start
position for the current
pipetting mode (in this
case, the standard PIP
mode).
1x
Setting the discharging speed
1. Bring up the menu
2. Change the
discharging speed
3. Confirm speed
level
Press the MENU key twice
to bring up the discharging
speed menu.
'Speed' blinks.
Press one of the arrow
keys (+/-) to select the
desired speed (in this
case, level 2).
'Speed' continues to
blink.
Press the ENTER key. The
display returns to the start
position for the current
pipetting mode (in this
case, the standard PIP
mode).
2x
+
–
1x
41
with the Transferpette ®-8/-12 electronic
Correct Pipetting
The volume is set at the factory to the nominal volume for the Transferpette ®-8/-12 electronic
and can be changed quickly and easily. See page 40.
Quick start in the standard pipetting mode
1. Attach the tips
2. Aspirate liquid
Note:
Ensure the tips are seated firmly and seal against the nose cones.
Hold the pipette vertically and immerse the tips
2 to 3 mm into the liquid.
Press the pipetting key
to aspirate the liquid into
the tips. The arrow in the
display points upwards to
indicate the aspiration of
liquid.
1x
Note:
3. Discharge liquid
To avoid the intake of air, leave the tips
immersed into the liquid for approx. 1 sec.
After the liquid has been aspirated, the arrow in the
display points downwards to indicate discharging.
Hold the pipette at an angle between 30º and 45º,
place the tips against the vessel wall.
Press the pipetting key
again and the liquid is completely discharged including
automatic blowout. Afterwards wipe pipette tips
against the vessel wall.
1x
4. Eject tips
42
Hold the pipette shaft over
a suitable disposal container and press the tip
ejection key.
Tip ejection
key
English
The Pipetting Programs
Page
1. Normal Pipetting
PIP Mode
44
Standard program. A previously set volume
is aspirated into the pipette tips and then
discharged.
2. Mixing of Samples
PIPmix Mode
46
Program for mixing liquids. The sample is
repeatedly aspirated and discharged.
3. Reverse Pipetting
revPIP Mode
48
Program especially for pipetting liquids with a
high viscosity or vapor pressure, or that tend
to foam.
4. Pipetting for Electrophoresis
GEL Mode
50
Program for loading electrophoresis gels.
A predefined sample volume is aspirated
at high, adjustable speed and then slowly
discharged.
5. Dispensing
DISP Mode
52
Program for dispensing liquids. An aspirated
volume is dispensed repeatedly in defined
steps.
43
The Programs · Settings and Use
PIP Mode
The standard program – a previously set volume is aspirated and then discharged.
Volume and speed adjustments are described on pages 40 and 41.
What to do
1. Bring up the menu
Press the MENU key three
times to bring up the mode
selection menu. 'Mode'
blinks.
2. Select PIP mode
Use one of the arrow
keys to scroll through
the modes until 'PIP'
appears. 'Mode'
continues to blink.
3. Confirm PIP mode
Press the ENTER key.
The display now shows
'blo' for blow-out.
4. Prepare for
pipetting
➞
5. Aspirate liquid
44
How to do it
Press the pipetting key
once to move the pistons
into the start position.
The arrow in the display
points upwards (aspiration).
Keys to press
3x
1x
1x
Press the pipetting key
once to aspirate the
liquid.
1x
Display readout
English
PIP Mode
What to do
6. Discharge liquid
➞
7. Start blow-out?
How to do it
Press the pipetting key
once to discharge the liquid.
The arrow in the display
points downwards
(discharge).
Keys to press
Display readout
1x
No action required!
When pipetting in the
PIP mode the blow-out
function is performed
automatically.
Start blow-out manually
The blow-out function can, if necessary, be initiated manually
at any time.
1. Bring up the
blow-out function
2. Start blow-out
Press the ENTER key.
The display shows 'blo'
for blow-out.
Press the pipetting key
once to initiate the blowout process. The display
moves back to the start
position of the selected
pipetting mode.
1x
1x
Note:
To accomplish the blow-out, the pistons move to the lowest position. The user must be certain that any
residual liquid is discharged safely.
If the pipetting key is pressed and held, the pistons will be maintained at their lowest position
to avert an accidental aspiration of liquid. When the key is released, the pistons return to the
start position.
45
The Programs · Settings and Use
PIPmix Mode
Program for mixing of liquids. The sample is repeatedly aspirated and discharged.
Volume and speed adjustments are described on pages 40 and 41.
What to do
1. Bring up the menu
2. Select PIPmix
mode
3. Confirm PIPmix
mode
4. Prepare for
pipetting
➞
5. Aspirate liquid
46
How to do it
Press the MENU key
three times to bring up
the mode selection
menu. 'Mode' blinks.
Keys to press
3x
Scroll through the modes
using the arrow keys
until 'PIPmix' appears.
'Mode' continues to
blink.
Press the ENTER key.
The Display now shows
'blo' for blow-out.
Press the pipetting key
once to move the pistons
into the start position.
The arrow in the display
points upwards (aspiration).
1x
1x
Press the pipetting key
once to aspirate the
liquid.
1x
Display readout
English
PIPmix Mode
What to do
6. Discharge liquid
in the PIPmix
mode
➞
➞
7. End pipetting
How to do it
Press and hold the pipetting
key and the liquid is
alternately aspirated and
discharged. The display
shows the up arrow for
aspiration and the down
arrow for discharging and
the number of cycles.
Display readout
press and hold
Press the pipetting key
once and the liquid is
discharged and the blowout function initiated.
After the discharge of the
residual liquid (blow-out),
the display moves back to
the start position.
Note:
Keys to press
1x
The display shows a maximum of 19 cycles.
47
The Programs · Settings and Use
revPIP Mode
Program for pipetting of liquids with high viscosity, vapor pressure or that tend to foam.
Volume and speed adjustments are described on pages 40 and 41.
What to do
1. Bring up the menu
2. Select revPIP
mode
3. Confirm revPIP
mode
4. Prepare for
pipetting
Press the MENU key three
times to bring up the mode
selection menu.
'Mode' blinks.
6. Discharge liquid
in the revPIP
mode
➞
48
Keys to press
3x
Scroll through the modes
using the arrow keys until
'revPIP' appears.
'Mode' continues to blink.
Press the ENTER key.
The Display now shows
'blo' for blow-out.
Press the pipetting key
once to move the pistons
into the start position.
The arrow in the display
points upwards (aspiration).
1x
1x
Press the pipetting key
once. The volume
aspirated will be a little
bit more than set.
➞
5. Aspirate liquid
How to do it
1x
To discharge the measured
amount of liquid, press the
pipetting key once. The
arrow in the display points
downwards (discharge).
Some liquid will remain
in the tips.
1x
Display readout
What to do
How to do it
7. Repeat aspiration
➞
of liquid in revPIP
mode
8. Initiate blow-out
Press the pipetting key
again and the set volume
is aspirated into the tips.
Press the pipetting key
again and the volume is
discharged again, and so
on...
Keys to press
English
revPIPMode
Display readout
1x
Press the ENTER key after
the last pipetting operation.
The display shows 'blo' for
blow-out.
1x
Press the pipetting key
once to initiate the blowout process. The residual
liquid is discharged.
1x
9. End pipetting
After the residual liquid is
discharged (blow-out), the
display moves back to the
start position.
49
The Programs · Settings and Use
Electrophoresis (GEL) Mode
Program for loading electrophoresis gels. A predefined sample volume is aspirated into
the pipette tips with high adjustable speed and then slowly discharged.
Volume and speed adjustment is described on pages 40 and 41.
What to do
1. Bring up the menu
How to do it
Press the MENU key three
times to bring up the mode
selection menu.
'Mode' blinks.
2. Select GEL mode
Scroll through the modes
using the arrow keys until
'GEL' appears.
'Mode' continues to blink.
3. Confirm GEL mode
Press the ENTER key.
The Display now shows
'blo' for blow-out.
4. Prepare for
pipetting
➞
5. Aspirate liquid
Press the pipetting key
once to move the pistons
into the start position.
The arrow in the display
points upwards (aspiration).
3x
1x
1x
Press the pipetting key
once. The set volume is
aspirated into the tips.
1x
Aspirate a larger volume
In order to aspirate a larger
volume than was set (up
to a max. of 110% of the
nominal volume), press
and hold the pipetting key
until the desired volume
has been aspirated. The
display shows a rhombus.
50
Keys to press
press and hold
Display readout
What to do
6. Discharge liquid
in the GEL mode
How to do it
➞
Press the pipetting key
once to discharge the
liquid. The rhombus is
shown in the display. The
liquid is discharged very
slowly.
Keys to press
English
Electrophoresis (GEL) Mode
Display readout
1x
Interrupt discharging
To interrupt discharging,
press the pipetting key
again. The display shows
the volume discharged
prior to interruption.
7. Initiate blow-out
1x
Press the ENTER key after
the last pipetting operation.
The display shows 'blo' for
blow-out.
1x
Press the pipetting key
once to initiate the blow-out
process. The residual liquid
is discharged.
1x
8. End pipetting
After the residual liquid is
discharged (blow-out), the
display moves back to the
start position.
Note:
The GEL mode operates using a very slow discharge speed to prevent swirling of the samples. To assure
optimal discharging into a gel, this discharge speed is fixed for the GEL mode. This speed is significantly
slower than level 1 and cannot be selected individually.
51
The Programs · Settings and Use
DISP Mode
Program for discharging an aspirated liquid in pre-defined steps.
The volume aspirated will be a little bit more than actually needed.
Speed adjustment is described on page 41.
What to do
1. Bring up the menu
2. Select DISP
mode
3. Confirm DISP
mode
4. Prepare for
dispensing
5. Set dispensing
step volume
6. Confirm dispensing
step volume
52
How to do it
Press the MENU key three
times to bring ap the mode
selection menu.
'Mode' blinks.
Keys to press
3x
Scroll through the modes
using the arrow keys until
'DISP' appears.
'Mode' continues to blink.
Press the ENTER key.
The Display now shows
'blo' for blow-out.
Press the pipetting key
once to move the pistons
into the start position.
The arrow in the display
points upwards (aspiration).
Press the arrow keys (+/-)
to set the volume. Holding
the arrow key down
accellerates the rate of
change. 'VOL' blinks.
Press the ENTER key.
The display now shows the
new volume setting for the
dispensing steps and the
max. number of steps.
'Steps' blinks.
1x
1x
+
–
1x
Display readout
What to do
How to do it
7. Set the number
of steps
Keys to press
+
English
DISP Mode
Display readout
Press the arrow keys (+/-)
to set the number of steps.
'Steps' continues to blink.
–
8. Confirm the
number of steps
9. Aspirate
Press the ENTER key.
The display now shows the
number of steps that has
been set.
1x
Press the pipetting key
once to aspirate the liquid.
➞
liquid
1x
10. Dispense
liquid
➞
11. Initiate blow-out
12. End dispensing
Each time the pipetting key
is pressed one dispensing
step is performed. The
arrow in the display points
downwards (discharge). The
display shows the number of
dispensing steps left.
Press the ENTER key after
the last dispensing step.
The display shows 'blo'
for blow-out. Press the
pipetting key next once
to initiate the blow-out
process (see also p. 51).
1x
1x
After the residual liquid is
discharged (blow-out), the
display moves back to the
start position.
53
Checking the Volume
Depending on use, we recommend inspection of the instrument every 3 to 12 months.
The cycle can, however, be adjusted to individual requirements.
The gravimetric testing of the pipette volume is performed according to the following
steps and is in accordance with DIN EN ISO 8655, Part 6.
1. Set nominal volume
See page 40 for procedure.
2. Condition the pipette
Condition the pipette before testing by using pipette tips to
aspirate and discharge the test liquid (distilled H2O) five times.
After this, discard the pipette tips.
3. Carry out the test
a) Attach new pipette tips and pre-rinse one time with test liquid.
b) Aspirate liquid and pipette it into the weighing vessel.
Note:
Each individual channel must be
tested separately.
c) Weigh the pipetted quantity with an analytical balance.
Please follow the operating manual instructions from the
balance manufacturer.
d) Calculate the volume, taking the temperature into account.
e) 3-10 pipettings and weighings per channel in three volume
ranges (100 %, 50 %, 10 %) are recommended for statistical
analysis.
Calculation (for nominal volume)
xi = Weighing results
n = Number of weighings
Mean value x =
Σ xi
n
Accuracy*
A% =
V – V0
· 100
V0
Z = Correction factor
(for example 1.0029 µl/mg at 20 °C, 1013 hPa)
Mean volume V = x · Z
Standard Deviation
s=Z·
Σ (x i – x ) 2
n–1
Coefficient of Variation*
CV% =
100 s
V
V0 = Nominal volume
*) = Calculation of accuracy (A %) and variation coefficient (CV %): A % and CV % are calculated
according to the formulas for statistical control.
54
Accuracy Table
!
20 °C
Ex
English
Final test values related to the nominal capacity (maximum volume) indicated on the instrument, obtained when instrument and distilled water
are equilibrated at ambient temperature (20 °C/68 °F) and with smooth
operation. According to DIN EN ISO 8655.
Accuracy tolerances for the Transferpette ®-8/-12 electronic
Volume range
µl
30 - 300
10 - 100
2 -
20
Volume step
µl
A*
≤±%
CV**
≤%
Increment
µl
300
0.6
0.25
0.2
150
1.2
0.4
30
3.0
1.2
100
0.8
0.25
50
1.6
0.4
10
4.0
1.5
20
1.0
0.5
10
2.0
1.0
2
8.0
3.0
0.2
0.02
Type of tips
µl
300
200 / 300
20
A* = Accuracy, CV* = Coefficient of Variation
55
Easy Calibration TM
Adjustment of the Transferpette ®-8/-12 electronic
The calibration mode 'CAL'
Adjustment
The instrument should be set to either the nominal volume (for example
100 µl for a 100 µl pipette) or a specific test volume, in the standard
pipetting mode (PIP). See page 40 for procedures.
What to do
1. Bring up the CAL
mode
2. Activate the CAL
mode
3. Confirm CAL mode
56
How to do it
Press and hold the MENU
key (> 3 sec) until CAL
appears. The display
reads 'off'. 'CAL' blinks.
Keys to press
1x
>3s
Press one of the arrow
buttons to activate the CAL
mode. The display changes
from 'off' to 'on'. 'CAL'
continues to blink.
Press the ENTER key.
The display now shows
the set pipetting volume.
'CAL' blinks.
4. Set the volume
Use the arrow keys (+/-)
to set the volume, which
was previously determined
and tested. 'CAL' blinks.
5. Confirm volume
Press the ENTER key.
The display shows the
tested and corrected
volume. The CAL symbol
is continously displayed to
confirm that an adjustment
has been made.
1x
1x
Display readout
English
Easy Calibration TM
Revert to factory default settings
The continually displayed CAL symbol refers to a previously
made adjustment.
What to do
How to do it
1. Bring up the CAL
mode
2. Deactivate CAL
mode
3. Revert to factory
setting
Important:
Note:
Press and hold the MENU
key (> 3 sec) until CAL
appears. The display reads
'on'. 'CAL' blinks.
Keys to press
Display readout
1x
>3s
Press one of the arrow
keys to deactivate the CAL
mode. The display changes
from 'on' to 'off'. 'CAL'
continues to blink.
Press the ENTER key. The
CAL symbol disappears.
The instrument has now
been reverted to factory
default setting.
1x
When the Transferpette®-8/-12 electronic is adjusted, a volume
offset is performed, which means that the volume is changed
across the entire volume range of the pipette by the same
amount. It is recommend that the adjustment be performed
at 50% of the nominal volume.
The instrument is permanently adjusted for watery solutions, but
it can also be set for solutions with varying density, viscosity and
temperature. The Transferpette ®-8/-12 electronic can be adjusted
in every mode, with the exception of the GEL mode.
57
Autoclaving
The manifold (M) of the Transferpette ®-8/-12 electronic
(highlighted in picture) can be autoclaved at 121 °C at a
pressure of 2 bar for 20 minutes according to DIN.
Note:
The handgrip can not be autoclaved!
1. Eject the pipette tips.
2. Unscrew the manifold from the grip.
3. Autoclave the complete manifold without
any further disassembling.
4. Allow the manifold to completely cool
and dry.
5. Screw the manifold into the grip.
6. Perform a reference run (rEF).
Note:
The effectiveness of the autoclaving
must be verified by the user.
If the manifold is autoclaved frequently, then the
pistons should be lubricate with the supplied silicone
oil in order to provide smoother movement.
M
Reference run (rEF)
A manual reference run must be completed each time the manifold is
reattached to the handle. The reference run is needed to assure secure connection of the pistons.
What to do
1. Bring up rEF mode
Simoultaneously press the
MENU and the ENTER key
to activate the rEF mode.
2. Perform the
Press the pipetting key
once to start the reference
run. A noise can be heard,
clearly indicating the
function is being performed.
reference run
Note:
58
How to do it
Keys to press
Display readout
1x
1x
After the reference run, the display automatically returns to the previous program.
Servicing and Cleaning
Note:
The changing of the V-rings/O-rings on the
individual nose cones is described in detail in
the instructions enclosed with the spare part.
English
The three main components of the manifold can be easily
separated and disassembled for servicing, cleaning or
replacing parts. The procedures are illustrated on the
following pages.
M
The main components of the manifold
A
Piston unit with piston support bar [ I ] and pistons
inserted in this unit, which can be screwed out individually for cleaning or replacement.
B
Nose cone assembly with nose cone support bar [ II ]
and central guide rod (Z), which is attached to this,
and the nose cones and seals, which can be screwed
out individually for cleaning or replacement.
C
Manifold housing, which is connected to the manifold
housing cover [ III ] of the piston unit with two turn-lock
fasteners.
III
Servicing
In order to assure proper functioning, the Transferpette®
-8/-12 electronic should be serviced and cleaned at regular
intervals.
I
A
What is to be inspected?
1. Inspect nose cones and seals for damage.
2. Inspect the pistons and seals for contamination and
damage.
3. Test the sealing of the instrument. To do this aspirate a
sample, and then hold the instrument in a vertical position
for about 10 sec. If a drop forms at the tip orifices, see
the troubleshooting guide on page 64.
Z
II
B
Cleaning Instructions
1.
Clean single nose cones, pistons and nose cone
support bar/piston support bar (these components
only) with soap solution or isopropyl alcohol,
afterwards rince with distilled water.
2.
Let these parts dry and cool down completely. Residual
moisture in the nose cones may result in a loss of
accuracy.
3.
Lubricate the piston with a very thin coating of the
silicone oil supplied. For the central guide rod (Z) only
use the recommended fluorstatic grease!
5.
After assembling the device, performe the reference
run (rEF).
C
59
Disassembling the Manifold
Removing of nose cones and seals for cleaning or replacing
1. Unscrew the manifold from
the handle.
2. Turn both closures of the
B
A
manifold housing cover 90°
and slide off the housing.
➞
3. Push the mounting tool on
the nose cone and unscrew
it (Fig. A and B).
➞
4. Push the piston unit down to
the bottom. Remove the seal
and inspect it and clean or
replace if necessary (Fig. C).
Push the mounting tool on and unscrew the single nose cone
Note:
The seal (Abb. C) will either
remain inside the nose cone
or will stay on the piston
after the nose cone is
removed.
D
C
6. If required, lubricate the
piston lightly with the supplied
silicone oil.
8. Reassemble the manifold
➞
with its flat side facing upward. Use the mounting tool
to mount and tighten the
cleaned or new nose cone
(Fig. D).
and check the instrument
for tightness (s. page 59
„Servicing“).
Remove the seal for cleaning
or replacement
60
➞
7. Push the seal on the piston
Insert the seal and screw in
the cleaned or new nose cone
Disassembling the Manifold
English
Removing of pistons for cleaning or replacing
1. Unscrew the manifold from
the handle.
A
B
2. Turn both closures of the
manifold housing cover 90°
and slide off the housing.
➞
➞
➞
3. Remove both outer Phillips
screws on the nose cone
assembly.
Z
➞
➞
Attention:
Do not loosen the central
guide rod (Z)!
4. Pull the piston and nose
Separate the piston and nose
cone assembly
C
Screw off the piston nut
D
cone assembly apart and
separate (Fig. A).
5. Place the mounting tool on
the piston nut and screw off
the piston nut (Fig. B).
6. Remove the piston nut and
➞
piston and screw on the
piston nut and tighten with
the mounting tool (Fig. D).
➞
pull out the piston (Fig. C).
7. Insert the cleaned or new
8. Reassemble the manifold and
check the instrument for
tightness (s. page 59
„Servicing“).
Remove the piston nut and the
piston
Insert the cleaned or new piston
and tighten the piston nut
61
Charging and Replacing the Battery
A fully charged battery allows approx. eight hours of continuous pipetting of
liquids with a viscosity and density similar to water.
Important!
Before charging the battery ensure that the AC adapter is compatible with the line voltage in the laboratory. Do not charge the device in an explosive environment. The battery can only be charged inside the
Transferpette ®-8/-12 electronic.
Charge the battery
a) Insert the charging cable plug for the AC
adapter into the jack at the top of the
Transferpette®-8/-12 electronic; charging
starts automatically
b) During the charging, the bars for the battery
capacity run continually from the bottom to
the top. The battery is fully charged, when
the bars in the display have stopped
moving.
Pipetting during charging?
During charging, you can continue to work with the Transferpette®-8/-12 electronic.
If the battery is fully discharged, it will take a few minutes until a certain minimum charge capacity is
available, which is needed to operate the instrument safely.
Note:
The last settings are stored in the memory of the instrument. If the battery is fully discharged
or the battery is changed, these settings are saved.
Replace the battery
a) Open the battery compartment cover.
Remove the battery and pull the plug
gently out of the socket.
A
b) Insert the plug of the new battery into the
socket and insert the battery.
B
c) Put the battery compartment cover in
place again and close it.
C
Remove the battery from the instrument, when it is not to be used
for longer periods.
62
Charging and Replacing the Battery
Note:
a) After the battery is inserted, the display
shows the full capacity indicator with a
blinking frame, the instrument does not
recognize the charging status right now.
After 3.5 hours of charging time – safe full
charging of the battery – the frame stops
blinking.
English
Battery display after
inserting a battery
After inserting a battery always charge 3.5 hours!
Battery regeneration function
(Refresh function)
In order to extend the service life and to optimize performance of the battery, the Transferpette ®-8/-12
electronic has a regeneration function (refresh function). This program provides a controlled full
discharge and recharging of the battery. To optimize the battery performance, this refresh function
should be used periodically.
Perform the refresh
function
a) Insert the plug for the AC adapter into the
jack on the top of the Transferpette®-8/-12
electronic.
b) Press and hold the lower
arrow key (>3 sec). During
the discharging process, the
capacity bars for the battery
indicator run continually from
the top to the bottom.
1x >3s
c) After the controlled discharge (up to
3 hours), the charging process (3.5 hours)
is started automatically. During charging,
the capacity bars run continually from the
bottom to the top.
Interrupting the discharge-charge cycle
Press any button to end the program. The instrument switches automatically to the standard pipette
mode (PIP) and to the nominal volume and the normal charging process is started automatically, see
page 62. Removing the plug for the AC adapter also ends the program.
63
Troubleshooting
If an error occurs, the instrument display shows “Err” and the error number is also shown. The instrument
will now only react to the ENTER key. Pressing the ENTER key will attempt to restart the instrument.
Therefore, a reference run is automatically requested.
Problem
Possible cause
Corrective action
Battery discharged or
faulty
Charge battery for at least
5 min without operating,
then only operate with
charging cable attached
until battery is recharged.
Replace battery if needed.
Faulty electronic
component
Send in the instrument
for repair.
Instrument does not
react
Faulty electronic
component
Send in the instrument
for repair.
Instrument does not
react
Unpredicted program
error
Confirm error by
pressing the ENTER
key. The instrument is
reinitialized.
Instrument does not
react
No battery inserted
Insert battery.
Battery is defective
Replace battery.
Faulty electronic
component
Send in the instrument
for repair.
Display is dark
Electrostatic discharge
Remove and insert the
battery.
Tip drips/
instrument not sealed
or volume error
Improper tip
Only use quality tips.
Tip is not properly
seated
Press tip in firmly
Piston seal is contaminated or damaged
Clean the instrument/
replace the seal.
Piston movement is
limited
Unscrew the manifold
and move the metal part
in the middle by hand.
Instrument does not
react
Liquid is not aspirated
or there is a loud motor
noise
64
Error message
Ordering Information · Accessories · Spare Parts
Volume
2 - 20 µl
10 - 100 µl
30 - 300 µl
Cat. No.
27054 02
27054 08
27054 12
English
Transferpette ®-8 electronic incl. AC adapter (110V/50-60 Hz)
Transferpette ®-12 electronic incl. AC adapter (110V/50-60 Hz)
Volume
2 - 20 µl
10 - 100 µl
30 - 300 µl
Cat. No.
27054 22
27054 28
27054 32
Quality pipette tips PLASTIBRAND®
racked in Tip-Box SL
AC adapters
Cat. No.
Volume
7053 52
Spare parts Transferpette -8/-12 electronic
Parts will differ slightly depending on nominal
volume of instrument. (Fig. shows spare parts
for Transferpette ®-8/-12 electronic 10-100 µl.)
Cat. No.
7022 02
0.1 -
20 µl
96
0.5 -
20 µl
96
7022 04
2
- 200 µl
96
7022 06
5
- 300 µl
96
7022 08
Repl. battery
®
Total tips per pack
Silicone oil
Fluorstatic gr.
Cat. No.
Cat. No.
Cat. No.
7055 00
7036 77
7036 78
A
D
Seal
B
Volume
C
Piston
Nose cone
V-Ring/O-Ring
A
B
C
D
2 - 20 µl
7056 70 7056 80 7034 13 7033 41
10 - 100 µl
7056 72 7056 82 7034 91 7033 44
30 - 300 µl
7056 74 7056 84 7034 91 7033 46
65
Repairs
If a problem cannot be fixed by following the troubleshooting guide, or by
replacing one of the parts listed on page 65, then the instrument must be
sent in for repair.
Please note: for the safety of courriers and our employees, and to
avoid violation of federal and local laws, only clean instruments free
of any chemical, biological or radioactive hazards can be inspected
and repaired!
Sending in for repair
Important:
Transporting of hazardous materials without a permit ist a
violation of federal law.
BrandTech Scientific, Inc. will not accept instruments that are not
appropriately cleaned and decontaminated.
Therefore contact BrandTech Scientific, Inc. and obtain return authorization
before sending your instrument for service.
Note:
66
No warranty claims can be considered if repairs other than those
described have been made or attempted.