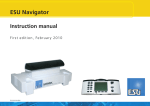
1
User Manual
1st edition, October 2 0 0 6
1
contents
1. Declaration of conformity ................................ 3
2. WEEE-Declaration ........................................... 3
3. Important Remarks – Please read this section first .... 4
4. Introduction – What can ECoS ......................... 4
5. Unpacking & Set-up ........................................ 5
5.1.
5.2.
5.3.
5.4.
Opening the package ...............................................
Contents of package .................................................
Locating the device ....................................................
Inserting the batteries ................................................
5
5
5
5
6. Starting up quickly ......................................... 5
6.1. Overview of possible connections ..............................
6.2. Minimal wiring for an initial test ................................
6.3. Overview of control input elements ...........................
6.3.1. Cabs ......................................................................
6.3.2. Touch screen ..........................................................
6.4. Your first train – call up a locomotive and run it .........
5
6
6
6
7
7
7. Features of ECoS ............................................ 8
7.1. Running locomotives ................................................. 8
7.1.1. Data formats .......................................................... 8
7.1.1.1. Motorola-format ................................................. 8
7.1.1.2. Range of addresses - Motorola ........................... 8
7.1.1.3. DCC-format ........................................................ 8
7.1.1.4. LGB®-Format extensions ..................................... 8
7.1.1.5. Selectrix® ............................................................ 8
7.1.2. Multi-protocol operation ........................................ 8
7.2. Consisting ................................................................. 9
7.3. Running shuttle trains ............................................... 9
7.4. Accessories with magnetic drives (solenoids) .............. 9
7.5. Routes ...................................................................... 9
7.6. Programming decoders ............................................. 9
7.6.1. Programming track ................................................. 9
7.6.2. Programming On the Main .................................... 9
7.7. Feedback with s88 .................................................. 10
7.8. Continue to use your old system with ECoSniffer .... 10
7.9. ECoSlink bus system ................................................ 10
7.10. ECoSlot module extension compartment ............... 10
8. Wiring details ............................................... 10
8.1. Power supply ..........................................................
8.2. Power supply ..........................................................
8.3. Track connection .....................................................
8.3.1. Wiring two-conductor tracks (standard DC) .........
2
10
10
11
11
8.3.2. Wiring three-conductor tracks ..............................
8.4. Wiring the programming track .................................
8.5. ECoSlink .................................................................
8.6. Computer interface .................................................
8.7. Wiring external boosters ..........................................
8.7.1. Suitable systems ...................................................
8.7.2. Connecting a DCC-booster .................................
8.7.3. Connecting a Märklin®-booster ...........................
8.7.4. Short circuit protection .........................................
8.8. ECoSniffer input ......................................................
8.9. s88-Input ................................................................
11
11
11
11
12
12
12
12
12
12
13
11.7.1. Conflicts of addresses ........................................ 18
11.7.2. "Locking" - Exclusive access to locomotives ........ 19
11.7.3. Address ranges – recommendations .................. 19
12. Operating consists ...................................... 19
12.1.
12.2.
12.3.
12.4.
12.5.
Add a new consist ................................................
Assigning a consist to a throttle ............................
Change parameters of consists .............................
Deleting a consist ..................................................
Hints for running consists .....................................
19
19
19
19
19
13. Switching accessories ................................. 19
9. Control elements in detail ............................. 14
9.1. Cabs .......................................................................
9.1.1. Throttles ...............................................................
9.1.2. Joystick .................................................................
9.1.3. Function buttons .................................................
9.2. Stop-button ............................................................
9.3. Go-button ...............................................................
9.4. Touch screen ...........................................................
9.5. Storing the stylus .....................................................
14
14
14
14
15
15
15
15
10. Introduction to operations ........................... 15
10.1.
10.2.
10.3.
10.4.
10.5.
10.6.
Main menue .........................................................
Switch buttons ......................................................
Data entry fields ....................................................
Choice lists ............................................................
Slide controller ......................................................
Radio buttons and choice fields ............................
15
16
16
16
16
16
11. Run locomotives ......................................... 16
11.1. Add new locos .....................................................
11.1.1. Direct entry in the list of locomotives ..................
11.1.1.1. Data format ....................................................
11.1.1.2. Address ..........................................................
11.1.1.3. Sniffer address ................................................
11.1.1.4. Name ..............................................................
11.1.1.5. Symbol ...........................................................
11.1.1.6. Favourites .......................................................
11.1.1.7. Speed steps / max speed display .....................
11.1.1.8. Direct changing of address and speed step settings
11.1.1.9. Extended decoder settings ..............................
11.1.2. Indirect entry of a locomotive .............................
11.2. Changing loco parameters ....................................
11.3. Assigning a loco to a throttle ................................
11.4. Speedometer display options ................................
11.5. Deleting a locomotive ............................................
11.6. Assign function symboles – Link mode ..................
11.7. Interesting information on how to run a loco .......
16
16
16
16
16
16
16
16
17
17
17
17
17
17
18
18
18
18
13.1. Enter new accessories ............................................
13.1.1. Data format .......................................................
13.1.2. Address .............................................................
13.1.3. Name .................................................................
13.1.4. Symbol ...............................................................
13.1.5. Permanent versus momentary action buttons .....
13.1.6. Switching time ...................................................
13.2. Setting accessory parameters .................................
13.3. Assign accessories to the turnout control panel ....
13.3.1. New link ............................................................
13.3.2. Delete a link .......................................................
13.4. Switch an accessory ...............................................
13.5. Delete an accessory ...............................................
19
20
20
20
20
20
20
20
20
20
21
21
21
14. Routes ....................................................... 21
14.1. Enter new route ....................................................
14.1.1. Advanced settings .............................................
14.1.1.1. Name ..............................................................
14.1.1.2. Delay ..............................................................
14.1.1.3. Trigger a route with an s88-contact ................
14.2. Edit a route ...........................................................
14.3. Assign a route to the turnout control panel ..........
14.4. Switching a route ..................................................
14.5. Deleting a route ....................................................
21
22
22
22
22
22
22
22
22
15. Running trains in "shuttle train" mode ........ 22
15.1. Configuring a shuttle train line ............................. 23
15.2. Locos travel "out-and-back" ................................. 23
15.3. Cancel shuttle train mode ..................................... 23
16. Programming Decoders ............................... 24
16.1. DCC-Programming ................................................
16.1.1. Direct Mode (CV-Mode) .....................................
16.1.2. Programming on the Main (POM) ......................
16.2. Introduction to Motorola-programming ................
16.3. Overview of programming options with ECoS .......
16.4. Manual programming (DCC & Motorola) .............
24
24
24
24
24
24
16.4.1. Read CVs ...........................................................
16.4.2. Write CVs ...........................................................
16.4.3. Programming on the Main (POM) ......................
16.4.4. Searching the address ........................................
16.5. Graphic programming ...........................................
16.5.1. Decoder profiles .................................................
16.5.2. Manual configuration of decoder profiles ..........
16.5.3. Automatic assignment of profiles .......................
16.5.4. Editing decoder settings .....................................
16.5.4.1. Download mode ............................................
16.5.4.2. Live mode .......................................................
16.5.5. More info on profile ..........................................
20.2.2. Backup configuration ........................................
20.2.3. Restore configuration ........................................
20.2.4. Resetting the access code ..................................
20.3. Train control software on your computer ...............
31
31
31
31
25
25
25
25
25
25
25
26
26
26
26
26
21. Annex ........................................................ 35
17. ECoSniffer .................................................. 26
21.1. Technical data ....................................................... 35
21.2. Code table for accessory decoder .......................... 35
17.1. Sniffer addresses ................................................... 26
17.2. Hints for using ECoSniffer ..................................... 27
18. Configuration menue .................................. 27
18.1. General settings ....................................................
18.1.1. Setting the language .........................................
18.1.2. LCD contrast and brightness ..............................
18.1.3. Current threshold of the internal booster ..........
18.1.4. Reset .................................................................
18.2. Display for train operations ...................................
18.2.1. Taking over loco .................................................
18.2.2. Numbering functions .........................................
18.2.3. Starting mode ....................................................
18.2.4. Pre-determined protocol for new locos ..............
18.3. Components in the system ...................................
18.3.1. Booster configuration ........................................
18.4. Access control .......................................................
18.4.1. Lock functions ....................................................
18.4.2. Access code .......................................................
18.4.2.1. Changing the code ........................................
18.4.2.2. Activating the code .........................................
18.5. Global information ................................................
18.5.1. Software version ................................................
18.5.2. Serial number .....................................................
27
27
27
27
27
27
27
27
28
28
28
28
28
28
28
28
29
29
29
29
19. s88-bus-configuration ................................. 29
20. Computer interface ..................................... 29
20.1. IP Set-up ...............................................................
20.1.1. Manually assigning IP-Addresses in Windows ....
20.1.2. Assigning an IP-address on ECoS ......................
20.1.3. DHCP-Server in the net ......................................
20.2. Web interface ........................................................
20.2.1. Firmware update ................................................
29
29
30
30
30
30
22. Warranty Certificate .................................... 32
23. Registration card ......................................... 33
24. Exchange V
oucher for 15V Power Supply ..... 33
Voucher
1. Declaration of conformity
We, ESU electronic solutions ulm GmbH & Co KG, Industriestraße
5, D-89081 Ulm, declare herewith in sole responsibility compliance
of the product
"ECoS ESU Command Station"
to which this declaration is related to , with the following
standards:
EN 71 1-3 : 1988 / 6 : 1994 – EN 50088 : 1996 – EN 55014, part
1 + part 2 : 1993
EN 61000-3-2 : 1995 – EN 60742 : 1995 – EN 61558-2-7 : 1998
ECoS bears the CE-mark according to the guidelines as per
88 / 378 / EWG – 89 / 336 / EWG – 73 / 23 / EWG
2. WEEE-Declaration
Disposal of old electrical and electronic devices (applicable in the
European Union and other European countries with separate
collection system).
This mark on the product, the packaging or the relevant
documentation indicates, that this product may
not be treated as ordinary household garbage.
Instead this product has to be delivered to a suitable
disposal point for recycling of electrical or electronic
equipment. By disposing of this product in the
appropriate manner you help to avoid negative
impact on the environment and health that could
be caused by inappropriate disposal. Recycling of materials
contributes to conserve our natural environment. For more
information on recycling this product please contact your local
administration, the rubbish disposal service or the shop where
you have purchased this product.
Batteries do not belong into household trash!
Please do not dispose of discharged batteries in your household
trash: take them to a collection point at your local town hall or
dealer. Thus you assure an environmentally friendly way of
disposal.
Copyright 1998 - 2006 by ESU electronic solutions ulm GmbH & Co KG. Irrtum,
Änderungen die dem technischen Fortschritt dienen, Liefermöglichkeiten und alle
sonstigen Rechte vorbehalten. Elektrische und mechanische Maßangaben sowie Abbildungen ohne Gewähr. Jede Haftung für Schäden und Folgeschäden durch nicht
bestimmungsgemäßen Gebrauch, Nichtbeachtung dieser Anleitung, eigenmächtige
Umbauten u. ä. ist ausgeschlossen. Nicht geeignet für Kinder unter 14 Jahren. Bei
unsachgemäßem Gebrauch besteht Verletzungsgefahr.
Märklin ist ein eingetragenes Warenzeichen der Firma Gebr. Märklin und Cie. GmbH,
Göppingen. RailCom ist ein eingetragenes Warenzeichen der Firma Lenz Elektronik
GmbH, Giessen.Alle anderen Warenzeichen sind Eigentum ihrer jeweiligen Rechteinhaber.
ESU electronic solutions ulm GmbH & Co. KG entwickelt entsprechend seiner Politik
die Produkte ständig weiter. ESU behält sich deshalb das Recht vor, ohne vorherige
Ankündigung an jedem der in der Dokumentation beschriebenen Produkte Änderungen und Verbesserungen vorzunehmen.
Vervielfältigungen und Reproduktionen dieser Dokumentation in jeglicher Form bedürfen der vorherigen schriftlichen Genehmigung durch ESU.
3
Introduction – What can ECoS
3. Important Remarks – Please read this section first
Welcome to ECoS!
We congratulate you to your purchase of an ESU ECoS Digital
Command Station. ECoS is a modern, intelligent model train
control system designed with the future in mind. In a short time
you will experience how easy it is to run trains and other devices
on your layout with ECoS and to discover new undreamt-of
possibilities for your hobby thanks to a unique variety of
functions.
This manual will guide you step by step through the multitude
of possibilities of ECoS. However, have one request:
Please read this manual carefully prior to initial operation.
Although ECoS is robustly constructed there is the risk of damage
due to incorrect wiring. If in doubt, avoid any "costly"
experiments!
• ECoS is only intended for the use with electrical model train
layouts. Never operate ECoS without paying attention and
never use it for controlling devices designed for transporting
persons.
• ECoS is not a toy. Make sure that children use this device
only when adults are present.
• Only use the power supply provided for ECoS: Other
transformers may lead to reduced output or in extreme
cases to damage of the command station.
• Use the power supply provided with ECoS for the energy
supply for ECoS only and not for any other household
appliances.
• Never use Y-adapters in order to provide power to other
devices for your model trains! An unintended connection to
ground could lead to damage or destruction of your ECoS!
• Check the power supply regularly for damage on the
housing or the mains cable. Damaged parts may not be
used under any circumstances! Do not attempt to repair
the power supply! This may be fatal!
• Assure adequate ventilation of the power supply. Do not
install in furniture without sufficient air circulation since this
could lead to overheating or fire!
• ECoS may only be operated with the devices described in
this manual. Any other use as described here is not
permitted..
• Only connect devices intended for this purpose to ECoS.
Even if other devices (also from other suppliers) may have
the same plugs and sockets does this not automatically
indicate that such devices may be operated with ECoS.
• Adhere to the wiring diagrams shown in this manual when
connecting your layout. Other circuitry could lead to damage
of ECoS.
• Do not drop your ECoS command station or subject it to
mechanical impact or vibrations. Such rough treatment could
cause breakage of components within the device.
• Never support yourself on the touch screen or sit on your
ECoS..
4
• The monitor with integral touch screen is a precision part.
Press it only lightly with your finger or the supplied peg
(stylus). Never use hard or pointed objects to avoid unrepairable damage to the touch screen..
• Never expose your ECoS to rain, humidity or direct sunlight.
In case of high temperature variations (e.g. when you take
your ECoS from the cold car to your comfortably heated
house) please wait for a few hours until the device has
adjusted to the temperature before switching it on..
• When using ECoS outside you must protect it from the
elements under all circumstances! Only keep ECoS outside
as long as you run trains and avoid temperatures below 8°
Celsius or above 30° Celsius.
• Do not use any aggressive chemicals, cleaning solutions or
solvents for cleaning ECoS. Never use liquids or spray for
cleaning the monitor. Instead use a clean slightly (!) moist
cloth and only when ECoS is switched off..
• Do not attempt to open ECoS. Inappropriate handling may
lead to damage of the command station.
4. Introduction – What can ECoS
ECoS is a state-of-the-art complete digital control system for
model trains of all gauges. ECoS combines several devices in
one unit:
• A multi-protocol digital command station. Suitable for easy
mixed operation of mobile and stationary decoders suitable
for Motorola®, DCC and Selectrix® protocols.
• Large seven inch FSTN LCD Display with touch screen and
white illumination. It serves for displaying information in
plain text and very easy menue-guided operation.
• Two ergonomic cabs with easy to grip throttle knobs, 4way joystick and 8 function buttons each.
• An integral booster with up to 4 Ampere output for supplying
"digital power" to your the tracks of your layout. A feedback
decoder as per the latest NMRA DCC standard ("Bidirectional Communication, RailCom®) is supplied as an integral part.
• Sockets for connecting external boosters compatible with
DCC or Märklin® 6017. Simply continue to use your own
boosters.
• One socket for wiring the programming track. With this
you can read out and program your mobile decoders
independent from the layout suitable for DCC, Selectrix®
and programmable Motorola®-decoders (e.g. ESU
LokPilot® mfx®, LokSound® mfx®).
• A computer interface (10 MBit Ethernet LAN, RJ45) allows
you to download software updates, save and restore your
configuration as well as controlling your layout with a PC
(with the aid of dedicated software by several suppliers).
• ECoSlink high-speed bus. You may connect up to 128 other
devices to ECoSlink. Other handheld (wireless) controllers,
boosters, bus distributors or feedback decoders, they all will
be detected automatically once they are plugged in: this is
true "Plug & Play".
• s88-feedback bus. This popular feedback system by
Märklin® enables you to control routes or to automate
train movements "shuttle train (shuttle trains).
• ECoSniffer-input. The port for any DCC resp. Motorola®capable, already available digital command stations:
Continue to use your favourite handheld controllers and
accessory keyboards – not a problem with ECoS.
• The ECoSlot module expansion compartment allows
upgrading of ECoS with new components at a later stage.
All above mentioned parts and components enable you to
run your trains with never before imagined comfort and
ease. You may fully focus your attention on your trains
while ECoS takes care of the details like a good co-pilot.
And here are all the things you can do with ECoS:
• Run locomotives: ECoS handles up to 16384 locomotives
and stores the name, a symbol, the function buttons and
their corresponding symbols, address and data format. As
from now on you will call up your locomotives by their name
and do not have to remember address numbers any longer!
• Control magnetic (solenoid) accessories: You may
comfortably switch up to 2048 turnouts, signals and other
devices with solenoid drives recognised by name and symbol
with the integral keyboard with 74 pages.
• Multi-traction (consists) are a basic function for ECoS:
Assemble any locomotives to a consist and control them
simultaneously.
• Routes are really no problem for ECoS. Group your
accessories and then switch them together; either manually
or triggered by an s88-feedback contact.
• The completely new functionality of the shuttle train mode
allows the definition of up to 8 track segments for shuttle
trains with two s88-contacts each. This is the easiest way to
run shuttle trains.
• Programming decoders: Due to the monitor programming
becomes as easy as never before: All parameters are shown
in plain text and avoid mistakes. Set your locomotives onto
the programming track or use P.O.M. (Programming On
the Main).
• In most cases you can continue to use your "old" digital
system: Provided it "speaks" DCC or Motorola®, you may
connect it to the ECoSniffer port and thus use all your
present handheld throttles.
Unpacking & Set-up
5. Unpacking & Set-up
5.1. Opening the package
The ECoS – command station is safely protected in two cartons
when delivered. First open the brown shipping carton at one
end and pull out the printed carton. This carton can be opened
at either end. Now pull out the two-part blister pack and place
it on a table with the monitor of ECoS facing upwards.
The upper half of the blister is secured to the lower part with
several buttons. No adhesive has been used. Pull both blister
halves apart at each button until you can separate the two
halves.
Please keep the packaging in a safe place for later use. Only
the original packaging guarantees protection from transport
damage. Pack your ECoS into the blister and both cartons
prior to dispatch by mail or parcel service.
6. Starting up quickly
5.4. Inserting the batteries
We recommend to always switch on your ECoS with batteries
installed and charged. The batteries assure a proper shutdown
of ECoS in case of a power failure or intended power interruption
(removal of power plug at the end of the operating session).
This "emergency power supply" is required to bridge the short
time gap between the interruption of the power and the
shutdown of the device. Batteries can be replaced without
any problems whenever ECoS is switched off. Your data is
safely stored in the flash memory of ECoS.
The battery compartment is located at the back of ECoS.
• Remove the cover by pressing the clip in the direction of the
arrow.
• Insert four batteries in the correct polarity. The poles ("+" and
"-") are imprinted in the battery compartment.
s88
ECoSniffer
Booster
Network
ECoSlink Extend
ECoSlink Connect
ECoSlink Connect
ECoSlink Connect
Place ECoS on a flat, clean and dry surface within sight of your
model train layout. Assure a stable position of ECoS and an
optimal distance between yourself and the command station.
The monitor is tilted at 12 degrees against the support surface
and is best suited for a sitting operator (easy reading of text,
etc. on display).
Avoid reflections of bright walls or lighting equipment on the
monitor.
Provide suitable conditions for your ECoS: ideally operate ECoS
at room temperature. Avoid heat sources in the immediate
surroundings. Generally it can be said that any room conditions
that are comfortable for you will be good for ECoS.
B 0B 0
Main-Track
5.3. Locating the device
All sockets are located at the back of your ECoS command
station:
Power
Please check if all parts are in the package as soon as you have
unpacked it:
• ECoS-command station
• Stylus for operating touch screen
• Power supply 90VA
• Separate mains cable for Euro-power outlets
• Accessory pack with two two-pole terminals for track
connection
• Seven-pole terminal block for ECoSniffer-socket
• 4 batteries type AAA ("Micro")
• Manual
• Registration card (as part of the manual)
• Order form for 15V-power supply (as part of the manual)
• Guarantee card (as part of the manual)
Should any one of these parts be missing please contact your
dealer immediately.
6.1. Overview of possible connections
Prog-Track
5.2. Contents of package
After working through this you will be able to carry out a quick
test of your ECoS command station and to do the "first laps"
with one locomotive.
Please read the entire manual before you wire your ECoS
permanently to your layout.
Figure 2
Power:
Figure 1
• Close the cover of the battery compartment.
• Only use high quality batteries or re-chargeable batteries.
• Remove batteries only when ECoS is switched off (pull mains
plug).
• After longer periods without operation (e.g. after the summer
vacation) please remove the batteries to avoid any leakage.
• ECoS does not contain any circuitry for re-charging batteries.
Use re-chargeable batteries with an external charger. Battery
chargers are available in hardware stores or electronic stores.
• Never try to charge normal batteries! There is a high risk of fire
and explosion!
Socket for power supply of ECoS and your layout
Connect this socket only with the power supply
delivered with ECoS.
Prog-Track: Two-way socket (5.08mm contact spacing) for
programming track (optional)
Main-Track: Two-way socket (5.08mm contact spacing) for
mainline
ECoSlink:
Three seven-way Mini-DIN sockets for direct
connection of external ECoSlink devices
(handheld controllers, boosters, feedback
decoders, etc.)
ECoSlink Extend: Nine-way mini-sockets (DIN) for wiring busextension modules to ECoSlink (up to 100m
total length)
Network:
10MBit Ethernet RJ45 socket for connecting
ECoS to a computer network
s88:
Six-way pin-connector for wiring Märklin® s88compatible feedback decoders (up to 32
modules)
ECoSniffer: Two-way socket (3.5mm contact spacing) for
connecting existing digital systems. Wire the track
terminals of your "old" command station to this
socket.
Booster:
Five-way socket (3.5mm contact spacing) for
wiring external boosters compatible with DCCstandards or Märklin® 6017.
5
Starting up quickly
c)
6.2. Minimal wiring for an initial test
l)
k)
e)
f)
a)
g)
B
to the
power
supply
0
d)
2 conductor
track
B
j)
h)
b)
Figure 5
0
6.3.1. Cabs
3 conductor
track
6.3. Overview of control input elements
All control input elements of ECoS are located on the top of
the housing as per Figure 4 below.
a) Left Cab
b) Right Cab
c) "Stop" button: disconnects track power from mainline
d) "Go" button: switches the track power on: track voltage is
present on the terminals.
e) Monitor with LCD Display and touch screen
f) "Stylus"
g) Storage space for stylus
h) Holding groove for stylus
Figure 3
• Connect the power supply to the appropriate socket of ECoS.
• Wire the two terminals "Main" to your test track.
With DCC-systems polarity is not an issue. When using 3conductor tracks polarity has to be observed; otherwise some
older locomotives and accessory decoders may not function as
intended.
e)
f)
g)
a)
b)
h)
c)
d)
Figure 4
6
i)
Each throttle consists of several components as shown in Figure
5 above:
a) Throttle knob with definitive end position and change-ofdirection function. Turning the knob clockwise increases
the speed while turning anti-clockwise reduces the speed..
The position of the knob corresponds with the speed. Turning
the throttle knob to the left beyond the "Zero"-position to
a clearly audible and mechanical "click" changes the
direction of travel.
b) Four-way joystick with centre-click-function serves for
navigating in the menues, selecting locomotives and to trigger
the whistle ("Playable Whistle") of locomotives equipped
with suitable decoders.
c) Function buttons. The first 8 functions of each locomotive
can be directly activated by pushing one of these buttons.
d) Function button symbols. Depending on the data format
and setting you may switch on and off up to 20 functions in
each locomotive by touching the appropriate symbol.
e) Name of locomotive: displays the name of the locomotive
(can be made up of letters and numbers).
f) Locomotive symbol: displays the symbol of your choice (can
be freely selected).
g) Speedometer display: shows the current speed.
h) Speed step indicator: displays the current speed step. The
range of values depends on the data format.
i) Direction of travel "Reverse": is highlighted, if the locomotive
travels forward.
j) Direction of travel "Forward": is highlighted, if the locomotive
travels backwards.
k) Select locomotive: pressing this screen button opens the
menue for selecting a locomotive. Press this button if you
want to run another locomotive.
l) Locomotive menue: after pressing this screen button you
can enter, edit or delete new locomotives or consists or
assign shuttle trains.
Your first train
6.3.2. Touch screen
As the name says the touch screen responds to contact with
your finger or with the stylus. Please do not use any hard or
pointed objects; this could lead to permanent scratches on the
surface.
The display shows information and screen buttons. Touching a
screen button will result in some action.
Examples for screen buttons:
Touching this screen button confirms an action.
Touching this screen button cancels an action; any data entered during this particular process will not be saved.
In some menues you can select or cancel certain options by
touching the screen button ("ticking them off electronically").
Choice lists are opened by touching the right arrow on the
heading of the list. Then a list of available elements appears.
Slider: Slide controllers enable you to comfortably set values.
Input fields are for entering text or numbers with the aid of the
display keyboard.
In our example we want to run a locomotive with the address
"44". Touch the number "3" behind the text "address" with
your finger. Did you notice the change? "Address" is now
framed to indicate that you can enter an address.
Push the Delete button of the keyboard to remove the "3"
and type "44".
• Turn the throttle to the right and watch the locomotive move.
The speedometer needle shows the current speed at all times;
at the same time the speed step is displayed as well (refer to
Figure 5 h).
• Turn the throttle to the left beyond the "zero" position until you
feel and hear the "click" and you have changed direction of
travel.
STOP
100%
Figure 9
6.4. Your first train – call up a locomotive and run it
We want to show you how easy it is to enter, call up and run a
locomotive. First make sure that ECoS is connected as per the
instructions and turn on the power supply.
ECoS needs one to two minutes for initialisation ("start-up"). A
small square at the bottom of the monitor runs from left to
right to indicate this process. As soon as ECoS is ready the
"Go"-button lights up (green).
Any audible chirping from the command station is quite normal
and no reason for concern..
Before we can run the locomotive we must enter it in the
internal list of locomotives in ECoS.
Touch the screen button "Locomotive Menue" at the top left
on the display and select "New Locomotive".
In our example we assume that the locomotive operates in
DCC-format. The DCC-mode is the default mode. Should you
want to run this locomotive in Motorola® format (e.g. for
Märklin® locomotives), push the arrow behind "data format"
and select "Motorola 14".
Confirm the entry by pushing "OK".
Now you arrive automatically in the main menu of ECoS, the
newly entered locomotive is called up and ready to run..
Figure 6
Figure 8
Figure 7
The throttles are supported by a motor drive. Whenever you
turn the knob beyond "zero" and change direction simply release
the knob and it will return to the zero position automatically.
• Any functions of the locomotive can be turned on or off by
pushing the corresponding buttons or by touching the screen
buttons.
With ECoS it is that easy to enter and run new locomotives.
How to proceed from here?
The following chapter 7 informs you about the characteristics of
ECoS and the technical background.
In chapter 8 we describe all possible connections in details.
Chapters 9 and 10 outline the operating philosophy and the
input devices available.
The following chapter deals with individual features of ECoS and
how to use them.
We recommend studying chapters 8 to 10 under all circumstances.
After a short while you will understand the way ECoS works and
easily master all its functions.
Should you come to a point where you do not know how to go
further simply look for advise at the online-help for ECoS on our
website. If in doubt we recommend to again study this manual.
Please consider, that working with ECoS requires some time to
get accustomed to it due to the manifold options available. Be
patient and take your time to simply try out things. Do not
hesitate - ECoS will support you like a good co-pilot.
We wish you lots of fun on your discovery tour of your ECoS!
7
Features of ECoS
7. Features of ECoS
ECoS is a state-of-the-art digital command control system and
offers many features. We want to explain the possibilities and
some technical background in greater detail. The detailed
operating instructions are given in chapter 13. If you wish you
may turn to these pages right now if you do not want to know
the technical background at this stage.
7.1. Running locomotives
ECoS can control up to 16,384 locomotives simultaneously. Of
course, this is only a theoretical number that will hardly be
reached in practice. The electrical power required for so many
locomotives would far exceed the maximum number of 128
boosters. The response times for each locomotive would also
be unacceptably long.
As a multi-protocol-system ECoS supports several data formats
for running your locomotives:
7.1.1. Data formats
7.1.1.1. Motorola-format
Motorola I ("Old" Motorola-format)
First generation Märklin® locomotives support this format in
which the status of the lighting function is transmitted besides
14 speed steps. Only when changing direction a special signal
will be sent to the locomotive. However, it is possible that the
direction status of the locomotive and the command station
status for this loco do not correspond initially. In this case you
would have to change direction once more to assure a
corresponding status.
Motorola® II (so called "new data format")
Besides the 14 speed steps a signal indicating direction of travel
is transmitted continuously. The info regarding direction always
corresponds between command station and locomotive.
The status of F1 to F4 is transmitted in a separate packet. This
is only generated if the status of at least one function has
changed. Advanced decoders store this information locally to
assure that it corresponds with the command station even in
case of a power interruption.
ECoS does not differentiate between Motorola old and new
but transmits (by using a special method.) data packets in both
formats.
In ECoS we call this mode "Motorola14"
Märklin® built an extension into their decoder series 6090x to
provide 27 speed steps: the so-called "half speed step"
between the actual speed steps increases the resolution. The
command station must transmit specific command sequences
in order to achieve this. ECoS knows this mode as
"Motorola27".
8
If you run a locomotive in "Motorola27" mode and you notice
that functions are only activated at every second speed step,
then your decoder does not support the 27 speed steps. Please
switch to "Motorola14".
ESU extended all decoders to suit the Motorola®-format by
an additional mode, namely "Motorola28". This operates with
28 real speed steps.
Run your mfx® decoders with "Motorola28" to allow the
locomotive to respond to minute adjustments of the throttle.
In the late 1980-s Märklin® launched some models with special
functions (e.g. coach with dancing figures, club coach, etc.)
that have to be addressed with a special data packet. Its
structure is similar to the packets for accessory decoders. We
call it "Motorola Fx 14".
ESU LokSound® mfx-decoders support a second Motorola®address. With this address it is also possible to activate function
buttons F5 to F8. ECoS supports transmission of this second
address in such a way that you can actually use 9 addresses.
7.1.1.2. Range of addresses - Motorola
Märklin® defined 80 addresses for its original digital system.
Since this number is far too small for many applications several
decoder suppliers extended the range. ESU LokSound mfx®,
LokPilot mfx® and LokPilot V3.0 support 255 addresses in the
Motorola-format.
If you are not sure which DCC modes are supported by your
decoder try DCC 28 first. This is the compulsory mode as stated
by the NMRA. All ESU DCC decoders detect the number of
speed step automatically. You may just as well start with DCC
128.
7.1.1.4. LGB®-Format extensions
LGB® uses the DCC protocol for operating garden railways.
The old Lokmaus® had only one function button "F1" besides
the lighting button. But how could you switch so many functions
with just one button?
The "solution" was what became know as the "sequential
function status mode". The user knew if he for instance wanted
to switch function F3, he had to press F1 three times in a row.
The decoder counts the number of status changes and then
switches the desired function. The disadvantage of this method
is that functions with higher numbers (e.g. F8) take longer to
respond, since several "on-off" commands have to be
transmitted.
Should you have any LGB locos with such decoders and you
want to run them with ECoS select the "LGB" format. It
corresponds to the "DCC14" format, but the functions are
activated sequentially in the background.
Modern LGB® locos or such locos with ESU LokSoundXL
decoders understand alternatively "DCC28" resp. "DCC128".
If in doubt, simply try it.
7.1.1.5. Selectrix®
7.1.1.3. DCC-format
The DCC standards published by the North American NMRA
(National Model Railroad Association) is based on a development
by the German company Lenz Elektronik.
In DCC-format up to 10,239 addresses, up to 21 functions and
up to 128 speed steps are encoded. In practice only 126 speed
steps can be used, the others are reserved for the emergency
stop function. The absolute direction of travel is also encoded.
How many of these addresses, functions and speed steps are
actually available depends on the type of decoder and the
command station. ECoS supports currently all known DCC
formats.
We differentiate between 14, 28 and 128 speed steps. In the
latter case 126 speed steps can actually be utilised.
Subject to the mode in which you want to run your DCC
locomotive please select "DCC14", "DCC28" or "DCC128" as
data format.
Please bear in mind, that the information regarding the speed
steps transmitted by ECoS has to correspond with the speed
step setting of the decoder. A data packet for "DCC14" is for
instance identical to one for "DCC128", but will be
"understood" differently by the decoder. If the settings do not
correspond then the headlights of the locomotive will blink
slowly while the locomotive is accelerating.
ECoS can control all locos with Selectrix® decoders. In this
mode 112 addresses, 31 speed steps and two function buttons
(Light and F1) are available. ECoS calls this mode "Selectrix".
7.1.2. Multi-protocol operation
ECoS can transmit all above formats in sequence. Thus each
loco can be controlled with its own data format. Mixed operation
of different decoders on the same track is generally possible
without any problems.
Some very old decoders may not be able to function properly
if another format is transmitted to the track besides "their
own". This may result in uncontrolled acceleration, blinking
headlights or other abnormal behaviour.
The very first series of Märklin® signals 763xx may get confused
if you run other data formats besides Motorola®.
If there is no colour mark at the underside of your Märklin®
signals we recommend to get them updated. A software
update makes them suitable for multi-protocol operation.
7.2. Consisting
7.4. Accessories with magnetic drives (solenoids)
7.5. Routes
ECoS enables you to set up and control consists of two or more
locos comfortably. All locos are listed in the memory of ECoS.
ECoS transmits separate signals (in the required data format)
to each loco of the consist. This happens at high speed so the
locos work like one. Locos with decoders that are not suitable
for consisting may also be in the consist. As indicated above it is
possible to run locos with different data formats and protocols
in the same consist.
One of the main features of ECoS is controlling accessories /
turnouts. By magnetic accessories we mean any device that is
operated by one or more solenoid drive. Amongst others these
are turnouts, signals, un-couplers or relays to switch lights or
motors.
ECoS can switch such devices via an accessory decoder.
In practice it is often useful to switch groups of turnouts and
signals and bring them into a pre-defined status instead of
switching them individually. ECoS allows you to combine them to
a so-called route. Switching a route is done in the same way as
switching an individual turnout except that all devices that are
part of this particular route are switched in sequence on after
another to reach the required status.
Routes are also stored internally and can be displayed by a specific
symbol on the accessory control panel of ECoS. ECoS can handle
up to 1024 routes with 256 individual devices each.
Each accessory can be part of as many routes as desired and, of
course, with different status or aspect.
ECoS transmits the appropriate signals in sequence – with an
adjustable gap between the individual signals. The duration of
the pulse depends on the type of accessory.
Routes can also be switched with s88 contacts: you can link any
s88 contact with any route. Thus it is possible to arrange sequential
processes and block protection.
All locos in a consist should have similar running characteristics.
Tune the locos - if necessary – by reprogramming acceleration
and maximum speed settings before combining them in a
consist.
You may assign a name and symbol to a consist in ECoS in the
same way as for a loco. A consist is always run with 128 speed
steps.
The available functions in a consist are determined by the
leading loco who’s functions will be displayed on the monitor.
The activated functions will be signalled to all locos in the consist.
Locos of a consist can be called up on another throttle, but
they cannot actually be run with that throttle.
7.3. Running shuttle trains
Many model train enthusiasts do not want to run their trains
simply "in circles" but want to have real point-to-point
operation. Branch lines onto mountains with terminal stations
at either end, small branch lines with a connection to a main
line, but also modular layouts are typical examples for such
point-to-point scenarios.
In ECoS we differentiate between shuttle tracks and shuttle
trains (locos) that run on these tracks (out and back). While the
tracks have to be set up only once it is quite possible to have
different locos on such a track. You may change the locos and
easily determine which trains should serve a particular branch
line.
ECoS can handle up to 8 shuttle lines and run one loco each on
each of these 8 lines. ECoS slows down the trains automatically
when they reach the end of the line, changes the direction and
lets the loco depart after a pre-determined layover time.
To detect the stopping point we use contact inputs of the s88
bus. One s88 input is needed for each stopping point.
Such stationary decoders are available from many
manufacturers. The most popular is probably the Märklin K83
ands compatible models. All such decoders can be used provided
they
• are compatible to Märklin® K83 resp. to Märklin® K84 and
understand the Motorola protocol or
• can process the appropriate DCC-format. DCC-accessory
decoders must comply with the "DCC accessory decoder"
standards.
Some accessory decoders by Roco behave like loco decoders
to enable them to work with the Lokmaus2. Such decoders
can only be operated with ECoS provided they can be set to a
DCC compatible mode.
7.6. Programming decoders
Wire accessory decoders as described in the manual. Some
accessory decoders are suitable for an external power supply
for the solenoids. We recommend a separate power supply for
all larger layouts: definitely use a separate transformer. Do not
use the ESU power supply for t his purpose.
ECoS allows you to program your decoders. ECoS knows two
principal programming modes and three different protocols: ECoS
supports DCC-programming as well as Motorola- and Selectrix®programming.
Please observe the correct polarity of the track power when
using k83 / k84 or compatible decoders.
7.6.1. Programming track
In ECoS accessory decoders are stored in lists similar to locos.
Each accessory can have its own name and symbol. This symbol
represents the function of the accessory. ECoS differentiates
between two- three- and four- aspect accessories. It is assumed
that whenever three- or four-aspect accessories are used the
second drive is wired to the following address of the decoder.
Example:
For a three-way turnout with the first address of 51 the second
address is automatically 52. The red output of the following
address (in this case: 52) cannot be used for other devices.
ECoS offers an integral control panel for turnouts with 74
levels (sub panels) with 16 each accessories. Thus you can arrange
your turnouts in groups and manually call them up when
necessary.
The programming track must be completely (!) isolated from the
rest of the layout and must be wired directly to the programming
track output of ECoS.
There should always be only one loco on the programming track
at any point in time. You may read out and write new values. All
DCC decoders are suitable for programming on the programming
track as well as programmable Motorola decoders (e.g. LokSound
mfx®, LokPilot mfx®), but also Selectrix® decoders. DCC and
Selectrix® decoders cannot only be completely re-programmed
on the programming track; it is also possible to read the values.
7.6.2. Programming On the Main
DCC decoders can be re-programmed directly on the main (also
known as "Programming On Main" or "POM"). The great
advantage is that any new settings can be monitored while
running the loco and without having to take it to the
programming track.
Such trains are stored in the virtual memory of ECoS. Thus this
feature is available regardless of the decoder type.
9
Features of ECoS
7.7. Feedback with s88
7.10. ECoSlot module extension compartment
ECoS offers a factory built-in galvanically isolated (!) input for
the very popular s88-modules. They serve as track occupancy
detectors and may be used for controlling routes and shuttle
train operations.
The s88-bus consists of up to 32 s88-modules that can process
either 8 or 16 feedback signals each. These modules are wired
in a "chain" (bus). s88-modules are available from various
manufacturers.
The number of existing s88-modules is configured in ECoS in
such a way that response times are as short as possible: since
the modules are checked continuously in sequence, only really
existing modules should be monitored.
On the underside of the ECoS housing is a compartment suitable
for extension modules. Thus ECoS can be extended. ESU will
launch a suitable receiver module for the radio controller "mobile control" in early 2007. The mobile control will enhance
ECoS with a wireless handheld throttle.
7.8. Continue to use your old system with ECoSniffer
ECoSniffer represents a very special feature of ECoS. It allows
you to use your existing digital system even when upgrading to
ECoS. Simply wire the track output of your old system to the
ECoSniffer sockets. ECoSniffer then monitors the signals
transmitted by your old system and "translates" them into
ECoS commands.
Therefore it is possible to use any existing command station as
long as it is suitable for either Motorola® or DCC since ECoSniffer
is multi-protocol-capable
It "understands" commands for locos in DCC (14, 28 or 128
speed steps, auto-detection, up to 12 function buttons),
Motorola (14 speed steps, 80 addresses, Motorola old and
new, up to 4 function buttons) as well as commands for
accessories in DCC and Motorola. All other commands from
the old system (perhaps programming commands) will be
ignored.
ECoSniffer allows an easy conversion to ECoS without having
to throw away your handheld throttles or keyboards for
turnouts.
You may only connect one digital command station to EcoSniffer.
The number of handheld throttles connected to this command
station is only determined by the old system. Thus you may for
instance continue to use your Lokmaus system with up to 32
"Lok Mice" or your Loco net®-command station with all
connected handheld throttles.
10
a)
8. Wiring details
8.1. Power supply
ECoS gets its power via a 2.1mm DC-socket. In principle any
power supply for DC or AC could be used provided the total
output power is sufficient. The secondary voltage corresponds
with the track voltage; voltage stabilising or adjustments are
not required. ECoS has its own internal protective circuitry for
under-voltage and overload (-current).
b)
Figure 11
a) Power-LED (red)
b) Output socket (Low Voltage)
c) Mains socket
outside: "-"
inside: "+"
Figure 10
Supply voltage: 14V to 18V AC or DC
Supply current:
max. 5A
• The peak voltage supplied by the transformer without load
may not exceed 19V. Otherwise the ECoS electronic circuitry
may be irrevocably destroyed..
• Please only use the power supply by ESU or any other power unit approved by ESU. The use of other power supply
units may lead to the destruction of your ECoS and, of
course, makes any warranty claim null and void!
7.9. ECoSlink bus system
Our bus system ECoSlink allows for the extension of your ECoS
command station. You may connect external handheld throttles,
feedback modules, boosters and other extensions. ECoSlink is
based on the CAN industrial standard, is suitable for a maximum
cable length of 100 metres and provides excellent data
transmission. ECoSlink operates with 250 kBit / second and is
"hot-plug" and "plug&play" capable. All devices report
automatically to the system and can be removed or reconnected during operation. The ECoSlink system can comprise
of up to 128 devices.
c)
8.2. Power supply
A power supply with
with ECoS:
Supply voltage:
Supply current:
Secondary voltage:
Secondary current:
Output socket:
the following characteristics is delivered
100V – 240 V AC, 50 / 60 Hz
1.8A max.
18V DC, stabilised
5A max.
DC-socket, 2.1mm, 1.8m cable
• Please only use the power supply that comes with ECoS.
The use of other transformers may lead to reduced output
power or in the worst case to the destruction of your ECoS.
• Please use the power supply provided with ECoS solely for
powering ECoS. Do not use it for other household appliances.
• Check the power supply regularly for any visible damage of
the housing or the mains cable. Damaged parts may never
be used! Do not attempt to repair the power supply! Extreme danger – risk of fatal injury!
• Make sure there is sufficient ventilation around the power
supply. Mounting in furniture without air circulation may
lead to overheating of even fire!
• First connect the mains cable to the appropriate socket of the
power supply and insert the plug into a power outlet..
Never use Y-adapters in order to supply power to other devices
of your layout! This may cause a connection to ground that is
not permitted and could destroy your ECoS!
The power supply provides a stabilised voltage output that
should only be used for your layout. For some N-gauge decoders
or locos 18V may be too. We recommend a lower track voltage
when using ECoS with N-gauge equipment.
• You may exchange the power supply (18V) against another
with an output voltage of 15V free of charge. How to go
about this you will learn in chapter 24 at the end of this manual.
Wiring details
8.3. Track connection
8.3.2. Wiring three-conductor tracks
The tracks are connected via a two-way socket with a
removable plug. Please make sure you us cables of adequate
size for your track power. We recommend wires of at least
1.5mm² (better: 2.5mm²) cross section. In larger layouts connect
track power every two meters to the tracks.
Wiring takes place as shown. Polarity must be observed
otherwise some older decoders may not work (e.g. k83).
B
B
0
red
0
8.5. ECoSlink
brown
Each ECoS command station has three sockets for connecting
external devices. They are called ECoSlink.
3 conductor
track
Figure 12
ECoS uses an H4-bridge (full bridge) for the track power.
Therefore with ECoS – contrary to older Märklin® systems there is no "Common" (Ground).
• Never connect another digital system or analogue
transformer to the same circuit as ECoS. Your ECoS may be
damaged or destroyed!
• Should your layout be split into several circuits please make
sure that all sectors are completely isolated from each other.
Under no circumstances may there be a Common.
• ECoS supplies up to 4A track current. Always consider if you
actually need such a high output current. In case of a short
circuit your locos may be damaged and there may be risk of
fire! Reduce the maximum current to a sensible level. Also
refer to chapter 18.1.3.
Remove all capacitors that may possibly haven been wired to
the track power supply cable in your layout. They would cause
a strong heat build-up of ECoS and impair the power output.
Almost in every connecting track in an analogue starter kit
(Roco, Märklin®) are resp. were capacitors installed.
Whenever the programming track is not in use an internal
relay in ECoS switches this track to the main line. Programming
track and main line are synchronised. Thus you may run your
locos onto the programming track and then re-program them.
Only when you have started the programming procedure separate signals will be transmitted to the programming track.
There should always be only one loco or coach with decoder on
the programming track to avoid unintended programming of
another vehicle. After finishing the programming procedure
remove the loco form the programming track. Otherwise
"parked" locos could be re-programmed unintentionally.
Figure 14
If your new Motorola locos work but the old k83 accessory
decoders and older Märklin® locos do not it is most likely that
polarity has been swapped.
Märklin® offers under part number 74040 a suitable connecting
track for the C-track system. For the K-track system use
connecting track No. 2290.
8.4. Wiring the programming track
ECoS has a separate low power output for the programming
track (max current 1A). The same type of socket is used as for
the mainline connection. Wire a section of track to this output
that is completely isolated from the rest of the layout, ideally
some short stub track.
a)
b)
Figure 16
a) ECoSlink Connect
b) ECoSlink Extend
Should you wish to connect more than three devices you have
to extend the bus with a bus-distribution-module. This device
has to be wired to the ECoSlink Extend socket and thus provides
further possibilities to connect other devices. Bus-distributionmodules will be available as from 2007.
8.6. Computer interface
Each ECoS has an 8-way RJ45 network socket. This is compliant
with the Ethernet standard and can be connected via a long
cable to your computer network. There are two LEDs integrated
into the socket.
8.3.1. Wiring two-conductor tracks (standard DC)
B
Wiring takes place as shown. Polarity is not an issue for DCC or
Selectrix®.
0
programming
track
main track
a)
B
0
Figure 17
track insulated on both
sides!
a) The LINK-LED lights up red continuously if ECoS is connected
to a network. If this LED is not lit there is an incorrect or no
connection.
b) The BUSY-LED blinks green as soon as there is a data transfer
Figure 15
2 conductor
track
Figure 13
b)
This track must be insulated on both sides from the layout – in
case of Märklin insulate the centre conductor and both tracks!
During programming the insulating gaps may not be bridged.
(boogies, coaches with interior lighting, etc).
11
Wiring details
between ECoS and the network.
Data
Gnd
ShDCC
ShMKL
Enable
SnInA
SnInB
Connecting to a Hub or Switch
Use a commercially available network cable and insert it into a
free socket of your Network Switch or Hub. The LINK-LED
must then light up.
1 2 3 4 5 6 7
Direct coupling of a PC and ECoS
Connect the network output only with a computer network
as per the Ethernet standard.. Telephones for the ISDN standard
and also other model train manufacturers use identical plugsocket-connections, but they must never be inserted into the
LAN socket of ECoS.
8.7. Wiring external boosters
Should the power output of the integral booster be insufficient
you may connect more external boosters. For this purpose you
have to divide your layout into several individual electrical sectors.
Always insulate all conductors (tracks). There may not be any
Common!
8.7.1. Suitable systems
There are two types of boosters on the market. In principle
both types (compatible to DCC or the Märklin® 6017 standard)
can be used since they are both capable to amplify DCC- and
Motorola- signals and to supply them to the track. Please also
refer to the manual of your booster.
socket with removable screw terminals.
1 = Data
2 = Gnd
3 = ShDCC
4 = ShMKL
5 = Enable
6 = SnInA
7 = SnInB
(Booster data cable has the signal)
(Ground)
(Short circuit-feedback for DCC, shutdown if
connected to GND)
(Short circuit-feedback for 6017, shutdown if
positive)
(Booster "On/Off", for 6017-booster)
(ECoSniffer Track signal input A)
(ECoSniffer Track signal input B)
8.7.2. Connecting a DCC-booster
You must connect "Data" and "Gnd" of you r DCC-booster. If
you also want to transmit short circuit data you have to connect
the "ShDCC" socket.
Since most commercially available boosters have problems with
Selectrix® data packets the external booster output of ECoS
does not supply any Selectrix®-data.. This means you cannot
run any Selectrix®-locos on sectors supplied by an external
booster.
The two types of boosters are different in the way they detect
a short circuit and in their polarity. The correct setting can be
configured in ECoS and is valid globally for all boosters. Therefore
you may only use boosters of one type with ECoS at any one
time.
We strongly recommend using only one type of booster by the
same manufacturer. The time related behaviour of boosters
varies so much that bridging gaps when travelling from one
sector to another quickly leads to problems.
There are 5 input poles for external boosters on a seven-way
engage
ShMKL
Gnd
Enable
Data
Figure 20
booster the other end has to be re-wired since the ECoS sockets
are not compatible.
The contact pins are
1 = Data
(wire
2 = Gnd
(wire
4 = ShMKL
(wire
5 = Enable
(wire
wired as follows:
1 of 6017-cable)
4 of 6017-cable )
5 of 6017-cable)
2 of 6017-cable)
Cut off the plug of the 6017-cable and connect the individual
wires to the ECoS booster output as described above.
Make sure all wires are connected correctly to avoid damage
to the booster and / or the ECoS.
1 2 3 4 5 6 7
8.7.4. Short circuit protection
After wiring your booster you have to configure the software
in order to assure correct functionality of the short circuit
protection. Chapter 18.3.1 provides more details.
CDE
8.8. ECoSniffer input
Figure 19
A Lenz®-Booster is wired as follows:
1 = Data
Terminal "C"
2 = Gnd
Terminal "D"
3 = ShDCC
Terminal "E"
Other DCC-boosters are wired according to the same principle.
12
8.7.3. Connecting a Märklin®-booster
Each 6017-booster (and compatible boosters) are supplied with
a 5-pole cable. One end is inserted into the socket of the
Figure 18
Data
Gnd
ShDCC
ShMKL
Enable
SnInA
SnInB
If you prefer to connect your ECoS directly to a PC without a
Switch or Hub you have to use a so called "cross-over-cable".
Such cables look like ordinary network cables but internally
two pairs of wires are crossed. The LINK-LED lights up
continuously if the connection is correct.
Refer to your booster manual to find out the appropriate
contacts.
The ECoSniffer input (SnInA and SnInB of the booster /
ECoSniffer socket) contacts have to be connected to the track
output of your old system. Polarity is not an issue. The old
system continues to get its power through the old power supply.
Make sure that the old system does not have any connection
to the tracks. All tracks must be supplied with power through
ECoS. The power outputs of two or more digital systems may
never be connected to the tracks simultaneously.
Input voltage: 14V to 30 V
Data signals:
DCC or Motorola, auto-detect
8.9. s88-Input
Data
Gnd
ShDCC
ShMKL
Enable
SnInA
SnInB
An s88-system consists of up to 32 s88-mocules that are
connected in series. The first module (module 1) is connected
to the s88-socket of ECoS while module 2 is wired to module 1,
etc. Thus we build up a bus –system. All modules will be
numbered within ECoS according to the place in the chain of
connected modules.
0
brown
brown
B
red
yellow
s88
s88 modul 1
transformer
control unit
Figure 21
s88 modul 2
Data
Gnd
ShDCC
ShMKL
Enable
SnInA
SnInB
s88 modul 32
Figure 23
transTrack
former
10761
Each s88-module is supplied with one cable. The polarity is
defined since the plug only fits in one position into the socket.
All s88-modules are normally supplied with power by ECoS. In
total the s88-input can supply 750mA. Should this be in sufficient
you may use s88-modules suitable for an external power supply.
Please refer to the manual of your s88-modules.
The s88-input of ECoS is galvanically isolated from the rest of
the layout and the command station. Therefore there is no
direct ground connection between ECoS and the feedback
decoders. If your s88-module has a direct ground connection
(e.g.. LDT s88-modules) this has to be wired to the track (ground).
ECoS was tested with the following s88-modules:
• Märklin® 6088
• LDT RM-DEC-88
• LDT RM-GB-8
• Viessmann 5217
transformer
Figure 22
Before you can use the feedback contacts you must configure
the s88-bus. You will find details in chapter 19.
Detailed information regarding the exact function of ECoSniffer
is provided in chapter 17.
13
Control elements in detail
9. Control elements in detail
9.1.2. Joystick
The four-way joysticks with centre-click-function help you to
navigate the menus, to select loco and to trigger the whistle
("Playable Whistle") of locos suitably equipped.
mainscreen
loco libary
menue
previous engine
previous element
F2
b)
"Playable whistle"
a)
d)
break
off:
c)
e)
Centerclick
call loco choice list
no
engine
select
h)
select a
engine
next engine
select a
element
break
off:
no
element
select
next element
Figure 26
f)
g)
Figure 24
9.1. Cabs
Each of the two cabs consists of three components namely
throttle, joystick and buttons for triggering functions and part
of the monitor.
a) Position maximum speed "100%"
b) Position Zero "STOP"
c) Change of direction " "
d) Speedometer needle
e) Direction arrows
f) Joystick
g) Buttons
h) Touch screen buttons
9.1.1. Throttles
14
9.1.3. Function buttons
Loco is stopped, speed is zero.
Loco is running at maximum speed. This
corresponds with speed step 14, 28, 31 or 126
depending on the loco and the protocol.
button F0 "light"
b) = STOP
c) =
Each of the motor-driven throttles 9.1.1. Drehreglerhas two
definite end positions at left and right. The position of the
throttle knob corresponds with the speed of the loco. A small
dot indicates the position of the knob.
Position b):
Position a):
Turn the throttle anti-clock wise to change direction beyond
position b) to position c) until you hear and feel a "click". Then
please release the throttle. It will return to position "b"
automatically. The arrows "e" indicate the current direction of
travel.
Never operate the joystick with force.
• You reach the loco choice list (loco library) on the mainscreen
by pressing the joystick. You may move through the list by up
down movements with the joystick and select a loco by pushing
the joystick once again (alternately move the joystick to the
right) or to cancel the process by moving the joystick to the left.
• Within the menus you can move up and down by moving the
joystick accordingly, moving right or pushing down selects an
element while moving left allows you to leave the particular
menue.
• In the mainscreen – without any open menus – you can trigger
function F2 by moving the joystick upwards. In conjunction with
a LokSound V3.5 decoder you can then vary the frequency
and volume of the whistle: the further you move the joystick
upwards, the louder the whistle. Finally you can handle the
whistle like the engineer of a prototype railroad!
a) = 100%
button F1
button F2
Figure 25
You may hold the knob even while it is turning automatically.
After about one second the motor will stop. There is no risk of
damage due to the sliding clutch.
Alternately you can adjust the train speed by touching on the
speedometer needle d) in six steps (speed zones).
When touching one of the direction arrows e) the direction of
travel will change and the loco will accelerate to the same
speed in the other direction.
button F3
button F4
button F5
button F6
button F7
Figure 27
Introduction to operations
There are 8 function buttons assigned to each throttle that are
sorted from top to bottom: At the top is the headlight button
(F0), below follow F2 to F7. You can trigger any function of the
currently run loco with them at any time.
touch screen. Please do not use any hard or pointed objects
since this could lead to permanent scratches on the surface.
Please observe the remarks in chapter 3 regarding the handling
of the touch screen.
9.2. Stop-button
9.5. Storing the stylus
Any commands are given graphically by using the touch screen.
The display on the screen changes accordingly subject to which
menue is currently open. ECoS uses always the same type of
control elements that are described in detail below.
After briefly pushing the Stop button ECoS will immediately
interrupt the track current and all external boosters. The display
shows "Emergency Stoop", the red Stop button is lit. Use the
Stop button in case of danger or when you place a loco on the
tracks.
The supplied stylus can be placed in the holding groove on the
right side of ECoS for short periods of time.
10.1. Main menue
For longer-term storage we recommend to place it in the
compartment at the back (right hand side).
On the main screen (window) (also refer to Figure 30) there
are 8 fields at the top and another two at the bottom. You can
touch them directly in order to select the desired action:
10. Introduction to operations
a) Selecting a loco (left): opens the window for selecting a loco
and assigning it to the left throttle
ECoS will also switch to "Emergency Stop" in case of overload
or short circuit: the display will show the symbol for "Short
Circuit" at both lower corners.
b) Loco menue (left): opens the menue to change any settings
of the loco currently run on the left throttle.
If you push the Stop button and keep it down the controlled
shut down of ECoS will be started after 3 seconds. ECoS saves
the current operating status, signals the end of operation to all
boosters and external devices and shuts down safely. As soon
as the following image appears on the screen you may switch
off ECoS (pull the mains plug).
c) Accessories menue: opens the menue for accessories
d) Link mode: after pushing this symbol ECoS changes into this
mode. In this mode all buttons or symbols for function buttons
and accessory symbols are displayed inverse. In the link mode
you cannot switch functions or accessories, but you can
assign new symbols for them. Push that symbol again and
ECoS changes back to normal switching mode.
e) Set-up menue: this opens the general set-up menue of
ECoS. Here you can adjust general things such as the
brightness of the screen, set-up shuttle train lines, configure
ECoSlink-devices and adjust the booster-current-threshold.
Figure 29
f) Help menue: a context related help function on the screen
makes it very easy to get accustomed to the system and to
find "a way out" should you have difficulties.
g) Loco menue (right): as in b), but for the right hand throttle
a)
b)
c)
d)
e)
f)
g)
h)
h) Selecting a loco (right): as in a), but for the right throttle
i) Changing throttles: you can change the locos from left to
right and vice versa by pushing a button. The throttles will
be adjusted to the correct position automatically.
j) Turnout control panel: pushing this symbol fades in (or out)
the turnout control panel. The currently assigned locos can
be run even when the turnout control panel is open. .
Figure 28
9.3. Go-button
k) Status line: displays any errors or remarks:
The Go-button releases the Emergency Stop. The internal and
the external boosters are re-activated. Operation may
continue. If ECoS switches in emergency stop again there is
most likely a short circuit on the layout. This has to be found
and removed before operations can continue.
Low Batt: no battery inserted or battery voltage too low.
Shut down ECoS as described in 11.2 with the "Stop"button and exchange the batteries.
.
9.4. Touch screen
The most important medium for commands is the touch screen.
This makes entering any commands extremely easy: by touching
a symbol, touch button or choice field on the screen the
corresponding action will be triggered.
You may use your fingers or the supplied stylus for handling the
k)
i)
j)
Emergency Stop: the track voltage is switched off manually,
"Stop" button lights up in red.
k)
Figure 30
15
Run locomotives
Short Circuit: the track voltage was switched off due to a
short circuit or overload, the "Stop" button lights up red.
Update: an internal software update is under way. Operations can only begin after finishing the update. This may
take up to 10 minutes.
10.2. Switch buttons
Switch buttons ("fields") serve to confirm certain actions. You
may activate them with your finger or the stylus.
This button confirms an action. Changes will be accepted and
saved.
10.6. Radio buttons and choice fields
11.1.1.1. Data format
Radio buttons enable you to make a choice out of a group of
possibilities. Only one entry can be active at any given time
similar to the pre-selection buttons of a radio tuner.
Via this choice list you set the data format for this particular
loco. ECoS does not check if the loco understands the selected
protocol. If in doubt read the decoder manual.
Choice fields serve for confirmation of options in ECoS. A tick
shows an active option.
11.1.1.2. Address
11. Run locomotives
Here you enter the current address of the loco. The accepted
address range is subject to the data format and may be
restricted. With this address the loco will be controlled.
ECoS stores a list of locos in which you have entered all locos
that you want to run on your layout. Any loco without an entry
in this list cannot be operated. Therefore these data have to
be entered once at the beginning.
11.1.1.3. Sniffer address
10.3. Data entry fields
11.1. Add new locos
The address entered here is for the ECoSniffer. You can learn
more about it in chapter 20. If you have not connected any old
devices to the ECoSniffer you may leave address "0"
unchanged.
Data entry fields allow you to enter text or a number. First
touch the choice field, then a cursor appears at the end of the
line. Now you can enter text and / or numbers with the aid of
the displayed keyboard.
There are two possibilities for entering new locos: choose the
one you prefer.
11.1.1.4. Name
This button cancels an action. Changes will not be saved.
11.1.1. Direct entry in the list of locomotives
Deletes the last character
takes you to the loco menue.
Deletes all lines
If several fields exist, only the one that has been activated by
touching it is active. You recognise this by the frame (interrupted
line) around the text.
You can assign a name with up to 16 characters to any loco at
any time. This name appears on the main screen whenever
you have called up this loco and also in the choice list of locos.
Be creative and address your locos by name only in future!
The name >xxxx< is set as the default value (xxxx corresponds
with the address). Locomotive names can be assigned several
times.
11.1.1.5. Symbol
10.4. Choice lists
Choice lists allow you to select something out of a list of possible
options.
Opens a list with possible options.
Figure 32
• Select the first entry "New Loco". A dialogue window opens in
which you can change the settings of this loco.
Figure 31
• Move your choice by moving the joystick up or down.
Figure 34
• Confirm the desired option with your finger or the stylus.
In this choice list you can select the suitable symbol for your
loco. The symbol has no influence on operations it only serves
for quick visual recognition and differentiation of your locos.
10.5. Slide controller
Slide controllers make it easy to set numerical values.
Increases the current value (alternately: move joystick upwards)
Figure 33
Reduces the current value (alternatively: move joystick
downwards)
Saves your entry, closes the dialogue window and adds the
loco to the list. The loco will be assigned to the throttle.
Cancels entries. No loco will be entered.
16
11.1.1.6. Favourites
In order to make it easier to find a certain loco out of a long list
you can mark your preferred locos as "Favourites". When
searching a loco you can then first list all the favourites before
you scan the rest of the list.
Run locomotives
11.1.1.7. Speed steps / max speed display
Pushing the tab "Properties" opens a dialogue window
"Representation". There you can select if you want to display
speed steps or speed (in km/h) on the speedometer.
• Place the loco on the programming track
• Select the option "Programming on programming track" (Fig.
36).
• Push the programming icon. ECoS will now program the
following parameters:
• The address in CV1 resp. CV 17 / 18, provided a long address
has been selected.
• In CV29 the use of long or short addresses and the number
of speed steps is set (14 resp. 28 / 128 speed steps).
11.1.1.9. Extended decoder settings
The function of this tab is explained later in chapter 16
"Programming Decoders".
The field "Edit Locomotive" is shaded if
• another user is running this loco. Only locos that are listed
for the throttle can be modified. Please read chapter 11.7.2
for further information.
• that access control prevents editing locos. Read more in
chapter 18.4.
• the loco is under control of the automatic shuttle train
mode. Chapter 15 explains the details.
11.3. Assigning a loco to a throttle
You can assign one loco to each throttle.
Push the loco choice button of the desired throttle and a list
with all available locos will open:
11.1.2. Indirect entry of a locomotive
Figure 35
• In the "Speed Step"-mode ECoS shows the currently set speed
step. This is represented in the following ranges: 0 – 14, 0 – 27,
0 – 31 resp. 0 – 126. This is subject to the protocol used.
• In the "Speed"-mode ECoS calculates a speed in km/h that is
then displayed on the screen.
In order to be able to display the correct speed you have to
enter the desired maximum speed of the particular loco in km/
h. This should be the maximum speed of the prototype and not
of the model.
The value that you select with the slide controller will be
displayed at the highest speed step. All values in between will
be interpolated accordingly.
The value entered here only serves for the display and has no
influence on the actual speed of the loco. No parameters of
the loco will be changed by this!
Setting the maximum speed has to be done via CVs in DCC
decoders; in Märklin® locos this generally has to be adjusted
within the loco.
Sometimes you may want to place a loco on the tracks and run
it without time-consuming data entry. Of course, this is also
possible with ECoS.
• Select the loco choice button of the throttle that you want to
use.
Whenever you enter a new loco the data is only entered in
ECoS without any changes to the decoder in the loco.
Often it happens that the address of a loco is not known. If so
desired you can program the loco when entering into ECoS
provided it is a DCC loco.:
l)
• Type in the address using the number block..
• Confirm your selection
o)
k)
n)
m)
g)
i)
b)
c)
d)
e)
f)
Figure 38
Figure 37
11.1.1.8. Direct changing of address and speed step settings
h)
j)
a)
If there is no other loco with the same address registered ECoS
will automatically enter the necessary data in the background
with the given address and the name "New>xxxx<" and by
setting the DCC 28-protocol.
Which protocol ECoS should use whenever you enter a loco
directly can be pre-set in a menue. You find details in chapter
18.24.
11.2. Changing loco parameters
You may change the settings of any loco at any time. First
assign the loco to one of the two cabs.
Open the loco menue; select "Edit Locomotive" in the menue.
All further steps are shown in chapter 11.1.
a) Marked loco
b) Sort list by favourites
c) Sort by active locos
d) Sort by name (activated in Fig. 36)
e) Select marked locomotive
f) Cancel without selecting a loco
g) Number block for selecting a loco by number
h) One element up
i) One element down
j) One page up
k) One page down
l) Position in inventory list (library)
m) Loco address
n) Data format of loco
o) Control not possible, loco is run from another throttle
Figure 36
17
Run locomotives
ECoS does not check if any particular symbol matches the
actual function of the locomotive. The pictogram only serves
for graphic representation.
You can fade in additional pictograms for each loco:
Active loco: this loco is running
Loco is blocked: this loc is run from another throttle
Select the symbol at the top right if you do not want to assign
a symbol for the function button.
Favourite: Loco bears favourite mark
You can now navigate the list either with the joystick or with
the stylus until you have found the desired loco. Alternately you
can type in the loco address. ECoS scrolls automatically to the
corresponding address within the list. After confirming the loco
it will be called up by a throttle. The throttle moves automatically
to the correct position according to the actual speed of the
locomotive.
Once you have changed all function symbols the way you want
them touch the symbol again and thus leave the "Link Mode".
Figure 40
• Select "Delete" and the loco will be deleted.
11.4. Speedometer display options
11.6. Assign function symboles – Link mode
After selection the loco speed is displayed on the speedometer.
Besides the information mentioned in chapter 9 the
speedometer shows further important data.
ECoS permits free assignment of symbols for each function
button. In other words not only can you assign a symbol for
each function of each loco but also determine if this particular
function should be active continuously or only as long as the
corresponding button is pressed.
• Push the screen button in the main screen. Then the symbols
will be displayed inverse (white on black).
a)
b)
This symbol appears for function buttons that were hidden
until now.
Push the symbol of the function you want to change and a list
of many symbols will open. Each symbol is displayed twice:
c)
Figure 39
a) Data protocol of loco
b) Address of loco
c) Current speed step resp. speed of locomotive
Subject to the status of the loco the following symbols can be
displayed:
Symbol "Conflict of Address" (see chapter 11.7.1)
Symbol "Loco is blocked"
(see chapter 11.7.2)
Symbol "Shuttle Train Mode" (see chapter 15)
Symbol "Consist"
(see chapter 14)
11.5. Deleting a locomotive
You can delete any loco at any time should you not need them
any more. First select the loco and assign it to a throttle.
• Select the loco menue of the appropriate throttle and select
"Delete Locomotive" in the menue. Then another menue
opens.
18
Figure 41
A small "D" next to the symbol means continuous operation. It
is switched by touching the screen and remains active until you
touch it again.
A small "M" next to the symbol means "Momentary Action".
It remains only active as long as you touch the button.
DCC locos can switch up to 20 functions, Selectrix®-decoders
only two. Locos running under "Motorola14" NS
2Mototrola"8" offer up to 9 functions. ECoS sets functions 5
to 8 automatically to the second Motorola address that is
supported by all LokSound decoders. This second address first
has to be activated. Refer to the decoder manual for
instructions.
11.7. Interesting information on how to run a loco
11.7.1. Conflicts of addresses
A conflict of addresses occurs if you want to run a loco but
another loco with the same address is already running.
Each locomotive should have its own unique address. That way
there will be no problems during operation. In practice it happens
frequently that two or more locos are listed in ECoS and have
the same address: collectors often own several locos of the
same class and to whom they have assigned the same address;
e.g. class 44 with address"44". Of course, normally only one of
the models will be put on the layout while the others remain in
a display case. However, the owner of these models wants to
list all of them in the list of locomotives in ECoS.
At first this can easily be achieved. ECoS permits you to enter
as many locos with the same address as you wish.
However, it is not possible to run them at the same time on
your layout. The first loco can be run in the normal way. When
the second loco with the same address is selected the symbol
shown on the left will be displayed and this loco cannot be
operated. In reality this would make no sense at all. As soon as
a command is transmitted to the first loco both locos would
respond – after all, they have the same address!
The same occurs if you enter the following locos:
• Loco1: Address: 03, DCC 28 speed steps, "E 103"
• Loco2: Address: 03, Motorola 14 speed steps, "BR 03"
In this case the display would also show a conflict of addresses
since both locos have the address "03". The differing data
format does not have any impact, because ECoS cannot know
if a modern multi-protocol-decoder (e.g. LokSound) will respond
to both formats.
Switching accessories
11.7.2. "Locking" - Exclusive access to locomotives
ECoS only permits one throttle to run a certain locomotive at
any point in time. As soon as a cab runs a loco or consist the
same loco can be selected on another controller but it cannot
actually be operated. The inferior controller indicates this with
the symbol shown here.
This setting is ideal for club layouts or display layouts where it is
intended to give control to individual controllers over certain
objects. "Taking Over" a loco from another controller is not
wanted.
When you often run your trains alone but have located several
handheld throttles around your layout it is useful to "hand
over" a loco form one throttle to the next. ECoS offers a
setting for this that we call "Taking Over Locomotives". Chapter
18.2 explains how it works.
If you permit that other operators may take over a loco you
should not select the same loco on both throttles. Since both
throttles would have "equal rights" the needle of the
speedometer may start vibrating because both potentiometers
may vary by one speed step due to tolerances.
select "New consist".
a) List of all locos
b) List of locos in this consist
c) Adds another loco to a consist
d) Deletes a loco from a consist
e) Moves the currently marked loco at the right up or down
f) Extended settings for consists
12.4. Deleting a consist
You can delete a consist just as easily as with individual locos,
refer to chapter 11.5.
Any locos that were part of the deleted consist will of course
not be deleted as well. They remain as individual locos in the list
of locos.
12.5. Hints for running consists
• Select the first loco to be added to the consist from the list on
the left.
• Touch the icon in order to add this loco.
• Repeat this process with the other locos you want to add to
the consist.
In the menue "Extended" you can select a symbol for the
• It is recommended only to add locos to a consist that process
the information regarding direction (e.g.: Motorola 2-format;
DCC-format).
• The characteristics of the locos in a consist should be similar
(maximum speed, acceleration and deceleration). There should
not be any big deviations. If necessary reprogram such locos
before adding them to a consist. Also refer to chapter 18.
• Do not couple lightweight vehicles between locos in consists
because of risk of derailment!
• Please make sure that any isolated sections ahead of signals
are sufficiently long when running consists (at least 36cm to
54cm longer than the length of consist).
11.7.3. Address ranges – recommendations
If you want to run vehicles multi-protocol-operation with
Märklin®, ESU LokPilot, ESU mfx® und DCC-decoders
simultaneously we recommend to arrange for a split of addresses
as follows:
Märklin®-decoders: Addresses 01 – 80
DCC-decoders: short addresses: Addresses 81 - 99
ESU mfx®-decoders: Addresses 100 – 255
DCC-decoders: long addresses: Addresses > 256
12. Operating consists
Consists also get an address in ECoS like locos. They are listed
and run in the same way as single locomotives.
12.1. Add a new consist
Select the loco menue of the left or right hand throttle and
13. Switching accessories
Accessories are listed in a library within ECoS similar to
locomotives. Thus all accessories have to be entered once before
they can be switched. For switching the accessories will be
assigned to one or several control panels.
Figure 43
consist and assign a name under which you will find it in the list
of locomotives.
• By touching this screen button the consist is established and
assigned to the throttle.
Consists are always run with 128 speed steps on the throttle.
Internally ECoS will convert these speed steps to the appropriate
value for each decoder.
• Locos can only be assigned to one consist.
• Consists cannot be added to other consists.
• Locos assigned to a consist cannot be run individually any more.
13.1. Enter new accessories
• Touch this symbol and select "Enter New Accessory" in the
menue. The following configuration dialogue will be opened:
12.2. Assigning a consist to a throttle
Selecting a consist is done the same way as selecting a
locomotive. Refer to chapter 11.3. Consists are marked as
"Multi" in the locomotive list.
12.3. Change parameters of consists
You can change any settings in a consist just as easily as with
individual locos, refer to chapter 11.2.
b)
a)
c)
d)
Figure 42
f)
e)
Figure 44
19
Setting accessory parameters
13.1.1. Data format
Here you can select the suitable data format to operate your
accessory. Both DCC and Motorola are available.
13.1.2. Address
Here you enter the digital address of the accessory. This value
has to be entered as a number. If you use Märklin® accessory
decoders and you are used to the process of entering the
address by typing the decoder number (1 to 64) followed by
the position on the decoder (1 to 4), please read up in chapter
21.2 on how to enter the address in the table.
Please make sure that you enter an address (that matches the
decoder) since ECoS does not check if an address is correct or
not.
Once you have set this parameter touch the corresponding
screen button and ECoS stores the setting and completes the
configuration dialogue.
Should the dialogue not close as desired and instead an
exclamation mark "!" appears just behind the three lines with
the name, then the text is too long. ECoS checks the length of
the text entry dynamically when it is saved. In that case please
shorten the name of the accessory.
Fade in the turnout control panel.
a)
13.2. Setting accessory parameters
You may reset the parameters of an accessory at any time:
• Push the screen button and select "Edit Accessory" in the
menue. A list with all accessories appears.
c)
• Select the desired accessory. All further steps are the same as
in chapter 13.1
13.1.3. Name
For a precise representation on the screen you may give your
accessory a name of up to 3 lines with 9 characters each.
a)
b)
Figure 46
13.1.4. Symbol
You should choose the symbol for your accessories as precisely
as possible: ECoS recognises two-, three- and four-aspect
symbols and controls through the symbol the outputs of the
accessories accordingly; also refer to chapter 7.4.
ECoS offers a large number of German and international
symbols in a choice list.
a) Choice buttons for the individual panels.
b) Display of the next 25 panels.
c) Display field for 2 x 8 accessories.
Each panel can handle 16 accessories. Pushing the corresponding
panel number activates a panel.
13.1.5. Permanent versus momentary action buttons
13.3.1. New link
Here you determine if the accessory should be switched for a
pre-determined time (=change over) or only as long as the
button is pressed (=pulse).
Normally you would use the "change over" mode for turnouts.
ECoS transmits a defined, time controlled pulse to the solenoid.
Thus any burnout of solenoid coils is prevented.
The "Pulse" function is best suited for un-couplers, which should
be active as long as the function is activated (until your finger
leaves the screen button).
The function mode cannot be changed later unless you delete
the accessory and re-enter it.
13.1.6. Switching time
The switching time can be adjusted in five steps from 0.25
seconds to 2.5 seconds in "Change Over" mode.
Should the default value of 250msec not be sufficient for reliable
switching increase the switching time step by step.
Figure 45
• Change to the link mode while the turnout panel is open. All 16
symbols will be displayed inverse.
An unused position on the panel will also be displayed.
• Select the position to be linked and touch it. A menue called
"New Link" will open.
13.3. Assign accessories to the turnout control panel
After entering accessories they must be assigned to one or
more turnout control panels in ECoS. Only once they have
been assigned can they actually be switched. The control panels
always show the current status.
ECoS saves the status of each accessory internally. Manual
change of the status cannot be detected by ECoS. Therefore
make sure that the status on the system corresponds with the
physical status of the accessory.
In total the turnout control panel of ECoS offers up to 74
individual panels each of which can switch up to 16 accessories
or routes.
Figure 47
20
Setting accessory parameters
• Select "Select from List".
• Select the accessory that you want to place here and confirm.
a)
b)
• Select "Delete" and the link disappears.
This deletes only the link but not the accessory.
13.4. Switch an accessory
An accessory can be switched very easily.
• Fade in the turnout control panel and select the desired panel.
• Push the pictogram of the desired article.
• Accessories with two definite positions: the alternate aspect or
status will be switched on.
14. Routes
Routes are also registered in lists analogue to locos and
accessories. Routes therefore have to be defined first before
they can be linked on a control panel and before they can be
activated. Definition means, which accessories belong to the
route and which aspect or status should they have.
Only linked accessories can be added to a route. Therefore you
should link all accessories before defining routes.
14.1. Enter new route
Push this symbol and select "Enter New Route" from the menue.
d)
c)
d)
Figure 48
a) Name of accessory
b) Data format and address of accessory
c) Sort accessories by address
d) Sort accessories alphabetically
• Repeat the process with the remaining other accessories.
You may link accessories several times and on different panels.
If you select "Create New Accessory" you will arrive directly at
this menue for entering new accessories as outlined in chapter
13.1. After entering an accessory successfully it will be linked to
the desired location automatically.
Figure 50
b)
• Three- or four-aspect accessories: A window showing all possible
aspects opens. Select the desired aspect. The window closes
and the aspect will be switched on.
c)
a)
13.5. Delete an accessory
An accessory can easily be deleted:
• Push the screen button and select "Delete solenoid Accessory"
from the menue.
13.3.2. Delete a link
If you wish to delete a link touch the link you want to delete
while you are in the active link mode (all fields are displayed
inverse). The menue "Edit Link?" appears:
Figure 52
a)
b)
c)
d)
Selection frame around all accessories
Selection box. active for each accessory within the route.
Desired aspect or status of the accessory in the route.
Tab "Advanced"
A selection frame is located around each accessory a). Other
routes are faded out since a route may only contain accessories
but not other routes. As always you may change between
panels in order to see all linked accessories.
Figure 51
• Select the first accessory to be included in the route and mark
it in the selection box at the top right with a tick.
• Push the accessory symbol and select the desired aspect or
status.
• Select all other elements of the route and their desired aspect.
step by step.
Select the desired accessory and confirm your choice.
When an accessory is deleted it will be removed from all routes
and links in the turnout control panel.
Figure 49
21
Switching a route and running trains in "shuttle train" mode
ECoS triggers the commands in the same sequence as you
have entered them. Keep that in mind when entering routes.
14.1.1. Advanced settings
Once you have added all accessories to a route please change
to "Advanced". There you can set other important parameters.
• Confirm your entries to save the new route. The data entry
dialogue will be closed and the new route is registered.
If the dialogue window does not close und an "!" is displayed
instead then the text is too long. ECoS checks the length of the
text when saving it. In that case simply shorten the name of the
route.
14.2. Edit a route
Should you wish to rename or edit a route this is easily possible
at any time:
• Push the corresponding screen button and select "Edit Route"
in the menue. A library with all routes appears.
14.4. Switching a route
In principle a route is switched in the same way as an individual accessory as described in chapter 13.4. However, there are
two differences:
This pictogram indicates that the route is currently not
completed. At least one accessory did not switch as it was
supposed to.
The route is completed; all accessories are switched to the
desired status.
Routes can only be switched. Switching another route that
contains at least one accessory of the previous route does
releasing routes.
It is always possible to switch an accessory belonging to a
route individually, for instance through another link to a screen
button in a control panel. As soon as the status of at least one
accessory does not correspond to the appropriate status of
this route the displayed symbol changes. Thus you keep control
at any time and have certainty that all accessories of one
route are switched correctly.
Figure 53
14.5. Deleting a route
Deleting a route is just as simple as deleting an accessory:
• Open the accessory menue and select "Deleting Route".
• Select the desired route and confirm your choice.
14.1.1.1. Name
For an unmistakeable recognition you may give each route a
name on the screen. Three lines with 9 characters each are
available.
14.1.1.2. Delay
When switching a route ECoS transmits individual pulses to the
corresponding accessories. The time interval between two individual commands can be adjusted. This may be necessary if
accessories with particularly high current draw are part of the
route. They high current could lead to a voltage drop and the
pause between commands assures reliable operation.
14.1.1.3. Trigger a route with an s88-contact
A mighty function is represented by the possibility to trigger a
route not only by pushing a screen button but also by an s88conctact.
Figure 54
• Select the desired route and proceed as described in chapter
14.1.
14.3. Assign a route to the turnout control panel
After configuring the routes you can link them to one or several
control panels of the turnout control panel. Only routes that
are linked to any panel can be switched manually: routes linked
to s88-conatcts do not have to be linked to a control panel.
Linking routes happens in the same way as linking accessories.
Chapter 13.3 explains how. Routes are marked with "ROU"
behind the name in the accessory library.
15. Running trains in "shuttle train" mode
The shuttle train mode represents another fascinating function
of ECoS.
ECoS differentiates between two terms:
• Shuttle train line: the track section on which the loco should
travel forward and backwards
• Loco in shuttle train mode: loco that is dynamically assigned to
a shuttle train line and travels "out and back".
This function can be used to realise block control: A train entering a block is detected by an s88 and the previous block is
cleared.
• Enter the desired s88-module and the port number of the
input that should switch the route.
a)
d)
Figure 56
The s88-bus must be configured prior to this procedure (refer
to chapter 19).
Of course, it is also possible to trigger the same route manually
on the turnout control panel.
Figure 55
22
b)
A shuttle train line must comprise of the following:
a) Station1
b) Brake point for station1
c) Station 2
d) Brake point for station 2
c)
Running trains in "shuttle train" mode
The train stops at each station for a pre-determined layover
time before it travels back to the other station. The sequence
happens as follows:
• As soon as the train from station 1 reaches the brake point for
station 2, ECoS transmits a "Stop" command (speed step "0")
to the train. At the same time a timer is started inside ECoS.
• The train slows down with the set deceleration and stops.
Deceleration has to be set in such a way that the train definitely
stops in station 2. You may have to experiment a little.
• Once the pre-set layover time is past (T1), the timer gives the
signal and the train receives a command to change direction.
The train is still stopped in station 2; it is now ready for departure
and the headlights are switched correctly for the return trip.
• Once the timer signals departure time (T2) the train accelerates
and moves towards station 1. Thus the procedure begins once
again.
• The periods T1 and T2 are of equal duration. The time the train
takes from brake point 1 plus the time the train is stopped
while still set to the original direction is the same as the time the
train waits in the station after having changed the direction
setting.
• These periods are identical for both stations. The distance from
the brake points to the station must be the same in both
stations since the braking distance is subject to the set
deceleration of the locomotive.
For detecting the brake points you have to install and assign
two s88-contacts.
a)
b)
c)
d)
e)
f)
Shuttle train lines that are already configured
Add a shuttle train line
Delete a shuttle train line
Edit a shuttle train line
Leave the set-up menue and save changes
Leave the set-up menue and cancel changes.
Pushing this screen button opens the sub-window "Shuttle
Train Line".
A shuttle train line can easily be configured:
• Select the set-up symbol from the top tool bar. A window with
several pictograms located on the left opens.
• Select the sixth pictogram from the top and the window "Shuttle Train" opens.
Once you have configured your "shuttle train lines" you may
dispatch a train.
• Call up the loco onto one of the two cabs.
• Move the loco into the shuttle train mode.
• Set the throttle to the desired speed.
• Select "Shuttle Train" from the menue.
• Choose the desired Shuttle Train Line from the sub menue.
Figure 59
Figure 58
Name of the (shuttle train) line
Assign explicit names to your shuttle train lines. This name is
required later for assigning the line.
15.1. Configuring a shuttle train line
15.2. Locos travel "out-and-back"
Station1: s88-contact and station2: s88-contact
• Now the locomotive will be controlled by the Shuttle Train Line
control function and cannot be controlled manually any longer.
An icon on the speedometer indicates this.
15.3. Cancel shuttle train mode
If you wish to run this loco manually again proceed as follows:
• Call up the loco on the same throttle that you used to set up
the shuttle train mode.
• Select "Shuttle Train Line" in the locomotive menue.
Here you select the two s88-contacts for the brake points of
the shuttle train line. The s88-bus must be correctly configured
prior to this action. See also chapter 19.
Use two separate s88-contacts. ECoS does not check if these
contacts are used for any other action.
Duration time in the stations
Here you enter the time T1+T2 (in total). This may be up to 300
seconds.
Finish your data entry, the window closes and the new shuttle
train line is displayed on the screen. Enter other shuttle train
lines in a similar fashion.
ECoS can handle up to 8 shuttle train lines.
a)
Pushing this symbol for the marked shuttle train line deletes it
Figure 60
• Select "Cancel Shuttle Train Mode"
• Now the loco can be controlled manually.
Open and edit the marked shuttle train line with this symbol.
b)
c)
d)
e)
f)
Figure 57
23
Programming Decoders
16. Programming Decoders
By programming we mean the method of electronically changing certain parameters of decoders. This applies to all types of
decoders such as mobile decoders, accessory decoders and
feedback decoders. Decoders with manual switches (DIPswitches) such as older models from Märklin® cannot be
programmed with ECoS.
Unfortunately there is no standardised method to access all
parameters; this varies subject to the manufacturer and
decoder type.
Generally it can be said that all parameters of a decoder are
stored in an internal memory space. Each memory space can
contain a number. The memory spaces are numbered in
sequence. Since the value of each memory space can be
changed at any time they are also know as variables. With
these variables the properties of the decoder are defined
("configured") and thus the term "Configuration Variable"
(CV) was introduced.
The values stored in each CV determine the behaviour of the
decoder to a great deal. Values that are not permitted or
wrong may cause havoc to the point that the decoder does
not work properly or not at all any more.
Change decoder settings only if you are certain about the
consequences. Otherwise you may experience all sorts of
unexplainable behaviour.
In the DCC standards the properties resp. characteristics of
most CVs are defined. The most important ones are:
CV
1
Name
Address
Description
Address of loco
Range
1 - 127
Value
3
2
Starting voltage
sets the minimum speed
1 - 64
3
3
Acceleration
8
4
Braking time
Multiply this value with 0.869
0 - 64
to calculate the time from 0 to Vmax
Multiply this value with 0.869
0 - 64
to calculate the time from Vmax to 0.
5
Maximum speed maximum speed of loco
0 - 64
8
Manufacturer’s ID
ID of ESU
151
17 /
18
Extended address
Long address
CV 17 contains the higher value byte
(Bit 6 and Bit 7 must always be active),
CV18 the lower value byte. Only active
if function in CV 29 is set.
29
Configuration register
Function
Bit 0: change direction
normal direction of travel
reversed direction of travel
Bit 1: speed step mode
14 speed steps
28 or 128 speed steps
Bit 2: Analogue mode
Switch off analogue mode
Permit analogue mode
Bit 4: select speed curve
Speed curve through CV 2, 5, 6
Speed curve through CV 67 - 96
Bit 5:Select short or long address
Short addresses (CV 1)
Long addresses (CV 17+18)
24
Value
0
1
0
2
0
4
0
16
0
32
A complete list of all CVs and further information to the DCC
standards is available at http://www.nmra.org/standards/DCC/.
Please also refer to your decoder manual.
16.1. DCC-Programming
The range of possibilities in programming DCC decoders has
continuously improved over the years. Therefore there are
different methods that are incompatible to each other:
Register Mode: Here you can only access CVs 1 to 8.
Paged Mode: On the programming track CVs 1 to1024 can
be reached
Direct Mode: On the programming track CVs1 to1024 can
be reached. Reading out decoder data is about
8-times faster than in Paged Mode.
POM Mode:
Here programming is done on the main line
("Programming On Main"). All CVs from 2 to
1024 can be overwritten. The base address
CV1 cannot be accessed.
Unfortunately there is no rule regarding the fact which decoder
supports which programming method. For new decoders the
Direct Mode is compulsory. All ESU decoders support Direct
Mode as well as the other methods.
With the LokPilot ESU has introduced a method to program
Motorola-decoders despite the fact that the original Märklin®
digital system did not cater for this option. Every ESU decoder
(except for pure DCC decoders) contains a specific so-called
6021-programming mode that allows access to all or at least to
the most important CVs of a decoder. They can be written but
not read.
Meanwhile Märklin® has also started to equip many locos
with decoders that support this special mode developed by
ESU. These could be locos with mfx®-decoders or locos without
"DIP switches".
The ECoS Motorola programming mode can be used for all
ESU decoders and most Märklin® decoders but not necessarily
for decoders by other manufacturers. .
The address search mode represents a very special feature. It
can be used to determine the address of older decoders that
are not suitable for the Motorola programming mode: ECoS
tests all possible addresses and stops as soon as the loco
responds. Thus you never have to open your locos again in
order to check DIP switches!
Refer to the manual of your decoder to find out which
programming methods are supported.
16.3. Overview of programming options with ECoS
From Veriosn 1.0.1. ECoS supports all programming modes.
Version 1.0.0 only supports DCC Direct Mode and POM mode.
DCC-Decoder
(ESU)
Write in DCC Direct Mode
Write in DCC Paged Mode
Write in DCC Register Mode
Write in DCC "POM mode"
Read in DCC Direct Mode
Read in DCC Paged Mode
Read in DCC Register Mode
Read of values on graphic interface
Motorola-Decoder
(ESU)
Search Motorola address
No
Write in ESU Motorola programming mode No
Read all values on graphic interface
No
Yes
Yes
No
Motorola®-Decoder
(DIP-switch)
Search Motorola address
Read all values on graphic interface
No
No n
Yes
No
Selectrix®-decoder
Write base values in Selectrix®
Read base values in Selectrix®
Read base values of Selectrix®
on graphic interface
No
No
Yes
Yes
mfx®-decoder
Write in ESU Motorola programming mode No
Search Motorola-addresses
No
Read of values on graphic interface
Nein
16.1.1. Direct Mode (CV-Mode)
6
For programming in DCC Direct Mode (also known as CVmode) the loco has to be located on the programming track.
No other loco may be on the programming track at that time
otherwise they will also be programmed simultaneously. In Direct
Mode you can read and write CVs.
64
16.1.2. Programming on the Main (POM)
6
16.2. Introduction to Motorola-programming
In the POM mode the loco may remain on the layout and is reprogrammed while running on the layout. Thus you may observe
and correct any changes directly.
Some decoders can only be programmed on the main if they
are set to speed step "0". ESU decoders can also be adjusted
while running.
In order to program a loco on the main ECoS must transmit
specific commands to this loco. Therefore the current address
of the loco must be known, otherwise it cannot be
programmed.
Should you not know the address of a loco place it on the
programming track. There you can read out the address.
Main
track
No
No
No
Yes
No
No
No
No
No
Progtrack
Yes
Yes*
Yes*
Yes
Yes
Yes*
Yes*
Yes
Yes
Yes
Yes
No
* from Version 1.0.1.
16.4. Manual programming (DCC & Motorola)
Always place only one loco on the programming track. Make
sure there is good electrical contact. There must be a motor
connected to the decoder otherwise ECoS cannot receive the
confirmation pulses and will erroneously report an error.
All described programming modes can be used with a universal
programming window.
Programming Decoders
• Open the set-up menue.
• Select this pictogram on the left to open the programming
window. The following figure appears:
"No Loco" means that no loco was found on the programming
track or that the current draw was below 4mA. Check the
electrical contacts.
ECoS tries first to read a CV in Direct Mode. If this does not
work ECoS attempts to read the CV in Paged resp. Register
Mode. This may take up to 30 seconds.
e)
b)
f)
g)
a)
c)
d)
h)
i)
k)
j)
Figure 61
a)
b)
c)
d)
e)
f)
g)
h)
i)
j)
k)
16.4.2. Write CVs
• Enter the CV number in field a), that you want to write.
• Enter the new value of the CV in field c). It may be entered in
decimal format or with the 8-bit blocks in binary format. Bit 0
is far right, bit 7 far left.
Lenz calls the bits of a CV sometimes switches and counts from
1 to 8. ECoS counts as per the DCC standards from 0 to 7.
• Push the screen button f) "Write"
• If successful the word "OK" will be displayed after as short
while in field b)
• If not successful then "Error" or "No Loco" will be displayed.
CV-number that should be read or programmed
Currently read value / error reports
New value, that you want to write (input in decimal numbers)
Binary display of the current value entered in c)
"Read" screen button
"Write" screen button
Number block for data entry
Choice of DCC- or Motorola-programming mode
Choice between POM and programming track mode
Current loco address (is needed for POM)
Search address (only for Motorola)
• First select if you want to use POM or programming on the
programming track. Remember: you can only read decoder
data on the programming track.
16.4.1. Read CVs
Only possible on the programming track and only in DCC.
• Enter the CV number in field a), that you want to read.
• Push the screen button e) "Read CV"
• After a short while the current value will be displayed in field b).
• If you were not successful "Error" or "No Loco" will be displayed.
"No Loco" means that no loco was found on the programming
track or that the current draw was below 4mA. Check the
electrical contacts.
In very rare cases it may happen that "Error" is displayed even
though writing the CV was successful. ECoS always waits for
confirmation from the decoder and in some cases this may not
happen or may not be recognised by ECoS!
16.5.1. Decoder profiles
A decoder profile is a description of the parameters of a decoder.
All CV numbers, their value ranges and their purpose, as well as
the layout of the elements on the ECoS monitor are summarised
here. Every decoder that has a graphic profile can be
programmed by this method.
ECoS knows profiles for all ESU decoders and also has two
generic profile decoders form other manufacturers.
16.5.2. Manual configuration of decoder profiles
You may assign each loco a decoder profile as follows:
• Call up the loco on a throttle
• Open the loco menue and select "Edit Loco"".
• Change to the third tab called "Advanced" and a window
opens.
a)
b)
c)
d)
e)
16.4.3. Programming on the Main (POM)
Only for DCC. When you select this mode you must enter the
current address in field j). Reading is not permitted in this mode.
f)
g)
16.4.4. Searching the address
A useful function particularly for finding the Motorola address
of older decoders. ECoS tests all 255 possible addresses and
checks if the loco responds.
This search mode only works if the acceleration has been set to
a low value. The loco will move for a moment. Make sure it
cannot fall off the layout.
16.5. Graphic programming
Besides the sometimes-cumbersome method of direct CV
programming – after all, who knows all CV numbers by memory
– ECoS offers a comfortable alternative method:
All ESU decoders and many others can be programmed easily
without having to know CV numbers. This is possible due to
decoder profiles.
Figure 62
a)
b)
c)
d)
e)
f)
g)
Global settings
Address settings
Analogue settings
Running characteristics
Motor settings
Function mapping
Sound settings
The content of the individual sub-dialogues depends on the
available decoder options resp. the assigned profile. For instance
sound settings will only be available in a LokSound decoder.
• Select the matching decoder profile in the choice list "Decoder
Profile". If the decoder is not in the list choose "Empty".
25
Programming Decoders & ECoSniffer
• Live mode is not suitable for
• setting addresses
• function mapping
• The live mode only works in DCC mode!
As soon as you have selected a decoder profile the sections b)
to g) will be loaded with the settings of the corresponding
decoder. Now you can comfortably modify any settings on the
graphic display.
ECoS transfers standard values according to a manual profile
selection. They do not necessarily match the actual values of
your loco. Therefore we recommend using the automatic
assignment of profiles.
16.5.5. More info on profile
• There is a matching profile for every ESU decoder. However, a
profile does not necessarily contain all decoder parameters.
Some rarely used settings should be adjusted manually as
described in chapter 18.4. Alternately you could use our
LokProgrammer with its software.
• For DCC decoders by other suppliers it is best to use the generic
NMRA profile. For extended settings we recommend to use
manual programming of CVs.
16.5.3. Automatic assignment of profiles
During the automatic assignment of the decoder profile the
decoder data is read out and then the matching profile is
assigned. All CV values of the decoder are read simultaneously
and displayed on the graphic interface. That way it can be
assured that the displayed settings correspond with the ones
saved in ECoS. This is how you proceed in detail:
• Place the loco on the programming track.
• Call up the loco on one of the two cabs
• Open the loco menue and select "Edit Loco".
• Change to the third tab called "Advanced" and a window as
shown in figure 62 opens.
• Touch the screen button "Continue" to start the read out.
• First ECoS finds out which decoder type is used and then selects
the matching profile.
• ECoS reads out all CV values from the decoder. This may take
a while.
• Finish the process by pushing "Finish".
• Should ECoS not be able to read the loco in DCC mode it will
check if it could be a Selectrix® decoder.
• If this is not the case either ECoS will try to find a Motorola
address. In this case ECoS assumes that this is an unreadable
Motorola decoder.
16.5.4. Editing decoder settings
After assigning a decoder profile you can edit any decoder
parameters comfortably on the graphic display. Initially all
changes are set in ECoS only and not transferred to the decoder.
Of course, you can transfer (program) the data set locally on
ECoS to the decoder at any time.
a)
c)
b)
d)
Figure 63
a)
b)
c)
d)
Choice field "Live"
Radio button "POM" (=Programming On the Main)
Radio button "Programming track"
Screen button "Write data on decoder"
• First use radio buttons b) and c) to select the programming
mode (POM or programming track).
If you want to program on the main (POM) then no address
change is permitted. As you already know address changes
can only be done on the programming track.
16.5.4.1. Download mode
• Transfer the complete set of data to the loco by pushing the
screen button d).
All CV data of the decoder will be overwritten with the data
displayed on the screen. Please check if you actually want to
proceed before pushing this button!
16.5.4.2. Live mode
In POM mode you can observe all changes "live" during the
programming process: ECoS transmits all changes to the
(running) loco immediately. Thus programming becomes far
easier than previously.
• Activate the screen button a) "Live" while in POM mode.
• As soon as you now change any value with the slide controller
(e.g. CV5, maximum speed) the new value is transmitted to the
loco and you see the effect immediately.
26
17. ECoSniffer
The ECoSniffer enables you to continue to use your old digital
system and it thus protects your investment. .
As already mentioned in chapter 7.8 all DCC- and Motorolasystems can be used with ECoSniffer. ECoSniffer behaves like
a digital decoder and translates all track signals into information
that can be processed by ECoS.
While all previously launched digital systems are based on
addresses ECoS establishes a library (loco list) with names. Since
there could be several locos with the same address the loco
address of the old system must be linked to the appropriate
name of the loco in ECoS.
ECoS handles this with great flexibility. For each entry in the
loco library you can assign a so-called "Sniffer Address" besides
the real decoder address. This Sniffer address is independent
of the real address and only serves to link the address received
from the old digital system to the locos in the ECoS loco library.
17.1. Sniffer addresses
Sniffer addresses are stored as additional parameter in each
loco and in the loco library.
Since they are independent of each other some fascinating
sequences can be realised:
Example 1:
You have connected a Lokmaus 2-system to ECoSniffer as per
Figure 22. The Lokmaus 2 can only work with addresses from
01 to 99.
Let’s assume you have a "Blue Tiger Class 250" with address
"250" and want to run it with the Lokmaus 2. You want to use
address "25" on the Lokmaus. Simply enter "25" as the Sniffer
address for the Blue Tiger.
From now on the Blue Tiger will respond to the address 25 on
your Lokmaus. ECoS links the address "25" by the Lokmaus to
the Blue Tiger, detects that it is actually run with the decoder
address "250" and runs the loco accordingly.
ECoSniffer & Configuration menue
Figure 64
Example 2:
You have connected a 6021 to ECoSniffer as per Figure 21.
The 6021 can only handle addresses from 01 to 80 in Motorola
format. .
Let’s assume you have a "Blue Tiger Class 250" with address
"250" in DCC format and now want to run it with the 6021.
You want to use address "50" on the 6021. Simply enter "50"
as the Sniffer address for the Blue Tiger.
From now on the Blue Tiger will respond to the address 50 on
your 6021. ECoS links the address "50" by the 6021 to the Blue
Tiger, detects that it is actually run with the decoder address
"250"(in DCC mode!) and runs the loco with this address in
DCC mode. In other words it is no problem to use a Motorola
command to run a DCC loco.
17.2. Hints for using ECoSniffer
18.1.2. LCD contrast and brightness
Of course, there are some limits to what ECoSniffer can do.
Since communication only takes place in one direction it is not
possible to transmit signals to the old system: If you for instance
run a loco with your old system on speed step "10" and
subsequently reduce this to speed step "2" with one of the
two cabs on ECoS, the old system will still show speed step
"10".
With the slide controllers for brightness and contrast you can
adapt the screen to the surroundings and your personal
preference.
• Do not call up a loco on your old system and on an ECoS
throttle at the same time. This could lead to problems.
• Run your DCC locos always with 28 or 128 speed steps in your
old system since ECoSniffer cannot differentiate reliably
between 14 and 28 speed steps.
• If you do not wish to run a loco with your old system anymore
stop the loco with your old system and turn off all functions.
After some time ECoSniffer will delete this loco from its internal
check list (purging).
• ECoSniffer will accept accessory addresses directly and switch
them immediately. There are no Sniffer addresses for
accessories.
18.1.3. Current threshold of the internal booster
The choice list "Maximum current of the internal booster"
allows you to adjust this value. Never set the current threshold
higher than necessary to avoid damage or "welding" of tracks
in case of a short circuit.
18.1.4. Reset
Push "Reset" to trigger a reset to default values. This deletes
all data in ECoS including all loco and accessory libraries.
This reset is carried out immediately.
For safety reasons the button "Reset" is normally shaded grey.
Before activating a reset you have to permit access to this
function as described in chapter 18.4.
18.2. Display for train operations
18. Configuration menue
Basic operational parameters are edited via the set-up menue.
After touching the pictogram for the set-up menue at the top
of the monitor the set-up dialogue is opened. This is structured
over several pages (windows).
18.2.1. Taking over loco
When you tick the field in front of "Transfer locomotive control"
then any other player may take (pinch) this loco (parallel
operation).
18.1. General settings
18.1.1. Setting the language
Select the desired language from the choice list. Any
adjustments will be accepted immediately.
Figure 65
• Assign each Sniffer address to one loco only. ECoS does not
check if the address has been assigned previously during data
entry.
• Assign the Sniffer address "0" to locos that you do not want to
run with the old system.
• Of course you cannot extend the address range of your old
system: A 6021 can only handle addresses from 01 to 80. If you
for instance enter Sniffer address "85" then you will not be
able to run this loco with your 6021.
• In DCC format ECoSniffer detects only function buttons F0 to
F12 of your old system.
• In Motorola format ECoSniffer detects only function buttons
F0 to F4. ECoS cannot detect extended function buttons (F5 to
F8) via the following address.
Figure 67
18.2.2. Numbering functions
If this function is active all function buttons are counted so you
can keep them apart easier. You recognise this by the small
numbers at the bottom right of the function symbols.
Figure 66
27
Configuration menue
18.2.3. Starting mode
18.4.1. Lock functions
This setting determines if you want to send the commands that
were active most recently (speed, functions, direction) to your
models. This function enables you to continue operations exactly
at the point where you stopped during your last operating
session.
• "Block Stop" prevents the emergency stop when pressing the
STOP button. This affects the internal STOP button and all
STOP buttons of devices connected to ECoS via ECoSlink and
ECoSniffer.
• "Block creating poerations" prevents adding new locos,
turnouts, routes etc. This is useful for public layouts that should
be operated but not changed in its settings.
• "Block reset operations" deactivates the reset to default values
(refer to chapter 18.1.4)
• "Block deleting operations" prevents deletion of locos, turnouts,
etc.
• "Block changing operations" prevents editing of locos, turnouts,
etc.
18.2.4. Pre-determined protocol for new locos
When you select a loco via the loco library then the data format
as stored in the library will be used. Also refer to chapter 11.12
18.3. Components in the system
In this menue all devices that are currently connected to the
ECoSlink bus. Each device reports automatically to ECoS (Plug
& Play) and generally can be configured further if required.
Figure 69
Then enter the delay time directly in "Delaying Short Circuit
Detection":
• Select "0 ms" for DCC compatible boosters (e.g. Lenz)
• Select "1500 ms" for LDT boosters
• Select "2000 ms" for Märklin® 6017-boosters
18.4.2. Access code
You can protect access to the sub-menue "Access Authorised"
with a code. This helps you to prevent any unauthorised
modifications to the settings of the system.
First you have to define a 5-digit number code. This has then to
be entered whenever anyone wants to open this menue.
Start with "0 ms" for all other makes and test it. Make sure
that both a Motorola- and a DCC-loco are active. Some boosters
cannot handle DCC packets very well. Should ECoS switch off
immediately (STOP button is illuminated red) then the time
must be increased.
18.4. Access control
Here you can set various options that reduce or prevent
unauthorised access, e.g. visitors cannot edit or delete loco
data or – even worse – trigger a reset.
Figure 68
The devices "ECoSniffer" "s88-Bus Control" and "External
Booster Control" will always be displayed even if there are no
external devices connected. These three devices are integrated
into ECoS but are displayed as if they were external.
Figure 71
18.3.1. Booster configuration
As mentioned in chapter 8.7 different booster types use different methods for detecting a short circuit. The time it takes
from detecting a short circuit until ECoS turns off the track
power must be adjusted to the type of booster to assure safe
operations and to avoid erroneous switch-offs.
These settings are adjusted in the sub-menue "Booster
Configuration".
You find this menue via the set-up menue "Configuring Devices"
as per Figure 68: Select "External Booster Control" from the
list of devices and press "Edit".
18.4.2.1. Changing the code
• Press the screen button "Change access Code" and another
dialogue window opens where you can enter the new code.
• Delete the old code and enter the new one.
• Confirm this entry
Figure 70
Make sure you remember your access code. Should you
forget it the only way to reset it is via the computer interface
(refer to chapter 22.2.4).
A reset of the code at the factory will cost money!
28
Configuration menue, s88-bus & Computer interface
18.4.2.2. Activating the code
20.1. IP Set-up
• Set a tick at "Protect".
• Whenever you call up the menue "setup area" you have to
enter the code that you entered as described in 18.4.2.1.
b)
If you have connected your PC with a broad band internet (e.g.
DSL) provider or if you even have a wireless router or operate
a small home network it is likely that you have a so called DHCP
server in your network: This assigns automatically IP-addresses
to all devices. Most Internet routers function as DHCP-servers:
if this is the case please read on in chapter 20.1.2.
If you do not have a DHCP-server or you want to connect ECoS
with a PC that is not connected to a network or works with a
static (manually assigned) IP-address continue reading below.
c)
18.5. Global information
Here you find some important info about your ECoS.
a)
e)
d)
f)
Figure 73
a)
b)
c)
d)
e)
f)
List with all currently known s88-modules
Name of module
8- or 16-port indicator
Screen button "Add Accessory Module"
Screen button "Delete Accessory Module"
Screen button "Shift between 8 and 16 Ports"
Figure 72
You have to enter each s88-module in ECoS:
18.5.1. Software version
• Press the screen button "Add Accessory Module"
The software version relates to the internal software. Important:
Whenever you contact ESU to ask questions relating to your
ECoS you must know the software number.
• Touching this screen button shifts between the 8-port and the
16-port module.
18.5.2. Serial number
The internal serial number is valid for your ECOS only. You need
this number when you register your ECoS with ESU. We also
need to know this number in order to help you whenever you
ask for support.
19. s88-bus-configuration
As mentioned in chapter 8.9 the individual s88 modules are
linked like a chain. ECoS needs to know how many of these
modules are connected and if they have 8 or 16 ports. This is
done in the set-up menue:
• Open the set-up menue.
• Select "Devices in the System" in the sub menue.
• Select "s88-Bus-Control" from the list in "Devices on ECoSlink"
(also see Figure 68).
• Push "Edit" and a dialogue window called "s88 Configuration"
will open:
• Confirm your entry.
20. Computer interface
This enables you to connect your ECoS with your PC. ECoS
works with several operating systems such as MS-Windows®,
Apple® or Linux®. ECoS is based on open standards for data
transfer and does not require any software installation on your
PC. All you need to have installed and configured is an Internet
browser (e.g. Mozilla Firefox®, MS Internet Explorer® or
similar).
The computer interface enables you to download updates, to
save and recall all ECoS data on your PC.
Communication between ECoS and your PC runs over a socalled IP-connection. In such IP-networks it is important that
each device resp. participant has a unique IP-address. With the
aid of these IP-addresses all connected devices can find each
other.
Therefore you must configure a correct IP-address in your
ECoS and also on your computer. Otherwise data transfer
cannot be facilitated.
20.1.1. Manually assigning IP-Addresses in Windows
If you use a static IP-address and your PC is already configured
you do not have to change anything in your PC. Continue
reading in chapter 20.1.2.
If you use a PC that has not been connected to a network until
now you have to check the IP-settings first. We present this as
an example for MS Windows® XP. Should you have another
operating system consult your system administrator or the
manual?
We assume that you will establish a network with your PC and
your ECoS only (without any other devices). This example is
only valid for this particular case. If in doubt consult a computer
specialist.
• Make sure that your PC and ECoS have connected to the
network as per figure 8.6
• Click on "Start" in Windows, Select "Settings" and then "System Control".
• Find the pictogram "Network Connections" and open it.
• Now a window similar to the one shown in Figure 74 should
open.
• Search for the used network connection. In most cases this is
called "LAN-Connection".
• Double click with the mouse on your connection. The following
dialogue window will open (see figure 75).
Figure 74
29
Computer interface
20.1.2. Assigning an IP-address on ECoS
Now you have to assign an IP-address to ECoS.
• Open the set-up menue.
• Select "Network Settings" from the list.
• In our example from chapter 20.1.1 you enter:
http://192.168.1.2
and press the return key.
• After a short while the start display of ECoS will have been
established. It must look like the following:
Figure 75
• Mark "Internet-Protocol" in the list and click on "Properties".
Figure 77
• Enter suitable values for your home network in the fields "IPAddress" and "Net Mask". Should you put the above example
into practice enter the values precisely as shown.
• Make sure the tick at "Obtain IP-Address via DHCP-Server" is
NOT set.
• Confirm your entry and leave the set-up menue.
a)
b)
c)
d)
Restart your ECoS. (shut down completely and then restart).
Continue in chapter 20.2.
20.1.3. DHCP-Server in the net
A DHCP-server in the net automatically assigns IP-addresses to
all devices in the network. ECoS checks by default during each
start up procedure if such a server is available and requests a
valid IP-address. All you have to do is read out the assigned IPaddress and enter it in the address line of the internet browser.
• Open the set-up menue of ECoS.
• Open the network set-up as per Figure 77.
• Make sure the tick at "Obtain IP-Address via DHCP-Server" is
set.
• Read and remember the "IP-Address"
Figure 76
• Select "Use the following IP-address" and enter the value
exactly as shown in Figure 76.
• Confirm your entry with "OK".
• Confirm again with "OK" to close the window "Properties".
30
20.2. Web interface
• To establish a connection with ECoS start your Internet browser.
• Type in the upper command line: http://IP-Address. IP-Address
means in this case the address assigned to ECoS. Confirm with
"Enter".
Figure 78
a)
b)
c)
d)
Menue
Menue
Menue
Menue
"Firmware Update"
"Save Configuration"
"Re-establish Configuration"
"Reset Access Code"
20.2.1. Firmware update
First save your data as per chapter 20.2.2 before you start a
firmware update.
This enables you to update the operating software of your
ECoS. First you must download new firmware packets from
our website and save it locally on your PC. You will find the
latest version of our software at: http://www.loksound.de.
Follow the link "Download", then "ECoS Software".
Update your firmware only if you want to upgrade relevant
errors or new functions that you absolutely need. Never change
the configuration of a system that is stable and works without
problems.
Computer interface
• Select "Firmware Update", and then enter the desired
firmware file with the aid of the "Browse"-button.
• Start the update by pushing the "Download"-button.
• Now the download will be started. It may take up to 10 minutes
before the new firmware has been downloaded. After that
ECoS will start again at least once and unzip and install the
new data. Therefore this start up procedure takes much longer
than usual.
20.3. Train control software on your computer
ECoS has a communication protocol to hook up to external
train control programmes run on your PC. Ask your software
supplier if and when his software will support the ECoS
communication protocol.
This communication protocol is due to the many possibilities
incompatible to any existing interfaces. A software update of
your train control program on your PC is therefore essential.
• Please be patient: an update may take even up to 15
minutes. Do not switch off ECoS during this process! This
could result in n complete non-operable software.
• Also make sure that the power supply to your PC and your
ECoS is not interrupted during this process. An incomplete
update may render your ECoS useless. A factory reset that
will be charged is then unavoidable.
• After a successful update ECoS should start with the standard
display.
20.2.2. Backup configuration
You should make it a habit to save your loco libraries on your
PC. Should you delete the lists by mistake then you have a
backup available thus avoiding having to go through the process
of entering all data individually once more.
• Select "Store Configuration" from the menue.
• Click on the screen button "Save Settings".
• Select "Save File" and save your file on your PC.
20.2.3. Restore configuration
When restoring the configuration all current settings of ECoS
will be replaced by the ones saved in the configuration file.
• Select "Restore Configuration" from the menue.
• Select the desired file that you wish to restore with the aid of
the "Browse" button.
• Start the download by pushing the "Send" button
• The configuration files of ECoS will be deleted and replaced by
the new ones. After that ECoS will re-start.
20.2.4. Resetting the access code
Here you can reset the access code back to the default value
"00000" in case you have forgotten the code. Follow the
instructions on the screen.
31
Warranty Card
Goods Return Note
22. Warranty Certificate
1. Customer data
(please enter in block letters)
24 months warranty from date of purchase
Name: ..........
Street: ..........
Dear customer,
congratulations to your purchase of this ESU product. This high tech product has been manufactured
according to the latest production processes and has passed stringent quality checks and tests.
Therefore ESU electronic solutions ulm GmbH & Co KG offers you in addition to the national warranty
rights as governed by law a special
Postal Code / Town:
Country: .......
E-Mail: ..........
Telephone ....
Date:
Signature:
manufacturers warranty of 24 months from date of purchase
Warranty conditions:
2. Serial number of device
• This warranty is valid for all ESU products, purchased at an ESU dealer.
• Any repair or replacement under this warranty is subject to proof of purchase. The warranty certificate
completed by your ESU dealer together with the receipt serves as the proof of purchase. We recommend
to keep the receipt together with the certificate.
• Please fill in the goods return note on the left accurately and send it in as well.
iD-code ......... 0x
3. Type of fault
Faulty display
Short circuit
Software
Output programming track
Throttle
Output main
Joystick / keyboard
No figure (no response)
Content of warranty / exemptions
The warranty of ESU electronic solutions ulm GmbH & Co KG comprises the free of charge disposal or
replacement of any faulty part due to faulty design, manufacturing or material or transport damage.
Any further claims are excluded.
4. Description of fault (use extra page if necessary)
This warranty expires:
1.
2.
3.
4.
5.
in case of failure due to wear and tear
if ESU products have been modified with parts not approved by ESU
if parts have been altered, especially missing shrink sleeves, or wires soldered directly to the decoder
if the product is used for a different purpose than the one intended by the manufacturer
if recommendations issued by ESU electronic solutions ulm GmbH & Co KG are not adhered to.
For reasons of liability no examination or repairs can be carried out on parts built into locos or coaches.
The warranty period will not be extended due to repairs or replacement.
5. Receipt of purchase
Please return the receipt with the shipment!
6. Details of dealer / hobby shop
32
Stamp or address of hobby shop
You may submit your claim by either returning the faulty product to your dealer or by shipping it directly
to ESU electronic solutions ulm GmbH & Co KG together with the warranty certificate, the receipt and
a detailed description of the fault.
ESU electronic solutions ulm GmbH & Co KG
warranty department
Industriestrasse 5
D-89081 Ulm
Registration card & Exchange Voucher for 15V Power Supply
24. Exchange Voucher for 15V Power Supply
23. Registration card
23.1. Introduction
24.1 Introduction
Thank you for purchasing the ESU ECoS. We spent much time and patience in developing this product and
hope that you will like it. To enable us to further develop ECoS in future we rely on your help. We kindly ask
you to register your ECoS with us and to answer the following questions. You will help us to improve ECoS
even further!
As outlined in chapter 8.2 the standard ECoS power supply provides a secondary voltage of 18V.
Since this is too high for many N-gauge layouts you offer the possibility to exchange the 18V power
supply against one with 15V secondary voltage.
Registered user will be informed about product updates when available.
Fill out this Exchange voucher completely and clearly readable and send it together with your 18V
power supply to the following address:
Thank you for your assistance.
23.2. Address
(Please fill out in capital letters)
Name: ..........
Street: ..........
24.2. Address
Postal Code / Town:
Street: ..........
E-Mail: ..........
Date: ............
Signature: ....
(Please fill out in capital letters)
Name: ..........
Country: .......
Telephone ....
ESU GmbH & Co KG.
- Exchange of power supply Industriestraße 5
D-89081 Ulm
Postal Code / Town:
Country: .......
E-Mail: ..........
Telephone ....
23.2. Serial number of your ECoS
ID-Code ........ 0x
I herewith declare that the 18V power supply is in perfect technical condition and request a free-ofcharge exchange against a15V power supply. I have carefully packed the 18V unit and applied the
appropriate postal stamps. ESU will cover the cost for shipping the 15V unit.
23.3. Information regarding the system environment
H0 3-conductors
Number of locomotives MOT:
Date: ............
H0 2-conductors
Number of locomotives DCC:
Signature: ....
N-gauge
Number of locomotives SX:
TT-gauge
Club layout
Gauge 1
Home layout
G-gauge
(Please fill out completely in capital letters)
Previously used digital system:
24.3. Delivery Address
Please ship the 15V-power supply to the following address:
23.4. Hobby shop or dealer
Name: ..........
Street: ..........
Postal Code / Town:
Country: .......
ESU pledges to use the data provided solely for the purpose as indicated above ands will not provide this
information to others. You may have your entry deleted from our database at any time. Surface mail or
Email suffices.
23.5. Confidentiality guarantee
33
34
Technical data & Code table for accessory decoder
21. Annex
21.2. Code table for accessory decoder
21.1. Technical data
H4-booster with 4.0 A continuous output
H4-programming track output with 0.6A
NMRA DCC BiDi Feedback with integral cut-out-device
7 inch QVGA FSTN LCD Display with touch panel and 6-fold
LED Backlight (white)
32-Bit ARM 720T Controller, 64 Mbytes Flash ROM, 32 Mbytes
RAM, Linux® Operating system
16 Bit Real time Co-processor
2 x motor driven potentiometer-cabs with definitive end position
2 x Two-way-analogue-joysticks
2 x 8 Function buttons as well as Stop- and Go-buttons
3 Sockets for ECoSlink devices
Socket for ECoSlink bus extension
Galvanically separated booster socket for DCC-conform and
6017-compatible boosters
Galvanically separated ECoSniffer input for connecting old
systems
Galvanically separated s88-bus input for feedback decoder
10/100 Mbit Ethernet-socket (RJ45)
1 ECoSlot-module to accommodate a radio receiver
Power supply 90VA
The table contains the link between the status of the DIP-switches and the turnout address as well as to the Märklin® keyboards.
Keyboard Keyboard
Tur
nouturnout-
Tur
nout decoder
urnout
Keyboard Keyboard
Tur
nouturnout-
Tur
nout decoder
urnout
No.
Button
addresse
DIP-switch ON
No.
Button
addresse
DIP-switch ON
1
1..4
1-4
-
2
3
-
5
-
7
-
11
1..4
161-164
-
-
-
4
-
6
-
8
1
5..8
5-8
-
-
3
-
5
-
7
-
11
5..8
165-168
1
-
-
-
-
6
-
8
1
9..12
9-12
1
-
-
4
5
-
7
-
11
9..12
169-172
-
2
-
-
-
6
-
8
1
13..16
13-16
-
2
-
4
5
-
7
-
11
13..16
173-176
-
-
-
-
-
6
-
8
2
1..4
17-20
-
-
-
4
5
-
7
-
12
1..4
177-180
1
-
3
-
-
-
-
8
2
5..8
21-24
1
-
-
-
5
-
7
-
12
5..8
181-184
-
2
3
-
-
-
-
8
2
9..12
25-28
-
2
-
-
5
-
7
-
12
9..12
185-188
-
-
3
-
-
-
-
8
2
13..16
29-32
-
-
-
-
5
-
7
-
12
13..16
189-192
1
-
-
4
-
-
-
8
3
1..4
33-36
1
-
3
-
-
6
7
-
13
1..4
193-196
-
2
-
4
-
-
-
8
3
5..8
37-40
-
2
3
-
-
6
7
-
13
5..8
197-200
-
-
-
4
-
-
-
8
3
9..12
41-44
-
-
3
-
-
6
7
-
13
9..12
201-204
1
-
-
-
-
-
-
8
3
13..16
45-48
1
-
-
4
-
6
7
-
13
13..16
205-208
-
2
-
-
-
-
-
8
4
1..4
49-52
-
2
-
4
-
6
7
-
14
1..4
209-212
-
-
-
-
-
-
-
8
4
5..8
53-56
-
-
-
4
-
6
7
-
14
5..8
213-216
1
-
3
-
5
-
-
-
4
9..12
57-60
1
-
-
-
-
6
7
-
14
9..12
217-220
-
2
3
-
5
-
-
-
4
13..16
61-64
-
2
-
-
-
6
7
-
14
13..16
221-224
-
-
3
-
5
-
-
-
5
1..4
65-68
-
-
-
-
-
6
7
-
15
1..4
225-228
1
-
-
4
5
-
-
-
5
5..8
69-72
1
-
3
-
-
-
7
-
15
5..8
229-232
-
2
-
4
5
-
-
-
5
9..12
73-76
-
2
3
-
-
-
7
-
15
9..12
233-236
-
-
-
4
5
-
-
-
5
13..16
77-80
-
-
3
-
-
-
7
-
15
13..16
237-240
1
-
-
-
5
-
-
-
6
1..4
81-84
1
-
-
4
-
-
7
-
16
1..4
241-244
-
2
-
-
5
-
-
-
6
5..8
85-88
-
2
-
4
-
-
7
-
16
5..8
245-248
-
-
-
-
5
-
-
-
6
9..12
89-92
-
-
-
4
-
-
7
-
16
9..12
249-252
1
-
3
-
-
6
-
-
6
13..16
93-96
1
-
-
-
-
-
7
-
16
13..16
253-256
-
2
3
-
-
6
-
-
7
1..4
97-100
-
2
-
-
-
-
7
-
-
-
257-260
-
-
3
-
-
6
-
-
7
5..8
101-104
-
-
-
-
-
-
7
-
-
-
261-264
1
-
-
4
-
6
-
-
7
9..12
105-108
1
-
3
-
5
-
-
8
-
-
265-268
-
2
-
4
-
6
-
-
7
13..16
109-112
-
2
3
-
5
-
-
8
-
-
269-272
-
-
-
4
-
6
-
-
8
1..4
113-116
-
-
3
-
5
-
-
8
-
-
273-276
1
-
-
-
-
6
-
-
8
5..8
117-120
1
-
-
4
5
-
-
8
-
-
277-280
-
2
-
-
-
6
-
-
8
9..12
121-124
-
2
-
4
5
-
-
8
-
-
281-284
-
-
-
-
-
6
-
-
8
13..16
125-128
-
-
-
4
5
-
-
8
-
-
285-288
1
-
3
-
-
-
-
-
9
1..4
129-132
1
-
-
-
5
-
-
8
-
-
289-292
-
2
3
-
-
-
-
-
9
5..8
133-136
-
2
-
-
5
-
-
8
-
-
293-296
-
-
3
-
-
-
-
-
9
9..12
137-140
-
-
-
-
5
-
-
8
-
-
297-300
1
-
-
4
-
-
-
-
9
13..16
141-144
1
-
3
-
-
6
-
8
-
-
301-304
-
2
-
4
-
-
-
-
10
1..4
145-148
-
2
3
-
-
6
-
8
-
-
305-308
-
-
-
4
-
-
-
-
10
5..8
149-152
-
-
3
-
-
6
-
8
-
-
309-312
1
-
-
-
-
-
-
-
10
9..12
153-156
1
-
-
4
-
6
-
8
-
-
313-316
-
2
-
-
-
-
-
-
10
13..16
157-160
-
2
-
4
-
6
-
8
-
-
317-320
1
-
3
-
5
-
7
-
35
36