1
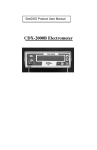
SeeDOS Product User Manual
LDR Brachytherapy Seed
Sterilization and Sorting Tray
Table of Contents
General Precautions ................................................. 2
Customer Responsibility ......................................... 3
Description .............................................................. 4
Features and Specifications ..................................... 5
Operation ................................................................. 6
Changing Covers
Loading Seeds
Sterilizing the Seeds
Removing the Seeds
Accessories
Using the Seed Alignment Tray
Using the Shielding Cover
Maintenance........................................................... 11
Service ................................................................... 11
Parts and Accessories ............................................ 11
Warranty ................................................................ 12
General Precautions
CAUTION: Proper use of this device depends on careful
reading of all instructions and labels.
CAUTION: Steam Sterilize (autoclave) or ETO sterilize
only. Do not gamma ray sterilize.
WARNING: After steam sterilization, unit will be hot.
Allow adequate cooling time before handling. Do not drop or mishandle unit.
-2-
Customer Responsibility
Federal law in the U.S.A. and Canada restricts the sale,
distribution or use of this device to, by or on the order of a
licensed medical practitioner. The use of this device should be
restricted to the supervision of a qualified medical physicist.
Handling of radioactive sources is potentially hazardous and
should be performed by qualified personnel. Should repair or
replacement of this device become necessary after the warranty
period, the customer should seek advice from Standard Imaging
Inc. prior to such repair or replacement. If this device is in need
of repair, it should not be used until all repairs have been made
and the product is functioning properly and ready for use. The
owner of this device has sole responsibility for any malfunction
resulting from abuse, improper use or maintenance, or repair by
anyone other than Standard Imaging Inc. The information in this
manual is subject to change without notice. No part of this
manual may be copied or reproduced in any form, or by any
means, without prior written consent of Standard Imaging Inc.
-3-
Description
Sterilization of LDR brachytherapy seeds before implantation is desirable, and is a routine procedure at many medical centers. Instructions from seed manufacturers may
include sterilization procedures. The Standard Imaging
LDR Brachytherapy Seed Sterilization and Sorting Tray,
REF 90085 shown in Figure 1, provides a convenient
method of achieving this sterilization using a steam autoclave.
The LDR Brachytherapy Seed Sterilization and Sorting
Tray has ten wells for the placement of LDR seeds. Each
well can easily hold up to 50 seeds, and is identified by a
stamped number from one to ten.
Tray
Loading
Cover
Sterilization
Cover
Fig. 1
Two interchangeable covers are provided.
1. The Loading Cover allows for access to one well at a
time. It can also be used in conjunction with either the
Seed Slider (REF 90090) or the Seed Alignment Tray
(REF 90089) to load prostate implant needles.
2. The Sterilizing Cover has ten screened openings which
align with the wells and insure proper sterilization of
the seeds and tray without allowing seed egress.
-4-
Safety Lock Feature
As a safety feature, both covers can be locked in place to
prevent accidental loss or spillage of seeds during transport
within the health care facility. The cover is in the locking
position when the arrow on the cover lines up with the
arrow on the well. To lock, screw the thumbscrew down
until finger-tight. In the lock position all wells are surrounded by 3/16 in. thick aluminum and exposure from
LDR seeds in the wells is minimized.
Fig. 2: The cover in the LOCK position.
Features and Specifications
Number of seed wells ................. 10
Height ......................................... 11.0 cm (4.3 inches)
Diameter ..................................... 16.0 cm (6.3 inches)
Weight ......................................... 1.1 kg (2.5 lbs)
Shielding thickness ..................... 3/16 in. Aluminum (min)
Specifications subject to change without notice.
-5-
Operation
Changing Covers
1. Unscrew and remove the top knob.
2. Lift off the cover.
3. Replace with the other cover and secure the top knob.
Loading the Seeds
The ten wells of the Sterilization Tray are useful for two
main purposes. Seeds of different strengths can be placed in
separate wells for sorting, calibration and identification.
Also, when large quantities of seeds are used, 10% of the
total can be placed in each well. The user is then shielded
from 90% of the seeds during needle loading.
1. With the Loading Cover in place on the Sterilization
Tray, position the opening over hole 1.
2. Load the wells with seeds.
3. Align the arrows and secure the thumb screw to lock
the cover in place.
Sterilizing the Seeds
1. Remove the Loading Cover and attach the Sterilizing
Cover to the Sterilization Tray.
2. Align the arrows and secure the thumb screw to lock
the cover in place.
-6-
3. Just before the device is placed in the autoclave,
release the thumb screw to unlock the Sterilizing
Cover. Rotate the cover so the arrow lines up with the
number 1. This aligns the screened areas with the
wells and insures a good flow of steam during the
sterilization process.
Fig. 3: The cover in place for sterilization.
4. Sterilize the Loading Cover along with the loaded
Sterilization Tray. Make sure the Sterilizing Cover is
positioned as shown above. If either the Seed Slider
or Seed Alignment Tray will be used, attach it to the
Loading Cover and sterilize along with the Sterilization Tray. If the spatula will be used to remove the
seeds from the well, it should also be sterilized at this
time.
5. To be certain the seeds are dry, a drying cycle must be
used. When the seeds are completely dry, handling is
much easier. Drying cycle times will vary depending
on the autoclave.
WARNING: The tray will be very hot after sterilization. Take adequate protection to prevent
burns.
6. After drying cycle is complete, lock the Sterilization
Cover with the thumbscrew (verify the arrows line
up) and transport the seeds to the loading station.
-7-
Removing the Seeds
1. Remove the Sterilizing Cover and attach the Loading
Cover.
2. Rotate the cover over each well and remove the seeds
as needed to load into the treatment system.
Accessories
Using the Seed Alignment Tray
The Seed Alignment Tray is used with a SeedVac™ to
conveniently load needles and reduce radiation exposure.
1. Attach the Seed Alignment Tray to the Loading Cover
by removing the two screws on top of the Loading
Cover. Align the captive screws on the Alignment
Tray to the nuts revealed in the Loading Cover.
Secure finger-tight.
Fig. 4: The Seed Alignment Tray attached to the Loading
Cover.
2. Sterilize the assembly with the loaded Sterilization
Tray and spatula.
-8-
3. Remove the Sterilization Cover and attach the
Loading Cover.
4. Use the sterilized spatula to scoop out the seeds from
the wells.
5. Align the seeds in the slots on the Alignment Tray.
6. Use a SeedVac to pick up the seeds and spacers.
7. Proceed with loading the needles (The Seed Slider
attaches in a similar fashion as the Seed Alignment
Tray).
Using the Shielding Cover
The Shielding Cover is useful when the tray is loaded by
one person and then sent out to be sterilized by another
person or department.
Follow the instructions for Loading the Seeds on page 6.
1. Remove the Loading Cover and place the Sterilizing
Cover on the Tray. Do not secure the top knob.
2. Align the arrow on the Sterilizing Cover with the
number 1 on the Tray.
Fig. 5: The cover in place for sterilization.
3. Place the Shielding Cover over the Sterilizing Cover.
-9-
Fig. 6:
4. Verify the arrow is visble through the small hole as
shown in Fig. 6.
5. Secure the assembly by tightening the top knob until
the Shielding Cover is not movable.
6. Again, verify the arrow is visible through the small
hole.
7. The device is now secure to transfer to another
department or person for sterilization.
8. Once the device is sterilized, follow the instructions
on page 8 for Removing the Seeds.
- 10 -
Maintenance
As is standard practice, it is recommended that the tray and
covers be examined after each use for deterioration. The
tray can be dismantled for cleaning when no seeds are
present.
Exterior cleaning should be done with a soft brush and a
cloth. Gently brush all surfaces to remove dirt and dust. To
remove any remaining, dirt use a cloth slightly dampened
with a solution of mild detergent and water or a liquid
disinfecting agent.
Service
There are no serviceable parts on the tray. Do not loosen or
attempt to remove the flat head screw on the bottom of the
device.
Parts and Accessories List
REF
90085
80029
30178
70080
72012
90089
90090
Description
Seed Sterilization and Sorting Tray
Instruction Manual
Sterilizing Cover
Spatula
Shielding Cover
Seed Alignment Tray
Seed Slider
- 11 -
Warranty
This product is sold by Standard Imaging Inc. under the warranty
herein set forth. The warranty is extended only to the buyer purchasing the
product directly from Standard Imaging Inc. or as a new product from an
authorized dealer or distributor of Standard Imaging Inc.
For a period of twelve (12) months from the date of original delivery
to the purchaser or a distributor, this product is warranted against functional defects in materials and workmanship, provided it is properly operated under conditions of normal use, and that repairs and replacements are
made in accordance herewith. The foregoing warranty shall not apply if
the product has been disassembled, altered or repaired other than by Standard Imaging Inc. or if the product has been subject to abuse, misuse, negligence or accident.
Standard Imaging’s sole and exclusive obligation and the purchaser’s
sole and exclusive remedy under the above warranties are limited to repairing or replacing free of charge, at Standard Imaging’s option, a product: (1) which contains a defect covered by the above warranties; (2)
which are reported to Standard Imaging not later than seven (7) days after
the expiration date of the 12-month warranty period; (3) which are returned to Standard Imaging promptly after discovery of the defect; and (4)
which are found to be defective upon Standard Imaging’s examination.
Transportation charges are the buyer’s responsibility. STANDARD IMAGING INC. SHALL NOT BE OTHERWISE LIABLE FOR ANY DAMAGES, INCLUDING BUT NOT LIMITED TO, INCIDENTAL DAMAGES, CONSEQUENTIAL DAMAGES, OR SPECIAL DAMAGES.
THIS WARRANTY IS IN LIEU OF ALL OTHER WARRANTIES,
EXPRESSED OR IMPLIED, WHETHER STATUTORY OR OTHERWISE, INCLUDING ANY IMPLIED WARRANTY OF FITNESS FOR A
PARTICULAR PURPOSE. IN NO EVENT SHALL STANDARD IMAGING INC. BE LIABLE FOR ANY INCIDENTAL OR CONSEQUENTIAL DAMAGES RESULTING FROM THE USE, MISUSE OR ABUSE
OF THE PRODUCT OR CAUSED BY ANY DEFECT, FAILURE OR
MALFUNCTION OF THE PRODUCT, WHETHER A CLAIM OF SUCH
DAMAGE IS BASED UPON THE WARRANTY, CONTRACT, NEGLIGENCE, OR OTHERWISE.
© 1999 Standard Imaging Inc.
6808Distributed
University Ave. by SeeDOS Ltd
Suite
105 information or a quotation
Phone: (608) please
831-0025
For further
Middleton, WI 53562
Fax:
(608) 831-2202
contact Colin Walters at [email protected]
Doc. No. 80029-07, 1/99, 12 pgs.