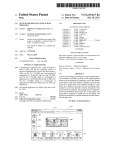
1
HITACHI
Inspire the Nert
Instruction
Manual
D Z . HV575 E
Precautions
Do notstore the camera to intense heat orcold for long periods oftime, asthis may result in permanent
damage to the camera
Do not use or store the product in dusty, dirty, or sandy areas, as its components may be damaged
Do not drop, puncture or disassemble lhe camera High-voltage intemal @mponents create the risk
of electric shock when exposed
Use the camera with @re Rough handling may damage the intemal components
Do not use harsh chemi€ls,
cleaning solvents or strong detergents to clean the product Clean only
with a slightly damp soft cloth
Do not ignite the flash close to eyes, or closer than prescribed minimum distances as this may result
indamagetovision
Whenusingtheflash,thecamerashouldbeatleastonemeterfromtheeyesof
the subject
Do not open the battery cover while an image is being recorded Doing so will not only make storage
of the current image impossible, it can also corrupt other image data already stored in file
Tesl for proper operation before using the €mera
. This €mera is designedfor use in temperaturesrangingfrom 5"C to 35'C (41"F to 95'F)
. Do not use or keepthe camerain the followingareas:
- In areassubjectto directsunlight
- In areassubjectto highhumidityor dust
- Nearair conditioneE,heaters,or otherareassubjectto temperatureextremes
- Insideof a closedvehicle,especiallyone parkedin the sun
- ln areassubjectto strongvibration
'
Useonlythetypeofbatterythatcamewithyour€mera
Donotusebatteriesofdifferentspecifications
Doing so may lead to the potential lor serious damage
.
Insert the battery according to the instructions Inserting the battery incorrectly can @use damage to
the product and possibly start a fire
.
Remove the battery to avoid the fluid leakage ifthe camera is not going lo be used for an extended
time
.
lf the battery is crushed or damaged, remove it immediately to avoid the battery fluid leakage and
abnormal exoansion
. The camera may feel warm after long periods of continuous use which is normal and not a malfunction
Battery will be in high temperature after long time using (aboul thr), Please be careful while taking
out the battery
.
Please be careful if you may need to take out the battery by finger nail
OF EQUIPMENT
This equipmenthas been designedand manufacturedto meet internationalsafetystandafdsbut, like
any electricalequipment,€re must be taken if you are to obtain the best resultsand safety is to be
assureo
DO read the operating inslructions before you attempt to use the equipment
DO ensure that all electrical connections (including the mains plug, extension leads and inter-connections
between the pieces of equipment) are properly made and in accofdance with the manufacturer's
instructions Switch off and withdraw the mains plug before making or changing @nnections
DO consult your dealer if you are ever in doubt about the installation, operation or safety of your
equipment
DO be careful with glass panels or doors on equipment
DO route the mains lead so that it is not likely io be walked on, crushed, chafed, or subjected to excessive
wear and tear or heat
DON'T remove any tixed cover as this may expose dangerous voltages
DON'T obstruct the ventilation openings of the equipment with items such as newspapere, tablecloths,
curtains, etc Overheating will cause damage and shorten the life of the equipment
DON'T allow electrical equipment to be exposed to dripping or splashing, or objects filled with liquids,
such as vases, to be placed on the equipment
DON'T place hot objects or naked flame sources such as lighted candles or nightlights on, or close to
equipment High temperatures €n
melt plastic and lead to llres
DON'T use makeshift stands and NEVER fix legs with wood screws - to ensure
complete safety always flt the manufacturer's approved stand or legs with the fixings
provided according to the instructions
DON'T use equipment such as personal stereos or radios so that you are distracted from
the requirements oftrafflc safety lt is illegal to walch television whilst dnvlng.
DON'T listen to headphones at high volume, as such use can permanently damage your
heanng
DON'T leave equipment switched on when it is unattended unless it is specifically stated
that it is designed for unattended operation or has a stand-by mode Switch off using the
switch on the equipment and make sure that your family know how to do this Special
arangements
may need to be made for infirm or handi€pped
people
DON'T continue to operate the equipment if you are in any doubt about it working
normally, or if it is damaged in any way - switch off, withdraw the mains plug and consult
your dealer
ABOVE ALL
-- NEVER let anyone especially children push anything into holes, slols or any other opening in the
case - this could result in a fatal electrical shock:
-- NEVER guess or take chances with electrical equipment of any kind
-- it is better to be safe than sorryl
****************
Contents
Section 1 Gettingto Know Your Camera..........
..........5
Section 2 Getting Started...........
Section3 Enjoyingthe RecordMode..................
Section4 Enjoyingthe PlaybackMode............................................20
Section 5 Setting Your Gamera
26
....................
Section6 Viewing Picturesand Movieson a TV.............................30
31
Section7 Viewing Movie & Pictureon PC..................,.....................
Section8 Burning the RecordedClip into DVD...............................32
Section9 UploadingVideo Filesto YouTube...................................34
Section 10 Specificationsand System Requirements......................38
..........................40
Section11 Troubleshooting...............
Section 12 Additional Information
41
Section1
Getting to Know Your Camera
The camera with 5 Mega Pixel sensor can take H 264 movies By way of using H 264 technology, more
videos can be taken within certain amount of memory High quality images with up to 12 mega-pixels
can also be delivered smoothly. With a color LCD monitor, use6 can compose images and examine
them easily.
The camera features 3" LCD touch panel which is an ideal platform for you to operate your €mera
The
menu options are ac@ssible with your fingeI With the touch panel, you €n select the options directly
and quickly.
ThecameraalsofeaturesmovierecordingatHDresolutionofl920xl0S0
Youcanalsoconnectittoan
HDTV via HDlrl €ble, and easily playback re@rded high-definition videos on the wide screen HDTV.
Moreove( the camera has an advanced uploading feature With the exclusive builfin YouTube Direct
application, you can upload the videos captured by the camera to YouTube more effortlessly
ISO sensitivityand colorbalance €n either be adjusted automaticallyof allowed to be changed manually.
A 5x optical zoom increases you control over the movies and pictures you take
Built-in memory allows you to take pictures and movies without memory card The memory card slot
allows usere to increase the storage €pacity.
Hitachi cannot compensale
recorded contents
for any damages caused when recording
is not made normally
or
cannot be played back bccause of a defect in the digital camera device or
memory card. Hitachi cannot be responsible
for your recorded video and audio.
lf you or a third party make a mistake when handling this digital camera device or memory card,
eic., the recorded
contents
may be lost. Hitachi cannot be responsible
for compensation
damage due to loss of recorded contents-
wofe
r'i''i:r'
Panial memoN of the built-in memoru is used for Fimware
@de
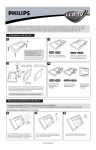
Unpack the package and make sure all standard accessories listed are included:
.
Camera
.
USB Cable
. AV Cable
.
HDMI Cable
. Adaptor
.
Lithium-ion Rechargeable Battery
. Quick Guide
.
CD-ROM (Software and User's Manual)
.
Pouch
. Strap
for
LCD Touch Panel
Five-wayKey
Record/PlayButton
TV Port
HDMIPort
M iniUSB20Por t
StrapHook
BatteryCover
Microphone
SD card Slot
Tripod Socket
Section2
Getting Started
Beforeusingthe camera,pleaseloadthe suppliedLithium-ion
rechargeablebattery
I Insertthe batteryfollowingto the correctpolaritymarks( +
or -)
2 Closethe batterycoverfirmly.
Youmustusethe suppliedAC charger
or USBcable
Cameramustbe turnedOFF;blinking
light@nfirmscharging,but lightis
@nstantwhencharging
has been@mpleted
The cameracomeswith internalmemorywhichallowsyou to store
pictufes and movies You can expand the memorycapacityby
usingan optionalSD/SDHCmemorycard
1 Insertthe memorycard into the right position Pleaserefer to
the tigure
2 To remove an installedSD card, press the card inwards to
releaseit
3 Whenthe card popsout, genllyremoveit from its slot
4 Recominendedmemory€pacity: 1GBabove
.t 'i- ,Vofe
-
. When a memory card is fitted, movies/picturesare
savedon card ratherthan on the built-inmemory
. Protecting Data on an SD Card: SD card is read-only
by locking the SD card. No pictutes and movies can be
re@tded when the SD card is locked. Make sure the
lock is on witeable positionbefore recording any media
T--]
q--\,
fr--rl I i'*ql
lttl
tlocK
I
wib+@bd
On and Getting Started
. To turn on the €mera:
1
Flip out the LCD panel; the €mera willturn on automatically.
2
Or pressPowerButtonfor one secondto turn on it-
. To take a movie:Pressthe MovieShuttergutton( 16
)
. To take a picture:Pressthe PictureShutterButton(
) halfiilaydowntill the focusingframeturns
tl
from whiteto green Then, pressthe PictureShufterButtonfullydown to take picture
To view stored movies and pictures, press RecordiPlay Button (
Mode Press a second time to return to Re@rd Mode
) on@ to switch to Playback
In record mode, lhe blue Record LED indicator will light up In playback mode, the green Playback
LED indi€tor will light up
To lurn off the camera, you can either press the Power Button for one second, or you can pla@ the
LCD panel back to its original position
Section3
Enjoying the Record Mode
Five-waykoy:
Rlght Key: DigitalLightOn/LightOn/ LightOFF
Left Key: Self timerON/OFF
Up K€y:LCDInfomationON (Showthe indi€toF on the
LCD screen)/ OFF (Do not showthe indi€toc on
the LCD screen)
SET Key: MenuOn Validatethe setting
Tele Butlon : Zoom ln
Wide Bunon : Zoom out
@
Power Button: Pressdown for one se@ndto tum on or tum
off the camera
Record/Play Button functlons:
1- Switch between Re@rd /Playback Mode
2 Retum to the previous page
3 For quick review, press it after re@rding
B
6
Movie Shutter Button:
1 Startto take movie
2 To stop €cording, pressit again
Pic-turcShuttel Button: Startlo take Dicture
The indicalors shown below may display on LCD when movies and pictures are re@rded:
Movie Resolution
E
E
E
(t)
E
E
HD (1080p)(30fps)
HD (720p)(30fps)
\IWGA (60fps)
VGA (30hs)
OVGA(30fps)
PictureResolution
o
High
@
Standard
o
71
00:06:{0
Number of images that can still be taken at current resolution
(21
Recordingtime of moviethat €n still be takenat currentresolulion
(3)
(4)
.'Ot
DigitallightOn
+
Light On
u
Self-timer enabled
w
fl
(s)
(6)
Motion Detection
t'r:j
OptionmenuOn
ffi
Skin
re
Nighl
Scene
(71
(8)
ffi
t
Backlight
Macro Position Focusing
(e)
WB
00)
@
@
SD Card inserted
ffi
Battery:mediumpower
m
Battery:low power
(11)
il
Manual White Balance
Battery:full power
Battery:powerempty
Zoom meter:
HD(1080p):1X-sX
(5XOpticalzoomand 1X Digitalzoom)
(121
Other video resolution:1X-20X(5X Opticalzoom and 4X Digital
zoom)
(13)
(l))
Stabilization
" j: Note
"
S""n", B^y'y'
/ Classic/ Nagativeeffectcan be previewedimmediatelywithout indicatoron the
LCD
dp$il*, |l\!,
7,'1{
ffi}ffi..lflK.$;
.
Press Movie Shutter Button ( 16 ) to start recording When a movie is recording, a time indicator will
display on LCD monitoL To stop recording, press Movie Shutter Button ( lf
) aOain
.
Press RECORD/PLAY Button to view the recorded movie
.
Five resolution settings are available:
Video Quality
E
HD (1080p)(30fps)
@
HD (720p)(30fps)
@
WVGA(60fps)
E
VGA (30fps)
EE
OVGA (30fps)
. Pressthe PictureShutterButton( (t
) halliilaydown till th€ focusingframe turns from white to
green. Then, pre$ the Piclure Shutter Buttontully ddn to take pictuF
. Pre$ RECORD/PLAYButton to view the pictuF
. Threeresolutionsettingsar€ availabl€:
lmage Ouality
o
Hlgh Quality:12MegaPixels
o
o
StandardQuallty:s MegaPixels
Low Qualibr:3MegaPixels
. To use lighttunction:
1. P6s RightKey,the DigitalLighti@n1"6i ritt app.a, on the sGn to extenddynamicEnge fo]
backlightand high @ntEst senseso that the objectswill be bnghterand clearer.
2. Pressagain,the Lighricon(.t'. ) will appearon the screen.The lightwill be turnedon and keeps
prcvidinglight
3. Pre$ Movie ShutterButton1lf
1to start reording or pcss PictureShufterButton1(l
1to
take oicture,
4 PressRightKey againto suspendthe light.
.,,;
Y'
IUofe
Th" t,gil nill b" disabled automaticallywhen battery powar is/ow ( m'll
)
To us€ Self-tim€r:
1. Pr6s Lefr Key, the Sef-timer i@n(
C)
2
) will appear on th6 smen
Pr6ss PicluE ShutterButton(tl
) fo t"t" the pictur€,the self-timerlight on the front of the
€m€ra blinksuntiltheshutteropeEtes(about10 se@ndlater).The speedof blinkingwillincr€ase
just before the picture is tEken.
. The zoom magnifi€simageswhen re@rdingmoviesor takingpictures,
1 To zoom in/out,pressthe T€leMide Button
2. lt €n be st from 1X-5X (5X Opti€lz@m and lX Digitalz@mylx-2ox (5X Opti€l z@m and
4X Digitalzoom)
-
--'"4"l]!riiq
1 Touch :l(on-screen
i@n) when in Record lvode The
Record menu will show on the screen
2 Touch the option icons on the screen lightly with your
finger to move between main menu options, which are
Movie Mode, Picture Mode, and Effect
3 Submenu will pop out while move to each main menu
option
4 Touchtoselectthespecificoptionyouwanttoadjust,then
touch OK icon to validate the setting After validating
the settings, touch exit icon ( ffi
) to back to Record
mode
5 Or touch exit icon ( &r
)to exit to Record mode without
Movie Mode Submenu Setting
Operalion
1
In Record Mode, touch nail(on-screen icon) to
2
Touch
3
The Movie L4ode submenu contains 3 options-
Display Screen
enter recoro menu screen
lMovie Mode] icon on the screen
Submenu of Movie l\4ode will pop out on the
screen
Resolution, Stabilization, and Motion DetecF-for
you to adjust the camera setting
Movie Resolution
Operation
DisplAy Screen
'1 In MovieModesubmenu,
touchlResolution]
on
the screen
2
Touchfl on the screento move betweenfive
settings
3
TouchOK i@n to validatethe settingthen touch
exit icon ( e ) to backto Recordmode
Stabilization
Operatiarn '
1
In Movie Mode submenu, touch lstabilization]
on the screen
2
Touch I
3
Touch OK icon to validate the setting then touch
exit icon ( ry ) to back to Record mode
)t
on the screen to choose On or O{f
!lii,,r.r,t, o"esn't
suppott
HD(1oBop)
and
wvcA(6ups)
Di$play Scresn
Motion Detection
'1
In Movie Mode submenu, touch lMotion Detect]
on ne screen
2
Touch I
3
Touch OK i@n to validate the setting then touch
exit icon ( M
) to back to Record mode
on the screen to choose on or off
4
Camera will start to record video automatically if
it detects a movement Stop recording if it does
not detecl a movement
Picture Mode Submenu Setting
Display Screen
'1
In Record Mode, touch i:--i(on-screen icon) to
2
Touch [Picture Nilode] icon on the screen
Submenu of Picture Mode will pop out on the
entef record menu screen
screen
3
The Picture Mode submenu contains '1 option,
Resolution,for you to adiust the €mera
setting
Picture Resolution
Operatlon
1
In Picture Mode submenu, touch lResolutlon]on
the screen
2
Touch I
settings
on the screen to move between three
3
Touch OK icon to validate the setting then touch
exit icon ( @ ) to back to Record mode
Dlsplay Screen
'1
In Record Mode, touch iii-1{on-screen ircn) to
enter record menu screen
2
Touch lEffect] icon on the screen Submenu of
Effect will pop out on the screen
3
The Effect submenu contains 4 options--Macro
Mode, S@ne, WB, and ISO-for you to adjust
the camera sefting
4
Touch &X]/
Kbn
the screen to change the
Macro Mode
Wth lvlacro Mode set to lvacro, you @uld take closer movies/images of objects in distance of lcm to
1
In Effect submenu, touch flVlacro Mode] on the
2
Touch I
Normal
3
Touch OK icon to validate the setting then touch
screen
exit icon ( e
on the scfeen to choose Macro or
) to back to Record mode
Scene
You can select the mode a@ording to the scene condition
. Auto: Shoot without any special effect on the image
. Skin: Shoot with an effect that makes skin tones more natural
. Night: Use Night mode for night scenes or low light conditions
. Backlight: You €n take shots when bright light is behind the subject
. B/W: The image is @nverted to black-and-white
. Classic: The image is converted to sepia look is applied to lhe image
. Negative: The image is converted as the negative ofthe normal
Opemtis
..g-}8plryScrm
1
In Effect submenu, touch [Scene] on the
screen
2
Touch I
settings
3
TouchOK iconto validatethe settingthen touch
exit icon ( @ ) to backto Recordmode
)
on the screen to move between7
Arole
To avoid blurry pictutes,
shots in Night mode
place the camera on a flat, steady suia@,
ot use a tipod
when take
WB (WhiteBalance)
The camera adjusts the color balan@ of images automatically. Three manual white balance settings are
available:
.
Auto: The €mera
.
Daylight: Under outdoore
.
Fluorescent:
'
Tungsten: Undertungsten light condition
automati@lly adjusts white balan@
Under fluoresent
light condition,
1
In Effect submenu, louch WBI on the screen
2
Touch !
4 settings
on the screen to move between
The
change
can be previewed
immediately
3
Touch OK icon to validate the setting then touch
exit icon ( r
) to back to Record mode
tso
The cameraadjustthe ISO sensitivityof imagesautomati€lly Two manualISO sensitivitysettingsare
availableThe largerthe number,the higherthe sensitivity.
. Aulo: The cameraautomatically
adjustsISO sensitivity.
' lso 800
. lso 1600
Operafon
1
In Efiectsubmenu,touch [SO] on the screen
2
TouchIl on the screento movebetweenthree
settings
3
TouchOK icon to validatethe settingthentouch
exit icon ( ru ) to backto Recordmode
Display Scrcen
Section 4
Mode
Playback
the
Enjoying
The Buttons/Keys have the following functions in Movie and Picture Playback Modes
Five-wayKey:
Right Key: Go to the next movie/pictureFastforuard
Left Key: Go to the previousmovie/pictureFast rewind
Up Key: Volumeincrease InformationON/oFF
Down Key: Volume decrease Delete the current or
movies/pictures
SET Key:
'1 Validatethe setting
2
In MoviePlaybackMode,pressto selectthe current
moviesto uploadto YouTube
3
In PicturePlaybackMode,pressto startslideshow.
4
In PictureMagniflcationMode,pressto exit to Picture
PlaybackMode
Tele Button : Magnifl€tion modeOn Zoom in
modeOff Zoomout
wide Button ; Magnification
Record/PlayButton functions:
1 SwitchbetweenRe@rdand Playbackmodes
2 Returntothe previouspage
B
Movie Shutter Button:
Startplayingthe recordedmovie
:
Indicatore on the LCD screen while in Plavback [4ode:
Movie Plavback Mode
i
( 1)
E
E
E
E
E
o
@
Picture Plavback Mode
HD (1080p)(30fps)
HD (720p)(30fps)
WVGA(60fps)
VGA (30rps)
QVGA(30rps)
High
Standard
o
(2\
0005/0005
Currentnumber/Totalnumberof movie
(3)
00:06:10
Movie playback time counter
(4)
(5)
(6)
Volume
KI
<{J
Previous movie/picture
Movies fast rewind
-->::.',:,:::
Movies Play
(71
*ril
Movies Pause
(8)
-f${iti
(s)
xl
Nexl movies/ picture
(10)
iniJ
Delete
( 11)
[-r-l
Magnili€tion
(121
g
Movies is selected to uDload to YouTube
l\4ovies fast foMard
Indicator
(r3)
(14)
(15)
+t
Exit
tEir+g
Slideshow
-'.tillulll
h!&ir@r@l
$
Slideshow stop
Consecutivenumberof oicture
ffiNljlllllliill|lllllll:ffiffi]glg
The PlaybackMode is for viewingand managingmoviesand pictureson the built-inmemoryor on an
SD card
1
Press RECORD/PLAY Button (
) to switch from
?
Re@rd lvlode to Playback Mode Main Menu Thefe are 2
options in the Playback lvode, Movie and Picture
2
Touch to select the sDecific ootion
1
Touch [Movie] on the screen to enter Movie Playback
Mode
2
to play or pausethe movies
Sweep to the left or touch -]m to go to the previous
movie;sweepto the rightor touch-trf,3 to go to the next
movte
-,{t!:]
While playing movies, touch
l-I[$to fast rewind/
foruard
TouchfElto increasethe volume:touchrcl
to reduce
the volume
Touchexit icon ('e )to exit
3
4
5
6
7
toucn -&/G
Press SET key to selectthe currentmoviesto uploadto
YouTube
' '; IVofe
/
When the LCD is idle for few seconds, the playback function
bars will disappear automaticatty
Delete Movies
Operatlon
1
2
Dlsplay Screen
Touch-K-J /-ILl to setectthe movies
Touch s to go to the Deleteoptionscreen
Touch yesl to delete the current movies or [No]
to cancel the operation and exit; touch lAlll to
delete all movies
L
Before all movies are deleted, a confirmation
screen will appear; touch [Yes] to execute the
operation and [No] to cancel the operation
I
):
lf a memory cad is insetted, you can delete only those movies stored on the card.
Movies on a wiften-prctected
memory card cannot be deleted
:;\r1)rl)t.,lrrj)
€
I
*
p oq@!q
Touch [Picture] on the screen to enter picture
Playback Mode
.r .s. Fp#y"qpeas
-" ;
Sweep to the left or touch lLd
to go to the
pHious
picture: sweep to the righl or touch
ru
to go to the next picture.
While the picture is selected,press on tne screen
as well as go up to enter L4agnification Mode
In the Magniti@tion Mode, press on the screen
as well as go up to zoom in or go down to zoom
out
To navigate the magnified picture, press on the
screen as weil as move (The inner Magniflcation
Indicator turns red) press Set Key to exit
navigation mode
lough
,@]!
/Jf3
to start or stop the slide
show
Touch exit icon ( -5;! )to exit.
')'
I
/Vofe
When the LCD is idle forfew seconds, the sildeshow function
ba6 will disappeat automaticatty.
DeletePicture
toucn -l{31 /-If3 to setect the picture
gto go
Touch
to the Deleteoptionscreen
Touch [Yes] to delete the current picture or [No]
to cancel the operation and exit; touch [All] to
delete all pictures
Before all pictures are deleted, a confifmation
screen will appear; touch [Yes] to execute the
operation and [No] to cancel the operation
I
)
I
Note
. lf a memory
youcandeleteonlythosepicturcs
stored
onthecard
cardis insefted,
.
Pictures on a wriften-protected
memory catd cannot be deleted
Section5
Settingyour Camera
t;u*)t );r;i1';
. Opafltion
y$ry"*
1
in Record l\4ode, press ffl(on-screen
2
Touch [Setting] icon on the screen Submenu of
Setting will pop out on the screen
3
The Setting submenu contains 6 options for
configuring your camera set up They are Sound
(operation sound), TV, Language, Format, Time
4
Touch ru/
icon) to
enter record menu screen
Sefting, and Default Setting
eeglon the screen to change the
page
Sound
Enable or disable KeyPad tone and operation sound
1
2
3
Offlratio$
E ..,
"
In Setting submenu,touch lsound] on the
screen
TouchI
on the screento chooseOn or Off
TouchOK iconto validatethe settingthentouch
exit i@n ( ffi ) to backto Re@rdmode
i
TV
Ensurethat the appropriateTV standardof your area is selected- eitherNTSCor PAL
WrongTV systemsettingmay causeimageflicker
NTSCstandard: USA,Canada,Japan,SouthKoreaand Taiwanetc
PAL standard: UK, Europe,China,Australia,Singaporeand HongKongetc.
ln Settingsubmenu,touchflvl on the screen
TouchtrI on the screento chooseNTSC(60H2)
or PAL(50H2)
TouchOK iconto validatethe settingthen touch
exit icon ( K ) to backto Recordmode
Language
Usethis optionto selectthe languageof user interfacewhichyou want
'I
In Setting submenu, touch [Language] on the
screen
2
Touch fl
options
on the screen to choose the language
3
Touch OK i@n to validate the setting then touch
exit i@n ( m
) to back to Record mode
Format
Yes: Fomat the built-inmemory( Whenthefe is no SD €rd in the camera) / SD Card (Whenthere is
an SD card in the camera)
No: Do not formatthe built-inmemory( When there is no SD card in the camera) / SD Card (When
thereis an SD card in the camera)
I
In Setting submenu, touch [Format] on the
screento go to the formatconfirmationscreen
2
Touch lYesl to execute the operation and [No] to
cancel the operation
- ' j. ,Vote
Ail the data will be erased if the SD card is formafted.
before fomafting
SD catd
Time Setting
'l
In Settingsubmenu,touch lfime Setting]on the
screento go to the TimeSettingmenu
2
TouchYear,Month,Day, Hour,or lvlinuteto be
set
3
Adjustthe numericvalueby touchingffi/ffi
4
TouchOK iconto validatethe settingthentouch
exit rcon( m ) to backto Re@rdmode
Make sure all the data are backup to pC
DefaultSetting
To restore the default factory setting, select this option
i
Operation
1
In Settingsubmenu,touchlDefaultSettingjon the
screento go to the DefaultSettingconfirmation
screen
2
Touch [Yes] to execute the opeEtion and [No] to
cancel the oDefation
The following table indicates the camera's default setting
Default Factory Setting
Setting
I
l
I
Resolution
HD (1080p)for Movie
Standardfor Picture
Stabiliation
off
Motion Detect
off
Macro Mode
Normal
Scene
Auto
WB (White Balance)
Auto
tso
Auto
Sound
On
w
Depends on shipping area
Language
Depends on shipping area
Volume
Level 7
Light
off
Self-timer
off
Section6
Viewing Pictures and Movies on a TV
1 Connectone end of the HDI\,41
cableto youf camera'sHDMIout port
2 Connectthe otherend of the cableto a television
3 Set video inputsourceof a TV to " HDMI"option
4 Use buttons/keysto view storedpicturesand movieon a TV.
'1 Use Righvleft Keysto go to the nextor last movie/picture
2 PressMovieShutterButtonto play moviesand pressit againto pause
3 Whileplayingmovies,press Righuleft Keysto fast foMard/rewind,then releasethe key to stop
4 Use Up/DownKeysto adjustvolume
5 In PicturePlaybackmode,useTeleButtonto magnifythe picture To navigatethe magnifiedpicture
useFive-waykeysto navigatethe magnifiedpicture PfessSet Key to exit navigationmode
I'l-rvofe
.'-'
The camerc @n not run movie re@rding and picture taking when it is connectedto an HDTV.T1e
LCD Panel does nol display when the camera is connectedto an HDW.
1 Connectone end of the AV cableto your €mera's AV out port
2 Connectthe otherend of the cableto a television
3 Use buttons/keysto view storedpicturesand movieon a TV.
i Arote
The LCD Panel does nat display when the camera is connected to a ru
Section7
Viewing Movie & Pictureon PC
The CD-ROMsuppliodwith this €mera contains2 piecs of soffware.
. Arcsoft Medialmprcsaionis a user-ftiendly
applicationthat helpsyou managingyourmedia,burning
your videointo DVD,and uploadingyourvideosto YouTube€aslly.
. Adobe R€aderis a popularprogramthat you needto have in6talledto cad the User'sManual-Many
mmputer userswill findthey alreadyhav€ this softtrareinstalledon their omputef,
To installlhe bundledsoftware:
1. Insertthe CD-ROMinto your comput€r'sCD-ROMdrive.Th€ autorunscreenappeaF
2. Click "lnstall Arcsoft Medialmpression". Follow the on-screen instruc'tionslo @mplete th€
installalion
""J:
-
A'ote
The detailed infomation can be found in online help of allthe bundled soflware'
You can transfer pic{uEs or movis stoEd on }our €meE to a @mputer and s€nd them in emails to
friends or msl them on websites.
To do this you should:
1. Connectlhe @mputerand €meE with the suppliedmini USB 2 0 @ble.The LED will lightup and
blink.
2. Afterthe LEDstopsblinking,moviesand pictu€(s)€n be foundon your@mputerst'My Computer\
3
you want.
Underthis iolder,you €n view,delete,move,ot @py any movi€/picture
4. Use the bundledArcSofr appli€tion sofr!ilare to edit the movies or picluEs.
Section I
Burningthe RecordedClip into DVD
Bundled software CD contarnsArcsoft Medialmpressionfeatures burning the movie clip into DVD You
can share this DVD movie with family and friends by using regular DVD playel
To create a DVD:
1 InstallArcsoft Medialmpression (Referto Section 7)
2 Click Windows IStart ] r[(All)
Programs ] JlArcsoft
Medialmpressronl
3 Afcsoft l\4edialmpressionmain Screen will appeaf on your desktop
4 Click I l\.4akeMovie I
to ArcSoft Medialmpressioh.
W€l@me
rtd.aMatr@
0 etbnlion
th. ryr-n*s
l& ''*'
o*u
$
ru'**,
d+\
tE
4*"hk)
4 ".*"4 ".,"
[email protected]
rdner&'dr
rrcarrprajcct!
-
l+ a
' h^
r a.
d- ,
/".h,..hr k
s .M - "
nriae
hse
Yd) ran
Iledi.InlfFsshn
lNl
vud. !iltd2 (eilci,t
clrt,
butt&
dr th
bta
5 The oPeration screen will aPPear:
you want to burn
. Select the foldef that contains the video flles
.
Select the file(s)
.
Click button 1o add the files inlo slrde
.
Click lBurn to Disc]
.xrfumPruso'
:]J
rtssisd,
- ;kiMidn*it$
j
kc4
,
;t
1 J ']t'$
4/ L'a{:
r ;e!@l
6 ClickI Start]to startDVDburnrng
Section9
UploadingVideo Filesto YouTube
The built-inYouTubeDirect applicationoffeE you an easy way to uploadyour video clipsto YouTube
instantly.lt helpsyou sharethem with your familyand friendson YouTubewebsite
To uploadvideofilesto YouTube:
Selectthe videoclips in MoviePlaybackModeby pressingSET fey $
Connectthe cameraand computerwith the suppliedUSBcble
I
2
3 Aftermakinga USBconnection,the
auto-runscreen
main screen appeaE automati€lly
appear Click[YouTubeDirect]+ [OK] as the
on the desktop
6H'""-*--'*-*',
' 'i. Note
-
lfthe autorun
screen does not appear
Click [My Computer]+[Dv(X)P[dvap exe]to executethe
applicalion
34
Preview the video: double click on the video clip in
thumbnail screen Click play/pause icon to
play/pause Click Return icon to back to thumbnall
preview screen
5
Upload video cilp
( 1) Upload single video clip or selected video
clips:ln thumbnail screen,click up/down icon to change
the pages Click on the vldeo clip you want to upload
(+ Ctrl Button to select two or more video clips),
and then click [Upload selected videos to youtube]
rcon
(2) Uproadthe videocripswhichare serectedin the camera
earrier:crick [uproadDV-serected
videos
to youtubelicon
6 Fill in the information in the blanks
7 lf you do not have a YouTubea@ount,clicklsignup] to registera new YouTubeaccountfirstly
Then,the YouTubesign-upscreenwlll appeaI Pleasefollowthe instructionon YouTubewebsite
lf you want to savethe user'snameand password,click lsave User Info]
8 Click [Upload Videos] to upload the video(s)
Section10
Specifications and System Requirements
llllillrr:l
,WlWl{{ili'
:r
Operatiiin :rirodes
)r"...
illens
l\,4ovierecord, Piclure record
,, r,.r.r.r, r..,,
,l I l
Focus range
1ocn-infinite (Nomal mode)
1cm-8ocm (Macro mode)
Built-ln128MBmemory(partialmmqy is usd ior fimware @de);
SD/SDHCcard slot support(up to 32cB)
lmagepby
SingleirnagelSlHehw
Tvoui
NTSCYPALsdectable,
HDMI
ffi
,lol U!iifill:,:,,,:::,:;;,;::,::lilli.lrrillliillllll
rl.!qP6$Si$fi6frii*iot,rrm
W
. MicrcsofrWindows 2000D(P r'istaz
. lntel Pentiumlll 800MHzor above
. 256 MB RAM
. CD-ROMDrive
. 700 MB free HDD spae
. AvailableUSB port
. lLbit ColorDisplay
.i'J: trtote
-
is manufacturedusingextremely hlgh+recis:Dntechnology & ovargg.gg% of
Th" LCD
""r"",
the pixelsare opentional for effectiveu* Horever, sometiny black ild/or bdght dots(whiE, red,
blue or green) may appear on the LCD screen,Thes dols are a rcnal resultof the milufetudng
prc@ss, and do not affect the re@ding.
Section 11
Troubleshooting
1. lf the LCD image is not clear when shooting, how can the focus be adiusted?
Try to switchbetweenl\,4acro
and NormalMode (Macrol\4ode:Forobjectin distanceabout1cmto
80cm,Normallvlode:Forobjectin distancebeyond1ocm)
2. Thelightis notworking.
The batterypoweris low.
3. The files on the memorycard do not display smoothly when the LCD shows the "!" marking.
The "!" meansthe SD €rd is low speedor havingwrcngcontentinside The way to solvethis
conditionis to formatSD card by €mera insteadof PC (Pleasereferto the detailedFomat
lnstructionin Section5)
4, Why do some of my indoor pictur€s look blurry and dark?
Cameraextendspicturesexposuretime underlow lighvindoor@nditionKeepcameE (and
photographed
subject)steadyfor severalse@ndswhentakingpicturesShutterwill soundwhen
oicturehas beentaken
5. Howdo I charge battery?
Youmustusethe suppliedAC chargeror USB@ble
CameE mustbe turnedOFF;blinkinglightconfirmscharging,but lightis constantwhencharging
has beencomoleted
I
Section12
Additional Information
K
r
Th€ above mark is in @mplian@ with the Waste Elec{ri€l and Elecbonic Equipm€ntDiEctive 2OO2l98l
EC (WEEE).The ma]k indi€tes lhe requirementNOTto dispce the equipmenlincludingany spentor
dis€rded batteriesas unsortedmunicipalwaste,but use the retum and mllectionsystemsavailable It
the battqies or admulatoF induded with this equiprent disday the chemi@l symbol Hg, Cd, d Pb,
then it means that the battery has a heavy m€tal content of mo€ than 0.(x)O5%Mercury or moF than
0.002%Cadmiumor morethan,0 004% L€ed.
In ths unlikgly event of a prcblem developing, please @ntacl the stoF where you purcfiased your
equipment
W9 continuallystrive to impove our prcducts;specificationsmay changewith out prior noti€. For advica
pleas€ @ntacl the stoF whec you purchased your €quipment
on wherc to purcha$ aNrigs,
Hitachi€nnot mmp€nsatefor any damagescaus€dwhen €@rding i8 not madenormallyor re@rded
of a def€ct in the digital €meB devie or remry €rd
mtonts @nnot be played back bffiu$
Hitechi €nnol be Gponsible for your @rded vid@ and audio. F lou or a third party maks a mistak6
when handlingthis digital €m€ra deviceor memorycard, etc., the re@rdedcontentsmay be lost
Hitschi ennot be Gponsible ior mmpensation for damage due to lG of @rded @ntsnts
Used correctly,domesticbatteriesare a sale and dependablesource of
portablepower Problemscan occur if they are misusedor abused
resultingin leakageor, in extremecases,fire or explosion
Here are some simplegurdelinesto safe batteryuse designedto eliminate
anv such oroblems
l
d
Take care to fil your banenes correctly,
observ ng thep/rsand mirrs marks on lhe
bafrery and appliance Incotrect ilning can
cause leakage or, in efrreme cases, fire or
even an explosron
!ffi's
Store unused bafreries in their packaging
And awav lrom meta ob ects whrch mav
cause a shoil-clrcuit resuliing in leakage ;r
Nwer anempt to recharge ord nary
bateries, either in a charger or by applyinq
heat to them They may leak, cause ire or
even exp ode There are special
rechargeable bateries which are cleaily
marked as such
Remove dead bateries fiom equipment and
all bafreries hom equipment you know you
are not going to use for a long t me
OtheMise th e bateies may leak and cause
damage
Supervise children ifthey are replacing
bateries themselves in order io ensure
these gurdel nes are followed
Replace the whole sel of bateries at one
t i m e r a ki n g ca r e n o t to m i x o l d a n d n e w
bateries or bateires of drfierenl types, s nce
this can resu t in leakage or in extreme
cases, fire or even an explosion
r$ry
N e v e r di sp o se o fb a fr e r i e s i n fi r e a sth r s ca n
cause lhem to exolode P ease oul dead
Remember thal small bunon cell bafreries
such as used in some hcar ng aids, toys,
g a m e s a n d o l h e r a p p l a n ce s, a r e e a s l y
I
w
O
Koep loose buton cells away fiom young
children
Make sure baf,ery compailments
secure
arc
S e e k m e d i ca l a d v ce i fyo u b e l i e ve a ce l l h a s
been swa lowed
Memory Card Capacity
1G
Video Resolution
HD(1080p)
HD(720p)
VVVGA
VGA
OVGA
HD(1080p)
HD(720p)
WVGA
VGA
OVGA
HD(1080p)
HO(720p\
WVGA
VGA
OVGA
8G
HD(1080p)
HD(7200)
WVGA
VGA
QVGA
16G
32G
HD(1080D)
HD(720D)
WVGA
VGA
OVGA
HD(1080p)
HD(720p)
VVVGA
VGA
OVGA
Approximate RecordableTime
IM i n u te sl
00:16:51
00:33:43
00:26:58
01:01.23
04:05:34
00:33:48
01:07:37
00:54:05
02:03:07
08:12:31
01:07:36
O2:15:13
01:48:10
04:06:1
3
16.24.52
02t12i11
04:24t23
03:3'l:30
08:01:25
32:05:41
04:25:1
9
08:50:39
07:04:31
16:06:15
64:25:03
09:01:53
181O3t47
14:27:O2
32153t29
99:59:59
Memory Card Capacity
Photo Resolution
Hiqh (12M pixels)
Std (5M pixels)
Low (3N4pixels)
Hiqh (12M pixels)
2G
Std (5M pixels)
Low (3M pixels)
Std (5M Dixels)
Low(3Moixels)
12947
High (12M pixels)
7379
14424
26444
Std (5M pixels)
Low (3NI oixels)
High (12M pixels)
8G
Std (5M pixels)
Low (3M oixels)
Hiqh ('12MDixels)
'16G
32G
229
448
822
460
899
'1649
920
! 799
3299
1 800
3518
6451
3616
7062
Hiqh (12M pixels)
4G
Approximate number of
RecordablePictures
Std (5M pixels)
(3lvloixels)
ARGOS
Product Guarantee
This prcduc-tis guaranteedagainstmanuiacturing
defectsfor a period
ot
1 Year
This does nol coverthe productwheE the fault is due to misuse,
abuse,use in @ntEventionof the instruciions.or wherethe Drcduct
has beenthe subiectof unauthorisedmodifi€tionsor alterations,or
has beenthe subjec{of commercialuse
In the eventof a pmblemwlth the productwithinthe guaranteeperiod
please return it to your nea6t ArgG store
lf the item is shownto have had an inher€ntdefectpresental the time
of sale,the storewill provideyou with a replacement
Yourstatutoryrightsremainunaftected
Guarantor;HomeRetailGrcup
489 - 499 AvsburyBoulevard
CentEl MiltonKeyn€s
MKg 2NW
2520A93181-A


![[Manual Makeup] - inverter & Plc](http://vs1.manualzilla.com/store/data/005906079_1-ccf407c70ed6dc9ae9bfcbd31676317c-150x150.png)