1
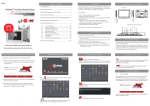
P1 phone view guide
Connect network
一、Connect
1.Connect network cable to your camera and to your router
2.Plug power adapter into camera and into wall outlet
3.The green network light at the rear of the camera will blink,and the camera will
automatically begin a pan/tilt cycle.
一、Download and install the software(mobile phone software
installation)
Visit http://p1.easyn.com then download related software,
Or direct scan QR code below and visit download software
1
PH3P1AE-E-A1
2
PH3P1AE-E-A1
Choose iPhone or Android according to your mobile phone, after it turns to the
download page, install the software
Feel free to download android or iPhone app
3
PH3P1AE-E-A1
After installation, it will pop up the icon :
4
PH3P1AE-E-A1
add ip camera
二、add
Run app and choose add ip camera
There are 2 ways to add camera:
1 search ip camera when mobile phone and camera under same router’s network;
5
PH3P1AE-E-A1
2 add UID by scan QR code or type it by hand(UID:User Identification)
1. search ip camera
when mobile phone and camera under same router’s network
Click “search” button , find cameras in LAN click it and then add in the UID
Password: In security code bar please type admin.
6
PH3P1AE-E-A1
The password is written on the label :admin, that is the default password.
7
PH3P1AE-E-A1
After add camera successful we can find camera as above.
A phone can add only 4 cameras ,user can delete UID then add new camera
8
PH3P1AE-E-A1
2、add UID by scan QR code or type it by hand(UID:User Identification)
9
PH3P1AE-E-A1
UID is the character string combination of
twenty letters and Numbers ,it can type
it by scan QR code or by hand.
10
PH3P1AE-E-A1
User can find UID and security code on the packaging or product
The string is was composed of
twenty letters and Numbers ,User can type UID by
hand or automatically scan UID.
11
PH3P1AE-E-A1
Select the "scanning bar code" and then select "barcode scanner". (remarks:when
the phone only have one scan software, it will enter to the scan status directly.)
Scan the QR Code written on your label directly by your camera, or the QR Code
stick on the label on the box , scanning.
12
PH3P1AE-E-A1
After scan successful , user need type twenty character string to the UID input bar
13
PH3P1AE-E-A1
The password is the Security Code on the label:admin, that is the default
password:admin
14
PH3P1AE-E-A1
After add camera successful we can find camera as above
Phone can add 4 cameras max,user can delete UID then add new camera
15
PH3P1AE-E-A1
Remote monitor and snapshot
四、Remote
The camera successful added will show online or offline status
Click online camera and into the live view.
16
PH3P1AE-E-A1
Watch the real time image:
17
PH3P1AE-E-A1
Click camera icon and snapshot
18
PH3P1AE-E-A1
After finished will show snapshot successfully
19
PH3P1AE-E-A1
Click on the image icon the arrows point to, and then browse the snapshot image
20
PH3P1AE-E-A1
camera setting
五、camera
1. Reconnect,check snapshot,delete camera
Click the icon, into the camera setting page:
21
PH3P1AE-E-A1
When camera shows “offline”, click “reconnect “
View snapshot:view snapshot image ”
,
Remove camera:remove camera in software. it does not affect the camera
setting .user can add same camera later and.
22
PH3P1AE-E-A1
2、retype UID、password、user name,
Click “edit camera”, into the page as belows:
user then can retype UID security code and name
3、 change password
23
PH3P1AE-E-A1
4、Click the "Settings" in "advanced Settings" and login the following pages:
click “modify security code”
24
PH3P1AE-E-A1
Type the default password admin then type new password twice
If user
Remark:for user
user’’s privacy please change default password 。If
forget new password please use a paperclip to press and hold the
reset button for 5 seconds,after the camera restart,password will
reset to admin
25
PH3P1AE-E-A1
4、 video setting
In video setting interface, user can change related setting:Set video quality, image
flip, environment mode etc.
26
PH3P1AE-E-A1
5、 wifi setting
Find wifi setting at bottom of page in the advance setting page.
27
PH3P1AE-E-A1
28
PH3P1AE-E-A1
Click manage Wi-Fi networks
29
PH3P1AE-E-A1
Click arrow button then set wifi ssid
30
PH3P1AE-E-A1
Choose router’s ssid
31
PH3P1AE-E-A1
Type wifi password
32
PH3P1AE-E-A1
show connecting
33
PH3P1AE-E-A1
When connected unplug network cable and power plug
Then plug power again
Camera will successfully connect wifi(remark:user need unplug power plug and
network cable first then plug power again
again)
34
PH3P1AE-E-A1