1
INTERACTIVE TRAINING SYSTEM MODEL ITS-1
QUICK INSTALLATION AND USER GUIDE
System Requirements
System: PC with Windows 95, 98 or 2000 – XP Home / XP Professional and higher
CPU: Minimum 800 MHz Processor (Pentium preferred) Memory: 264MB RAM, 20 GB HDD
Video: 126 MB 3-D graphics video accelerator card (Direct X compatible) COM Port: Free
DB9 Serial COM Port or Serial to USB accessory
THE FUN IS ABOUT TO BEGIN
1/17
Table of Contents
Page
3
3
4
5
6
7
7
9
9
9
10
10
10
10
11
11
11
11
12
13
14
15
16
17
2/17
Topic
Introduction
Indoor training notes
PTS components
Hardware installation on a bicycle trainer or roller
Serial port configuration
Hardware installation on an exercise or spin bike
Connections to PTS sensor box and to PC – Serial to USB
NetAthlon software installation
Starting and exiting UCVR
Choosing a course
Equipment configuration
Other OPTIONS from pull down menu
Previewing a course in demo mode
Running a single person session
Multi-person session & "Web Racing"
Finishing a session
Saving session data
Trouble-shooting
Appendix 1: determining equipment circumference settings for exercise
bikes
Appendix 2 : PC setup and trouble-shooting information
What is DirectX?
Table 1: common wheel circumferences
Table 2: equipment settings for trainers (for watts calculation)
Warranty/RMA policy / information
PEAK TRAINING SYSTEM CYCLE FIX
Introduction
It's not our intention to advocate indoor riding and training as a replacement for the outdoors - just the
opposite. We advocate cycling for all levels: from competition to recreation, from kids to seniors. The truth
is that adverse climatic conditions, time constraints and urban traffic can often make outdoor riding
impractical or impossible.
Peak Training System is about making indoor cycling fun and motivating through the world of PCs and 3D
virtual reality graphics. This is good stuff but please allow yourself a couple of hours to learn how to use
the software. There are loads of great features in both the Virtual Reality (VR) interactive courses and
HRM training log. You will also have to make sure your PC is configured correctly. One thing is for certain:
once you start priding, indoor training will definitely become an enjoyable activity. We invite you to visit
www.riderunrow.com for new accessories, courses, training tips, and great links to a variety of cycling
related web sites. Your comments are always welcome, so please keep in touch.
Important Notes on Indoor Training
WARNING: Please consult with your physician before beginning this or any new exercise program. If you
develop medical symptoms that concern you, stop exercising immediately and get proper medical
evaluation. Please read the PEAK Training and NetAthlon - user's manuals before beginning your
exercise program. Keep your room well ventilated - you're indoors now but will still need fresh air. A
circulating fan is good to use. Warm up and stretch before your ride, and perform a cool down after your
ride. Keep hydrated! Have your water bottle handy. When warming up, use the easy gears and always
practice good riding technique. If you're not sure about riding technique and need some tips, check out
our web site. If using a trainer, be sure that the trainer is on a solid base and that the rear wheel
adjustment knobs are secure. If you're sweating profusely, place some towels or a plastic sheet on the
floor. Be sure to keep your front wheel level.
3/17
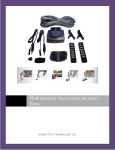
Components Included in This Box:
1. NetAthlon Software
2. Serial Cable
3. Digital Signal Processor box (ITS box)
4. Bag with: Speed sensor, wheel magnet, sensor holder, pad, and ladder strap.
5. Bag with: pedal arm magnet, sensor holder, round tube adapter, two screws and self adhesive velcro
pad.
Hardware Installation on a bicycle trainer or roller:
1. Install bike on trainer (or roller). For trainers, Adjust tension so wheel does not slip.
2. Install spoke magnet: First remove screw from magnet, attach magnet to a spoke on the left side of the
wheel approximately 2" from the rim. Replace screw into magnet and tighten screw. Magnet should face
left side of the bike. (see diagram a.)
3. Install sensor: Place rubber pad on sensor bracket, place sensor bracket on left stay so sensor tip is
near magnet. Attach rubber ladder strap to bracket securely. Be sure that sensor tip is within 1/4" of
magnet face. Route sensor cable back toward trainer. Be sure cable does not interfere with any moving
parts. (see diagram b.)
4. Attach PTS sensor box using self adhesive Velcro. Use the "round tube adapter" for Cycle-Ops,
Blackburn and other trainers with round shaped frames. Attach the adapter using Phillips screw driver
and provided screws. Attach sensor box using self adhesive Velcro. (see diagram c.)
When using PTS for an exercise bike, the circumference setting on the UItraCoach equipment setup must
be adjusted. Please see appendix 1 for detailed information on how to to get correct speed readings. lf
you have a spin bike with no, cycle computer, measure the diameter of the wheel and enter it's
circumference into the NetAthlon equipment setup.
Diagram a.
4/17
Diagram b.
Diagram c.
SERIAL "COM" PORT CONFIGURATION
Note: Due to the variations and complexity of personal computer systems and with Windows 95/98/2000,
Peak Training System will NOT provide any technical support in setting up Serial COM ports on your
computer or with Windows assistance. Please see a computer service technician. The following reference
material is intended to assist you in understanding COM port setup requirements. Please do NOT attempt
to change any settings on any of your devices unless you are an advanced computer user and
understand what you are doing.
A COM port, or communications port, is a device on your computer that provides for the input and output
of serial data. The devices that usually use a COM port are modems and a mouse. The PTS ITS requires
a free DB9 serial COM port for it's data transmission.
If you have a PS/2 port on your PC, be sure your mouse is connected to that port. If your mouse does not
have the round PS/2 connector on it's end, you can purchase a new PS/2 mouse for under $10 at most
computer stores.
To check if your mouse in on the PS/2 port:
1. Right-click on the My Computer icon and select Properties.
2. Click on the Device Manager tab at the top of the window.
3. Expand the "Mouse" branch by clicking on the "+" next to the mouse. It should say PS/2
Next, you will need to check which COM port your modem is on:
1. Right-click on the My Computer icon and select Properties.
2. Click on the Device Manager tab at the top of the window.
3. Expand the "Modem" branch by clicking on the "+" next to the modem.
4. Left click one time on your installed modem
5. Click on the Properties button.
6. Once the window comes up, click on the Modem tab at the top of the window.
You will now see which COM port the modem is on (and can change it if necessary). If your modem is
using COM 1 or 3, then choose COM 2 NetAthlon equipment setup and if your modem is on COM 2 or 4,
use COM 1 NetAthlon, equipment setup.
1. Plug the speed connector into speed jack on PTS sensor box, labeled SPD
2. Plug the serial cable's "telephone" connector into PC jack on sensor box, labeled PC
3. Route serial cable to PC, install DB9 connector into PC.
Be sure cable does not interfere with any moving parts and is well away from pedals. When inserting 3.5
mm stereo connectors into the PTS sensor box, please do so carefully, and do not bend the connectors
as it may damage the box.
NOTE: The speed (SPD), cadence (CAD), and heart rate (HR) jacks on the PTS sensor box are 3.5 mm
stereo, the PC jack is an RJ1 1, the auxiliary (AUX) jack is an RJ45. The auxiliary jack will be used for
future accessories such as steering and action buttons.
5/17
Hardware Installation on an exercise or spin type bike:
Using PTS with an exercise or spin bike will require installation of a pedal magnet to actuate
bike's cadence or pedal RPM, and a sensor on the bike's frame or housing to pick up the magnet's
signal. The sensor must be at least 3/16" from the magnet.
1. Locate an appropriate position on the bike's frame or housing where the sensor would be in close
proximate) to the magnet on the pedal arm. Choose this position carefully, you do not want the cables or
sensor near any moving parts or where your foot may be. We suggest the bottom or rear of the bike of
possible.
2. Install cadence magnet: Insert the cable tie through the slot in the pedal magnet. Cut a small piece of
the provided hook and loop Velcro (approx. 1/2" X 3/4") and attach to the pedal magnet, then to the
correct portion on the pedal arm.
3. Install speed magnet: Insert the cable tie through the slot in the speed magnet.
4. Gently slide the sensor into the sensor holder, and rotate the pedal arm so that the pedal magnet is
near the position where the sensor will be placed. Check that this location is away from moving parts and
that the sensor and it's cables will not be damaged by moving parts in regular use. If it's OK,
remove the tape backing from the holder and apply to the surface of the bike. The sensor tip must be
within 3/16" of the magnet. Secure the magnet's cable tie, then cut the excess using wire. cutters. To
prohibit vibration of the sensor in the holder, use black electrical tape or duct tape around the
6/17
sensor, holder, and bike. Please see next page for an additional photograph and information.
If you do not have a PS/2 port on your PC, then your mouse is probably connected to your DB9 port. If
your computer only has one DB9 port, you will have to upgrade your computer to add an additional DB9
port for PTS 's serial cable. If you have two DB9 ports, then you must check to see what COM port your
mouse and modem are using. Follow the above procedure using Properties and Device Manager, and
refer to the technical assistance section in the user's manual and your Windows Help
Please note: Even though you may have two serial ports on the back of your computer, one of them may
not be configure correctly, and can very possibly be disabled or turned off. If you are not an advanced
computer user, please see your computer service technician to resolve this problem. CycleFX will only
work if the serial COO port is configured correctly and is not in conflict with your mouse, modem or any
other device.
Serial to USB
If your computer has no serial port, you must use a serial to USB dongle. Note that the COM port is not
COM1, but can be within the range of COM port 1 > COM port 10.
Software Installation:
1. Install the CD-ROM into your computer and follow prompts for software installation.
We suggest using "typical" setup, which installs the software on your hard drive. Read the "User's
Manual" prior to full installation of the software. This material contains vital information that will help you
understand the software thoroughly.
NetAthlon requires a Direct-X compatible 3d graphics accelerator card. Be sure to have the updated
driver respective to your 3D graphics card/accelerator. Visit the web site of the respective company to
download the updated driver for your graphics card.
2. After installation, restart your computer. Go to Programs / Ultracoach products and select UltraCoach
life. You will see an icon initializing the 30 day period for free "Web Racing".
Additional "Web Racing" and courses require purchase of UCVR full version. Please contact
www.veqtor.co.uk
Go to Programs/ UltraCoach products and click on the UltraCoach VR User's Manual.
We strongly urge you to PRINT THE USER'S MANUAL and refer to it in the software setup.
4. After launching the UltraCoach program, the UCVR wizard will appear. Click "cancel" at the bottom
right corner of the wizard window. This will expose the "splash" page. Click options / equipment" on the
drop menu. The settings for your CycleFX hardware should be:
• Category--stationary bike
• Brand/model--CycIeFX ITS
• Choose the correct COM port
• Enter the wheel circumference settings (refer to the table 2)
• Choose the units you prefer in miles or kilometers
Choose the stationary trainer type from table 1. This will provide approximate wafts information. If your
trainer is not listed in table 1 or you don't to see the watts display, select "not set". Enter OK
IF YOU HAVE AN EXERCISE BIKE, PLEASE REFER TO APPENDIX 1 BEFORE SETUP!
5. If you do not have a sound card, MUTE all sounds in the options/ sound drop menu. The
7/17
program will "crash" if this is not done!
6. To select one of the four courses, click on options / choose course from the drop menu. 7. Select single
person from the main menu.
8. Click on Go and get ready to ride
During the session, a "plus sign" next to the "Time" should be blinking, indicating that program is
performing correctly.
Starting and exiting UltraCoach VR
To start UltraCoach VR, click on the Windows Start button and select Programs / UltraCoach Products /
UltraCoach VR LITE. A message will appear, telling you that UltraCoach VR is loading. Once UltraCoach
VR has loaded, you will see the UltraCoach VR "splash screen" then the UltraCoach VR window will
appear. To exit UltraCoach VR from the main screen, select Race / Exit from the menu. To end a session,
click on the escape key.
Choosing a Course
UltraCoach VR Lite comes with four cycling courses: a track course (Velodrome), a road course (Atlanta 1996), and and two off road courses (Lost in Arizona and Field of Dreams). To change to a different
course, click on the Choose Course button, or select Options I Choose Course and select one of the
available courses.
Equipment Configuration
During installation, you selected the exercise equipment you have to use with UltraCoach VR and the
equipment's configuration. If you need to change the exercise equipment configuration, select Options /
Equipment from the menu. UCVR Lite only works with the CycleFX ITS (Interactive Trainer System). The
Equipment options are:
Category - Here you select the type of exercise equipment you have. This version of UltraCoach VR only
supports Stationary bike equipment. You should keep this selection at Stationary bike.
Brand / Model - Here you select which equipment you will be using with UltraCoach VR. The first item,
demo mode, can be selected to preview the course without actually running a session with your exercise
equipment.
COM Port - This is the COM (serial) port on your PC that your equipment is connected to.
Units - Here you select the units of measurement (miles or kilometers) that will be displayed during your
session.
Wheel Circumference - Refer to Table 1 (if you have an exercise bike, refer to appendix 1)
Stationary trainer Type - Refer to Table 2 (use only if you have a trainer, otherwise choose "not set")
Enable auto start/stop - If you check this option, your elapsed time will start when you start moving and
will stop when you stop moving. If you don't check this option, the elapsed time clock will keep going
regardless if you are moving or not.
Pacers go only when I go - If you check this option, the pacers (either assigned to a constant speed or a
previously recorded session) will not move until you register a
non-zero speed. It is a good idea to check this option as well as "Enable auto start/stop" so that you can
stop during your workout and start again without having UltraCoach VR advance the clock or the pacers
while you take a break.
Other items on the OPTIONS pull down menu: (please refer to UCVR user's manual)
Sound - Sound option allows you to playa music CD or turnoff sound effects. If you do not have a sound
card, click on Mute All Sound
Entering name, weight and heart levels - Use this option to change name and heart rate target levels.
Please see UCVR user's manual for more detail.
Workout & Race Settings - Here you can set the number of laps, your race length, starting point and
statistical sampling rate. You can also configure your pacers here, using previously saved data, computer
generated pacers (Ultra Rabbits) or constant speed pacers. Graphics- Here you can adjust resolution,
use textures, shadows and smoothing. You must indicate here if you have a 3D Direct compatible
accelerator card, or an "add on" card (add on cards work with existing graphics cards) or a replacement
8/17
card.
Previewing a Course in Demo Mode
UltraCoach VR allows you to view a course without actually hooking up your exercise equipment and
going for a ride. To preview a course, first change the equipment configuration so that demo mode is the
selected equipment. Now you are ready to preview the selected course. Once the session has started,
you can use the following keyboard keys to travel along the course:
• UpArrow - Press this key to increase your speed
• DownArrow - Press this key to decrease your speed
• Home - Press this key to go 100 mph.
• End - Press this key to stop.
Running a Single Person Session
Choose Single Person session if you want to run a session by yourself (not connected to another
computer). Once you have selected the course (see the Choosing a Course section) and the number of
laps (see the Changing Workout / Race Settings section) you are ready to begin. Click on OK. The course
will then begin to load and you will see a status bar that shows the progress of the course loading. When
the course has finished loading, you will see the message, "Preparing renderer, please wait..."
UltraCoach VR is now optimizing the rendering pipeline so that you'll see the smoothest graphics possible
on your computer. When UltraCoach VR's renderer is prepared, you will see a "fly-by" to the course start
line (even if you are not doing the session with computer generated pacers and/or live competitors, you
will always see four bikes). At the end of the fly-by, you will see "Get Ready..." then "Go!" on your screen
(you will also hear "Get ready" and "Go" if you have enabled sound). When you see/hear "Go!," start
exercising! The UCVR screen will display important statistical information during your ride. Please review
the UCVR user's manual for detailed information on the session screen. Here are some some keyboard
tips:
• Toggle between F1 and F3 to change your view
Press the "2", "3" or "4" keys to place the respective pacers in front of you
• Press the "Insert" key to place yourself in a specific spot on the course
Multi-Person sessions over a LAN and "Web Racing": Please refer to the UCVR User's Manual for
detailed information
Finishing a Session: There are two ways an UltraCoach VR session can end:
•
•
You complete the number of laps of the course that you had specified
You press the Esc key on your keyboard.
Saving session data:
If you click Yes at the end of the session to save data, two files will be created: a DAT file that can be
assigned to a pacer to race against in the future and a RAW file to be used with UltraCoach HRM. Once
the data has been saved, you will be asked if you want to exit UltraCoach VR.
Session Data and UltraCoach HRM
Using UltraCoach HRM, you can record workout and race information collected during an UltraCoach VR
session. UltraCoach HRM enables you to keep a workout history, and UltraCoach HRM will recommend
workouts based on your workout history and physiological trends.
Refer to the UCVR users manual for further, detailed information. For UltraCoach HRM, we
suggest you read the UC HRM manual.
Troubleshooting
After I installed UCVR life, the program won't start: If you don't have a sound card or are not sure, click on
Mute All Sounds in Options. If this does not work, exit the program, restart your computer and try again in
"demo mode". Be sure that you have DirectX version 6.1 properly installed on your PC and the latest
driver for your 3D accelerator card before you call UltraCoach Technical Support
After / installed UCVR life, / have poor graphics: If you have a Direct3D compatible 3D accelerator card
and UltraCoach VR does not run or runs very slowly, you may need to get an updated driver from the 3D
accelerator card manufacturer. Also, if you see visual anomalies during an UltraCoach VR session, this
may be caused by an outdated 3D accelerator driver. Check the documentation for the 3D accelerator
card; most have a web page listed. 3D accelerator card manufacturers often put driver updates on their
9/17
web page, with instructions on how to update your PC with the new driver. Be sure that you have DirectX
version 6.1 properly installed on your PC and the latest driver for your 3D accelerator card before you call
UltraCoach Technical Support. Check your graphics settings in Options (refer to UCVR User's manual) if
you have an accelerator card or Direct 3D compatible card.
If you can't get a speed signal (no blinking `plus" sign next to Time): The most common and likely cause
of this problem is incorrect COM port configuration, however, check all cable connections and that
magnet is close to sensor first. If you think the cables and connections are ok, check your COM port
settings.
Please refer all software technical support to
[email protected]
Appendix 1: Determining equipment circumference settings for exercise bikes
Most exercise bikes today include an onboard cycle computer providing such information as speed,
distance, and elapsed time. To synchronize the Ultra Coach software with your exercise bike's onboard
computer, please follow the procedure below:
1. Attach magnet to pedal and sensor on bike, sensor tip at least 1/4" from pedal magnet.
2. Insert the sensor's 3.5 mm plug into the CAD jack on the CycleFX sensor box.
3. Start a UCVR session, don't worry about circumference setting. Set units to "Miles".
4. You will need to take three readings comparing RPM on the computer screen to the exercise bike's
onboard computer, so get a paper and pencil ready when you start riding.
5. Take readings at 70 RPM, 80 RPM, and 90 RPM, record the respective speeds from your bike's
computer.
6. Find the average speed in MPH.
7. We will now use the formula:
(Average MPH /Average RPM) X 1056 = circumference
The circumference will be in inches, and enter this number into the UCVR equipment setup
Example:
RPM
70
80
90
MPH
18.8
21.3
23.5
Average = 21.2
Average RPM = 80
(21.2 / 80) X 1056 = 279.84 inches. This obviously does not look right, your wheel can't possibly be that
big. Wrong! This is a conversion of pedal speed to land speed, where gearing and other factors are
involved, so please use the number!
8. IMPORTANT: Remove the plug from the CAD jack and insert it into the SPD jack. Your bike's
computer should now be synchronized with UCVR when doing a session. Warning: Cutting and
splicing wires from your exercise bike's computer into the CycleFX plug can void your bike's warranty,
and may not work due to different sensors. Please use the pedal magnet technique outlined above.
Appendix 2: Further PC setup & troubleshooting information
Due to the variations and complexity of personal computer systems and their setup parameters, Peak
Training System will NOT provide any technical support in setting up Serial COM ports on your computer.
For further assistance, please see a computer service technician. The following reference material is
intended to assist you in understanding COM port setup requirements. Please do NOT attempt to change
any settings on any of your devices unless you are an advanced computer user and understand what you
are doing. An advanced user should be capable of recovering their own system from any situation. What
is a com port? A COM port, or communications port, is a device on your computer that provides for the
input and output of serial data. Serial data, as opposed to parallel data, transmits and receives on very
few "wires" or lines, where parallel data is exchanged many bits at a time across a higher number of
wires. Your mouse is an example of a serial device; your printer is an example of a parallel device. COM
ports use a dedicated set of resources: one "port address" and one "IRO channel". A port address is an
address at which the CPU can find a certain device. Every device on your computer probably has a port
address, so that when the CPU needs to communicate with that device, it knows where to find it. An
Interrupt Request Channel, or IRO channel, is used by the device to request time from the CPU. If the
device needs processor time, it gets the CPU's attention by sending a signal on the Interrupt line
assigned to it. The port address and IRQ channel on the COM port work to give devices that use them
access to serial data. If you have more than one device using the same IRQ or port address, chances are
you'll have problems. All devices are intended to have their own address and IRO channel. The devices
that usually use a COM port are modems and a mouse. Sometimes game devices like virtual helmets or
digital cameras will use COM ports also, so you have to be sure you have no conflicts if you have more
10/17
than two COM port devices on your system. A device conflict is where more than one device is trying to
use the same IRQ channel to talk to the CPU.
TIP: Whenever possible, use a PS/9 mouse and keyboard with your PC. This will free up the COM
port for use with PTS
CHECK WHICH COM PORT YOUR INTERNAL MODEM IS USING:
In order to establish that no other conflicts exist, you first need to check to see which COM port your
modem is using.
1. Right-click on the My Computer icon and select Properties.
2. Click on the Device Manager tab at the top of the window.
3. Expand the "Modem" branch by clicking on the "+" next to the modem.
4. Left click one time on your installed modem
5. Click on the Properties button.
6. Once the window comes up, click on the Modem tab at the top of the window. You will now see which
comport the modem is on, and can change it if necessary. If your modem is using a COM port other than
1 or 2, make sure you get the IRQ channel information. Please refer to Windows Help file (Resources for
hardware and resources available to the system).
IMPORTANT: If you have a device on COM1, like a mouse, then you may have conflicts with devices
using COM 3 because they share the same IRO. Likewise, devices on COM2 may conflict with devices
on COM4. Interrupt sharing does not usually work well; we recommend that you use the COM1 or COM2
port for your modem. If you have other devices that use a COM port, make sure the port is using an
interrupt other than 3 or 4. Note: Only advanced users should try to change the resource settings of their
devices.
TIP: If the modem is on COM1 and you select COM 2 in UltraCoach equipment setup, things
should work fine. However, if Ultracoach is still not running, try putting the modem on COM 2 and
select COM 1 in UltraCoach equipment setup.
External Serial Modems: Depending on the configuration of your computer, if you have an external
modem and no PS/2 port for your mouse, then you will need to remove the modem in order to use the
serial port for the PTS cable connector.
Two Serial Ports: Many PCs have two serial ports and a PS/2 port. It is common that one of these serial
ports may not have been configured, and the other serial port is used by an external modem or other
device. Be sure your mouse is connected to the PS/2 port, and remove the modem or other device from
the functioning port. Connect the PTS connector to the functioning serial port. For both serial ports to
work properly, you need to have both of them enabled in your CMOS setup utility. Only advanced users
capable of completely restoring their system should attempt to change settings in CMOS. Please refer to
your system documentation or contact your system vendor for further assistance.
NOTE: On some older PCs, you may only have one serial port and no PS/2 port. In this case,
please bring your computer in to your local service center for an upgrade in order to use, Peak
Training System
Update your drivers: Video and sound card drivers are an integral part of Windows 95/98 and DirectX.
They tie the operating system and the DirectX API to the hardware itself, providing a compatibility layer
for Windows applications and games to access. Hardware manufacturers post new drivers on their web
sites regularly that have enhanced performance and stability. Please check with your hardware
manufacturer for an update as some difficulties may be related to the driver.
What is DirectX?
DirectX is a game API (Application Program Interface) that allows games designed for Windows 95/98 to
have access to your hardware through a standard interface. Any function that the game wants your
hardware to perform is passed via the DirectX API to your hardware drivers. These drivers are
responsible for making sure that the game's request is properly implemented in the hardware.
Table 1 Information: Stationary trainer settings used in equipment setup
CycIeFX has tested the following trainers in our lab using the Power Tap from
Tune Corp. as the torque and watts measurement source, where watts equals torque multiplied by speed.
We used the trainer for approximately 20 minutes before testing in order to get the trainer's resistance
unit up to a realistic "riding" temperature. Measurements were taken at 15, 17.5, 20, 22.5 and 25 mph. As
we did not test at speeds above 25 MPH, watts readings as displayed on your computer's monitor will
remain at the 25 MPH reading. Actual watts may increase, or perhaps even decrease due to the
increased temperature of the resistance unit, but not having tested speeds over 25 mph, we didn't want to
11/17
display potentially incorrect readings.
Wheel press-on force, tire air pressure and temperature of the resistance unit plays an extremely
important role in the accuracy of our data, and will probably be different from yours if you use the Power
Tap. The watts information is for reference only, we do feel it is accurate within +/- 15%, but we make no
claims beyond that. If you are not satisfied with the data or are using a trainer other than one that is listed
below, please choose "not set".
Some Mag trainers use a handlebar mounted resistance control lever. If you are using one of these
trainers and are constantly changing resistance, choose either "not set" or a setting in the middle. If you
are using a spin bike or exercise bike, "choose not set
TABLE 1 : EQUIPMENT SETTINGS FOR TRAINERS
12/17
Table 1 con't.
Number
not set
Manufacturer
------------
Model
Resistance Setting
101
102
103
104
105
106
107
108
109
110
111
112
113
114
115
116
117
118
119
120
121
122
123
124
125
126
127
128
129
130
131
132
133
134
135
136
137
138
139
Cycleops
Cycleops
Cycleops
Cycleops
Cycleops
Cycleops
Cycleops
Cycleops
Cycleops
Cycleops
Cycleops
Cycleops
Cycleops
Minoura
Minoura
Minoura
Minoura
Minoura
Minoura
Minoura
CyclePro
CyclePro
CyclePro
C-Force
Elite/Performance
Elite/Performance
Elite/Performance
Elite/Performance
Elite/Performance
Elite/Performance
Elite/Performance
Elite/Performance
Elite/Performance
Blackburn Defender
Blackburn Defender
Blackburn Defender
Tacx
Tacx
Tacx
wind
fluid
fluid plus
fluid plus
fluid plus
fluid plus
fluid plus
mag
mag
mag
mag
mag
mag
mag
mag
mag
mag
mag
mag
mag
mag
mag
mag
centrifugal
fluid
mag
mag
mag
mag
mag
mag
mag
mag
mag
mag
mag
mag
mag
mag
n/a
n/a
1
2
3
4
5
1
2
3
4
5
6
1
2
3
4
5
6
7
low
middle
high
n/a
n/a
1
2
3
4
5
6
7
8
1
3
5
1
4
7
COMMON WHEEL CIRCUMFERENCES
Table 2: Bicycle Wheel Circumference: Used in equipment setup
Tire Size
inches mm
Tire size
inches
mm
700x38c
700x32c
700x25c
700x20c
700x18
650 x 38a
27 x 1 3/8
271 1 /8
26 x 2.35
26 x 2.1
26 x 1.95
26 x 1.5
26 x 1 1 /2
26 x 1.25
85.8
84.8
82.9
82.1
81.5
83.5
85.4
84.8
81.9
81.5
80.7
78.3
82.7
76.8
700x35c
700x28c
700x23c
700x19c
650 x 38b
650 x 35a
27 x 1 1 /8
27 x 1
26 x 2.125
26 x 2
26 x 1.75
26 x 1.4
26 x 1 3/8
26 x 1
85.4
84.1
82.5
81.9
83.1
82.3
85.4
84.6
81.7
81.1
79.5
78.7
81.5
75.2
2168
2136
2096
2080
2110
2090
2169
2150
2075
2060
2020
2000
2070
1910
2180
2155
2105
2086
2070
2120
2169
2155
2080
2070
2050
1990
2100
1950
WARRANTY
Limited one year warranty: This product is limited for a period of one year against defects in materials
and workmanship, effective from the date of purchase to the original purchaser. The manufacturer will
repair or replace any defects due to materials or workmanship. The manufacturer of this product shall not
extend the warranty to: 1) any failure or malfunction of the product due to any modifications made to the
product; 2) damages resulting from misuse of product; 3) damages not attributable to a defect in
workmanship or material. The customer is responsible for properly packing the defective product for
shipment and for the cost of shipment back to the company. The company will ship the repaired or
replaced product via UPS ground or US mail at no cost to the customer. For faster modes of shipment,
the customer is responsible for the difference between the faster mode and UPS ground or US mail. The
manufacturer shall not be liable for any consequential or incidental damages in connection with the
purchases, use or handling or this product. Some states do not allow the exclusion or limitation of
consequential damages, and the above limitation may not apply to you. This warranty gives you "specific
rights, and you have other rights which vary from state to state.
Return Merchandise Authorization Policy: Before returning a product for repair or replacement, a
Return Merchandise Authorization number (RMA) must be obtained from the company. The RMA can be
obtained by email [email protected] Please have the following information available when
obtaining the RMA: Date of purchase, place of purchase and serial number. The RMA # must be clearly
displayed on the outside of the package.
Please refer all software technical support to
[email protected]
Peak Training System
www.riderunrow.com - www.simultrainer.com
Made in USA
13/17