1
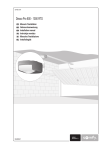
INSTALLATION
Assembly
If the toilet has not already been assembled please see User Manual for assembly instructions
Excavation
Prepare installation trench as per diagram. Measurements are: 2500 mm ( 8.2 ft ) long, 800 mm
(2.5 ft ) wide and 630 mm ( 2.4 ft ) deep. At the rear end of the toilet the trench should be dug
deeper to accommodate the catchment drum. The measurement for this section is 800 mm ( 2.5
ft ) wide and 1200 mm ( 4 ft ) deep.
Pour concrete layer +/- 100 mm ( 4 inches ) thick to support the long section that houses the
helical screw conveyor. In high water table areas, also pour concrete into the bottom
section where the catchment drum is. Once the toilet is installed concrete must be
poured into the area around the catchment drum as well. This will prevent that the
toilet " pops up " after installation.
Fit toilet into excavation, level and do backfilling. CAUTION - Take care not to compact soil around
the toilet. When backfilling make sure that the ventilation pipe connector and waste collection
inspection section are sufficiently above the ground level to ensure that water will not be able to
enter the system once normal gardening has been completed by the owner.
Assemble ventilation pipes and secure wind turbine on adaptor with screws supplied. Fit end of
ventilation pipe over ventilation opening on toilet and secure with screws supplied.
PLEASE NOTE - if an electric fan was supplied with the toilet a small slot has to be cut
into the bottom of the ventilation pipe to prevent the pipe from pinching the electrical
wires that are used for main power connection to the fan. After installation seal the slot
with silicon sealant. Secure ventilation pipes with supplied bracket to structure ( toilet hut or
outside wall of home ).
Hook waste bag onto hooks at rear end of toilet. Please ensure that the bag fits snugly under the
exit of the helical screw conveyor to prevent waste from falling outside the bag.
The toilet is now ready for operation.
Thoroughly test the toilet and check that:
1) The lid can be operated smoothly.
2) The helical screw conveyor is turning properly.
3) No foreign objects have been left inside the toilet bowl that can block the exit hole.
4) The lid is in place and has been fixed with the supplied screws.
Indoor installation
For installation, inspection and maintenance purposes it is necessary to make a hole in the wall
behind the toilet bowl. The section should be large enough to allow work on the linkages from the
outside. The wall, where bricks have been taken out should be supported by inserting a suitable
lintel during construction. See picture on next page.
Installation pictures