1
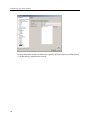
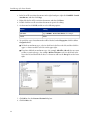
PureMessage 4 for Lotus
Domino
startup guide
Lotus Domino 8
Product version: 4.5
Document date: March 2012
Contents
1 Before you begin.......................................................................................................................................3
2 Installing PureMessage.............................................................................................................................5
3 Configure anti-spam updates through a proxy.....................................................................................13
4 Opening PureMessage ............................................................................................................................14
5 Setting up email notifications................................................................................................................15
6 Scanning for viruses................................................................................................................................16
7 Adding Disclaimers.................................................................................................................................17
8 Blocking email attachments...................................................................................................................21
9 Blocking spam and email content..........................................................................................................24
10 Removing PureMessage........................................................................................................................26
11 Technical support..................................................................................................................................27
12 Legal notices..........................................................................................................................................28
2
startup guide
1 Before you begin
1.1 About this guide
This guide is for Lotus Notes administrators who want to install and set up PureMessage 4 for
Lotus Domino on their Lotus Domino servers.
This guide tells you how to configure some of the options in PureMessage. For information about
configuring all the options in PureMessage, see the following:
■
PureMessage 4 for Lotus Domino Help
■
PureMessage 4 for Lotus Domino user manual (printable version of Help)
Sophos documentation is published at www.sophos.com/support/docs/ and on the Sophos CDs.
1.2 System requirements
For system requirements, go to the system requirements page of the Sophos website
(http://www.sophos.com/products/all-sysreqs.html).
You must have internet access in order to download the installation software from the Sophos
website.
1.3 Prepare Lotus Notes and Lotus Domino
Before installing PureMessage, prepare Lotus Notes and Lotus Domino for installation.
1. Read the PureMessage 4 for Lotus Domino release notes, as they may contain important
late-breaking information.
2. Log on to your system as Administrator.
3. In the Lotus Notes Name and Address Book, create a multi-purpose group called, for example,
PureMessage-Admin for the administrator(s) that you want to receive email notifications.
If you already have a suitable group, you can configure PureMessage to use that instead (Setting
up email notifications (page 15)).
4. Stop the Lotus Domino server.
5. Back up the following Lotus Domino server files:
■
log.ntf
■ mailbox.ntf
■ statrp.ntf/statrp5.ntf
Your own templates will be preserved during the installation. PureMessage will add the necessary
extensions to any existing templates.
3
PureMessage 4 for Lotus Domino
1.4 Install Sophos Anti-Virus
Before you install PureMessage, you must install Sophos Anti-Virus in order to provide virus
scanning for PureMessage.
Note: You do not need to do this if the Lotus Domino server is being managed by Enterprise
Console, as it will already have installed Sophos Anti-Virus for you.
■
Using the web address and download credentials provided by Sophos, download and run the
standalone installer for Sophos Anti-Virus for Windows, version 7 for Windows 2000 and later.
For help with installing Sophos Anti-Virus, see the Sophos Endpoint Security and Control
standalone startup guide.
Sophos documentation is published at www.sophos.com/support/docs/.
4
startup guide
2 Installing PureMessage
To ensure PureMessage installs and functions correctly it is important to perform all of the following
steps in sequence:
1. Choose and install PureMessage in one of the supported modes.
For information on available install modes, see Install modes (page 5).
2. Configure exclusions in Sophos Anti-Virus.
For information on how to set exclusions in Sophos Anti-Virus, see Configure Exclusions in
Sophos Anti-virus (page 11).
3. Place the toolkit.lic file in the PureMessage installation folder.
For information on how to configure the license file, see Configure License (page 11).
4. Restart the computer.
2.1 Install modes
You can choose to install PureMessage in one of the following modes:
Install in Standard mode
If you want to use the default settings listed below, follow the instructions in Install PureMessage
in Standard mode (page 6).
Default setting
Value
Domino program directory
C:\Program Files\IBM\Lotus\Domino\
notes.ini directory
C:\Program Files\IBM\Lotus\Domino\
Domino data directory
C:\Program
Files\IBM\Lotus\Domino\data\
PureMessage data subdirectory
PureMessage
PureMessage program directory
C:\Program
Files\IBM\Lotus\Domino\PureMessage\
Name of administrator
PureMessage-Admin
Virus scanner support
Sophos Anti-Virus
Proxy settings
false
5
PureMessage 4 for Lotus Domino
Install in Advanced mode
If you want to do any of the following, follow the instructions in Install PureMessage in Advanced
mode (page 7):
■
Change the default settings listed above.
■
Configure the anti-spam update settings.
Install in a replicated environment
If you want to do any of the following, follow the instructions in Install PureMessage in a replicated
environment (page 8):
■
Change the default settings listed above.
■
Configure the anti-spam update settings.
■
Install the configuration databases as replicas of existing databases.
Install on a partitioned server
If you want to do any of the following, follow the instructions in Install PureMessage on a partitioned
server (page 9):
■
Change the default settings listed above.
■
Configure the anti-spam update settings.
■
Install the configuration databases as replicas of existing databases.
■
Install PureMessage on a partitioned server.
2.2 Install PureMessage in Standard mode
Note: The server where you install PureMessage will need to be restarted after installation.
To install PureMessage using the default settings:
1. Using the web address and download credentials provided by Sophos, download the
PureMessage 4 for Lotus Domino installer.
2. Locate the installer in the folder where it was downloaded.
3. Double-click the installer. In the installer window, click Install to extract the installer’s contents
to your computer and start the installation wizard.
4. On the Setup type page, under Type of installation, select Standard.
5. Complete the installation wizard.
After the installation is complete and the wizard prompts for a restart, click No and continue
to the next step in the install sequence. For information, see Installing PureMessage (page 5).
6
startup guide
2.3 Install PureMessage in Advanced mode
Note: The server where you install PureMessage will need to be restarted after installation.
To install PureMessage by changing the default settings and/or configuring the advanced settings:
1. Using the web address and download credentials provided by Sophos, download the
PureMessage 4 for Lotus Domino installer.
2. Locate the installer in the folder where it was downloaded.
3. Double-click the installer. In the installer window, click Install to extract the installer’s contents
to your computer and start the installation wizard.
4. On the Setup type page, under Type of installation, select Advanced.
The PureMessage installation wizard will show you a series of pages that provide installation
preference options. Information about the different setup options is provided below.
5. On the Directories for program files page, enter the paths to the Domino server and
PureMessage program directories.
6. On the Directories for notes.ini and configuration databases page, enter the following:
■
■
The path to the notes.ini file.
The name of the PureMessage data subdirectory.
7. On the Configuration databases page, leave Standard database installation selected.
8. On the Database administrator page, enter the name of the group you specified in Prepare
Lotus Notes and Lotus Domino (page 3)
The name of the administrator group is added to the notes.ini file and stored as Administrator
in the Access Control List (ACL) of the PureMessage configuration databases.
9. On the Configuration SASI update page, select the Configure SASI update check box if you
want to configure the anti-spam update service.
a) To configure the proxy settings for the anti-spam update service, select the Configure proxy
check box, and then configure the proxy URL, port, user name, and password.
You can configure the proxy settings after installation. For information, see Configure
anti-spam updates through a proxy (page 13).
b) To configure the notification settings for the anti-spam update service, click Next.
10. On the Notification SASI update page, various notification options are available if you wish
to be notified of the success or failure of an anti-spam update. To receive a notification in both
cases, leave <Errors and successful updates> selected in the E-mail options box.
After the installation is complete and the wizard prompts for a restart, click No and continue
to the next step in the install sequence. For information, see Installing PureMessage (page 5).
7
PureMessage 4 for Lotus Domino
2.4 Install PureMessage in a replicated environment
The server must be available, known, and started. In case the database on the master server cannot
be opened (because the server or the database does not exist), the installation is aborted. The target
server (on which the software is to be installed) must have sufficient rights to read the master
server databases. Otherwise, the databases from the installation package will be installed.
Note: The server will need to be restarted after installation.
PureMessage supports replicated multi-server environments i.e. the configuration databases can
be installed as replicas of existing databases.
1. Using the web address and download credentials provided by Sophos, download the
PureMessage 4 for Lotus Domino installer.
2. Locate the installer in the folder where it was downloaded.
3. Double-click the installer. In the installer window, click Install to extract the installer’s contents
to your computer and start the installation wizard.
4. On the Setup type page, under Type of installation, select Advanced.
The PureMessage installation wizard will show you a series of pages that provide installation
preference options. Information about the different setup options is provided below.
5. On the Directories for program files page, do the following:
a) Enter the paths to the Domino server and PureMessage program directories.
b) Leave the Installation on partitioned servers check box cleared.
6. On the Directories for notes.ini and configuration databases page, enter the following:
■
The notes.ini path.
■ The name of the PureMessage data subdirectory.
7. On the Configuration databases page, select Database installation in replicated environment
to install the configuration databases as replicas of existing databases.
Creating your configuration databases as replicas allows you to keep your existing configuration
for the time being and import the new configuration at a later stage.
8. On the Installation in a replicated environment page, enter the name of the master server
and the subdirectory where the databases are located.
The master server specified here is entered in the notes.ini file.
9. On the Database administrator page, enter the name of the group you specified in Prepare
Lotus Notes and Lotus Domino (page 3)
The name of the administrator group is added to the notes.ini file and stored as Administrator
in the Access Control List (ACL) of the PureMessage configuration databases.
8
startup guide
10. On the Configuration SASI update page, select the Configure SASI update check box if you
want to configure the anti-spam update service.
a) To configure the proxy settings for the anti-spam update service, select the Configure proxy
check box, and then configure the proxy URL, port, user name, and password.
You can configure the proxy settings after installation. For information, see Configure
anti-spam updates through a proxy (page 13).
b) To configure the notification settings for the anti-spam update service, click Next.
11. On the Notification SASI update page, various notification options are available if you wish
to be notified of the success or failure of an anti-spam update. To receive a notification in both
cases, leave <Errors and successful updates> selected in the E-mail options box.
After the installation is complete and the wizard prompts for a restart, click No and continue
to the next step in the install sequence. For information, see Installing PureMessage (page 5).
Any errors occurring during database replication are logged in the installation log file
tk_setup_data.log. This file can be either viewed at the end of the installation or opened after
installation from the PureMessage data directory.
2.5 Install PureMessage on a partitioned server
To install on a partitioned server, all servers have to be stopped on all partitions, as the basic
PureMessage program files are written to the Domino program directory (which exists only once
on a partitioned server). The files in this program directory must not be accessed during the
installation.
Note: The server will need to be restarted after installation.
1. Using the web address and download credentials provided by Sophos, download the
PureMessage 4 for Lotus Domino installer.
2. On the Setup type page, under Type of installation, select Advanced.
The PureMessage installation wizard will show you a series of pages that provide installation
preference options. Information about the different setup options is provided below.
3. On the Directories for program files page, do the following:
a) Enter the paths to the Domino server and PureMessage program directories.
b) Select the Installation on partitioned servers check box.
4. On the Installation on partitioned servers page, enter the following:
■
■
A list of notes.ini paths. These will usually be the data directories on the partitioned server.
The name of the PureMessage data subdirectory.
9
PureMessage 4 for Lotus Domino
5. On the Directories for notes.ini and configuration databases page, enter the following:
■
The notes.ini path.
■ The name of the PureMessage data subdirectory.
6. On the Configuration databases page, select one of the following options:
■
Install databases without replication
Install databases as replicas
■ Install databases as replicas of databases located on another server
■
Creating your configuration databases as replicas allows you to keep your existing configuration
for the time being and import the new configuration at a later stage.
The PureMessage installation modifies the design of various standard databases. To leave the
database design unchanged, clear the Design update check box.
7. On the Installation in a replicated environment page, enter the name of the master server
and the subdirectory where the databases are located.
The master server specified here is entered in the notes.ini file.
8. On the Database administrator page, enter the name of the group you specified in Prepare
Lotus Notes and Lotus Domino (page 3)
The name of the administrator group is added to the notes.ini file and stored as Administrator
in the Access Control List (ACL) of the PureMessage configuration databases.
9. On the Configuration SASI update page, select the Configure SASI update check box if you
want to configure the anti-spam update service.
a) To configure the proxy settings for the anti-spam update service, select the Configure proxy
check box, and then configure the proxy URL, port, user name, and password.
You can configure the proxy settings after installation. For information, see Configure
anti-spam updates through a proxy (page 13).
b) To configure the notification settings for the anti-spam update service, click Next.
10. On the Notification SASI update page, various notification options are available if you wish
to be notified of the success or failure of an anti-spam update. To receive a notification in both
cases, leave <Errors and successful updates> selected in the E-mail options box.
After the installation is complete and the wizard prompts for a restart, click No and continue
to the next step in the install sequence. For information, see Installing PureMessage (page 5).
Any errors occurring during database replication are logged in the installation log file
tk_setup_data.log. This file can be either viewed at the end of the installation or opened after
installation from the PureMessage data directory.
10
startup guide
2.6 Configure Exclusions in Sophos Anti-virus
You must configure Sophos Anti-Virus to add exclusions for PureMessage.
1. With Sophos Anti-Virus installed, right-click the Sophos Anti-Virus icon in the system tray,
and then click Open Sophos Anti-Virus .
2. On the Configure menu, click On-access scanning.
3. Click the Exclusions tab.
4. Click Add.
5. In the Item type list, click Folder.
6. In the Exclude item box, enter the item name as follows:
Note: Ensure you have a backslash (\) at the end of path when you exclude a location.
a) Add the location where Lotus Domino is installed:
Lotus Domino 8
C:\Program Files\IBM\Lotus\Domino\PureMessage\
b) Add the Windows temporary folder location. By default the location is
C:\WINDOWS\Temp\.
c) With the Exclude Item box displayed, click Start, and then click Run.
d) In the Open box, type cmd, and then click OK.
e) At the command prompt, type set, press ENTER.
A list of environment variables is displayed. Make a note of the path mentioned for TEMP
and TMP variable. If both these variables point to same location (as in the example), enter
the path in the Exclude item box once and click OK.
Example:
TEMP=C:\DOCUME~1\ADMINI~1\LOCALS~1\Temp\
TMP=C:\DOCUME~1\ADMINI~1\LOCALS~1\Temp\
If the TEMP and TMP variables point to different locations, enter both paths as exclusions.
7. Click Apply and exit Sophos Anti-Virus.
2.7 Configure License
The toolkit.lic is a license file provided by Sophos to ensure different modules of PureMessage
function properly. An invalid toolkit.lic file may result in the product not functioning as expected.
11
PureMessage 4 for Lotus Domino
You must place the toolkit.lic file in the PureMessage install location. The default install location
for PureMessage is:
■
Lotus Domino 8
C:\Program Files\IBM\Lotus\Domino\PureMessage
If you do not have a toolkit.lic file, you can contact Sophos to obtain one. For more information,
see http://www.sophos.com/support/knowledgebase/article/50620.html.
Note: If your license does not include anti-spam functionality, you can still see the jobs/menu
items in the left menu, but these jobs will not initialize or work.
12
startup guide
3 Configure anti-spam updates through a proxy
You can configure the proxy settings for the anti-spam update service after installation by editing
the settings.xml file located in the C:\Program Files\IBM\Lotus\Domino\PureMessage\SASI\Update
directory, if your license includes it.
The following settings can be configured:
Setting
Value
Description
Proxy enabled
[true | false]
Default: false. Defines whether a proxy server is
to be used or not.
Url
proxy
Proxy server address.
Port
8080
Proxy server port used for communication.
Username
proxyuser
User name needed to access the proxy server.
Password
proxypassword
Password needed to access the proxy server.
Authentication mode
[Any | None | Basic | Digest
| NTLM]
Default: Any. Defines the method to be used for
authentication.
Type mode
[HTTP | SOCKS4 | SOCKS5]
Default: HTTP
13
PureMessage 4 for Lotus Domino
4 Opening PureMessage
1. Log on to Lotus Domino Administrator as an administrator.
2. On the Bookmark bar, click your Domino domain.
3. On the menu bar:
■
Select File>Application>Open.
4. In the Look in list, click the name of the server where PureMessage is installed.
5. Double-click the PureMessage data directory.
6. Double-click the PureMessage 4.5 Admin database.
The PureMessage user interface displays.
14
startup guide
5 Setting up email notifications
Before you begin using PureMessage to scan email or databases, set it up to send email notifications
to administrators when it detects a virus, blocks an email attachment, or encounters an error whilst
processing a message or a file.
To set up email notifications:
1. In the PureMessage Task pane, click Global > Global Parameters .
2. In the list of parameters in the right-hand pane, double-click PureMessage administrators
(person/group).
3. On the menu bar, click Edit.
4. On the Basics tab, set Value(s) to the name of the user group that will receive notifications.
5. Set Status to Active.
6. On the menu bar, click Save & Close.
15
PureMessage 4 for Lotus Domino
6 Scanning for viruses
6.1 Check that mail scanning is working
Mail scanning is active by default in PureMessage when you install it.
■
To check that mail scanning is working, download the harmless test file from
www.eicar.org/anti_virus_test_file.htm, attach it to an email and send it to yourself.
6.2 Set up scheduled database scanning
You set up scheduled database scanning to accomplish the following tasks:
■
Scan one or more mail database(s) for viruses.
■
Scan new or modified items only.
■
Alert the administrator(s) and the recipient if a virus is found in a mail database.
■
Place a copy of any infected mail in quarantine, together with a report.
■
Delete infected mail.
1. In the PureMessage Task pane, click Anti-Virus/File Blocking > Database Jobs .
2. In the list of database jobs in the right-hand pane, right-click DEFAULT - DB Virus Check,
and then click Copy.
3. Right-click the list of database jobs, and then click Paste.
4. Double-click the database job to open it for editing.
5. On the menu bar, click Edit, and then set the following options:
Option
Setting
Job name
Type SOPHOS - DB Virus Check, for example.
Status
Active
Execution mode
Scheduled
Start time
Enter, for example, 01/12/2008 22:00.
Interval
Enter, for example, 1 Days 0 Hours 0 Minutes
Note: If you only want to scan one mail database, enter its details in Database Selection.
6. On the menu bar, click Save & Close.
16
startup guide
7 Adding Disclaimers
7.1 Add a text disclaimer to your email
1. In the PureMessage Task pane, click Disclaimer > Mail Jobs .
2. In the list of mail jobs in the right-hand pane, right-click DEFAULT - Add a Legal Disclaimer,
and then click Copy.
3. Right-click the list of mail jobs, and then click Paste.
4. Double-click the new mail job to open it for editing.
5. On the menu bar, click Edit, and then set the following options:
Option
Setting
Job name
Type SOPHOS - Add a Legal Disclaimer , for example.
Status
Active
6. Click the Operations tab.
7. Under Disclaimer document, click Select.
8. Select a disclaimer document, and then click OK.
9. On the menu bar, click Save & Close.
17
PureMessage 4 for Lotus Domino
7.2 Add an image disclaimer to your email
PureMessage can include images in the email bodies of Richtext emails. You can integrate images
in GIF, PNG or JPG format into MIME emails.
7.2.1 Administrator side
To be able to use the PureMessage Disclaimer image functionality, the Notes client needs to be
extended.
Note: You may require basic skills in the use of widgets (window objects). For information on
widgets, refer to the IBM Lotus Domino documentation.
1. After PureMessage is installed, check that the admin_frontend.xml file and the g_update.nsf
database are located in the PureMessage data directory under <update>.
The database contains the client extensions (plug-ins) needed to use PureMessage Disclaimer.
The XML file above defines the storage location of the database. The database is referred to
through the Replica ID.
Note: The toolbar for widgets must be visible in order to access the ’My Widgets’ area. The
Notes client settings required to this end depend on the client version used. In the Notes client
8.0.2, these settings are located under: FILE -> PREFERENCES -> WIDGETS -> ENABLE
THE CHECKBOX: SHOW WIDGET TOOLBAR AND THE MY WIDGETS SIDEBAR PANEL.
2. Integrate the admin_frontend.xml file into the ’My Widgets’ sidebar of the Notes client.
18
startup guide
3. The PureMessage Disclaimer components are installed and the Notes client is restarted. This
may take a few seconds.
4. Select PREFERENCES -> PureMessage -> CONFIGURATION and click the ADD button.
a) Check that the Server name or the server’s IP address is set correctly and points to the correct
Puremessage data directory of the server. If PureMessage has been installed on multiple
servers, you may switch between servers. Click ADD to define these servers.
b) The new administration console is available in two default languages: German and English.
You can change the default setting either manually (’Selection’) or dynamically according
to the ’Content Language’ of the Notes client used (set in the notes.ini file). The language
of the new administration console does not have to be the same as for the traditional
administration console.
c) Change the settings manually as required and verify the installation of the PureMessage
components under: HELP -> ABOUT IBM LOTUS NOTES -> FEATURE DETAILS.
7.2.2 User side
Every user who is to be able to configure Puremessage Disclaimer needs to integrate the
admin_frontend.xml file in the Notes client. Use one of the following methods to provide the
users with the XML file:
■
a shared directory
■
by email
■
through a widget catalog
The users import the XML file into the ’My Widgets’ sidebar panel of the Notes client, e.g. via
Drag&Drop.
As an alternative, you can also publish the XML file in the widget catalog1. To do so, in the Domino
Administrator of your Notes client, provide the users with appropriate rights for using widgets.
Please note that the users require the following information:
■
Server where the widget catalog is located (Catalog server).
■
Widget category that includes the admin_frontend.xml file (Categories to install).
19
PureMessage 4 for Lotus Domino
For more information on further configurations required to integrate images into email disclaimers,
see the PureMessage Administration manual.
20
startup guide
8 Blocking email attachments
You can block some or all types of email attachment by following these steps:
■
Create a mail scanning job for attachment blocking.
■
Create a file restriction document, and then associate it with the attachment blocking job.
8.1 Create an attachment blocking job
1. In the PureMessage Task pane, click Anti-Virus/File Blocking > Mail Jobs .
2. In the list of mail jobs in the right-hand pane, right-click SAMPLE - Denied Attachments all
users, and then click Copy.
3. Right-click the list of mail jobs, and then click Paste.
4. Double-click the new mail job to open it for editing.
5. On the menu bar, click Edit, and then set the following options:
Option
Setting
Job name
Type SOPHOS - Denied Attachments all users, for example.
Status
Active
Runs on
Selected mails
Note: The Selected mails setting ensures that PureMessage does not take action against emails
released from quarantine and emails to and from the administrator.
6. Click the Operations tab, and then click the Denied Attachments tab.
7. Set the following options:
Option
Setting
Use file restrictions
Yes
Perform general modify option
Yes
8. Optionally, choose to notify the administrator, recipient, and/or the sender when a denied
attachment is detected.
9. On the menu bar, click Save & Close.
8.2 Create a file restriction document
1. In the PureMessage Task pane, click Anti-Virus/File Blocking > Utilities > File Restrictions
.
21
PureMessage 4 for Lotus Domino
2. In the list of file restriction documents in the right-hand pane, right-click SAMPLE - Denied
Attachments, and then click Copy.
3. Right-click the list of file restriction documents, and then click Paste.
4. Double-click the new file restriction document to open it for editing.
5. On the menu bar, click Edit, and then set the following options:
Option
Setting
Job name
Type SOPHOS - Denied Attachments, for example.
Status
Active
6. To specify the types of attachment that will be blocked, under Fingerprint, click the Select
Categorized icon.
■
To block an attachment type, select its check box in the list on the left, and then click the
upper >> button to add it to the list on the upper right.
■
If you have blocked an attachment type—for example, MS Office (doc xls), but you want
to allow a certain sub-type—for example, MS Excel Version 4, select its check box in the
list on the left, and then click the lower >> button to add it to the Except list on the lower
right.
7. Click OK to close the Pattern Selection dialog box.
8. Click the Misc. tab.
22
startup guide
9. Click the drop-down arrow beside Job(s) to run with this file restriction, and then click the
name of your attachment blocking job—for example, SOPHOS - Denied Attachments all
users).
10. On the menu bar, click Save & Close.
23
PureMessage 4 for Lotus Domino
9 Blocking spam and email content
As well as blocking spam and junk mail, PureMessage can search the content of email bodies and
attachments for keywords/phrases, which allows you to both monitor for offensive content and
reduce accidental data leakage from workstations.
■
Use spam detection and blocking to reduce incoming spam levels.
■
Use content filtering to monitor for offensive content and enforce acceptable use policies.
■
Use content filtering to reduce accidental data leakage from workstations.
9.1 About spam detection
Using PureMessage to detect spam requires a correctly configured DNS environment and an open
port 53. Without a correctly-configured DNS environment, timeouts will occur, which could
strongly affect the processing of emails by the anti-spam component.
For instructions on testing your DNS environment, see Test your DNS environment (page 24).
The PureMessage anti-spam component analyzes patterns within each email message and evaluates
the degree of concordance. Depending on the spam probability calculated, the following results
are returned:
■
[0%, 50%] Not spam. The email does not include spam features and is delivered to the
recipients.
■
[50%, 80%] Probable spam (quarantine or tagging, no delivery). The email should be placed
in quarantine or tagged, and may not be delivered to the recipients.
■
[80%, 100%] Definite spam (deletion, no delivery). The email should be deleted and not
delivered to the recipients.
9.2 Test your DNS environment
To make sure that the anti-spam component provides satisfactory results, you need to have a
correctly configured DNS environment.
To test that your DNS environment is correctly configured:
1. Open Command Prompt.
2. Type nslookup.
3. Type dnsbl.njabl.org.
If the IP address 69.28.95.178 is returned in response, your DNS environment is correctly
configured.
24
startup guide
9.3 Block spam
To protect your Lotus Domino environment against spam/junk mails:
1. In the PureMessage Task pane, click Anti-Spam/Content > Mail Jobs .
2. In the list of mail jobs in the right-hand pane, double-click DEFAULT - From Internet to open
it for editing.
3. On the menu bar, click Activate.
9.4 Filter email content
To search the content of email bodies and attachments for keywords/phrases:
1. In the PureMessage Task pane, click Anti-Spam/Content > Database Jobs .
2. In the list of database jobs in the right-hand pane, right-click SAMPLE - Content analyse based
on Dictionary (Body-Subject), and then click Copy.
3. Right-click the list of database jobs, and then click Paste.
4. Double-click the database job to open it for editing.
5. On the menu bar, click Edit, and then set the following options:
Option
Setting
Job name
Type SOPHOS - Content analyse based on Dictionary
(Body-Subject), for example.
Status
Active
6. Click the Operations tab.
7. Under Analyse Elements, select the Attachments check box.
8. On the menu bar, click Save & Close.
25
PureMessage 4 for Lotus Domino
10 Removing PureMessage
1.
2.
3.
4.
Click Start, click Control Panel, and then double-click Add or Remove Programs.
Click Change or Remove Programs.
Click PureMessage 4 for Lotus Domino , and then click Remove.
Use the Refresh Design command to reset the productive databases log.nsf and mail.box to
their original state.
5. If necessary, delete the PureMessage databases and database templates from the PureMessage
data directory, as they are not removed by the uninstall program.
26
startup guide
11 Technical support
You can find technical support for Sophos products in any of these ways:
■
Visit the SophosTalk community at http://community.sophos.com/ and search for other users
who are experiencing the same problem.
■
Visit the Sophos support knowledgebase at http://www.sophos.com/support/.
■
Download the product documentation at http://www.sophos.com/support/docs/.
■
Send an email to [email protected], including your Sophos software version number(s),
operating system(s) and patch level(s), and the text of any error messages.
27
PureMessage 4 for Lotus Domino
12 Legal notices
Copyright © 2012 Sophos Limited. All rights reserved. No part of this publication may be
reproduced, stored in a retrieval system, or transmitted, in any form or by any means, electronic,
mechanical, photocopying, recording or otherwise unless you are either a valid licensee where the
documentation can be reproduced in accordance with the license terms or you otherwise have
the prior permission in writing of the copyright owner.
Sophos, Sophos Anti-Virus and SafeGuard are registered trademarks of Sophos Limited, Sophos
Group and Utimaco Safeware AG, as applicable. All other product and company names mentioned
are trademarks or registered trademarks of their respective owners.
28