1
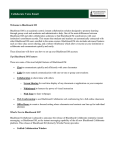
INTEGRAL
Science Operations Centre
Software User Manual
Proposal Generation Tool SUM
INT-SOC-SUM-018
Issue 2.0
26 January 2006
Prepared by P. Balm
Authorised by L. Hansson
INTEGRAL
Doc.No: INT-SOC-SUM-018
Proposal Generation Tool
SUM
Issue:
Date:
Page:
Issue 2.0
10 February 2006
ii
Document Status Sheet
Document Title
INTEGRAL Proposal Generation Tool SUM
Reference No:
INT-SOC-SUM-018
Issue
Revision
Date
Reason for change
0
Draft
7th September 2000
First issue for SAG internal review
1
0
20th October 2000
Issue with minor updates
1
1
3rd June 2003
AO2 issue
1
2
9th June 2004
AO3 issue
2
0
10 February 2006
AO4 issue
INTEGRAL
Proposal Generation Tool
SUM
Doc.No: INT-SOC-SUM-018
Issue:
Date:
Page:
Document Change Control
DCR No:
1
Date: 26th January 2006
Document Title
Proposal Generation Tool SUM
Reference No:
INT-SOC-SUM-018
Issue
Paragraph
1.0
1.1
Reason for change
New document
Figure 12
Updated for AO2
Figure 18
Figure 22
1.2
7.4
Screw 292
2.0
5.4.6
Screw 508
7.1
Screw 509
5.4.4
Screw 519
Approved:
Issue 2.0
10 February 2006
iii
INTEGRAL
Proposal Generation Tool
SUM
Doc.No: INT-SOC-SUM-018
Issue:
Date:
Page:
Issue 2.0
10 February 2006
iv
Table of Contents
1
Introduction................................................................................................................................... 7
1.1
Purpose ................................................................................................................................... 7
1.2
Intended Readership ............................................................................................................... 7
1.3
Using Online Help.................................................................................................................. 7
1.4
What’s new............................................................................................................................. 7
1.5
Using the SUM....................................................................................................................... 7
1.5.1
2
3
Conventions Used............................................................................................................ 7
1.6
Problem Reporting ................................................................................................................. 7
1.7
Definitions, acronyms and abbreviations ............................................................................... 8
1.8
References .............................................................................................................................. 8
1.8.1
Applicable documents ..................................................................................................... 8
1.8.2
Reference documents....................................................................................................... 8
Proposal Generation Tool Conventions ........................................................................................ 9
2.1
Common Panel Layout........................................................................................................... 9
2.2
Mandatory Fields.................................................................................................................... 9
2.3
Help Menu............................................................................................................................ 10
2.4
Panel Menu........................................................................................................................... 10
Proposal Generation Tool Basics................................................................................................ 11
3.1
Installing the Proposal Generation Tool............................................................................... 11
3.2
Starting the Proposal Generation Tool ................................................................................. 11
3.3
Enabled and Disabled Fields ................................................................................................ 11
3.4
Using the Mouse................................................................................................................... 11
3.4.1
Terminology .................................................................................................................. 12
3.4.2
Input Focus .................................................................................................................... 12
3.4.3
Menus ............................................................................................................................ 12
3.4.4
Pick-Lists ....................................................................................................................... 12
3.4.5
Buttons and Checkboxes................................................................................................ 13
3.5
Using the Keyboard.............................................................................................................. 13
INTEGRAL
Proposal Generation Tool
SUM
5
Issue 2.0
10 February 2006
v
Input Focus..................................................................................................................... 13
3.5.2
Menus............................................................................................................................. 13
3.5.3
Pick-Lists ....................................................................................................................... 14
3.5.4
Buttons and Check Boxes .............................................................................................. 14
3.5.5
Text fields ...................................................................................................................... 14
Exiting the Proposal Generation Tool .................................................................................. 14
Saving, Loading and Printing...................................................................................................... 15
4.1
Saving ................................................................................................................................... 15
4.2
Loading................................................................................................................................. 16
4.3
Printing ................................................................................................................................. 16
4.3.1
The Print Options Dialogue ........................................................................................... 16
4.3.2
Printing an Entire Proposal ............................................................................................ 17
4.3.3
Printing Admin Details .................................................................................................. 17
4.3.4
Printing Proposal Details ............................................................................................... 17
4.3.5
Printing Observations..................................................................................................... 17
4.3.6
Printing the Observation Summary................................................................................ 17
Entering Data............................................................................................................................... 18
5.1
The Main Panel..................................................................................................................... 18
5.2
The Admin Details Panel...................................................................................................... 18
5.3
The Proposal Details Panel................................................................................................... 19
5.3.1
Submitting the proposal as associated with a key programme ...................................... 19
5.3.2
Attaching the Scientific Justification ............................................................................. 20
5.4
6
Issue:
Date:
Page:
3.5.1
3.6
4
Doc.No: INT-SOC-SUM-018
The Observation Details Panel ............................................................................................. 21
5.4.1
Observation Numbering................................................................................................. 21
5.4.2
Displaying Observations................................................................................................ 22
5.4.3
The Observation Menu .................................................................................................. 23
5.4.4
Observation Details for Key Programme associated Proposals..................................... 23
5.4.5
Instrument Settings ........................................................................................................ 23
5.4.6
JEM-X TM Formats....................................................................................................... 23
Online Tools................................................................................................................................ 24
INTEGRAL
Proposal Generation Tool
SUM
7
8
Doc.No: INT-SOC-SUM-018
Issue:
Date:
Page:
Issue 2.0
10 February 2006
vi
Submitting a Proposal to ISOC................................................................................................... 24
7.1
Submitting for the First Time............................................................................................... 24
7.2
Repeating a Submission ....................................................................................................... 25
7.3
Obtaining a Copy of a Submitted Proposal from ISOC ....................................................... 26
7.4
Transfer of the Scientific Justification ................................................................................. 26
Extra Features ............................................................................................................................. 26
8.1
Autosave............................................................................................................................... 26
8.2
Changing the Mandatory Item Colour.................................................................................. 27
INTEGRAL
Proposal Generation Tool
SUM
Doc.No: INT-SOC-SUM-018
Issue:
Date:
Page:
Issue 2.0
10 February 2006
7 of 30
1 Introduction
1.1 Purpose
This document explains how to use the Proposal Generation Tool (PGT) software to prepare a
science proposal for use with the INTEGRAL Observatory. It explains the use of the software from
a functional, rather than scientific, point of view.
1.2 Intended Readership
Observers wishing to apply for science time on INTEGRAL should familiarise themselves with this
document and keep it handy to use as a reference. Open-time proposals for INTEGRAL can only be
created and submitted by using the PGT software.
1.3 Using Online Help
The online help provides brief explanations for most of the fields in the PGT and is accessed from
the Help menu (see 2.3).
1.4 What’s new
Several new features have been implemented in the PGT for AO4. Most notable is the introduction
of the Key Programme concept. It is explained in section 5.3.1.
During previous AO’s it has become clear that only one of the two JEM-X instruments is operated
at a time. For this reason, in AO4, as user can only specify instrument settings for a single JEM-X,
the active one, as described in section 5.4.6.
Finally, in addition to the existing checks of the data entered, the source information is checked in
the Simbad database (name and coordinates). We refer to section 7.1 for more details.
1.5 Using the SUM
This document provides more detailed explanations of the PGT functionality than the online help
can provide. However, the PGT is not a difficult tool to use and once you are familiar with the
basics, you should not need to refer to this document very often.
1.5.1 Conventions Used
The labels used for items in panels are shown in italics. Items in a panel which cause an action to be
performed are shown in bold.
1.6 Problem Reporting
If you discover a problem with the PGT, your first port of call should be the Frequently Asked
Questions (FAQ) page on the Integral Web Site (IWS) found at this location:
INTEGRAL
Doc.No: INT-SOC-SUM-018
Proposal Generation Tool
SUM
Issue:
Date:
Page:
Issue 2.0
10 February 2006
8 of 30
http://integral.esac.esa.int/
If this does not answer your query, then you can send a message to the Helpdesk at the following
email address:
[email protected]
1.7 Definitions, acronyms and abbreviations
Refer to INTEGRAL glossery of terms , reference INT-SOC-DOC-022.
1.8 References
1.8.1 Applicable documents
The following documents are applicable in their latest version (except PSS-05):
AD-1
PSS-05-0
ESA Software Engineering Standards, Issue 2
AD-2
INT-SOC-DOC-002
Definition of Observations Terms
AD-3
INT-SOC-URD-001
ISOC URD
AD-4
INT-SOC-SRD-002
ISOC SRD
AD-5
INT-SOC-PL-005
ISOC SPAP
AD-6
INT-SOC-PL-002
ISOC SCMP
AD-7
INT-SOC-PL-003
ISOC SVVP
AD-12
INT-SOC-PL-004
ISOC SPMP
1.8.2 Reference documents
RD-1
INT-SOC-DOC-001
ISOC Operations Concept
RD-2
INT-SYS-MIS-TN-0002-SMD
RD-3
BSSC ESA; Issue 1 Draft 2
INTEGRAL Mission Planning Concept
Guide To Applying ESA software
engineering standards to projects using OO
Methods; July 1997
RD-6
INT-SR-1594
RD-7
INT-PL-03197
SGS Requirement Document
SGS Implementation Plan
RD-8
INT-IC-AI-0005
Satellite Database ICD
RD-10
INT-SAG-98-0042-TN
Instrument Modes and Mode Transitions
Supported by ISOC
RD-11
INT-SOC-DOC-023
JEM-X Observer’s Manual
INTEGRAL
Proposal Generation Tool
SUM
Doc.No: INT-SOC-SUM-018
Issue:
Date:
Page:
Issue 2.0
10 February 2006
9 of 30
2 Proposal Generation Tool Conventions
2.1 Common Panel Layout
Every panel shares a common layout. This layout consists of a menu bar at the top of the panel with
an icon strip underneath it. The icon strip usually has a lay-out as shown in Figure 1. Below the icon
strip is a scrollable area containing the main body of the panel. When a panel is first opened it will
be shown at its default size. If you resize the panel so that it is smaller than this default size, scroll
bars will automatically appear and you can use these to view the hidden parts of the panel.
Figure 1 - Common Panel Layout
At the bottom of every panel is a message bar. Informative messages may appear here from time to
time.
2.2 Mandatory Fields
Mandatory fields are fields which you must complete. They are denoted by a coloured background.
By default, they are coloured cyan, though you may choose a different colour by editing the
PGT.lax file (see section 8.2).
Mandatory
fields
Figure 2 - Example of Mandatory Fields
INTEGRAL
Proposal Generation Tool
SUM
Doc.No: INT-SOC-SUM-018
Issue:
Date:
Page:
Issue 2.0
10 February 2006
10 of 30
2.3 Help Menu
Menus are located on the menu bar at the top of every panel (see 3.4.3, and 3.5.2, for details of the
different ways of accessing menus). One menu which is common to all panels in the PGT is the
Help menu. This menu contains at least two entries: Panel and Overview.
The Panel entry causes a help panel to be displayed which provides information about the panel to
which the help menu belongs. The Overview entry opens a help panel which contains an overview
of the major functionality in the PGT. This overview is the same no matter which Help menu was
used to activate it.
Figure 3 - Example Help Panel
2.4 Panel Menu
Every panel, except the Main Panel, contains a Panel menu with some or all of the entries Reset,
Print and Hide.
The Reset entry allows the user to reset all the inputs in the current panel to their default values.
The Print entry allows the contents of some panels to be sent to a printer.
The Hide entry closes the current panel, but preserves any data entered into any of the fields. This
means that if the panel is reopened, the data will be visible again.
INTEGRAL
Proposal Generation Tool
SUM
Doc.No: INT-SOC-SUM-018
Issue:
Date:
Page:
Issue 2.0
10 February 2006
11 of 30
3 Proposal Generation Tool Basics
3.1 Installing the Proposal Generation Tool
The PGT is written in the Java programming language and, as such, is platform independent,
meaning that the same software will run on many operating systems without modification.
However, in order to ease installation on different platforms and to allow local customisation of
certain parameters, the PGT is provided in a variety of platform specific packages. These packages
can be found on the Integral Web Site (see section 1.6 for the URL).
To install the package for a given platform, follow the instructions in the README.txt file which
can also be found on the Integral Web Site.
3.2 Starting the Proposal Generation Tool
The method of starting the PGT depends on the platform in use. UNIX users start the PGT by
running a script, whereas Windows users double click on a desktop icon. The README.txt file
provides details of how to start the PGT.
3.3 Enabled and Disabled Fields
Certain fields can become disabled or enabled depending on which selections or settings are made
to other fields in a panel. When a field is disabled, it is shown with gray text on a gray background,
and when it is enabled, it is shown with black text on a gray or coloured (if it is a mandatory field)
background.
Enabled field
Enabled
fields
Disabled fields
Figure 4 - Enabled and Disabled Fields
3.4 Using the Mouse
The mouse is used to move an on-screen pointer and to trigger events, such as activating menus and
buttons, making selections from pick-lists, moving the input focus from one field to another and
changing the positions of scrollbars.
INTEGRAL
Proposal Generation Tool
SUM
Doc.No: INT-SOC-SUM-018
Issue:
Date:
Page:
Issue 2.0
10 February 2006
12 of 30
3.4.1 Terminology
“Clicking” refers to pressing the left-hand mouse button while the pointer is over an item you want
to activate. For example, “click the OK button” means move the pointer to the OK button and press
(and release) the left-hand mouse button.
“Right-clicking” refers to clicking using the right-hand mouse button instead of the left-hand one.
“Dragging” refers to holding a mouse button down whilst moving the pointer.
3.4.2 Input Focus
Data can be entered into only one field at a time. Similarly, only one button, menu item or pick-list
can be activated at a time. The item which is currently active, that is, receiving input, is said to have
the “input focus”. Text entry fields are signified as having the input focus by a vertical bar (called
the “caret”) which usually flashes. Buttons and pick-lists have a faint rectangular box within them,
if they have the input focus. To transfer the input focus from one item to another, click on the item
you want to transfer the input focus to.
3.4.3 Menus
To open a menu, click on the name of the menu you wish to open in the menu bar (see Figure 1) of
the panel. To select an entry from the menu, click on the entry. An alternative way of making menu
selections is to hold the mouse button down over the menu bar and when the menu appears, drag the
pointer to your selection; when you release the mouse button, the entry under the pointer will be
activated.
3.4.4 Pick-Lists
A pick-list can be opened by clicking on it. To make a selection from the list, click on the entry you
want to select from the list.
Click here to move
up the list
Drag the scrollbar
to move up or down
the list
Click here to move
down the list
Figure 5 - Using Pick-Lists
If the list has many entries, not all will be visible at once and a scrollbar will be shown to the right
of the list. You can use this scrollbar to make visible the entries in the list which are currently
hidden. In order to make use of the scrollbar, you must not hold the mouse button down when you
open the pick-list. If you do hold the mouse button down and drag the pointer, you will only be able
INTEGRAL
Proposal Generation Tool
SUM
Doc.No: INT-SOC-SUM-018
Issue:
Date:
Page:
Issue 2.0
10 February 2006
13 of 30
to select the entries which are currently visible, because the pick-list will close as soon as you
release the mouse button.
3.4.5 Buttons and Checkboxes
To activate a button, just click on it. Similarly, to toggle the state of a checkbox, click on it.
3.5 Using the Keyboard
It is possible to use the majority of the PGT using only the keyboard. Most of the functionality of
the mouse can be replicated with a few simple key presses. However, the mouse may still be
necessary to make the PGT windows active in the desktop environment of your chosen platform.
Note that the SPACEBAR may be used in place of the ENTER key in the sections which follow.
3.5.1 Input Focus
To move the input focus from one item in a panel to another, press the TAB key on the keyboard.
Repeatedly pressing this key will cause the input focus to move to each item in turn. To reverse the
direction in which the input focus cycles, hold down the SHIFT key whilst pressing the TAB key.
3.5.2 Menus
Look at Figure 6 and notice that the initial letter of each of the menu names on the menu bar is
underscored. The underscored letter can be used in combination with the ALT key to open the
menu. For example, to open the Panel menu, hold down the ALT key and press the P key.
Figure 6 - Accessing Menus Using the Keyboard
Once a menu is open, the UP-ARROW and DOWN-ARROW cursor keys can be used to highlight
entries in the menu. To select an entry, use the cursor keys to highlight it, then press the ENTER
key. Alternatively, just press the letter key which corresponds to the underscored letter for the menu
entry you wish to select. For example, to select the Reset entry in the open Panel menu, just press
the R key. Similarly, to open the Print submenu, press the T key. Note that any letter in the name of
the menu entry may be underscored, not just the initial letter.
Some menu entries have keyboard shortcuts (known as accelerators), which are shown to the right
of the entry in a menu. For example, to reset the contents of the Observation Details Panel (Figure
6) press and hold the CTRL (Control) key then press the R key. This can be done whenever the
INTEGRAL
Proposal Generation Tool
SUM
Doc.No: INT-SOC-SUM-018
Issue:
Date:
Page:
Issue 2.0
10 February 2006
14 of 30
window is active, that is, you do not need to open a menu first. A complete list of keyboard
accelerators is shown in Appendix A.
3.5.3 Pick-Lists
To open a pick-list using the keyboard, press the TAB key until the pick-list gains the input focus
(see 3.4.2, and 3.5.1) then press the ENTER key. To traverse the list, use the UP-ARROW and
DOWN-ARROW cursor keys. When your chosen entry is highlighted, press the ENTER key to
select it.
3.5.4 Buttons and Check Boxes
A button can be activated by pressing the TAB key until the button has the input focus (see 3.4.2,
and 3.5.1), then pressing the ENTER key. To toggle the state of a check box, press the TAB key
until the check box has the input focus, then press the SPACEBAR (not the ENTER key).
3.5.5 Text fields
To enter text into a textfield, ensure it has the input focus (see 3.4.2, and 3.5.1) before typing. Some
textfields only allow numbers to be entered, while others will allow any character. All textfields
have a maximum number of characters (including spaces and carriage returns) which may be
entered and you will hear a beep when this limit is reached. Some textfields also limit the number of
lines which may be entered i.e. you can press ENTER only a limited number of times. Note that
textfields may sometimes resize themselves within a panel while you type. This allows the
components in a panel to make the best use of the available space for the input you have entered.
3.6 Exiting the Proposal Generation Tool
The PGT can be exited by selecting the Exit menu entry from the File menu in the Main Panel (see
Figure 7), or by pressing and holding the CTRL key and then pressing the E key while the Main
Panel is active.
Click Exit to quit
the PGT
Figure 7 - The File Menu
If you have made changes to your proposal, you will be asked if you would like to save your
proposal before exiting.
Doc.No: INT-SOC-SUM-018
INTEGRAL
Issue:
Date:
Page:
Proposal Generation Tool
SUM
Click Yes to open the Save
dialogue and save your
proposal
Issue 2.0
10 February 2006
15 of 30
Click Cancel if you do not
want to exit the PGT
Click No to exit the PGT
without saving your changes
Figure 8 - The Quit Dialogue
4 Saving, Loading and Printing
4.1 Saving
A proposal may be saved at any time by selecting the Save menu entry in the File menu of the Main
Panel (see Figure 7). This will cause the Save dialogue to appear.
Current directory
Use the pick-list to make
quick jumps to other
directories
Move one level up
the directory tree
Go to the “home”
directory
Create a new
folder/directory
List of files in
current directory
Click the Save button
to write the proposal
to the specified file
File name for saved
proposal
Click Cancel to close the
Save dialogue without
saving the proposal
Figure 9 - The Save Dialogue
The Save dialogue allows you to navigate around a local filesystem. The area in the centre of the
display shows the files and directories contained in the current directory. The current directory is
shown in the pick-list at the top of the display. You can move between directories by double
clicking on a directory icon or by choosing a directory from the pick-list.
To save your proposal, type a file name into the box provided and click the Save button. This will
save your proposal into the directory shown at the top of the display using the file name you gave.
If you change your mind about saving a proposal, click the Cancel button.
INTEGRAL
Proposal Generation Tool
SUM
Doc.No: INT-SOC-SUM-018
Issue:
Date:
Page:
Issue 2.0
10 February 2006
16 of 30
4.2 Loading
To load a proposal, select the Open menu entry in the File menu of the Main Panel (see Figure 7).
The Open dialogue will appear and this looks very similar to the Save dialogue, described above.
Indeed, you can navigate around your local filesystem in exactly the same way as you would in the
Save dialogue.
When you locate the proposal you wish to load, either double click on its name in the file list, or
click once on the name (the name will appear in the File name: box) and click the Open button.
Double click on the
proposal name to load
it into the PGT
If you click once on
the proposal name, click
the Open button to load
it into the PGT
Figure 10 - The Open Dialogue
4.3 Printing
4.3.1 The Print Options Dialogue
The paper size and the font used for printing can be chosen using the Print Options dialogue. To
open this, select the Options menu entry from the Print submenu in the File menu of the Main
Panel (see Figure 7).
Select paper size here
Choose the font by
clicking on its name
Click Cancel to discard
your selection and use
the current settings
Click the OK button when
you are happy with your
choice
Figure 11 - The Print Options Dialogue
INTEGRAL
Proposal Generation Tool
SUM
Doc.No: INT-SOC-SUM-018
Issue:
Date:
Page:
Issue 2.0
10 February 2006
17 of 30
Two paper sizes are supported, A4 and US letter. Click on the appropriate button at the top of the
dialogue to choose the paper size.
The central part of the dialogue lists the fonts available on your system. This list will vary from one
machine to another, but there are five standard fonts which are available on every system. These
are: Dialog, DialogInput, Monospaced, SansSerif and Serif. A sample of the selected font is shown
below the font list.
To make the selected font and paper size the current (active) choices, click the OK button. To
disregard the selections and close the dialogue, click the Cancel button.
4.3.2 Printing an Entire Proposal
To print a complete proposal, including all observations, choose the Proposal menu entry from the
Print submenu in the File menu of the Main Panel (see Figure 7). A Print dialogue will appear
which will allow you to select a destination for the print job (printer or file) and to start the print
job. The exact appearance of this dialogue will depend on the platform you are using.
4.3.3 Printing Admin Details
The data entered in the Admin Details Panel (see 5.2) can be printed separately by choosing the
Print menu entry from the Panel menu of the Admin Details Panel.
4.3.4 Printing Proposal Details
The data entered in the Proposal Details Panel (see 5.3) can be printed separately by choosing the
Print menu entry from the Panel menu of the Proposal Details Panel.
4.3.5 Printing Observations
The Print submenu in the Panel menu of the Observation Details Panel (see Figure 6) allows you to
print individual observations or all the observations in the proposal.
To print an individual observation, make sure the observation is displayed in the Observation
Details Panel (see 5.4) and choose the Current Observation menu entry from the Print submenu,
described in the previous paragraph. To print all the observations, choose the All Observations
menu entry from the same menu.
4.3.6 Printing the Observation Summary
A summary of all the observations in the proposal (one observation per line) can be printed by
choosing the Summary menu entry from the Print submenu in the Panel menu of the Observation
Details Panel (see Figure 6).
INTEGRAL
Proposal Generation Tool
SUM
Doc.No: INT-SOC-SUM-018
Issue:
Date:
Page:
Issue 2.0
10 February 2006
18 of 30
5 Entering Data
5.1 The Main Panel
When the PGT is first started, it is the Main Panel which is displayed. This panel acts like the parent
for all other panels and it is from this panel that you can access the other panels which make up the
PGT.
Figure 12 - The Main Panel
The Main Panel is divided into two sections. The top half of the panel contains buttons which open
other panels. These panels are described in later sections of this document. In addition, there is a
Check Proposal button which will run through a series of checks on your proposal and list
anything which is wrong or incomplete. This check can be performed at any time.
The lower half of the Main Panel is devoted to proposal submission. With the Submit Proposal to
ISOC button you are able to electronically send your proposal, via the Internet, to the ISOC. See
section 7, for more details on submitting a proposal.
5.2 The Admin Details Panel
To open the Admin Details Panel, select the Admin Details Panel button on the Main Panel. When
the panel first appears, only the upper part of the body of the panel is visible. To see the lower part,
click in the empty space below the scrollbar on the right-hand side of the panel.
INTEGRAL
Proposal Generation Tool
SUM
Doc.No: INT-SOC-SUM-018
Issue:
Date:
Page:
Issue 2.0
10 February 2006
19 of 30
Click here to
see the lower
part of the
panel
Figure 13 - The Admin Details Panel (upper part)
The Admin Details Panel contains fields which are used for administrative purposes. They are selfexplanatory. The lower part of the panel concerns co-investigators and data distribution. As this is
also self-explanatory, the lower part of the panel is not shown in this document.
5.3 The Proposal Details Panel
To open the Proposal Details Panel, select the Proposal Details Panel button on the Main Panel
(see Figure 12). As with the Admin Details Panel, this panel is sized to show only the upper part of
the body of the panel when first opened.
5.3.1 Submitting the proposal as associated with a key programme
At the bottom of the proposal details panel, there is a checkbox labelled “Associate with Key
Programme”. Select this option if you want your proposal to be associated with an INTEGRAL Key
Programme (KP). Such a proposal is internally in ISOC referred to as a key programme
subscription. Note that in AO-4, the only KP implemented will be performed around the Galactic
Centre, but it is expected that in subsequent AO's additional Key Programme observations will be
available. See document INT/SDG/05-0241/Dc for a complete description of the KP philosophy,
and for description of the Galactic Centre observation.
INTEGRAL
Proposal Generation Tool
SUM
Doc.No: INT-SOC-SUM-018
Issue:
Date:
Page:
Issue 2.0
10 February 2006
20 of 30
5.3.2 Attaching the Scientific Justification
At the bottom of the Proposal Details Panel is a button marked New Attachment.
Figure 14 - Adding Attachments
Pressing this button will open the Attach dialogue, a dialogue very similar to the Open dialogue
described in section 4.2. You can use this dialogue to attach a scientific justification, but only if the
file containing your scientific justification is in PostScript or PDF format.
Attachments must be
in PostScript or PDF
format
Figure 15 - The Attach Dialogue
INTEGRAL
Proposal Generation Tool
SUM
Doc.No: INT-SOC-SUM-018
Issue:
Date:
Page:
Issue 2.0
10 February 2006
21 of 30
Once you select the Attach button, the name of your attachment will be shown in the Current
Attachment box of the Proposal Details Panel (see Figure 14). If you save your proposal, the
attachment will be saved with it (in compressed form), so there is no need to re-attach the file every
time the proposal is loaded. However, if you make changes to your scientific justification after
attaching the file to your proposal, you will need to re-attach the changed file.
Note that it is not possible to remove an attachment on its own (you can select Reset from the Panel
menu and this will remove the attachment, but it will also clear the other fields). However, you can
replace the existing attachment with another one at any time, simply by using the Attach dialogue
again.
5.4 The Observation Details Panel
To open the Observation Details Panel, select the Observation Details Panel button on the Main
Panel (see Figure 12). As with the Proposal Details Panel, this panel is sized to show only the upper
part of the body of the panel when first opened. The appearance of the panel is different if on
Proposal Details Panel it has been indicated that the current proposal should be submitted as part of
a key programme. This is described in section
5.4.1 Observation Numbering
Each observation in a proposal is numbered sequentially, as shown in the Number field on the left
of the tool bar at the top of the panel (see Figure 16). Here, you can see the number of the currently
displayed observation and the total number of observations in the proposal.
Whenever an observation is added to a proposal, it is added at the end of the list. For example,
adding an observation to a proposal which contains ten observations will result in the new
observation being given the number eleven. When removing an observation, those observations
with a higher number than the observation which was removed will have their numbers reduced by
one. For example, removing observation number five from a proposal which contains ten
observations will result in observation numbers six to ten being renumbered five to nine
respectively.
INTEGRAL
Proposal Generation Tool
SUM
Doc.No: INT-SOC-SUM-018
Issue:
Date:
Page:
Issue 2.0
10 February 2006
22 of 30
Navigation buttons
Tool bar
The sum of the
durations in all
observations in
this proposal
The current
observation
number and
the total number
of observations
in the proposal
Click here to
see the lower
part of the
panel
Figure 16 - The Observation Details Panel (upper part)
5.4.2 Displaying Observations
Only one observation may be displayed at a time. To display a different observation, use the
navigation buttons on the tool bar. The First button always causes observation number one to be
displayed. The Last button causes the last observation which was added to the proposal to be
displayed (this is always the observation with the highest number, because observations are always
added to the end of the list). The Next button causes the current observation number to increase by
one, i.e. pressing this button repeatedly will cause each observation to be displayed in numerical
order. The Previous button works in the reverse manner to the Next button, i.e. the current
observation number will be decreased by one. Note that this button does not necessarily return you
to the observation you were looking at previously, so if the proposal contains three or more
observations and you click the First button, then the Last button and then the Previous button, you
will not be looking at observation number one, but rather, observation number n-1, where n is the
number of observations in the proposal.
INTEGRAL
Doc.No: INT-SOC-SUM-018
Proposal Generation Tool
SUM
Issue:
Date:
Page:
Issue 2.0
10 February 2006
23 of 30
5.4.3 The Observation Menu
The Observation Details Panel has an additional menu, named Observation.
Figure 17 - The Observation Menu
Using this menu you can manipulate observations in your proposal. The menu entries should be
self-explanatory: to add a new observation, select Add (the display will show the new observation);
to remove the currently displayed observation, select Delete; to copy the currently displayed
observation, select Duplicate (the display will show the copied observation); to check the currently
displayed observation, select Check; to display a particular observation, select Go To.
5.4.4 Observation Details for Key Programme associated Proposals
Due to the Key Programme (KP) pointings and instrument configuration being pre-defined for the
observations, the Galactic Centre observations, the only information that has to be provided here by
you is that related to the Target Source you would like to analyze from the KP data. The following
sections will describe various observation-specific parameters. For KP subscriptions these will be
blocked in this panel, because they cannot be modified under the proposer request, as happens for
ordinary open time observations.
5.4.5 Instrument Settings
In the lower half of the Observation Details Panel you can choose certain instrument settings. If an
instrument has only one mode available for selection, the Mode pick-list for that instrument will be
disabled, as there is no choice to make. Similarly, if there are no parameters to set for an instrument,
the Parameters button for that instrument will be disabled.
5.4.6 JEM-X TM Formats
Only one of the two JEM-X instruments is operated at a time. Instrument settings can be given for
only one JEM-X – the settings given will refer to the active JEM-X.
If you click the Parameters button for the JEM-X instrument, the Mode Parameters panel for that
instrument will be displayed. This panel allows you to set the Primary and Secondary TM Formats.
The allowed Secondary TM Formats are dependent on the Primary TM Format selected and
correspond to a matrix of allowable Primary and Secondary TM Format combinations, see RD-10
and RD-11.
INTEGRAL
Proposal Generation Tool
SUM
Doc.No: INT-SOC-SUM-018
Issue:
Date:
Page:
Issue 2.0
10 February 2006
24 of 30
Figure 18 – The JEM-X Mode Parameters Panel. The list of secondary TM Formats varies
depending on the choice of Primary TM Format.
6 Online Tools
Two online tools are provided to aid proposal writing: the Observation Time Estimator (OTE) and
the Target Visibility Predictor (TVP). The tools can be accessed on the ISOC website, at
http://integral.esac.esa.int/isoc/html/AO_prop_tools.html. For instructions on their use, please refer
to the respective user manuals, that are avaialable on the above address as well.
7 Submitting a Proposal to ISOC
The PGT allows you to send your proposal electronically to the ISOC. In order for this to work,
your computer must be connected to the Internet.
7.1 Submitting for the First Time
The lower half of the Main Panel (see Figure 12) allows you to submit your proposal to the ISOC
when it is complete and you are happy with it.
Clicking the Submit Proposal to ISOC button starts the submission process. First, the PGT will
check your proposal. If it fails any checks, the submission process will be aborted and you will need
to correct the errors shown in the Failed Checks Panel. If it passes the checks, a panel is displayed
showing a summary of the proposal. Click Submit to send the proposal, Cancel to abort the
submission.
One of the checks is the confirmation of the source coordinates entered against the Simbad
database. In case the name of your source is not known to Simbad, or if the coordinates deviate, a
warning is printed in the Failed Checks Panel. If your PC is not connected to the internet, a warning
to this effect is printed also. These are nothing more than warnings for your convenience. You will
still be able to submit your proposal, although obviously for submission an internet connection is
required.
INTEGRAL
Proposal Generation Tool
SUM
Doc.No: INT-SOC-SUM-018
Issue:
Date:
Page:
Issue 2.0
10 February 2006
25 of 30
Figure 19 - The Summary Panel
If you click Submit, the PGT will attempt to establish contact with a computer at the ISOC which
has been set up to receive proposals. Once contact is established, your proposal will be sent. If the
proposal was sent successfully, the dialogue shown in Figure 20 will be displayed.
Figure 20 - Successful Submission Dialogue
When it receives your proposal, the computer at the ISOC will check the proposal (these checks are
different from those performed by the PGT) and return an email message to you confirming receipt
and providing a Proposal ID for your proposal (you will need this ID if you want to resubmit the
proposal). The message will also tell you whether your proposal has been accepted (it passed the
checks) or rejected (it failed the checks).
7.2 Repeating a Submission
If you realise you have made a mistake, or you just want to make changes to a proposal you have
already submitted, you can resubmit a proposal using the Proposal ID you received when you
submitted the proposal for the first time.
Make the changes you wish to make to the proposal and enter the Proposal ID in the box provided
at the bottom of the Main Panel (see Figure 12). The Resubmit Proposal to ISOC button will be
enabled and the Submit Proposal to ISOC button will be disabled (to prevent you pressing the
wrong button). When you click the Resubmit Proposal to ISOC button, the PGT will repeat the
proposal submission process, described in section 7.1
INTEGRAL
Proposal Generation Tool
SUM
Doc.No: INT-SOC-SUM-018
Issue:
Date:
Page:
Issue 2.0
10 February 2006
26 of 30
It is not allowed change the “Associate to Key Programme” checkbox on the Proposal Details
Panel, and resubmit. The reason is that proposal ID is different for a proposal that is associated to a
Key Programme, and a proposal that is not. You are therefore not allowed to change this checkbox
and re-use the same ID. In this case, when the “Associate to Key Programme” checkbox must be
changed, simply submit the proposal without specifying the ID. You will then be given a new ID
that is compatible with your selection.
The computer at ISOC will use the Proposal ID you provide to find your old proposal in the ISOC
database. If it is found, your amended proposal will replace the old one in the ISOC database. If it
can’t be found, the email message which is returned to you will inform you of that fact (make sure
you have entered the Proposal ID correctly).
NOTE: The PGT cannot prevent you submitting the same proposal multiple times. Each time you
submit a proposal, you will receive a new Proposal ID. It is not possible to undo a submission, so if
you want to avoid having duplicate (or very similar) proposals in the ISOC database (each of which
will be reviewed by the TAC), use the Resubmit Proposal to ISOC button when you need to make
changes to a previously submitted proposal.
7.3 Obtaining a Copy of a Submitted Proposal from ISOC
Once you have submitted your proposal, you should save it (see 4.1) to ensure you have a copy on
your local system for your own reference, or to allow you to resubmit the proposal at a later date.
However, life is full of surprises and mistakes happen occasionally, so if you accidentally delete
your proposal, or your machine catches fire, do not despair! You can request a copy of your
proposal by sending an email to the ISOC Helpdesk at the email address shown in section 1.5, page
1. Just state in the body of the message that you would like a copy of your proposal and give the
Proposal ID of the proposal. The proposal will be emailed to you at the email address you entered
into the proposal. If this email address is wrong, you should provide the correct address in your
email to the Helpdesk.
7.4 Transfer of the Scientific Justification
In exceptional cases the scientific justification can be sent to ISOC by using ftp. This may be done
after arrangement with the helpdesk.
8 Extra Features
8.1 Autosave
To prevent you losing precious hours of work through a problem with your computer, an autosave
feature is available which will automatically save your proposal every so often. The frequency at
which your proposal is saved and the file name used for the saved proposal can be defined by you.
INTEGRAL
Proposal Generation Tool
SUM
Doc.No: INT-SOC-SUM-018
Issue:
Date:
Page:
Issue 2.0
10 February 2006
27 of 30
The autosave feature is enabled by editing the PGT.lax file in your PGT installation directory. Open
the PGT.lax file in an editor and find the following lines:
AutosaveSeconds=0
AutosaveFile=
By default, the autosave feature is disabled. To enable autosaving, set the AutosaveSeconds
variable to a value which represents the number of seconds you would like to elapse between
successive saves of your proposal. For example, to have your proposal automatically saved every
five minutes, edit the line to read:
AutosaveSeconds=300
You must also specify a filename for the saved proposal by editing the AutosaveFile variable. For
example, to save the proposal as “my_proposal” in a directory called “tmp” (which must already
exist) on the top level of your disk drive, you would edit the line as follows:
On a UNIX system:
AutosaveFile=/tmp/my_proposal
On a Windows system:
AutosaveFile=C:/tmp/my_proposal
NOTE: Use / (slash) characters, not \ (backslash) characters and do not put spaces around the =
(equals) symbols.
8.2 Changing the Mandatory Item Colour
By default, the background colour for mandatory items is cyan. This can be changed by editing the
PGT.lax file found in your PGT installation directory. Open the PGT.lax file in an editor and find
the following line:
MandatoryItemColour=Cyan
The colour specified to the right of the equals symbol may be set to one of the following values:
Black, Blue, Cyan, DarkGray, Gray, Green, LightGray, Magenta, Orange, Pink, Red, White or
Yellow.
NOTE: These names are case sensitive. Do not put spaces anywhere on the line.
The text colour is always black, so setting MandatoryItemColour=Black is not terribly useful.
Similarly, the non-mandatory colour is always white, so setting MandatoryItemColour=White
means you will not be able to tell the mandatory items from the non-mandatory items.
INTEGRAL
Proposal Generation Tool
SUM
Doc.No: INT-SOC-SUM-018
Issue:
Date:
Page:
Appendix A: Keyboard Shortcuts
A.1
Main Panel
Table 1- Main Panel Keyboard Shortcuts
Key Press
ALT-A
ALT-C
ALT-E
ALT-F
ALT-F E
ALT-F O
ALT-F P
ALT-F P O
ALT-F P P
ALT-F S
ALT-H
ALT-H A
ALT-H O
ALT-H N
ALT-O
ALT-P
ALT-V
CTRL-E
CTRL-H
CTRL-O
CTRL-S
A.2
Function
Open the Admin Details Panel
Check Proposal
Open the Observation Time Estimator
Open the File menu
Exit the PGT
Open the Open dialogue
Open the Print submenu
Open the Print Options dialogue
Print the Proposal
Open the Save dialogue
Open the Help menu
Open the About dialogue
Open the Overview Panel
Open the Main Panel Help
Open the Observation Details Panel
Open the Proposal Details Panel
Open the Target Visibility Predictor
Exit the PGT
Open the Main Panel Help
Open the Open dialogue
Open the Save dialogue
Admin Details Panel
Table 2 - Admin Details Panel Keyboard Shortcuts
Key Press
ALT-H
ALT-H N
ALT-H O
Function
Open the Help menu
Open the Admin Details Panel Help
Open the Overview Panel
Issue 2.0
10 February 2006
28 of 30
INTEGRAL
Doc.No: INT-SOC-SUM-018
Proposal Generation Tool
SUM
ALT-P
ALT-P E
ALT-P R
ALT-P T
CTRL-E
CTRL-H
CTRL-P
CTRL-R
A.3
Issue:
Date:
Page:
Issue 2.0
10 February 2006
29 of 30
Open the Panel menu
Close the Admin Details Panel without losing data
Reset the Admin Details Panel fields to their default settings
Print the admin details
Close the Admin Details Panel without losing data
Open the Admin Details Panel Help
Print the admin details
Reset the Admin Details Panel fields to their default settings
Proposal Details Panel
Table 3 - Proposal Details Panel Keyboard Shortcuts
Key Press
ALT-H
ALT-H N
ALT-H O
ALT-P
ALT-P E
ALT-P R
ALT-P T
CTRL-E
CTRL-H
CTRL-P
CTRL-R
A.4
Function
Open the Help menu
Open the Proposal Details Panel Help
Open the Overview Panel
Open the Panel menu
Close the Proposal Details Panel without losing data
Reset the Proposal Details Panel fields to their default settings
Print the proposal details
Close the Proposal Details Panel without losing data
Open the Proposal Details Panel Help
Print the proposal details
Reset the Proposal Details Panel fields to their default settings
Observation Details Pane
Table 4 - Observation Details Panel Keyboard Shortcuts
Key Press
ALT-H
ALT-H N
ALT-H O
ALT-O
ALT-O A
ALT-O C
ALT-O D
ALT-O G
Function
Open the Help menu
Open the Observation Details Panel Help
Open the Overview Panel
Open the Observation menu
Add an observation to the proposal
Check the current observation
Delete the current observation from the proposal
Go to a specific observation
INTEGRAL
Proposal Generation Tool
SUM
ALT-O U
ALT-P
ALT-P E
ALT-P R
ALT-P T
ALT-P T A
ALT-P T C
ALT-P T S
CTRL-E
CTRL-H
CTRL-P
CTRL-R
Doc.No: INT-SOC-SUM-018
Issue:
Date:
Page:
Issue 2.0
10 February 2006
30 of 30
Copy an observation and add it to the proposal
Open the Panel menu
Close the Observation Details Panel without losing data
Reset the Observation Details Panel fields to their default settings
Open the Print submenu
Print the details of all observations
Print the details of the current observation
Print a summary of all observations
Close the Observation Details Panel without losing data
Open the Observation Details Panel Help
Print all observation details
Reset the Observation Details Panel fields to their default settings