1
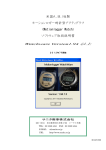
Ver 5
WatchWare Clock Collector
WatchWare
http://www.watchware.net
Ver 5
Ver 5.0.0
Welcome to Clock Collector Version 5
WatchWare Clock Collector will help you manage your entire horological collection. Whether
you collect clocks, horological tools, or any combination of horological items, this program will
make it easy and fun to manage your collection. It can help you keep track of additional clocks
you want for your collection as well as help keep track of clocks you have sold from your
collection. Clock Collector is a comprehensive program designed to assist you with data entry.
You don't need to be an expert to be able to describe your Clock professionally. There are
multiple drop down fields that contain helpful information to guide you with entering accurate
information.
There are numerous reports to let you maintain hardcopy records of your collection. These
reports will make it fun to review your collection without having to take the clocks down from
the shelf.
Whether you are a new collector or an old time collector, this program will add functionality,
usability, and security to your collection.
2
Ver 5.0.0
Once and for all, throw away those handwritten lists or spreadsheets of the clocks you have
purchased over the years … just print out a report from Clock Collector and you will have an
instant up to date list of your entire collection! Clock Collector can be used to track collections
both big and small. It provides space to record clocks, literature, tools, etc.
Clock Collector contains a complete, updateable database of manufactures, escapements, case
material types, etc. By selecting from a drop down list of choices, your entry time is decreased
significantly.
Lots of reports are included. Print a list of all your clocks with or without pictures. Print an
insurance report to show the value and contents of your collection. Print a summary to show
what you've spent on your collection (some of you may want to skip this one) and what it's
total value is!
Clock Collector was designed exclusively for the Clock collector. It is not just a make-it-work add-in to
a collection program. We started from the ground up, breaking the mold of other collection software
– you'll notice the difference. WatchWare has been helping collectors since 1995.
3
Ver 5.0.0
Contents
Welcome to WatchWare Version 5 ......................................................................................................... 2
Installation.............................................................................................................................................. 8
WatchWare .............................................................................................Error! Bookmark not defined.
Import Utility ...........................................................................................Error! Bookmark not defined.
Picture Folder ...................................................................................................................................... 8
Linking the Data File ............................................................................................................................ 9
Known Issues with Windows Vista ....................................................................................................... 9
Getting Started ..................................................................................................................................... 11
Data File Linking ................................................................................................................................ 11
Common Form Features ....................................................................................................................... 12
Toolbars ............................................................................................................................................ 12
Tabs .................................................................................................................................................. 12
Saving Records .................................................................................................................................. 12
Find Record or Select Record .............................................................................................................. 13
Record Selector for Deletion............................................................................................................... 13
Record Navigation ............................................................................................................................. 13
Using Drop Down Lists ....................................................................................................................... 13
Sort Buttons....................................................................................................................................... 13
Data Input ......................................................................................................................................... 13
Scroll Bar ........................................................................................................................................... 14
Shortcut Menu ................................................................................................................................... 14
WatchWare Menu Ribbon .................................................................................................................... 15
Set Your Watch Pictures Folder Path .................................................................................................. 15
Data File Linking ................................................................................................................................ 15
About WatchWare ............................................................................................................................. 16
Exit .................................................................................................................................................... 16
Main Menu ........................................................................................................................................... 17
Input Forms ....................................................................................................................................... 17
Watch Collection Form ......................................................................................................................... 18
Find Watch ........................................................................................................................................ 18
4
Ver 5.0.0
Select Watch to Edit........................................................................................................................... 19
Tool Bar ............................................................................................................................................. 19
Close.............................................................................................................................................. 19
Forms ............................................................................................................................................ 19
Reports .......................................................................................................................................... 19
Manufacturer ................................................................................................................................ 20
Utilities .......................................................................................................................................... 20
New Record ................................................................................................................................... 20
Save............................................................................................................................................... 20
Apply Filter .................................................................................................................................... 21
Remove Filter ................................................................................................................................ 21
Delete Watch ................................................................................................................................. 21
Record ID ........................................................................................................................................... 21
Watch Description ............................................................................................................................. 21
Watch Type ....................................................................................................................................... 22
Watch Info Tab .................................................................................................................................. 23
Data Fields ..................................................................................................................................... 23
Storage Case No. ........................................................................................................................ 23
Sale? Sold?................................................................................................................................. 23
Watch No. .................................................................................................................................. 23
Size ............................................................................................................................................ 24
Serial No. ................................................................................................................................... 24
Jewels ........................................................................................................................................ 24
Manufacturer ............................................................................................................................ 24
Circa .......................................................................................................................................... 25
Condition ................................................................................................................................... 25
Positon Adjustments .................................................................................................................. 25
Running Condition ..................................................................................................................... 25
Winding Mechanism .................................................................................................................. 26
Movement ................................................................................................................................. 26
Model ........................................................................................................................................ 27
5
Ver 5.0.0
Grade......................................................................................................................................... 27
Dial Type .................................................................................................................................... 28
Case/Cost Tab.................................................................................................................................... 29
Data Fields ..................................................................................................................................... 29
Condition ................................................................................................................................... 29
Material ..................................................................................................................................... 29
Configuration ............................................................................................................................. 30
Manufacturer ............................................................................................................................ 31
Case Features ............................................................................................................................ 31
Purchase Information ................................................................................................................ 32
Repair Costs ............................................................................................................................... 32
Comments Tab................................................................................................................................... 32
Watch Pictures .................................................................................................................................. 33
Adding Pictures.............................................................................................................................. 33
Viewing Pictures ............................................................................................................................ 34
Picture Zooming ............................................................................................................................ 34
More Pictures Tab.............................................................................................................................. 34
Quick Entry Form .................................................................................................................................. 35
Quick Review Form ............................................................................................................................... 35
Watch Tags ........................................................................................................................................... 36
Selling Watches..................................................................................................................................... 38
Sold Watch ........................................................................................................................................ 39
Archive List of Watches Sold .............................................................................................................. 39
Remove ‘Sold’ Watches ................................................................................................................. 40
Exporting Watch Data to Excel.............................................................................................................. 41
Misc. Items and Parts............................................................................................................................ 42
Tools ..................................................................................................................................................... 43
Suppliers ............................................................................................................................................... 44
Literature and Books............................................................................................................................. 45
Customers ......................................................................................................................................... 46
Printing Labels ................................................................................................................................... 47
6
Ver 5.0.0
Customer Phone List .......................................................................................................................... 47
Wish List ............................................................................................................................................... 48
Owner Information ............................................................................................................................... 49
Reports ................................................................................................................................................. 50
Example Reports ................................................................................................................................ 51
Single Watch Reports ..................................................................................................................... 51
Watch Cards .................................................................................................................................. 52
Watch Index .................................................................................................................................. 53
Watch Index2 ................................................................................................................................ 54
7
Ver 5.0.0
Installation
The Clock Collector program is a Microsoft Access database built in two parts, the program file and the
database file. The program file is separated from the database file so that updates can be provided if
necessary without impacting your data file.
Ver 5 database file has changed from previous versions in that it is one single file rather than multiple
database files. This makes file management easier.
The database program uses the runtime version of Microsoft Access 2007. This is included with the
installation package and will install automatically. In addition to MS Access runtime, a separate program
file will install an ActiveX file (DBPix20.ocx) that is used for picture handling in the Clock Collector
program. This file will also be automatically installed. Please do not delete the folder c:\Program
Files\DBPix 2.0 Control. This is where the ActiveX file resides.
Clock Collector
To install Clock Collector, insert the CD and the setup program should automatically open if autorun is
enabled. If it is not enabled, open Windows Explore, select your CD drive and double-click the setup.exe
file in the root directory. The setup will start. It is recommended that you accept the default installation
path c:\Program Files\WatchWare or you will have to re-link your database file.
The Clock Collector program and database file will be installed and a shortcut will be created that can be
found by clicking on <Start><All Programs><ClockCollector5>. After the Clock Collector program files are
installed, the runtime version of Microsoft Access will be installed. Upon completion a separate
installation file will run to install the ActiveX file. If this file does not install for some reason, it is included
on the CD with the file name “DBPixs.exe”. It can be found on the CD in the “WatchCollector5\Files ”
folder or you will find a copy that was copied to the “c:\Program Files\WatchWare” folder.
Picture Folder
Clock Collector Ver 5 does not store pictures in the database file. Instead it uses links to picture files.
Once you open Clock Collector Ver 5 for the first time, you need to set the path for you picture folder.
Do this by clicking on “Utilities” found on the “WatchWare” ribbon. Select “Set Picture Folder” to open a
folder browser window so you can select the folder where you store your watch pictures. It is
recommended that you create a subfolder under the WatchWare folder for this. Picture files should be
.jpg format.
8
Ver 5.0.0
Linking the Data File
If needed, you can re-link the data file. This should only be necessary if you install WatchWare to a
folder other than the default folder. Select “Link Data File” from “Utilities” found on the “WatchWare”
ribbon. A browser window will open to the default path “C:\Program Files\WatchWare”. Select the file
“ClockData.accdb” and the data tables will be re-linked.
Known Issues with Windows Vista
If you are using Windows Vista, you will need to change the permissions on the “C:\Program
Files\Watchware” folder to allow you to write to the data file. Vista starts with this folder with “Read
Only” permissions. To change the folder permissions, perform the following steps
STEP 1: Right click on the “WatchWare” folder (using Windows Explorer)
STEP 2: Click on the “Security” tab
STEP 3: Click on the <Edit> button
9
Ver 5.0.0
STEP 4: Select “Users”, click on “Full Control” and then <OK>
10
Ver 5.0.0
Getting Started
After you have installed Clock Collector you can open the program by clicking on <Start><All
Programs><WatchWare><Clock Collector>.
Data File Linking
The data file is where all the data you input is stored. The file name is ClockData.accdb. It also contains
all the data for the drop down lists that make data entry easier.
If you installed it to the default installation folder c:\program files\watchware, you will not have to relink the data file. If you installed the program to any other folder, you will have to re-link to the database
file. To do this click on the ‘Ribbon’ at the top of the open program and select <Utilities><Link Data File>.
A browser window will open to allow you to find the folder where the ClockData.accdb file is located.
Select the file and the program will link the tables.
11
Ver 5.0.0
Common Form Features
WatchWare contains a number of features to make entering and finding data easier.
Toolbars
Most input forms have a toolbar on them to allow selecting additional features associated with that
particular form. The only menu bar (now referred to as a ribbon) available is at the top of the program
window and not related to any particular form. Menu bars and tool bars are very similar and common to
most programs you typically use. You will use the form toolbar to open additional forms, reports, and to
perform various functions.
Tabs
The watch data form contains a tabbed control for data collection. The data tab has multiple tabs for
different classes of information. To move between pages on the control, click on the tab you want.
Saving Records
You can save a record you are currently working on by clicking the <Save> button or by moving to
another record. One thing to keep in mind that if you select a report to print prior to saving the record,
it will not appear in the report. You must move off the current record or click the <Save> button first.
12
Ver 5.0.0
Find Record or Select Record
Most forms have either a Find Record or Select Record capability. The Find Record method utilizes a
drop down combo box that shows all available records and allows you to choose from the list which
record to make current. The Select Record method displays a list of records from which you can click on
the record you want to make current. Both methods do exactly the same thing.
Record Selector for Deletion
The record selector used for selecting a record deletion is the vertical bar on the left side of a form.
When you click on this vertical bar, the entire current record is selected. After selecting a record, the bar
will turn a darker color. Once this happens, you can press the <DEL> key on your keyboard to delete the
current record. The main watch input form does not use the record selector, instead has a “Delete
Watch” button on the toolbar.
Record Navigation
To move between records, you use the record navigation buttons on the bottom left of each form.
There are navigation buttons for next, previous, first, last, and new records. You may also type the
number of the record you want to go to in the text box. NOTE: this is not the same as "Watch No.".
Using Drop Down Lists
There are numerous drop down lists available to assist you with choosing the correct data to enter. You
can either choose from the list available or type something not in the list. Drop down lists are generally
multicolumn lists that contain the data to be entered in the field in the first column and informational
data to explain or assist you in the second column. All of the drop down lists can be edited by selecting
the appropriate one from the <Utilities> option found on the toolbar. NOTE: You can also double-click
any drop down list to open the appropriate utility form for adding/editing.
Sort Buttons
Sort buttons are used to sort records either ascending or descending. On the main watch input form,
there are sort buttons for sorting the “Find and Select” list of watches in the database for each column
of data in the search list.
Data Input
Data input is done by either typing in the data, selecting from the drop down lists, or by using one of the
available "Description Calculators". The "Description Calculators" provide the means to automatically
generate descriptions for data fields such as movement description, dial description, or case material
description. These description calculators format the information into common descriptions found in
many of the watch collector books found on the market and used by professionals for describing
watches.
13
Ver 5.0.0
Scroll Bar
Drop down lists or search lists will generally have a scroll bar on the right hand side for scrolling up or
down through the list of data that the field contains. These scroll bars work the same as the scroll bars
found on any other program.
Shortcut Menu
The shortcut menu is available by right clicking when the cursor is in any data input field. This pop-up
menu allows you to sort or filter records.
14
Ver 5.0.0
WatchWare Menu Ribbon
The new style “Ribbon” replaces the menu bar found in previous versions. This ribbon allows you to
open the Main Menu back up if you accidentally close all the forms.
Set Your Watch Pictures Folder Path
WatchWare Ver 5 does not store pictures in the database file. Instead it uses links to picture files. Once
you open WatchWare Ver 5 for the first time, you need to set the path for you picture folder. Do this by
clicking on “Utilities” found on the “WatchWare” ribbon. Select “Set Picture Folder” to open a folder
browser window so you can select the folder where you store your watch pictures. It is recommended
that you create a subfolder under the WatchWare folder for this. Picture files should be .jpg format.
Data File Linking
The data file is where all the data you input is stored. The file name is WatchwareData.accdb. It also
contains all the data for the drop down lists that make data entry easier.
If you installed it to the default installation folder c:\program files\watchware, you will not have to relink the data file. If you installed the program to any other folder, you will have to re-link to the database
file. To do this click on the ‘Ribbon’ at the top of the open program and select <Utilities><Link Data File>.
15
Ver 5.0.0
About WatchWare
Clicking on “About” will open the information form that shows the version of WatchWare you have.
Exit
Clicking on <Exit> will close the program. You can also close the program by clicking on the
found at the top right hand corner of the program.
16
Ver 5.0.0
Main Menu
The Main Menu is the form that allows access to the different data input forms.
Input Forms
Input forms include separate forms for importing your watch collection, other miscellaneous horological
tools and items, tools, literature, horological suppliers you want to keep track of, your customers (if you
sell watches), your wish list of future purchases and owner information which appears on various
reports.
The Main Menu is the launching location for all other data input forms.
17
Ver 5.0.0
Watch Collection Form
In Version 5, the watch, wristwatch, and movement collection forms have been combined into one form
to make it easier to switch between watch types.
Find Watch
There are four drop down lists to help you find a watch previously entered into your collection. You can
find a watch by serial number, watch number, storage case number, or model. The “Find Watch” fields
are colored yellow to differentiate them from a data entry field. You cannot enter add data using a “Find
Watch” field, only select from previously entered watches. You can click on the drop down list and then
either use the scroll bars or start typing the watch data of the watch you are looking for.
18
Ver 5.0.0
Select Watch to Edit
This yellow colored list of watches is another type of search list. It contains all the watches in your
collection and if you click on any watch in the list, it will become the current record for your review or
for editing. At the top of the search list there are sort buttons for each column of data showing. If you
want to sort by serial number to make it easier to find a watch, click on the sort accending button
or the sort decending button
that are directly above the serial number column.
Tool Bar
The tool bar contains buttons to allow various functions or access to reports or other forms.
Close
The <Close> button will close the current form
Forms
The <Forms> button is a drop down list to provide access to other useful forms.
Reports
The <Reports> button is a drop down list to provide access to the various reports available for printing.
19
Ver 5.0.0
Manufacturer
The <Manufacturer> button allows you to select from US, European, or Wristwatch manufacturers.
When you select a manufacturer, the data entry drop down lists for manufacturer and size are changed
to that manufacturer and sizes. Whichever manufacturer was last set when you close the Watch
Collection form will be the default the next time you open the form.
Utilities
The <Utilities> button provides you a list of various input forms that provide the data found in different
drop down lists on the Watch Collection input form. If you want to add to any drop down list, such as
adding a new case manufacture to the list so it will be available in the future when adding watches, click
on “Case Manufacture” when the list of “Utilities” opens. A pop-up form will open for adding/editing
“Case Manufactures”. You can also open up a utility pop-up by double-clicking on the data entry dropdown list for that information on the watch input form.
New Record
The <New Record> button will move off the current record (automatically saving it) and go to a new
blank watch record.
Save
The <Save> button will save the current record with any data you have entered up to that point.
20
Ver 5.0.0
Apply Filter
The <Apply Filter> button will apply the last filter you used on your watch record set. Filtering is used to
view/print subsets of your watch collection. The last filter you used remains available until you change
it. If the last filter you used was not on the “Watch Type” you are currently working with (ie: last filter
was on wristwatches and now you are working on pocket watches) you will have to click the <Remove
Filter> button first and then create a new filter.
Remove Filter
The <Remove Filter> button removes the last filter used and resets the sort order back to its original
state.
Delete Watch
The <Delete Watch> button will delete the current watch record. You will be given a chance to cancel
the delete prior to the actual deletion.
Record ID
The watch record ID is an automatically assigned number that cannot be changed. Every time you enter
a new watch record, the assigned number is incremented by one. If you delete a watch, these numbers
do not change. The deleted record ID is gone but the numbers continue to increment up from the last
assigned number. You may want to use this number as part of your “Watch No.” since the number will
never change.
Watch Description
The watch description field contains a description of the data you enter for the watch. The field itself is
not changeable. If you change a field on the watch input form, the description field will automatically
reflect that change. This description field shows the description of your watch as it will appear on some
of the printable reports.
21
Ver 5.0.0
Watch Type
The watch input form is used for pocket watches, wristwatches and movements (watches without
cases). To select which type of watch you are entering data for, select the type by clicking on the
appropriate choice. The selection type is found next to the input form title.
When you select the watch type, the form title changes to indicate the watch type being entered.
The selection you make will remain the default until you change it. If you happen to enter data on the
form and realize you forgot to change to the correct type before entering data, you can change the type
without deleting already entered data by clicking on or off the watch type checkboxes. Another
possibility is that you add a case to a movement that was in your database so that you now want to
change the “Mvmt Only” to pocket watch. These check boxes are found next to the “Find Watch” search
fields.
Notice that there are only two check boxes available. If the watch is a pocket watch, both checkboxes
should be unchecked. These checkboxes will default to the same type as you watch type selection so
you should not have to worry about these checkboxes unless you need to change the watch type.
22
Ver 5.0.0
Watch Info Tab
Data Fields
Storage Case No.
If you store your watches in cases, it is convenient to number the cases
and enter the storage case number for each watch so you can find it easily. This field is a drop down that
allows you to select previously entered storage case numbers for any watch. You can use any
combination of letters and/or numbers to designate the storage case.
Sale? Sold?
The “Sale?” checkbox is used to designate the current watch is for sale. The
“Sold” checkbox is used to designate the watch as being sold. If you click the “Sold” checkbox, a pop-up
form will open to allow you to capture information for whom and when you sold the watch. It also
copies the watch data to a separate archive table for a permanent record of the watch if you elect to
delete the watch from your current collection.
Watch No.
The watch number field allows you to enter a unique number for each
watch. You cannot use duplicate watch numbers. If you enter a previously used watch number, an error
message will pop up. This field can be any combination of letters and/or numbers to designate the
watch number.
23
Ver 5.0.0
Size
The size field is the movement size. You can select to use either US, European, or
wristwatch sizes by clicking on the <Manufacturer> button on the tool bar. Your last choice will remain
the default until you change it.
Serial No.
The serial number field is used to enter the watches unique serial number.
Duplicates are allowed but odds are you will never have duplicates.
Jewels
The jewels field is used to enter the number of jewels the watch has. Many
watches are marked with this information but if not, you can double click the “Jewels” field to open the
“Jewels” utility form that contains information about how to identify a watch jewel count.
Manufacturer
The manufacture field is used to enter the watch
manufacturer. You can select to use either US, European, or wristwatch manufacturers by clicking on the
<Manufacturer> button on the tool bar. Your last choice will remain the default until you change it.
24
Ver 5.0.0
Circa
The “Circa” field is used to enter the year of manufacturer for the watch. There are
many resources for obtaining this information. The best is probably the annual “Watch Price Guide”.
Condition
The condition field is used to enter the overall watch condition. The grading
system used from the annual “Watch Price Guide”. You can double click this field to open the utility
form for information on how to grade your watch.
Positon Adjustments
The position adjustments is for entering the number of postions the
watch is adjusted to. This information is normally marked on the watch movement.
Running Condition
The watch “Runs?” checkbox allows you to indicate if the watch is in running condition. This
checkbox defaults to checked so if the watch you are entering data for doesn’t run, you will need to click
on the checkbox to remove the check.
25
Ver 5.0.0
Winding Mechanism
The winding mechanism is used to indicate how the
watch is wound and set. The abbreviation is used in this field. When the drop down list is opened, the
abbreviations are described in a separate column to assist you with the correct selection.
Movement
The movement field can be used in two different
ways. By clicking on the drop down list, you can select from a selection of common movement types.
If you prefer, you can use the “Movement Calculator” to create a more detailed movement description.
Click on the button
to the right of the movement field. This will open the movement calculator.
Once you have completed all the movement description fields you want, click on <Copy to Movement
Field> and the description will be copied to the movement field on the watch data form. As you enter
data in the movement calculator fields, the description that will be copied is available near the top of
the movement calculator form. Once copied over, the movement calculator tab will be made invisible.
26
Ver 5.0.0
Model
The model field is for entering the watch movement model.
It is a drop down list that will allow you to pick from a list, any model previously entered in your
collection.
Grade
The grade field is similar to the model field but used for
entering the movement grade. It is a drop down list that will allow you to pick from a list, any grade
previously entered in your collection.
27
Ver 5.0.0
Dial Type
The dial type field is similar to the movement field in
that there are two different ways to use the field. By clicking on the drop down list, you can select from
a selection of common dial types.
If you prefer, you can use the “Dial Calculator” to create a more detailed dial description. Click on the
button
to the right of the dial type field. This will open the dial type calculator.
Once you have completed all the dial description fields you want, click on <Copy to Dial Field> and the
description will be copied to the dial type field on the watch data form. As you enter data in the dial
28
Ver 5.0.0
calculator fields, the description that will be copied is available near the top of the dial calculator form.
Once copied over, the dial calculator tab will be made invisible.
Case/Cost Tab
Data Fields
Condition
The condition field is for entering the condition of the
case. It is a drop down list that contains the generally accepted case condition descriptions.
Material
The case material field is similar to the movement
field in that there are two different ways to use the field. By clicking on the drop down list, you can
select from a selection of case materials
29
Ver 5.0.0
If you prefer, you can use the “Material Calculator” to create a more detailed case material description.
Click on the button
to the right of the material field. This will open the case material calculator.
Once you have completed all the case material description fields you want, click on <Back to ‘Case and
Cost’> and the description will be copied to the case material field on the case/cost form. As you enter
data in the material calculator fields, the description that will be copied is available near the top of the
calculator form. Once copied over, the calculator tab will be made invisible.
Configuration
The configuration field is used to enter the case
configuration information. If you use the case material calculator, this field will be automatically filled
30
Ver 5.0.0
out with the configuration abbreviation as selected on the calculator. You can also just click on the drop
down list and select from a list of common configurations.
Manufacturer
The case manufacture field is a drop down list that
contains a list of common watch case manufacturers.
Case Features
The case features field is a drop down list of
commonly found case features.
31
Ver 5.0.0
Purchase Information
The purchase data fields are used to enter when you
purchased the watch, who you bought the watch from, cost of the watch, and current value of the
watch. The “Purchased From” field is a drop down list that will list any previously entered data.
Repair Costs
The repair costs field can be used to enter any costs for
repairing the watch. By clicking on the
button to the right of the field, you can open a pop-up form
where you can enter all the parts you need for repairing this watch. Clicking on the part required field
will open a drop down list of nearly all the parts that are found in a watch.
Comments Tab
The “Comments” tab contains two fields that allow you to enter more descriptive data for your watch.
The text you type in the Description field will appear on the “Watches for Sale” report. The Comments
field text appears on all other reports, but not on the “For Sale” reports.
32
Ver 5.0.0
Watch Pictures
Watch pictures are handled somewhat differently than in previous version. You can no longer store
pictures in the database itself. The method of picture handling was changed to allow more options for
using your watch pictures. If they are stored in the database, the database file size grows quite large and
the pictures cannot be used for any other purpose. By linking the pictures, they are still available for
your use with other programs, uploading to the web, etc. The only data stored in the database is the
picture file name.
Adding Pictures
There are three buttons for adding pictures on the watch input form.
These three pictures are the typical views used for a watch. To add a picture, click on the appropriate
button to open a browser to find a picture file stored in your previously designated picture folder. When
the browser window opens, click on the picture file and select OK. The picture file name will be stored in
the database until you delete it. If you want to change a previously entered picture file name, click the
appropriate “X” button next to the picture type you want to change. This removes the picture file name.
You can then click the picture type button to open the browser again to find the new picture you want
to use. If a picture file is entered for the picture type, clicking on the picture type button will show that
picture in the picture view frame.
33
Ver 5.0.0
Viewing Pictures
You can view any picture currently visible in the picture field by clicking on the “View in Browser” link
found just above the picture type buttons. This will open up actual picture file stored in your watch
picture folder in your internet browser. Pictures can be stored in any size. The picture view frame is a
zoom type frame that will automatically zoom the picture to fit the frame by either the largest vertical
height or horizontal width.
Picture Zooming
You can zoom in or out any picture currently visible in the picture frame. Right click when your mouse is
over the picture frame to access a pop-up menu.
When you zoom in or out on a currently visible picture, scroll bars will appear on the picture frame to
allow you to scroll around the picture to view up close detail. You can use the scroll bars or the “hand”
icon that the mouse turns into when over the picture frame. NOTE: when you move to another picture
or watch record, the picture returns to its normal size. It does not stay zoomed.
More Pictures Tab
The “More Pictures” tab allows you to link as many pictures to the watch as you want. To set a picture
link, double click on an empty row and a browser window will open with the default path for the folder
you designated as your “Picture Folder”. Select the new picture link and select OK. To view any picture
link you have entered, click on it once and the picture will appear in the picture frame on the Watch
Collection form.
34
Ver 5.0.0
Quick Entry Form
The Quick Entry Form is accessed from the watch collection form by selecting “Quick Entry Form” from
the toolbar drop down option “Forms”. This data form is a datasheet view of the watch collection form.
You can edit any data field for any watch. The fields that are drop down lists on the watch collection
form are also available as drop down lists on the Quick Entry form.
Quick Review Form
The Quick Review Form is accessed from the watch collection form by selecting “Quick Review Form”
from the toolbar drop down option “Forms”. This form is not intended for data changes. It is used to just
scroll through your collection (using the “First / Previous / Next / Last” buttons on the toolbar) with all
the watch data in a compact easy view. However, you can check/uncheck the “For Sale?” checkbox and
change cost/value fields.
35
Ver 5.0.0
When reviewing your watches with this pop-up form and you want to go to that specific watch on the
Watch Collection data input form, click on the <Go To Watch> button. This will make that watch the
current record for editing. It creates a single watch filter that must be removed by clicking the <Remove
Filter> button before you will be able to see all you watches again.
Watch Tags
The watch tags form is accessed from the watch collection form by selecting “Watch Tags” from the
toolbar drop down option “Forms”. This form is used for selecting the watches you want to print tags
for printing. There are two types of tags you can print.
36
Ver 5.0.0
Rectangular tags are designed for printing on mailing labels using standard sheets of mailing labels.
Usually, these stick on mailing labels are then placed on a jewelers tag of approximately the same size.
The jeweler tags come with strings so they can be attached to the watch bow. These tags are available
through many on-line jewelry supply houses.
The round tags are designed for printing on regular paper and cutting the circular “tag” out for placing in
a movement holder.
The watch tags to be printed are selected by clicking on the “PrintTag” checkbox found in the datasheet
list of watches. On the toolbar you can <Select All> the watches which will place a check in the checkbox
next to each watch. To clear all the checkmarks, click the <Reset> button.
You can also filter the watch list by using the same right-click pop-up menu that is available on the watch
collection form. Click on the data field you want to filter by and press the right mouse button to access
the pop-up menu. This is especially useful when you use “Case No.” for storage cases and want to print
tags for a specific storage case of watches.
The information that will be printed on the tags is visible on the left hand side of the form in the format
that will be printed. You can elect to include/exclude either or both cost and value by selecting the
appropriate checkbox.
37
Ver 5.0.0
To select the category of watches to print tags for (pocket watches / wristwatches/movements), click on
the <Select Category> drop down button on the tool bar and select the category desired.
Selling Watches
You can keep track of watches you want to sell as well as watches you have sold. All watches marked
“For Sale?” will appear on the “Watches For Sale” reports. They also appear in your printable watch
collection reports whether they are for sale or sold.
38
Ver 5.0.0
Sold Watch
If you sell a watch, place a check in the “Sold?” checkbox.
When you do this, a popup for will open for that watch. What happens when this occurs is the basic
watch data is copied to a separate table for sold watches. The popup form allows you to keep track of
who you sold the watch to and the sell price. If you want to add this customer to your customer
database (will sell to more than once), click the <Add to ‘Customers’> button. This customer will then be
available in the drop down list in the future.
Archive List of Watches Sold
To access the list of watches you have previously sold, click on <Forms><Archive List of Watches Sold>
found on the watch input form toolbar.
39
Ver 5.0.0
A pop-up form will open that allows you to view all the watches you have sold and remove one or more
from your archive. To delete a sold watch from your archive only, click on the record selector (vertical
bar to left of watch record data) and then click the delete button.
Remove ‘Sold’ Watches
If you want to remove the watches you have sold from your watch collection, click on <Forms><Remove
“SOLD” Watches from Collection> found on the watch input form toolbar.
This will open a datasheet view of all the watches marked sold (“Sold?” checkbox marked true). Select
the watch or watches you want to delete by clicking on “Delete” checkbox at the end of the watch
record for each watch you want to delete from your collection. After selecting all the watches you want
to delete, click the <Delete> button on the tool bar. You can select all the “Sold” watches at one time by
clicking on the <Select All> or unselect all the checked (“Delete” checkmarks) by clicking on <Reset>.
Alternatively, you can click the record selector (vertical bar to left of watch record data) and then click
the delete button.
40
Ver 5.0.0
Exporting Watch Data to Excel
If you want to export your watch data to Microsoft Excel select <Utilities><Export to Excel> from the
toolbar on the Watch Collection form. A browser window will open to allow you to select the folder
where you want to save the file. After selecting the folder, an input box opens with a default file name
which you can change to whatever file name you prefer. After entering the file name, click OK and your
watch data will be exported in the xls format.
41
Ver 5.0.0
Misc. Items and Parts
The Miscellaneous Items/Parts collection allows you to keep track of those items that are not complete
watches or movements. Typical uses would be for extra cases, watch chains, fobs, etc. This form allows
you to keep track of all these items and also keep track of the costs, who the item was purchased from,
etc. There is also space to allow personal comments. All records can be printed out on the available
report which also keep tracks of total costs of all the items in the miscellaneous inventory. You can also
mark any item ‘For Sale’ and then print out a report of ‘Other Items for Sale’. Note: Item No. is an
alphanumeric field and is sorted alphabetically. If you use only numbers, then all records that have an
item number that begins with the number 1 will appear before any beginning with the number 2. It is a
good idea to use alphnumeric characters to differentiate the type of item. Such as C-1 for case number
one, etc.
You are given the choice of manufacturers in the same manner as with the watch data input forms. You
can choose between pocket watch, wristwatch, or European manufacturer lists. The corresponding size
list is also change when you chose a manufacturer list.
42
Ver 5.0.0
Tools
The ‘Tools’ input form is used to keep track of horological tools in your collection.
This form allows you to keep track of all these items and also keep track of the costs,
who the item was purchased from, etc. There is also space to allow personal
comments. All records can be printed out in several ways. Separate lists can be
printed for items marked ‘For Sale’. You can input one picture for each tool. Follow
the same procedure as described on the ‘Watch Collection’ input form.
43
Ver 5.0.0
Suppliers
The ‘Suppliers’ input form is used to keep track of suppliers and vendors you purchase parts from. A
comment field is available for any personal comments you want to keep track of. You can print either an
index of records or a more complete report.
Click on any Supplier listed in the list on the right hand side of the form to make current for editing or
deleting.
44
Ver 5.0.0
Literature and Books
The ‘Literature Collection’ data form is used to keep track of of your library. It will allow you to keep
track of the costs of your library. A comment field is available for any personal comments you want to
keep track of. All records are printed out on an available report which also includes the total cost of
your library. You can also print a quick index of all your records.
If you sell Horological Literature, you can mark the items you want to sell by clicking the checkbox for
each item you intend to sell. 'For Sale' reports are available for printing and sending to your customers
along with your 'Watches For Sale' lists.
45
Ver 5.0.0
Customers
The ‘Customer Input Form’ provides the means to keep track of your customers. The
customers you enter on this pop-up form are available to the drop down list on the
‘Sold’, pop-up form. If you want to edit an existing customer’s data, you can click on
that customer on the list of customers found to the right of the input fields. Scroll
up/down until you see the customer record you want to edit and then click on that
customer with the left mouse button. The customer record will then appear as the
current record, available for editing. You can add or delete customers by using the
record selectors as described previously. A number of reports allows you to print the
customer list in a variety of formats.
46
Ver 5.0.0
Printing Labels
When you click on the ‘Print Labels’ button on the customer form, another pop-up
form opens allowing you to filter the customer records for printing labels for all
customers, customers from a specific state, or customers from a specific country. The
labels are printed in three columns suitable for many of the preconfigured label
sheets available on the market. You can adjust the column spacing when you use the
'Print Setup' while viewing the report.
Customer Phone List
A ‘Phone List’ is available for quick access to customer phone numbers. This pop-up
form is accessed by clicking on the ‘Phone List’ command button on the customer
input form. You can filter customers alphabetically or view all customers at one time.
47
Ver 5.0.0
Wish List
The ‘Wish List’ input form is available for you to keep track of watches you would like to purchase in the
future. If you collect specific types of watches, this is a great way to keep track of what you need in
order to complete your collection. It also allows you to keep track of how much money you are willing to
spend on these purchases. You can also keep track of the typical price range usually found for these
watches (typically from a price guide) which will allow you to make good buying decisions.
Much of the watch data is available for selection from drop down lists. These drop down lists are the
same ones available on the ‘Watch Input Form’.
All the records you enter on the ‘Wish List’ will appear on the ‘Wish List Report’.
48
Ver 5.0.0
Owner Information
The ‘Owner Input Form’ provides the means to put your name and address on the reports that are
available for print out. If you intend to use the ‘For Sale’ reports, you can type in introductory
information, instructions or any other information you want to appear on page one of the ‘For Sale’
reports. The black background text box is the field you use for this information.
49
Ver 5.0.0
Reports
Reports are printouts of your collection. There are a variety of reports available for printing. You can
print a report for a single watch, a set of filtered watches, or your entire collection. You can print reports
with or without pictures.
Reports are accessed from <Reports> button on the toolbar.
NOTE: the pictures on any report with pictures will be the three main pictures for a watch. These are the
pictures entered using the <Dial>, <Case>, and <Movement> buttons on the Watch Collection form. The
pictures you enter on the <More Pictures> tab DO NOT print on any report at this time.
50
Ver 5.0.0
Example Reports
Single Watch Reports
51
Ver 5.0.0
Watch Cards
52
Ver 5.0.0
Watch Index
53
Ver 5.0.0
Watch Index2
54