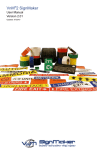
1
VnM®8 SignMaker
User Manual
Version 2.06
Updated: 05/2011
Table of Contents
Introduction
1
VnM8 SignMaker Specifications
1
Warranty
1
Support
1
Out of the Box
1
Accessories
1
VnM8 Quickstart
2
VnM8 Keypad Template Navigation
3
Loading VnM Ink Rolls
4
Loading VnM Media
5
Connecting VnM8 Keypad
6
Powering Up the VnM8 SignMaker
6
VnM8 SignMaker Templates
1 to 5 Line Horizontal
7
1 Line Vertical
8
2 Line Horizontal
9
Header Template
10
Pipe Markers
11
Arc Flash
12
ANSI Signs
13
Hazardous Waste
14
Test Print Settings
15
Select Font
15
Fonts/Symbols
16
Common Questions
17
Introduction
®
®
Thank you for purchasing the VnM 8 SignMaker. Let your imagination run wild with the VnM 8
by creating a variety of signs and labels perfect for safety, identification, and efficiency.
Throughout the manual you will see Tip Sections, Troubleshoots, and important information that
will make your sign and label creation experience quick and easy.
Specifications
Dimensions: 17.32” (W) x 13.23” (H) x 19.84” (D)
Operating Conditions: 5°-40° C (41°-104° F)
Storage Conditions: -40°- 60° C (-40°-140° F)
Resolution: 300 DPI
AC Input:
90-264VAC, 47-63Hz
DC Output: 24V 14-58A, 350W Internal Pwr Sply
Print Speed: 2, 3, 4, or 5 inches per second
®
Connections: VnM Keypad, USB, LPT, Ethernet 10/100
Warranty
®
VnM 8 SignMaker comes with a 2-Year Printer Warranty, 1-Year Printhead Warranty, 6-Month
Cutter Warranty, and 1-Year Keypad Warranty.
Support
®
For support, call the VnM Service & Technical department at 800.262.7298 or your local
distributor.
Out of the Box
1
2
®
The VnM 8 SignMaker out of the box includes:
1. VnM 8 SignMaker
2. VnM 8 Keypad
3. VnM 8 Power Cord
4. USB Cable
5. Take-Up Core for Ink
6. Cleaning Pen
®
®
®
4
3
5
6
VnM Label Direct Sign Software
The VnM® Label Direct (optional) offers all the features you would
expect from a professional labeling package including database
integration, copy fitting, variable graphics, serial numbers and industry
standard linear and 2D barcode symbologies.
With Label Direct you can create and save templates on your PC and
print straight to the VnM2 or VnM8 Sign Makers.
Includes symbols library
Connect via USB interface
Must have 1 GB of RAM or greater
1
®
VnM 8 Quickstart
2
1
Open VnM-8 Printer
2
Load VnM® Media & feed
®
through VnM 8 Cutter
3
Load VnM® Ink Roll & attach
to take up core.
4
Plug in VnM®8 Keypad
5
Connect power cord to the
®
VnM 8 SignMaker & outlet
6
Turn ON VnM®8 SignMaker,
choose template and print
®
Loading VnM Ink Rolls
/IMPORTANT
/IMPORTANT
TURN OFF PRINTER WHEN
CHANGING INK ROLLS
FOLLOW INSTRUCTIONAL
DIAGRAM INSIDE PRINTER
1
2
®
TURN OFF VnM 8 SignMaker, open the VnM8
& lift green lever to open printing assembly.
3
Center the ink roll on the ink roll spindle and
feed the ink roll under the printing assembly
5
Feed the rear ink roll up to the take up core &
attach in the centerusing a thin adheisvie tape.
Slide on VnM8 Ink Roll to rear Ink Roll spindle.
4
Attach and center the take up core to the front
ink spindle.
6
Once attached hand wind the front ink roll
spindle up to remove any creases and to keep
the tension taunt.
7
Close the print assembly and continue to
Loading VnM8 Media.
3
®
Loading VnM Media
/IMPORTANT
HANDLE MEDIA ON THE SIDES
TO PREVENT BAD PRINTS
1
Open the VnM8 Printer and release the printing assembly.
3
Slide the Media Spindle end guide onto the
Media Spindle to secure the VnM8 Media Roll
5
Secure the whtie media guides to the media
and feed under green media sensor bar.
7
Review the media feed before closing the
printing assembly.
4
2
Slide on the VnM8 Media onto the center of
the rear Media Spindle
4
Feed the Media under the white roll bar &
under the white media guides.
6
Continue to feed the media under the printing
assebmly & between the cutter gap.
8
Close the printing assembly by pressing down
until your hear a click.
®
Connecting VnM 8 Keypad
1
/IMPORTANT
RECOMMEND POWERING VNM8
WITH A SURGE PROTECTOR
1.
2
Connect the VnM8 Keypad cable (male)
to the back of the VnM 8 SignMaker port
(female).
®
2.
Tighten the cable’s screws to prevent the
cable from being pulled off.
Powering Up the VnM®8 SignMaker
1.
After connecting the
VnM 8 Keypad to the
VnM 8SignMaker,
connect power cord to
the back of the VnM*
SignMaker
®
®
2.
1
Plug the 3-prong plug
into the electrical outlet.
3.
®
Turn on the VnM 8
SignMaker, select your
template and print!
2
USB Connection
To print to the VnM8 via USB connection go
to www.vnmsignmaker.com/drivers. Download and install the driver package before
connecting the VnM8 to your PC
Ethernet/Network Connection
If you experience difficulties setting up the
network connection of the VnM8 SignMaker
please contact technical support by calling
800-262-7298.
3
/IMPORTANT
KEEP VNM8 KEYPAD AND SIGNMAKER
AWAY FROM STRONG MAGNETIC SOURCES
5
®
VnM 8 Keypad Template Navigation
®
The VnM 8 template navigation tree to the left
displays the flow and order of the templates.
1 to 5 Line Horizontal
More detailed information about the
templates are found further in the manual.
PRESS ENTER
1-Line Vertical
PRESS ENTER
1 to 5 Line Horizontal
PRESS ENTER
1 to 5 Line Horizontal is the default template
when powering on the VnM 8 SignMaker and
when pressing the ALT + EXIT keys.
®
2-Line Horizontal
PRESS ENTER
Use the UP and
DOWN arrow keys on
the VnM 8 Keypad to
navigate through the
templates. Press the
ENTER key to select
your template.
®
Header Templates
PRESS ENTER
Pipe Markers Template
PRESS ENTER
Arc Hazard Template
PRESS ENTER
ANSI Sign Templates
PRESS ENTER
Hazardous Waste
PRESS ENTER
To go backward press the EXIT
key, and confirm by pressing Y for
Yes.
To get back to the main
menu (or if you made
a type error), press the
ALT key + EXIT key.
+
VnM8 TIPS
+
VnM PRINT SETTINGS
PRESS ENTER
SELECT FONT
PRESS ENTER
6
ENTER TEXT:
,,
5
DIAMETER
In order to print quotations (“) or inch and
foot marks, press the SHIFT key + PERIOD
key (on the numeric keypad). Do not use the
keypad QUOTATION key, you will have blank
text.
®
VnM 8 SignMaker Templates - 1 to 5 Line Horizontal
The 1 to 5 Line Horizontal template is
the most versatile template for the VnM 8
SignMaker. Create anything from 1 to 5 lines
of text and control the font size by selecting
the appropriate media size.
®
The sample sign below, a), was created by
first selecting the SYMBOLS1 font, second
selecting the 1 to 5 Line Horizontal template,
then select the media width and choosing 1
for how many lines, then typing, “/CAUTION”
where the “/” on the keypad screen
represents / symbol.
a) 1 line template no reverse, symbols1 font
1 to 5 Line Horizontal
1.
PRESS ENTER
ENTER MEDIA WIDTH:
®
2.
Enter the media width by pressing the
number 4, 5, 6, 7 or 8. Do not press
enter after pressing the media size.
3.
Select how many lines by pressing the
numbers 1, 2, 3, 4 or 5. Do not press
enter after pressing the amount of lines.
4.
Enter the text/symbols for your sign and
once you finished the line or sign, press
the ENTER key.
5.
Enter the quantity to print and press
ENTER.
PRESS 4,5,6,7 OR 8
XINCH HOW MANY LINES?
PRESS 1,2,3,4 OR 5
ENTER TEXT:
/CAUTION
ENTER QUANTITY TO PRINT:
1
Select the 1 to 5 Line Horizontal template by pressing the ENTER key on the
VnM 8 Keypad.
REVERSE TEXT?
DANGER!
b) 1 line template reverse text (press Y)
(Y)ES OR (N)O
NOTE: If you select the 1-Line template
for any media size, you will have an
extra prompt that asks if you would like
reverse text, press Y for yes and N for
no, reverse text is sample b).
c) 1 line template no reverse text (press N)
PRINT UP TO
5 LINES OF TEXT
WITHOUT THE
USE OF A COMPUTER
OR SOFTWARE!
d) 5 lines
7
®
VnM 8 SignMaker Templates - 1 Line Vertical
The 1 Line Vertical template allows you to
easily create a vertical text on VnM Media.
®
E
X
I
T
a) no reverse text
E
X
I
T
Below are sample created with the 1 Line
Vertical template.
%
z
P
5
9
1
c) symbols1 font
d) no reverse text
b) reverse text
1-Line Vertical
1.
®
PRESS ENTER
ENTER MEDIA WIDTH:
2.
Enter the media width by pressing the
number 4, 5, 6, 7 or 8 Do not press
enter after pressing the media size.
3.
Enter the text/symbols for your vertical
sign and once you finished the sign,
press the ENTER key.
4.
Press the N key for no reverse text (a) or
press the Y key to reverse the print (b).
5.
Enter the quantity to print and press
ENTER.
PRESS 4,5,6,7 OR 8
ENTER TEXT:
EXIT
REVERSE TEXT?
Select the 1 Line Vertical template by
pressing the ENTER key on the VnM 8
Keypad.
(Y)ES OR (N)O
ENTER QUANTITY TO PRINT:
1
VnM8 TIPS
IF YOU ARE USING A 8
INCH MEDIA, TRY USING A
6 INCH TEMPLATE TO GET
A SMALLER FONT
8
®
VnM 8 SignMaker Templates - 2 Line Horizontal
The 2 Line Horizontal template gives you the
ability to create a label with a large font size
and the second line font size being smaller.
Below are sample signs created with the 2
Line Horizontal template.
LABORATORY
BOILER WATER
ROOM 602
TO BOILER #5
a) 2-Line Horizontal
2-Line Horizontal
b) 2-Line Horizontal
1.
®
PRESS ENTER
ENTER MEDIA WIDTH:
2.
Enter the media width by pressing the
number 4, 5, 6, 7 or 8 Do not press
enter after pressing the media size.
3.
Enter the text/symbols for your first line
of text, press the ENTER key when the
first line is complete.
4.
Enter the text/symbols for your second
line of text, press the ENTER key when
the second line is complete.
5.
Enter the quantity to print and press
ENTER.
PRESS 4,5,6,7 OR 8
Enter 1st Line:
BOILER WATER
Enter 2nd Line:
TO BOILER #5
ENTER QUANTITY TO PRINT:
1
Select the 2 Line Horizontal template by
pressing the ENTER key on the VnM 8
Keypad.
VnM8 TIPS
MAKE SURE YOU ARE
USING THE RIGHT PRINT
SETTING WITH THE
PROPER INK AND MEDIA
9
®
VnM 8 SignMaker Templates - Header
The Header template is perfect for creating
Caution, Warning, Notice and Safety labels.
/CAUTION
DO NOT STAND
WITHIN
25 FEET
OF MACHINERY
Left is a sample Header sign (a).
SYMBOLS1 font is selected first then choose
the Header template and press ENTER. For
the Header line, “/CAUTION” is shown on
the keypad, press ENTER. Then enter the
information for the 1st, 2nd, 3rd and 4th line.
The “/” seen on the keypad (after SYMBOLS1
font is chosen) translates to the yield /
symbol.
a) symbols1 font, 5-Line Header
NOTE:
Keep in mind the 4 lines below the header are always
standard BOLD font even if you change the symbol.
Header Template
Keep in mind that if you do not need 4 lines
of text to blank out the first line or any line
you choose.
1.
Select the Header template by pressing
the ENTER key on the VnM 8 Keypad.
®
PRESS ENTER
ENTER MEDIA WIDTH:
2.
Enter the media width by pressing the
number 4, 6, or 8 Do not press enter
after pressing the media size.
3.
Enter the text/symbols for header, press
the ENTER key when the first line is
complete.
4.
Enter the text/symbols for your first line
of text, press the ENTER key when the
first line is complete.
5.
Enter the text/symbols for your second
line of text, press the ENTER key when
the second line is complete.
6.
Enter the text/symbols for your third line
of text, press the ENTER key when the
third line is complete.
7.
Enter the text/symbols for your fourth line
of text, press the ENTER key when the
fourth line is complete.
8.
Enter the quantity to print and press
ENTER.
PRESS 4,6, OR 8
ENTER HEADER TEXT:
/CAUTION
ENTER 1ST LINE:
DO NOT STAND
ENTER 2ND LINE:
WITHIN
`
ENTER 3RD LINE:
25 FEET
ENTER 4TH LINE:
OF MACHINERY
ENTER QUANTITY TO PRINT:
1
10
®
VnM 8 SignMaker Templates - Pipe Marker
The Pipe Markers Template meets ANSI/
ASMI letter height standards and tape
lengths. Create any custom pipe marker with
the appropriate template.
FIRE SPRINKLER WATER
Below is a 2 x 12 pipe marker identifying the
contents of the pipe as NITROGEN (a).
DOMESTIC CHILLED WATER
DOMESTIC CHILLED WATER
DOMESTIC CHILLED WATER
DOMESTIC CHILLED WATER
DOMESTIC CHILLED WATER
a) 6 X 5 INCH WRAP TEMPLATE
TEMPLA
b) 4 x 24 INCHES
DOMESTIC CHILLED WATER
c) 4 x 32 INCHES
Pipe Markers Template
1.
®
PRESS ENTER
4 X 24 MARKER TEMPLATE
6 X 5 WRAP TEMPLATE
PRESS ENTER
PRESS ENTER
4 X 24 MARKER TEMPLATE
8 X 6 WRAP TEMPLATE
PRESS ENTER
PRESS ENTER
2.
Select the corresponding Pipe Marker
Template with the diameter pipe your are
going to identify. Press the up and down
arrow key to go through the Pipe Marker
Template selections.
3.
Enter the text/symbols for the marker,
press the ENTER key when complete.
4.
Enter the quantity to print and press
ENTER.
4 X 2.5 WRAP TEMPLATE
PRESS ENTER
ENTER TEXT:
Select the Pipe Markers Template by
pressing the ENTER key on the VnM 8
Keypad.
NITROGEN
ENTER QUANTITY TO PRINT:
1
VnM8 TIPS
IF YOU ARE NOT SURE
WHAT MARKING TEMPLATE
TO USE REFER THE VNM
PIPE MARKING GUIDE
11
®
VnM 8 SignMaker Templates - Arc Flash Template
The Arc Flash Templates meets the NEC
electrical code for “Arc flash hazard warnings
are required to reduce the occurrences of
serious injury or death due to arcing faults
to those who work on or near energized
electrical equipment.”
a) 4 X 7 INCHES
a)
a) 7 X 10 INCHES
Arc Hazard Template
1.
Select the Arc Flash Hazard Template by
pressing the ENTER key on the VnM8
Keypad.
2.
Select media size of 4" or 7" only. Press
the number 4 or 7.
3.
Enter the quantity to print and press
ENTER.
PRESS ENTER
Select Media Size:
PRESS 4 or 7
ENTER QUANTITY TO PRINT:
1
NOTE:
Must use 4" or 7" Orange VnM Premium
Vinyl or Engineer Grade Reflective media for
the arc flash template.
®
VnM8 TIPS
TO GET BACK TO THE MAIN
MENU PRESS AND HOLD
DOWN THE ALT KEY AND
EXIT BUTTON
12
®
VnM 8 SignMaker Templates - ANSI SIGN TEMPLATES
The ANSI Sign templates are header
templates that prints CAUTION, DANGER,
NOTICE, SAFETY FIRST, OR WARNING on
top & allows for a custom message from 1-4
lines to be printed in the space below.
ANSI Sign Template
These tempates are a fixed sizes, 5”x7” &
7”x10”. The font will squeze to the width
of the sign depending on the number of
characters entered per line.
1.
Select the ANSI Sign Templates by
pressing the ENTER key on the VnM8
Keypad.
2.
Select the approperate header for your
sign.
3.
Select the size of media you are using.
NOTE: Only works with 5” or 7” me-
4.
Select the number of lines of text to desiered. This will print below the Header
text.
5.
Enter the 1st line of text. If you only
require 1 line of text skip to ‘Enter Print
Quantity
6.
Enter the 2nd line of text. If you only
require 2 lines of text skip to ‘Enter Print
Quantity
7.
Enter the 3rd line of text. If you only
require 3 lines of text skip to ‘Enter Print
Quantity
8.
Enter the 4th line of text.
7.
Enter the quantity of signs to be printed.
PRESS ENTER
CAUTION HEADER
SAFETY FIRST HEADER
PRESS ENTER
PRESS ENTER
DANGER HEADER
WARNING HEADER
PRESS ENTER
PRESS ENTER
NOTICE HEADER
CUSTOM HEADER
PRESS ENTER
PRESS ENTER
Select Media Size:
PRESS 5 or 7
HOW MANY LINES?:
PRESS 1,2,3 OR 4
ENTER FIRST LINE:
NO SMOKING
ENTER SECOND LINE:
BEYOND
ENTER THIRD LINE:
THIS
ENTER FOURTH LINE:
POINT
ENTER QUANTITY TO PRINT:
1
13
®
VnM 8 SignMaker Templates - Hazardous Waste
Print the California Hazardous Waste Labels
using the VnM8 SignMaker.
Hazardous Waste
PRESS ENTER
1.
Select the Hazardous Waste template
by pressing ENTER. From here you can
Print the hazardous waste label, set the
company contact info and set the date/
time settings
2.
Select Print Label to begin filling out the
Hazardous Waste Label form.
Print Label
ENTER EPA ID#:
SELECT PHYSICAL STATE
LIQUID
ENTER MANIFEST DOC #:
SELECT HAZ PROPERTIES
TOXIC
ENTER EPA WASTE #:
ENTER 1ST LINE:
ENTER CA WASTE #:
ENTER 2ND LINE:
ENTER CONENTS COMP L1:
ENTER 3RD LINE:
ENTER CONENTS COMP L2:
ENTER QUANTITY TO PRINT:
ENTER QUANTITY TO PRINT:
2a-l. Enter the information prompted to complete the label. To Select the Physical
State and Hazardous Properties use the
UP & Down arrows to naviate to Solid or
Liquid and Flammable, Tocic, Corrostive,
Reactivity, or other.
2m. Select the quantity of Hazardous Warning Labels to be printed.
1
3.
ADMINISTRATION
Enter Company
Enter State:
ABC COMPANY
CA
Enter Street Address
Enter Zip Code:
123 MAIN ST.
92001
Enter City:
Enter Phone Number:
LOS ANGELES
555 874 4569
Select Administration to enter the contact
information that will be displayed on the
Hazardous Warning Labels.
3a-f Enter the information prompted to
complete the company information to be
printed on all Hazarous Warning Labels.
3.
Select Date/Time Setup to synranise the
VnM8 Keypad to a real time clock.
DATE/TIME SETUP
FOUR Digit Year
Enter Hour (0-23):
2011
23
Enter Month (1-12):
Enter Minute (0-59):
5
Enter Day (1-31):
23
14
3a-f Enter the date and time information as
prompted on the screen.
®
VnM 8 SignMaker Templates - Test Print Settings & Select Font
®
Utilize the VnM Print Settings template to
change the VnM 8 print settings for certain
VnM Inks and Media.
®
To utilize different fonts or symbols, choose
the Select Font template simply by pressing
the up arrow key at the main menu.
1. Press ENTER to access the fonts
VNM PRINT SETTINGS
SELECT FONT?
PRESS ENTER
a)
TEST PRINT 1:
WHITE VnM INK
b)
TEST PRINT 2:
BLACK VnM INK
c)
TEST PRINT 3:
FAST - WHITE VnM INK
d)
e)
Optimal print setting for VnM
White ink
Optimal print setting for VnM
Black ink
Optimal fast print setting for
VnM White ink
FAST - BLACK VnM INK
Optimal fast print setting for
VnM Black ink
TEST PRINT 5:
Print with high heat setting
TEST PRINT 4:
VnM1 INK 1
f)
TEST PRINT 6:
VnM
g)
LOOK AT VNM MANUAL
TURN CUTTER OFF
h)
LOOK AT VNM MANUAL
BLANK CUT
Manually input speed and heat
settings
Turn cutter off, all other setting turn on cutter
Cuts VnM Media in inches to
desired size
PRESS ENTER
2. Choose your font by pressing ENTER
CHOOSE FONT?
BOLD
CHOOSE FONT?
SYMBOLS1
CHOOSE FONT?
SYMBOLS2
CHOOSE FONT?
NORMAL
VnM8 TIPS
TURN THE CUTTER OFF TO MIX
AND MATCH VNM8 TEMPLATES.
ONCE YOU HAVE THE DESIRED
LOOK ACTIVATE INK SETTING TO
TURN CUTTER BACK ON
VnM8 TIPS
VnM8 TIPS
USE THE BLANK CUT TEMPLATE
TO CUT MEDIA TO A DESIRED
LENGTH WITH NO PRINT.
PERFECT FOR AISLE AND FLOOR
MARKERS
WHEN USING A DIFFERENT
COLOR VNM INK OR MEDIA USE
THE VNM SETTING f) TO SET THE
HEAT AND SPEED MANUALLY
15
®
VnM 8 SignMaker Templates - Fonts/Symbols
When the Select Font template is selected,
you can make a selection of 5 different fonts
that contains symbols and different styles.
Keypad
1
2
3
4
5
6
7
8
9
0
!
@
#
$
%
^
&
*
Normal
1
2
3
4
5
6
7
8
9
0
!
@
#
$
%
^
&
*
Bold
1
2
3
4
5
6
7
8
9
0
!
@
#
$
%
^
&
*
Symbols1
1
2
3
4
5
6
7
8
9
0
!
@
#
$
%
^
&
*
Symbols2
1
2
3
4
5
6
7
8
9
0
!
@
#
$
%
^
&
*
Symbols3
1
2
3
4
5
6
7
8
9
0
!
@
#
$
%
^
&
*
Utility
1
2
3
4
5
6
7
8
9
0
!
@
#
$
%
^
&
*
NOTE: After selecting
your font, keep in mind
to use this font legend.
Keypad
(
)
-
+
€
=
/
?
;
:
‘
“
.
Normal
(
)
-
+
€
=
/
?
;
:
‘
“
.
Bold
(
)
-
+
€
=
/
?
;
:
‘
“
.
The Keypad legend is
what you see for the
required symbol below.
Symbols1
(
)
-
+
€
=
/
?
;
:
‘
“
.
Symbols2
(
)
-
+
€
=
/
?
;
:
‘
“
.
Symbols3
(
)
-
+
€
=
/
?
;
:
‘
“
.
Utility
(
)
-
+
€
=
/
?
;
:
‘
“
.
Keypad
A
B
C
D
E
F
G
H
I
J
K
L
M
N
O
Normal
A
B
C
D
E
F
G
H
I
J
K
L
M
N
O
Bold
A
B
C
D
E
F
G
H
I
J
K
L
M
N
O
Symbols1
A
B
C
D
E
F
G
H
I
J
K
L
M
N
O
Symbols2
A
B
C
D
E
F
G
H
I
J
K
L
M
N
O
Symbols3
A
B
C
D
E
F
G
H
I
J
K
L
M
N
O
Utility
A
B
C
D
E
F
G
H
I
J
K
L
M
N
O
Keypad
P
Q
R
S
T
U
V
W
X
Y
Z
Normal
P
Q
R
S
T
U
V
W
X
Y
Z
Bold
P
Q
R
S
T
U
V
W
X
Y
Z
Symbols1
P
Q
R
S
T
U
V
W
X
Y
Z
NOTE: What you
see on the keypad
will not show up
as a symbol. ie:
Symbols1 font is
chosen, press SHIFT
+ 1 key to get /.
The Keypad lcd: !
Keypad
16
After selecting your font, use the legend
below to ensure you are getting the proper
symbol for your sign.
a
b
Symbols2
P
Q
R
S
T
U
V
W
X
Y
Z
Symbols3
P
Q
R
S
T
U
V
W
X
Y
Z
Utility
P
Q
R
S
T
U
V
W
X
Y
Z
d
e
f
g
h
i
j
k
l
m
n
o
c
Normal
a
b
c
d
e
f
g
h
i
j
k
l
m
n
o
Bold
a
b
c
d
e
f
g
h
i
j
k
l
m
n
o
Symbols1
a
b
c
d
e
f
g
h
i
j
k
l
m
n
o
Symbols2
a
b
c
d
e
f
g
h
i
j
k
l
m
n
o
Symbols3
a
b
c
d
e
f
g
h
i
j
k
l
m
n
o
Utility
a
b
c
d
e
f
g
h
i
j
k
l
m
n
o
Keypad
p
q
r
s
t
u
v
w
x
y
z
Normal
p
q
r
s
t
u
v
w
x
y
z
Bold
p
q
r
s
t
u
v
w
x
y
z
Symbols1
p
q
r
s
t
u
v
w
x
y
z
Symbols2
p
Symbols3
p
Utility
p
q
r
s
q r s
q
r
s
t
u
v
w
x
y
z
t
u
v
w
x
y
z
t
u
v
w
x
y
z
®
VnM 8 SignMaker Common Questions
®
Q: How do I get out of a VnM template?
A: Press EXIT to go back or press and hold
down the ALT key and press EXIT at the
same time to go back to the main menu.
Q: I made a spelling mistake on a multi-line
template, how do I get back to the line I
made a spelling error?
A: Press EXIT and choose the template
again. You will have to retype your sign.
Q: I am trying to make quotation marks on
the sign and when it prints, no text shows
up, what do I do?
A: In order to print quotation marks (“) you
must hold down the SHIFT key + (.)
PERIOD key to create an apostrophe (‘).
Repeat the process again to get (‘‘).
®
Q: The VnM Ink Roll is coming out with the
VnM Media and is being cut, what do I
do?
A: Tape the cut ink to the take-up core with
a piece of scotch tape and wind up the
slack. Turn the printer OFF and wait two
seconds, then turn back ON. Print a label.
Q: The print quality is splotchy and I notice
lines in the final label, what should I do?
A: Make sure you are using the right print
setting with VnM Ink Roll you are using.
Also make sure the printhead is clean with
the provided cleaning pen and that you
have minimal skin contact with the media.
®
®
®
VnM SignMaker is a registered trademark of Cobra Systems, Inc.
For more information, please visit www.vnmsignmaker.com
17