1
Chapter #1: Getting Started · Page 1
Chapter #1: Getting Started
HOW MANY MICROCONTROLLERS DID YOU USE TODAY?
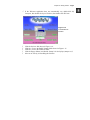
A microcontroller is a kind of miniature computer that you can find in all kinds of
gizmos. Some examples of common, every-day products that have microcontrollers
built-in are shown in Figure 1-1. If it has buttons and a digital display, chances are it also
has a programmable microcontroller brain.
Figure 1-1
Every-Day Examples of
Devices that Contain
Microcontrollers
Try making a list and counting how many devices with microcontrollers you use in a
typical day. Here are some examples: if your clock radio goes off, and you hit the snooze
button a few times in the morning, the first thing you do in your day is interact with a
microcontroller. Heating up some food in the microwave oven and making a call on a
cell phone also involve operating microcontrollers. That’s just the beginning. Here are a
few more examples: turning on the television with a handheld remote, playing a handheld
game, using a calculator, and checking your digital wristwatch. All those devices have
microcontrollers inside them that interact with you.
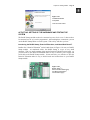
THE BASIC STAMP 2 - YOUR NEW MICROCONTROLLER
Parallax, Inc.’s BASIC Stamp® 2 module shown in Figure 1-2 has a microcontroller built
onto it. It’s the black chip with lettering on it that reads “PIC16C57”. The rest of the
components on the BASIC Stamp module are also found in consumer appliances you use
every day. All together, they are correctly called an embedded computer system. This
name is almost always shortened to just “embedded system”. Frequently, such modules
are commonly just called “microcontrollers.”
The activities in this text will guide you through building circuits similar to the ones
found in consumer appliances and high-tech gizmos. You will also write computer
programs that the BASIC Stamp module will run. These programs will make the BASIC
Stamp module monitor and control these circuits so that they perform useful functions.
Page 2 · What’s a Microcontroller?
Figure 1-2
The BASIC Stamp® 2
Microcontroller Module
BASIC Stamp 2
modules are the most
popular
microcontrollers made
by Parallax, Inc.
®
In this text, “BASIC Stamp” refers to Parallax Inc.’s BASIC Stamp 2 microcontroller
module. There are other BASIC Stamp modules, some of which are shown in Figure 1-3.
Each BASIC Stamp module is color coded. The BASIC Stamp 2 is green. The BASIC
Stamp 2e is red. The BASIC Stamp 2SX is blue, and the BASIC Stamp 2p is gold. Each
variation on the BASIC Stamp 2 is slightly different, featuring higher speed, more memory,
additional functionality, or some combination of these extra features.
Figure 1-3
BASIC Stamp®
Modules
From Left to Right:
®
BASIC Stamp 2, 2e,
2SX, and 2p
AMAZING INVENTIONS WITH BASIC STAMP MICROCONTROLLERS
Consumer appliances aren’t the only things that contain microcontrollers. Robots,
machinery, aerospace designs and other high-tech devices are also built with
microcontrollers. Let’s take a look at some examples that were created with BASIC
Stamp modules.
Robots have been designed to do everything from helping students learn more about
microcontrollers, to mowing the lawn, to solving complex mechanical problems. Figure
1-4 shows two example robots. On each of these robots, students use the BASIC Stamp 2
to read sensors, control motors, and communicate with other computers. The robot on
Chapter #1: Getting Started · Page 3
the left is Parallax Inc.’s Boe-Bot™. The projects in the Robotics with the Boe-Bot text
can be tackled using the Boe-Bot after you’ve worked through the activities in this one.
The robot on the right was built by a group of students and entered into a First Robotics
competition. The goal of the contest is different each year. In the example shown, the
goal was to see which group’s robot could sort colored hoops the fastest.
Figure 1-4
Educational Robots
Parallax Boe-Bot™ (left)
First Competition Robot
(right)
Other robots solve complex problems, such as the autonomous remote flight robot shown
at the left of Figure 1-5. This robot was built and tested by mechanical engineering
students at the University of California, Irvine. They used a BASIC Stamp module to
help it communicate with a satellite global positioning system (GPS) so that the robot
could know its position and altitude. The BASIC Stamp also read level sensors and
controlled the motor settings to keep the robot flying properly. The mechanical millipede
robot on the right was developed by a professor at Nanyang Technical University,
Singapore. It has more than 50 BASIC Stamp modules, and they all communicate with
each other in an elaborate network that helped control and orchestrate the motion of each
set of legs. Robots like this not only help us better understand designs in nature, but they
may eventually be used to explore remote locations, or even other planets.
Figure 1-5
Examples of Research
Robots that Contain
Microcontrollers
Autonomous flying
robot at UC Irvine (left)
and Millipede Project at
Nanyang University
(right)
Page 4 · What’s a Microcontroller?
With the help of microcontrollers, robots will also take on day-to-day tasks, such as
mowing the lawn. The BASIC Stamp module inside the robotic lawn mower shown in
Figure 1-6 helps it stay inside the boundaries of the lawn, and it also reads sensors that
detect obstacles and controls the motors that make it move.
Figure 1-6
Robotic Lawn Mower
Prototype by the Robot
Shop
Microcontrollers are also used in scientific, high technology, and aerospace projects.
The weather station shown on the left of Figure 1-7 is used to collect environmental data
related to coral reef decay. The BASIC Stamp module inside it gathers this data from a
variety of sensors and stores it for later retrieval by scientists. The submarine in the
center is an undersea exploration vehicle, and its thrusters, cameras and lights are all
controlled by BASIC Stamp microcontrollers. The rocket shown on the right is one that
was part of a competition to launch a privately owned rocket into space. Nobody won the
competition, but this rocket almost made it! The BASIC Stamp controlled just about
every aspect of the launch sequence.
Figure 1-7
High-tech and Aerospace
Microcontroller Examples
Ecological data collection
by EME Systems (left),
undersea research by
Harbor Branch Institute
(center), and JP Aerospace
test launch (right)
From common household appliances all the way through scientific and aerospace
applications, the microcontroller basics you will need to get started on projects like these
are introduced here. By working through the activities in this book, you will get to
Chapter #1: Getting Started · Page 5
experiment with and learn how to use a variety of building blocks found in all these hightech inventions. You will build circuits for displays, sensors, and motion controllers.
You will learn how to connect these circuits to the BASIC Stamp 2 module, and then
write computer programs that make it control displays, collect data from the sensors, and
control motion. Along the way, you will learn many important electronic and computer
programming concepts and techniques. By the time you’re done, you might find yourself
well on the way to inventing a gizmo of your own design.
HARDWARE AND SOFTWARE
Getting started with BASIC Stamp microcontroller modules is similar to getting started
with a brand-new PC or laptop. The first things that most people have to do when they
get a new PC or laptop is take it out of the box, plug it in, install and test some software,
and maybe even write some software of their own using a programming language. If this
is your first time using a BASIC Stamp module, you will be doing all these same
activities. If you are in a class, your hardware may already be all set up for you. If this is
the case, your teacher may have other instructions. If not, this chapter will take you
through all the steps of getting your new BASIC Stamp microcontroller up and running.
ACTIVITY #1: GETTING THE SOFTWARE
The BASIC Stamp Editor (version 2.0 or higher) is the software you will use in most of
the activities and projects in this text. You will use this software to write programs that
the BASIC Stamp module will run. You can also use this software to display messages
sent by the BASIC Stamp that help you understand what it senses.
The BASIC Stamp Editor is free software, and the two easiest ways to get it are:
•
Download from the Internet: Look for “BASIC Stamp Windows Editor version
2.0…” on the www.parallax.com → Downloads → BASIC Stamp Software page.
•
Included on the Parallax CD: Follow the Software link on the Welcome page.
Make sure the date printed on the CD is May 2003 or newer.
In a Hurry? Get your copy of the BASIC Stamp Windows Editor version 2.0 (or higher) and
install it on your PC or laptop. Then, skip to: Activity #3: Setting Up the Hardware and
Testing the System.
If you have questions along the way, Activity #1 can be used as a step-by-step reference
for getting the software, and Activity #2 can be used as a reference for the installation
procedure.
Page 6 · What’s a Microcontroller?
Computer System Requirements
You will need either a PC or laptop computer to run the BASIC Stamp Editor software.
Getting started with BASIC Stamp programming is easiest if your PC or laptop has the
following features:
Microsoft Windows 95® or newer operating system
A serial or USB port
A CD-ROM drive, World Wide Web access, or both
•
•
•
USB Port Adapter If your computer only has USB ports, you will need a USB to Serial
Adapter. See Appendix A: USB to Serial Adapter for details and installation instructions.
Downloading the Software from the Internet
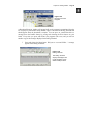
It’s easy to download the BASIC Stamp Editor software from the Parallax web site. The
web page shown in Figure 1-8 may look different from the web page you see when you
visit the site. Nonetheless, the steps for downloading the software should still be similar
to these:
√
√
√
Using a web browser, go to www.parallax.com (shown in Figure 1-8).
Point at the Downloads menu to display the options.
Point at the BASIC Stamp Software link and click to select it.
Figure 1-8
The Parallax Web Site:
www.parallax.com
Chapter #1: Getting Started · Page 7
√
√
When you get to the BASIC Stamp Software page, find the most recent
version of the BASIC Stamp Windows Editor download, with a version
number of 2.0 or higher.
Click the Download icon. In Figure 1-9, the download icon looks like a file
folder to the right of the description: “BASIC Stamp Windows Editor version
2.0 Beta 1 (6MB)”.
Figure 1-9
The Parallax Web Site
Downloads Page
√
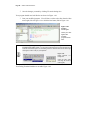
√
When the File Download window shown in Figure 1-10 appears, select: Save
this program to disk.
Click the OK button.
Figure 1-10
File Download Window
Figure 1-11 shows the Save As window that appears next. You can use the Save in field
to browse your computer’s hard drives to find a convenient place to save the file.
√
After choosing where to save the file you are downloading, click the Save
Button.
Page 8 · What’s a Microcontroller?
Figure 1-11
Save As Window
Selecting a place to
save the file
√
Wait while the BASIC Stamp Editor installation program downloads (shown in
Figure 1-12). This may take a while if you are using a modem connection.
When the download is complete, leave the window shown in Figure 1-13 open
while you skip to the next section - Activity #2: Installing the Software.
√
Figure 1-12: Download Progress Window
Figure 1-13: Download Complete
Finding the Software on the Parallax CD
You can also install the BASIC Stamp Editor from the Parallax CD, but it has to be May
2003 or newer so that you can get the version of the BASIC Stamp Editor that is
compatible with the examples in this text. You can find the Parallax CD’s Year and
Month by examining the labeling on the front of the CD.
√
Place the Parallax CD into your computer’s CD drive. The Parallax CD
Welcome application shown in Figure 1-14 should run as soon as you load the
CD into your computer’s CD drive.
Chapter #1: Getting Started · Page 9
√
If the Welcome application does not automatically run, double-click My
Computer, then double-click your CD drive, then double-click Welcome.
Figure 1-14
The Parallax CD
Browser
√
√
√
√
√
Click the Software link shown in Figure 1-14.
Click the + next to the BASIC Stamps folder shown in Figure 1-15.
Click the + next to the Windows folder.
Click the floppy diskette icon labeled “Stamp 2/2e/2sx/2p/2pe (stampw.exe)”.
Move on to Activity #2: Installing the Software.
Page 10 · What’s a Microcontroller?
Figure 1-15
The Parallax CD
Browser
Select the BASIC
Stamp Editor installation
program from the
Software page.
Free downloads at the Parallax web site are included in the Parallax CD, but only up to the
date the CD was created. The date on the front of the CD indicates when it was created. If
the CD is just a few months old, you will probably have the most up-to-date material. If it’s
an older CD, consider requesting a new one from Parallax or downloading the files you need
from the Parallax web site.
ACTIVITY #2: INSTALLING THE SOFTWARE
By now, you have either downloaded the BASIC Stamp Editor Installer from the Parallax
web site or located it on the Parallax CD. Now let’s run the BASIC Stamp Editor
Installer.
Installing the Software Step by Step
√
If you downloaded the BASIC Stamp Editor Installer from the Internet, click
the Open button on the Download Complete window shown in Figure 1-16.
Chapter #1: Getting Started · Page 11
Figure 1-16
Download Complete Window
If you skipped here from the
“Downloading the Software
from the Internet” section, click
the Open button.
√
If you located the software on the Parallax CD, click the Install button shown
in Figure 1-17.
Figure 1-17
The Parallax CD Browser
Install button located near
bottom of window.
√
When the BASIC Stamp Editor InstallShield Wizard window opens, click the
Next button shown in Figure 1-18.
Figure 1-18
InstallShield Wizard for
the BASIC Stamp Editor
Click Next.
√
Select Typical for your setup type as shown in Figure 1-19.
Page 12 · What’s a Microcontroller?
√
Click the Next button.
Figure 1-19
Setup Type
Click Typical, then click
the Next button.
√
When the InstallShield Wizard tells you it is “Ready to Install the Program”,
click the Install button shown in Figure 1-20.
Figure 1-20
Ready to Install.
Click the Install button.
√
When the InstallShield Wizard window tells you “InstallShield Wizard
Completed”, as shown in Figure 1-21, click Finish.
Chapter #1: Getting Started · Page 13
Figure 1-21
InstallShield Wizard
Completed:
Click the Finish button.
ACTIVITY #3: SETTING UP THE HARDWARE AND TESTING THE
SYSTEM
The BASIC Stamp module needs to be connected to power for it to run. It also needs to
be connected to a PC so it can be programmed. After making these connections, you can
use the BASIC Stamp Editor to test the system. This activity will show you how.
Introducing the BASIC Stamp®, Board of Education®, and HomeWork Board™
Parallax Inc.’s Board of Education® carrier board shown in Figure 1-22 next to a BASIC
Stamp module. As mentioned earlier, the BASIC Stamp is a type of very small
computer. This very small computer plugs into the Board of Education carrier board. As
you will soon see, the Board of Education makes it easy to connect a power supply and
serial cable to the BASIC Stamp module. In later activities, you will also see how the
Board of Education makes it easy to build circuits and connect them to your BASIC
Stamp module.
Figure 1-22
BASIC Stamp® 2
Microcontroller Module (left)
and Board of Education ®
Carrier Board (right)
Page 14 · What’s a Microcontroller?
Parallax, Inc.’s BASIC Stamp HomeWork Board™ is shown in Figure 1-23. This board
is like a Board of Education with the BASIC Stamp 2 module built-in. Its surfacemounted components are visible to the left of the white breadboard area. You can use
either the Board of Education with a BASIC Stamp module or the BASIC Stamp
HomeWork Board as your project platform for the activities in this text.
Figure 1-23
BASIC
Stamp®
HomeWork
Board™
Project
Platform.
Learn more about the features, parts and functions of BASIC Stamp modules, Board of
Education carrier boards, and the HomeWork Board project platform. See Appendix C:
BASIC Stamp and Carrier Board Components and Functions on page 307.
Required Hardware
(1) BASIC Stamp 2 module AND
(1) Board of Education
- or (1) BASIC Stamp HomeWork Board
(1) 9 V battery
(1) strip of 4 adhesive rubber feet
(1) Serial cable
Start with a new or fully charged 9 V battery. Avoid all the confusion a dead battery can
cause. Start with a new alkaline battery or a rechargeable battery that has recently been
fully recharged.
Chapter #1: Getting Started · Page 15
CAUTION! Before using an AC adapter, “battery replacer”, or DC supply:
√
Consult Appendix D: Batteries and Power Supplies on page 311 to make sure the
supply you use is appropriate for the activities in this text.
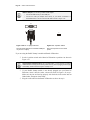
Connecting the Hardware
Both the Board of Education and the BASIC Stamp HomeWork Board come with a strip
that has four adhesive rubber feet. These rubber feet are shown in Figure 1-24, and they
should be affixed to the underside of your Board of Education or BASIC Stamp
HomeWork Board.
Figure 1-24
Rubber Feet
√
Remove each rubber foot from the adhesive strip and affix it to the underside
of your board as shown in Figure 1-25. If you are using the Board of
Education, it has circles on its underside that show where each rubber foot
should be attached. For the HomeWork Board, just place a rubber foot next to
each plated hole at each corner.
Figure 1-25
Rubber Foot
Affixed to
Underside of Board
of Education (left)
and HomeWork
Board (right)
Next, the Board of Education or BASIC Stamp HomeWork Board should be connected to
your PC or laptop by a serial cable.
√
Connect your serial cable to an available COM port on the back of your
computer as shown in Figure 1-26.
Page 16 · What’s a Microcontroller?
USB Port Adapter If you are using a USB to Serial Adapter:
√
Connect the USB end to your PC’s USB port.
√
Connect the COM port adapter either directly to your Board of Education or
HomeWork Board, or connect it to the serial cable as shown in Figure 1-26.
Com
Reset
0
1
2
Figure 1-26: PC or Laptop COM Port
Figure 1-27: 3-position Switch
Plug the serial cable into an available COM port
on your PC or laptop.
Set to the 0 position to turn off the
power.
If you are using the BASIC Stamp 2 module and Board of Education:
√
Set the 3-position switch on the Board of Education to position-0 as shown in
Figure 1-27.
Only the Board of Education Rev C has a 3-position switch. To turn off power on a Board
of Education Rev B, simply disconnect the power source by either unplugging the DC supply
or the battery These are shown in Figure 1-28, step 3 or 4.
√
√
If your BASIC Stamp module is not already plugged into your Board of
Education, insert it into the socket, oriented as shown in Figure 1-28, step-1.
Make sure the pins are lined up properly with the holes in the socket and not
folded under, then press down firmly.
Plug the serial cable into the Board of Education as shown in step-2.
Chapter #1: Getting Started · Page 17
√
Alkaline Battery
Powercell
√
Plug a DC power supply into the 6-9 VDC jack as shown in step-3, or plug a
9-V battery into the 9 VDC battery jack as shown in step-4.
Move the 3-position switch from position-0 to position-1. The green light
labeled Pwr on the Board of Education should now be on.
3
Figure 1-28
Board of
Education,
BASIC Stamp
Module,
Battery and
Serial Cable.
4
or
15 14 Vdd 13 12
6-9VDC
9 Vdc
Battery
Red
Black
X4
Pwr
STA
MPS
C LA
SS
in
TM
1
Sout
Sin
ATN
Vss
P0
P1
P2
P3
P4
P5
P6
P7
U1
Vin
Vss
Rst
Vdd
P15
P14
P13
P12
P11
P10
P9
P8
Vss
P1
P3
P5
P7
P9
P11
P13
P15
Vin
Vss
P0
P2
P4
P6
P8
P10
P12
P14
Vdd
X1
Reset
Vin
Vss
X3
P15
P14
P13
P12
P11
P10
P9
P8
P7
P6
P5
P4
P3
P2
P1
P0
X2
0
2
Vdd
X5
1
2
www.stampsinclass.com
Board of Education
© 2000-2003
1
Connect
components in
the order
shown in the
diagram.
Make sure to
properly orient
your BASIC
Stamp module
right side up,
matching the
notch on its
top edge to
notch on the
socket.
If you are using the BASIC Stamp HomeWork Board:
√
√
Connect the serial cable to the HomeWork Board (Figure 1-29, step-1).
Connect a 9 V battery to the battery clip as shown in step-2.
Page 18 · What’s a Microcontroller?
Figure 1-29
HomeWork Board and
Serial Cable
1
STA
MPS
CL A
SS
(916) 624-8333
www.parallaxinc.com
www.stampsinclass.com
in
Vdd
Vin
Rev A
Vss
X3
2
Power
Powercell
Alkaline Battery
Reset
P15
P14
P13
P12
P11
P10
P9
P8
P7
P6
P5
P4
P3
P2
P1
P0
Plug the serial cable
and 9 V battery into the
HomeWork Board.
X2
© 2002
®
BASIC Stamp HomeWork Board
Testing for Communication
The BASIC Stamp Editor has a feature for testing to make sure your PC or laptop can
communicate with your BASIC Stamp module.
√
Double-click the BASIC Stamp Editor shortcut on your desktop. It should
look similar to the one shown in Figure 1-30.
Figure 1-30
BASIC Stamp Editor Shortcut
Look for a shortcut similar to
this one on your computer’s
desktop.
Chapter #1: Getting Started · Page 19
The Windows Start Menu can also be used to run the BASIC Stamp Editor. Click your
Windows Start button, then select Programs → Parallax, Inc. → BASIC Stamp Editor 2…,
then click the BASIC Stamp Editor icon.
Your BASIC Stamp Editor window should look similar to the one shown in Figure 1-31.
The first time you run your BASIC Stamp Editor, it may display some messages and a
list of your COM ports found by the software.
√
To make sure your BASIC Stamp module is communicating with your
computer, click the Run menu, then select Identify.
Figure 1-31
BASIC Stamp
Editor
Select Identify
from the Run
menu.
An Identification window similar to the one shown in Figure 1-32 will appear. The
example in the figure shows that a BASIC Stamp 2 has been detected on COM2.
√
√
Check the Identification window to make sure a BASIC Stamp 2 module has
been detected on one of the COM ports. If it has been detected, then you are
ready for Activity #4: First Program.
If the Identification window does not detect a BASIC Stamp 2 module on any of
the COM ports, go to Appendix E: Trouble-Shooting on page 315.
Figure 1-32
Identification Window
Example: BASIC Stamp
2 found on COM2.
Page 20 · What’s a Microcontroller?
ACTIVITY #4: FIRST PROGRAM
The first program you will write and test will tell the BASIC Stamp to send a message to
your PC or laptop. Figure 1-33 shows how it sends a stream of ones and zeros to
communicate the text characters displayed by the PC or laptop. These ones and zeros are
called binary numbers. The BASIC Stamp Editor software has the ability to detect and
display these messages as you will soon see.
Alkaline Battery
Powercell
11
100
1 0 0 0 01 0 0
0
0
01
10
00
10
1
0
1
10
10101001
Figure 1-33
Messages from the
BASIC Stamp module
to your Computer
001
000
0
1 1
00
6-9VDC
9 Vdc
Battery
STAM
PS
CLA
SS
in
TM
101
0
1
11
00
001
0
1
1
Sout
Sin
ATN
Vss
P0
P1
P2
P3
P4
P5
P6
P7
U1
Vin
Vss
Rst
Vdd
P15
P14
P13
P12
P11
P10
P9
P8
Vs
P0
P2
P4
P6
P8
P1
P1
P1
Vd
The BASIC Stamp
module sends
characters to your PC
or laptop by
transmitting a stream
of binary ones and
zeros. The BASIC
Stamp Editor can
detect and convert
these binary codes to
characters and display
them.
10
0
www.stampsinclass.com
First Program
The program listings that you will type into the BASIC Stamp Editor and download to
the BASIC Stamp module will always be shown with a gray background like this:
Example Program: FirstProgram.bs2
' What's a Microcontroller - FirstProgram.bs2
' BASIC Stamp sends message to Debug Terminal.
' {$STAMP BS2}
' {$PBASIC 2.5}
DEBUG "Hello, it's me, your BASIC Stamp!"
END
Chapter #1: Getting Started · Page 21
You will enter this program into the BASIC Stamp Editor. Some lines of the program are
made automatically by clicking buttons on the toolbar. Other lines are made by typing
them in from the keyboard.
√
√
Begin by clicking the BS2 icon (the green diagonal chip) on the toolbar,
shown highlighted in Figure 1-34. If you hold your cursor over this button, its
flyover help description “Stamp Mode: BS2” will appear.
Next, click on the gear icon labeled “2.5” shown highlighted in Figure 1-35.
It’s flyover help description is “PBASIC Language: 2.5”.
Figure 1-34
BS2 Icon
Figure 1-35
PBASIC 2.5 Icon
Clicking on this button will
automatically place “ ‘ {$STAMP BS2}”
at the beginning of your program.
Clicking on this button will automatically
place “ ‘ {$PBASIC 2.5}” at the beginning
of your program.
ALWAYS use these toolbar buttons to add these two lines as the beginning of every
{ }. If you try to type in these parts of your
program, you may accidentally use parentheses( ) or square brackets [ ]. If you do
program!
Compiler directives use braces
this, your program will not work.
√
Type in the remaining 4 lines of the program exactly as shown in Figure 1-36.
Page 22 · What’s a Microcontroller?
Figure 1-36
First Program
Entered into
Editor
Enter your first
program into the
BASIC Stamp
Editor as shown
here.
√
√
√
Save your work by clicking File and selecting Save as shown in Figure 1-37.
Enter the name FirstProgram into the File name field near the bottom of the
Save As window as shown in Figure 1-38.
Click the Save button.
Figure 1-37: Saving the First Program
Figure 1-38: Entering the File Name
The next time you save, the BASIC Stamp Editor will automatically save to the same
filename (FirstProgram.bs2) unless you tell it to save to a different filename by clicking File
and selecting Save As (instead of just Save).
√
Click Run, and select Run from the menu that appears (by clicking it) as shown
in Figure 1-39.
Chapter #1: Getting Started · Page 23
Figure 1-39
Running Your First
Program
A Download Progress window will appear briefly as the program is transmitted from the
PC or laptop to your BASIC Stamp module. Figure 1-40 shows the Debug Terminal that
should appear when the download is complete. You can prove to yourself that this is a
message from the BASIC Stamp by pressing and releasing the Reset button on your
board. Every time you press and release it, the program will re-run, and you will see
another copy of the message displayed in the Debug Terminal.
√
Press and release the Reset button. Did you see a second “Hello…” message
appear in the Debug Terminal?
Figure 1-40
Debug Terminal
The Debug Terminal
displays messages sent
to the PC/laptop by the
BASIC Stamp module.
Page 24 · What’s a Microcontroller?
The BASIC Stamp Editor has shortcuts for most common tasks. For example, to run a
program, you can press the ‘Ctrl’ and ‘R’ keys at the same time. You can also click the Run
button. It’s the blue triangle shown in Figure 1-41 that looks like a CD player’s Play button.
The flyover help (the Run hint) will appear if you point at the Run button with your mouse.
You can get similar hints to find out what the other buttons do by pointing at them too.
Figure 1-41
BASIC Stamp Editor
Shortcut Buttons
How FirstProgram.bs2 Works
The first two lines in the example are called comments. A comment is a line of text that
gets ignored by the BASIC Stamp Editor, because it’s meant for a human reading the
program, not for the BASIC Stamp module. In PBASIC, everything to the right of an
apostrophe is normally considered to be a comment by the BASIC Stamp Editor. The
first comment tells which book the example program is from, and the program’s
filename. The second comment contains a handy, one-line description that explains what
the program does.
' What's a Microcontroller - FirstProgram.bs2
' BASIC Stamp sends message to Debug Terminal.
Although comments are ignored most of the time, the BASIC Stamp Editor does search
through comments for special directives. Every program in this text will use these two
directives:
' {$STAMP BS2}
' {$PBASIC 2.5}
The first directive is called the $STAMP Directive, and it tells the BASIC Stamp Editor
that you will be downloading the program specifically to a BASIC Stamp 2 module. The
second directive is called the $PBASIC directive, and it tells the BASIC Stamp Editor
that you are using version 2.5 of the PBASIC programming language. Note that these
compiler directives are enclosed in braces { } not parentheses ( ). You should always use
the toolbar icons to place these compiler directives in your program to avoid typing
errors. Also, entering the compiler directives by hand may not activate the syntax
highlighting in the BASIC Stamp Editor. That function is what causes various letters,
characters and words in your program to appear in different colors and capitalizations.
Syntax highlighting makes your programs easier to read, understand, and correct if there
are any bugs in them.
Chapter #1: Getting Started · Page 25
A command is a word you can use to tell the BASIC Stamp do a certain job. The first of
the two commands in this program is called the DEBUG command:
DEBUG "Hello, it's me, your BASIC Stamp!"
This is the command that tells the BASIC Stamp to send a message to the PC using the
serial cable.
The second command is called the END command:
END
This command is handy because it puts the BASIC Stamp into low power mode when it’s
done running the program. In low power mode, the BASIC Stamp waits for either the
Reset button to be pressed (and released), or for a new program to be loaded into it by the
BASIC Stamp Editor. If the Reset button on your board is pressed, the BASIC Stamp
will re-run the program you loaded into it. If a new program is loaded into it, the old one
is erased, and the new program begins to run.
Your Turn – DEBUG Formatters and Control Characters
A DEBUG formatter is a code-word you can use to make the message the BASIC Stamp
sends look a certain way in the Debug Terminal. DEC is an example of a formatter that
makes the Debug Terminal display a decimal value. An example of a control character is
CR, which is used to send a carriage return to the Debug Terminal. The text or numbers
that come after a CR will appear on the line below characters that came before it. You can
modify your program so that it contains more DEBUG commands along with some
formatters and control characters. Here’s an example of how to do it:
√
√
First, save the program under a new name by clicking File and selecting Save
As. A good new name for the file would be FirstProgramYourTurn.bs2
Modify the comments at the beginning of the program so that they read:
' What's a Microcontroller - FirstProgramYourTurn.bs2
' BASIC Stamp sends messages to Debug Terminal.
√
Add these three lines between the first DEBUG command and the END
command:
DEBUG CR, "What's 7 X 11?"
DEBUG CR, "The answer is: "
DEBUG DEC 7 * 11
Page 26 · What’s a Microcontroller?
√
Save the changes you made by clicking File and selecting Save.
Your program should now look like the one shown in Figure 1-42.
√
Run your modified program. You will have to either select Run from the Run
menu again, like in Figure 1-39 or click the Run button, like in Figure 1-41.
Figure 1-42
Modified
FirstProgram
Check your work
against the
example
program shown
here.
Where did my Debug Terminal go? Sometimes the Debug Terminal gets hidden behind
the BASIC Stamp Editor window. You can bring it back to the front by using the Run menu
as shown at the left of Figure 1-43, the Debug Terminal 1 shortcut button shown at the right
of the figure, or the F12 key on your keyboard.
Figure 1-43
Debug Terminal 1 to
Foreground
Using the menu (left)
and using the shortcut
button (right).
Your Debug Terminal should now resemble Figure 1-44.
Chapter #1: Getting Started · Page 27
Figure 1-44
Modified
FirstProgram.bs2
Debug Terminal Output
Make sure that when
you re-run your
program, you get the
results you expect.
ACTIVITY #5: LOOKING UP ANSWERS
The two activities you just finished introduced two PBASIC commands: DEBUG and END.
You can find out more about these commands and how they are used by looking them up,
either in the BASIC Stamp Editor’s Help or in the BASIC Stamp Manual. This activity
guides you through an example of looking up DEBUG using the BASIC Stamp Editor’s
Help and the BASIC Stamp Manual.
Using the BASIC Stamp Editor’s Help
√
In the BASIC Stamp Editor, Click Help, then select Index (Figure 1-45).
Figure 1-45
Selecting Index
from the Help
Menu
√
√
Type DEBUG in the field labeled Type in the keyword to find: ( Figure 1-46).
When the word DEBUG appears in the list below where you are typing, click it,
then click the Display button.
Page 28 · What’s a Microcontroller?
Figure 1-46
Looking up
the DEBUG
Command
Using Help.
Your Turn
√
√
√
√
Use the scrollbar to review the DEBUG command’s write-up. Notice that it has
lots of explanations and example programs you can try.
Click the Contents tab, and find DEBUG there.
Click the Search tab, and run a search for the word DEBUG.
Repeat this process for the END command.
Getting and Using the BASIC Stamp Manual
The BASIC Stamp Manual is available for free download from the Parallax web site, and
it’s also included on the Parallax CD. It can also be purchased as a printed book.
Downloading the BASIC Stamp Manual from the Parallax Web Site
√
√
√
√
Using a web browser, go to www.parallax.com.
√
Click the Download icon that looks like a file folder to the right of the
description: “BASIC Stamp User’s Manual Version 2.0 (3.2 MB)”.
Point at the Downloads menu to display the options.
Point at the Documentation link and click to select it.
On the BASIC Stamp Documentation page, find The BASIC Stamp Users
Manual.
Chapter #1: Getting Started · Page 29
Viewing the BASIC Stamp Manual on the Parallax CD
√
√
√
√
√
Click the Documentation link.
Click the + next to the BASIC Stamps folder.
Click the BASIC Stamp Manual book icon.
Click the View button.
Figure 1-47 shows an excerpt from the BASIC Stamp Manual v2.0 Contents
section, showing that information on the DEBUG command is found on page 97.
Figure 1-47
Finding the
DEBUG
Command in
the Table of
Contents
Figure 1-48 shows an excerpt from page 97 in the BASIC Stamp Manual v2.0. The
DEBUG command is explained in detail here along with example programs to demonstrate
how the DEBUG command can be used.
√
√
Look over the BASIC Stamp Manual’s explanation of the DEBUG command.
Count the number of example programs in the DEBUG section. How many are
there?
Figure 1-48
Reviewing
the DEBUG
Command
in the
BASIC
Stamp
Manual
Page 30 · What’s a Microcontroller?
Your Turn
√
√
Use the BASIC Stamp Manual’s Index to look up the DEBUG command.
Look up the END command in the BASIC Stamp Manual.
ACTIVITY #6: INTRODUCING ASCII CODE
In Activity #4, you used the DEC formatter with the DEBUG command to display a decimal
number in the Debug Terminal. But what happens if you don’t use the DEC formatter
with a number? If you use the DEBUG command followed by a number with no formatter,
the BASIC Stamp will read that number as an ASCII code.
Programming with ASCII Code
ASCII is short for American Standard Code for Information Interchange. Most
microcontrollers and PC computers use this code to assign a number to each keyboard
function. Some numbers correspond to keyboard actions, such as cursor up, cursor down,
space, and delete. Other numbers correspond to printed characters and symbols. The
numbers 32 through 126 correspond to those characters and symbols that the BASIC
Stamp can display in the Debug Terminal. The following program will use ACSII code to
display the words “BASIC Stamp 2” in the Debug Terminal.
Example Program – ASCIIName.bs2
√
Enter and run ASCIIName.bs2.
Remember to use the toolbar icons to place Compiler Directives into your programs!
'{$STAMP BS2} - Use the diagonal green electronic chip icon.
'{$PBASIC 2.5} - Use the gear icon labeled 2.5.
You can see a picture of these icons again on page 21.
'What's a Microcontroller - ASCIIName.bs2
'Use ASCII code in a DEBUG command to display the words BASIC Stamp 2.
'{$STAMP BS2}
'{$PBASIC 2.5}
DEBUG 66,65,83,73,67,32,83,116,97,109,112,32,50
END
Chapter #1: Getting Started · Page 31
How ASCIIName.bs2 Works
Each letter in the DEBUG command corresponds to one ASCII code symbol that appeared
in the Debug Terminal.
DEBUG 66,65,83,73,67,32,83,116,97,109,112,32,50
66 is the ASCII code for capital “B”, 65 is the code for capital “A” and so on. 32 is the
code for a space between characters. Notice that each code number was separated with a
comma. The commas allow the one instance of DEBUG to execute each symbol as a
separate command. This is much easier to type than 12 separate DEBUG commands.
Your Turn – Exploring ASCII Code
√
√
√
√
Save ASCIIName.bs2 as ASCIIRandom.bs2
Pick 12 random numbers between 32 and 127.
Replace the ASCII code numbers in the program with the numbers you chose.
Run your modified program to see what you get!
The BASIC Stamp Manual Appendix A has a chart of ASCII code numbers and their
corresponding symbols. You can look up the corresponding code numbers to spell your
own name.
√
√
√
√
√
Save ASCIIRandom.bs2 as YourASCIIName.bs2
Look up the ASCII Chart in the BASIC Stamp Manual.
Modify the program to spell your own name.
Run the program to see if you spelled your name correctly.
If you did, good job, and save your program!
ACTIVITY #7: WHEN YOU’RE DONE
It’s important to disconnect the power from your BASIC Stamp and Board of Education
(or HomeWork Board). First, your batteries will last longer if the system is not drawing
power when you’re not using it. Second, soon you will build circuits on the Board of
Education or HomeWork Board prototyping area.
Circuit prototypes should never be left unattended with a battery or power supply
connected. Always disconnect the power from your Board of Education or HomeWork
Board before you walk away, even if you only plan on leaving it alone for a minute or two.
Page 32 · What’s a Microcontroller?
Disconnecting Power
With the Board of Education Rev C, disconnecting power is easy. If you are using the
Board of Education Rev C, power is disconnected by moving the 3-position switch to
position-0 by pushing it to the left as shown in Figure 1-49.
Sout
Sin
ATN
Vss
P0
P1
P2
P3
P4
P5
P6
P7
U1
P10
P12
P14
Vdd
Vin
Vss
Rst
Vdd
P15
P14
P13
P12
P11
P10
P9
P8
P11
P13 P10
P15 P9
Vin P8
P7
X1
P6
P5
P4
P3
Reset
P2
P1
P0
Figure 1-49
Turning the Power off
X2
0
1
2
Board of Education
www.stampsinclass.com
© 2000-2003
Board of Education
Rev C
Do not remove the BASIC Stamp module from its socket in the Board of Education!
Every time the BASIC Stamp is removed and re-inserted into the socket on the Board of
Education, you risk damaging it. You do not need to remove it for storage.
Disconnecting the BASIC Stamp HomeWork Board’s power is easy too. If you are using
the BASIC Stamp HomeWork Board, disconnect the battery as shown in Figure 1-50.
Vdd
Vin
Vss
X3
Power
Powercell
Alkaline Battery
Reset
P15
P14
P13
P12
P11
P10
P9
P8
P7
P6
P5
P4
P3
P2
P1
P0
Figure 1-50
Disconnecting the
power to the HomeWork
Board
X2
© 2002
®
BASIC Stamp HomeWork Board
If you are using a Board of Education Rev B, you will not have a 3-position switch.
Either unplug power supply, or remove the 9 V battery, whichever you are using.
Your Turn
√
Disconnect the power to your board now.
Chapter #1: Getting Started · Page 33
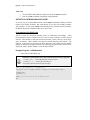
SUMMARY
This chapter guided you through the following:
•
An introduction to some devices that contain microcontrollers
•
An introduction to the BASIC Stamp module
•
A tour of some interesting inventions made with BASIC Stamp modules.
•
Where to get the free BASIC Stamp Editor software you will use in just about all
of the experiments in this text
•
How to install the BASIC Stamp Editor software
•
An introduction to the BASIC Stamp module, Board of Education, and
HomeWork Board
•
How to set up your BASIC Stamp hardware
•
How to test your software and hardware
•
How to write and run a PBASIC program
•
Using the DEBUG and END commands
•
Using the CR control character and DEC formatter
•
How to use the BASIC Stamp Editor’s Help and the BASIC Stamp Manual
•
A brief introduction to ASCII code
•
How to disconnect the power to your Board of Education or HomeWork Board
when you’re done.
Questions
1. What is a microcontroller?
2. Is the BASIC Stamp module a microcontroller, or does it contain one?
3. What clues would you look for to figure out whether or not an appliance like a
clock radio or a cell phone contains a microcontroller?
4. What does an apostrophe at the beginning of a line of PBASIC program code
signify?
5. What PBASIC commands did you learn in this chapter?
6. Let’s say you want to take a break from your BASIC Stamp project to go get a
snack, or maybe you want to take a longer break and return to the project in a
couple days. What should you always do before you take your break?
Exercises
1. Explain what the asterisk does in this command:
DEBUG DEC 7 * 11
Page 34 · What’s a Microcontroller?
2. Guess what the Debug Terminal would display if you ran this command:
DEBUG DEC 7 + 11
3. There is a problem with these two commands. When you run the code, the
numbers they display are stuck together so that it looks like one large number
instead of two small ones. Modify these two commands so that the answers
appear on different lines in the Debug Terminal.
DEBUG DEC 7 * 11
DEBUG DEC 7 + 11
Projects
1. Use DEBUG to display the solution to the math problem: 1 + 2 + 3 + 4.
2. Which lines can you delete in FirstProgramYourTurn.bs2 if you place the
command shown below on the line just before the END command in the program?
Test your hypothesis (your prediction of what will happen). Make sure to save
FirstProgramYourTurn.bs2
with
a
new
name,
like
FirstProgramCh01Project05.bs2. Then make your modification, save and run
your program.
DEBUG "What's 7 X 11?", CR, "The answer is: ", DEC 7 * 11
Solutions
Q1. A microcontroller is a kind of miniature computer found in electronic products.
Q2. The BASIC Stamp module contains a microcontroller called the PIC16C57.
Q3. If the appliance has buttons and a digital display, these are good clues that it has
a microcontroller inside.
Q4. A comment.
Q5. DEBUG and END
Q6. Disconnect the power from the BASIC Stamp project.
E1. It multiplies the two operands 7 and 11, resulting in a product of 77. The asterisk
is the multiply operator.
E2. The Debug Terminal would display: 18
E3. To fix the problem, add a carriage return, the CR, control character.
DEBUG DEC 7 * 11
DEBUG CR, DEC 7 + 11
P1. Here is a program to display a solution to the math problem: 1+2+3+4
'{$STAMP BS2}
'{$PBASIC 2.5}
Chapter #1: Getting Started · Page 35
DEBUG "What's 1+2+3+4?"
DEBUG CR, "The answer is: "
DEBUG DEC 1+2+3+4
END
P2. The last three DEBUG lines can be deleted. An additional CR is needed after the
"Hello" message.
' What's a Microcontroller - FirstProgramYourTurn.bs2
' BASIC Stamp sends message to Debug Terminal.
' {$STAMP BS2}
' {$PBASIC 2.5}
DEBUG "Hello, it's me, your BASIC Stamp!", CR
DEBUG "What's 7 X 11?", CR, "The answer is: ", DEC 7 * 11
END
The output from the Debug Terminal is:
Hello, it's me, your BASIC Stamp!
What's 7 X 11?
The answer is: 77
This output is the same as it was with the previous code. This is an example of
using commas to output a lot of information, using only one DEBUG statement.
Further Investigation
In this chapter, you visited the Software section of either the Parallax web site or the
Parallax CD to get a copy of the BASIC Stamp Editor. You can go to the Documentation
sections of either the Parallax web site or the Parallax CD to get a free copy of this text
and of the BASIC Stamp Manual. Printed copies can also be purchased from Parallax.
“BASIC Stamp Manual”, Users Manual, Version 2.0c, Parallax Inc., 2000
You can learn much more about the DEBUG and END commands by looking them
up in the BASIC Stamp Manual. You can find them using the Table of Contents.
The BASIC Stamp Manual has many more examples you can try, along with
lessons similar to those in the Projects section you just completed.