1
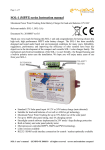
SOL-1 (MPPT) series Instruction manual
Maximum Power Point Tracking Solar Battery Charger for lead acid batteries 12V/24V
Relevant models: SOL-1, SOL-1(A)
Document No. 20071111 rev2.0
Thank you very much for buying this SOL-1 unit and congratulations for choosing this high
tech high performing MPPT solar battery charger. The SOL-1 has been carefully designed
and tested under harsh real environmental conditions for many years. Reliability, ruggedness,
performance and the improvement of efficiency of solar systems have been key objectives in
the development of the compact and versatile SOL-1 solar charger family series. The
mechanical and electrical installation of the SOL-1 is user friendly: A flanged housing and
the built-in polarity tester ease the installation. We hope you’ll be able to use your SOL-1
for many years in the most satisfactory manner.
•
•
•
•
•
•
•
•
Standard 12V Solar panel input Æ 12V or 24V battery charge (auto detected)
Suitable for lead-acid batteries of wet cell or gel technology
Maximum Power Point Tracking for up to 40% better use of the solar panel
For up to 100W solar panel rating, max 6A charging current
Power booster output for power range extension (in conjunction with SOL-PWR-x)
Built-in battery and solar panel polarity tester
Microprocessor controlled MPPT, SMPS and PWM technology.
Serial interface output for performance analysis (in conjunction with SOL-LCD-1)
SOL-1 user’s manual
©EMPO-NI 2008
all rights reserved
errors and omissions excepted
1.
SAFETY ADVISE
1.1) Avoid short circuits and wrong connections to the SOL-1: Danger of fire !
1.2) Avoid reverse polarity of the solar panel and of the battery ! (Use built-in polarity
tester ! maximum test time: 5sec). Keep batteries in a well ventilated area !
1.3) Do not exceed the max. operating conditions ! (details in chapter “Technical data”)
1.4) Add a suitable fuse into the (+) cable to the battery and load output (for 24V systems
only). (details in chapter “Technical data”) !
1.5) Sparks / arc-overs can occur during installation and any time cables get in touch with
terminals. Do not install this solar equipment in rooms where potentially flammable gases
mixtures could be set free (e. g. by gas bottles, laquers, solvents, etc.)!
1.6) The case of SOL-1 must be mounted horizontally ensuring free access to the ventilation
slots of the housing and in climatic suitable conditions ! (details in chapter “Technical data”)
1.7) The cable connected to the terminals must be of a suitable diameter and must not
exceed a certain length ! (details in chapter “Technical data”)
1.8) Follow strictly the mechanical / electrical installation guide to avoid any malfunction or
wrong commissioning of the SOL-1 !
1.9) Do not charge non-rechargeable batteries !
1.10) Keep electrically conducting material like metals etc. away from the terminal blocks
top and bottom side. Danger of short circuit !
2.
INSTALLATION GUIDE
2.1) Mechanical installation: The case of the SOL-1 has a flanged bottom side cover which
should be used to mount the device on a wall or any other non-vibrating surface. Simple
screws (not contained in the SOL-1 package) and washers can be used to attach the flanges
to the (wall) surface. Mount the case horizontally ensuring free air ventilation around the
housing.
2.2) Electrical installation: The SOL-1 has got a built-in polarity tester to simplify the
installation of the system and to avoid a hazardous reverse polarity situation which might
damage the SOL-1.
2.2.1) Usage of the polarity tester:
12V
FUSE
SOL-1 user’s manual
©EMPO-NI 2008
12V
all rights reserved
errors and omissions excepted
Figure 2.2.1 shows the usage of the polarity tester: For a maximum time of 5 seconds the
cables of unknown polarity and maximum voltage of 24V (minimum voltage = 12V) are
brought into contact with the square shaped metallized part of the PCB below the indication
“POL(+)” and “POL(-)” respectively. If the built-in LED of the SOL-1 is getting on, the
polarity of the cables touching the metallized pads will be polarized according to the
indication on the PCB. If the LED is not on, please swap the cables. In case there is no LED
indication in both ways, please check the cabling / fuse / battery voltage. This polarity test is
only effective when the SOL-1 has not yet started to operate, e.g. before complete
initialisation of the unit.
2.2.2) The connection of the battery, solar panel and the load (only applicable in 24V battery
systems) to the terminals of the SOL-1 has to be done following a correct order. First the
system must be determined as the SOL-1 is suitable charge 12V or 24V batteries out of a
12V solar panel in two different configurations. Depending on the used battery type two
different wiring possibilities are existing. The corresponding connections to the SOL-1 for
booth types of battery voltage systems are indicated on the printed circuit board close to the
terminal block. The following figures explain the 12V / 24V battery options of the
connections:
2.2.2.1)
12V
12VÆ12V
12V
12V
+
FUSE
12V
+
Connection diagram 2.2.2.1 indicates the configuration for a 12V battery system. The solar
panel is a “12V” type.
2.2.2.2)
12V
12VÆ24V
LOAD
FUSE
24V
FUSE
24V
+
SOL-1 user’s manual
©EMPO-NI 2008
+
all rights reserved
12V
+
errors and omissions excepted
The connection diagram 2.2.2.2 indicates the configuration for a 24V battery system. In this
configuration a 24V rated non capacitive and non inductive load of up to 100W can be
connected between the “LOAD” output and the +24V terminal. A suitable fuse must be
implemented into this loop close to the output terminals of the SOL-1 to protect the output.
2.2.3) Electrical commissioning order
Check battery’s polarity
Connect battery to its corresponding terminals – “+”- pole FIRST
Check polarity of solar panel
Connect solar panel to its corresponding terminals
END (LED is on or flickering)
The correct initialization of the SOL-1 is confirmed by a lit LED or a flickering LED
provided that the solar panel is sufficiently exposed to sun. Otherwise the commissioning
has failed and the SOL-1 must be decommissioned and re-commissioned again.
2.2.4) Electrical decommissioning order
The decommissioning order: 1.) Remove the solar panel
2.) Remove the “-“ pole from the battery
3.) Remove the“+”- pole from the battery.
3.
LED FUNCTIONS
MODE
Polarity test
Operation
LED
ON
OFF
FLICKERING:
ON
INTERPRETATION
correct polarity
Solar panel low (low sunlight)
MPPT operating
battery full
Table 1 indicates the LED and its information content during the two modes “polarity test”
during the commissioning of the SOL-1 and the “normal operation”.
SOL-1 user’s manual
©EMPO-NI 2008
all rights reserved
errors and omissions excepted
4.
MPPT (Maximum Power Point Tracking) function
The SOL-1 series contains a Maximum Power Point tracking software algorithm which
efficiently optimizes the operation point of the solar panel. Through the MPPT functionality
the solar system can reach up to 40% more output of the solar panel compared with standard
solar battery chargers.
The decoupling of the best operation point for the solar panel (MPP) from the actual battery
voltage by Switch Mode Power Supply (SMPS) technology and state-of-the-art
microprocessor technology for efficient MPPT are the main features of the SOL-1 solar
battery charger systems. The typical, highly temperature depending MPP voltage of solar
panels is around 16,8V at 25°C and 1000W/m2 of solar irradiation intensity under reference
conditions. Assuming an empty battery at 12V the difference in the achievable performance
between conventional and the SOL-1’s MPP technology becomes apparent by the following
graph showing an example curve of a V/I characteristic of a solar panel charging an empty
battery:
V
MPP
16,8V
higher output with MPPT
12,0V
Up to +40%
better use of
Standard solar battery charger
solar panels
I
A simple calculation on this example curve reveals the advantage of the SOL-1’s MPP
tracking function, which can reach up to 40% more output power than conventional systems.
Smaller and much more cost efficient solar panels can be used to reach the same
performance like conventional standard battery charger plus large solar panels.
5.
EXTENSION PORT functions
The extension port “EXTPORT” and its 4 pins counting connector allows to connect
accessories like a LC-Display unit (e.g. “SOL-LCD-1”, ask your dealer) monitoring the
performance of the power conversion (solar panel voltage, battery voltage, transferred solar
power, battery condition) or a power multiplier (e.g. “SOL-PWR-xx”) unit in case the SOL1’s output power is not sufficient. The information at this port is purely digitally coded, e.g.
it requires a compatible receiving unit. Using a power multiplier unit the totally applicable
solar panel’s power (in Wp) is the sum of the SOL-1’s own solar panel capability plus the
power multiplier’s capability. The same way of computation is valid to determine the
maximum charging output current of the combined units.
SOL-1 user’s manual
©EMPO-NI 2008
all rights reserved
errors and omissions excepted
12V
BUS
12V
12V
SOL-PWR-xx
SOL-LCD-1
The figure above indicates the principle of the bus system for information read-out and the
usage of the power multiplication unit SOL-PWR-xx. SOL-LCD-1 and SOL-PWR-xx are
accessories and are not contained in the SOL-1’s scope of delivery.
6.
TECHNICAL DATA
ITEM
Operation temperature range
Storage temperature range
Solar panel voltage (open loop, entire temperature range)
Battery voltage
Solar panel rated power
Charging current
Own consumption (indicator = off)
Battery end of charge protection voltage (24V system)
Battery end of charge protection voltage (12V system)
MPP voltage control range
Power terminal cable diameter
Cable length (power / EXTPORT)
Humidity (non condensing)
Polarity tester usage time
Fuse rating for battery and load output (fast time lag)
Capacity of charged battery
LOAD terminal output power (24V configuration only)
Weight
Min.
-20
-40
12,0
11,0
15
0
26,3
13,0
12,0
Typ.
3
27,0
13,5
Max.
45
85
24,0
28,0
100
6,0
12
28,0
13,9
19,0
1,5
20
7,5
2,5
60
5
8,0
20
100
300
Unit
°C
°C
V
V
Wp
A
mA
V
V
V
mm2
m
rel%
sec
A
Ah
W
g
Classification according to EN60529: IP20, 2002/95/EC directive: RoHS compliant,
2002/96/EC ANNEX II (WEEE) directive: Electronic waste - do not dispose to unsorted
municipal waste, dispose only at dedicated recycling /disposal centres for electronic waste !
SOL-1 user’s manual
©EMPO-NI 2008
all rights reserved
errors and omissions excepted