1
Coreco Imaging • 7075 Place Robert-Joncas, Suite 142 • St-Laurent, Quebec, Canada • H4M 2Z2
http://www.imaging.com
WiT
Programmer’s Manual
Edition 8.0
Part number OC-WITM-PROG0
*OC-WITM-PROG0*
NOTICE
© 2003 Coreco Imaging Inc. All rights reserved.
This document may not be reproduced nor transmitted in any form or by any means, either electronic
or mechanical, without the express written permission of Coreco Imaging Inc. Every effort is made to
ensure the information in this manual is accurate and reliable. Use of the products described herein is
understood to be at the user’s risk. Coreco Imaging Inc. assumes no liability whatsoever for the use of
the products detailed in this document and reserves the right to make changes in specifications at any
time and without notice.
Microsoft and MS-DOS are registered trademarks; Windows, Windows 95, Windows NT, and
Windows XP are trademarks of Microsoft Corporation. All other trademarks or intellectual property
mentioned herein belong to their respective owners.
Printed on September 30, 2003
Document Number: OC-WITM-PROG0
Printed in Canada
Contents
Introduction .................................................................................................................................... 1
Custom Programs using Igraphs................................................................................................... 3
Creating a WiT Code File ............................................................................................................ 3
Initializing and Exiting................................................................................................................. 4
Loading and Executing WIC Files ............................................................................................... 6
Mapping Displays to Windows .................................................................................................... 7
Setting Inputs ............................................................................................................................... 8
Getting Outputs ............................................................................................................................ 9
Changing Parameters.................................................................................................................. 10
Status and Error Messages ......................................................................................................... 11
WiT Engine ................................................................................................................................... 13
Using Visual Basic ..................................................................................................................... 13
Applications ........................................................................................................................... 14
ActiveX Controls .................................................................................................................... 14
Examples................................................................................................................................ 14
A Simple Example............................................................................................................. 15
Create Project................................................................................................................ 15
Create a Picture Object for Display Data ...................................................................... 16
Declare Variables .......................................................................................................... 16
Initialize ........................................................................................................................ 16
Clean Up ....................................................................................................................... 16
Completing the rest of the Form ................................................................................... 17
Using a Frame Grabber ..................................................................................................... 17
Set Properties ................................................................................................................ 17
Declare Variables .......................................................................................................... 18
Completing the Form .................................................................................................... 18
Clean Up ....................................................................................................................... 19
Using an Interactive Operator............................................................................................ 19
Controlling an Interactive Operator................................................................................... 21
Automatic Notification to User Application...................................................................... 22
Passing Data To and From WiT Engine ............................................................................ 24
Running Individual Operators in Script Mode .................................................................. 26
Running Any Operator or WIC ......................................................................................... 27
Form Load Procedure.................................................................................................... 27
Control Buttons ............................................................................................................. 28
Developing ActiveX Controls ........................................................................................... 29
Using C/C++ .............................................................................................................................. 30
i
Multi-Threaded Applications .................................................................................................30
MFC Examples.......................................................................................................................31
A Simple Example .............................................................................................................32
Create Project ................................................................................................................32
Create a Picture Control ................................................................................................33
Initialize WiT Engine ....................................................................................................33
Clean Up........................................................................................................................33
Complete the Application..............................................................................................33
Using a Frame Grabber......................................................................................................34
Using an Interactive Operator............................................................................................35
Controlling an Interactive Operator ...................................................................................37
Automatic Notification to User Application ......................................................................39
Passing Data To and From WiT Engine ............................................................................41
Running Operators in Script Mode ....................................................................................43
Running Any Operator or WIC..........................................................................................45
Win32 Examples.....................................................................................................................47
A Simple Example .............................................................................................................47
WiT Engine ActiveX ..................................................................................................................48
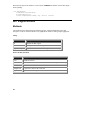
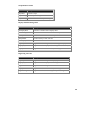
Methods..................................................................................................................................48
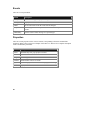
Events .....................................................................................................................................50
Properties...............................................................................................................................50
WiT Engine DLL........................................................................................................................51
Custom Programs using WiT C Functions .................................................................................53
A Simple Example......................................................................................................................53
Program Structure.......................................................................................................................55
Headers and Link Libraries ........................................................................................................55
Status Callback Function ............................................................................................................56
Object Library ............................................................................................................................57
Display Library...........................................................................................................................58
Image and Data Display ........................................................................................................59
GetData - Entering Graphics Data ........................................................................................61
Interactive Image and Data Edit ............................................................................................62
Plotting Graphs......................................................................................................................63
Using Frame Grabbers................................................................................................................64
More Examples...........................................................................................................................66
Adding Operators to WiT ............................................................................................................67
A Simple Example......................................................................................................................67
WiT Manager .........................................................................................................................67
Create Configuration .............................................................................................................68
Create Project ........................................................................................................................69
Create Library........................................................................................................................71
Define Operator .....................................................................................................................72
Implment Operator Source.....................................................................................................73
Update WiT Conguration .......................................................................................................75
Compile and Test....................................................................................................................76
ii
Build Release DLL ................................................................................................................. 77
Add On-line Help ................................................................................................................... 77
Add Icon................................................................................................................................. 78
Programming Conventions......................................................................................................... 78
Inputs and Parameters........................................................................................................... 78
Outputs................................................................................................................................... 79
Return Values......................................................................................................................... 80
Memory Management ............................................................................................................ 82
Function Headers ....................................................................................................................... 83
Contexts ..................................................................................................................................... 83
Igraph Status Changes................................................................................................................ 85
Calling Other WiT Operators..................................................................................................... 86
International Language Support ................................................................................................. 90
Data Objects.................................................................................................................................. 91
Object Types .............................................................................................................................. 91
Vectors and Images .................................................................................................................... 92
Nested Objects ........................................................................................................................... 93
Object Type ID........................................................................................................................... 94
Memory Allocation .................................................................................................................... 95
Data Cache ................................................................................................................................. 96
The CorObj Type ....................................................................................................................... 96
Naming Conventions.................................................................................................................. 98
Adding New Data Types ............................................................................................................ 99
A Simple Example .................................................................................................................. 99
Define the New Object .................................................................................................... 100
Modify the Operator Definition....................................................................................... 101
Modify the Operator Source Code................................................................................... 102
Test the New Object and Operator .................................................................................. 103
Examples of Using Objects in a C Program............................................................................. 104
Processing Objects of Type CorObj..................................................................................... 104
User Defined Objects as Operator Outputs ......................................................................... 105
Advanced ................................................................................................................................. 107
Processing Object Fields ..................................................................................................... 107
Adding Object Types Dynamically....................................................................................... 108
Code Generation from Igraphs ................................................................................................. 111
Generating C Code from an Igraph .......................................................................................... 111
Building Generated Code ......................................................................................................... 111
Limitations of Code Generation ............................................................................................... 111
Adding Hardware Support ........................................................................................................ 115
A Simple Example ................................................................................................................... 115
Create Library ..................................................................................................................... 115
Add Acquire Operator.......................................................................................................... 116
Implement Source ................................................................................................................ 117
Test New Frame Grabber .................................................................................................... 118
iii
Hardware Initialization and Cleanup ........................................................................................118
The Advanced Panel.................................................................................................................119
Live Video ................................................................................................................................120
Compiler Issues ...........................................................................................................................121
Run Time Libraries...................................................................................................................121
Dynamic Memory Allocation ...................................................................................................121
Other Visual Studio Settings ....................................................................................................122
Shipping Custom Applications ..................................................................................................123
Manual Installation of Distribution WiT Components .............................................................123
Installation of Custom WiT Components .................................................................................126
Run Time License.....................................................................................................................126
Coreco Imaging Contact Information.......................................................................................127
iv
Introduction
This manual describes WiT from a programmer’s perspective. It describes how WiT processing
functions can be used in a standalone C/C++ program, how new processing functions can be
added as operators to WiT, how new data object types can be created and used, the structure and
organization of operators and objects, and support for hardware resources. It assumes familiarity
with the C programming language and Microsoft Visual C/C++.
1
2
Custom Programs using
Igraphs
Igraphs are perfect for prototyping new and efficient algorithms. But when you need to deploy an
application or product, you probably don’t want your users to have to run WiT or even to see the
igraphs so they can copy your ideas. WiT can generate a non-displayable file, called a WiT
Imaging Code (WIC) file, from an igraph. You can then create your own application in VB or
C/C++ and link it with the WiT Engine. WiT Engine is a Windows DLL with an optional
ActiveX interface that has all the execution capabilites of WiT but without the igraph display
capabilities. WiT Engine cannot load igraphs, only WIC files. On the other hand, WiT cannot load
WIC files. So when you distribute WIC files together with your applications, there is no danger
that an unauthorized person can view the algorithm. A WIC file is just binary data.
Creating a WiT Code File
When your igraph is complete and ready to run as part of a larger application, the first step to
perform is conversion of the igraph into a WiT code file ('wic' file). This step is easily carried out
by selecting the Graph|Make WiT code menu item in WiT. Selecting the Make WiT code item
will cause WiT to generate a wic file in the directory where the igraph is located named after the
igraph file but with a '.wic' file extension. After selection, the menu item will have a check mark
indicating that WiT code file generation is enabled for this igraph. Each time the igraph is saved,
the associated wic file will be updated. To remove the wic file, simply select the Make WiT code
item again. The menu item will become unchecked and the wic file will be removed. The wic file
is a binary file and cannot be loaded into WiT. The file can only be loaded by either the WiT
ActiveX control or the WiT DLL. In this manner, your intellectual property is protected since the
igraph file remains with the developer and not the customer who only has access to the wic file
that carries out the execution represented by the igraph.
3
Enabling WiT Code Generation
For this overview, we will work with the sample igraph named tutorial.igr located in the
$WITHOME\pro\demo\wic directory. Load this igraph now and select the Make WiT code menu
item to create a tutorial.wic file in the same directory.
Initializing and Exiting
This section shows how to insert the WiT ActiveX control onto a Visual Basic form then initialize
and exit the control. This is the first step before an application can begin using the WiT code file
generated from WiT.
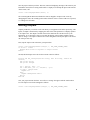
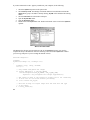
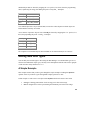
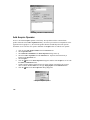
Start Visual Basic 6.0 and use the wizard to create a Standard EXE project.
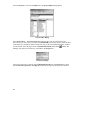
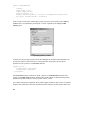
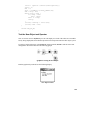
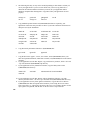
Select Project|Components... to bring up the Components dialog. Scroll down and select the WiT
Control. Select OK.
4
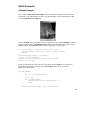
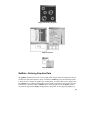
Selecting the WiT Control
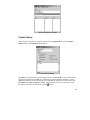
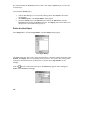
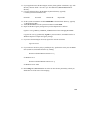
Select the WiT Control icon from the components panel. Insert the control onto your form.
Inserting the WiT Control on a Form
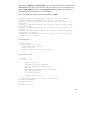
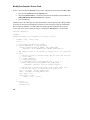
Go to the Form_Load function and add the following initialization code:
Private Sub Form_Load()
5
Dim status As Long
status = Wit1.Init(Form1.hWnd, 0)
If status = 0 Then
MsgBox "WiT failed to initialize!"
End If
End Sub
Go to the Form_Unload function and add the following exit code:
Private Sub Form_Unload(Cancel As Integer)
Dim status As Long
status = Wit1.Exit
If status = 0 Then
MsgBox "WiT failed to exit!"
End If
End Sub
Save your Visual Basic project then run your form to ensure that the WiT control initializes and
exits properly. Remember to exit your form by selecting the close button at the top right of your
form. Don't use the Visual Basic run/stop toolbar to stop your form since that will not call your
Form_Unload function.
Loading and Executing WIC Files
At this point, we have a Visual Basic application that initializes and exits the WiT ActiveX control
and we have a wic file generated from WiT. In this section, we will load and execute the wic file
just as you would load and execute an igraph from WiT.
Load your Visual Basic project developed in the previous section. Declare a global variable called
execId as follows:
Dim execId As Long
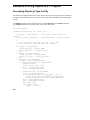
Add the following code to your Form_Load function to load the sample "tutorial.wic" file:
' Initialization goes here
execId = Wit1.Load(Environ("WITHOME") & "\pro\demo\wic\tutorial.wic")
If execId = 0 Then
MsgBox "WiT failed to load!"
End If
Now add a button to your form. Call it 'Run'. Add the following code for the Run_Click function:
Private Sub Run_Click()
6
Dim status As Long
status = Wit1.ControlExec(execId, WIT_EXE_FLASH, 0)
If status = 0 Then
MsgBox "WiT failed to run!"
End If
End Sub
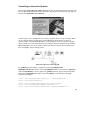
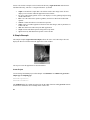
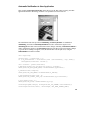
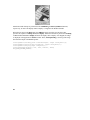
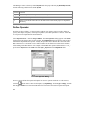
Save your project and run the form. When your form appears, the WiT control will have been
initialized and the tutorial.wic file loaded. Select the Run button to execute the WiT code file. You
should see an image of the moon appear in a pop-up window with the title 'image'. The tutorial
igraph used to create the WiT code file reads an image file from disk and displays the image to a
window. Since the window is not redirected anywhere, the window appears detached from our
form. In the next section, we will learn how to map this window to a PictureBox control so it
appears within our form.
Mapping Displays to Windows
A display is any window that pops up in WiT to show data or prompt for input. Igraph operators
that produce displays include display, overlayData, getData, surface, graph, prompt, etc. As you
saw in the previous section, the display operator in the tutorial.wic file caused detached windows
to pop-up just the way you would expect as if running the tutorial igraph from WiT. If we want to
redirect this window to our form, then we need to create a PictureBox control to map the display
operator. Follow this exercise to learn how this is done.
Create a PictureBox control on your form. Call it Picture1. Picture1 should be roughly the size of
the moon image (256x256 pixels). Now add the following code to your Form_Load function:
status = Wit1.SetDisplayWnd("image", Picture1.hWnd)
If status = 0 Then
MsgBox "WiT failed to map display!"
End If
Save and run your form. This time when the Run button is selected, the moon image will appear in
your PictureBox control! In order for this mapping to work, the first argument of the
SetDisplayWnd method must match the value of the name parameter of a display operator in the
WiT code file. The name parameter of a display operator will always appear as the name of the
pop-up window when run in WiT. Whenever the WiT engine finds a mapping between the title bar
name of a window produced by a display operator and a valid window handle (Picture1.hWnd),
the display window will be directed to use the window handle instead of creating a detached
window.
To unmap a window to a PictureBox control, use:
Wit1.RmDisplay("image")
7
Unmapping windows is important if the PictureBox control comes and goes as part of a temporary
form in your application. If you don't unmap from a PictureBox that no longer exists, then the WiT
engine will try to access a non-existent handle and crash.
Setting Inputs
Think of the WiT code file as an operator in WiT. Our application supplies input to the code file,
the code file executes which generates outputs for transfer back to the application. We have so far
learned how to perform the computing part by loading and running a WiT code file. We also have
learned to redirect a display window to a PictureBox in our form for some visual feedback. This
section shows how to transfer data in and out of a WiT code file using Visual Basic.
Application data can be fed into a WiT code file by mapping the name of a filename parameter for
a readObj operator to an input event where the data is supplied. Typically, the readObj operator
reads data from a file specified by the filename parameter. When a mapping is established
between the filename parameter value, then the readObj operator invokes the input event of the
ActiveX control at which point data is provided by the application. The readObj operator returns
and uses this data as its output. To see how this works, lets map the filename parameter value,
"moon", of the readObj operator in the tutorial code file. In the input event, we will create a "Hello
There" string as the readObj output.
Add the following code to your Form_Load procedure:
status = Wit1.RegInputEvent("moon", 1)
If status = 0 Then
MsgBox "WiT failed to register an input event!"
End If
The code above creates a mapping between the "moon" filename value of a readObj operator in
the code file and the input event procedure called Wit1_OnInput. The code for Wit1_OnInput
is:
Private Sub Wit1_OnInput(name As String)
Dim status As Long
If name = "moon" Then
status = Wit1.SetInputData(name, "Hello There", 0)
If status = 0 Then
MsgBox "WiT failed to set input data!"
End If
Else
MsgBox "Unexpected name!"
End If
End Sub
8
Save the project and run your form. This time, instead of displaying an image of the moon in your
PictureBox control, the text string "Hello There" is displayed. To unmap the input event from the
"moon" name, call:
status = Wit1.RegInputEvent("moon", 0)
The second argument determines whether the name is mapped to an input event or not. By
unmapping the name, the readObj operator whose filename value is "moon" behaves as expected,
i.e. reading a file from disk.
Getting Outputs
Outputs produced by a code file can be sent directly to an application for further processing. Like
inputs, an output is transferred by mapping the value of the name parameter of a display operator
to an output event. The output event then retrieves the data from the code file for use by the
application. To see how this is done, we will map the display operator name parameter whose
value is "image" to an output event then retrieve the string data created by the input event carried
out in the previous step.
First, map the output event in the Form_Load procedure:
status = Wit1.RegOutputEvent("image", 1, WIT_DATA_FORMAT_NONE)
If status = 0 Then
MsgBox "WiT failed to register an output event!"
End If
Second, add the output event code for the ActiveX control as follows:
Private Sub Wit_OnOutput(name As String, data As String, rawData As
Variant)
Dim str As String
Dim pos As Integer
pos = InStr(1, data, " ")
str = Mid(data, pos + 1, Len(data) - pos)
If name = "image" Then
MsgBox str
Else
MsgBox "Unexpected name!"
End If
End Sub
Save your project and run the form. You will see a message box appear with the "Hello There"
text. The output event can be unmapped as follows:
status = Wit1.RegOutputEvent("image", 0, WIT_DATA_FORMAT_NONE)
9
Since mapping a window, input or output event relies on the value of a key parameter to either a
display or readObj operator, it is possible to use several such operators in a WiT code file that
refer to the same name. For example, if an input event was mapped to the value "moon", then two
readObj operators which set their filename parameter to the value "moon" would trigger the same
input event.
Changing Parameters
Now that you can feed data into the WiT engine and retrieve results from the engine, the last
important step is to be able to control parameter values belonging to operators in a WiT code file.
For example, you may wish to adjust a threshold or set a constant used in a comparison operation.
This ability requires two steps. First, you load your igraph in WiT and identify the parameter of an
operator you wish to control. Then you promote this parameter and give it a unique name which
will be exported to the WiT code file for later access. If the parameter you want to change belongs
to an operator in a nested subgraph, then you must promote the parameter up one level and
continue to promote the parameter up one level until it is promoted from the top-level for access
by the WiT code file. Save your igraph (ensuring the Make WiT code option is enabled to
generate a new wic file). Second, you issue a call to the SetOpParams method to send a new
value to the promoted parameter from your Visual Basic application. Let's try this with our tutorial
Visual Basic project.
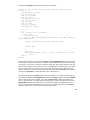
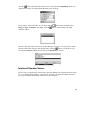
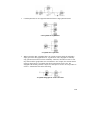
Start WiT and load the tutorial.igr igraph. Split the link at the output of the start operator and
connect this to the input of a constant operator. Connect the output of the constant operator to a
display operator with its name parameter set to "text". Set the constant parameter of the constant
operator to the value "Hello Again". When you run this igraph, you see the image of the moon
pop-up and you also see a text pop-up with the message "Hello Again". If we wish to change the
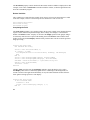
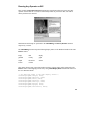
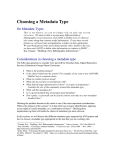
value of the constant from your application, then the constant parameter must be promoted. Do
this by right clicking on the constant operator to get the property panel. Now select the promote up
arrow button to the left of the constant parameter. Set the promoted name to be "constant". This
name must be unique across all promoted names to the WiT code file. Now save this igraph to
update the associated wic file.
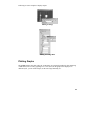
10
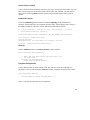
Promoting an Operator Parameter
In your Visual Basic project, add this code to front of the Run_Click function:
status = Wit1.SetOpParams("constant", "Goodbye")
If status = 0 Then
MsgBox "WiT failed to set a parameter!"
End If
The SetOpParams method will cause the value of the promoted parameter called "constant" to
change to "Goodbye". Save your project and run your form. Click on the Run button. You will see
a text pop-up window with the message "Goodbye" instead of the message "Hello Again" since we
changed its value with SetOpParams.
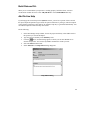
Status and Error Messages
At this point in the development of our Visual Basic project, we may wish to finalize the interface
between the WiT code file and our application by registering events to retrieve status and error
messages from the WiT engine. This is easily done by adding the following code to your
Form_Load procedure:
11
status = Wit1.RegStateEvent(1)
If status = 0 Then
MsgBox "WiT failed to register the status event!"
End If
status = Wit1.RegStatusMsgEvent(MSG_WARNING, 1)
status = Wit1.RegStatusMsgEvent(MSG_OTHER, 1)
If status = 0 Then
MsgBox "WiT failed to register the status message event!"
End If
The argument given to the RegStateEvent method determines whether the ActiveX control event
callback called Wit1_OnState will be invoked each time there is a state change with the WiT
engine. Add the code for Wit1_OnState as follows:
Private Sub Wit1_OnState(ByVal state As WITLib.enumExecState)
If state = EXEC_STOPPED Then
MsgBox "WiT engine stopped"
End If
If state = EXEC_RUNNING Then
MsgBox "WiT engine running"
End If
If state = EXEC_PAUSED Then
MsgBox "WiT engine paused"
End If
End Sub
The second argument given to the RegStatusMsgEvent method determines whether the ActiveX
control event callback called Wit1_OnStatusMsg will be invoked anytime there is a message of
the type set by the first argument is encountered during WiT code file execution. There are two
types of messages: warnings or other. Add the code for Wit1_OnStatusMsg as follows:
Private Sub Wit1_OnStatusMsg(ByVal witcode As enumWitcode, msg As String)
If witcode = MSG_WARNING Then
MsgBox "Warning: " + Mid(msg, 1, Len(msg) - 1)
Else
MsgBox "Status: " + Mid(msg, 1, Len(msg) - 1)
End If
End Sub
This concludes your introduction to the general use of the WiT ActiveX control. For further
information, follow the various examples given in the next chapters.
12
WiT Engine
The WiT Engine makes the execution functionality of WiT available to Microsoft Visual Basic,
Microsoft Visual C/C++, or any other programming tool that supports ActiveX technology or can
load Windows DLLs.
The WiT Engine can be used as either an ActiveX control or simply as a DLL. Several demo
applications for either flavor are included in the WiT package to make it faster and easier for you
to learn to use the WiT Engine.
1.
2.
ActiveX Control: For VB programmers, once the WiT ActiveX control has been added
to your VB project, it can be used like any other ActiveX control. It becomes part of your
development and run-time environment, providing your application with all the image
processsing capabilities of WiT. The WiT ActiveX control makes it easy and convenient
to load and run WiT code files, display data in pop-up windows or within your
application, and pass data to and from the WiT imaging engine. You can also seamlessly
integrate WiT and other ActiveX controls from Microsoft or third party vendors, making
it easy to add features to your image processing application. Finally, since Visual Basic
has the ability to create ActiveX controls, you can create your own end-user ActiveX
controls that include the image processing power of WiT.
DLL: Your application only needs to call a few functions to load and run WiT imaging
code files, display data in pop-up windows or within your application, and pass data to
and from the WiT Engine.
Using Visual Basic
Microsoft Visual Basic (VB) owes its popularity to two major characteristics: first, it provides a
flexible set of tools for the rapid design of graphical user interfaces (GUIs), and second, it
provides a simple and convenient environment for integrating ActiveX controls and DLLs from
different suppliers into a single end-user application.
VB Programmers can use the WiT ActiveX control to access the full functionality of WiT for the
development of image processing applications, while providing their end-users with a custom
designed GUI. Once the WiT ActiveX control has been added to your VB project, it can be used
like any other ActiveX control. It becomes part of your development and run-time environment,
providing your application with the full image processsing power of WiT. The WiT ActiveX
control provides methods to load and run imaging code files generated by WiT, run individual
WiT operators in script mode, display data in pop-up windows or within your application, and
pass data to and from the WiT imaging engine. Its methods provide the same functionality as the
WiT DLL functions but in a more convenient form for VB programmers.
13
Applications
Writing a VB application consists of the following steps (refer to the Visual Basic documentation
from Microsoft for more detail if necessary):
1.
2.
3.
4.
5.
6.
Create a new VB project of type 'Standard EXE'.
Add the WiT Control to your VB project. From the Project menu, select the
Components option. Select the Control tab of the Components panel, and select the
WiT Control. Close the Components panel.
Instantiate the WiT Control in the main Form. Note that since WiT is designed to control
hardware such as frame grabbers, only a single WiT Control can be added to a VB
application.
Put initialization code in the Load procedure of the main Form.
Call appropriate WiT Control methods in the event procedures of various controls.
Put clean up code in the Unload procedure of the main Form.
When using the WiT ActiveX Control with a VB application, most of the computation should be
performed by WiT, since it runs much faster than VB code.
ActiveX Controls
Creating your own VB ActiveX Control is just as straightforward as creating a standalone
application. Follow the same steps described in Applications, except for step 1. Instead of creating
a project of type "Standard EXE", create a new VB project of type "ActiveX Control".
Examples
These examples assume you have a basic familiarity with the VB development environment. If
any of the concepts discussed here seem unclear, please refer to your Visual Basic documentation
from Microsoft. This chapter describes the following demo projects. The functionality and
behavior of these applications is the same as the corresponding MFC examples. Source code for
each of these projects can be found in the engine\demo\vb subdirectory under the WiT installation
directory, which is ‘C:\Program Files\WiT’ by default.
1.
2.
3.
4.
5.
6.
7.
14
simple: Load and run a simple WiT code file that reads a WiT image from a file and
displays it in a window within the VB form.
fg: Access a frame grabber board supported by WiT then perform live video display as
well as grabbing and processing of individual frames.
notify: Notify your VB application whenever WiT data changes, and set operator
parameters in a WiT code file.
control: Control the behaviour of an interactive operator.
data: Pass data between the WiT engine and your VB application.
script: Execute individual operators using WiT’s script mode.
ops: Execute any WiT operator or a WiT code file.
8.
9.
inter: Use a WiT interactive operator (getData), and retrieve data from an individual
operator.
simpleX: Build an ActiveX control that reads and displays a bitmap image, and performs
some simple image processing operations on it. This is an ActiveX control version of the
simple example.
A Simple Example
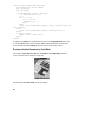
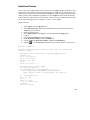
This example (engine\demo\vb\simple) is a simple application which allows you to read a WiT
object file and display the data in a window within the VB form. The application accomplishes
this task by loading and running a WiT imaging code file which reads an image from a file and
displays the result. The WiT imaging code file is engine\demo\wic\simple.wic.
VB Simple
The steps required to create this application are described below.
Create Project
Create a Standard EXE project. Add the WiT ActiveX Control to your project.
Inserting the WiT ActiveX Control
15
Create a Picture Object for Display Data
Create a Picture object on the VB form where you want WiT to show images or data. The same
Picture object can be used for getData and other operators which normally display data in a popup window. To make it easier to match image sizes, set the ScaleMode of both the Form and the
Picture to Pixel.
Declare Variables
WiT methods return a status code that can be checked to make sure the WiT engine is operating
successfully. Declare a variable as Long type to store these return values. When a WiT code file is
loaded, a handle for later referral is returned. Declare a variable as Long type to store this handle.
For example, put the following in the Declarations section of the form:
Dim status As Long
Dim execID As Long
Initialize
In the Load procedure of the VB form, use the Init method to initialize the WiT engine, and the
SetDisplayWnd method to map each VB Picture object to a WiT display name (the name is
"image" in this example). Any WiT pop-up window which matches this name will be re-directed
to the VB Picture object. Finally, use the Load method to load the "simple" WiT code file:
Private Sub Form_Load()
Dim answer As Integer
status = 0
answer = vbYes
Do While (status = 0 And answer = vbYes)
status = Wit.Init(Form1.hWnd, 0)
If (status = 0) Then
answer = MsgBox("Failed to initialize WiT, try again?", _
vbExclamation + vbYesNo, "VB Message")
End If
Loop
If (status = 0) Then
End
End If
status = Wit.SetDisplayWnd("image", Picture1.hWnd)
execID = Wit.Load(Environ("withome") & "\pro\demo\wic\simple")
End Sub
Clean Up
Use the Exit method in the Unload procedure of the main form:
Private Sub Form_Unload(Cancel As Integer)
status = Wit.Exit
End Sub
16
Completing the rest of the Form
To complete this example, create a Button object. In the Click procedure of the Button, use the
ControlExec method to run the WiT code file in flash mode.
Private Sub Command1_Click()
status = Wit.ControlExec(execID, WIT_EXE_FLASH, 0)
End Sub
That’s it! Save your VB application and run it!
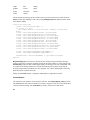
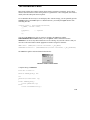
Using a Frame Grabber
This example (engine\demo\vb\fg) demonstrates how to use the WiT ActiveX control to access a
frame grabber board.
VB Frame Grabber
The VB form is still very simple: it consists of a Picture control for showing grabbed images, a
Grab button for grabbing a single frame and applying a Sobel filter to it, and a Live button for
showing live video.
Set Properties
Interfacing to a frame grabber from WiT is simple. All you need to do is to use a WiT
configuration file that loads frame grabber support. If you are already using a frame grabber board
in WiT and you have saved your WiT configuration then the WiT engine that runs from your VB
application will use the same defaults as WiT. You can also set a configuration file to explicitly
load support with the config property of the WiT control. Set the value of the config property to
the path of a WiT configuration file you wish to use, e.g. ‘C:\Program
Files\WiT\config\bandit.wrc’.
17
The showStatus property controls whether the WiT status window is hidden or displayed. For this
example, set the value of showStatus to FALSE to hide the window, so that the application looks
more like a standalone program.
Declare Variables
Three variables are required by this example. Status and execId serves the same purpose as it did
in the first example, liveState is used to keep track of whether live video is on or off:
Dim liveState As Boolean
Dim status As Long
Dim execID As Long
Completing the Form
The Form Load procedure is very similar to that in the previous example. First, initialize the WiT
engine as usual, and then map both the display names "image" and "display" to the Windows
handle of the Picture control. "Display" is the title of the display operator in the igraph. "Image"
is an arbitrary name chosen to represent the binding between the Picture control and the frame
grabber accessed by the LiveDisplay method. Finally, load the WiT code file to run the grab and
image processing.
Private Sub Form_Load()
Dim execName As String
status = Wit1.Init(Form1.hWnd, 0)
If (status = 0) Then
Call MsgBox("Failed to initialize WiT", vbOKOnly, "VB Message")
End
End If
status = Wit1.SetDisplayWnd("image", Picture1.hWnd)
status = Wit1.SetDisplayWnd("display", Picture1.hWnd)
execName = Environ("withome") & "\pro\demo\wic\fg.wic"
execID = Wit1.Load(execName)
liveState = False
End Sub
The live_Click procedure uses the LiveDisplay method to toggle the display of live video.
LiveDisplay causes WiT to continuously update the live video image in the background, but
returns execution to the application immediately. It may also utilize hardware features from the
frame grabber for high-speed live video display.
Private Sub live_Click()
If Not liveState Then
liveState = True
status = Wit1.LiveDisplay("image", 0, 1)
End If
18
End Sub
The first argument to LiveDisplay specifies the window name to be used for displaying live video.
In this example it must be set to "image", because that is the name we chose in the call to
SetDisplayWnd during the form load step. The second argument specifies the name of the frame
grabber. A zero value passed uses the first frame grabber loaded by WiT. If you are using more
than one frame grabber, then the name of the frame grabber as it appears in the WiT operator
explorer must be used. The third argument turns live video on (1) or off (0). The grab_Click
procedure checks if live video is active. If it is, then it is stopped by passing the LiveDisplay
method a zero (off) as the third argument. Then, it uses the ControlExec method to run the
specified WiT code file. The WiT code file, fg.wic, grabs a single frame, applies a Sobel filter, and
displays the result. Recall that the output of the display operator was mapped to the Picture
control's window.
Private Sub grab_Click()
If liveState Then
status = Wit1.LiveDisplay("image", 0, 0)
liveState = False
End If
status = Wit1.ControlExec(execID, WIT_EXE_FLASH, 0)
End Sub
Clean Up
The Form_Unload procedure checks if the live video is active. If it is, then it is stopped by
passing the LiveDisplay method a zero (off) argument. The Exit method is then used.
Private Sub Form_Unload(Cancel As Integer)
If liveState Then
status = Wit1.LiveVideo("image", 0, 0)
liveState = False
End If
Wit1.Exit
End Sub
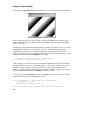
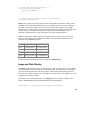
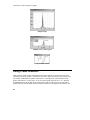
Using an Interactive Operator
This example (engine\demo\vb\inter) demontrates the use of a WiT interactive operator (getData
in this case) and how to retrieve data values from a script mode register.
19
Running an Interactive Operator
The declarations and Form Unload sections are standard.
All the real work is done in the Wit1_OnOutput procedure. First, readObj is called to read in a
sample image. Then, getData is called. Because the name "getData" has been mapped to the
Picture control, the image appears inside the Picture control and the user can enter graphical data
in this window. When the user has finished entering data, they can bring up the pop-up menu on
the image (by pressing the right mouse button) and select OK. At this point, the getData operator
returns. Then, ScriptGetReg is used to retrieve data from the output register of getData (register
"data"). The value DATA_FORMAT_DISPLAY for the format argument tells ScriptGetReg to
return the data in the same format that WiT uses to display objects. In this example, the data is
simply displayed in the "statusWin" control. WiT returns multi-line data with only a line-feed
character between lines. Because a VB edit control requires both a line-feed and carriage return
character for each new line, the carriage return characters are added to the text before it is
displayed.
Private Sub Wit1_OnOutput(name As String, buf As String, rawData As
Variant)
'local declarations
...
statusWin.Text = ""
buf1 = Mid(buf, 9, 9)
If buf1 Like "CorVector" Then
buf1 = Mid(buf, 19, 10)
If buf1 Like "CorGraphic" Then
'process graphic objects
...
Else
statusWin.Text = statusWin.Text + "Warning: Data error"
End If
Else
statusWin.Text = statusWin.Text + "Warning: Data error"
End If
End Sub
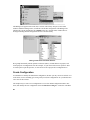
20
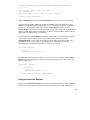
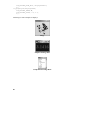
Controlling an Interactive Operator
This example (engine\demo\vb\control) demonstrates how to control an interactive operator from
the user application, suppressing the normal menu or pop-up panel provided by the WiT engine. It
loads the file engine\demo\wic\control.wic.
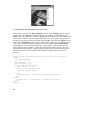
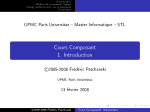
Interactive Operator Control
In this example, you are prompted to enter a variety of graphic objects on top of an image. When
you are satisfied with the graphic objects, hit the OK button, and the number of objects is
reported. Then if you hit the Next Set button, you are prompted to enter a second set of graphic
objects. The first set is still maintained but can no longer be deleted or modified. Keep on hitting
OK and Next Set to enter more graphics and the total number of objects will be reported each
time. Press Stop to stop the editing session.
Interactive Operator Control Igraph
The getData2 operator's display is mapped as usual using SetDisplayWnd.
RegDisplayActiveEvent is used to ensure that OnDisplayActive is called whenever getData2 is
created. ControlDisplay is used to suppress the getData2 operator's pop-up menu and Graphics
Editor panel. RegStateEvent is used to ensure that OnState is called whenever the igraph
execution state changes.
status = Wit1.RegOutputEvent("display", 1, DATA_FORMAT_TEXT)
status = Wit1.RegStateEvent(1)
status = Wit1.SetDisplayWnd("getData2", Picture1.hWnd)
status = Wit1.RegDisplayActiveEvent("getData2", 1)
status = Wit1.ControlDisplay("getData2", "suppressPopupMenu 1")
21
Next, SetDisplayWnd and RegDisplayActiveEvent are used to ensure that OnDisplayActive is
called whenever the prompt operator named "NextSet" is created, which suppresses display of the
normal pop-up dialog. This way the user can control when to move on to the next set of inputs.
status = Wit1.SetDisplayWnd("NextSet", 0)
status = Wit1.RegDisplayActiveEvent("NextSet", 1)
Load and ControlExec are used to load and run the chosen WiT code file. When getData2 is run,
OnDisplayActive is called and all the appropriate buttons are enabled. User inputs to getData2
can be executed the normal way using the mouse.
The controls OK, Stop, Select, Line, Constrast, etc., all use the ControlDisplay function to
execute various actions for the getData2. See the methods reference section for details concerning
the operation of ControlDisplay.
Automatic Notification to User Application
This example (engine\demo\vb\notify) demonstrates how to get the WiT engine to notify your
VB application whenever data change, and how to set parameters in a WiT code file.
Notification of Change and Setting Operator Parameters
The declarations and Form Unload sections are standard.
In Form Load, the RegOutputEvent method is used to make sure the OnOutput event
procedure is called when data in the window named "data" changes. Similarly, RegStateEvent is
used to ensure that the OnState event procedure is called whenever the WiT code execution state
changes (e.g. from idle to running to stopped).
22
status = Wit1.RegOutputEvent("data", 1, DATA_FORMAT_NONE)
status = Wit1.RegStateEvent(1)
The Load button loads the WiT code file specified by the WiT code edit control, which defaults to
\wit\engine\demo\wic\notify on startup, using the environment variable $WITHOME internally.
If you click the Load button and the WiT code file is successfully loaded, the Run button is
enabled. The Run button demonstrates how to set simple parameters in an igraph and promoted
parameters from a subgraph. The parameter values are read from the Image, Loop, and Smooth
controls:
Private Sub runButton_Click()
dataWin.Text = ""
runButton.Enabled = False
pauseButton.Enabled = True
stopButton.Enabled = True
'*** example of setting a simple parameter
status = Wit1.SetOpParams("filename", imNameWgt.Text)
If status = 0 Then
MsgBox "Cannot set image name", 48, "Run"
End If
'*** example of setting a promoted parameter
status = Wit1.SetOpParams("count", loopWgt.Text)
If status = 0 Then
MsgBox "Cannot set loop count", 48, "Run"
End If
'*** example of setting parameters in a sub-graph
status = Wit1.SetOpParams("width", smoothWgt.Text)
If status = 0 Then
MsgBox "Cannot set smooth width", 48, "Run"
End If
status = Wit1.SetOpParams("height", smoothWgt.Text)
If status = 0 Then
MsgBox "Cannot set smooth height", 48, "Run"
End If
status = Wit1.ControlExec(execID, WIT_EXE_FLASH, 0)
If status = 0 Then
MsgBox "Cannot run WiT code!", 48, "Run"
End If
End Sub
While the igraph is running, the Pause and Stop buttons are enabled. If you press Pause, the
Continue button is enabled. When the igraph terminates by itself or after your press Stop, the
application goes back to its initial state: Load and Run are enabled, Pause, Continue, and Stop
are disabled. These buttons simply use ControlExec with different arguments to control the
execution.
23
Passing Data To and From WiT Engine
This example (engine\demo\vb\data) demonstrates how to pass data between WiT and a user
application. It uses the file engine\demo\wic\data.wic.
Data Passing
In this example, when you click Run, some data is sent from the user application to the WiT
engine and then processed by WiT, and some data is sent from WiT to the user application and
processed by the user application.
Data is passed from the user application to WiT by using the readObj operator. Data is passed
from WiT to the user application by using the display operator.
Data Passing Igraph
The display window is mapped to the name "data" as usual. RegOutputEvent is used to ensure
that the OnOutput event procedure is called whenever the display operator named
dataFromWiT is created. The data format is set to WIT_DATA_FORMAT_HYBRID, because
we are going to send image data from WiT to the user-application, and the hybrid type is most
efficient for images. Then RegInputEvent is used to ensure that OnInput is called whenever any
readObj operator with its filename parameter set to "sample" is created.
Status = Wit1.SetDisplayWnd("data", Picture1.hWnd)
Status = Wit1.RegInputEvent("sample", 1)
Status = Wit1.RegOutputEvent("dataFromWiT", 1, DATA_FORMAT_HYBRID)
24
The function OnOutput processes the data it receives from WiT:
Private Sub Wit1_OnOutput(name As String, data As String, rawData As
Variant)
Dim objHeader As String
Dim str As String
Dim str1 As String
Dim c As String
Dim imageData As Variant
Dim total As Double
Dim i As Long
Dim j As Long
Dim poz As Integer
Dim pozEnd As Integer
str = ""
i = 1
pos = InStr(1, data, "CorImage")
If pos 0 Then
'fetch image data
Status = Wit1.GetOutputData("dataFromWiT", objHeader, imageData,
DATA_FORMAT_HYBRID)
'replace linefeed with carriage return/line feed
...
'compute mean
...
'show mean
Form1.ImProp.Caption = str & ", mean: " & Format(total / 65536,
"0.00")
End If
End Sub
Because the data format was specified as HYBRID when RegOutputEvent was called, the data
for the image is split into two sections. The header, which contains information about the image
size and type, is stored as text (ASCII) in character buffer data. WiT returns multi-line data with
only a line-feed character between lines. Because a VB edit control requires both a line-feed and
carriage return character for each new line, the carriage return characters are added to the text
before it is displayed. The actual image data is stored in raw format in rawData. The raw data is
processed by OnOutput to compute the mean value of all the pixels.
The WiT code contains a readObj operator with the filename set to "sample". Because this file
name has been mapped with RegInputEvent, when the readObj operator is executed, OnInput
will be called. In the event procedure, if the value of DataToWiT is TRUE it means the user
chose to send an image, so a simple grayscale ramp image is prepared and passed to WiT using
SetInputData. Otherwise the data in the text window on the right of the application is sent to
WiT. The format of the data should be the same as the text format supported by the writeObj
operator (see the WiT User Manual for details about this format).
25
Private
Dim
Dim
Dim
Sub Wit1_OnInput(name As String)
imageData(255, 255) As Integer
i As Integer
j As Integer
If Form1.dataToWit(0).Value = True Then
'*** send image data to wit
k = 0
For i = 0 To 255
For j = 0 To 255
imageData(j, i) = j
Next j
Next i
Status = Wit1.SetInputData("sample", "OBJ_B H CorObj2D ushort 256
256", imageData)
Else
Status = Wit1.SetInputData("sample", Form1.Text1.Text, 0)
End If
If Status = 0 Then
MsgBox "Error in object data"
End If
End Sub
A mapping for readObj can be unregistered at any time by calling RegInputEvent with a value
of 0 for the onOff parameter. In this example, if Data from this application is unchecked, the
event is unregistered and the readObj operator will read from file "sample" instead.
Running Individual Operators in Script Mode
This example (engine\demo\vb\script) uses the ScriptExec and ScriptGetReg methods to
execute a sequence of WiT operators in script mode.
Script mode execution
The declarations and Form Unload sections are standard.
26
The Form Load procedure maps the display name "display" to the Windows handle of the
Picture box:
status = Wit.SetDisplayWnd("display", Picture1.hWnd)
The Click procedure of the Run button executes three WiT operators in sequence: readObj,
invert, and display. Notice how the data is passed from readObj to invert, and from invert to
display. Because the display name "display" was mapped, the image is displayed in the Picture
box.
status = Wit.ScriptExec("readObj ( param filename=sample; output
Out=myData1)")
status = Wit.ScriptExec("invert ( input In=myData1; output Out=myData)")
status = Wit.ScriptExec("display( input In=myData)")
status = Wit.ScriptGetReg("myData", str, buffer,
WITLib.DATA_FORMAT_HYBRID)
See the ‘Script File Format’ chapter in the User section of theReferences Manual for details
concerning script syntax.
Running Any Operator or WIC
This example (engine\demo\vb\ops) can execute any WiT operator or WiT code file. As such, it
is functionally almost as powerful as WiT, but with an entirely different user interface!
VB General Operator and WiT imaging code Test
The declarations and Form Unload sections are standard.
Form Load Procedure
The Form Load procedure maps the following display names to the Windows handle of the same
Picture control:
27
image
data
display
getData
overlay
graph
Graph
3d-surface
surface
terrain
volume
This means that any WiT pop-up data window with any of these names will be redirected to the
Picture control. This mapping is achieved by using SetDisplayWnd with different names but the
same Window handle:
Private Sub Form_Load()
status = Wit1.Init(Form1.hWnd, 0)
If (status = 0) Then
Call MsgBox("Failed to initialize WiT", vbOKOnly, "VB Message")
End If
status = Wit1.SetDisplayWnd("image", Picture1.hWnd)
status = Wit1.SetDisplayWnd("data", Picture1.hWnd)
status = Wit1.SetDisplayWnd("display", Picture1.hWnd)
status = Wit1.SetDisplayWnd("getData", Picture1.hWnd)
status = Wit1.SetDisplayWnd("overlay", Picture1.hWnd)
status = Wit1.SetDisplayWnd("graph", Picture1.hWnd)
status = Wit1.SetDisplayWnd("Graph", Picture1.hWnd)
status = Wit1.SetDisplayWnd("surface", Picture1.hWnd)
status = Wit1.SetDisplayWnd("3d-surface", Picture1.hWnd)
status = Wit1.SetDisplayWnd("terrain", Picture1.hWnd)
status = Wit1.SetDisplayWnd("volume", Picture1.hWnd)
status = Wit1.RegStatusMsgEvent(MSG_WARNING, 1)
status = Wit1.RegStatusMsgEvent(MSG_OTHER, 1)
execName.Text = Environ("WITHOME") & "\pro\demo\wic\simple"
End Sub
RegStatusMsgEvent is used twice to redirect all WiT warning messages and other messages:
whenever WiT issues a message originally destined for the status window, it will be passed to the
OnStatusMsg event procedure, which simply displays the message in the text window txtw. This
is a simple use of message redirection. You can do something more elaborate by parsing the
messages and provide user feedback in a more graphical way, such as flashing lights or showing
different pictures to indicate the status.
Finally, the execName textbox is assigned a default path to a sample WiT code file.
Control Buttons
The "Run WiT code" button is used to run WiT code files. The runExecButton_Click procedure
calls Load with the text in the execName text window as argument. If the file exists, and the WiT
code file loads successfully, then ControlExec is called to run the file in 'flash' mode.
28
The "Run script" button is used for executing WiT scripts. The runScriptButton_Click procedure
calls ScriptExec with the text in the "scriptCmd" text window as argument. See chapter 'Script
Mode' in the User Manual for more information on script mode.
Data objects in script registers can be displayed by clicking the "Display data" button. The
displayButton_Click procedure reads the text in the "scriptRegName" control and calls
ScriptExec to execute the display operator to display the object.
Instead of displaying a data object, you can also fetch its value by clicking the "Fetch data" button.
The fetchButton_Click procedure reads the text in the "scriptRegName" control and calls
ScriptGetReg to fetch the object. In this example, ScriptGetReg is set to retrieve unformatted
data. This means that only data values are reported, without labels. Unformatted data values are
usually easier to process by a VB application. The data values are reported in the Text control
"objValWin".
The Delete button is used to delete script mode registers that are no longer needed. It uses
ScriptDelReg to do the job.
Developing ActiveX Controls
This example (engine\demo\vb\simpleX) creates a simple ActiveX control which has the same
functionality as the simple application example. It uses the file engine\demo\wic\simple.wic.
Simple ActiveX Control Used in Internet Explorer
The steps required to create this control are the same as those for the application, except that a
project of type 'ActiveX Control' should be selected when creating the new project.
When the project has been built, it will create the file simple.ocx which can be installed and
registered just like any other ActiveX control. Of course the control requires that a properly
installed copy of the WiT runtime environment be present on the target machine before it can be
used.
29
Using C/C++
The WiT Engine DLL is a Dynamic Link Library (DLL) that has functions for running WiT code
files or operators, redirecting specific data displays to windows within your application GUI,
transferring data between WiT and your application, etc. The functionality provided by the WiT
Engine is identical to WiT with the GUI removed. The WiT Engine retains all the power of WiT,
including interfaces to frame grabbers and accelerators, the ability to run WiT code files that
contain hundreds or thousands of operators, and parallel processing on multi-processors or
networked computers. It provides the same capabilities as the WiT ActiveX control, but in the
form of a library of C functions.
The WiT Engine can be used to run either scripts or WiT code files. Unlike the WiT GUI, the WiT
Engine does not require the user to set the execution mode: functions from a WiT code file are run
with witControlExec while functions that are executed immediately like a script are run with
witScriptExec.
The WiT Engine can be used by any programming environment which can call DLL functions.
For C programmers, a header file (witdll.h) is available which contains all the declarations
necessary to call the functions in the WiT Engine.
Writing an MFC or Win32 C/C++ program consists of the following steps:
1.
2.
3.
4.
Include the WiT Engine header file in your project.
Call witDllInit3 to initialize the WiT engine before making any other WiT Engine
function calls.
Call WiT Engine functions as required by your application.
Call witDllExit clean up and exit the WiT engine when finished. Do not make any
subsequent calls to WiT Engine functions.
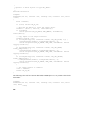
Multi-Threaded Applications
If you are creating a multi-threaded application, then you must make sure that the following WiTDLL functions are called only from the main thread:
witDllInit3 (and all older versions: witDllInit2, witDllInit)
witControlExec (and all older versions: witRunIgr, witControlIgr)
witSetDisplayWnd
witWndRepaint
The reason is that WiT-DLL always runs with multiple internal threads. One of these threads
handles all operators that require a GUI, such as display and getData, so this must be the main
application thread. WiT uses Windows messaging to communicate and synchronize between this
thread (the main thread) and the other WiT threads. This communication is kept to a minimum,
30
since Windows messaging is slow. However, the starting and stopping of a WIC program requires
the use of Windows messages, even if the WIC program contains no GUI operators.
WitControlExec can be called from any thread if the Block parameter is FALSE. But if the Block
parameter is TRUE and witControlExec is called from a thread other than the main thread, it will
never return because in blocking mode, witControlExec uses an internal loop to get and dispatch
Windows messages.
If it is necessary to call witControlExec from a thread other than the main thread in your
application, set the Block parameter to FALSE, and register a state callback function using
witSetStateCallback. By having appropriate code for the case when the state is
EXEC_STOPPED in the callback function, your program can accurately and efficiently handle
the end of WIC program execution. One of things you can do is to put a semaphore wait right after
the witControlExec call. The semaphore is signaled when the WIC execution state has changed to
EXEC_STOPPED. E.g.:
mainThread( )
{
witDllInit3(...);
witSetStateCallback(witStateCallback);
create wicStoppedSema as binary semaphore with initial value 0
spawn threadCode as thread
...
}
threadCode( )
{
while (1) {
witControlExec(execHandle, WIT_EXE_FLASH, FALSE);
semaphoreWait(wicStoppedSema);
}
}
witStateCallback(const ExecState state)
{
if (state == EXEC_STOPPED)
semaphoreSignal(wicStoppedSema);
}
MFC Examples
These examples illustrate the use of WiT Engine DLL with C++. All were produced using
Microsoft's DevStudio AppWizard to make a dialog based application (exe). They assume you
have a basic familiarity with the DevStudio development environment. If any of the concepts
discussed here seem unclear, please refer to your documentation from Microsoft. Each of the
samples can be loaded, built, and run using the provided source code and project files. The
functionality and behavior of the applications is the same as the corresponding VB examples.
31
Source code for these examples can be found in the directory engine\demo\mfc under the WiT
installation directory, which is ‘C:\Program Files\WiT’ by default.
•
•
•
•
•
•
•
•
simple: Load and run a simple WiT code file that reads a WiT image from a file and
displays it in a window within the applications main window.
fg: Access a WiT frame grabber for live video display as well as grabbing and processing
of individual frames.
inter: Use a WiT interactive operator (getData), and retrieve data from an individual
operator.
control: Control the behavior of an interactive operator.
notify: Notify your MFC application whenever WiT data changes, and set parameters in
a WiT code file.
data: Pass data between WiT and your MFC application.
script: Execute individual operators using WiTs script mode.
ops: Execute any individual WiT operator or Wit code file.
A Simple Example
This simple example (engine\demo\mfc\simple) allows the user to read a WiT object file and
display the data in a window within the application’s main window.
The steps to create this application are described below.
Create Project
Create a dialog based EXE project called 'Simple'. Add #include's for witDll.h and gTools.h to
simple.cpp and simpledlg.cpp:
#include "gtools.h"
#include "witdll.h"
The witDll.h header file contains prototypes for the WiT DLL functions while gTools.h contains
needed macro definitions. Do not modify either of these files.
32
Create a Picture Control
Create a Picture control in the dialog resource of your project. Size and position it where you want
WiT to show images. Set the ID of the Picture control to IDC_PIC_FRAME. The same Picture
control can be used for getData and other operators which normally display data in a pop-up
window.
Initialize WiT Engine
Create the onInitDialog member function to handle CSimpleDlg’s WM_INITDIALOG
messages. Add the following code to initialize the WiT engine, map the display name "image" to
the Windows handle of your Picture control, and load the desired WiT code file:
if (!(m_witDllHandle = witDllInit3((void *)GetSafeHwnd(), 0, NULL)))
MessageBox("witDllInit failed!");
witSetDisplayWnd("image", GetDlgItem( IDC_PIC_FRAME)->GetSafeHwnd());
char *withome = getenv("withome");
CString execPath;
execPath.Format( "%s\\pro\\demo\\wic\\simple", withome);
m_execID = witLoad(execPath.GetBuffer(0));
Clean Up
Call the witDllExit function in the DestroyWindow member function:
BOOL CSimpleDlg::DestroyWindow()
{
// TODO: Add your specialized code here and/or call
// the base class
witDllExit(m_witDllHandle);
return CDialog::DestroyWindow();
}
Complete the Application
Create a Button control, to control running of the WiT code file. Set the ID of the Button to
ID_READ. Create the message handler onRead for the BN_CLICKED message for this control.
void CSimpleDlg::OnRead()
{
witControlExec(m_execId, WIT_EXE_FLASH, 0);
}
That’s it. You can now build and run your application!
33
Using a Frame Grabber
This example (engine\demo\mfc\fg) demonstrates the use of a frame grabber with the WiT DLL.
In this example the project is still very simple: it consists of a Grab button for grabbing single
frames, a Live button for controlling live video, and a Picture control for showing the grabbed
images or live video.
Interfacing to a frame grabber through the WiT DLL is simple. All you need to do is to use a WiT
configuration file which uses a frame grabber. If you have installed a frame grabber from
supported by WiT and saved your configuration then WiT will automatically use the frame
grabber on startup by default. You can also explicitly set the server configuration with the '-config'
initialization switch when calling witDllInit3. For example:
m_witDllHandle = witDllInit3((void *)GetSafeHwnd(),
"-config c:\wit\config\bandit.wrc");
In this example, it is assumed you have already installed a supported frame grabber and the WiT
configuration file has been set to use the frame grabber, so the "-config" switch is not necessary.
Instead, this example illustrates use of the "-showStatus" option to turn off the WiT status
window, so that the application looks more like a completely standalone program. You can pass
the same command line arguments to witDllInit3 as you pass to WiT.
Create the project, add the #include’s, and create the Picture control as in the previous example.
Add the initialization code, and load the WiT code file:
if (!(m_witDllHandle = witDllInit3((void *)GetSafeHwnd(),
"-showStatus 0", NULL)))
MessageBox("witDllInit failed!");
witSetDisplayWnd("image", GetDlgItem(IDC_OUTPUT)->GetSafeHwnd());
34
witSetDisplayWnd("display", GetDlgItem(IDC_OUTPUT)->GetSafeHwnd());
m_live = 0;
char* withome = (char *)getenv("withome");
char execName[256];
sprintf(execName, "%s\\pro\\demo\\wic\\fg", withome);
m_execID = witLoad(execName);
Add the witDllExit function call to the destroyWindow function as in the previous example.
Create the message handler onLive for the BN_CLICKED message of the Live button, and
onGrab for the Grab button. The onLive function sets a status flag to keep track of whether live
video is on or off, and calls the WiT-DLL function witLive Display to display live video.
WitLive Display causes WiT to continuously update the live video image in the background, but
returns execution to the application immediately. It may also utilize hardware features from the
frame grabber for high-speed live video display.
The first argument to witLiveDisplay specifies the window name to be used for displaying live
video. In this example it must be set to "image", because that is the name used when
witSetDisplayWnd is called. The second argument sets the name of the frame grabber. This
argument can be set to a zero value to select the first frame grabber loaded by the WiT
configuration file. The third argument turns live video on (1) or off (0).
void CFgDlg::OnLive()
{
m_live = 1;
witLiveDisplay("image", 0, 1);
}
The onGrab function checks if live video is active. If it is, then it is stopped by calling witLive
Display with a zero (off) argument. Then, the previously loaded WiT code is run to grab and
display a single frame.
void CFgDlg::OnGrab()
{
if (m_live) {
m_live = 0;
witLiveVideo("image", 0, 0);
}
witControlExec(m_execID, WIT_EXE_FLASH, 0);
}
Using an Interactive Operator
This example (engine\demo\mfc\inter) shows how to use WiT interactive operators (getData in
this case) from your application, and how to retrieve data values from a script mode register.
35
The initialization and cleanup are standard.
All the real work is done in the onRun message handler. First, readObj is called to read in a
sample image. Then, getData is called. Because the name "getData" has been mapped to the
Picture control, the image appears inside the Picture control and the user can enter graphical data
in this window. When the user has finished entering data, they can bring up the pop-up menu on
the image (by pressing the right mouse button) and select OK. At this point, the getData operator
returns. Then, witScriptGetReg is used to retrieve data from the output register of getData
(register "data"). The value DATA_FORMAT_DISPLAY for the format argument tells
witScriptGetReg to return the data in the same format that WiT uses to display objects. In this
example, the data is simply displayed in the "statusWin" control.
void CInterDlg::OnRun()
{
witControl(m_execID, WIT_EXE_FLASH, 0);
}
36
Controlling an Interactive Operator
This example (engine\demo\mfc\control) shows how to control an interactive operator from the
user application, suppressing the normal menu or pop-up panel provided by the WiT engine. It
uses the WiT code file engine\demo\wic\control.wic.
In this example, you are prompted to enter a variety of graphic objects on top of an image. When
you are satisfied with the graphic objects, hit the OK button, and the number of objects is
reported. Then if you hit the Next Set button, you are prompted to enter a second set of graphic
objects. The first set is still maintained but can no longer be deleted or modified. Keep on hitting
OK and Next Set to enter more graphics and the total number of objects will be reported each
time. Press Stop to stop the editing session.
In onInitDialog, the image window is mapped to a getData2 operator using witSetDisplayWnd.
Then, witSetDisplayActiveCallback is called to register the getDataActive callback function.
Then witControlDisplay is called to suppress the pop-up menu and the Graphics Editor of the
getData2 operator:
HWND hwnd = GetDlgItem( IDC_PIC_FRAME)->GetSafeHwnd();
witSetDisplayWnd("getData2", (void*)hwnd);
witSetDisplayActiveCallback("getData2",
(const void (__cdecl *)(const char *,const int))getDataActive);
witControlDisplay("getData2", "suppressPopupMenu 1");
37
Next, witLoad is called to load the desired WiT code file if possible:
sprintf(execName, "%s\\pro\\demo\\wic\\control", withome);
if (!(m_execID = witLoad(execName))) {
char msg[256];
sprintf( msg, "Cannot load WiT code %s", execName);
MessageBox(msg);
}
Then, witSetDisplayWnd and witSetDisplayActiveCallback are called to map the
nextSetActive callback function to the prompt operator called "NextSet", so that the WiT engine
will call the callback instead of displaying the normal pop-up dialog:
witSetDisplayWnd("NextSet", 0);
witSetDisplayActiveCallback("NextSet", (const void (__cdecl *)(const char
*,const int))nextSetActive);
In the onRun message handler, the name of the image file is retrieved, and the value passed to the
WiT using witSetOpParams. Then, the WiT code is run, using witControlExec:
char objName[256];
GetDlgItem( IDC_EDIT_SAMPLE)->GetWindowText( objName, 256);
if (!witSetOpParams("filename", objName))
MessageBox("Cannot set image name\n");
if (!witControlExec( m_execID, WIT_EXE_FLASH, 0))
MessageBox("Cannot run WiT imaging code\n");
During WiT code execution, when getData2 executes the callback function getDataActive, all the
appropriate buttons are enabled. User inputs to getData2 can be executed the normal way using
the mouse.
The controls OK, Stop, Select, Line, Contrast, etc. all use witControlDisplay to execute various
actions for getData2.
38
Automatic Notification to User Application
This example (engine\demo\mfc\notify) shows how to get the WiT engine to notify your MFC
application whenever data change, and how to set parameters in a WiT code file.
The initialization and clean-up calls in onInitDialog and DestroyWindow are standard. In
onInitDialog, the function witSetOutputCallback is used to tell the WiT engine to call
dataChanged when data in the window named "data" changes. Similarly, witSetStateCallback is
used to tell the WiT engine to call stateChanged whenever the WiT code execution state changes
(e.g. from idle to running to stopped.). Also, the default WiT code file path is set, using the
$WITHOME environment variable.
char args[1024];
sprintf(args, "-showStatus 0 ");
if (!(m_witDllHandle = witDllInit3((void *)GetSafeHwnd(), args, NULL)))
MessageBox("witDllInit failed!");
char *withome = getenv("withome");
m_ExecPath.Format("%s/pro/demo/wic/notify", withome);
GetDlgItem(IDC_EDIT_EXEC_PATH)->SetWindowText(m_ExecPath);
m_imName.Format("sample");
GetDlgItem(IDC_IMG_NAME)->SetWindowText(m_imName);
m_FilterSzText.Format("%d", 3);
GetDlgItem(IDC_STATIC_FILT_SZ)->SetWindowText(m_FilterSzText);
m_Loop.Format("%d", 5);
GetDlgItem(IDC_LOOP)->SetWindowText(m_Loop);
witSetDisplayWnd("image", GetDlgItem(IDC_PIC_FRAME)->GetSafeHwnd());
witSetOutputCallback("data", dataChanged, WIT_DATA_FORMAT_NONE);
39
witSetStateCallback(StateChanged);
The Load button loads the WiT code file specified in the m_ExecPath edit control. If the user
clicks the Load button and the WiT code file loads successfully, then the Run button is enabled:
GetDlgItem(IDC_EDIT_EXEC_PATH)->GetWindowText(m_ExecPath);
if (m_execID = witLoad(LPCTSTR (m_ExecPath)))
GetDlgItem(IDC_RUN)->EnableWindow(TRUE);
else {
char mes[256];
sprintf(mes, "Cannot load WiT code %s\n", m_ExecPath);
MessageBox(mes);
}
The code for the Run button demonstrates how to set simple WiT code parameters. In this
example, the parameter values are read from the Image, Loop, and Smooth controls:
void CNotifyDlg::OnRun()
{
GetDlgItem(IDC_RUN)->EnableWindow(FALSE);
GetDlgItem(IDC_PAUSE)->EnableWindow(TRUE);
GetDlgItem(IDC_STOP)->EnableWindow(TRUE);
GetDlgItem(IDC_EDIT_OUTPUT)->SetWindowText("");
GetDlgItem(IDC_IMG_NAME)->GetWindowText(m_imName);
if (!witSetOpParams("filename", m_imName))
MessageBox("Cannot set image name\n");
GetDlgItem(IDC_LOOP)->GetWindowText(m_Loop);
if (!witSetOpParams("count", m_Loop))
MessageBox("Cannot set loop count\n");
GetDlgItem(IDC_STATIC_FILT_SZ)->GetWindowText(m_FilterSzText);
if (!witSetOpParams("width", m_FilterSzText))
MessageBox("Cannot set smooth width\n");
if (!witSetOpParams("height", m_FilterSzText))
MessageBox("Cannot set smooth height\n");
if (!witControlExec(m_execID, WIT_EXE_FLASH, 0))
MessageBox("Cannot run WiT imaging code\n");
/* witControlExec returns immediately, so you can poll for
* data values here if you don't want to use callbacks
*/
}
While the WiT code is running, the Pause and Stop buttons are enabled. If the user presses Pause,
the Continue button is enabled. When the WiT code terminates by itself or after the user presses
Stop, the application goes back to its initial state: Load and Run are enabled, Pause and Stop are
40
disabled. These buttons simply call witControlExec with different arguments to control the
execution.
Passing Data To and From WiT Engine
This example (engine\demo\mfc\data) demonstrates how to pass data between WiT and a user
application. It uses the file engine\demo\wic\data.wic.
In this example, when you click Run, some data is sent from the user application to the WiT
engine and then processed by WiT, and some data is sent from WiT to the user application and
processed by the user application.
Data is passed from the user application to WiT by using the readObj operator. Data is passed
from WiT to the user application by using the display operator.
There are two ways to pass data between a C/C++ application and the WiT Engine. You can either
pass an address to a CorObj data object, or you can use buffers to pass the values. Either
technique works for both inputs and outputs. Passing a CorObj address is much more efficient
than passing data values in a buffer. The buffer technique is primarily used for programming
languages that don't use compatible data structures with C. In this example, we'll use the address
technique to pass data from WiT to the application, and the buffer technique to pass data from the
application to WiT.
The display window is mapped to the name data as usual. witSetOutputHandleCallback is used
to map the dataChanged callback function to the display operator named dataFromWiT. Then
witSetInputCallback is used to map the witNeedData callback function to the readObj file
name "sample":
witSetDisplayWnd("data", hwnd);
witSetOutputHandleCallback("dataFromWiT", dataChanged);
witSetInputCallback("sample", witNeedData);
41
loadExec();
The callback function dataChanged processes the data it receives from WiT:
static const void _cdecl
dataChanged(const char *name, const void *ref, const CorObj *handle)
{
// handle is the address to the object, ref is the reference
// that must be used when calling witFreeObj()
CDialog* pDlg = (CDialog*)AfxGetMainWnd();
if (CorObj_type(handle) == COR_OBJ_IMAGE) {
CorImage *im = CorObj_image((CorObj *)handle);
int width, height;
float total;
unsigned char *dp, *dataEnd;
char str[1024];
if (CorObj_mdType(im) == COR_OBJ_UBYTE) {
width = CorObj_width(im);
height = CorObj_height(im);
dp = (unsigned char *)CorObj_mdData(im);
dataEnd = dp + width*height;
total = 0;
while (dp < dtaEnd) {
total += *dp++;
}
sprintf(str, "%dx%d, mean: %.2f", width, height,
total/(width*height));
pDlg->GetDlgItem(IDC_INFO)->SetWindowText(str);
} else
pDlg->GetDlgItem(IDC_INFO)->SetWindowText(
"Not an 8-bit unsigned image");
} else
pDlg->GetDlgItem(IDC_INFO)->SetWindowText(
"Data is not an image");
// tell WiT that our app doesn't need this object any more
witFreeObj(ref);
}
Because the data format was specified as HYBRID when RegOutputEvent was called, the data
for the image is split into two sections. The header, which contains information about the image
size and type, is stored as text (ASCII) in character buffer buf. The actual image data is stored in
raw format in rawBuf. The raw data is processed to compute the mean value of all the pixels.
This WiT code contains a readObj operator with the file name set to "sample". Because this file
name has been mapped with witSetInputCallback, when this readObj operator is executed, the
callback function witNeedData will be called. In the callback function, if Data To Send WiT is
set to Text Window the data in the text window on the right of the application is sent to WiT.
42
Otherwise, the user chose to send an image, so a simple grayscale ramp image is prepared and
passed to WiT using witSetInputData. The format of the data should be the same as the text
format supported by the writeObj operator (see References in the WiT User Manual for details
about this format).
const int _cdecl
witNeedData(const char *name)
{
char data[1024];
CDialog* pDlg = (CDialog*)AfxGetMainWnd();
if ((((CButton*)pDlg->GetDlgItem(IDC_TEXT)))->GetCheck()) {
/* send text */
pDlg->GetDlgItem(IDC_EDIT)->GetWindowText(data, 1024);
if (!witSetInputData(name, data, strlen(data), 0, 0))
pDlg->MessageBox("Error in object data");
} else {
/* send image */
int i, j;
int headerLen;
char imHeader[128];
char *imBuf, *datap;
sprintf(imHeader,
"OBJ_B "
"H "
"CorImage "
"CorUByte "
"256 "
"256 ");
headerLen = strlen(imHeader);
imBuf = (char *)malloc(65536);
datap = imBuf;
for (i=0; iMessageBox("Error in image data");
free(imBuf);
}
return 0;
}
A mapping for readObj can be unregistered at any time by calling witSetInputCallback with a
value of NULL for the callback function parameter. For this example, this is done in the onCheck
message function. If Data from this application is unchecked, the event is unregistered and the
readObj operator will read from the file sample instead.
Running Operators in Script Mode
This example (engine\demo\mfc\script) uses the witScriptExec and witStriptGetReg functions
to execute a sequence of WiT operators in script mode.
43
Initialization and cleanup are performed in the onInitDialog and DestroyWindow functions,
respectively, as usual. The display named "display" is mapped to the Windows handle.
When the user presses the Run button, the onRun message procedure executes three WiT
operators in sequence: readObj, invert, and display. Notice how the data is passed from readObj
to invert and from invert to display. Because the display name "display" was mapped, the image
is displayed in the application’s Picture control. Then, witScriptGetReg is used to get the image
data from the output of the invert operator.
witScriptExec("readObj(param filename=sample; output Out=myData1)");
witScriptExec("invert(input In=myData1; output Out=myData)");
witScriptExec("display(input In=myData)");
witScriptGetReg("myData", buf, 1024, rawData, 65544,
WIT_DATA_FORMAT_HYBRID);
44
Running Any Operator or WIC
This example (engine\demo\mfc\ops) demonstrates an application that can execute any WiT
operator or WiT code file. As such, it is functionally almost as powerful as WiT, but with an
entirely different user interface.
Initialization and cleanup are performed in the onInitDialog and DestroyWindow functions
respectively, as usual.
The onInitDialog function maps the following display names to the Windows handle of the same
Picture control:
image
data
display
getData
overlay
graph
Graph
3d-surface
surface
terrain
volume
This means that any WiT pop-up data window with any of these names will be redirected to the
Picture control. This mapping is achieved by using witSetDisplayWnd with different names but
the same Window handle:
/* map multiple names to the same display window */
witSetDisplayWnd("image", hwnd);
witSetDisplayWnd("display", hwnd);
witSetDisplayWnd("data", hwnd);
witSetDisplayWnd("getData", hwnd);
witSetDisplayWnd("overlay", hwnd);
witSetDisplayWnd("Graph", hwnd);
witSetDisplayWnd("graph", hwnd);
witSetDisplayWnd("3d-surface", hwnd);
45
witSetDisplayWnd("surface", hwnd);
witSetDisplayWnd("terrain", hwnd);
witSetDisplayWnd("volume", hwnd);
/* handle all status and warning messages */
witSetStatusCallback(statusProc);
witSetWarningCallback(warningProc);
Then, witSetStatusCallback and witSetWarningCallback are used to redirect all WiT warning
messages and other messages: whenever WiT issues a message originally destined for the status
window, it will be passed to the appropriate callback function, which in this example simply
displays the message in the text window txtw. This is a simple use of message redirection. You
can do something more elaborate by parsing the messages and provide us er feedback in a more
graphical way, such as flashing lights or showing different pictures to indicate the status.
The "Run" button is used to run WiT code files. The onRun message handler calls witLoad with
the text in the igName text window as argument. If the file exists, and the WiT code file loads
successfully, then witControlExec is called to run the WiT code file in ‘flash’ mode.
The "Run script" button is used for executing WiT scripts. The onRunScript message handler
calls witScriptExec with the text in the "scriptCmd" text window as argument. See the previous
example for more on script mode.
Data objects in script registers can be displayed by clicking the "Display data" button. The
onDisplayData message handler reads the text in the "scriptRegName" control and calls
witScriptExec to execute the display operator to display the object.
Instead of displaying a data object, you can also fetch its value by clicking the "Fetch data" button.
The onFetchData message handler reads the text in the "scriptRegName" control and calls
witScriptGetReg to fetch the object. In this example, witScriptGetReg is set to retrieve
unformatted data. This means that only data values are reported, without labels. Unformatted data
values are usually easier to process by an application. The data values are reported in the T ext
control "objValWin".
The "Delete" button is used to delete script mode registers that are no longer needed. It uses
witScriptDelReg to do the job.
46
Win32 Examples
A Simple Example
This example (engine\demo\win32\simple) creates a simple Win32 application with the same
functionality as the VB and MFC version of A Simple Example. It also loads and runs the WiT
code file engine\demo\wic\simple.wic.
Most of winMain is taken up with creation of the application's GUI. Then witDllInit3 is called to
initialize the WiT engine, witSetDisplayWnd is called to map the display name "image" to the
Windows handle, and witLoad is called to load the application’s WiT code file:
if (!(witDllHandle = witDllInit3(hWnd, NULL, NULL))) {
MessageBox(hWnd, "witDllInit failed!", appName, MB_OK);
exit(1);
}
witSetDisplayWnd("image", pictureWnd);
withome = getenv("withome");
sprintf(fn, "%s/pro/demo/wic/simple.wic", withome);
execID = witLoad(fn);
Finally, the main message loop is entered. The callback function msgProc was registered to
handle Windows messages. It simply calls witControlExec when the user presses the
application’s "Run" button:
case WM_COMMAND:
{
int id = (int)LOWORD(wParam);
switch (id) {
case ID_READ_BUTTON:
witControlExec(execID, WIT_EXE_FLASH, 0);
break;
}
}
return DefWindowProc(hWnd, msg, wParam, lParam);
47
When the user presses the window's "Close" button, witDllExit is called to exit the WiT engine
before quitting:
case WM_DESTROY:
witDllExit(witDllHandle);
PostQuitMessage(0);
return DefWindowProc(hWnd, msg, wParam, lParam);
WiT Engine ActiveX
Methods
The methods can be classified into the following groups. All the methods that register and
unregister events are listed in both their own group and in whichever other group is appropriate.
Setup
Method
Description
Init
Initialize the WiT engine.
Exit
Clean up and exit the WiT engine.
RegStatusMsgEvent Register event for WiT status messages of a particular type.
WiT Code File Execution
Method
Description
Load
Load WiT code file.
ControlExec
Control the execution of the current WiT code file, with optional blocking.
GetState
Get current WiT code state.
SetOpParams
Set parameter values in WiT code file.
RegStateEvent Register event for changes in WiT code execution state.
48
Script Mode Execution
Method
Description
ScriptExec
Execute a script.
ScriptDelReg Free a script mode register.
ScriptGetReg Get data values from a script mode register.
Display and Data Management
Method
Description
SetDisplayWnd
Associate a window with a display name.
ControlDisplay
Control the behaviour of some interactive operators.
GetOutputData
Get data from a WiT code file in a specified format.
SetInputData
Set data used by a WiT code file.
LiveDisplay
Turn live video on or off.
RegOutputEvent
Register event for changes to data of a mapped display.
RegDisplayActiveEvent Register event for display window being created or destroyed.
RegInputEvent
Register event for execution of any readObj operator.
Registering of Events
Method
Description
RegOutputEvent
Register event for changes to a display operator.
RegDisplayActiveEvent Register event for display window being defined or deleted.
RegStateEvent
Register event for changes in WiT code execution state.
RegInputEvent
Register event for execution of any readObj operator.
RegStatusMsgEvent
Register event for status messages of a particular type.
49
Events
There are 5 event procedures.
Method
Description
OnOutput
Data sent to a mapped display has changed.
OnDisplayActive Display window has been defined or deleted.
OnState
The execution state of the WiT code file has changed.
OnInput
A readObj operator with a specified value of its filename parameter is about to
execute.
OnStatusMsg
WiT has issued a status message of a specified type.
Properties
There are several properties of the ActiveX control, corresponding to the WiT command line
arguments. Refer to the Configuration chapter of the WiT User Manual for a complete description
of the command line parameters.
Method
Description
autoClr
Automatically clear pop-up object windows
bell
Enable/disable audible bell
config
WiT configuration file
launchSvr
Enable/disable auto server launch
ngray
Number of gray scales to be used to display grayscale images
showStatus Display/hide the status window
50
WiT Engine DLL
The functions provided by the WiT DLL can be classified into the following groups. All the
functions that register callbacks are listed both in their own group and in whichever other group is
appropriate.
Setup
Function
Description
witDllInit3
Initialize the WiT engine.
witDllExit
Clean up and exit the WiT engine.
witSetWarningCallback Set callback to call when a warning message is issued to status window.
witSetStatusCallback
Set callback to call when a non-warning message is issued to status
window.
WiT Code File Execution
Function
Description
witLoad
Load WiT code from a file.
witControlExec
Control execution of the current WiT code, with optional blocking.
witGetState
Get current WiT code state.
witSetOpParams
Set parameter values in WiT code file.
witSetStateCallback Set callback to call when WiT code execution state changes.
Script Mode Execution
Function
Description
witScriptExec
Execute an operator.
witScriptDelReg Free a register.
witScriptGetReg Get data values from a register.
51
Display and Data Management
Function
Description
witSetOutputWnd
Associate a window with a display name.
witControlDisplay
Control the behavior of some interactive operators.
witGetOutputData
Get data from a displayed object.
witSetInputData
Set the data values for a readObj operator.
witLiveDisplay
Turn live video on or off.
witSetOutputCallback
Set callback to call when data in a mapped display changes.
witSetDisplayActiveCallback Set callback to call when a display operator is created or destroyed.
witSetInputCallback
Set callback to call when a readObj operator is executed.
Callback Handling
Function
Description
witSetWarningCallback
Set callback to call when a warning message is issued to status
window.
witSetStatusCallback
Set callback to call when a non-warning message is issued to status
window.
witSetOutputCallback
Set callback to call when data in a mapped display changes.
witSetDisplayActiveCallback Set callback to call when a display operator starts or finishes
executing.
witSetInputCallback
Set callback to call when a readObj operator is executed.
witSetStateCallback
Set callback to call when WiT code execution state changes.
52
Custom Programs using WiT
C Functions
All WiT operators are implemented as C functions in Windows dynamic link libraries (DLLs). As
a programmer, you have the option of calling WiT functions directly from any C/C++ program, or
design igraphs in WiT Studio and run the WIC file using the WiT Engine. The advantages of
calling WiT functions directly instead of using the WiT Engine are:
•
•
•
Lower execution overhead. WiT Engine interprets WIC files at the function level.
More compact and easier to distribute executables.
Easier to mix data processing using both WiT functions and user application code.
There are some disadvantages that you have to be aware though:
•
•
•
No automatic multi-threaded, multi-CPU parallelism.
Other languages not supported, particularly Visual Basic.
Cannot easily switch between igraph development and end user application.
A Simple Example
Following is a simple C example ($WITHOME/samples/programs/simple) that uses WiT
processing functions. It reads an image and reports its size.
#include "corObj.h"
#include "wSystem.h"
main(void)
{
CorImage im;
CorObjInit(NULL, NULL);
if (cor_rdImage(&im, "../data/sample2.bmp", 0) != COR_OP_OK) {
printf("Failed\n");
} else {
int x, y;
CorUByte min, max;
int w = CorObj_width(&im);
int h = CorObj_height(&im);
CorUByte *ip = CorObj_mdData(&im);
53
min = max = *ip;
for (y=0; y<h; ++y) {
for (x=0; x<w; ++x) {
if (*ip < min) min = *ip;
if (*ip > max) max = *ip;
++ip;
}
}
printf("Size: %dx%d, range: %d-%d\n",
w, h, min, max);
CorImageFree(&im);
}
CorObjExit();
}
The function CorObjInit checks if you have a proper runtime license for the WiT libraries, and, if
successful, initializes the libraries. The first argument is reserved for future use, and should always
be NULL. The second argument is a function pointer for error messages. For this simple example,
we set it to NULL so that all error messages are ignored.
The 'Cor' prefix, which stands for Coreco, is used for all utility functions and macros. Processing
functions are all prefixed by 'cor_'.
The real work is done by cor_readImage. It takes the name of the file as the first argument and
the image format as the second argument. cor_readImage can usually detect the image format by
reading the first few lines of the file, so normally you can set the second argument to 0, which
means auto-detect. The remaining 8 arguments are for specific image formats. For auto type
detect, they can all be set to 0.
WiT provides several macros to access fields within data objects. Access macros are preferable to
directly specifying the field names in case the internal implementation changes in the future. In
this example, we used the macros CorObj_width and CorObj_height to retrieve the width and
height values for the image.
Before exiting the program, you must call CorObjExit to clean up. Otherwise your application
may leak memory, potentially causing your computer to slow down over time.
WiT utility functions are declared in the header file corObj.h, and file I/O functions are declared
in the header file wSystem.h.
Compile and link this program with the libraries wObj.lib and wSystem.lib, in the directory
$WITHOME\lib. You can find a ready to build Visual C project for this example under
$WITHOME\samples\programs\simple.
54
Program Structure
First you need to initialize the WiT environment with the function CorObjInit at the beginning of
the program, before calling any WiT functions, Then you can call the processing functions.
Finally, before the program terminates, you have to clean the WiT environment with the function
CorObjExit. Conceptually, the program structure will always look like this:
main( )
{
...
CorObjInit(NULL, NULL);
...
...do processing, e.g.
cor_readImage(&im, "myImage");
cor_lopass2d(&im, &lopass, 3, 3);
...
CorObjExit();
...
}
If any graphics (GUI) WiT functions (such as cor_displayCreate are used, then CorGuiInit and
CorGuiExit should be used instead.
The first argument for CorObjInit or CorGuiInit should be the Windows handle (HWND) of the
main application window. CorGuiInit and all graphics WiT functions can only be used with a
windowed application. CorObjInit can be used in all applications, including console based
applications. When calling CorObjInit from a console based application, pass a NULL pointer or
0 as the first argument.
The second argument for CorObjInit or CorGuiInit is the address of a status callback function.
This callback function is called when a WiT operator fails or otherwise need to pass a message
back.
Headers and Link Libraries
WiT header files are mostly stored in $WITHOME\h. Some low level function headers are in
$WITHOME\g\h. In general, you should add these two paths to 'Project settings' dialog, 'C/C++'
tab, 'Category/Preprocessor, 'Additional include directories' field.
You also need to add the appropriate import libraries for the linker. The simplest way to do that is
to add the import libraries files to the project's file list. All the WiT libraries are stored in
$WITHOME\lib. You will always need 'wObj.lib'. Other libraries are only required if you directly
use a function from it. For example, if in your application you call the function 'cor_readImage',
then you will need to add 'wSystem.lib' to your file list, and add
55
#include "wSystem.h"
to you source file. The operator documentation will tell you which include file and import library
you need.
Status Callback Function
A C/C++ function normally can only return a simple error code if something went wrong during
its execution. Often times this is not enough. For example, suppose you called a function to read
an image from a file by passing it a relative path name, and the function failed because the file
does not exist. Rather than simply returning an error code, it is more helpful if the function returns
an error message with the file name expanded to the absolute path. In addition, some complex
functions may want to report warnings and feedback information during processing.
The WiT libraries support a multi-thread safe error and status report mechanism that allows any
WiT function to pass a message back to the caller in addition to returning a status code. All you
need to do is to register a status callback function at the start of your application. The status
callback function is registered using either CorObjInit or CorGuiInit. It will be called with a
code and message when one of the following conditions occur during execution of a WiT
function:
Condition
Code
The function wants to display a message.
COR_OP_MSG
The function encountered an unexpected but non-critical condition.
COR_OP_WARNING
The function failed.
COR_OP_ERROR
The function encountered a fatal error and the whole application should
be terminated.
COR_OP_FATAL
If the status function address is NULL, all status messages will be ignored. The Code is returned
by the function and is also passed to the status function.
Following is a simple example (wit/samples/programs/status) which has a status callback function
registered. The name of the file passed to cor_rdImage is deliberately set to a non-existing file.
When you run this program, the error message returned by cor_rdImage will be passed to the
statusCallback function and displayed in the console.
#include "corObj.h"
#include "wSystem.h"
static int
statusFunc(CorOpRtn code, char *msg)
{
56
switch (code) {
case COR_OP_MSG:
printf(msg);
break;
case COR_OP_WARNING:
printf("\007Warning: ");
printf(msg);
break;
case COR_OP_ERROR:
printf("\007Error: ");
printf(msg);
break;
}
return OK;
}
main(void)
{
CorImage im;
CorObjInit(NULL, statusFunc);
if (cor_rdImage(&im, "../data/sample_bad.bmp", 0) != COR_OP_OK)
printf("Failed\n");
else
printf("Image size is %dx%d\n", CorObj_width(&im),
CorObj_height(&im));
CorObjExit();
}
Object Library
WiT has a sophisticated data object system that simplifies the handling of complex data types,
dealing with issues such as allocating and freeing memory, caching, saving and reading data files,
etc. When writing stand-alone C/C++ applications, usually only a small subset of the object
system is necessary. You will need to use the object library to allocate and free image and vector
memory, and use the access macros to retrieve or set data fields.
The functions and macros that you will most likely need are:
CorImageAlloc
allocate data for an image
CorImageRelease release allocated data for an image
CorVectorAlloc
allocate data for a vector (1-dimensional array)
CorVectorRelease release allocated data for a vector
CorObj_mdData retrieve data pointer from an image or vector
CorObj_mdType element type of an image or vector
57
CorObj_width
width of an image, or size of a vector
CorObj_height
height of an image
Object library functions and macros are declared in the header file corObj.h, Type specific
macros are in corObjPrimitive.h and corObjCompound.h.
For example, the following code fragment uses the function CorVectorAlloc to allocate a vector
(1-dimensional array) of CorFpoint objects, then subsequently uses the access macro
CorObj_mdSize to retrieve the size of the vector, and the macro CorObj_mdData to get the data
pointer from the vector.
CorFpointVector vec;
CorFpoint *pp;
int i;
int size;
if (CorVectorAlloc((CorVector *)&fpts, COR_OBJ_FPOINT, 10) < 0)
return CorOpStatus(COR_OP_ERROR, COR_OP_ERR_USER, "Allocation
failed");
...
size = CorObj_width(&vec);
pp = (CorFpoint *)CorObj_mdData(&vec);
for (i=0; i<10; ++i, ++pp)
printf("(%d, %d)\n", pp->x, pp->y);
For more information about more advanced uses of the WiT object system, refer to Data Objects.
Display Library
Functions in the WiT display library use graphics windows to display data or receive user inputs.
When such functions are used, the application must call CorGuiInit instead of CorObjInit at the
beginning of the program. Only windowed applications can use WiT graphics functions.
The following code fragment uses the functions from cor_display to display an image.
CorImage image;
CorDisplay displayHandle;
void *corGuiHandle;
HWND mainHwnd;
corGuiHandle = CorGuiInit(mainHwnd, statusCallback);
cor_rdImage(ͮ, "sample.bmp", 0);
displayHandle = cor_displayCreate(pictureWnd,
COR_DISPLAY_IMAGE, ͮ,
COR_DISPLAY_DONE_PROC, displayDoneProc,
0);
58
...
cor_rdImage(ͮ, "anotherSample.bmp", 0);
cor_displaySet(displayHandle,
COR_DISPLAY_IMAGE, ͮ,
0);
...
if (displayHandle) cor_displayDestroy(displayHandle);
CorGuiExit(corGuiHandle);
Display library functions typically consists require a large number of parameters. Many of these
parameters are interrelated and often default values are appropriate for most uses. So instead of
providing a simple single function interface as used in all other WiT operators, these display
functions use a variable argument 'object-oriented' application programming interface (API). This
API style allows C programs to take advantage of some object-oriented features, such as
inheritance, default parameter values, and implicit action when setting parameters.
Windows created by WiT display functions are implemented as 'objects'. Once created, each
instance of these objects can be controlled individually using the Set and Get functions, and
destroyed using the Destroy function.
Function Description
Example
Create
Create the object
cor_displayCreate
Set
Set data values
cor_displaySet
Get
Get data values
cor_displayGet
Destroy Destroy the object cor_displayDestroy
Function prototypes and attribute enums are declared in wDisplayUsr.h.
Image and Data Display
The display operator displays images or other data object types. It can also show overlay graphics
on top of images and vectors of images can be handled as well. Once displayed, several tools are
provided to study the data, such as X and Y profiles, contrast enhancement, changing fonts for
data objects, etc. Display windows can be embedded in a window inside a user application, or can
be popped up as separate windows.
Following are some code fragments that use the display function. Complete examples can be
found in '$WITHOME\samples\programs\displayMfc' and 'displayWin32'.
displayHandle = cor_displayCreate(imageWnd.GetSafeHwnd(),
59
COR_DISPLAY_DONE_PROC, displayDoneProc,
0);
cor_displaySet(displayHandle,
COR_DISPLAY_IMAGE, ͮ,
COR_DISPLAY_SCALE, 0.5, 0.5,
0);
Following are some examples of displays:
Image
Simple Non-Image Data
Compound Non-Image Data
60
Image with Overlay Graphics
Image Properties
Data Properties
GetData - Entering Graphics Data
The getData operator allows a user to enter graphics data using an image as background. The user
can thus enter data with locations in image coordinates. GetData pops up a mini drawing toolbox
to allow the user to change the graphic type, stacking order, etc. This toolbox can be suppressed so
that getData can be seamlessly integrated into a user window. Attributes can be used to effect the
same actions as from the toolbox. GetData inherits all the properties from the display operator.
Any attribute supported by display and applicable to image data are also supported implicitly by
61
getData. For example, X and Y profiles, contrast enhancement, etc., can all be applied to the
getData operator.
Following are some examples of getData:
GetData with Toolbox
Embedded with Suppressed Toolbox
Interactive Image and Data Edit
The edit operator allows a user to modify data interactively at run time. If the object being edited
is an image, edit presents itself as a mini painting tool. If the object is not an image, edit presents
the object with nested controls (usually text entry boxes).
62
Following are some examples of display output:
Editing an Image
Editing non-Image Data
Plotting Graphs
The graph operator plots data values for visualization. It is primarily intended for fast monitoring
of data values, not as a fancy graphing tool. Curves (lines) on the graph can be displayed in
different styles, you can zoom and pan, set the axis ranges manually, etc.
63
Following are some examples of graphs:
Simple Graph
Multiple Curves with Legend
Graph without Labels
Using Frame Grabbers
Frame grabbers usually require initialization and cleanup. WiT has a consistent operator set for
interfacing with frame grabbers. All functions start with a unique name for the frame grabber type.
For example, all Bandit frame grabber functions have a 'bandit' prefix, and all emulator frame
grabber functions have a 'emu' prefix. To use any frame grabber functions in a C/C++ program,
the Open function from the WiT frame grabber library must be called prior to any other frame
grabber functions, and the Close function should be called before the application terminates. The
64
following example shows a simple program that uses the emulator frame grabber to acquire a
frame:
#include "corObj.h"
#include "wEmu.h"
main(void)
{
CorObj imObj;
CorImage *im;
CorLibCaps emuCaps;
CorContext context;
CorObjInit(NULL, NULL);
emuOpen(NULL, &emuCaps);
context.libContext = emuCaps.contexts[0];
context.opContext = NULL;
emuAcquire(&context, &imObj, NULL, 1, 0);
im = CorObj_image(&imObj);
printf("Image size is %dx%d\n", CorObj_width(im), CorObj_height(im));
CorObjFree(&imObj);
emuClose(&emuCaps);
CorObjExit();
}
Since we are using the emulator frame grabber in this example, the Open call is emuOpen. The
first argument to Open is the GUI handle returned by CorGuiInit, which are only called from
windowed applications. Since this example is a console application, we pass NULL for this
handle.
The second argument to Open is the address of a WiT server capability object, where all the
information about the frame grabber is returned. For this simple example, the only field we need
from the capabilities is the context.
All WiT frame grabbers has library context. Some frame grabber servers have multiple contexts.
For example, a frame grabber may be connected to a number of camera inputs. Each of these
inputs constitute a different context. When the Acquire function is executed, you need to tell it
which context it should acquire from. In this example, we simply use the first context,
emuCaps.contexts[0].
The Close function requires the address of the capability object passed back to it so that it can
terminate the frame grabber properly.
65
More Examples
Under the directory $WITHOME/samples/programs are several examples which range from a
very simple console application to fairly sophisticated windowed applications:
Name
Description
simple
Simple console application, serves as a "Hello World" type example to introduce
you to the basics of using WiT functions.
simpleMfc
Similar to 'simple', but uses MFC instead to create a windowed application,
instead of a console based application.
displayMfc
Uses the cor_display function set to display an image in an MFC application.
displayWin32
Similar to 'displayMfc', but uses Win32 instead.
alignSimple
Simple console based example of using the FastAlign tool.
alignSimpleMfc Simple MFC example of using FastAlign. Allows interactive selection of search
area to reduce search time.
ocrPerim
Simple console example of using FastOCR to recognize characters using the
perimeter based technique. The perimeter technique is most robust than the area
technique.
ocrGray
Simple console example of using FastOCR to recognize characters using the
area based technique. The area technique is most robust than the perimeter
technique. It can also deal with arbitrary character symbols, whereas the
perimeter can only deal with characters defined by a single contour.
barsPostnet
Simple console example of using FastBars to recognize Postnet barcode.
66
Adding Operators to WiT
You can extend the power of WiT by adding your own operators. Even if you create your own
applications in C/C++, when you need to create a new function for your application or project,
consider making the function into a WiT operator. You can still call your function from a C/C++
program without any speed penalty, but you gain the possibility of experimenting how your new
function works by combining it with other WiT operators in an igraph. New operators are added
by using the WiT Manager.
The restrictions of a WiT operator function are few:
•
•
•
•
You must arrange the arguments to your function in the order: inputs, outputs, and
parameters. This is hardly a restriction! In fact, this may be considered a good design
because it creates regularity in implementation, which improves ease of maintenance and
user acceptance.
All arguments to your functions must be a valid WiT object type.
Input objects should not be modified. This is good programming practice anyway.
No global variables should be used. Again, this is good programming practice anyway.
Most image processing algorithms work with a certain degree of trial-and-error. Being able to test
out a new function with different algorithms quickly using WiT will almost always increase your
productivity. Give it a try!
A Simple Example
In this simple example, we will create a new operator called myInvert. The myInvert operator
will take an unsigned 8-bit greyscale image and invert each pixel, producing an image that looks
like the negative of the original.
WiT Manager
New WiT operators are added by using the WiT Manager program. Start the WiT Manager from
the WiT program group in the Programs folder of the Start menu.
67
The Manager will appear with a menu bar, a tool bar, and a library setup area, and a status
window. When the Manager starts, it loads the current WiT configuration. The Manager title
indicates the current configuration file (default in this case), and the status window shows a
message indicating that the configuration file was read successfully.
Manager Main Panel and Status Window
WiT groups functionally related operators in libraries (DLLs), related libraries in projects, and
related projects in configurations. For this example, we just want to add one new operator. Since
we need a place to put this operator, we will need to create a project and a configuration too.
Create Configuration
You should never modify the default WiT configuration, becasue you may need to revert back to it
in the future, in case something goes wrong with your custom configurations. So you should create
a new one for this exercise.
The simplest way to create a new configuration is to save the default configuration under a new
name, then modify the new configuration. Select the File/Save Config As... menu item. The Save
68
Config dialog appears. By default the browser shows the $WITHOME\config directory. Enter
tutorial and press Save.
If $WITHOME is not a writable directory (such as when you installed WiT on a shared file
server), navigate to a directory that you can write to, set the file name to tutorial, then press Save.
Save Configuration Dialog
The Manager title now shows that tutorial.wrc is the current configuration. Since you have not
yet made any changes to it, this configuration is still identical to the default configuration.
Create Project
Next we need to create a project to put our library in. A WiT project is a storage place for a
collection of libraries. It is simply a directory with sub-directories of a standard structure.
69
Select the Projects... item from the Edit menu. The Project Editor dialog appears.
Project Editor Dialog
Select Project/New.... The New Project dialog appears. Here you can enter the name of a
directory for your new project. The expression ${WITUSR} refers to the directory where all WiT
related files are to be placed, which is usually the same as the root installation directory for WiT.
button. The
For this tutorial, leave the project name as ${WITUSR}\custom, and click the
Manager will create the new directory, and add it to the Projects list.
New Project Dialog
Select the new project by clicking on the ${WITUSR}\custom item in the Projects list. Notice
that the Libraries, Operators, and Objects windows are all empty for this project at this time.
70
After New Project is Created
Create Library
Next we need to create library to put our operator in. Select Library/New... from the Project
Editor dialog. The New Library dialog appears.
New Library Dialog
The Label is a descriptive label used for display purposes, and the Name is a short name used for
naming files and directories. Label may contain spaces and non-alphabetic characters, whereas
Name must contain no spaces and can only have alphanumeric characters. For this tutorial, enter
My Library for Label and myLib for Name. The check boxes are for more advanced use. For
button.
this tutorial, leave them all unchecked. Click the
71
The Manager creates a directory named myLib under the project directory ${WITUSR}\custom,
and the following sub-directories under myLib:
Directory Contents
help
On-line help files for the operators in this library.
icons
Icon files for the operators in this library.
src
Source code and all related files for the Microsoft Visual Studio project to implement
the library.
Define Operator
Now that we have a library, we can proceed to add our new operator. First we need to define it:
specify what inputs it requires, what output it produces, and what parameters it can use. After that
we can proceed to implement the actual function.
Select Operator/New... from the Project Editor. The New Operator dialog appears. The Name
field specifies the display name for the operator. The Implement field specifies the name of the C
function that implements the operator. Usually the operator and its function have the same name.
But sometimes it is convenient to use a different name for the function to reduce name conflicts
when linking with other libraries. For example, all standard WiT operator functions have a ‘cor_’
prefix. Enter myInvert in the Name field and myCo_myInvert for the Implement field.
New Operator Dialog
Next we need to define the inputs and outputs for our new operator. With the ‘in’ tab selected,
click the
button. Enter a name for the inputs, say inputImage. Set the Type to Image, and the
Vec. Type to uint8. Leave the Vec. Cols field at 0. This field is not used for inputs and outputs.
72
Click the
button. This defines the operator to have one input named inputImage which is an
unsigned 8-bit image. one output named out which is also an image.
For the output, click to select the ‘out’ tab. Then click the
button. Enter the out for name,
Image for Type, and uint8 for Vec. Type. Click the
button. You should have an output
defined as follows:
There are many other options offered by the WiT Manager, but for now, let us just keep it simple
and leave all the other settings at their default values. Click the
button. You should see your
new operator myInvert added to the operator list for myLibrary, as follows
Implment Operator Source
The next step is to add the body of the function. The WiT Manager only supports Microsoft Visual
C/C++ for implementing operators. It is possible to use other C compilers and IDEs, but some of
the steps performed by the Manager will have to be done manually.
73
If you have Microsoft Visual C properly installed on your computer, do the following:
1.
2.
3.
4.
5.
6.
Select the myInvert operator in the operator list.
Select Library/Load. The Manager will launch Microsoft Visual Studio and load the
myLib library project. If Studio is already running, myLib will be loaded in the running
Studio.
Select the FileView tab in the Studio workspace.
Open the myLib files folder.
Open the WiT Files folder.
Double click on the myInvert.c item. Studio will load the source code for the myInvert
operator.
Microsoft Visual Studio
The Manager has already generated skeleton code for the myInvert function. You need to
complete the body of the function. Enter the following code to the Studio myInvert.c window
(you can copy and paste if you are reading this manual on-line).
#include "wMyLib.h"
CorOpRtn
myInvert(CorImage *in, CorImage *out)
{
CorUByte *srcp, *dstp, *dstEnd;
int w, h;
// Only handle unsigned 8-bit images
if (CorObj_mdType(in) != COR_OBJ_UBYTE)
return CorOpStatus(COR_OP_ERROR, COR_OP_ERR_USER,
"myInvert: only unsigned 8-bit images supported\n");
// The output is NULL if the operator's output port is not connected,
// in that case we can return without processing.
if (!out) return COR_OP_OK;
// Allocate storage for output image with the same size and type
// as the input.
w = CorObj_width(in);
74
h = CorObj_height(in);
if (CorImageAlloc(out, CorObj_mdType(in), w, h) <= 0)
return CorOpStatus(COR_OP_ERROR, COR_OP_ERR_USER,
"myInvert: failed to allocate output image\n");
// Add "amount" to each pixel value of the source image "in",
// and save the result in the destination image "out".
srcp = (CorUByte *)CorObj_mdData(in);
dstp = (CorUByte *)CorObj_mdData(out);
dstEnd = dstp + w*h;
while (dstp < dstEnd) {
*dstp++ = 255 - *srcp++;
}
return COR_OP_OK;
}
Update WiT Conguration
Now you have to tell WiT to include your new library next time it runs. Close the Project Editor
dialog. You will see that My Library has now been added to the Available list.
Adding MyLib to WiT Configuration
Do the following:
1.
2.
3.
4.
Select the My Library item in the Available list.
Click the button to add My Library to the Installed list.
Click to save the tutorial configuration.
Select Tools/Activate to make this configuration the active WiT configuration.
The Manager’s job is now done. You can close the Project Editor and shut down the Manager.
75
Compile and Test
Compile your new operator by clicking the
button in Microsoft Visual Studio. If you have
copied the source code correctly, there should be no errors, and Visual Studio will create a new
DLL named wMyLib.dll in the $WITUSR\bin\debug directory.
Now you are ready to test how your new operator works inside WiT. To do this, you must first tell
Visual Studio to use WiT as the executable for debugging your DLL. Do the following:
1.
2.
3.
4.
5.
Select Project/Settings....
Select the Debug tab.
Select General for Category.
Enter the debug version of WiT for the executable. For example, if WiT was installed at
c:\wit, then enter c:\wit\bin\debug.
Click OK.
Setting Debug Executable in Studio
Now start debugging your DLL by clicking the
button in Visual Studio. WiT will be launched
automatically. Notice that at the top of the status window, WiT reports that it is using the tutorial
configuration. Also notice that My Library is now in the library list.
Create the following test igraph in WiT:
Test Igraph
Run the igraph and check that the image is indeed inverted.
76
Build Release DLL
When you are convinced that your operator is working properly, build the release version in
Visual Studio. Studio will create a new wMyLib.dll DLL in the $WITUSR\bin directory.
Add On-line Help
If you bring up the on-line help for the myInvert in WiT, you will see a picture of the icon with
the input, output and parameter types listed, the operator function's C prototype, and a description
of the operator's parameters. This shell for an operator's help entry is generated automatically. You
can add a description to make the help more useful.
Do the following:
1.
2.
3.
4.
5.
In the WiT Manager Project Editor, choose the project and library. Then double-click at
the operator you want to add help to.
Type the one-line summary in the Summary field.
Click the
button. An editor dialog appears in which you can enter HTML text to
describe the operator. You can use any HTML commands to format your text.
Select the File/Save menu item.
Select File/Close. The Help Source dialog disappears.
Help Editor Dialog
77
Add Icon
WiT operators are perfectly usable without a graphic icon. However, having a graphic icon will
greatly enhance the readability of igraphs. You can add an icon for the myInvert operator by
doing the following:
1.
2.
3.
4.
Double-click the myInvert operator in the Project Editor.
button. The WiT Icon Editor comes up.
Click the
Draw the icon. Press and hold the left mouse button to draw in the foreground color, the
right button for the background color. The purple color (more precisely, magenta) is the
transparent color. It will show up it WiT as the background color of the icon. You can
also move ports and set the hotspot with the Icon Editor, and it is possible to use other
more powerful bitmap editors to create WiT icons, but for this exercise, modify only the
graphics. and just do some simple graphics using the WiT Icon Editor. You can click the
button to change the icon size if desired.
button on the tool box window.
When you are satisfied with the icon, click the
Icon Editor
Programming Conventions
All WiT operators follow a set of conventions governing their behavior. Therefore, every function
that implements a WiT operator must adhere to the following guidelines to ensure proper operator
behavior. Failure to meet these requirements may result in unstable behavior, including program
crashes.
Inputs and Parameters
1.
78
The calling code must guarantee that all inputs and parameters are well formed objects of
the correct type, including any dynamically allocated memory required by the object. The
calling code must therefore perform any necessary error checking to ensure that this
2.
3.
4.
guarantee is met. However, this does not imply that the actual data values are necessarily
meaningful or appropriate.
The function is responsible for all necessary testing to determine whether the input data is
appropriate or meaningful. For example, a function that performs an operation on
unsigned 8-bit images can assume that its input is a well-formed image but not that the
image is unsigned or 8-bit.
The function must treat its inputs as read-only. Data in an input object must not be
modified by the function under any circumstances.
The calling code must guarantee that parameters have values consistent with the
parameter specification in the operator definition. In particular, if the parameter specifies
a gadget, the value of the corresponding argument must be consistent with the gadget
specification. The calling code must therefore perform all necessary validity checking to
ensure that this guarantee is met.
Outputs
1.
2.
3.
4.
An operator may produce all, some, or none of its outputs, depending on circumstances.
The calling code tells the function which outputs it expects to be produced: if it passes a
NULL value for an output, the function must not produce that output. If the calling code
passes a non-NULL value, then this is guaranteed to be the address of a valid object of
the correct type. It is the responsibility of the calling code to ensure that this guarantee is
met.
The function tells the calling code which outputs were actually produced, through the
return status code and the CorOpStatus function.
It is the function’s responsibility to ensure that its outputs are well formed. In general, the
calling code allocates storage for the top-level output object, while the function
completes the object by setting field values, including pointer fields. For pointer fields,
the function must allocate the required memory.
79
Return Values
A WiT operator function must return one of the following four CorOpRtn values:
•
•
•
•
COR_OP_OK
COR_OP_ERROR
COR_OP_OUTPUTS
COR_OP_NO_OUTPUT
Functions which complete successfully may return COR_OP_OK directly. Otherwise the
CorOpStatus function should be used to return the appropriate value and error message.
Normally a function should produce all of its (non-NULL) outputs, and return COR_OP_OK. By
returning this status the function tells the calling code that execution was successful and all (nonNULL) outputs were produced. This status can be returned directly (that is, it is not necessary to
call CorOpStatus first). Note that if the function is passed NULL values for all of its outputs, the
most common behaviour is to return COR_OP_OK immediately.
If the function has executed successfully but for some reason has not produced any outputs, it can
return COR_OP_NO_OUTPUT instead of COR_OP_OK. This also indicates to the calling code
that execution was successful, but that no outputs were produced. This status can also be returned
directly.
If an error is encountered during processing then the function should normally produce no outputs,
and return COR_OP_ERROR. This should not be returned directly, but only after calling
CorOpStatus, which communicates the error condition to WiT. Remember that in this case the
outputs must still be well formed. If an output has been partially produced, then all memory
allocated by the function for that output should be freed and the top-level structure cleared (all
fields set to 0). Since the top-level structure was allocated by the calling code, the function must
not attempt to free it.
If the function executes correctly but for some reason has produced only some of its (non-NULL)
outputs, it can return COR_OP_OUTPUTS to indicate this. This status must not be returned
directly, but only after calling CorOpStatus to indicate which outputs were produced.
The function prototype for CorOpStatus is:
CorOpRtn CorOpStatus(CorOpRtn code, ...)
The CorOpStatus function returns the value passed to it in its first argument. The remainder of its
arguments vary depending on the value of the first argument.
If the first argument is COR_OP_OUTPUTS, then CorOpStatus takes one more argument,
which must be a string containing a space separated list of integers, where each integer represents
80
one of the outputs that was produced by the function. Outputs are numbered from 1, in the order in
which they appear in the function's formal parameter list. For example, if an operator has five
outputs, but under some circumstances only produces the first, second, and fifth outputs, then in
that case the function implementing that operator should use the following statement to return:
return CorOpStatus(COR_OP_OUTPUTS, "0 1 4");
Notice that because CorOpStatus returns the value of its first argument, this results in the
function returning COR_OP_OUTPUTS after calling CorOpStatus, as required.
If the first argument to CorOpStatus is COR_OP_ERROR, then the second argument must be
one of ERR_USER, or ERR_MEMORY, which indicates the nature of the error. If the second
argument has the value ERR_USER, then the rest of the arguments consist of a printf style
format string, followed by any values it requires. For example, the following statement is taken
from the implementation of the "brighten" operator created in the tutorial:
return CorOpStatus(COR_OP_ERROR, ERR_USER,
"brighten: cannot process images of type %s\n",
CorObjGetName(CorObj_imType(in)));
Here, the brighten function returns the value returned by CorOpStatus, which is just the value of
its first argument, COR_OP_ERROR. The third argument is the format string, which contains
the one format specifier %s. The fourth argument is the value required by the format string (the
value is returned by the function CorObjGetName).
If the second argument to CorOpStatus is ERR_MEMORY, then the third argument is a string
containing the name of an object for which memory allocation failed, and the fourth argument is
the size (in bytes) of the object.
The CorOpStatus function can also be called simply to send a regular or warning message to
WiT, without returning. In these cases, the first argument has the value COR_OP_MSG, or
COR_OP_WARNING, respectively. In both cases the remaining arguments consist of a printf
style format string followed by any values it requires.
81
The following table illustrates the calling conventions for these uses of CorOpStatus:
CorOpRtn value
Call
COR_OP_OK
return COR_OP_OK;
COR_OP_NO_OUTPUT return COR_OP_NO_OUTPUT;
COR_OP_OUTPUTS
return CorOpStatus(COR_OP_OUTPUTS, char *list);
COR_OP_WARNING
CorOpStatus(COR_OP_WARNING, char *format, arg1, ...);
COR_OP_MSG
CorOpStatus(COR_OP_MSG, char *format, arg1, ...);
COR_OP_ERROR
return CorOpStatus(COR_OP_ERROR, ERR_USER, char *format,
arg1, ...);
COR_OP_ERROR
return CorOpStatus(COR_OP_ERROR, ERR_MEMORY, char
*name, int size);
Memory Management
1.
2.
3.
4.
5.
6.
7.
8.
82
Normally, an operator function should not access (for reading or writing) any global
variables. If a library contains any globally accessed data, then the single thread
capability flag should be selected for the library.
For simple output objects (e.g. int, float, etc.) the calling code must allocate memory for
the object, and pass the address to the function. The function must not allocate memory
for the output object.
For structured output objects (e.g. Image, Vector, Object, etc.), the calling code must
allocate memory for the object's top-level structure only, and pass the address to the
function. The function must not allocate the top-level sturcture, but it must allocate any
memory pointed to by any pointer fields in that structure.
For user-defined output objects, the calling code must allocate memory for a pointer to
the object, and pass the address of the pointer (that is, a double pointer to the object) to
the function. Therefore the function must allocate the memory for the object (including
the top level structure if it exists), and set the output to point to the object. That is, the
function must set the output (which is a double pointer) to the address of the allocated
memory.
The result of any attempt inside the function to allocate memory dynamically (e.g. using
malloc or calloc) must be checked. If memory allocation fails, the function must:
1. free all memory already allocated in the function (including memory for output
objects), and
2. return COR_OP_ERROR, preferably via a call to opStatus.
If a function allocates memory for internal use, for example a temporary buffer, then it
must free that memory before returning under all circumstances.
Memory for input objects must not be freed or modified by the function under any
circumstances.
After a function returns, the calling code must free all of that function's output objects
that were produced (when they are no longer needed). The calling code should check the
function's return value to determine which outputs were produced. See Output Behavior
for more details. Such objects should be freed using the appropriate function from the
Object Library.
Function Headers
The WiT manager automatically generates the C header files which contain the prototypes of the
functions that implement operators. The prototypes for all operators defined in a library are
maintained in that library’s header file, which is kept in the $WITUSR\h directory (or
$WITHOME\h in the case of the libraries included with WiT). The manager parses an operator's
definition to determine the number and order of the corresponding function's parameters, as well
as the name and type of each. By default, the order of the function's parameters follows the order
in the operator definition, except that all inputs come first, followed by all outputs, followed by all
parameters. For this reason operator definitions (by convention) usually list their inputs, outputs
and parameters in this order also.
Because the header files are generated automatically, WiT relies on the fact that operator
definitions and their functions always correspond properly. Therefore they should never be edited
independently.
When an operator is created, the Manager creates the source code (.c) file for the function
definition, with a stub for the function. The source code files for all the operators in a library are
kept in that library's src subdirectory. (Recall that the WiT Manager creates a directory in
$WITUSR for each project you create, and a subdirectory for each library you create in that
project. For example, in the tutorial, the $WITUSR\tutorial directory was created for the tutorial
project, and the $WITUSR\tutorial\customPoint directory was created for the customPoint
library. The source code for the brighten operator is in
$WITUSR\tutorial\customPoint\src\brighten.c.) If the operator definition is changed, the
manager updates the function prototype in the header file, but never modifies the source code file.
Therefore the developer has responsibility for updating the function definition when necessary, to
maintain the correct correspondence with the function declaration in the header file.
Contexts
In some cases an operator may need to maintain state or context information that persists between
invocations. This requirement may be purely local (that is, the operator needs to access and
maintain information only about its own state) or shared (that is, a group of operators needs to
access and maintain information that is shared among all operators in the group). WiT provides a
mechanism to support this.
In the first case, the operator can be defined to have operator context. This is accomplished by
including the "context" keyword in the operator definition. For example, the webRowExtend
operator (part of the SmartWeb package) requires operator context:
83
operator webRowExtend
{
context;
input Image (0,20);
output Image (60,20);
param int "rows" = 2;
summary "Extend images in a stream for neighbourhood operations";
key "pad", "neighbourhood", "linescan";
}
In the second case the library containing the group of operators can be defined to have library
context. This is accomplished by checking the "Context" capability in the Manager's Edit
Library panel:
Specifying Library Context
In either case, the prototype generated by the WiT Manager for the function that implements an
operator that requires context will have a context parameter. Specifically, the first formal
parameter will be a pointer to a CorContext structure:
typedef struct {
CorLibContext *libContext;
CorOpContext *opContext;
} CorContext;
The CorContext structure contains two fields: a pointer to a CorLibContext structure and a
pointer to a CorOpContext structure. Which of these fields contains a valid pointer depends on
whether the operator has library context, operator context, or both.
For example, libraries that implement frame grabber support normally require context to maintain
hardware state information. Since this information must be shared by all the operators that access
84
the hardware, library context is required. As a specific example, the acqStart operator starts
continuous acquisition of images on a frame grabber board:
Operator Definition:
operator acqStart
{
iconSize (40,40);
input sync (0,20);
output sync (40,20);
param int "skipFrames" = 0 (20,40);
summary "Start continuous acquisition on frame grabber";
}
Prototype:
CorOpRtn vDigStart(CorContext *context, int skipFrames);
This function's first formal parameter is a pointer to a context structure, even though the operator
definition contains no reference to it. The Manager inserts this parameter when generating
function prototypes since the library containing the operator indicates that context is required. The
prototype for the function to implement the webRowExtend operator defined above also has a
context parameter, in this case because the operator definition itself specifies it:
CorOpRtn cor_webRowExtend(CorContext *context,
CorImage *In, CorImage *Out, int rows);
In either case, at run-time WiT constructs the appropriate CorContext structure for that function
each time it is called, and passes it to the function.
In the case of library context, an initialization routine (called once when the library is loaded)
normally allocates memory for a custom structure to hold whatever state information is required,
and sets the libContext field in the CorContext structure to point to it. See the chapter on
Hardware Initialization and Cleanup for more information.
In the case of operator context, the operator normally checks the value of the opContext field of
the context argument it was passed. It will be NULL if the operator is being called for the first
time, in which case the function normally allocates memory for a custom structure, and sets the
opContext field in the CorContext structure to point to it. All subsequent calls to this function
will be passed the pointer to this structure.
Igraph Status Changes
Sometimes you want your library to be notified when the igraph state changes. This is particularly
useful when your library has contexts, such as memory of different states. By checking the Igraph
85
messages box in the library properties in the WiT Manager, you instruct WiT to notify your
library when an igraph is starting or when it has stopped. The WiT Manager does this by
generating a ‘Msg’ callback function in your caps.c file. The following is an example of the ‘Msg’
callback function:
void
emuMsg(CorLibContext *libContext, CorLibMsg msg, char *arg)
{
ThisContext *context = (ThisContext *)libContext;
CorContext contextArg;
COR_LIB_CONTEXT(&contextArg) = libContext;
switch(msg) {
case COR_LIB_MSG_IG_START:
// TODO, handle igraph starts...
break;
case COR_LIB_MSG_IG_STOP_REQ:
// TODO, handle stop request...
if (context->useTrigger)
context->triggered = YES;
break;
case COR_LIB_MSG_IG_STOP:
// TODO, handle igraph stops...
break;
case COR_LIB_MSG_DEBUG:
// TODO, debug mode...
break;
}
}
Calling Other WiT Operators
All WiT operators are implemented as C functions, and therefore can be executed directly by
calling the C functions that implement them. This also means that one operator can execute other
operators to perform some of its data processing tasks.
Recall that the prototype for an operator function is found in the $WITUSR\h directory (or
$WITHOME\h in the case of libraries included with WiT) in a file named for the library that
contains the operator. For example, invert is in the point library and so its prototype can be found
in the header file $WITHOME\h\wPoint.h.
To illustrate how one operator calls another WiT operator, the definition and code for the reduce
operator (in the pyramid library) is shown. Image reduction is accomplished by smoothing
followed by decimation. For the purposes of this example, it is sufficient to know that the gauss
operator smoothes an image and the decimate operator creates an output image by copying the
pixels in every alternate row and column of the input image. This creates an output image of one
half the height and width of the input. To reduce a color or complex image, it must be split into its
component image planes first using the rgbSplit or complexSplit operator, and then merged back
86
again using the rgbMerge or complexMerge operator, so these functions are required also since
reduce handles these image types. The source code also illustrates the use of the object access
macro CorObj_mdType, as well as the CorImageFree function from the object library (see
chapter Utility Library Functions for more information).
Here are the prototypes for the operator functions called by reduce:
CorOpRtn cor_gauss(CorImage *In, CorImage *Out, int filterSize);
CorOpRtn cor_gauss_consume(CorImage *In, int filterSize);
CorOpRtn cor_decimate(CorImage *In, CorImage *Out, int useRows, int
useColumns);
CorOpRtn cor_rgbSplit(CorImage *RGB, CorImage *red, CorImage *green,
CorImage *blue);
CorOpRtn cor_rgbMerge(CorImage *red, CorImage *green, CorImage *blue,
CorImage *o0);
CorOpRtn cor_complexSplit(CorImage *in, CorImage *Real_Mag, CorImage
*Imag_Phase, int output);
CorOpRtn cor_complexMerge(CorImage *Real_Mag, CorImage *Imag_Phase,
CorImage *out, int input);
Operator definition:
operator reduce {
input Image "in" (0,20);
output Image "out" (60,20);
param int filter;
summary "Filter and decimate an image";
}
Operator Source Code:
/* reduce.c
* for WIT 3/9/93
Image Utilites in C
Copyright Charles H. Anderson
Dept. of Anatomy and Neurobiology
Box 8108
Washington University School of Medicine
660 South Euclid Ave.
St. Louis, MO 63110
[email protected]
*
* 13sep93: tjd modified - Brought into WIT style.
#include "wPyramid.h"
#include "wFilter.h"
*/
#include "local.h"
87
Witcode
cor_reduce(WitImage *in, WitImage *out, int filter)
{
Witcode
r;
WitImage
temp;
if(!authAccess())
return opStatus(WIT_ERROR, ERR_USER, "reduce: Authentication
failed\n");
memset(&temp, 0, sizeof(WitImage));
if (filter > 0) {
switch(WIT_imType(in)){
case COR_OBJ_RGB:
case COR_OBJ_HSV:
case COR_OBJ_YUV:
{
WitImage red, green, blue;
int outTypeCode;
switch(WIT_imType(in)){
case COR_OBJ_RGB: outTypeCode = 0; break;
case COR_OBJ_HSV: outTypeCode = 1; break;
case COR_OBJ_YUV: outTypeCode = 2; break;
}
CorObj_mdData(&red) = 0;
CorObj_mdData(&green) = 0;
CorObj_mdData(&blue) = 0;
r = cor_splitChannels(in, &red, &green, &blue);
if( r == WIT_OK )
r = cor_gauss_consume(&red, filter-1, NO);
if( r == WIT_OK )
r = cor_gauss_consume(&green, filter-1, NO);
if( r == WIT_OK )
r = cor_gauss_consume(&blue, filter-1, NO);
if( r == WIT_OK )
r = cor_mergeChannels(&red, &green, &blue, &temp,
outTypeCode);
freeWitImage(&red);
freeWitImage(&green);
freeWitImage(&blue);
}
break;
case WIT_COMPLEX:
{
WitImage real, imaginary;
CorObj_mdData() = 0;
CorObj_mdData(&imaginary) = 0;
r = cor_complexSplit(in, , &imaginary, 0);
88
if(r == WIT_OK)
r = cor_gauss_consume(, filter-1, NO);
if(r == WIT_OK)
r = cor_gauss_consume(&imaginary, filter-1, NO);
if(r == WIT_OK)
r = cor_complexMerge(, &imaginary, &temp, 0);
freeWitImage();
freeWitImage(&imaginary);
}
break;
default:
r = cor_gauss(in, &temp, filter - 1, NO);
break;
}
if (r != WIT_OK)
return opStatus(WIT_ERROR, ERR_USER,
"reduce: failed filtering image\n");
r = cor_decimate(&temp, out, 0, 0);
freeWitImage(&temp);
}
else
r = cor_decimate(in, out, 0, 0);
if(r != WIT_OK)
return opStatus(WIT_ERROR, ERR_USER, "reduce: failed decimating
image\n");
return WIT_OK;
}
First, the output is checked to see if it is connected (non-NULL). If it isn't then the operator returns
immediately.
Next, the filter parameter is tested. If it is 0 then no filtering is required so decimate is called
directly. Otherwise, the appropriate Gaussian filter is called and then the image is decimated. If
the input image is either color or complex, then it is split into its component image planes before
decimation, and the decimated sub-images are merged.
Note the following characteristics of the code:
1.
2.
3.
After every call to a WiT operator, the return code is verified. If the return code is not
COR_OP_OK then the function aborts processing and returns the error (via an opStatus
call).
The CorObj_mdType object access macro is used to retrieve the value of the type field
of the input image structure. An object's fields should not be accessed directly by name,
since the structure's implementation is subject to change.
If the input image is a color image then four temporary images are required: red, green,
blue, and temp. All fields of these image structures are set to 0 (by the memset calls) to
ensure that they are well-formed objects before being passed as arguments to other
89
4.
functions (recall that it is the calling code's responsibility according to the coding
Conventions to ensure this). This also applies to temporary images used if the input
image is complex.
The temporary images are always freed, if necessary, using the CorImageFree function,
when they are no longer needed. Note for example that temp is always freed if and only if
cor_gauss succeeds, no matter what happens later, since in this case cor_gauss would
have allocated memory for the data in temp. If cor_gauss fails, then its outputs do not
need to be freed since according to the coding conventions cor_gauss should not have
produced them.
Calling operators that have a context parameter requires special consideration.
International Language Support
WiT supports international languages for operators names, parameter names and values, and
library names. Refer to section ‘Configuration/International Language Support’ in the User’s
Manual for details.
90
Data Objects
As image processing operations progress through pre-processing to the analysis phase, the objects
that are created at each stage become increasingly more sophisticated. For example, an image is
binarized and blobs are collected. The major axes of the blobs are converted to a line, which is
then used to find a step change in the image along the line. In this case a blob data type and a line
data type are needed to represent the processed information, so that these objects can be passed to
further processing functions, displayed on screen, saved to a file, etc.
WiT provides a rich standard set of object types from primitives such as integers, floats, and
strings, to structures like images, blobs, features, lines, edges, and graphics. You can also augment
this data type set by adding your own object types using the WiT Manager.
Each WiT data object has a display name and a programming name. The programming name
must be a valid C identifier. The display name may contain spaces and other non-alphanumeric
characters. This being the WiT Programmer’s Manual, we will mostly refer to objects by their
programming names.
Object Types
There are two categories of WiT object types: simple and compound. Simple objects include basic
data types such as integers, strings, images, floating-point numbers, etc. Compound objects are
made by combining simple objects, similar to and in fact implemented with C structures.
Following is an example of a compound object:
typedef struct
{
int x;
int y;
short value;
} myObj;
You can add new object types to the WiT object system using the WiT Manager. User-defined
objects are handled exactly like standard compound objects. You can then use many of the
standard utility functions and WiT operators to write and read your data object to and from a file,
display it in a window, send it through TCP/IP, etc. New functions that you create can also use
your new object types to reduce the number of function arguments.
91
Vectors and Images
WiT has special object types to represent vectors (1-D arrays) or images (2-D arrays). The element
type of a vector or image can be any WiT object type, even vectors or images. This recursively
definition can be carried to any arbitrary depth.
For example, you can the following definitions, where the object level2 contains a vector and an
image whose element type is a level1 object. A level1 object in turn contains an image whose
element type is a 16-bit short integer.
typedef struct {
float otherStuff;
CorShortImage im;
} level1;
typedef struct {
level1Image im;
level1Vector vec;
} level2;
WiT has the predefined object types CorVector and CorImage for generic vectors and images
respectively. The data field of these generic array data types is declared as a void pointer (void *).
WiT also creates specific array data types for each object type. These objects have the data field
pre-defined to point to the specific data type. Each object type has a corresponding vector and
image type with the suffix Vector and Image, respectively. For example, by using the WiT
Manager to create the level1 object type above, the WiT Manager will create the corresponding
array types level1Vector and level1Image. In the case of the simple objects which use standard C
type names, a Cor prefix is also added to reduce the likelihood of type name conflicts, such as the
CorShortImage type for the short object used in the above example.
Most image processing functions support a small subset of object types as the pixel type. The
following are the most commonly supported image types:
•
•
•
•
•
•
•
CorUByte
CorByte
ushort
short
float
CorRGB
CorComplex
Access macros are available and should always be used to access the size and data pointer of a
vector or image object. Using access macros will make your code more portable in case the
underlying implementation of vectors and images change over time.
92
Field
Macro
Applicable
Element type CorObj_mdType Vectors and images
Data
CorObj_mdData Vectors and images
Width
CorObj_width
Vectors and images
Height
CorObj_height
Images only
Nested Objects
Compound objects can be nested. For example, the CorGeom object contains the field plist,
which is a vector of CorFpoint compound objects, and a field text which is a pointer to a
CorGeomText compound object.
typedef struct {
float x;
float y;
} CorFpoint;
typedef struct {
String data;
String fontFamily;
char fontStyle;
ushort fontSize;
} CorGeomText;
typedef struct {
int type;
CorFpoint plist[];
CorGeomText *text;
} CorGeom;
WiT does not support the inclusion of an unnamed structure inside an object. For example, to
implement the following C structure:
typdef struct {
struct {
int x, y;
} position;
CorVector data;
} ObjX
You must first define the nested structure as a named object:
typedef struct {
int x;
93
int y;
} DataPosition;
typedef struct {
DataPosition position;
CorVector data;
} ObjX;
Object Type ID
For efficiency reasons, every WiT object has a unique integer ID in addition to its unique name.
Most program code uses the ID to recognize the object type. The function CorObjGetId from the
object library ($WITHOME/h/corObj.h) returns the ID of an object given its name, and
CorObjGetName does the opposite.
All the standard WiT simple and compound object types have constant predefined integer IDs and
can be used directly wherever an object ID is required. For example, to allocate a vector of 10
Graphic objects, you can write:
CorVectorAlloc(vec, COR_OBJ_GRAPHIC, 10);
Standard IDs are formed by stripping the Cor prefix (if it is there) from the programming name,
capitalize the string, then adding the prefix COR_OBJ_. For example, the ID for the object
CorEdge is COR_OBJ_EDGE, and the ID for short is COR_OBJ_SHORT. The complete list
of standard objects IDs can be found in the Reference Manual.
In addition to the standard object IDs, there are three special IDs:
COR_OBJ_GENERIC
Indicates an empty or uninitialized object.
COR_OBJ_FIRST_COMPOUND_TYPE The ID of the first compound object type. If an
object’s type ID is less than or equal to this, then it
is a simple object.
COR_OBJ_LAST_BUILTIN_TYPE
The ID of the last built-in (or standard) object type.
If an object’s type ID is greater than this, then it is a
user-defined object.
When WiT builds the object system at start-up, it constructs a mapping which assigns an integer to
each object type in the object system at that time. The standard types are always assigned the same
values, since they are always created in the same order. But because user-defined objects may be
loaded in different orders, a particular integer value may not always represent the same userdefined object type. It may even change during a single WiT session (if the object system is
reinitialized and changed by the user at run time). It is therefore mandatory to use CorObjGetId
to determine the ID of a user-defined object.
94
For example, if you have a custom object myObj and you want to allocate a 10x10 image of this
type, you should write:
CorImageAlloc(image, CorObjGetId("myObj"), 10, 10);
Memory Allocation
The WiT object system facilitates the creation and destruction of any object type. Simple objects
of course can be allocated and freed directly, or simply declared as variables. But array objects
(vectors and images), as well as compound objects with embedded pointers or array objects, can
be handled much more easily with the WiT object system.
There are functions to facilitate the allocation and freeing of array objects:
Type
Allocate
Free
Vector CorVectorAlloc CorVectorRelease
Image CorImageAlloc CorImageRelease
In addition, the functions CorVectorAllocSafe and CorImageAllocSafe will allocate memory
and zero the entire block. The function CorVectorAllocAndSet allows you to set the values of the
vector within the same call. This is very useful when creating short fixed-value vectors.
For compound objects, the function CorObjDataCreate and CorObjDataRelease1 can be used
to allocate and free the memory. While the usefulness of CorObjDataCreate is limited because it
can only allocate the memory for one level of storage, CorObjDataRelease1 is much more
powerful because it recursively traverses down an object and free all nested pointers and arrays.
The function CorObjDataCopy provides an equally powerful copy mechanism that also traverses
all nested pointers and arrays. Examples:
CorGeom *geom;
CorEdge edge;
int i;
CorFpoint *pp;
geom = (CorGeom *)CorObjDataCreate(COR_OBJ_GEOM);
CorVectorAlloc((CorVector *)&geom->plist, COR_FPOINT, 10);
pp = CorObj_mdData(&geom->plist);
for (i=0, ix = i;
pp->y = 0;
}
CorObjDataRelease1(geom, COR_OBJ_GEOM, 0, YES);
geom = &edge.geom;
CorVectorAlloc((CorVector *)&geom->plist, COR_FPOINT, 10);
95
...
CorObjDataRelease1(&edge, COR_OBJ_EDGE, 0, NO);
Data Cache
Memory allocation and freeing can take up a significant amount of time. One way to avoid that is
to use preallocated buffers and never free the buffers until the program is ready to exit. This works
fine for small loops and relatively simple logic. But when an algorithm becomes very complex, the
implementation is often safer and more readable and data is freed (or released) as soon as they are
no longer needed. WiT has a data cache for vector and image data blocks to make dynamic
memory management more efficient.
If the WiT data cache is enabled and a vector or image is allocated using CorVectorAlloc or
CorImageAlloc, the data cache is searched for a block large enough to fit the requested size. If a
match is found, the address is returned without allocating new memory. If no match is found (such
as when the cache is new), a new block is allocated and returned to the caller.
When a vector or image is released, the data block is not freed, but simply added to the data cache
and marked as free.
Usually, enabling the WiT data cache either makes a program run faster or at the worst has no
effect on execution speed. However, under some circumstances the cache may actually degrade
performance if not set up correctly. For example, if you need to allocate and free some very large
images mixed with some small data blocks, repeated allocation and freeing may cause internal
fragmentation of the cache, causing the available physical memory to be tied up and resulting in
slower execution speed or even crashes. By raising the minimum cacheable block size, such
problems can be avoided.
To avoid any 'unexpected' behavior, the WiT data cache is disabled by default.
The CorObj Type
The CorObj object is special. It is used as a container to allow processing functions to handle
different object types at run time. It can also be used as the element type of an image or vector
object to support the representation of heterogenous element types within a vector or image.
CorObj has the following fields:
Field
Access Macro
Type of object
CorObj_type
Value of primitive
CorObj_name, where name is the name of the object. E.g. CorObj_Byte,
96
CorObj_int
Pointer to
compound
CorObj_data
Primitive object types are stored directly inside the CorObj structure, whereas only a pointer to
the object itself is stored for compound objects. This is because compound objects can be userdefined and they can be as large as the user wants. Therefore, if an object of type CorObj is
declared or allocated, the storage for any primitive object will be available also, whereas storage
for compound object types must be declared or allocated separately. Examples:
CorObj obj, obj1;
CorColor *colorp;
CorObj_type(&obj) = COR_OBJ_INT;
CorObj_int(&obj) = 1;
CorObj_type(&obj1) = COR_OBJ_COLOR;
CorObj_data(&obj1) = malloc(sizeof(CorColor));
colorp = (CorColor *)CorObj_data(&obj1);
colorp->r = 255;
colorp->g = 0;
colorp->b = 0;
Some primitive object types, such as CorVector, CorImage, and CorString, have pointers in
them. These pointers are not initialized when a CorObj is declared or allocated. They must be
allocated separately also. Examples:
CorObj obj, obj1;
CorString str;
CorImage *image;
CorByte *ip;
CorObj_type(&obj) = COR_OBJ_STRING;
str = CorObj_string(&obj) = (char *)malloc(10*sizeof(char));
strncpy(str, "Hello", 10);
CorObj_type(&obj1) = COR_OBJ_IMAGE;
image = CorObj_image(&obj1);
CorImageAlloc(image, COR_OBJ_BYTE, 10, 10);
ip = (CorByte *)CorObj_mdData(image);
The function CorObjCreate should be used to allocate compound objects. It is simpler and less
error prone than setting the type and data fields directly. Examples:
CorObj obj;
CorGraphic *graphic;
CorObjCreate(&obj, COR_OBJ_GRAPHIC);
graphic = (CorGraphic *)CorObj_data(&obj);
97
CorObjCreate only allocates the top level of a compound object. If the object has nested pointers
or arrays, they must be allocated or declared separately.
Naming Conventions
Most standard WiT object type names start with a ‘Cor’ prefix. The only exceptions are the simple
types which are standard C types: short, ushort, int, uint, float, and double. WiT uses the
standard C names for these types.
The standard C type ‘char’ is somewhat ambiguous, since it sometimes represents an arbitrary 8bit integer, but other times it may represent a character in an alphabet. Because of this ambiguity,
WiT does not use the type char. Instead, it uses the type CorChar to represent a character, and
the types CorByte and CorUByte to represent a signed and unsigned 8-bit integer respectively.
An array type name is formed by appending the word Vector and Image to the base object name.
In the case of the simple objects which use standard C type names, a ‘Cor’ prefix is also added to
reduce the likelihood of type name conflicts. Examples:
Base Object Vector Type
Image Type
CorColor
CorColorVector CorColorImage
CorGeom
CorGeomVector CorGeomImage
float
CorFloatVector CorFloatImage
short
CorShortVector CorShortImage
98
Standard object IDs are formed by stripping the ‘Cor’ prefix (if it’s there) from the programming
name, capitalizing the string, then adding the prefix ‘COR_OBJ_’. Examples:
Base Object ID
CorPoint
COR_OBJ_POINT
CorEdge
COR_OBJ_EDGE
short
COR_OBJ_SHORT
User defined objects have no pre-defined IDs, because their values depend on which objects are
loaded and the order they are loaded.
Access macros of primitive objects from a CorObj are formed by dropping the ‘Cor’ prefix (if it’s
there) and prepending the prefix ‘CorObj_’. Examples:
Base Object Access Macro
CorUByte
CorObj_UByte
CorString
CorObj_String
int
CorObj_int
The complete list of standard objects names and IDs can be found in the Reference Manual.
Adding New Data Types
You can add your own data types to WiT using the WiT Manager. User-defined data types are as
efficient as standard WiT object types, and they can be manipulated with the same tools in igraphs
or with the same utility functions in C/C++.
A Simple Example
This example assumes that you have gone through the simple example of adding the myInvert
operator earlier. If you haven’t gone through that example, please do so now.
In this example we will create a new object name myStats which will consist of two fields:
•
•
average: a floating-point number for the average pixel value in the image.
max: an unsigned 8-bit value representating the maximum pixel value in the image.
99
We will then modify the myInvert operator so that it will output a myStats object as well as the
inverted image.
First reload the custom project:
1.
2.
3.
Start the WiT Manager if it is not already running. Ensure that custom is the loaded
configuration.
Select Edit/Projects.... The Project Editor dialog appears.
Select the custom project. The Libraries panel will list the myLib library and the
Operators panel will list the myInvert operator. The Objects panel will be blank, since
no objects have been added to this project yet.
Define the New Object
Select Object/New... from the Project Editor. The New Object dialog appears.
New Object Dialog
The Name field is the name of the C field, and must follow C identifier naming conventions. Enter
myStats. The Display field is for displaying the object in WiT. You can use nicer looking names
with spaces and other characters not allowed in a C identifer. Enter My Statistics for this
example.
button to add a field to this object. The Field dialog appears. Enter average for
Click the
Name. Choose float32 for the Type.
100
Click the
button. The Field dialog disappears. Click
for Name and int8 for Type.
again to add the next field. Enter max
button on the New Object dialog. The dialog disappears and the new object is now
Click the
listed in the Object list in the Project Editor.
Select Project/Update prototypes to generate all header files for the selected project (should
be‘custom’ at this point). A new file named wCustom.h in the directory $WITUSR\h will be
generated which will contain the corresponding C structure for myStats
Modify the Operator Definition
Next we’ll modify the myInvert operator definition to add an output to it. Double click on the
myInvert operator from the Operators list. The operator definition editor window comes up.
Click the Out tab, then click the
button. The Output dialog comes up. Enter stats for the
Name of the output, and My Statistics for Type.
Click
on the Out and Operator Editor panels. Then select Library/Update prototypes to
generate a new function prototype in the file $WITUSR/h/wMyLib.h.
101
Modify the Operator Source Code
Now we need to modify the myInvert source code to compute the field values in the stats output:
1.
2.
3.
Click to select myInvert from the Operators list.
Select the Operator/Source... menu item. Microsoft Visual Studio is started and the file
$WITUSR\custom\myLib\src\myInvert.c is opened.
Close the Manager.
Modify the file to the following. Note particularly that the function prototype has changed. When
an operator is first created, WiT Manager generates the correct function prototype automatically.
But if an operator definition is modified later, the Manager updates the header file but not the
source code. After you have made the changes, recompile the myLib library in Visual Studio.
#include "wMyLib.h"
CorOpRtn
myInvert(CorImage *in, CorImage *out, myStats **stats)
{
CorUByte *srcp, *dstp, *end;
int w, h;
// Only handle unsigned 8-bit images
if (CorObj_mdType(in) != COR_OBJ_UBYTE)
return CorOpStatus(COR_OP_ERROR, COR_OP_ERR_USER,
"myInvert: only unsigned 8-bit images supported\n");
// The output is NULL if the operator's output port is not connected,
if (out) {
// Allocate storage for output image with the same size and type
// as the input.
w = CorObj_width(in);
h = CorObj_height(in);
if (CorImageAlloc(out, CorObj_mdType(in), w, h) <= 0)
return CorOpStatus(COR_OP_ERROR, COR_OP_ERR_USER,
"myInvert: failed to allocate output image\n");
// Add "amount" to each pixel value of the source image "in",
// and save the result in the destination image "out".
srcp = (CorUByte *)CorObj_mdData(in);
dstp = (CorUByte *)CorObj_mdData(out);
end = dstp + w*h;
while (dstp < end) {
*dstp++ = 255 - *srcp++;
}
}
if (stats) {
float total;
CorUByte max;
102
*stats = (myStats *)malloc(sizeof(myStats));
total = 0;
max = 0;
srcp = (CorUByte *)CorObj_mdData(in);
end = srcp + w*h;
while (srcp < end) {
if (*srcp > max)
max = *srcp;
total += *srcp;
++srcp;
}
(*stats)->average = total/(w*h);
(*stats)->max = max;
}
return COR_OP_OK;
}
Test the New Object and Operator
Now we can test our new myStats object. We will display it to check if the values are reasonable.
Just by being displayable shows that the object has been incorporated into the WiT object system.
If you have followed the steps in the myInvert operator tutorial, custom is still the active WiT
configuration. Start WiT and create the following igraph:
Igraph for Testing the New Object
Run the igraph and you should see the following display:
New Object Values
103
Examples of Using Objects in a C Program
Processing Objects of Type CorObj
The following example illustrates how a WiT container object is interpreted as input and produced
as output. It also demonstrates the use of some of the access macros and functions from the Object
Library.
The flipSign operator converts an input object of type CorByte, float, or CorImage with pixel
type CorByte and flips the sign of the scalar value or each pixel value.
#include "wMyLib.h"
CorOpRtn flipSign(CorObj *in, CorObj *out)
{
int inType = CorObj_type(in); // what type of object does 'in'
contain?
if (!out) return COR_OP_OK; // return immediately if output is NULL
//
// Do the conversion. Note that the type of 'out' must
// be set before the contained object is accessed.
//
if (inType == COR_OBJ_BYTE) {
CorObj_type(out) = COR_OBJ_BYTE;
CorObj_Byte(out) = -CorObj_Byte(in);
} else
if (inType == COR_OBJ_FLOAT) {
CorObj_type(out) = COR_OBJ_FLOAT;
CorObj_float(out) = -CorObj_float(in);
} else
if ((inType == COR_OBJ_IMAGE)) {
CorImage *inIm = CorObj_image(in);
if (CorObj_mdType(inIm) == COR_OBJ_BYTE) {
CorImage *outIm;
CorByte *srcp, *dstp, *end;
int w = CorObj_width(inIm);
int h = CorObj_height(inIm);
CorObjCreate(out, COR_OBJ_IMAGE);
outIm = CorObj_image(out);
if (CorImageAlloc(outIm, COR_OBJ_BYTE, w, h) < 0)
return CorOpStatus(COR_OP_ERROR, COR_OP_ERR_USER,
"flipSign: failed to allocate output image\n");
srcp = CorObj_mdData(inIm);
dstp = CorObj_mdData(outIm);
end = dstp + w*h;
while (dstp < end)
*dstp++ = -*srcp++;
104
} else
return CorOpStatus(COR_OP_ERROR, COR_OP_ERR_USER,
"flipSign: does not work with images of type %s\n",
CorObjGetName(CorObj_mdType(inIm)));
} else {
return CorOpStatus(COR_OP_ERROR, COR_OP_ERR_USER,
"flipSign: does not work with objects of type %s\n",
CorObjGetName(inType));
}
return COR_OP_OK;
}
User Defined Objects as Operator Outputs
This example illustrates how a function builds a user-defined object, when the function is
implementing an operator which has an output of user-defined type. Assume that the two objects
defined below are needed:
Object definitions:
typedef struct {
int field0;
Point field1;
Image field2;
Vector field3;
} Test1;
typedef struct {
int field0;
Point field1;
Image field2;
Vector field3;
Test1 field4;
} Test2;
Note that object Test2 contains a field of type Test1. Here are two operators whose outputs are
objects of this type.
The following is the code for a function that builds a Test1 object. Note the use of the Utility
Library functions (CorObjDataCopy, CorObjDataFree, CorObjGetId) and the access macro
CorObj_mdType. Note also that the output parameter is a double pointer. When an operator
output is a user-defined type, the function’s corresponding formal parameter is the address of a
pointer to an object of that type. The function must allocate the memory for the object, and set the
parameter to the object’s address.
Source code:
/* buildTest1.c
105
*
* Operator to build objects of type OBJ_TEST1.
*
*/
#include "wCustom.h"
CorOpRtn
buildTest1(int in0, CorPoint *in1, CorImage *in2, CorVector *in3, Test1
**out0)
{
Test1 *outTest1;
if (!out0) return COR_OP_OK;
// Allocate the memory to store the output object
outTest1 = (Test1 *) calloc(1, sizeof(Test1));
if (!outTest1)
return opStatus(COR_OP_ERROR, ERR_MEMORY, "buildTest1",
sizeof(Test1));
// Copy inputs to the output structure
outTest1->field0 = in0;
if (!CorObjDataCopy(in1, &outTest1->field1, COR_OBJ_POINT, 0))) {
CorObjDataFree(outTest1, CorObjGetId("Test1"), 0);
return CorOpStatus(COR_OP_ERROR, ERR_USER, "buildTest1: Failed
copying field1!\n");
}
if (!CorObjDataCopy(in2, &outTest1->field2, COR_OBJ_IMAGE,
CorObj_mdType(in2))) {
CorObjDataFree(outTest1, CorObjGetId("Test1"), 0);
return CorOpStatus(COR_OP_ERROR, ERR_USER, "buildTest1: Failed
copying field2!\n");
}
if (!CorObjDataCopy(in3, &outTest1->field3, COR_OBJ_VECTOR,
CorObj_mdType(in3))) {
CorObjDataFree(outTest1, CorObjGetId("Test1"), 0);
return CorOpStatus(COR_OP_ERROR, ERR_USER, "buildTest1: Failed
copying field3!\n");
}
// Set output pointer to outTest1
*out0 = outTest1;
return COR_OP_OK;
}
The following is the code for a function that builds a Test2 object. It is very similar to that for the
first builder:
CorOpRtn
buildTest2(int in0, CorPoint *in1, CorImage *in2, CorVector *in3, Test1
*in4, Test2
**out0)
106
{
Test2 *outTest2;
// Return right away if no output is required
if (!out0) return COR_OP_OK;
// Allocate the memory to store the output object.
outTest2 = (Test2 *) calloc(1, sizeof(Test2));
if (!outTest2)
return CorOpStatus(COR_OP_ERROR, ERR_MEMORY, "buildTest2",
sizeof(Test2));
// Copy inputs to the output structure
outTest2->field0 = in0;
if (!CorObjDataCopy(in1, &outTest2->field1, COR_OBJ_POINT, 0)) {
CorObjDataFree(outTest2, CorObjGetId("Test2"), 0);
return CorOpStatus(COR_OP_ERROR, ERR_USER, "buildTest2: Failed
copying field1!\n");
}
if (!CorObjDataCopy(in2, &outTest2->field2, COR_OBJ_IMAGE,
CorObj_mdType(in2))) {
CorObjDataFree(outTest2, CorObjGetId("Test2"), 0);
return CorOpStatus(COR_OP_ERROR, ERR_USER, "buildTest2: Failed
copying field2!\n");
}
if (!CorObjDataCopy(in3, &outTest2->field3, COR_OBJ_VECTOR,
CorObj_mdType(in3))) {
CorObjDataFree(outTest2, CorObjGetId("Test2"), 0);
return CorOpStatus(COR_OP_ERROR, ERR_USER, "buildTest2: Failed
copying field3!\n");
}
if (!CorObjDataCopy(in4, &outTest2->field4, CorObjGetId("Test1"), 0))
{
CorObjDataFree(outTest2, CorObjGetId("Test2"), 0);
return CorOpStatus(COR_OP_ERROR, ERR_USER, "buildTest2: Failed
copying field4!\n");
}
// Set output pointer to outTest2
*out0 = outTest2;
return COR_OP_OK;
}
Advanced
Processing Object Fields
WiT data objects are created in a consistent way so that they can be manipulated without custom
code. This is how WiT reads and writes user defined objects, for example. Several functions are
available to allow C programmers to access and manipulate object fields.
107
The data structure CorObjDataInfo, declared in the file wit\h\corObj.h, contains information
about each field in an object.
The CorObjGetNumObjs function returns the total number of objects currently loaded in the
WiT object system. You can traverse the fields of an object with the function
CorObjTraverseAll. This function traverses through all the fields of an object, including nested
structures, and calls the callback function supplied as one of its arguments.
Because of the recursive nature of WiT objects, only primitive types need to be dealt with directly.
Compound objects can be processed by calling CorObjTraverseAll recursively. The function
CorObjIsStd can be used to determine whether an object is a primitive type or not.
An example of how object fields can be processed by traversing the fields can be found in
\wit\samples\programs\objField.
Adding Object Types Dynamically
You can add object types to the object system dynamically during program execution using the
function:
CorObjAdd(char *name, char *progName, int size, List *wlist);
108
name is the display name of the new object, and progName is the programming name. For user
defined objects, the size argument is not used. The list argument is a linked list of CorObjDataInfo
objects, declared in corObj.h as follows:
typedef struct CorObjFieldStruct {
struct CorObjFieldStruct *next, *previous;
CorObjType type;
CorObjType refType;
unsigned int d0, d1, d2;
unsigned int size;
char name[COR_OBJ_MAX_FIELD_NAME_LEN];
char nestLevel;
Boolean forwardDeclar;
} CorObjDataInfo;
where:
type
Object type of field
refType
Reference type. Applicable only for vectors, images, or pointers. All other object
types should set this field to COR_OBJ_GENERIC (0).
d0
Size of dimension 0 (X). Applicable only if refType is COR_OBJ_VECTOR or
COR_OBJ_IMAGE. All other object types should set this field to 0.
d1
Size of dimension 1 (Y). Applicable only if refType is COR_OBJ_IMAGE. All
other object types should set this field to 0.
d2
Reserved. All object types should set this field to 0.
size
Size of field in bytes
name
Name of field
nestLevel
Used for internal purposes. No need to set.
forwardDeclar Used for internal purposes. No need to set.
The information for each field should be allocated using CorMemAlloc. All field information
structures will be freed when the object system is exited.
An example of creating object types dynamically can be found in
\wit\samples\programs\dynAddObj.
109
110
Code Generation from
Igraphs
WiT can generate a C function from an igraph. Generated C code allows you to produce
standalone programs which are small and fast. You can also convert a frequently used or time
critical igraph into a compiled WiT operator, so that all igraphs which use this operator can run
faster. WiT code generation is designed to work with Microsoft Visual C/C++ version 5 or above.
Generating C Code from an Igraph
To generate C code from an igraph, do the following:
1.
2.
3.
4.
Choose Make C Code... from the Graph menu. The Generate Code Panel appears.
In the C File name text box, enter a file name for the C file to be generated. If the igraph
contains subgraph operators, they will be generated as functions named after the name of
the operator. If you are not certain where to write the files, click the button to browse
your directory system.
If you want each WiT operator call in the generated file to check its return status for any
errors, check the Check return status option. It is safer to check return status of
operators, but doing so makes the code slightly less readable, because of all the repetitive
and bulky checking statements. Unless you are certain all the operators will run without
errors, it is recommended that you check operator return status.
Click the button. The C code is written to the file you specified. It is also displayed in
the WiT Status Window so that you can quickly review it.
Building Generated Code
WiT only generates the function code without a Visual Studio project or Makefile. This is because
you may want to link the function to a variety of target types, such as Win32 or MFC executable,
DLL, ActiveX, etc. Read the appropriate documentation for the different target types, and the
documentation for properly initializing a WiT-based C/C++ application.
Limitations of Code Generation
Currently there are some limitations to what igraphs can be converted into C program code. WiT
generates code by analyzing the operators and links on an igraph and attempt to match appropriate
111
C constructs to them, much like what a human would do. The generated code automatically
allocates the minimum number of WiT data objects for the igraph, and handles initialization and
freeing of temporary data, such as for vector parameters.
One obvious limitation of this technique is that if the igraph is not designed in a readable way, the
WiT code generator is likely to fail, since it studies by matching recognized operator arrangements
to known C code contructs.
Igraphs are inherently two-dimensional and parallel. Converting an igraph into structured C code
is a difficult process and, depending on how the igraph is constructed, may not even be possible.
Keep the following issues in mind when doing code generation:
•
Simple combinations of operators, including if, for, sequencer, and collector, are
supported.
Acceptable Operators and Constructs for Code Generation
•
112
A collector without a sequencer is not supported.
•
Cascaded junctions are not supported. Branch off from a single junction instead.
Unacceptable use of junctions
Acceptable use of junctions
•
When executed in WiT, subgraphs behave as if all the operators inside the subgraph is
simply part of the main graph. However, in generated C code, subgraphs are currently
only generated as functions for better readability. Therefore, the behavior of the C code
may differ from the igraph under some circumstances. For example, the construct shown
in the top figure below is acceptable; that shown in the bottom figure is not. The
subgraph at the bottom generates 5 objects for each object it receives. It is not possible to
create a C function that will do the same thing.
Acceptable Subgraph for Code Generation
113
Unacceptable Subgraph for Code Generation
•
114
The following operators are not supported yet: ifConditional, graph, oneShot, surface,
volume.
Adding Hardware Support
WiT has a flexible framework for hardware and context (execution state) support. The most
common type of hardware used with WiT are frame grabbers. WiT has a consistent yet powerful
interface for all frame grabbers. You can add support for your own frame grabbers and other types
of hardware by following some simple guidelines. This chapter explains how you can do that.
A Simple Example
In this simple example, we will add an emulated frame grabber to WiT. This frame grabber does
not actually acquire data from any hardware. It simply creates an image in memory and set the
values such that the data changes every time an image is grabbed.
Create Library
This tutorial assumes that you have gone through the simple example of adding the myInvert
operator earlier. If you haven't gone through that tutorial, please do so now.
A frame grabber is just a WiT library. To create our new frame grabber library, do the following:
1.
2.
3.
4.
5.
6.
7.
8.
Start the WiT Manager with the tutorial configuration.
Open the Project Editor.
Select the custom project.
Select Library/New....
Enter My Frame Grabber for Label.
Enter myFg for Name.
Check the Single thread, Context, and Frame grabber items.
Click the button.
115
Creating a Frame Grabber Library
Add Acquire Operator
Now we will add an acquire operator to the library. WiT predefines all the common frame
grabber functions in the Video Acquisition library. In order to provide device independence at the
application level (igraph or C), all new frame grabber libraries should adopt the same operator
definitions. So we will share the operator definition for acquire when we add our new operator:
1.
2.
3.
4.
5.
6.
7.
8.
Click to select My Frame Grabber from the Libraries list.
Select Operator/New...
Select Shared for Definition. The Share Operator dialog comes up.
Select the Video Acquistion from the Libraries list. Operators from that library is
loaded on the Operators list.
Select acquire.
Click the button. The Share Operator disappears and the name acquire is set for both
the Name and Function entries.
Usually all frame grabber functions have the frame grabber prepended to the operator
name. Uncheck the Use name box, and type myFgAcquire for the Function name.
Click the button. The New Operator dialog disappears.
Adding the Acquire Operator
116
Implement Source
Now we are ready to implement the source code for our new acquire operator. Since this is only a
simple exercise, our operator will not actually interface to any hardware. We will just create the
image and set the pixel values such that each time acquire is called, the image will change. This is
done by having a static variable that is updated every time acquire is called. In general having a
static variable in a WiT function is not a good idea, since it may cause re-entrance problems. But
for the sake of keeping this exercise simple, we will use a static variable.
Do the following:
1.
2.
3.
4.
5.
6.
7.
8.
9.
Select acquire from the Operators list.
Select Operator/Source. Microsoft Visual Studio starts and the skeleton file for the
acquire operator is loaded.
Enter the following code.
Select Library/Load on the Manager. Visual Studio loads the myFg project.
Compile.
Close the Project Editor on the WiT Manager.
Select My Frame Grabber from the Available list.
Click the button. My Frame Grabber is added to the Installed list.
Click the to save the tutorial configuration. The new frame grabber is ready for use!
#include "context.h"
CorOpRtn acquire(CorContext *context, CorObj *out, int *dropped, int
frames, int delay)
{
ThisContext *lib = (ThisContext *)COR_LIB_CONTEXT(context);
CorImage *im;
int w = lib->info.w;
int h = lib->info.h;
CorUByte *ip, *end;
int i;
static int offset = 0;
CorObjCreate(out, COR_OBJ_IMAGE);
im = CorObj_image(out);
if (CorImageAlloc(im, COR_OBJ_UBYTE, w, h) < 0)
return CorOpStatus(COR_OP_ERROR, COR_OP_ERR_USER,
"myFg acquire: failed to allocate memory for image\n");
ip = CorObj_mdData(im);
end = ip + w*h;
i = 0;
while (ip < end)
*ip++ = offset + i++;
++offset;
return COR_OP_OK;
}
117
Test New Frame Grabber
To test our new frame grabber:
1.
2.
3.
Start WiT and make sure the tutorial configuration is loaded.
Select the Tools/Frame Grabber... menu item. The Frame Grabber window appears.
Select Acquire/Snap. You should get an image like this:
4.
5.
6.
Select Acquire/Snap a few times. You should see the image pattern shift to the left.
Select Acquire/Continuous. Images are now continuously acquired.
Select Acquire/Continuous again to stop the continuous acquisition. Your new frame
grabber is now fully functional!
Hardware Initialization and Cleanup
WiT has a flexible framework for hardware and context (execution state) support. The most
common type of hardware used with WiT are frame grabbers. WiT has a consistent yet powerful
interface for all frame grabbers. You can add support for your own frame grabbers and other types
of hardware by following some simple guidelines. This chapter explains how you can do that.
118
The Advanced Panel
Most frame grabbers have unique features that are hard to generalize. Fortunately, most of these
features affect the behavior of the frame grabber in a global nature. Once configured, such features
usually affect all subsequent frames acquired.
To accommodate the necessity to set and display these custom settings, you can optionally provide
a Panel function to the Video object. To add this function, you modify the Open function with
something like this:
context->video = GCreateVideo(mainFrame,
G_LABEL, context->label,
...
myFgPanel,
// acqPanel
...
0);
You can put the Panel in any file you want. For example, the emu frame grabber
$WITHOME\hardware\emu\src library has a file panel.c which contains the function
emuPanel. You can use any Win32 functions to create a dialog. All you need to know is that you
can retrieve the main window and the appplication instance using these functions:
HWND hwnd = (HWND)GGet(context->mainFrame, G_MS_HWND);
HINSTANCE hInstance = (HINSTANCE)GGet(context->mainFrame, G_MS_INSTANCE);
The emu frame grabber Advanced Panel looks like this:
Emulator Frame Grabber Panel
Complete listing of emuPanel:
#include "context.h"
#define CREATE_WITH_G YES
int
emuPanel(CorLibContext *cp)
{
#ifdef CREATE_WITH_G
return gEmuPanel(cp);
#else
return win32EmuPanel(cp);
119
#endif
}
Live Video
Live video display is an important aspect of frame grabber use. Many frame grabbers support high
speed live window in hardware. WiT supports the use of hardware live video with the Live
function. The Live function is called when the user starts or stops live video display. When live
video is enabled, your code must do whatever is necessary to start live video display. You can
retrieve the window handle displayed by WiT for live video by implementing a SetLiveWindow
function.
You register both the Live and SetLiveWindow functions in the Open function, when the Video
object is created. The functions prototypes are:
Live(CorContext *context, int enable)
SetLiveWindow(CorContext *context, HWND handle, int managed)
See the Bandit frame grabber library ($WITHOME\hardware\bandit\src) for an example of how
hardware live window is done.
120
Compiler Issues
WiT is created with Microsoft Visual C and has been tested only with user applications and
libraries written in Visual C/C++. Usage with other languages is not explicitly supported.
There are many settings for Visual C projects and many versions of C run time libraries. Care
must be taken when linking user programs or libraries with WiT.
Run Time Libraries
Microsoft Visual C provides a variety of run time libraries which, although extremely useful, can
cause all kinds of problems if not set up properly.
Each Visual C project can be built in either Debug or Release mode. For each mode, three flavors
of run time C libraries are available: single-threaded, multi-threaded, and multi-threaded DLL.
Refer to the Microsoft Visual C documentation for the explanation for all these options.
WiT supports both debug and release builds. However, WiT uses the multi-threaded DLL C run
time libraries only and you should set your application or library to use multi-threaded DLL run
time libraries also. The main reason for this requirement is the incompatibility of dynamically
allocated memory blocks among the different flavors C run time libraries. Refer to Dynamic
Memory Allocation for details. If your application or library never allocates memory that will be
freed by WiT, or free memory that has been allocated by WiT, then you can actually mix run time
library flavors. However, since it is hard to predict what you will need to implement in your own
code, and the different run time libraries are so similar in performance, it is recommended that you
always set the C run time libraries to multi-threaded DLL.
Dynamic Memory Allocation
Different C run time libraries have different versions of malloc and free which are not compatible.
This is particularly true for the C/C++ versions of malloc and free. You should not allocate
memory with one version of malloc and free it with some other version of free. WiT provides the
functions CorMemAlloc and CorMemFree which will guarantee that the memory blocks are
compatible with what WiT uses internally.
Microsoft Visual Studio can report memory leaks with debug builds. In order to allow user written
code to linked and debugged with WiT while utilizing Visual Studio’s support for memory leak
detection, WiT uses a dynamically switchable memory allocation library. When run with the ‘debug’ command line argument, WiT will use a debuggable library to do all dynamic memory
121
allocations. If you have operators that leak memory, or if your igraph uses a WiT operator that
leaks memory, the leak will be reported by Visual Studio, even though you can only run the
release build of WiT.
Sometimes the source of the leak may be hard to determine from the dump from Visual Studio
because you do not have the source code. To make tracing memory leaks easier, WiT offers a
labelled version of all the memory allocation functions. For example, CorMemAllocLbl is the
labelled version of CorMemAlloc. The labelled version writes a short label, supplied as an
argument to the function, at the beginning of each allocated block. Because Visual Studio dumps
out the first few bytes of each leaked block, the block label should tell you where the source of the
leak is.
Also, some newer microprocessors can access 16-byte aligned memory faster. To take advantage
of these speed improvements, WiT can optionally align image and vector memory blocks with 16byte alignment. Such blocks are not compatible with malloc and free functions (including
CorMemAlloc and CorMemFree, since those functions simply call malloc and free in turn). By
default, WiT uses only 8-byte alignment so that image and vector blocks can be manipulated with
malloc and free. However, if 16-byte alignment is enabled (using CorMemSetAlign), all WiT
image and vector memory blocks should be allocated using CorImageAlloc and CorVectorAlloc,
and freed using CorImageRelease and CorVectorRelease. For consistency, even if you are not
using 16-byte alignment, you should always use these functions when manipulating image and
vector memory.
Other Visual Studio Settings
All other Microsoft Visual Studio settings should be left at their default values, unless you know
for sure changing them would not affect interoperability with WiT. One setting you should
definitely not change is the Struct member alignment. You must leave it at the default value of 8
Bytes.
122
Shipping Custom
Applications
An application developed with WiT can be redistributed as a WiT run time appliation. WiT run
time licenses cost much less than a WiT development license, and a run time requires less disk
space and memory. WiT run time applications can use the WiT Engine or call WiT library
functions directly. The license is the same.
For any WiT run time application to function correctly on a PC, you need to install three
components:
1.
2.
3.
Distribution WiT: The subset of distribution WiT components required by your
application,
Custom WiT: WICs and custom WiT operator libraries you created for the application,
Non-WiT: Components not directly related with WiT, such as VB forms and
applications, applications created with MFC, COM objects, etc.
Since all the Non-WiT components are created or acquired by you, you should know how to
install them. This includes any drivers or support software your frame grabber or other hardware
may require.
To install the Distribution WiT components, you can either run the WiT Setup program and
choose the Runtime type, or you can perform all the functions done by the WiT Setup program
for run times yourself, using perhaps a setup program of your choice. While more difficult, this
option has the benefit that you can combine the installation of your own files and other
requirements with those of WiT. This is particularly important when you want your users to install
all the software related to your application themselves.
Manual Installation of Distribution WiT Components
1.
2.
3.
Create a home directory for WiT, usually ‘C:\Program Files\WiT’. This is the
$(WITHOME) directory.
Create a ‘bin’ directory under $(WITHOME).
Copy the following files in $(WITHOME)\bin:
gTools.dll
wObj.dll
wUtil.dll
123
4.
5.
6.
The following files may or may not be needed, depending on what features of WiT you
use in your application. If you are not sure which ones you need, copy them all. To
determine the minimum number of libraries you need, run your application and let
Windows complain about missing DLLs. Copy DLLs until your application can start
properly.
corlmgr.exe
gVideo.dll
gWidget.dll
wit.ocx
witmgr.exe
witras.exe
Copy standard operator libraries in $(WITHOME)\bin that are required by your
application. Follow the same procedure as above if you want to minimize the amount of
disk space used by the installation.
wBlob.dll
wCalcul.dll
wCalibration.dll
wColor.dll
wConvert.dll
wDisplay.dll
wEdges.dll
wFilter.dll
wFind.dll
wFit.dll
wGeom.dll
wMeas.dll
wMorpho.dll
wObjman.dll
wPixel.dll
wPyramid.dll
wSegment.dll
wSerial.dll
wStats.dll
wSystem.dll
wTiff.dll
wXform.dll
Copy these Intel performance libraries to $(WITHOME)\bin:
ippcv20.dll
7.
8.
9.
wit.dll
ippi20.dll
ipps20.dll
Copy the directories ‘ipp20’, ‘win32’, and ‘win64’, under $(WITHOME)\bin in your
WiT development installation, and all their contents, to $(WITHOME)\bin on the runtime
computer.
If your application uses the WiT Engine, copy, with directory structure, all the ‘.def’ and
‘.ops’ files under the $(WITHOME)\ops directory.
If your application uses any SmartSeries libraries, copy the library DLLs in the
$(WITHOME)\bin directory:
wMatrix.dll
wOCR.dll
wSmartSearch.dll Search360dll.dll
wWeb.dll
10. If your application uses the WiT Engine, and any SmartSeries libraries, copy with
directory structure all the ‘.def’ and ‘.ops’ files under the $(WITHOME)\smart directory.
11. If your application uses any frame grabber or hardware, copy the WiT server DLL in
$(WITHOME)\bin that corresponds to the hardware you are using. WiT server DLLs
always start with a ‘w’ followed by the name of the server. For example, the DLL for the
Viper Quad is wVQuad.dll, and the DLL for the PC-Vision is wpcVision.dll.
124
12. If your application uses the WiT Engine, and any frame grabber or hardware, copy with
directory structure all the ‘.def’ and ‘.ops’ files under the $(WITHOME)\hardware
directory.
13. Copy the following files in the Windows System32 directory (typically
C:\winnt\system32 for Windows NT):
mfc42.dll
msvcrt.dll
oleaut32.dll
olepro32.dll
14. Set the system environment variable WITHOME to the WiT home directory, typically
‘C:\Program Files\WiT’.
15. Add $(WITHOME)\bin to the system environment variable Path.
16. Export all the WiT registry settings from your development PC as follows:
regedit /e wit.reg "HKEY_CURRENT_USER\Software\Coreco Imaging\WiT\Main"
Copy the file ‘wit.reg’ produced by regedit to your run time PC, and double-click it in
Windows Explorer to import the registry settings.
17. If your uses the WiT Engine ActiveX, register the ActiveX as follows:
regsvr32 wit.ocx
18. If your run time will be keyed by a parallel port key, put the WiT CD in your CD-ROM
drive (assume D:) and install the driver by running:
D:\Drivers\Sentinel\Win9x\sentw9x.exe /q
for Windows 9x or
D:\Drivers\Sentinel\WinNT\sentw9x.exe /q
for Windows NT or 2000.
19. Run corlmgr in $(WITHOME)\bin to set the run time license password(s), which you
should have received from Coreco Imaging.
125
Installation of Custom WiT Components
1.
2.
3.
4.
5.
If your application uses the WiT Engine, copy all the ".def" and ".ops" files from any
custom projects you created for your application.
Copy all the DLLs for your custom libraries and servers in the $(WITHOME)\bin
directory.
If your application uses the WiT Engine, copy all the WIC files required by your
application.
If your application uses the WiT Engine, copy the WiT configuration file your
application requires. Usually all WiT configuration files are saved in the directory
$(WITHOME)\config, but you may have saved it elsewhere. You can find out what the
active configuration file by running WiT. WiT reports the complete path of the active
configuration file in its status window.
If your application uses the WiT Engine, you must set the active WiT configuration on
your run time PC. The active WiT configuration file location is stored in the system
registry, which you should have copied to your run time PC in a previous step. However,
the absolute file path is stored in the registry. So if the location of the WiT configuration
file is different on your run time PC as your development PC, you need to modify the
path. You can do that by running the WiT Manager on your run time PC and activate the
configuration, or you can modify the registry directly (usually using the program
regedit). The registry path is:
HKEY_CURRENT_USER\Software\Coreco Imaging\WiT\Main\config
Run Time License
Usage of WiT or Smart libraries is protected by a run time license. The run time license can be
keyed to a parallel port key, or a Coreco Imaging board. When ordering a run time license, you
must specify what the license should be keyed to.
126
Coreco Imaging Contact
Information
Sales Information
Web site:
www.imaging.com
Email:
[email protected]
Technical Support
Voice:
(604) 435-2587 ext 9
Email:
[email protected]
Corporate Headquarters
Coreco Imaging Inc.
7075 Place Robert-Joncas, Suite 142
St. Laurent
Quebec H4M 2Z2
Canada
Tel:
Fax:
(514) 333-1301
(514) 333-1388
US Sales Office
Coreco Imaging Inc.
900 Middlesex Turnpike
Building 8, Floor #2
Billerica, MA 01821
USA
Tel:
Fax:
(781) 275-2700
(781) 275-9590
127
128