1
Before You Start…
Before You Start…

Don’t connect anything until you make sure the Forte is properly and safely situated. If your
Forte keyboard has been out in the cold, give it time to warm up to room temperature before
starting it, since condensation may have formed inside.
Setting up the Forte/Forte7
1. Set the keyboard on a hard, flat, level surface.
2. Four adhesive-backed rubber feet are provided with Forte. Carefully turn the keyboard
over onto a soft surface, remove the paper backing from the rubber feet and attach them.
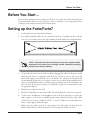
NOTE : Unless the instrument will always be used with a keyboard stand,
attachment of the rubber feet is strongly advised. Otherwise protruding
screws may scratch the tabletop.
3. Connect the AC power cord to the Forte. Before plugging the cable into the power outlet,
check that the power is compatible with the Forte. The Forte runs on AC power and
works with voltages from 100-240 volts at 50–60 Hz. The voltage level is detected and
set automatically by the Forte. If your power source does not have the standard three hole
outlet, you should take the time to install a proper grounding system. This will reduce the
risk of a shock. If your power outlet is not within these ranges it is recommended you use
an appropriate adaptor.
4. Plug the power cable into the wall.
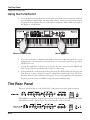
5. Plug the Switch Pedal into the marked SW1 (Sustain) Pedal jack on the Forte rear panel.
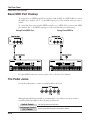
6. Connect stereo headphones to the headphone jack on the front left panel, or connect the
audio outputs to your mixer or amplifier inputs using standard (1/4-inch) audio cables
(use the Left out for mono). Balanced (“TRS” or “Stereo”) cables are recommended if your
mixer or amp supports balanced inputs.
7. Make sure your sound system is at a safe volume level. Also make sure that the Forte
Master Volume slider (on the far left side of the front panel) is all the way down.
GS-1