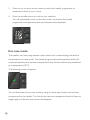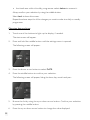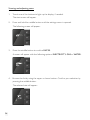
1
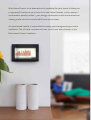
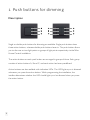
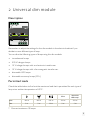
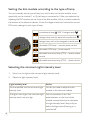
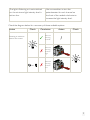
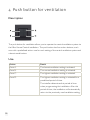
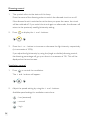
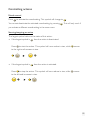
Niko Home Control
User manual
Niko Home Control is the latest electrical installation for your home. It allows you
to operate all functions in your home from one central location, and to monitor –
and therefore possibly reduce – your energy consumption whilst at the same time
creating a safer and more comfortable home environment.
An experienced installer is responsible for setting up and programming an entire
installation. You will have complete end-user control over every function in the
Niko Home Control installation.
Table of contents
1 Push buttons for dimming
2
2 Universal dim module
5
3 Push buttons for motor-controlled
roll-down shutters, sun blinds and
venetian blinds
8
4 Push button for ventilation
10
5 Mood control
11
6Thermostat
14
7Eco-display
24
8Touchscreen
30
9 Touchscreen 2
45
10 Remote control service
67
1 Push buttons for dimming
Description
Single or double push buttons for dimming are available. Single push buttons have
three action buttons, whereas double push buttons have six. The push button allows
you to dim one or two light points or groups of light points respectively via the Niko
Home Control installation.
The action buttons on each push button are arranged in groups of three. Each group
consists of action buttons A, B and C, and each action has been predefined.
Action buttons are also available with indication LEDs. The LED lights up or is dimmed
whenever you press the action button. While programming the installation, the
installer determines whether the LED should light up or be dimmed when you press
the action button.
2
Use
Use of action button A
Action
Result
Briefly press A.
The light is switched on at the maximum
intensity level if the installer did not program the
action button.
or:
The light is switched on at the previously used
intensity level, as programmed by the installer.
Press and hold A.
The light intensity increases for as long as you
press and hold the action button or until the
maximum intensity level is reached.
Use of action button B
Use action button B to adjust and set the light intensity level to your preference. The
standard setting for the light intensity level is 50%.
Action
Result
Dim the light until the desired light You have now programmed this action button
intensity level is reached, then
with your personal preference setting.
press and hold B for more than
three seconds.
Briefly press B.
Your preference setting for the light intensity
level is activated.
3
Use of action button C
Action
Result
Briefly press C.
The light is alternatingly switched off and set to
the minimum light intensity setting.
Press and hold C.
The light intensity decreases for as long as you
press and hold the action button or until the
minimum intensity level is reached.
4
2 Universal dim module
Description
Remember to adjust the settings for the dim module in the electrical cabinet if you
decide to use a different type of lamp.
You can dim the following types of lamps using this dim module:
• incandescent lamps
• 230 V halogen lamps
• 12 V halogen lamps with an electronic transformer
• 12 V halogen lamps with a ferromagnetic transformer
• dimmable LED lamps
• dimmable economy lamps (CFLi)
Permitted loads
Check the table below to find out the maximum load that is permitted for each type of
lamp at an ambient temperature of 45°C.
CFLi*
dimmable
LED lamp*
Max.
400 W
400 W
400 W
200 W
200 W
Min.
5W
5W
20 W
5W
5W
* Connect maximum 10 lamps.
5
Setting the dim module according to the type of lamp
You can manually set the type of lamp you wish to dim on the dim module, more
specifically on the channel (1 or 2) that lamp is connected to. Make your selection by
adjusting the DIP switches on the front of the dim module, which is usually located at
the bottom of the electrical cabinet. Check the diagram below to find out the correct
DIP switch settings for each type of lamp.
incandescent lamp / 230 V halogen lamp
halogen lamp with an electronic transformer
halogen lamp with a ferromagnetic transformer
dimmable LED lamp – reverse phase control
dimmable LED lamp – phase control
dimmable economy lamp (CFLi) – reverse phase
control
dimmable economy lamp (CFLi) – phase control
Selecting the minimum light intensity level
1. Switch on the light at the minimum light intensity level.
2. Adjust the light intensity level:
Light intensity level
Action
You are satisfied with the minimum light
You do not need to adjust the dim
intensity level.
module in the electrical cabinet.
The light is too bright: the minimum light
Use a screwdriver to turn the
intensity level is set too high.
potentiometer on the front of the
module counterclockwise to decrease
the light intensity level. Stop until just
before the light starts flickering or is
switched off.
6
The light is flickering or is not switched
Use a screwdriver to turn the
on: the minimum light intensity level is
potentiometer for each channel on
set too low.
the front of the module clockwise to
increase the light intensity level.
Check the diagram below for a summary of these available options.
Action
Check
Dimming to minimum
level on the control
OR
Conclusion
✓
Minimum
dimming
level OK
✗
Minimum
dimming
level too
high
✗
Minimum
dimming
level too
low
Action
Check
/
7
3 Push buttons for motor-controlled
roll-down shutters, sun blinds and
venetian blinds
Description
Single or double push buttons for motor control are available. Single push buttons
have three action buttons, whereas double push buttons have six. The push button
allows you to operate the motors of one or two groups of roll-down shutters, sun
blinds or venetian blinds respectively that are connected to the Niko Home Control
installation.
The action buttons on each push button are arranged in groups of three. Each group
consists of action buttons A, B and C, and each action has been predefined.
Action buttons are also available with indication LEDs. The LED lights up or is dimmed
whenever you press the action button. While programming the installation, the
installer determines whether the LED should light up or be dimmed when you press
the action button.
8
Use
If the roll-down shutter, sun blind or venetian blind is in motion, you can end this
motion by pressing one of the action buttons. Pressing an action button will stop any
motion.
Use of action button A
Action
Result
Briefly press A.
The roll-down shutter is opened completely.
Press and hold A.
The roll-down shutter is opened until it
reaches the position of your choice. The
upward motion will stop as soon as you release
the action button.
Use of action button B
Use action button B to adjust and set the position of the roll-down shutter to
your preference. The standard setting for the position of the roll-down shutter is
somewhere halfway.
Action
Result
Make sure the roll-down shutter
You have now programmed this action button
has reached the position of your
with your personal preference setting.
choice, then press and hold B for
more than three seconds.
Briefly press B.
You open or close the roll-down shutter until
the preference setting is reached.
Use of action button C
Action
Result
Briefly press C.
You have now programmed this action button
with your personal preference setting.
Press and hold C.
You open or close the roll-down shutter until
the preference setting is reached.
9
4 Push button for ventilation
Description
The push button for ventilation allows you to operate the central ventilation system via
the Niko Home Control installation. The push button has four action buttons, each
one with a predefined action: one for each setting of the central ventilation system and
a boost mode button.
Use
Action
Result
Press A.
The lowest ventilation setting is activated.
Press B.
The normal ventilation setting is activated.
Press C.
The highest ventilation setting is activated.
Press D.
The highest ventilation setting is activated for a
predefined period of time.
The installer determines this period of time
when programming the installation. After this
period of time, the installation will automatically
return to the previously used ventilation setting.
10
5 Mood control
Use the mood control to select one of the mood settings pre-programmed by the
installer during the set-up and programming of the installation. The programming
software includes 20 symbols of which a maximum of eight symbols per mood control
can be selected. The installer then links one or more actions to each one of these
eight symbols to help create the ideal mood for each occasion.
A mood setting is represented by a specific symbol and can be a combination of
different settings with regard to lighting, roll-down shutters, sun blinds …
Activating a mood setting
1. Touch one of the buttons to light up the display.
When not in use, the display is dimmed to reduce energy consumption.
Depending on the programmed mood settings and the selected symbols, the
following screen will appear:
2. Browse the pre-programmed mood settings by using the up or down arrow
button until the symbol appears from the mood setting of your choice.
3. Press the middle button to confirm your selection.
11
The symbol will now be amber-coloured and will remain that way as long as the
mood setting is activated.
Adjusting date and time
1. Touch one of the buttons to light up the display, if needed.
2. Press and hold the middle button until the settings menu is opened.
The following screen will appear:
Note: The language is selected by the installer while programming the installation.
This setting cannot be changed via this screen.
12
3. Verify that DATE has been selected and press the middle button to confirm
your selection.
The following screen will appear, displaying the time, day, month and year:
4. B rowse the list by using the up or down arrow button. Confirm your selection
by pressing the middle button.
5. Press the up or down arrow button to change the value displayed.
6. Press the middle button to confirm the value you entered.
You will automatically return to the previous screen.
7. Press the up arrow button to select back. Confirm your selection by pressing
the middle button.
You will return to the settings menu.
13
6 Thermostat
Use the thermostat to adjust the temperature setting for a specific room. There are
three weekly programmes you can choose from: two for the heating function and
one for the cooling function. In addition, you can also make a selection from five fixed
temperature settings: DAY, NIGHT, ECO, COOL and OFF. You can modify these
pre-programmed settings and temperature levels. You can also use the thermostat to
manually increase or decrease the temperature level.
Start screen
1. Touch one of the buttons to light up the display.
When not in use, the display is dimmed to reduce energy consumption.
The following start screen will appear:
The top row mentions the current temperature within the room. The target
temperature is displayed underneath. When the target temperature is higher than
the current temperature, the
symbol will appear on the screen, indicating that
the heating system has been activated. If you selected a cooling programme, the
symbol indicates that the cooling system has been activated.
The bottom row shows the programme that is currently active, or the selected
temperature level. If this programme or temperature level has been manually
overwritten temporarily, a small clock symbol will appear as well (see next
section). The current time is displayed in the bottom right.
14
Changing the current temperature for a certain period of time
1. Touch one of the buttons to light up the display, if needed.
The start screen will appear.
2. Press the up or down arrow button.
The following screen will appear:
3. Press the up or down arrow button until you reached the temperature of your
choice.
4. Press the middle button to confirm the new temperature setting.
You will automatically go to the bottom row. Enter the timeframe during which
you want the installation to maintain this temperature. The standard setting for
this is one hour.
5. Press the up or down arrow button to increase or decrease the duration
displayed respectively.
You can change the duration in increments of 15 minutes. The maximum duration
is 23 hours and 45 minutes.
15
6. Press the middle button to confirm the selected duration.
You will automatically return to the start screen. The start screen will now
display a small clock symbol, which indicates that the usual programme has been
modified temporarily.
After the selected duration has lapsed, the thermostat will return to the
programme that was active before the change of the duration.
Selecting a pre-programmed weekly programme or
temperature level
The fixed temperature levels have been pre-programmed as follows:
16
DAY
21°C
NIGHT
16°C
ECO
18°C
COOL
24°C
OFF
7°C
The weekly programmes have been pre-programmed as follows:
PROG1
weekday
06:00 => 08:00 DAY
08:00 => 16:00 NIGHT
16:00 => 18:00 ECO
18:00 => 22:00 DAY
22:00 => 06:00 NIGHT
weekend
08:00 => 22:00 DAY
22:00 => 08:00 NIGHT
PROG2
weekday
08:00 => 22:00 DAY
22:00 => 08:00 NIGHT
weekend
08:00 => 22:00 DAY
22:00 => 08:00 NIGHT
PROG3
weekday
16:00 => 19:00 COOL
19:00 => 16:00 OFF
weekend
10:00 => 19:00 COOL
19:00 => 10:00 OFF
1. Touch one of the buttons to light up the display, if needed.
The start screen will appear.
2. Press the middle button to open the menu with weekly programmes and
temperature levels.
The following screen will appear:
Note: The language is selected by the installer while programming the installation.
This setting cannot be changed via this screen.
17
3. Press the up or down arrow button to select the weekly programme or
temperature level of your choice.
4. Press the middle button to confirm your selection.
You will automatically return to the start screen, where also the weekly
programme or temperature level you selected will be displayed.
Eco-save mode
The installer may have programmed a push button with a mood setting that sets the
thermostat to eco-save mode. The weekly programmes and temperature levels will
remain activated but the maximum temperature level will be limited to the predefined
eco-temperature (18°C).
The following screen will appear:
ECO-SAVE
You can deactivate the eco-save mode by using the same push button that has been
programmed by the installer. The limit to the maximum temperature level will then no
longer apply and the eco-save screen will disappear.
18
Changing settings
Changing weekly programmes
In a weekly programme, you can personally set the time and the accompanying
temperature level for each individual day.
1. Touch one of the buttons to light up the display, if needed.
The start screen will appear.
2. Press and hold the middle button until the settings menu is opened.
Use this screen to change the programme, date and time or to adjust the
calibration.
3. Verify that PROG has been selected and press the middle button to confirm
your selection.
The following screen will appear:
4. Press the up or down arrow button to select the weekly programme you want
to modify.
19
5. Press the middle button to confirm your selection.
The following screen will appear:
A set of seven bullets represents one week, from Monday to Sunday. Each row
corresponds to a specific daily programme that may be applied to one or more
days. The selected days are amber-coloured.
In the sample screen above, a different daily programme applies to weekdays (top
row) than to weekend days (bottom row).
6. To add a daily programme: Press the down arrow button to select add.
Confirm your selection by pressing the middle button.
To modify an existing daily programme: Press the up or down arrow button to
select a row. Confirm your selection by pressing the middle button.
The following screen will appear:
You will see the overview of the daily programme on the screen. Each row can
be modified by selecting it with the up or down arrow button. Always confirm
your selection by using the middle button.
20
7. Select the top row of bullets if you want to modify the days to which the daily
programme should apply.
The following screen will appear:
Run through the row of bullets by using the up or down arrow button.
Press the middle button to deactivate the amber-coloured bullets or to activate
the white-coloured bullets. An amber-coloured bullet indicates the day of the
week on which the daily programme is activated, whereas a white-coloured
bullet indicates that the daily programme is not activated on that day.
Select back to return to the previous screen.
8. Select one of the following rows of which you want to modify the time and/or
the accompanying temperature level.
The following screen will appear:
In this screen, you can modify:
• time: on the first row, you select the time of your choice by using the up
or down arrow button.
• temperature: from the list of temperature levels, you select the
temperature level of your choice that you want to apply to the time you
selected.
21
• the timeframe within this daily programme: select delete to remove it.
Always confirm your selection by using the middle button.
Select back to leave this screen.
Repeat the above steps for all the changes you want to make to a daily or weekly
programme.
Changing date and time
1. Touch one of the buttons to light up the display, if needed.
The start screen will appear.
2. Press and hold the middle button until the settings menu is opened.
The following screen will appear:
3. Press the down arrow button to select DATE.
4. Press the middle button to confirm your selection.
The following screen will appear, listing the time, day, month and year:
5. B rowse the list by using the up or down arrow button. Confirm your selection
by pressing the middle button.
6. Press the up or down arrow button to change the value displayed.
22
7. Press the middle button to confirm the value you entered.
You will automatically return to the previous screen.
8. Press the up arrow button to select back. Confirm your selection by pressing
the middle button.
You will return to the settings menu.
Calibrating the thermostat
The installer is responsible for calibrating the thermostat. If you notice that
the temperature displayed on the thermostat varies too much from the actual
temperature, the thermostat temperature must be corrected as follows.
1. Touch one of the buttons to light up the display, if needed.
The start screen will appear.
2. Press and hold the middle button until the settings menu is opened
The following screen will appear:
3. Press the down arrow button to select CALIBRATION.
4. Press the middle button to confirm your selection.
5. Press the up or down arrow button until the temperature on the display
corresponds to the temperature measured in the room. You can increase or
decrease the temperature on the display by up to six degrees.
6. Press the middle button to confirm the temperature you entered.
You will automatically return to the settings menu.
7. Press the up arrow button to select back. Confirm your selection by pressing
the middle button.
You will return to the start screen.
23
7 Eco-display
The eco-display provides you with information on the electricity, gas and water
consumption and the electricity production in your home. The type of information
displayed will depend on the measuring modules included in your installation by the
installer. The eco-display can also be used to activate the eco-function or the presence
simulation.
Viewing consumption details
Viewing measuring data
1. Touch one of the buttons to light up the display.
When not in use, the display is dimmed to reduce energy consumption. The
following start screen will appear:
The
symbol in the bottom left indicates that this screen shows the electricity
consumption. The top row displays the electricity consumption expressed in
W or kW. During the set-up and programming of the installation, the installer
decides which consumption circuit will be displayed on this screen. The bottom
row displays the week consumption from the previous seven days, expressed in
Euro.
2. Press the middle button to browse the various readings. The number of
screens available for viewing measuring data will depend on the number of
readings carried out by the installation.
24
The screen with the
symbol shows the yield generated by solar panels,
expressed in kW, and the week yield, expressed in Euro:
The screen with the
symbol shows the gas consumption, expressed in
m³/day, and the week consumption, expressed in Euro:
The screen with the
symbol shows the water consumption, expressed in
m³/day, and the week consumption, expressed in Euro:
Note: The language and currency are selected by the installer while programming
the installation. These settings cannot be changed via this screen.
25
Viewing and adjusting rates
1. Touch one of the buttons to light up the display, if needed.
The start screen will appear.
2. Press and hold the middle button until the settings menu is opened.
The following screen will appear:
3. Press the middle button to confirm RATES.
A screen will appear with the following options: ELECTRICITY, GAS or WATER.
4. Browse the list by using the upper or lower button. Confirm your selection by
pressing the middle button.
The selected rate will appear:
26
5. If needed, adjust the rate as follows:
• Select the average value if more than one rate applies (day/night rate or
variable rate).
• Press the upper or lower button to increase or decrease the rate respectively.
The longer you press and hold the button, the faster the increment rate.
• Press the middle button to confirm the value you entered. You will
automatically return to the previous screen.
• Select back by using the upper button. Confirm your selection by pressing the
middle button.
You will return to the settings menu.
Adjusting date and time
1. Touch one of the buttons to light up the display, if needed.
The start screen will appear.
2. Press and hold the middle button until the settings menu is opened.
The following screen will appear:
3. Press the lower button to select DATE.
4. Press the middle button to confirm your selection.
The following screen will appear, listing the time, day, month and year:
27
5. Browse the list by using the upper or lower button. Confirm your selection by
pressing the middle button.
6. Press the upper or lower button to change the value displayed.
7. Press the middle button to confirm the value you entered.
You will automatically return to the previous screen.
8. Press the upper button to select back. Confirm your selection by pressing the
middle button.
You will return to the settings menu.
Using the presence simulation
You can activate a number of security scenarios via the start screen.
The presence simulation includes one or more time-controlled actions. It allows you,
for instance, to have the lights switch on or have the roll-down shutters open and
close at certain times. By using the presence simulation, it looks as though someone is
home.
While programming the installation, the installer decides which lights will be included in
the presence simulation, and when and how long they should be switched on for.
1. Touch one of the buttons to light up the display, if needed.
The start screen will appear.
2. Briefly press, or press and hold the upper button (depending on the
programmed settings) to activate the presence simulation.
The following screen with the
28
symbol will appear:
Using the eco-button
In addition to the security scenarios, you can also activate a number of energy-saving
scenarios via the start screen.
Use this eco-button to ensure that no electrical devices are left on unnecessarily when
you leave your home. This will imply that you will not use any energy when it is not
required. The installer can program an action for this button which determines, for
instance, that all lights and devices are switched off and that the ventilation or heating is
switched to a lower setting when you leave your home.
1. Touch one of the buttons to light up the display, if needed.
The start screen will appear.
2. Briefly press, or press and hold the lower button (depending on the
programmed settings) to activate the eco-mode.
The following screen with the
symbol will appear:
29
8 Touchscreen
Caution: This touchscreen does not support access control. For access control in a
Niko Home Control installation, you should use touchscreen 2. Consult chapter 9 for
more information.
You can operate the Niko Home Control installation from a central location via the
touchscreen. Its user-friendly interface provides an easy and quick overview of all the
functions available in the installation, as well as their status. This allows you to switch
and dim the lighting, control the temperature and move roll-down shutters and sun
blinds to the position of your choice. The touchscreen also provides you with an upto-date status about the electricity, gas and water consumption at any time of the day,
provided that these functions have been activated in your installation.
This chapter will guide you through the various control options using the touchscreen.
Start screen
1. Touch the touchscreen.
The start screen will appear. If you do not touch the touchscreen within 30
seconds, the display will be dimmed to reduce energy consumption.
30
The start screen shows an overview of the various menus available: control,
favourites, energy and settings.
The day, date and time are also displayed.
At the top of the energy tab, the live reading of the overall electricity
consumption is displayed, provided that this function has been activated in the
installation. If not, this field will be empty.
2. Select the tab of the menu you want to open.
When the menu has been opened, the menu bar will appear at the bottom of the
screen.
You can return to the start screen at any time by pressing home at the bottom left.
Using the control tab
1. Select the control tab.
The control menu will be opened. You will get an overview of all the locations
entered in the programming software by the installer. Only eight locations can
be displayed per screen. If more than eight locations have been entered, you go
to the next screen by using the arrow on the right. Use the arrow on the left to
return to the previous screen.
31
2. S elect the location for which you want to view the available actions.
The various types of actions and their names have been entered in the
programming software by the installer. Depending on the settings, the following
screen may appear, for instance:
On the left of the screen, you will see the location you selected. Up to six actions
are displayed per screen. If more than six actions are available, you can browse
the various actions by moving up or down the list.
3. S elect the action you want to control. The various actions are further
explained in the section “Controlling actions”.
4. Select control in the menu bar at the bottom, or press the small cross symbol
on the right of the screen to return to the overview of locations.
In the menu bar, select the tab of the menu you want to open.
Select home at the bottom left to return to the start screen.
32
Controlling actions
Mood control
Press
to activate the mood setting. This symbol will change to
You cannot deactivate the activated mood setting by pressing
.
. This will only work
if you activate a different mood setting in the same room.
Starting/stopping an action
The largest symbol refers to the status of this action:
• If the largest symbol is
Press
, then the action is deactivated.
to start the action. This symbol will now reduce in size, while
moves to the right and increases in size.
• If the largest symbol is
Press
, then the action is activated.
to stop the action. This symbol will now reduce in size, while moves
to the left and increases in size.
33
Dimming control
1. The symbol refers to the status of this lamp.
Press the name of the dimming action to switch the dimmed circuit on or off.
If the dimmed circuit is switched on at the time you press the name, the circuit
will be switched off. If you switch the circuit again on afterwards, the dimmer will
return to the previously used light intensity setting.
2. Press
50
50
to display the + and - buttons:
50
50
3. Press the + or - button to increase or decrease the light intensity respectively
(in increments of 10%).
If you adjust the light intensity by using the (single or double) dimming control,
the dimming percentage will go up or down in increments of 1%. This will be
displayed on the touchscreen.
Ventilation control
1. Press
to control the ventilation.
The + and - buttons will appear:
2. Adjust the speed setting by using the + and - buttons.
Available speed settings for ventilation control are:
: low (ecostand)
: normal
: high
34
: boost (the boost function activates the highest ventilation setting during a
period of time predefined by the installer)
Roll down shutter control
1. Press
50
50
to control the roll-down shutter.
The arrow buttons will appear:
50
50
2. Press the up or down arrow button to open or close the roll-down shutter
respectively.
When the roll-down shutter is open, only the down arrow button will appear.
When the roll-down shutter is closed, only the up arrow button will appear.
3. Press the pause symbol to have the roll-down shutter stop to your preference:
50
50
Venetian blind control
The same method as with roll-down shutters is used to control venetian blinds.
The symbol will indicate that it concerns a venetian blind control.
50
50
35
Thermostat
It is not possible to adjust the thermostat settings via the touchscreen. Programming
the thermostat is done via the thermostat itself.
The temperature symbol indicates the current temperature. The target temperature is
displayed immediately to the right of the symbol.
22.5°
18.5°
To the far right of this action, in the same action tab, you will find a menu. Press the
down arrow button to open this menu:
This menu allows you to select from various pre-programmed programmes and
temperature levels. Select the programme of your choice. Press the up arrow button
to close this menu.
To change the current temperature for a certain period of time:
1. Press
22.5°
22.5°
to adjust the target temperature.
The + and - buttons will appear:
22.5°
22.5°
2. Press the + or - button to increase or decrease the temperature respectively
(in increments of 0.5°C).
The adjusted temperature will remain active for a maximum period of 24 hours.
The initially defined programme is temporarily deactivated, which is indicated by
the diagonal line across the programme symbol.
36
Using the favourites tab
Caution: To be able to use favourites, you have to enter them first via the settings tab.
1. Select the favourites tab.
The favourites menu will be opened. You will get an overview of the favourite
actions with the relevant location listed underneath the action name. Up to six
actions are displayed per screen. If more than six actions are available, you can
browse the various actions by moving up or down the list.
2. S elect the action you want to control (see also the section “Controlling
actions”).
In the menu bar, select, if applicable, the tab of the menu you want to open.
Select home at the bottom left to return to the start screen.
37
Using the energy tab
1. Select the energy tab.
The energy menu will be opened. Three drop-down menus are displayed at the
top of the screen.
2. Press the arrow of each drop-down menu to make your choice. From left to
right:
• drop-down menu 1 with various energy reading options for the
installation: select the type of reading you want to see displayed (electricity,
gas, water).
• drop-down menu 2 with various periods: select a period (live, day, week,
month, year).
Caution: Live readings are not available for water and gas.
• drop-down menu 3: select the display mode for the period you selected
(consumption expressed in kW or cost expressed in Euro).
Caution: For live readings, the ‘cost in Euro’ display mode is not available.
38
3. Depending on the selection you made, an overview of measuring data will appear.
The following screen shows the daily water consumption level:
The bar chart in the background displays the consumption from a previous period.
The bar chart in the foreground displays the current consumption:
• red: the current consumption level is higher than during the previous period.
• green: the current consumption level is lower than during the previous period.
• grey: the current and previous consumption levels are the same.
The following screen shows the annual yield generated by solar panels:
In this case, the blue chart represents the yield.
39
Using the settings tab
Select the settings tab. The settings menu will be opened.
alarms
control submenu
1. Select the control submenu.
The control settings menu will be opened. This is where you can change the
symbols linked to each location. You will get an overview of all the locations
entered in the programming software by the installer. Only eight locations can
be displayed per screen. If more than eight locations have been entered, you go
to the next screen by using the arrow on the right. Use the arrow on the left to
return to the previous screen.
Press the small cross symbol in the menu bar at the bottom to return to the main
settings menu.
40
2. Select a location for which you want to change the automatically assigned
symbol.
3. Browse the available symbols by moving up or down the list. Select the symbol
of your choice.
You can choose the eight locations that you want to appear on the first screen of
the control menu. Select 1st page by pressing the tick mark.
41
4. Press save to save the changes you made. You will automatically return to the
overview of locations.
Press the small cross symbol at the bottom right if you do not want to save the
changes you made. You will return to the overview of locations.
favourites submenu
1. Select the favourites submenu.
The settings menu for your favourites will be opened.
on/off
dimmer
ventilation
thermostat
2. Select the action(s) you want to display in the favourites menu. Move up or
down the list to browse the actions per location.
3. Press save to save the changes you made. You will automatically return to the
overview of locations.
Press the small cross symbol at the bottom right if you do not want to save the
changes you made. You will return to the overview of locations.
42
system info submenu
Select the system info submenu to view the system information (IP address,
Mac address …).
In this screen, you can view but not change the chosen language and currency. Only
the installer can change the system information in the programming software.
Use the back button in the menu bar at the bottom to return to the main settings
menu.
43
alarms submenu
Alarms are displayed immediately as pop-up window. After having confirmed the
alarm (by pressing OK), the pop-up will disappear and will be saved to the log file.
Notifications, however, do not appear as pop-up windows. A yellow envelope is
displayed at the bottom right of each menu. When you press the envelope, a pop-up
will appear to display the notification. The last ten notifications/alarms, including date
and time, are recorded in one common log file.
Select the alarms submenu to view the log file with notifications and alarms. Select an
alarm or a notification of your choice to view the entire content.
You can browse the various alarms and notifications by moving up or down the list.
Alarm 1
07.03.12 14:57:21
Alarm 2
07.03.12 14:57:19
Alarm 3
07.03.12 14:57:17
Alarm 4
07.03.12 14:44:57
Alarm 5
07.03.12 14:39:45
alarms and notes
44
9 Touchscreen 2
Parallel with the introduction of the new external video unit, Niko has also improved
the central Niko Home Control touchscreen and its user interface and design.
Touchscreen 2 now also allows for access control through the Niko Home Control
external video unit. This provides you with direct control over your entry door or
gate: on your screen, you will see who is standing at the door or gate, you can accept
the call, or not, you can communicate with the visitor clearly and in full-duplex without
having to wait until he has stopped talking … Another handy feature is that, even when
coming home from work or after a holiday, you will know who has been at your door.
The integrated 130° HD camera on the external video unit automatically generates
a video recording starting ten seconds before the visitor rings the bell and ending ten
seconds after the call.1
Moreover, touchscreen 2 offers the same functionalities as its predecessor: switching
and dimming the lighting, controlling the temperature, moving roll-down shutters and
sun blinds to the position of your choice, monitoring the electricity, gas and water
consumption (provided that these functions have been activated in your installation) …
This chapter will guide you through the various control options using touchscreen 2.
1
Privacy and personal data protection: When using the camera, you are yourself responsible for
observing the Act of 8 December 1992 regarding the protection of privacy within the scope of the
processing of personal data and the Act of 21 March 2007 to regulate the installation and use of
surveillance cameras. Niko does not process personal data processed by your camera and as such
does not accept any responsibility under this legislation.
45
Start screen
1. Touch touchscreen 2.
The start screen will appear. If you do not touch touchscreen 2 within one
minute, the display will be dimmed to reduce energy consumption.
Saturday 03.05.14
control
09:01
favourites
14 W
energy
20
access
The start screen shows an overview of the various menus available: control,
favourites, energy, access and (indicated by the symbol
) settings.
The day, date and time are displayed at the top left of the start screen. Here, you
will also find the live reading of the overall electricity consumption, provided that
this function has been activated in the installation. If not, no measuring data will be
displayed.
On the right, the following four symbols are displayed (only if activated):
Symbol
Meaning
chime sound muted
ringtone sound muted
20
number of missed calls
notifications
46
2. Select the tab of the menu you want to open.
When the menu has been opened, the menu bar will appear at the bottom of the
screen. The name of the open menu is shown at the top left.
You can return to the start screen at any time by pressing niko at the top left.
General operation
When a visitor rings the bell, you will see immediately who is standing at the door
or gate. You have the possibility to either accept or ignore the call. You will receive
information about the origin of the incoming call. If a manual action is linked to the
bell where the visitor is standing, you can also activate this action (such as opening the
garage door or switching on the driveway lighting). Also a door lock can be opened
from this screen.
control
no manual action
no door lock
incoming call:
front door
practice
accept call
ignore
control
favourites
energy
access
settings
47
As soon as you have answered the call, you can adjust the speech volume of the
visitor, mute the volume of your own microphone (mute, unmute) and end the call.
control
no manual action
no door lock
mute
end call
control
48
favourites
energy
access
settings
Using the control tab
1. Select the control tab.
The control menu will be opened. On the left, you will get an overview of all the
locations entered in the programming software by the installer. You can browse
the various locations by moving up or down the list.
2. Select the location for which you want to view the available actions.
The various types of actions and their names have been entered in the
programming software by the installer. Depending on the settings, the following
screen may appear, for instance:
control
airco
livingg room
all off
kitchen
lights on
terrace
desk
entrance
bedroom
edroom parents
paren
control
favourites
energy
access
settings
On the left of the screen, the location you selected will be highlighted. If more
actions are available, you can browse the various actions on the right by moving
up or down the list.
3. Select the action you want to control. The various actions are further
explained in the section “Controlling actions”.
In the menu bar, select, if applicable, the tab of the menu you want to open.
Press niko at the top left to return to the start screen.
49
4. If you want to change the symbol of a location, press the three small points to
the right of the location and then change symbol.
control
lighting 1
change symbol
livingg room
control
lighting 2
kitchen
favourites
energy
access
settings
In the next screen, select and save the image of your choice.
Note: If you want to change the name of a location or action, download the Niko
Home Control User Settings software on www.niko.eu > Products > Niko
Home Control > Apps for the user.
50
Controlling actions
Mood control
Press
to activate the mood setting. This symbol will change to
You cannot deactivate the activated mood setting by pressing
.
. This will only work if
you activate a different mood setting in the same room.
Starting/stopping an action
The largest symbol refers to the status of this action:
• If the largest symbol is
Press
, then the action is deactivated.
to start the action. This symbol will now reduce in size, while
moves
to the right and increases in size.
• If the largest symbol is
Press
, then the action is activated.
to stop the action. This symbol will now reduce in size, while
moves
to the left and increases in size.
51
Dimming control
The symbol refers to the status of this lamp.
1. Press the name of the dimming action to switch the dimmed circuit on or off.
If the dimmed circuit is switched on at the time you press the name, the circuit
will be switched off. If you switch the circuit again on afterwards, the dimmer will
return to the previously used light intensity setting.
2. Press
50
50
to display the + and - buttons:
50
50
3. Press the + or - button to increase or decrease the light intensity respectively
(in increments of 10%).
If you adjust the light intensity by using the (single or double) dimming control,
the dimming percentage will go up or down in increments of 1%. This will be
displayed on touchscreen 2.
Ventilation control
1. Press
to control the ventilation.
The + and - buttons will appear:
2. Adjust the speed setting by using the + and - buttons.
Available speed settings for ventilation control are:
: low (eco-mode)
: normal
: high
: boost (the boost function activates the highest ventilation setting during a
period of time predefined by the installer)
52
Roll-down shutter control
1. Press
50
50
to control the roll-down shutter.
The arrow buttons will appear:
50
50
2. Press the up or down arrow button to open or close the roll-down shutter
respectively.
When the roll-down shutter is open, only the down arrow button will appear.
When the roll-down shutter is closed, only the up arrow button will appear.
3. Press the pause symbol to have the roll-down shutter stop to your preference:
50
50
Venetian blind control
The same method as with roll-down shutters is used to control venetian blinds.
The symbol will indicate that it concerns a venetian blind control.
50
50
53
Thermostat
It is not possible to adjust the thermostat settings via touchscreen 2. Programming the
thermostat is done via the thermostat itself.
The temperature symbol indicates the current temperature. The target temperature is
displayed immediately to the right of the symbol.
22.5°
18.5°
To the far right of this action, in the same action tab, you will find a menu. Press the
down arrow button to open this menu:
This menu allows you to select from various pre-programmed programmes and
temperature levels. Select the programme of your choice. Press the up arrow button
to close this menu.
To change the current temperature for a certain period of time:
1. Press
22.5°
22.5°
to adjust the target temperature.
The + and - buttons will appear:
22.5°
22.5°
2. Press the + or - button to increase or decrease the temperature respectively
(in increments of 0.5°C).
The adjusted temperature will remain active for a maximum period of 24 hours.
The initially defined programme is temporarily deactivated, which is indicated by
the diagonal line across the programme symbol.
54
Using the favourites tab
Caution: From the control tab you can add an action to your favourites by briefly
pressing the three small points to the right of the action and then Add to favourites. If
you want to remove an action from your favourites, press briefly the three small points
to the right of the action and then Remove from favourites.
1. S elect the favourites tab.
The favourites menu will be opened. You will get an overview of the favourite
actions with the relevant location listed underneath the action name. You can
browse the various actions by moving up or down the list.
favourites
start/stop
living room
control
favourites
energy
access
settings
2. Select the action you want to control (see also the section “Controlling
actions”).
In the menu bar, select, if applicable, the tab of the menu you want to open.
Press niko at the top left to return to the start screen.
55
Using the energy tab
1. Select the energy tab.
The energy menu will be opened. Below the measuring data, the type of energy
reading and the relevant period are displayed. When pressing the question mark
at the top right, you will get more information on the colour codes used in the
energy readings.
energy
split view
?
21.80 m³
15
1.0
22
5
12
0.80
0
0.60
0
0.40
0
0.20
0
0
March 2014 April 2014
gas reading studio
control
consumption
month
favourites
energy
access
settings
2. Press – from left to right – any of the following fields to make your choice:
• the various energy reading options for the installation: select the type of
reading you want to see displayed (electricity, gas, water).
• the various periods: select a period (live, day, week, month, year).
Caution: Live readings are not available for water and gas.
• the display mode for the period you selected: select the consumption
expressed in kW or the cost expressed in Euro.
Caution: For live readings, the ‘cost in Euro’ display mode is not available.
56
3. Depending on the selection you have made, an overview of measuring data
will appear.
Daily water consumption level:
energy
split view
?
101.80 m³
7.5
15
22
29
5
12
6.0
4.5
3.0
1.5
0
March 2014 April 2014
water reading global
control
month
favourites
energy
access
consumption
settings
The bar chart in the background displays the consumption from a previous period.
The bar chart in the foreground displays the current consumption:
• red: the current consumption level is higher than during the previous period.
• green: the current consumption level is lower than during the previous period.
• grey: the current and previous consumption levels are the same.
Annual yield generated by solar panels, displayed in a blue chart.
57
4.Press split view at the top right to compare two consumption periods of an
energy reading with one another.
energy
split view
?
197.010 kWh
75
Mon 7
Mo
Tue 8
Wed 9
Thu 10
Fri 11
Sat 12
?
3.169 kW
Sun 13
13:48
13:49
3.5
60
2.8
45
2.1
30
1.4
15
0.7
0
0
7 April - 13 April 2014
eelectricity reading 1
control
week
favourites
consumption
energy
electricity reading 1
live
consumption
settings
access
Press split view again to return to one consumption period.
Using the access tab
Select the access tab. The access menu will be opened
access
20
recent calls
chime sound
ringtone sound
ringtone 40%
control
58
favourites
energy
access
settings
recent calls submenu
Select the recent calls submenu.
The 20 most recent calls are displayed chronologically (including date and time). A
small yellow dot indicates that you have not yet checked the call.
access
20
recent calls
chime sound
ringtone sound
ringtone 40%
control
favourites
energy
access
settings
When pressing a call, you will enter a subscreen in which you can watch the video
recording. Use the previous and next buttons to go to other video recordings. Press
niko at the top left to return to the list of missed calls and directly select another video
recording.
front door private 24/03 13:53
<
previous
next
>
front door
private
play
control
favourites
energy
access
settings
59
chime sound submenu
This submenu is only shown if the installation is equipped with a chime. You can
deactivate the sound of the chime by selecting this submenu. A symbol on the start
screen indicates that you deactivated the chime sound.
ringtone sound submenu
This submenu allows you to deactivate the sound of the ringtone, which is also
indicated with a symbol on the start screen.
ringtone submenu
With the + or - buttons you adjust the volume of the ringtone from 0 to 100%.
When the volume equals 0%, the ringtone is muted automatically and the symbol
is activated on the start screen.
Using the settings tab
Select the settings tab. The settings menu will be opened.
settings
!
notifications
access control
info
terms and conditions
reset
control
60
favourites
energy
access
settings
notifications submenu
When using touchscreen 2, notifications are displayed immediately as pop-up window.
After having confirmed the notification (by pressing OK), the pop-up will disappear
and will be saved to the log file. The last ten notifications, including date and time, are
recorded in one common log file. Both on the start screen and at the top right of each
menu, a small yellow triangle with exclamation mark is displayed. This indicates that the
log file contains notifications.
Select the notifications submenu to view the log file. Select a notification of your
choice to view the entire content. If you have already read a notification as pop-up,
you will see a tick mark to the right of the notification. If you still read the content of a
notification in the list, the notification is checked.
You can browse the various notifications by moving up or down the list.
notifications
control
favourites
!
Movement detected in front of the house
Sat 03 May 2014 - 09:17:34
!
Movement detected in front of the house
Fri 02 May 2014 - 19:37:28
!
Movement detected in front of the house
Fri 02 May 2014 - 18:31:20
!
Movement detected in front of the house
Thu 01 May 2014 - 23:05:16
energy
access
settings
61
access control submenu
Select the access control submenu.
access control
external video unit settings
select chime
control
favourites
energy
access
settings
This screen offers you the following possibilities:
• You set the external video unit(s) and/or change the settings on the unit(s).
• If one or more chimes are connected to the installation, you select the chime
that rings together with touchscreen 2 when the bell is rung.
To set the external video unit(s) or change the settings on the unit(s)
1. Select external video unit settings.
A list of all connected external video units (and ordinary bell push buttons) will
appear.
62
external video unit settings
external video units
001d02438088_000
control
favourites
energy
access
settings
2. Select an external video unit from the list.
external video unit settings
reload image
name:
001d02438088_000
bell:
bell:
bell:
control
favourites
energy
access
settings
63
This screen offers you the following possibilities:
• If the camera image of the external video unit is not good enough, you press
the refresh button (next to reload image) to have it replaced by a more recent
camera image.
• Select name to change the name of the external video unit. A keyboard will be
displayed on which you can enter the new name.
edit 001d02438088_000
Rename external video unit
front door
OK
Cancel
reload image
001d02438088_000
name:
q
w
a
e
s
z
r
d
f
x
c
/
?123
t
y
g
v
u
h
b
i
j
o
p
k
n
l
m
@
!
,
‘
“
?
.
-
:-)
_
• S elect the bell of the external video unit (more bells if it concerns an external
video unit with more than one touch button) to change its settings.
edit bell
bell
name:
select ringtone
select manual action
select door lock
receive calls from this button
control
64
favourites
energy
access
settings
From this screen, you can adjust the name of the bell, select the ringtone on
touchscreen 2 for this bell, select one action that you activate yourself when this
bell will be rung (such as switching on the garden lighting or opening the entry
gate) and determine the door lock that is controlled when this bell will be rung.
If you want that touchscreen 2 receives a call from this bell, you have to check
receive calls from this button.
info submenu
Select the info submenu to view the system information (IP address, Mac address …).
In this screen, you can view but not change the chosen language and currency. Only
the installer can change the system information in the programming software.
Press niko at the top left to return to main settings menu.
terms and conditions submenu
Select this submenu to view the general terms of use.
65
reset submenu
When selecting this submenu or pressing the reset button at the bottom left of
touchscreen 2, the following actions are generated:
• The symbols you selected for the various locations will be reset to the symbols
selected by the installer. Also the order of the actions in the locations will be
reset.
• A ll favourite actions in the favourites menu will be deleted.
• The names of the external video units and their bell(s), the names of the touch
button(s) and the ringtone volume will be reset to their factory settings. The
chime will no longer ring together with touchscreen 2. The ringtone for each
bell will return to the standard ringtone (Dunes). No manual action will be
linked to incoming calls anymore and also the door locks are no longer linked to
bells. All internal units and mobile devices will start receiving all calls again.
66
10 Remote control service
Description
The remote control service allows you to use all of the functions in the smartphone
and tablet application – both iOS and Android – from outside the home as well. So
Niko Home Control can be securely operated via 3G, GPRS or a WiFi hotspot. This
service can be installed on all new and existing Niko Home Control installations.
Steps for implementation
1. Your installer will add a Niko Home Control gateway to the electrical cabinet.
Using an Ethernet cable, he will connect the gateway to the IP interface of
your installation and the router of your Internet connection.
As soon as completed, the only thing you will need to do is register online.
2. Surf to www.niko.eu/remotecontrolservice, the portal page of the remote
control service.
3. Enter your personal data together with the serial number and Mac address of
your gateway. You will find both the serial number and the Mac address on a
sticker on your gateway.
4. Follow the steps outlined on the portal page.
5. Download or update the Niko Home Control application to your smartphone
or tablet. Log in with your e-mail address and password.
The application for iPads and iPhones requires iOS version 5.0 or later. The
Android application requires version 2.2 or later for smartphones and version 3.0
or later for tablets.
And then you are ready to control your lighting, heating, ventilation, roll-down
shutters … remotely and to monitor your energy consumption with one touch of
your smartphone or tablet, no matter where you are world-wide.
67
68
PM-NHC-11R14331
Niko nv
Industriepark West 40
BE-9100 Sint-Niklaas
[email protected]
tel. +32 3 778 90 00
fax +32 3 777 71 20
www.niko.be