1
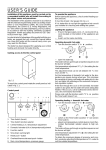
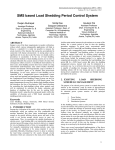
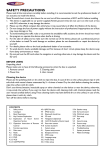
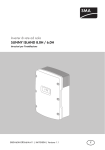
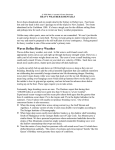
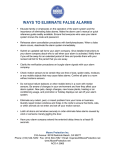
Video editing tips
STORYBOARDING
below the drawing and possibly arrows that point out the direction of any
action. Directors may also write down
Before filming, most directors like to the duration of each shot.
When you pan, do it very slowly and
develop a plan for each shot. They deuse a tripod to avoid a jerking, amateurcide on shot angles and duration beish effect. Almost no one can film withfore actually recording. This saves time
out a tripod and keep the camera from
and lets everyone know the direction
jiggling up and down. Don’t try it.
the filming process is headed. After turning your video camera to There is also a handle on the tripod that
Storyboards should have simple draw- standby mode, hitting the red button allows you to sweep across a scene
4-pin and 6-pin Firewire cables
ings that include a brief description will start filming. You should wait two slowly (pan) without jerking. Uneven
seconds after you push the red button panning is very obvious in the final
before the action begins because it product. As far as zooming, the same
takes that long for the camera to acturule applies: do it gradually. People acally begin recording. In other words,
tually get seasick watching some
don’t say “action” and hit the button
You will most likely have to buy adapters to connect different types of cables. Here are
movies. The overuse of the zoom feaat the same time or the beginning of
types of cables:
ture focuses the viewer on the camerathe action will not be recorded. Genman rather than the action in the film.
Analog Types – This is non-digital video, so it’s not as high quality.
erally, a cue is given with fingers
Coax – It’s what comes out of your wall from the cable company. Audio and video are
counting down from five. Press the You can always edit stagnant scenes
combined.
red button when you get to two, and together to make more interesting shot
RCA – Your VCR and stereo usually have RCA cables. Each cable has one red and one
cue the action to start by pointing to segments, but you can’t edit out the
yellow wire, and stereo audio connections have a third white wire. Yellow is usually
the actors after all of your fingers are zooming. Hit the red pause button,
video and the other two are right and left speakers.
zoom without recording, then hit the red
Mini – This type looks like the kind modern Walkmans use for headphones. It’s just a
down.
button again in order to get a close up
small version of an RCA cable. There are many adapters to convert a mini signal to an
RCA signal. A mini with two black lines on the silver part is a stereo sound. One with
of the subject.
zoom and pan
action
types of cables
one black line is mono sound.
Svideo – This is a high quality video that is better than RCA. However, it’s just not as
good as digital.
Digital Types – Much higher quality, but also more expensive.
USB – Most new computers have this type of connection, especially the new iMacs. You
can connect several items together in a daisy chain with USB without rebooting. Usually, this is too slow for video captures to a computer.
Super USB – This is the latest technology. It’s a new type of USB that allows for extremely fast transfer of information and, apparently, it’s the rage in video capturing.
Firewire (iLink, IEEE1394) – A small cable that incorporates both audio and video.
There are two types. One is a bit wider than the other and there are adapters to connect
each type together splendidly. The new Sony digital cameras often have a firewire port,
and so do some laptops.
pause
Do not turn the camera off after each
take. Instead, use the red (pause) button to stop and start. This will keep
that annoying blue screen from interrupting between takes, and it acts as
an automatic editing process. Some
cameras do also have the ability to
back up to the previous shot automatically in case of mistakes. Consult your
user’s manual to find out how to use
this function.
RCA cable (stereo)
angles
USB cables (6-pin and 4-pin)
framing
What is captured and not captured
within the frame is crucial to the message of the film. We have all seen how
the news has captured various earthquakes in California to make it seem
as though the whole state had been destroyed when only a few buildings
were affected. That is because they left
out the undamaged part of the picture.
The director used a part of the Mexican shore to film Titanic because he
only had to film in the direction of the
sea to make it seem as though the entire ship on the set was surrounded by
water. You can make your backyard
look like a jungle or like ancient Rome
with a few props and the right framing. Be creative.
2
The height the camera relative to the
actors or the action is something important to consider. A low to high angle
gives the impression of the viewer being smaller and the actor more intimidating. A high to low angle has the opposite effect. A level angle conveys an
eye-to-eye message, which is why the
news is broadcast in the way that it is.
They want you to feel that they are talking to one person, face-to-face. Imagine if it were filmed at one of the other
angles!
video effects
Most new cameras have easy-to-use
special effects, including titling, different shadings of the film, and the
ability to add or decrease the light. New
Sony cameras often have the “night
vision” feature as well. These can add
style to your film. If you have video
editing software, you can add these
features after you have filmed. It might
be better to add the effect later because
you can’t change it back if it’s applied
to the original filming. With editing
software, you also have the ability to
add eye-catching transitions between
scenes and effects like lightening and
fire, depending on the software. Some
software even allows you to use a blue
or green screen like they do in highbudget films. Slow motion, still shots,
and the ability to copy and paste scenes
are just a few other features that most
editing software includes.
cameras
VHS – These old clunkers are huge and hold an entire VHS tape, like you play in your
VCR. They aren’t really practical because the batteries wear out quickly and they are too
big.
8mm – This has a small tape, almost the same size as a cassette.
Video C – These tapes are smaller and fatter than the 8mm tapes and require an adapter
to play them on your VCR. These usually don’t have the connections needed for transfer
to a computer.
Svideo – This video is much clearer than a regular 8-millimeter recording. An S-Video
tape is required.
Hi8 – Again, this is a clearer type of video that requires its own type of tape.
Digital 8 – These use a Hi8 tape, but they film in a digital format, which is what computers read. The transfer to a computer is clearer since there is no change of format.
Digital Mini – These are the most compact cameras available since the tape is so small.
It still holds a good amount of time, but the tapes cost about $15, about twice what Hi8
tapes cost.
Stereo Mini plug (note two black stripes)
special effects
With video editing software, you can
often adjust the volume and blend dubbing and music into the final product.
There are archives of sound effects on
the web as well, or you can purchase a
CD of thousands of sound effects for
under $10.
capturing video
There are different types of connections from the camera to the computer, but
there are basic ideas that will help you figure out how to connect your cables.
First, the video information is flowing out of your camera and into something
(the computer, a TV, a VCR, etc.). In some cases, the video and audio are
separated into a cable with two distinct wires. That is because one wire carries
the audio and the other the video. Some cables have three wires—two for stereo audio and one for video. Cables that have only one wire combine both
audio and video into one. To capture the video, you will need to connect the
wires out from the playing device (VCR or camera) and into the “video in” and
“audio in” ports on the computer. When these are hooked up, start the capture
software that comes with the video editing software. “Capture” may be a function of the editing software. When you play the video, you should see it on the
computer screen. Click the record button, and you will begin capturing video.
computer capture cards
Analog (RCA) – You need four RCA plugs, two for video and audio input, and two for
video and audio output. Devices are sold that only allow for input, but you can’t ever put
the edited video on a VCR tape that way. Don’t be fooled by a capture card that doesn’t
have output capability! Often the audio will be in mini form while the video is in RCA
form. Be prepared to buy adapters.
Mini – This is just for sound. Be careful to get adapters with stereo capability (two black
lines on the silver part) because most video software captures in stereo. If you capture in
mono, the final product will only come out of one speaker.
Svideo – You need an Svideo capture device to maintain Svideo quality.
Firewire – If you’ve got a digital camera with a firewire port, get this. Some computers
have it installed when you buy them. It’s fast and easy. This is the method to capture
digital video without turning it back into analog, which would deteriorate its quality.
Super USB – I haven’t seen too many of these, but I’m sure they are coming. Supposedly, they are even faster than Firewire.
3
what you need to edit
Video Camera ($300-$1200) - If you’re investing in a new one, buy digital. I think digital
mini is the best because it is compact, but it also costs more. Don’t forget to buy a camera
with a firewire port as well.
Capture Software ($40-$1000) - All computers need to capture the video somehow. You
will need capture software, which is usually included with video editing software or the
capture card itself, to put your video on the computer.
Hard Drive Memory ($100-300) - You need a tremendous amount of hard drive space for
big projects. You can estimate about one gigabyte of space for every two minutes of video
captured. Many people buy an external hard drive specifically for movies. I recommend a
firewire or Super USB external or internal hard drive of at least 40 GB if you are serious
about video editing. After the project is edited, you will compress the video so it will be
much smaller and then you will record it to a VHS tape and dump it, but you cannot work
with compressed video during the editing process.
RAM ($50-100) - In addition to hard drive memory, you may need RAM. Video editing
software runs best with at least 64 megabytes, but more is better.
taping the final product
Once the video is edited, you will need to have some kind of final product.
First, overnight you will render, compress, produce (or do whatever your software calls it) to get a final, compressed product. Then, you must use Windows
Media Player or some other free software, like Quicktime, to play the movie in
full screen mode. While it’s playing, you must send out the screen information
to a VCR. It’s good to have a TV hooked up to it to monitor what’s happening.
You must hook the video and audio out ports on your computer to a video and
audio in port on the VCR. Select the correct line for viewing what is going into
the VCR by hitting “line” or “input” on your VCR remote until you can see it.
Make sure the sound is also playing from the computer at an adequate volume.
On an IBM compatible, you may have to change the monitor to the TV by
choosing “Display” under the “Control Panels” menu. Pressing the “Fn” button and the LCD/CRT button at the same time can also allow you to toggle
between monitors, so try that. The video will not play on two monitors at the
same time because it takes too much memory. Once you get a picture, hit record
on the VCR and it should work.