1
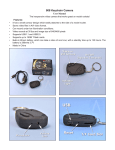
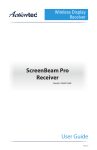
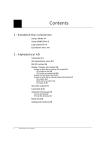
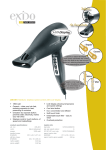
Sky-Spy Keychain HD Camera User Manual The inexpensive HD video camera that works great on model rockets! Features: It has a small contour design which easily attaches to the side of a model rocket. Saves video files in AVI video format. Can record under low illumination conditions. Video records at 30 fps and image size of 1440 X 1080 pixels Supports USB1.1 and USB2.0. Contains an 8GB, and can support a 32GB T-flash cards. Build-in lithium battery, which can take a video of one hour, with a standby time up to 120 hours. Motion detection capability, so it doesn't record video when nothing in the field of view changes. Its two infared lights to allow stealthy video recording under low illumination conditions. NOTE: This is an incomplete instruction manual. At this time, we don't know how to access all the functions. If you can help, please send your observations about the camera to Tim Van Milligan at ts.vm@apogeeRocketscom Operation Guide 1. Charging the Battery The battery in the Sky Spy Keychain HD video camera is a built-in lithium rechargeable battery. You should recharge it before using the camera. The method for charging is: 1.) Connect the Sky Spy Keychain HD video camera to your computer using the supplied USB cable. 2.) During the charge cycle the indicator light will illuminate with a red light. When it is fully charged, the light will turn to Green (or Blue – depending on what mode it is in) and remain steadily illuminated. Notice: When battery power is too low, the camera will enter into protection mode. In this state, it cannot be turned on. It should be recharged for video operations. 2. Turning ON the Sky Spy Keychain HD video camera Press the “ON/OFF” button. The indicator light will illuminate and flash one long light, followed by two short blinks. This indicating that the camera is now powered on, and has started recording video. THAT'S RIGHT... AS SOON AS YOU TURN IT ON, IT IS RECORDING VIDEO! There is NO light to indicate that it is taking video. Why is that? Because this is a spy camera, remember? A light would give you away that you were taking video. We're not the manufacturer, so Apogee has no control over the lights on the camera. IMPORTANT NOTE: Because it is so easy to turn on the camera, you'll find that you've accidentally turned it on while you traveled to the launch range. Before you mount it on your rocket, plug it into a lap-top computer to verify that you did not use up all the memory by taking video of the inside of your camera bag. You may also need to verify that the battery wasn't drained during accidental video recording. This is the downside of this camera – if it didn't have such a great video picture, we'd probably wouldn't sell it. The lens is not designed for close-up videos. You'll need at least 50cm (about 20in) between the lens and the subject for proper focus and to allow sufficient illumination. 3. Turning OFF the Sky Spy Keychain HD video camera: Press and HOLD the on/off button for a minimum of two seconds. As soon as you release the button, the Sky Spy Keychain HD video camera will be off. It indicator light (on top) will flash one long green light (or blue light, depending on what mode it is in). The video is automatically saved to memory during shut down. 4. Pausing Video Recording Press the Pause/Resume button to pause recording. Any video you paused is saved as a separate video file in the memory. When in pause mode, the indicator light will illuminate a solid-steady color (blue or green, depending on what mode it is in) To resume recording, press the Pause/Resume button. 5. To Turn On and Off the Infared lights While the camera is on momentary press the ON/OFF button. If you hold too long, you'll turn the camera off, so make it real quick press. To turn them off, again momentary press the ON/OFF button. To be honest, the infared lights are useless. For one thing, you can't see that they are on – they are outside of the visible spectrum of light. It is like the infared light on the remote of your television. The only way to tell that they are on, is to look at the camera with a different camera. I use the built-in webcam on my computer to verify that they are on, since it can sense infared light. The infared lights are supposed to illuminate a night-time scene. But they are too small to make any difference in the picture quality. You might as well leave them off at all times. 6. To Take Still Photos This is the part of the process we haven't figured out yet. Your help would be greatly appreciated. We know that the camera can take still photos in jpg format. I was able to accidentally do this. But I can't figure out the exact sequence of button pushing to make it happen consistently. I'm sure it has to do with the “Mode” button. 7. Motion Detection This is another part of the camera we haven't figured out how to turn on/off yet. Again, your help would be greatly appreciated. The purpose of motion detection is to save memory by only taking video when something is moving in the view of the camera. When the camera is in motion detection mode, the video will be automatically saved to memory every five minutes. When the camera can no longer detect moving objects, it will continue recording for 15 seconds, automatically save the file, and enter into a standby state. This mode should be OFF for model rockets flights. Otherwise you'll miss the launch of the rocket if it has been sitting on the pad for too long. 8.Setting the Time Stamp This is another part of the camera we haven't figured out fully yet. Again, your help would be greatly appreciated. a. Connect the Sky Spy Keychain HD camera to your computer using the USB cable. b. Open (or create) the Time.txt file on the root directory of the memory card. c. Change the time stamp in this format: YYYY-MM-DD HR:MIN:SEC For example, October 23, 2013 at 12-noon would be: 2013-10-23 12:00:00 You can choose to display or not display the time stamp. The text file controls this feature. Put a Y or an N after the time. For example: Display the time in the video image: 2013-10-23 12:00:00 Y Do not display the time in the video image: 2013-10-23 12:00:00 N You may want to set the time ahead a minute so that you can have enough time to get the camera turned on and the new time-stamp loaded. d. Resave the file to the memory card. It should be .txt format e. Disconnect the camera from the computer and power it on. Take a short video. Put the camera back into stand-by mode, and then turn it off. When you load the video onto the computer, it will now have the new time-stamp imprinted on it. 9. Auto-power off function These features have yet to be verified. Please let us know your observations. The Sky Spy Keychain HD video camera will save video files and turn off automatically under the following conditions: a. Battery power is low: the camera will disable, the video file will be saved automatically, and then the Sky Spy Keychain HD video camera will power down. b. When available memory space on the T/F card is insufficient, the indicator light will go out, the video file will be saved, and the camera will power down. c. When in standby mode, without any operation for 45 seconds, it will be auto-power off. 10.Connecting to your computer When the Sky Spy Keychain HD video camera is connected to your computer using the USB cord, your computer should recognize it just like a simple USB memory stick. While connected to your computer, the illumination light will be a steady color (depending on if it needs to charge). You should see several folders on the “removable drive.” The folder called “DCIM” contains the videos and the photos you have taken. Open the folder, and copy the files you wish to view to your computer. It is better to copy the files before trying to play them, as they will play with less choppiness. Use your computer to delete the video files from the T/F card to free up memory space to take more videos. The camera can also be used as a memory disk to hold and transfer files. 8.Reset When the camera doesn't seem to work properly, it can be reset. There is a reset button for the camera. But it on the inside of the camera, and you have to take it apart to access it. The manufacturer's instructions say to poke a paperclip into the hole on the back of the camera – DON'T DO THIS. That hole is for the microphone, not the reset button. Use extreme caution if opening up the camera body. NOTE: There is NO warrantee on this camera, so go ahead and take it apart. You own it, do what you want with it; just don't come back to Apogee Components and say it is broke. We do not repair or replace the components or the device. Mounting Options Because it is such a lightweight camera, you can use strong electrical tape or duct tape to hold the Sky Spy Keychain HD video camera onto your rocket. Be sure not to cover up the operation buttons or the lens of the device. On small rockets, mount the camera closer to the front of the rocket to keep the Center-of-Gravity forward of the Center-of-Pressure. On bigger rockets, you can move the camera rearward to get a more unobstructed view of the ground during launch. 9. Notice Suitable usage: Please follow all applicable state laws. Do not use it illegally. Moisture Warning: Do not get the Sky Spy Keychain HD video camera wet or use it in high humidity conditions. It is not waterproof and will destroy the device. Shooting illumination: The Sky Spy Keychain HD video camera works best in sunlight conditions. Do not aim the camera at the sun or other strong light sources, as that will damage the optical sensors in the camera. Cleaning requirements: Protect the camera and the lens from dust and dirt. Waste treatment: Protect the environment, do not to throw the product in with household garbage. It should be disposed of in a manner suitable for electronic products. Fire: In order to avoid a battery explosion, do not throw product into a fire. Warranty Apogee Components is not the manufacturer of this product. We do not warranty the Sky Spy Keychain HD video camera other than it will work on your bench when you receive it. If your camera does not operate when you receive it, contact the vendor you purchase the camera from. Once the camera has been flown or driven on a vehicle, the warranty is no longer in effect.