1
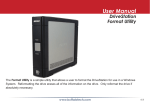
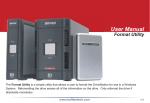
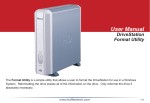
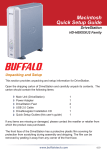
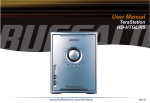
User Manual
DriveStation
HD-HB160U2/HD-HB250U2
Unpacking and Setup
This section provides unpacking and setup information for DriveStation.
Open the shipping carton of DriveStation and carefully unpack its contents. The
carton should contain the following items:
Main Unit (DriveStation)
Power Adapter
DriveStation Feet
USB Cable
DriveNavigator Installation CD
Quick Setup Guide
1
1
2
1
1
1
If any items are missing or damaged, please contact the reseller or retailer from
which the product was purchased.
The front face of the DriveStation has a protective plastic film covering for
protection from scratching during assembly and shipping. The film can be
removed by peeling it away from any corner of the front face.
www.buffalotech.com
QSG-HB160/250-U2
DriveStation Setup
Flip the power switch on the back of DriveStation to the OFF position.
Plug DriveStation’s power cord into a power outlet. Then, connect the
included USB cable into the USB port on the back of DriveStation.
Connect the USB cable into the USB port on the computer or device you
are adding the DriveStation to.
2
DriveStation Setup
Windows 2000 & XP
Flip the power switch on the back of the DriveStation to the ON position.
In Windows 2000 and XP, the DriveStation will automatically install upon
power-on.
Open ‘My Computer’ and the new drive will be present. By default it will
pick the first available drive letter and will be named ‘Local Disk’. The
DriveStation comes pre-formatted so you may begin using it immediately.
The DriveNavigator CD includes several useful utilities for your Windows
System. Please insert the DriveNavigator CD into your CD-ROM Drive to
learn more about them.
3
DriveStation Setup
Windows 98SE & ME
Insert the DriveNavigator CD into your CD-ROM Drive. Shortly thereafter
the DriveNavigator Easy Setup program will launch.
NOTE: If the DriveNavigator program does not launch, it can be launched
by pressing on the ‘Start Menu’ and selecting the ‘Run’ option. Once the
dialog opens, type X:\easysetup.exe (where X is CD-ROM drive letter).
The Easy Setup Wizard will begin running. Please follow the on screen
documentation to complete the DriveStation Setup for your system. The
DriveNavigator CD includes several useful utilities for your Windows
System. Please explore the CD contents to learn more about them.
4
DriveStation Setup
Using DriveStation with LinkStation
Flip the power switch on the back of the DriveStation to the ON position.
Please refer to the User Manual on the LinkStation’s LinkNavigator CD for
LinkStation USB Disk configuration.
5
Troubleshooting
Troubleshooting
The following is a list of common issues with the DriveStation. Following
each common issue are possible resolutions.
I see the DriveStation in ‘My Computer’ but I cannot access it.
The drive requires formatting. Try using the Disk Formatter
Utility on the DriveNavigator CD-ROM. Consult the manual for
the Disk Formatter Utility for more help. The manual can also be
found on the DriveNavigator CD-ROM.
I cannot see the DriveStation in ‘My Computer’.
Verify that the POWER light is lit green. If it is not, then ensure
that the power switch is in the ON position.
Try toggling the POWER MODE switch right below the power
switch. The POWER MODE switch toggles whether the device is
powered up via a USB signal or purely based on the power
switch’s position.
If you have installed the Power Save Utility, then verify that the
DriveStation was not put into power saving mode. Consult the
manual for the Power Save Utility for additional help. The manual
can be found on the DriveNavigator CD-ROM.
Verify that the hard drive inside the DriveStation is spinning. This
can be verified by placing your hand on the sides of the case
and feeling for a slight vibration. Also, after the DriveStation has
been powered on for fifteen minutes or more it will begin to get
warm. If neither of the preceeding tests verified that the hard drive
is spinning, then please call technical support at 866-752-6210 for
further assistance.
If you are experiencing any additional troubles, please contact our live 24x7
technical support for additional assistance. They can be reached toll-free
at (866) 752-6210.
6
Technical Specifications
USB Standards:
USB Specification Rev. 2.0
Capacity:
160, 250 GB
Seek Time:
Max. 11 milliseconds
Transmission Speed:
Max. 480 Mbps
Power Consumption:
Max. 25W, Average 17W
Power Supply:
AC100V 50/60Hz
Dimensions:
53(W) x 173(H) x 164(D) mm
Weight:
3.15 lb.
Operating Environment:
5 - 35 degree C
20-80% humidity (non-condensing)
Technical Support
Buffalo Technology offers toll-free technical support 24 hours a day, 7 days
a week for this product. Customers in the United States and Canada may
obtain technical support using the following information:
Web:
E-mail:
Telephone:
www.buffalotech.com
[email protected]
866-752-6210 (USA & Canada only)
FCC Warning
This device complies with part 15 of the FCC Rules. Operation is subject
to the following two conditions: (1) This device may not cause harmful
interference, and (2) this device must accept any interference received,
including interference that may cause undesired operation.
7
Warranty Statement
Buffalo Technology (USA) products come with a one-year limited warranty from
the date of purchase. Buffalo Technology (USA) warrants to the original purchaser
the product; good operating condition for the warranty period. This warranty does
not include non-Buffalo Technology (USA) installed components. If the Buffalo
product malfunctions during the warranty period, Buffalo Technology (USA) will, at
its discretion, repair or replace the product at no charge, provided the product has
not been subjected to misuse, abuse, or non-Buffalo Technology (USA) authorized
alterations, modifications or repair.
When returning a product, include your original proof of purchase. Return cannot
be processed without proof of purchase. Shipment of returned products to Buffalo
Technology (USA) is the responsibility of the purchaser. All expressed and implied
warranties for the Buffalo Technology (USA) product line are limited in duration to
the above period.
Under no circumstances shall Buffalo Technology (USA) be liable in any way to the
user for damages, including any lost profits, lost savings or other incidental or consequential damages arising out of the use of, or inability to use the Buffalo products. Buffalo Technology (USA) reserves the right to revise or update its products,
software, or documentation without obligation to notify any individual or entity.
Please have your proof of purchase receipt to get warranty support. All defective products shall be returned to the original place of purchase with a copy
of proof of purchase. All RMAs are governed by the RMA policy or procedures
of each individual reseller selling Buffalo WLAN products. In no event shall Buffalo Technology (USA) liability exceed the price paid for the product from direct,
indirect, special, incidental, or consequential damages resulting from the use of
the product, its accompanying software, or its documentation. Buffalo Technology
(USA) does not offer refunds for any product.
Buffalo Technical Support Information
(Please have your proof of purchase when calling Buffalo Technical Support)
United States of America & Canada
Buffalo Technology (USA) Inc.
4030 West Braker Lane, Suite 120
Austin, Texas 78759-5315
24/7 Help Line: (866) 752-6210
email: [email protected]
web: www.buffalotech.com
8
4030 W. Braker Ln. Suite 120
Austin, Texas 78759
Tel: 800-456-9799
Fax: 512-794-8606
Technical Support is available 24 hours a day, 7 days a week
(USA / Canada)
Toll-Free: 866-752-6210
email: [email protected]
©2004, Buffalo Technology (USA), Inc.