1
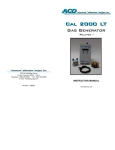
Advanced Calibration Designs, Inc. Calibration Gas Instrument INSTRUCTION MANUAL Advanced Calibration Designs, Inc. 2024 W. McMillan St. Tucson, Arizona 85705 . USA Telephone (520)290-2855 Fax (520) 290-2860 Email [email protected] www.goACD.com Revision 11/20/13 Release I www.GoACD.com Instruction Manual Gas Generator Release I TABLE OF CONTENTS I. General Description Page 2 II. Start-Up Page 4 III. Normal Operation Page 5 IV. Non-Normal Operation Page 6 V. Cell Life Page 8 VI. Corrections to Volumetric Flow Page 9 VII. Maintenance Page 10 VIII. Accessory Items / Parts List Page 10 IX. Warranty Information Page 11 910-0601-00 WARNING: This instrument generates calibration gas for toxic gas detectors. The instruction manual should be read and understood prior to operation of the instrument. Failure to operate the instrument correctly can lead to improper calibrations. This instrument conforms to the protection requirements of the EC DIRECTIVE 89/336/EEC on Electromagnetic Compatibility (EMC), in accordance with the provisions of Statutory Instrument 2372. The following standards have been applied: EN 50081-1 Emissions Standard (Residential Commercial and Light Industry) EN 50082-1 Immunity Standard (Residential Commercial and Light Industry) I. GENERAL DESCRIPTION The CAL-101 is a small, battery-powered, portable electrochemical gas generator designed to calibrate toxic gas sensors. Fast warm-up time allows the instrument to be turned off between remotely located sensors saving battery life and avoiding generation of unwanted gas. The CAL-101 uses the following components to produce the calibration gas/air mixture: Internal Micro Pump A small air pump draws in ambient air to blend with the electrochemically generated gas. Electrochemical Generating Cell The electrochemical generating cell contains an electrolyte solution and either inert or consumable electrodes, depending upon the gas being generated. A precise concentration of gas is produced when the CAL-101 supplies a known amount of current and a known amount of air continuously to the cell. Alkaline “AA” Batteries A set of two fully charged alkaline “AA” batteries provides 10-12 hours of operation. To replace the batteries, first remove the cell then slide the battery chamber in to allow the batteries to drop out the bottom of the instrument. NOTE: Rechargeable batteries will provide substantially fewer hours of operation and will self discharge while the instrument is in storage. Users should also be aware that use of rechargeable batteries will void the CSA approval of the CAL-101 for intrinsic safety. Microprocessor-Based Circuitry When powered-up, the microprocessor provides remaining cell and battery life indication via the display LEDs. Low battery or exhausted cell conditions are also indicated when the condition occurs. (See section IV Non-Normal Operation.) Page 2 ON/OFF Switch The CAL-101 has no on/off switch. To use the instrument simply insert the cell. To turn the unit off, simply remove the cell by pushing the cell eject button located on the top of the instrument. When the unit is configured as a 'bump' station, a modified generating cell is used. The 'bump' generating cell is equipped with a switch to initiate a 'bump' cycle. In this configuration the cell remains in the instrument and automatically turns off after a 30 second 'bump' cycle. Delivery Hose The instrument comes standard with a hose for delivering the gas to the sensor calibration adapter. The air flow of the instrument is affected by the hose length (and subsequent pressure drops through the hose) and must be readjusted if alternative delivery hoses are used. Page 3 II. START-UP To start the generator, insert the generating cell. In the bump station configuration, press the button protruding from the bottom of the cell. The RED LEDs will light to indicate battery life remaining. All 10 LEDs indicate fully charged batteries. If only one RED LED is observed, the batteries are near depletion. During the battery test time, current is supplied to the generating cell and the air pump is not turned on in an attempt to speed up equilibrium time. This helps to saturate the generating cell with gas. After the battery life indication, the pump will start to pump air through the instrument and the GREEN LEDs will begin to flash approximately once every 4 seconds. The flashing GREEN LEDs will indicate the time remaining in the generating cell as follows: 10 LEDs lit indicates that 2 hours remain on the cell. 1 LED lit indicates less than 12 minutes of calibration time remain. These are the normal operating conditions for the CAL-101. Complete equilibrium may take an additional two to five minutes, depending upon the type and amount of gas being generated and the operating conditions of the instrument. In the bump station configuration the unit will automatically shut off after thirty seconds. When the generating cell is inserted, if all 10 green LEDs come on constant, this indicates a cell failure. Remove the cell and wait for all LED’s to turn off, then re-insert ensuring that the cell is fully inserted correctly and properly aligned. If the GREEN LEDs ‘ramp’ up and down from max to min this indicates that the cell life is depleted and a new generating cell should be purchased. At any time the instrument may be turned off by removing the generating cell. The GREEN LEDs will all light indicating cell failure and the instrument will then shut off. Page 4 III. NORMAL OPERATION After the desired equilibrium has been achieved, the instrument may be used to perform gas calibration. The GREEN LEDs will continue to flash ever 4 seconds indicating remaining cell life. While in normal operating mode, the CAL-101 will run continuously and generate gas until either the battery becomes discharged or the cell is consumed. (In the bump station configuration the unit will run for thirty seconds then automatically turn off) If the cell is consumed the green LEDs will 'ramp' max to min repeatedly indicating the need for cell replacement. When this occurs, please refer to the Non-Normal Operation section that follows. Note: Changes in air pressure or temperature will affect the output of the CAL-101 instrument. Before beginning any calibration please refer to section VI. CORRECTIONS TO VOLUMETRIC FLOW- for important adjustments needed to obtain accurate calibration gas. The calibration gas is delivered through the calibration hose attached to the CAL-101 via a quick connect coupling. A calibration adapter, or cup, which is provided by the manufacturer of your gas detector, is usually attached to the end of the delivery hose. This adapter or cup is then placed over the gas sensor. Be sure not to restrict or block the delivery hose while the pump is running. This method is used for calibrating diffusion type sensors. Alternatively, the output gas may be collected into a gas collection bag for calibrating sample draw instruments. If this method is used, it is recommended that the instrument is allowed to flow into and out of the bag via a “Y” connector. First, partially fill the bag with generated gas. Second, attach the sample draw unit to the third side of the “Y” connector. The sample draw instrument will draw from both the generator and/or the bag depending upon the flow rate of the generator. Be sure to disconnect the sample draw unit before the bag is completely emptied of gas. An alternative method is to connect the “Y” adapter directly to the instrument with no bag attached. This should only be used if the flow rate of the CAL101 is greater than that of the sample draw instrument, otherwise dilution gas will also be drawn into the instrument reducing the calibration gas concentration. NOTE: Never attach a sample draw instrument directly to the end of the CAL-101 delivery hose without a “Y” connector in between the two instruments. This may cause damage to one or both of the air pumps in the CAL-101 and/or sample draw instrument. Page 5 IV. NON-NORMAL OPERATION If either the batteries or the generating cell become depleted, or the generating cell is removed from the CAL-101, the instrument enters a nonnormal operating condition Under a low battery condition, the RED LEDs will begin to flash. If the low battery condition occurs during power up, the RED LEDs will flash dimly for approximately 10 seconds and then the instrument will power down. If the low battery condition occurs after start up, the instrument will simply power down. It is recommended to replace depleted batteries with two "AA" heavy duty Alkaline batteries for maximum operating life. If the cell becomes depleted either at start or during calibration, the GREEN LEDs will begin to 'ramp' up and down from max to min until the cell is removed. No gas generation will occur during this cell depleted indication. If there is an error in cell communication when inserted all green LED's will come on constant indicating a cell failure. Remove the cell and wait for all LED's to turn off then reinsert the cell ensuring proper alignment of the pins. If the error continues check the pins and corresponding pads on the cell for corrosion and attempt cleaning. If the cell has been depleted, it should be removed and replaced with a new generating cell. Please refer to the section on cell life for proper instructions on replacing the generating cells. If the cell has not been depleted, there may be a faulty electrical connection between the cell and the instrument. Remove the cell and inspect the pins protruding from the pump board and the corresponding pads on the cell board. Remove any debris and or corrosion that may be present and reinsert the cell ensuring proper alignment. If either the pins become damaged or non-repairable, the pump board should be replaced.. The rate of airflow through the instrument is critical for accurate gas concentrations. The flow should be adjusted to 0.5 LPM (liters per minute) STP (standard temperature and pressure) of sea level and 20oC. (see chart in section VI) To trim the flow hold the magnetic screw driver over the ‘flow trim’ area of the instrument indicated with a magnet symbol. The GREEN LEDs will begin flashing at a once per second rate indicating the relative power to the pump. As you hold the magnet over this area the pump will continue to increase in speed (The LEDs will ramp up indicating the relative power) until the magnet is removed. When the magnet is reapplied Page 6 If the cell has been depleted, it should be removed and replaced with a new generating cell. Please refer to the section on cell life for proper instructions on replacing the generating cells. If the cell has not been depleted, there may be a faulty electrical connection between the cell and the instrument. Remove the cell and inspect the pins protruding from the pump board and the corresponding pads on the cell board. Remove any debris and or corrosion that may be present and reinsert the cell ensuring proper alignment. If either the pins become damaged or non-repairable, the pump board should be replaced.. The rate of airflow through the instrument is critical for accurate gas concentrations. The flow should be adjusted to 0.5 LPM (liters per minute) STP (standard temperature and pressure) of sea level and 20oC. (see chart in section VI) To trim the flow hold the magnetic screw driver over the 'flow trim' area of the instrument indicated with a magnet symbol. The GREEN LEDs will begin flashing at a once per second rate indicating the relative power to the pump. As you hold the magnet over this area the pump will continue to increase in speed (The LEDs will ramp up indicating the relative power) until the magnet is removed. When the magnet is reapplied to the area, the pump speed will decrease (the LEDs will also ramp down indicating the relative power) until the magnet is again removed. Each time the magnet is removed and reapplied the flow will change from increasing to decreasing. This is how the flow rate of the instrument should be adjusted to obtain 0.5LPM STP. Once the flow is adjusted the instrument will save the flow data and return to that flow rate for future use Page 7 V. CELL LIFE The generating cell is consumed during the operation of the unit. Cells can be purchased for two hours of generation time. Once a cell has been depleted, it may be replaced with a new cell to provide additional calibration time. Replacement cells may be stored in their containers in a cool, humid area for several years under most conditions. Different types of generating cells can be used with each instrument, both in the type of gas and in the concentration of the gas being generated. The microprocessor reads the type of gas and the ppm output of the cell from a memory chip embedded in the cell body. It then adjusts the current for the proper gas output. For a complete list of correct cell part numbers, please refer to the parts list at the end of this manual. To replace the generating cell in the instrument, press down firmly on the 'cell eject' button at the top of the instrument.. The generating cell plugs directly up into the cell chamber. Ensure that the pads on the cell board align with the corresponding pins on the pump board. Care must be taken when replacing the cell to ensure that the locating pin seats in the alignment hole of the cell. Make sure to line up the electrode pins with the corresponding sockets. Do not force the cell into the cell chamber if it is not properly aligned, otherwise the pins may become damaged rendering the cell and/or instrument useless. Note: The generating cells contain very small amounts of acidic solution and should be disposed of as per local regulations. For more information, please contact the factory. Page 8 VI. CORRECTIONS TO VOLUMETRIC FLOW Changes in altitude and temperature can cause changes in air density, thus affecting the output of the CAL-101. The output of the CAL-101 was calibrated to STP (standard temperature and pressure) of sea level and 20°C. To compensate for differences in altitude or temperature from STP, the following tables should be utilized: Note: Altitude and Temperature are cumulative, i.e., you must correct for both factors to obtain the most accurate calibration. Altitude Correction Table Altitude Temperature Correction Table Corrected Output (multiply by) Temperature (°C) Corrected (multiply by) 0 1.000 -30 0.829 1000 1.038 -20 0.863 2000 1.076 -10 0.898 3000 1.116 0 0.932 4000 1.158 10 0.966 5000 1.202 20 1.000 6000 1.248 30 1.034 40 1.068 50 1.102 Example: At 3200 feet with a temperature of 29°C. The corrected volumetric flow rate is .5 LPM x 1.116 x 1.034 = .577 LPM (volumetric) Page 9 VII. MAINTENANCE CAUTION Both the electrochemical cell and the alkaline batteries used in the CAL-101 instrument contain corrosive chemicals. While it is not expected that the chemicals in the cell or alkaline batteries will leak during normal operation, it is recommended that both the cell and the batteries be removed from the instrument if it is being stored for periods longer than one week between use. VIII. ACCESSORY ITEMS/ PARTS LIST The following items and spare parts are available for the CAL-101: Part Number 113-0400-00 400-0000-00 400-0001-00 400-0002-00 510-0101-00 510-0101- 05 510-0101- 07 510-0101-09 510-0102-00 510-0102- 05 510-0102- 07 510-0102-09 730-0101-00 910-0601-00 Description Quick connect outlet fitting, body, panel mount Circuit board for CAL-101 Processor Circuit board for CAL-101 Interface Circuit board for CAL-101 pump assy Chlorine generation cell, 2 hour, specify ppm Hydrogen sulfide generation cell, 2 hour, specify ppm Hydrogen cyanide generation cell, 2 hour, specify ppm Hydrogen generation cell, 2 hour, specify ppm BUMP Chlorine generation cell, 2 hour, specify ppm BUMP Hydrogen sulfide generation cell, 2 hour, specify ppm BUMP Hydrogen cyanide generation cell, 2 hour, specify ppm BUMP Hydrogen generation cell, 2 hour, specify ppm Hard-body, water proof, padded accessory case Instruction manual, CAL-101 Page 10 IX. STANDARD WARRANTY We warrant gas calibration equipment manufactured and sold by us to be free from defects in materials, workmanship and performance for a period of one year from date of shipment. Any parts found defective within that period will be repaired or replaced, at our option, free of charge, F.O.B. factory. This warranty does not apply to those items which by their nature are subject to deterioration or consumption in normal service, and which must be cleaned, repaired, or replaced on a routine basis. Such items may include: a. b. Electrochemical type generating cells Batteries Warranty is voided by abuse including rough handling, mechanical damage, alteration, or repair procedures not in accordance with the instruction manual. This warranty indicates the full extent of our liability, and we are not responsible for removal or replacement cost, local repair costs, transportation costs or contingent expenses incurred without our prior approval. Advanced Calibration Designs, Inc.’s obligation under this warranty shall be limited to repairing or replacing, and returning any product which shall be returned to Advanced Calibration Designs, Inc. at its manufacturing facilities, with transportation charges prepaid, and which Advance Calibration Designs, Inc.’s Material Review Board examination shall disclose to its satisfaction to have been defective. This warranty is expressed in lieu of any and all other warranties and representations, expressed or implied, and all other obligations or liabilities on the part of Advanced Calibration Designs, Inc. including, but not limited to, the warranty of fitness for a particular purpose. In no event shall Advanced Calibration Designs, Inc. be liable for direct, incidental or consequential loss or damage of any kind connected with the use of its products or failure of its products to function or operate properly. The following is a listing of the available electrochemical CAL-101 cells and their standard warranty when installed in equipment manufactured and supplied by Advanced Calibration Designs, Inc. Chlorine, Hydrogen, Hydrogen Sulfide, and Hydrogen Cyanide - 2 Hour Cell - 2 hour of use Page 11 Manufactured by: Advanced Calibration Designs, Inc. 2024 W. McMillan St. Tucson, Arizona 85705 USA Phone: 520 290 2855 - Fax: 520 290 2860 Int'l Phone: 001 520 290 2855 - Fax: 001 520 290 2860 Web site: www.GoACD.com - E-mail: [email protected] Page 12 Advanced Calibration Designs, Inc. Calibration Gas Instrument INSTRUCTION MANUAL Advanced Calibration Designs, Inc. 2024 W. McMillan St. Tucson, Arizona 85705 . USA Telephone (520)290-2855 Fax (520) 290-2860 Email [email protected] www.goACD.com Revision 11/20/13 Release I www.GoACD.com