1
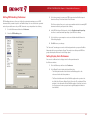
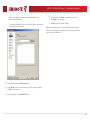
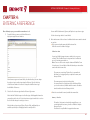
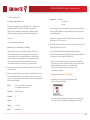
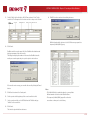
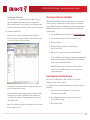
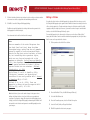
Getting Started Guide - Chapter 2: Working in an EndNote Library
1.
Click the Sync button in the toolbar.
2. Click the Sign Up button to go to a User Registration dialog.
3. Enter an e-mail address in the User Registration dialog.
Retype your e-mail address, and then click the Continue button.
4. Enter your personal information in the required fields on the next User
Registration form. For example, enter your name, a password, and a title.
5. S
elect the appropriate radio button to Opt in or Opt out
for e-mail communication.
6. Click the I Agree button indicating that you agree to the Terms and Conditions.
Once you create your account, EndNote populates the fields on the Sync Preferences page
with your e-mail address and password that you entered during registration. Later, you can
change the data in these fields if you ever change your e-mail address or password.
Sync Status Button
After the Sync process completes, the Groups panel includes a Sync Status button.
Click the button to open the Sync Status dialog to review information about the EndNote
library that you selected to synchronize with your online library. The dialog tells you the
number of references and the number of file and figure attachments that EndNote updated
during the last Sync process.
Sync Conflicts
If Sync conflicts occur during the Sync process, a Sync Conflicts group appears
in the Groups panel.
A conflict occurs when you edit the reference in both desktop and web between Syncs.
As a result, EndNote does not know which one you want to keep.
Select the Sync Conflicts group to open the Resolve Sync Conflicts dialog where you can
resolve conflicts between references in your library.
2-7