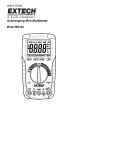
1
AUTO-RANGING
DIGITAL STICK
METERS:
HS35
HS36
Function Legend
Continuity
VDC Volts DC
MFD Capacitance
°C/°F Temperature
μADC Microamps DC
Ω
Resistance
Hz
Frequency
VAC Volts AC
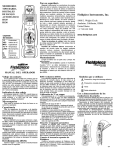
For your safety...
Limited warranty
General: Disconnect the test leads before opening
the case. Inspect the test leads for damage to the
insulation or exposed metal. Replace if suspect.
Never ground yourself when taking electrical measurements. Do not touch exposed metal pipes, outlets,
fixtures, etc., which might be at ground potential.
Keep your body isolated from ground by using dry
clothing, rubber shoes, rubber mats, or any approved
insulating material. When disconnecting from a circuit, disconnect the "RED" lead first, then the common lead. Work with others. Use one hand for testing. Turn off power to the circuit under test before cutting, unsoldering, or breaking the circuit. Keep your
fingers behind the finger guards on the probes. Do
not measure resistance when circuit is powered. Do
not apply more than rated voltage between input and
ground.
All voltage tests: All voltage ranges will withstand
up to 600V. Do not apply more than 600VDC or
600VAC.
AC tests: Disconnect the meter from the circuit
before turning any inductor off, including motors,
transformers, and solenoids. High voltage transients
can damage the meter beyond repair. Do not use
during electrical storms.
This meter is warranted against defects in material or workmanship for one year from date of purchase. Fieldpiece will replace or repair the defective
unit, at its option, subject to verification of the defect.
This warranty does not apply to defects resulting
from abuse, neglect, accident, unauthorized repair,
alteration, or unreasonable use of the instrument.
Any implied warranties arising from the sale of a
Fieldpiece product, including but not limited to
implied warranties of merchantability and fitness for a
particular purpose, are limited to the above.
Fieldpiece shall not be liable for loss of use of the
instrument or other incidental or consequential damages, expenses, or economic loss, or for any claim of
such damage, expenses, or economic loss.
State laws vary. The above limitations or exclusions may not apply to you.
Service
Return any defective HS35/36 to Fieldpiece for
warranty service along with proof of purchase.
Contact Fieldpiece for out of warranty repair charges.
Maintenance
Clean the exterior with clean dry cloth. Do not use
liquid.
Battery replacement: When the multimeter displays "
" the battery must be replaced. Disconnect
and unplug leads, turn meter off, and remove the battery cover. Replace the battery with a NEDA type
1604 9V battery.
www.fieldpiece.com
OPERATOR’S MANUAL
Non-contact voltage
True RMS (HS36)
With the red NCV tab on the tip of the meter close
to an AC voltage, press and hold the NCV button.
The NCV LED will light and the beeper will beep. The
closer you get to AC voltage, the louder the beep.
The NCV function is sensitive enough to detect
24VAC on thermostats.
Digital multimeters use two different types of AC
sensing. The most common is average sensing, normalized to a true RMS value of a sine wave. The
other is true RMS sensing. The actual true RMS
value is sensed for a wave form within the limits of
the crest factor. Either sensing method will give the
same results on a clean sine wave but they may differ on a non-sinusoidal waveform.
Hi voltage indicator
In any VAC/VDC range, when you touch a voltage
greater than 30V, the beeper will beep and the red HiV LED will blink. BE CAREFUL!
Microamps
For measuring the flame diode current in a heater
control.
Capacitance
For motor-start and motor-run capacitors.
Disconnect the capacitor from power first. Short the
terminals to discharge the capacitors. Disconnect
any resistors that might be between the terminals of
the capacitor.
MIN/MAX
Press MIN/MAX once to begin recording MIN and
MAX. Press MIN/MAX to select current reading’s MIN
or MAX. Hold down for 2 seconds to exit MIN/MAX
function.
Temperature
Plug any K-type thermocouple directly into the
meter to measure temperature. Temperature measurement will be accurate even in fast changing environments because of excellent temperature compensation. One thermocouple is included. No adapter is
required.
Backlight (HS36)
Press the
button to activate the backlight for
approximately 60 seconds.
Field °F calibration
For accuracies of ±1°F, calibrate to a known temperature. A glass of stabilized ice water is very close
to 32°F (0°C) and is usually very convenient but any
known temperature can be used.
1. Select the 400°F range.
2. Remove back case and hold the battery in place
with a rubber band so terminals are touching.
3. Stabilize a large cup of ice water.
4. Immerse the thermocouple probe and let it stabilize.
5. Adjust VR3 (lower right corner of PCB) to get
close to 32°F (0°C) then adjust VR2 (left of VR3)
to get within 0.1°F (0.05°C) of 32°F (0°C).
6. To calibrate in °C, close the jumper that is to the
left of VR3.
Symbols used:
Caution, risk of electric shock
!
Caution, refer to manual.
Ground
Double insulation
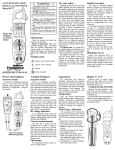
Using & storing test leads
Because the wire insulation is silicone the leads
will stay flexible in cold weather and will not melt if
bumped by a soldering iron.
Disconnect top half of test lead and plug tip directly into meter to make voltage testing easy. Use with
included alligator clip (ASA2) as shown for even easier operation.
For convenient lead storage, wrap the leads as
shown. Pull leads around front between overhanging
tips, twist, and pull over one of the lead plugs.
Disable auto off
Set to OFF position, press and hold RNG (HS35)
or MIN/MAX (HS36) button while turning rotary dial
to desired range position. Release the button when
LCD displays normally. Note: “APO” annunciator will
be missing from the display. The Auto Power Off
mode is on when “APO” indicated on the display.
Attach to Fieldpiece accessory head
Connect your Fieldpiece accessory head directly
to the top of HS series and switch to range indicated
by head. Visit www.fieldpiece.com for more info.
v08
Voltage
Resistance
Works with Fieldpiece accessory
heads!
CLAMP
300V
CAT.III
400A
AC Current
Clamp
!
1AAC / 1mVAC
400AAC MAX
ACH4
Frequency
Capacitance
DC Current < 4000μADC
Temperature
Selecting Ranges
For DC voltage, set the meter to the VDC parameter instead of VAC as shown above.
For all ranges choose a range just above the value
you expect. If display reads “OL” (overload), select a
higher range. If display shows less than three numbers, select a lower range for better resolution.
SPECIFICATIONS
Display: 3¾ digit liquid crystal display (LCD) with a
maximum reading of 3999.
Analog bar graph: 41 segments with measurements 20 times per second.
Range (RNG): Manual ranging mode (HS35)
Overrange: "OL" mark indication.
Auto power off: 30 minutes.
Operating environment: 32 to 122°F (0 to 50°C) at
<70% R.H.
Storage temperature: -4 to 140°F (-20 to 60°C), 0
to 80% R.H. with battery removed.
Accuracy: Specifications good in ambient conditions of 73°F ±9°F (23°C ±5°C), <75% relative
humidity.
Temperature coefficient: 0.1×(specified accuracy)
per °F/°C. (32 to 64°F (0 to 18°C), 82 to 122°F(28
to 50°C)).
Power: Single standard 9-volt battery, NEDA 1604,
JIS 006P, IEC 6F22.
Battery life: 300 hours typical with alkaline.
Accessories: One pair test leads, one pair alligator
clips, k-type thermocouple, 9V battery (installed),
and operating instructions.
Safety: UL,CE,Cat III600V,UL61010-1,IEC/EN61010-1.
Temperature
Range: -30 to 1000°F (-34 to 538°C)
Resolution: 0.1°F/°C
Accuracy: ±1°F, 32 to 120°F (0 to 49°C),
±1% + 1.5°F, -4 to 750°F (-20 to 399°C),
±2% + 4°F, -30 to -4°F (-34 to -20°C),
±2% + 4°F, 750 to 1000°F (399 to 538°C)
Sensor type: K-type thermocouple
Overload protection: 60 VDC or 30 VAC rms
Continuity
Audible indication: Less than 40Ω
Response time: 500ms
Green LED will be on continuously.
Disconnect test
leads from voltage before plugging in thermocouple!
Insure the temperature
being
measured is stable.
Maintain good contact between the
thermocouple and
what's being measured.
Overload protection: 500VDC or AC rms
DC volts
Ranges: 400mV, 4000mV, 40V, 400V, 600V
Resolution: 0.1mV
Accuracy: ±(0.5% rdg + 2 dgt)
Input impedance: 3MΩ on V inputs, 10MΩ on mV
input
Overload protection: 600VDC or AC rms
Transient protection: 6kV for 10μ sec
AC volts (50Hz - 500Hz)
Ranges: 400mV, 4V, 40V, 400V, 600V
Conversion: True RMS (HS36), average (HS35)
Crest factor: Less than or equal to 3 (HS36)
Resolution: 0.1mV
Accuracy:
±(1.2% rdg + 5 dgts) 50Hz ~ 60Hz on 400mV range
±(1.5% rdg + 5 dgts)
±(2% rdg + 5 dgts) on 600V range
Input impedance: 3MΩ
Overload protection: 600V DC or AC rms
Transient protection: 6kV for 10μ sec
DC current
Ranges: 400μA, 4000μA
Resolution: 0.1μA
Accuracy: ±(1.0% rdg + 2 dgt)
Voltage burden: 1V, (8V on 4000μA range)
Overload protection: 500V DC or AC rms
Resistance
Ranges: 400Ω, 4kΩ, 40kΩ, 400kΩ, 4MΩ, 40MΩ
Resolution: 0.1Ω
Accuracy:
±(1.0% rdg + 4 dgts) on 400Ω to 400kΩ ranges
±(1.5% rdg + 4 dgts) on 4MΩ range
±(3.0% rdg + 5 dgts) on 40MΩ range
Open circuit volts: -0.45VDC typical, (-1.2VDC on
400Ω range)
Overload protection: 500VDC or AC rms
(1)
(2)
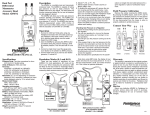
Connect to Fieldpiece accessory heads by simply
attaching them to the top of meter (1) or attach
remotely through leads (2). For most heads, move
dial to range shown (1). For the AAC clamp (ACH4),
move dial to VAC range (2).
Capacitance
Range: 400μF
Resolution: 0.1μF
Accuracy: ±(3% rdg + 5 dgts)
Overload protection: 500V DC or AC rms
Frequency
Ranges: 4k, 40k, 400k, 4M, 40MHz
Resolution: 1Hz
Accuracy: ±(0.1% rdg + 3 dgts)
Sensitivity: 10Hz ~ 4MHz: > 1Vrms, 4MHz ~
40MHz: > 2Vrms, <5Vrms
Minimum pulse width: > 25ns
Duty cycle limits: > 30% and < 70%
Overload protection: 500VDC or AC rms
!
WARNINGS
!
DISCONNECT AND UNPLUG TEST LEADS
before opening case.
TEST NCV FUNCTION ON KNOWN LIVE
WIRE before using.
DO NOT APPLY VOLTAGE greater than
30VAC or 60VDC to the thermocouple or the
jacks when the rotary dial is on OF.
REMOVE THE THERMOCOUPLE when taking voltage measurements.
DISCONNECT THE TEST LEADS when taking
temperature measurements.
DO NOT APPLY VOLTAGE TO THE JACKS
when the rotary dial is on microamps. Even low
voltages can cause a current overload and blow
the fuse. Replace blown fuse to regain function.