Download EAGLE™ 2.0 User Manual - Southwest Energy Smarts
Transcript
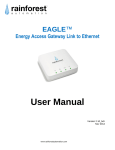
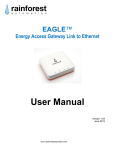
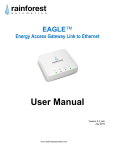
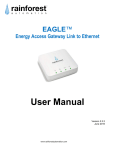
EAGLE™ Energy Access Gateway Link to Ethernet User Manual Version 2.01 Jan 2014 EAGLE™ User Manual Copyright © 2014 by RAINFOREST AUTOMATION, INC (“RFA”). All rights reserved. No part of this manual may be reproduced or transmitted in any from without the expressed, written permission of RFA. Under copyright law, this manual or the software described within, cannot be copied, in whole or part, without the written consent of the manufacturer, except in the normal use of the software to make a backup copy. The same proprietary and copyright notices must be affixed to any permitted copies as were affixed to the original. This exception does not allow copies to be made for others, whether or not sold, but all of the material purchased (with all backup copies) can be sold, given, or loaned to another person. Under the law, copying includes translating into another language or format. Rainforest Automation may have patents, patent applications, trademarks, copyrights, or other intellectual property rights covering subject matter in this document. Except as expressly provided in any written license agreement from Rainforest Automation, the furnishing of this document does not give you any license to these patents, trademarks, copyrights, or other intellectual property. Trademarks Third-party brands and company names mentioned herein may be trademarks and/or registered trademarks of their respective companies and are the sole property of their respective manufacturers. Notice The author(s) assumes no responsibility for any errors or omissions that may appear in this document nor does it make a commitment to update the information contained herein. 2 EAGLE™ User Manual EAGLE™ – Energy Access Gateway Link to Ethernet RFA-Z109 Version 2.01 User Manual Table of Contents Regulatory information ................................................................................................. 4 Quick Setup ................................................................................................................... 5 Step 1: Prerequisite software and hardware ................................................................ 5 Step 2: Provision the EAGLE™ ................................................................................... 5 Step 3: Power up the EAGLE™ ................................................................................... 5 Step 4: Connect to the EAGLE™ ................................................................................ 6 Features of Your EAGLE™ ........................................................................................... 7 Introduction to Your EAGLE™ ..................................................................................... 8 EAGLE™ Status LED Lights ........................................................................................ 9 EAGLE™ Hardware Ports ........................................................................................... 10 Understanding the Information Label........................................................................ 11 Web Viewer Functions ................................................................................................ 12 Meter Button .............................................................................................................. 12 History Button ............................................................................................................ 14 Messages Button ....................................................................................................... 15 Settings Button .......................................................................................................... 16 EAGLE Sub-Page ............................................................................................ 17 Internet Sub-Page ............................................................................................ 18 Cloud Sub-Page .............................................................................................. 18 Smart Meter Sub-Page .................................................................................... 19 Advanced Settings Page.................................................................................. 20 Connecting to a Cloud Service .................................................................................. 21 Connecting to Bidgely ................................................................................................ 22 Connecting to Wattvision ........................................................................................... 24 Troubleshooting Guide ............................................................................................... 27 Technical Support ...................................................................................................... 28 3 EAGLE™ User Manual Regulatory information FCC Notices This device complies with part 15 of the FCC Rules. Operation is subject to the following two conditions: (1) This device may not cause harmful interference, and (2) this device must accept any interference received, including interference that may cause undesired operation. Changes or modifications not expressly approved by the manufacturer could void the user’s authority to operate the equipment. FCC/IC RF Exposure Statement This equipment complies with FCC and Industry Canada radiation exposure limits set forth for an uncontrolled environment. The antenna(s) used for this equipment must be installed to provide a separation distance of at least 8 inches (20cm) from all persons. ICES-003 Compliance This Class B digital apparatus complies with Canadian ICES-003. Note: This equipment has been tested and found to comply with the limits for a Class B digital device, pursuant to part 15 of the FCC Rules. These limits are designed to provide reasonable protection against harmful interference in a residential installation. This equipment generates, uses and can radiate radio frequency energy and, if not installed and used in accordance with the instructions, may cause harmful interference to radio communications. However, there is no guarantee that interference will not occur in a particular installation. If this equipment does cause harmful interference to radio or television reception, which can be determined by turning the equipment off and on, the user is encouraged to try to correct the interference by one or more of the following measures: Reorient or relocate the receiving antenna. Increase the separation between the equipment and receiver. Connect the equipment into an outlet on a circuit different from that to which the receiver is connected. Consult the dealer or an experienced radio/TV technician for help. Compliance Regulations For Australia and New Zealand This equipment complies with the C-Tick labeling requirements for Australia and in New Zealand. As a radio transmitter, this device complies with the requirements of AS/NZS 4268:2008 as designated in the Radiocommunications (Short Range Devices) Standard 2004 for Australia and as required by the Radiocommunications Regulations (General Users Radio License for Short Range Devices) Notice 2011 for New Zealand. This device is a Category A device as defined in the Radiocommunications (Compliance Labeling - Electromagnetic Radiation) Notice 2003. 4 EAGLE™ User Manual Quick Setup Step 1: Prerequisite software and hardware 1) A free Ethernet port on a router directly connected to the Internet. 2) A PC or other device with a web browser. Step 2: Provision the EAGLE™ Your EAGLE™ must be registered with your utility to connect to the smart meter. You will need to contact your utility with two numbers (MAC Address and Install Code) that can be found on the Information Label on the underside of your EAGLE™: Install Code MAC Address Note that it may take some time for your utility to enable the smart meter to connect with your device. You must wait until this process is complete before proceeding; your EAGLE™ will not function correctly until the smart meter is enabled. Step 3: Power up the EAGLE™ 1) Plug the Ethernet cable into a port on your router, and the other end into the Ethernet port on your EAGLE™. 2) Plug the AC adapter into a nearby wall outlet, and plug the other end into the power socket on your EAGLE™. 3) Allow three minutes for the device to boot up. You should see that 3 of the 4 status LED lights (not the Cloud) are all on continuously. This indicates that the unit is functioning normally. 5 EAGLE™ User Manual Step 4: Connect to the EAGLE™ You should now be able to connect to your EAGLE™ using a web browser. The computer running the web browser must be connected to the same router as the EAGLE™, and the computer must also be running multicast Domain Name System (mDNS), which is known as Bonjour on Apple computers. mDNS may be already installed on your computer, as many printers and Apple’s iTunes use this protocol. If you need to manually install mDNS on your Windows PC, you can find instructions at: http://support.apple.com/kb/DL999 The Local Web Address of the EAGLE™ can be found on the Information Label that is on the underside of the unit. Local Web Address Simply type this address into the URL field of your web browser and connect. When your web browser connects to the EAGLE™, you should see the Web Viewer “Usage” page: Note that you may have to wait a short while until the data is loaded. 6 EAGLE™ User Manual Features of Your EAGLE™ Front Status LED Lights: Power Ethernet Cloud ZigBee Underside Back USB Port Ethernet Port Power Plug Keyhole Slots Non-slip Pad Information Label 7 EAGLE™ User Manual Introduction to Your EAGLE™ Congratulations on getting an EAGLE™, the most versatile link to your smart meter energy information. This device is a compact gateway that connects directly to the smart meter using ZigBee wireless. It reads the meter in real time, and streams the data to your home network. You can also direct the data to the internet to take advantage of the many Cloud Services available. Your EAGLE™ helps you track the energy consumption of your home – whether you are home or not. This will help you take control of your usage, and allow you to save energy and lower your utility bills. It’s easy to get started: just plug in your EAGLE™ and connect to it with your web browser. Your EAGLE™ has a built-in web server that provides a simple Web Viewer that you can use to see your smart meter data. Any device, including your smartphone or tablet, that has a web browser and is connected to your local router can connect to your EAGLE™ and use its Web Viewer. This allows you to see your smart meter energy data on any web device on your home network. In addition to the Web Viewer, there is also a free EnergyVUE app available on iTunes and Google Play that will let you see your smart meter energy data directly on your iOS and Android devices. Your EAGLE™ can also connect you to an online Cloud Service. This can provide you with a feature-rich presentation of your smart meter energy data that is available from anywhere, from a wide variety of devices. There are quite a number of Cloud Services available, providing all sorts of detailed data analysis, amazing graphics, and helpful household suggestions. There are also opportunities for social networking and even ways to earn money and merchandise. Your EAGLE™ has been designed to talk to all of these Cloud Services. It is an open system that uses industry standard communication protocols, and is not tied to any particular service. To make things easy, a menu of compatible Cloud Services is provided to enable you to connect to the service of your choice with just a few mouse clicks. 8 EAGLE™ User Manual EAGLE™ Status LED Lights Your EAGLE™ has four LED lights at the front of the top of the device. These lights give you a quick way to check the status of your device. Power LED – shows that the device is powered on. It should always be on when the unit is plugged in. Ethernet LED – shows the status of the connection to the local Ethernet network. When the link is active, the light will be flashing. When an IP address is obtained, the light will be on constantly. Cloud LED – shows the status of the connection to a cloud service. When the user has enabled the cloud service, the light will be flashing. When successfully sending and receiving data with the cloud service, the light will be on constantly. ZigBee LED – shows the status of the ZigBee link to the meter. Initially, it will flash briefly once per second. Once the meter has been found, the light will flash longer every three seconds. Finally, when the connection to the meter is established, the light will stay on continuously. Normally, all four LED lights should be on continuously when the unit is in normal operation. 9 EAGLE™ User Manual EAGLE™ Hardware Ports Your EAGLE™ has three interface ports on the back. From left to right, these ports are: 10 Power – the included AC adapter plugs into this socket. The other end of the adapter plugs into a nearby power outlet. Ethernet – the included Ethernet cable plugs into this socket. The other end of the cable plugs into your local network router. This should be plugged in first before plugging the power in. USB – this socket can be used to expand the functions of the EAGLE™. Nothing should be plugged into this socket. EAGLE™ User Manual Understanding the Information Label The information Label is located on the underside of your EAGLE™. important information that you will need to operate your device. It contains MAC Address ZigBee Area Install Code Ethernet Area Local Web Address Cloud ID ZigBee Area – This area at the top of the label has two fields: o MAC: the (802.15.4 ZigBee MACID. o IN: the Install code for the device. Both of these numbers are unique to your device, and must be provided to your utility so that they can load them into your meter. Only when the meter is loaded with these numbers can it communicate with your EAGLE™. Ethernet Area – This area in the middle of the label has two fields: o Local: the local URL, or Local Web Address of your EAGLE™, which is used to find it on your Local Area Network (LAN) using your web browser. o CloudID: the last 6 digits of the Ethernet MAC address of the device, which is used when registering the device with a Cloud Service. Both of these numbers uniquely identify your device on the Internet Protocol (IP) network. 11 EAGLE™ User Manual Web Viewer Functions The EAGLE™ Web Viewer has four Function Buttons down the right side. These buttons can be used to see more detailed information, such as historical data and status details, as well as allowing you to control configuration settings. The button corresponding to the active function is shown in light gray with black letters. The inactive functions are shown as darker buttons with white lettering. Buttons will turn lighter as the cursor passes over them, but they do not become active until the button is clicked. Meter Button Clicking the Meter button takes you to the “Usage” page. This page shows your usage data from the meter. There are two display modes: 12 Current Usage, shown above, displays the rate at which you are consuming energy in kilowatts. This is shown as a self-scaling meter graph with a number below. Meter Reading, shown below, displays the raw, total accumulated electricity usage reading in kilowatt-hours from the smart meter. This usage is labeled, EAGLE™ User Manual “From Grid”. If you are generating your own electricity (for instance, with solar panels), and have a Net Metering agreement with your utility, then there may be times when you will be producing more energy than you are using, and electricity will flow out to the grid. The total of this surplus electricity you have delivered out to the grid is labeled “To Grid”. To the right of the usage display is pricing information. This shows the price of electricity that is currently in effect. This is labeled “Price per kWh”, and is usually shown in cents. Above the price is the Rate Label. This usually reads, “Set by User” and indicates the current price has been set manually by you (see the Settings button section). It is also possible that the price can be read directly from the smart meter, if the meter supports this feature. In this case, the Rate Label will be set by the meter, and can be up to 12 characters long. If no price value has been set – either by the smart meter or manually – then the words “Not set” will be shown in place of the price. Below the price is the estimated cost per hour. This is calculated from the current price per kWh multiplied by the current rate of energy consumption. 13 EAGLE™ User Manual History Button Clicking the History button takes you to a page that can display a bar graph of your historical consumption. You can choose the time period: Day – each bar is the consumption for an hour; shows the last 24 hours. Week – each bar is the consumption for a day; shows today and the previous 6 days. Month – each bar is the consumption for a day; shows today and the previous 30 days. Year – each bar is the consumption for a month; shows the current month and the previous 11 months. If you hover the cursor over a bar, a box will pop up with the detailed info for that data point. If your EAGLE™ has not yet collected enough history for the graph, then the missing entries will be zero. 14 EAGLE™ User Manual Messages Button Clicking the Messages button takes you to a page that can display text messages sent to you by your utility. 08/17/2012 8:00 pm Very hot weekend predicted. Demand will be high. Please try to moderate usage. Confirm When a new text message is received from the meter, you will see the Messages button pulse red to indicate that there is an active message. When you click on the button the message will be displayed. A message can be up to 128 characters long. If the message requires an acknowledgment, you will see the red “Confirm” button in the lower right corner of the message. 15 EAGLE™ User Manual Settings Button Clicking the Settings button takes you to the main “Settings” page. This page contains several “collapsed” bars representing sub-pages. Each bar contains summary status information about that sub-page, and will expand to a full separate screen when selected. The status bars on the Settings page are color-coded to indicate status. Bars are green for normal operation, while a red color indicates an error condition and a grey bar indicates an inactive function. Status bars can be expanded by clicking the white triangle on the far right of the bar. This will expand the corresponding sub-page to fill the page. 16 EAGLE™ User Manual EAGLE Sub-Page Expanding the EAGLE status bar on the Settings page brings up the EAGLE sub-page. This sub-page is used to configure the Time Zone, Language, and adjust price settings. Timezone – Click on the white info field to bring up a world map. Click on your location to set your Time Zone. Language – Click on the drop-down list to select your preferred language for the Web Viewer (only English is currently supported). Price – If price is not supplied by the meter, then you can set the price manually. To do this, enter the price in dollars in the lower right entry field and click the “Set” button. If the price is supplied by the meter, then you will just see “From Meter”. Notice that there is a gear icon in the lower right corner. Clicking this will bring up the Advanced Settings page. Information about the Advanced Settings page can be found at the end of this section. 17 EAGLE™ User Manual Internet Sub-Page Expanding the Internet status bar on the Settings page brings up the Internet sub-page. This sub-page provides information about the connection between your EAGLE™ and the internet. Cloud Sub-Page Expanding the Cloud status bar on the Settings page brings up the Cloud sub-page. This sub-page is used to configure your EAGLE™ to stream your real time smart meter data to an internet cloud service. Select the cloud service you want from the drop-down menu for “Provider”, and click the “Set Cloud” button at the bottom right. To complete 18 EAGLE™ User Manual your connection to the Cloud Service, you will also have set up an account with them. See the “Connecting to a Cloud Service” section for details Smart Meter Sub-Page Expanding the Smart Meter status bar on the Settings page brings up the Smart Meter sub-page. This sub-page provides information about the ZigBee wireless link between your EAGLE™ and the smart meter. Clicking the “Disconnect” button in the lower right corner terminates the connection to the smart meter. The meter will not talk to the EAGLE™ again until it is re-provisioned by the utility. This function can be used to move the EAGLE™ to a different meter. 19 EAGLE™ User Manual Advanced Settings Page Clicking the gear icon in the lower right corner of the EAGLE sub-page brings up the Advanced Settings page. This page provides information about your EAGLE™ hardware and firmware, and lets you set some network configuration options. The “Factory Reset” button in the lower left corner should be used with caution! It reboots the EAGLE™, terminates the smart meter connection, clears all of the history data, and sets all options to original factory settings. The meter will not talk to the EAGLE™ again until it is re-provisioned by the utility. This function should only be used if absolutely required. Your EAGLE™ comes preconfigured to allow remote device management, including software updates, using Secure Shell (SSH) and Virtual Private Network (VPN). If you prefer not to allow external connections to your device, you can disable this function by un-checking the box next to “Allow Remote Management”. 20 EAGLE™ User Manual Connecting to a Cloud Service To set up a connection to the Cloud Service of your choice, click the Settings button in the lower right of the Web Viewer, then expand the Cloud status bar to bring up the Cloud sub-page. Now you can select the Cloud Service you want from the drop-down menu for “Provider”. To set your selection, click the “Set Cloud” button. To complete your connection to the Cloud Service, you will have set up an account with the Cloud Service, and you will have to indicate that data will be coming from a Rainforest EAGLE™ device. You will also have to provide your 6-digit EAGLE™ Cloud ID, which is shown right above the drop-down menu on this sub-page. Your Cloud ID is also printed in the middle of the Information Label that is on the underside of your EAGLE™. In addition to the Cloud Services found in the drop-down menu, you can also select “Manual”. This will cause a new “Enter URL” field to appear. You can enter the internet address to any server that understands the EAGLE™ Uploader RESTful interface. This interface is documented in the EAGLE™ Uploader API Manual, which can be found on our Developer Portal: http://rainforestautomation.com/developer. In the following sections you will find detailed directions for connecting to specific Cloud Services. 21 EAGLE™ User Manual Connecting to Bidgely Set up the EAGLE™ upload server 1) In the Cloud sub-page, select “Bidgely” from the drop-down menu for “Provider”. 4) Click the “Set Cloud” button. 1 2 Get a Bidgely account 1) Open another window in your web browser and go to bidgely.com. Click on 'sign up' at the top right of the page: 1 You will see the “How to Get Started” page. 2) Click on the blue “Sign Up >” button 3) Fill in the form on the “User account” page and click the “Create new account” button at the bottom on the right. 22 2 EAGLE™ User Manual You should be automatically sent to the “Energy Monitor Set Up” page. 4 5 6 4) Select “Rainforest EAGLE (RFA-Z109)” 5) In the “Cloud ID/INET” field, enter: the 6-digit Cloud ID found on the Information Label on the underside of the EAGLE™. 6) Click “Update Info” 7) You will see a dialog box appear that asks you to test your connection. Click “OK”. Notice that a “Test Connection” button appears at the bottom of the page. 8) Click the “Test Connection” button. 9) You will see a dialog box indicating that the connection between your Bidgely account and your EAGLE™ is being tested. It may take a few minutes to get a GOOD result. View your Bidgely data Click the small grey pie graph at the top right of the Bidgely page to see your Energy Dashboard. 23 EAGLE™ User Manual Connecting to Wattvision Set up the EAGLE™ upload server 1) In the Cloud sub-page, select “Wattvision” from the drop-down menu for “Provider”. 4) Click the “Set Cloud” button. 1 2 Get a Wattvision account Note that Wattvision uses your Google account for sign in. If you do not have a Google account, go to the Google home page (www.google.com), and click the “Sign in” button in the top right corner. Then click the red “SIGN UP” button in the top right corner, and follow the directions. 10) Open another window in your web browser and go to www.wattvision.com/partners/rainforest. Click on the big green 'Sign in to Wattvision” button at the bottom of the page: 11) You will see the Google sign in page. Enter your email and password and click the blue “Sign in” button. [email protected] ●● ●● ● ● ● ● ●● ● 24 EAGLE™ User Manual 12) After you sign in, Google will ask you to allow Wattvision to connect to your account: [email protected] Click the “Allow” button. 13) You will now be returned to the Wattvision site: Cloud ID 0012cd In the “Cloud ID” field, enter: the 6-digit Cloud ID found on the Information Label on the underside of the EAGLE™. Then click the big green “Connect Rainforest to Wattvision” button. You should then see the “My House” screen: 25 EAGLE™ User Manual View your Wattvision data Click the “Live” tab in the “My House” screen to see your near real time data: 26 EAGLE™ User Manual Troubleshooting Guide Symptom: Your web browser cannot find the EAGLE™. a. Check that the EAGLE™ power light is on. If not, make sure the power cord is plugged in firmly in the back, and the adapter is plugged into the wall outlet (you can also try another outlet). b. Check that the EAGLE™ Ethernet light is on continuously, and is not flashing. If the light is not on, ensure that the Ethernet cable is plugged in solidly to both the router and the EAGLE™. Check that router is turned on and that the light on router port indicates that the EAGLE™ is connected. If the EAGLE™ Ethernet light is flashing, this means that the EAGLE™ did not get an IP address from the router. Make sure that the EAGLE™ is connected to a router, and not just a switch. Try unplugging the power cord of your EAGLE™, and plugging it back in again after 10 seconds. This will reset your EAGLE™. Make sure the Ethernet light comes on and goes from flashing to always on. c. Make sure that your computer is plugged into the same router as the EAGLE™. If you are on a mobile device, make sure you are connected to the same WiFi network that the EAGLE™ is plugged into. d. If you are not using an Apple computer, check that you have installed mDNS, or Bonjour for windows: http://support.apple.com/kb/DL999 e. If none of the above work, find the IP address of the EAGLE™ by logging into your router and locating the EAGLE™ on the network. Entering this IP address into your browser will connect you to the EAGLE™. Symptom: The Web Viewer just shows “Loading” and is unable to get data. a. Ensure that you have contacted your utility, and they have loaded your meter with your device information, and the meter is ready to communicate with the EAGLE™. b. Check that the EAGLE™ ZigBee light is on continuously, and is not flashing. If the light is flashing, try moving the EAGLE™ closer to the meter. If this does not cause the light to go from flashing to continuously on, then the EAGLE™ may need to be disconnected from the meter and be reprovisioned by your utility. 27 EAGLE™ User Manual Technical Support Contact us at: http://support.rainforestautomation.com 28


