1
English
Radne Motor AB
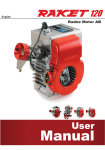
User
Manual
User Manual
Introduction
Congratulations to your choice of engine. The Raket 120 is a multi purpose engine, which you
will find useful for many applications. If you read this manual before you install and start your new
engine you can avoid some costly mistakes.
Keep this manual as a reference, it is a part of the complete delivery from Radne Motor AB in
Sweden or our distributors.
Read carefully the safety precautions on page 5.
If you, after having read this manual, have more questions about the Raket 120 engine or the
installation of it for any particular application, you are always welcome to contact Radne Motor or
our local distributor. We want to make sure that every product we produce and sell will meet the
expectations of our customers.
Information when contacting us:
Radne Motor AB
Box 3035
S-136 03 Haninge
Sweden
phone:
+46 8 556 506 90
fax:
+46 8 556 506 91
e-mail:
[email protected]
home page: www.radne.se
Rev 2, 2002-11-30
© Radne Motor AB 1998-2002
2
User Manual
Radne Motor AB
Radne Motor AB was founded in 1967 by Leif Radne to
manufacture and sell parts for gokart racing. Approx. thirty years
later this is still the business idea of the company, and it is still led
by Leif Radne. Radne Motor is today the leading Nordic gokart
business. Radne Motor represents the leading manufacturers of
tyres, chassis and personal protection, and is also producing the
Raket line of engines, mainly for gokart use.
In Sweden, Radne Motor is well-known for very good service.
Orders are normally shipped the same day as they arrive. The
repair and service of engines and karts is done in one of the most
modern kart service shops in Europe. Radne Motor is also present
at most gokart racing tracks in Sweden, either through distributors
or from the Radne service and spare parts van.
Over the years, more than 25.000 Raket gokart engines have
been produced. They form today the basis for many classes for
young drivers. Raket engines are used for racing, for rental karting
or just for karting-for-fun. For whatever purpose, its owner always
appreciates the extreme durability of the Raket engine.
Radne Motor has distributors in 25 countries abroad, so it is very
likely that you will find one also in your country. Ask for a list of
distributors. But, you can also order products and parts directly
from Radne Motor. Customers abroad find it very convenient
to order engines and parts via Internet, our home page is:
www.radne.se
Radne Motor publishes every year a new catalogue with all the
parts we sell. The catalogue also contains complete spare parts
lists for most of the products we sell. In many countries Radne
Motor has issued homologation forms that describe in detail all
critical measures for the Raket engines. These forms are available
from the national automobile sport federations.
3
User Manual
Raket engines
The first Raket engine was introduced in 1972. Extensive research
for a reliable, simple to use, yet fun to drive gokart engine at
an acceptable price, had convinced Radne Motor to start the
manufacture of such an engine. Power chain saw engines are
the toughest two stroke engines that are built, and Radne Motor
decided to build the gokart engine on well-tested vital parts.
Hence, cylinder and piston, crankshaft, carburettor and ignition
system were purchased. Radne Motor manufactured other parts
that are typical for a gokart engine, like the aluminium crankcase.
Finally, the engine was assembled and tested by Radne Motor
before it was shipped. All Raket engines have been built around
this concept, which has proven to be very successful.
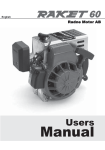
Raket 60
Today the Raket line of engines consist of:
Raket 60 for the very young drivers. This engine has rope start,
centrifugal clutch and forced air cooling. It can be equipped with
catalytic emission control and a rev. limiter.
Raket 85 Racing
Raket 85 is the most popular and most produced Raket engine. It
is used in many countries for the youngest drivers. Often the same
engine is used with some type of power restrictor for the youngest,
and later, with the restrictor removed, for the more professional
drivers. The Raket 85 engine has a whole series of extras and
conversion kits, so it can be used also for indoor driving and for
rental kart use.
Raket 120 is used mainly for Ultra Light Aircraft, so called Paragliders. This engine is extremely powerful for its low weight. But
Raket 120 has found many more uses, both for gokart and where
the low weight in combination with high power and good reliability
is appreciated.
Spare parts and service for the Raket engines are available from
Radne Motor or from our distributors. We recommend that you
consult our catalogue. A new catalogue is produced every year,
in which you find the latest parts and also hints for the best use of
your Raket engine.
Raket 120
Raket 120 Aero ES
Raket 120 Racing ES
4
User Manual
Safety precautions
The Raket 120 engine is intrinsically a very safe design. If you
follow these rules and general rules for machine safety, you
should not encounter any risks or hazards.
1.Always equip your engine installation with a safety switch, which
will make emergency stop possible from where the engine is
normally operated.
2.Always protect rotating parts with protective covers.
3.Never machine any rotating parts. It is explicitly forbidden to
machine the flywheel or the clutch drum, as machining can cause
them to explode.
4.Take care when you handle gasoline. It can ignite if exposed
to heat or flame. Always stop the engine when you fill up with
gasoline.
5.Cylinder and muffler become very hot, and you must protect
yourself and other persons from accidental contact with hot parts.
Also after the engine has been stopped, those parts remain hot for
quite some time. NOTE! If your engine is equipped with catalytic
emission control, the temperature of the catalytic converter is
extremely high, also a long time after you have stopped the
engine. Make sure that any contact with the muffler and the
catalytic converter is impossible.
6.The exhaust fumes are poisonous and contain carbon mono
oxide. Never run your engine in a confined environment. Make
sure that neither you nor any other person is exposed to the
fumes from the running engine.
5
User Manual
Make yourself familiar with the Raket 120 engine
4
3
5
7
(Other side)
10
2
6
9
1
1
2
3
4
5
6
7
8
9
10
11
12
13
Main component
Crankcase, engine stand
Carburettor
Ignition
Spark plug
Decompression valve
Magnapul start
Clutch
Cylinder and piston
Crankshaft
Mufflers
Wearparts
Preparations for start
Problems?
Learn about
Assembly of engine in chassi or frame
How to set the jets
Electrical settings 12
Nippondenso W22MP-U
How to start
How to change rope
How to maintain the clutch
Maintenance hints
15
Service hints
Different types and how to install them
When to change them
How to solve them
6
Page
8
9
4
12
12
13
14
15
15
16
17
18
User Manual
How to install the Raket 120 engine in a
chassis or frame
For the assembly of the Raket 120 engine four threaded holes,
M8, are provided in the bottom of the crankcase. For mounting
the engine in a kart, a special mounting plate is available (part No
3004) with mounting clamps (part No 3005), which facilitates the
assembly as well as the adjustment of the chain tension.
Note, the correct length of the M8 bolt is important. The depth of
the threaded hole is 20 mm. You should make sure that, when
fully inserted in the hole, the bolt uses at least 18 mm of the
treaded hole, but also that the bolt is not too long to penetrate into
the crankcase.
For mounting the engine in a ULA, the specifics for each ULA will
determine the best mounting procedure.
The crankcase and the cover over the rope starter are made of
aluminium.
You must protect all rotating parts for two reasons. First is to
prevent you or another person to come in contact with a chain
or shaft where you can get caught and be injured. Secondly,
because of the high speed of the engine (up to 15.000 rpm)
very big forces are present. If a chain or shaft should break, you
must be protected against parts that can be thrown away. If you
feel uncertain about the design of these protections, you should
consult someone for professional help.
After you have mounted the engine to the frame or structure, you
must make the following connections:
·connect the fuel tank with the carburettor inlet nipple
·connect the accelerator pedal or equivalent with the throttle of the
carburettor
·connect the emergency breaker
These are all the connections needed.
7
User Manual
The carburettor
The Raket 120 is equipped with a Walbro diaphragm carburettor
of type VG6 with fixed High Speed jet.
How it works
The carburettor is connected to the fuel tank with a flexible hose,
made of rubber or plastic. The hose connects to the fuel inlet
nipple (part No 32029 - see figure).
When you pull the starter rope and the piston moves up and down
the cylinder, the pressure variations in the crankcase makes the
pump diaphragm (part No 32045) move up and down. As the
outer side of the diaphragm is connected to the fuel inlet nipple via
two rubber valves, the movement of the diaphragm will cause a
pumping action that will draw fuel from the tank to the carburettor.
NOTE! The tank and the engine shall be placed so that the
carburettor normally shall suck fuel from the tank, i.e. the fuel shall
not flow freely from the tank to the carburettor causing an overpressure. Neither shall the tank be placed so low that the pump of
the carburettor has difficulties in pumping the fuel from the tank.
NOTE! During normal operation the carburettor shall pump air
free fuel from the tank. If, due to heavy vibrations or excessive
movements of the fuel tank, you can observe that the fuel is
mixed with bubbles of air (use a transparent plastic hose), this
may cause the engine to loose power or to stop. If this problem
cannot be solved by changing the mounting of the fuel tank, you
may try to equip the fuel take off in the tank with a fuel pick up.
Fuel pick ups are normally used in power chain saws, and may be
obtained from most chain saw service stations.
After the fuel has passed the pump it reaches the inlet valve
(sometimes referred to as the inlet needle valve - part No 32025).
The normal position for the valve is closed. The valve can be
opened only if the main diaphragm (part No 32017) is pressing
down the lever (part No 32024). It is the amount of fuel in the
main chamber that makes the main diaphragm move. When
the valve is open, the fuel will flow into the main fuel chamber
of the carburettor. From the main chamber the fuel can flow into
the venturi of the carburettor through two jets. One jet is fixed,
and controls the flow of fuel at high speed. The size of this jet is
factory set and shall not be changed. If you change the fixed jet to
another size you will either loose some power or your engine will
run too lean and seize up.
The second jet is adjustable, it is a needle valve. It controls the
flow of fuel at low speed. The normal setting of this needle valve
8
User Manual
is one turn open from its closed position. Before you make any
attempts to start the engine, make sure that the needle valve is in
the ”one turn open” position. Later you may open it a little further
to make your engine run a little richer, or close it to make the
engine run leaner.
NOTE, never set the low speed valve less than 3⁄4 of a turn open,
as leaner settings may cause severe engine problems.
The carburettor is equipped with a cold start device, sometimes
referred to as the choke. The purpose of the choke is to enrich
the fuel during start by restricting the air flow and increasing
the vacuum in the venturi. When you intend to start your Raket
engine, you normally close the choke and pull the starter rope.
After one or two pulls the engine will start. As the fuel-mixture with
closed choke is very rich, the engine will normally stop soon. Then
you open the choke, open the throttle a little and pull the starter
again. Now the engine shall normally start on the first pull and run
smoothly.
Installation
Apart from connecting the carburettor to the fuel tank, you also
connect the lever of the throttle shaft to your accelerator pedal or
other device that controls the speed of the engine. Note that on
the carburettor there is an idle speed adjustment screw that allows
you to set the rpm when the engine idles. The correct setting is
found in combination with the setting of the low speed needle
valve. When idling you shall be able to open the throttle without
any tendencies for the engine to stop or stall. When you make this
adjustment you normally let the engine run at a speed a little over
the normal idle speed by turning the inlet speed adjustment screw
a little clockwise. Adjust the low speed needle valve so that the
engine responds directly when the throttle is opened, both slowly
and quickly. When you have found the best setting, turn the low
speed adjustment screw counter clockwise until the correct idle
speed is found.
Service
Actually, there isn’t much that can go wrong. If your fuel mixture is
clean so no deposits clog up the interior of the carburettor you will
have a problem free operation. We recommend you to change the
two diaphragms and the gaskets once every year. If you haven’t
used your engine for some time, the diaphragms may have
hardened and you may change them if you notice the engine is
more difficult to start or it doesn’t run smoothly at low rpms.
If you are troubled with unstable operation, i.e. sometimes the
engine stops at idle speed, sometimes it revs up and you have
to adjust the setting of the low speed needle valve. Then, it may
9
User Manual
be the inlet needle valve that is causing you problems, and we
recommend you to change the inlet needle valve (part No 32025).
NOTE. If you find that you have problems with deposits in
the interior of your carburettor due to contaminated fuel, we
recommend you to install a small fuel filter in the hose between
the tank and the carburettor.
If none of the hints above solve your problems, and you still
have problems with low power or unstable idle speed, check
the condition of all gaskets in the carburettor and between the
carburettor, heat shield (part No 32065) and the cylinder. If this
doesn’t solve your problems, we recommend you to disassemble
the carburettor from the engine and have it cleaned by Radne
Motor or one of our service agents. You may also find professional
help at a service station for power chain saws, snowmobiles or
garden tools.
Air filter
It is strongly recommended that the Raket 120 engine is equipped
with an air filter. Radne Motor has a number of different designs
which all protect the interior of the engine from being damaged by
sand, dust and other hard particles. See main catalogue, i.e. inlet
silencer No 5201.
·the inlet noise is drastically reduced, resulting in total engine
noise reduction
·improved filter action, prolongs engine life length
·protects the engine during rainy operations from being flooded
with water
·can improve the engine torque curve at low speeds (depending
on inlet silencer and output muffler arrangement - please contact
Radne Motor for advice)
10
User Manual
Ignition
The Raket 120 engine is equipped with a solid state ignition
system, which consists of a minimum of parts.
·
·
·
The ignition coil with built in electronics.
The flywheel with the permanent magnet.
The emergency breaker = stop button.
When the flywheel rotates past the ignition coil, an electric current
is generated. At a certain position of the flywheel in relation to the
ignition coil, the electronic circuit, which is integrated in the coil
assembly, causes the coil to produce a high tension spark for the
spark plug.
As there are no moving parts, there is no setting needed. The
only measure that can influence the ignition is the distance
between flywheel and the yoke of the ignition coil. If you have
disassembled the engine, first mount the flywheel on the shaft.
Don’t forget the crankshaft key. Tighten the flywheel nut with 5 kg.
Then place a stainless (non magnetic) feeler gauge 0,35 mm thick
between the yoke of the coil and the part of the flywheel where the
pole shoes of the magnet are seen. Tighten the screws that hold
the coil to the crankcase.
The only maintenance for the flywheel itself is cleaning. Also make
sure that the starter claws near the centre can move freely.
Never attempt to make any modifications of the flywheel. If the
flywheel is damaged, replace it with a new one. See also under
Safety precautions.
The emergency breaker
On the coil there is an electric contact which must be connected
to the emergency breaker. When this contact is short circuited
to ground ( i.e. to the metal parts of the engine) the ignition is
stopped. Depending on application the emergency breaker can
have many different designs. It is your responsibility to make sure
that the breaker is placed so that it can be easily reached from the
place of normal operation. On a kart it is convenient to place the
stop button on the steering wheel.
Spark plug
The spark plug is a special design for this type of engine. When
you replace the spark plug, make sure that you get an original part
or an identical replacement. Other spark plugs can permanently
and mechanically damage your Raket engine.
In original the Raket 120 engine is equipped with a Nippondenso
11
User Manual
W22MP-U spark plug. This has the correct length of the threaded
part which exactly matches the threaded part of the cylinder.
The correct distance between the centre electrode and the side
electrode is 0,4 mm. This distance shall be measured with a piece
of wire, 0,35 mm in diameter.
During normal operation the spark plug shall have a brownish
surface on the centre electrode. However, the colour can differ
a lot. If you stop the engine directly after heavy load, the centre
electrode can be light grey or light brown. On the other hand,
if your engine has been idling for a while before you examine
the spark plug, the centre electrode may be dark brown or even
black. For all the different applications that the engine has been
tested for, the recommended spark plug Nippondenso W22MPU has proven to be the best, and no ”hotter” or ”cooler” plug is
recommended.
The normal service life of a spark plug is 200 - 300 hours.
However, we recommend that you have extra spark plugs
available, as e.g. repeated attempts to start a flooded engine (too
rich fuel mixture) can destroy a spark plug.
12
User Manual
The magnapull rope starter
When you intend to start the Raket 120 engine, you close the
choke of the carburettor and push the decompression valve. Then
you should remember two simple rules:
never just pull out the rope. Grab the rope handle and pull out the
rope slowly until you feel that the starter mechanism has engaged
the engine. Then you pull the rope with a powerful stroke.
never pull out the full length of the rope. Test once, slowly, to
extend the full length of the rope. Notice this length, and then
never pull it out so far again. Because, the life length of the starter
rope is very long, subject that you don’t pull it to the end. Even if
the end of the rope is protected by a sleeve, it is the full extension
of the rope that cuts off the knot at the end.
Service
If the rope is broken, always replace it with an original dyneemic
rope with string lock (part No 3075), or at least a rope of exactly
the right length (1150 mm). This is how you assemble the starter
again:
first check the starter coil spring. If it is dirty, blow it or wipe it
clean. Don’t put oil or grease on it, unless you have special oil
for coiled springs. Coil in the spring in the cassette. Put the
protective washer in the bottom of the cavity for the spring, then
the spring in its cassette .
take a new dynamic rope and make a knot at one end. You may
find it suitable to burn the end of the rope with a cigarette lighter
flame before you tie the knot, but don’t burn the rope, as this will
cause it to break more easily. Put the protective sleeve on the free
end of the rope and slide it all the way to the end with the knot.
Thread the rope through the hole in the rope disk (don’t forget the
string lock), you find it near the centre (see figure). Then thread
the rope from the inside and out through the fan cover, and finally
through the starter handle. Before you make a nice knot at the
free end of the rope, remember to thread the washer that takes up
the pulling force on the rope.
finally engage the slotted part of the rope disk with the inner end
of the coiled spring. While doing this, make sure that the rope
comes out through the opening slot at the periphery of the rope
disk. Assemble the parts No 55393 and 3131 and secure the disk
with screw No 55156.
Finally, grab the end of the rope that comes out through the slot
at the periphery of the disk, and turn the rope disk clockwise three
13
User Manual
turns. Hold the rope disk with the slot adjacent to the entrance of
the starter rope in the fan cover. Pull the rope by the starter handle
and release the handle. The spring will now pull the rope into the
fan cover. Repeat this action until all the rope is coiled into the fan
cover when the starter handle is released.
The centrifugal clutch
When the engine is idling, the centrifugal clutch shall disengage
the engine from whatever the engine is powering. E.g. when
used to power a gokart, you release the accelerator pedal and
the kart comes to a halt, the engine shall continue to run on idle
speed. When you increase the rpm of the engine, the clutch shall
smoothly start to pull the gokart away.
If you look at the X-ray-drawing of the engine, you will see the
parts of the clutch. It consists of the hub with three spokes, three
powder iron weights and three short springs. These parts are
fastened to the shaft of the engine through a coarse counter
clockwise (left turn) thread.
You will also find the clutch drum with the sprocket wheel for the
chain. The drum can rotate on the crankshaft due to a needle
bearing in the centre hole of the drum.
NOTE, a protective washer holds the needle bearing in place, see
drawing for details.
NOTE, the clutch drum is made of very tough steel, which is partly
heat treated. No machining what so ever on the clutch drum can
be done, as this may cause the drum to explode.
NOTE, never attempt to start the engine with the clutch weights in
place but without having assembled the clutch drum in place, as
this will cause the springs to break and drum weights to be thrown
off. The force of a drum weight can harm you lethally.
Service
To disassemble the clutch, first disassemble the fan cover. Then
use the special tool that is provided for the disassembly of the
clutch hub. Hold the flywheel with one hand and loosen the clutch
from the shaft by turning it clockwise (Note, the thread on the shaft
is counter clockwise - left turn).
NOTE, if any parts in the clutch are damaged they must be
replaced with new original parts for safety reasons. Never attempt
to repair any detail of the clutch by welding, brazing or machining.
14
User Manual
When you assemble the clutch, put some heat resistant grease,
like graphite grease, on the needle bearing.
Cylinder and piston
The cylinder has a permanent coating in the bore that will last
the life of the Raket engine. The piston is made of aluminium and
will under normal conditions have a life time of 500 hours. The
difference between long and short life for the piston is determined
by the type of inlet air filter that is used.
The piston is equipped with two piston rings, each 1,5 mm
thick. They have a life time of 200 hours under normal running
conditions.
On the top of the pistons there is a marking showing which part of
the piston that shall face the exhaust port.
New pistons are only available in one dimension as spare parts.
This has been made possible due to the extreme tolerances of the
cylinders and the pistons.
When replacing piston or piston rings, make it a good rule also to
replace the small end needle bearing and the cylinder foot gasket.
Crankshaft
The crankshaft with connecting rod and connecting rod needle
bearing is one unit, and we don’t recommend any attempts to
repair this unit.
The bearings on the crankshaft are SKF 6203 C 3. This bearing
cannot be replaced by any standard bearing. (Larger radius of the
inner ring). When you disassemble the crankcase, the bearings
should normally sit on the shaft.
15
User Manual
Mufflers
Raket 120 can be delivered different muffler arrangements.
The Power Exhaust Muffler consists of three parts:
. the exhaust tube that is bolted to the cylinder
. the flexible hose that connects the exhaust tube with the muffler,
and
. the tuned muffler (with or without emission control)
The three parts of the Power Muffler have been tuned to give the
best (highest) output, and we advise against the change of any
of the three parts. If you reduce the diameter of the tubes or the
volume of the end muffler, you will loose power. If you shorten
the length of the flexible hose, the torque curve of the engine will
show lower values at lower speeds.
Catalytic emission control
At Radne Motor we take pride in the care of our environment.
For this reason we recommend the use of a catalytic exhaust
converter, and all our mufflers can be delivered with or without a
converter.
NOTE, a muffler with catalytic converter will be much hotter than
one without. So, when your engine is equipped with catalytic
converter, take special care to protect the muffler from accidental
contacts.
NOTE, a muffler with converter cannot be repaired. If damaged it
has to be replaced.
NOTE, don’t throw away a muffler with catalytic converter. Find
out where in your community you can safely deposit your used
catalytic mufflers.
NOTE, always use lead free gasoline, as gasoline with lead in will
momentarily destroy your muffler.
16
User Manual
Wearparts and service intervals
The Raket 120 will need very few spare parts due to its simple and reliable design. The table below
shows some typical service intervals. Please notice that the conditions under which the engine is
operated will have great influence on these intervals.
Every 200 hours
·piston rings
Every 300 hours
·spark plug
·centrifugal clutch drum and weights (if the drum shows sign of wear on the inside of the drum)
Every 400 hours
·piston
·small end connecting rod needle bearing
·main roller bearings
·sealing rings
·gaskets
How to mix gasoline and oil for proper fuel
Every engine needs oil to lubricate cylinder and piston, and all the different bearings and sealings.
In a four stroke engine the oil is normally kept in the crankcase and pumped around to where it is
needed.
Raket 120 is a two stroke engine, and two stroke engines don’t have any separate oil for
lubrication. As oil still is needed, the oil is mixed with the gasoline, and thus follows the fuel in and
around in the whole interior of the engine. If you would attempt to run the Raket 120 engine on
fuel with no oil in it, the engine would break down due to the internal friction between cylinder and
piston. For this reason it is important that you always use a gasoline and oil mixture as fuel.
The Raket 120 is designed to run on a mixture of 4 % (per cent) synthetic oil in lead free gasoline,
95 or 98 octane.
NOTE. If you have your engine equipped with catalytic emission control (catalytic converter)
you MUST use lead free gasoline. If you don’t have a catalytic converter, you could use leaded
gasoline, but we still recommend the unleaded types, preferable with 98 octane, but 95 will also do.
How to get 4% oil mixture:
Use a clean can or fuel container. Mix 10 liters of fuel with 0,4 liters of synthetic oil. Shake well!
Your gas station can offer you a variety of two stroke oils. We recommend the type that is used for
chain saws, lawn movers and smaller motorcycles. Two stroke oil for marine use is called outboard
oil, and is not recommended depending on the extra ingredients for corrosion control.
Don’t use so called racing oil, sometimes also called castor oil. This type of oil mixes not so well
with the gasoline, and may later separate in the tank.
17
User Manual
Environmental fuel
In some countries fuel for lawn movers, garden tools, chain saws etc
is made from other raw materials than oil. The advantage of these fuel
products is that they produce less of exhausts that polute the environment.
Before you use a fuel of this kind, make sure with the manufacturer
that you can do so without harm to your Raket engine. Also get the
recommendation from the manufacturer to the percentage of synthetic oil
mixture that corresponds to 4 % of oil in normal gasoline.
Radne Motor AB takes no responsibility for damages that may occur due
to use of improper types of fuel and oil.
Preparations for start
1
2
3
4
5
6
7
8
9
10
11
Check the condition of the engine installation. Does the throttle
operate well? Is the emergency breaker correctly connected? Is the
flexible hose from the tank to the carburettor fastened so it will not
break?
Is there enough gasoline in the tank?
Close the choke and push the decompression valve.
Grab the starter handle. Pull out the starter rope until you feel that the
starter has engaged the engine, and then pull out the rope, avoiding
to pull it to the fully extended length.
Observe the transparent fuel hose and note if gasoline is
drawn from the tank to the carburettor.
Repeat until you are sure that gasoline has entered the
carburettor.
Check that the emergency breaker is in the OFF (running)
position.
Pull the starter again, until you hear that the engine starts (ignites).
It is quite normal that the engine just rotates a few turns and then
stops again due to the very rich mixture with the choke closed.
Open the choke.
Pull the starter again. Now the engine shall normally start and run at
idle speed.
If the engine starts but stops again, you may open the throttle just
a little to increase the speed of the engine just after start. After a
few seconds at increased idle speed, the engine shall run at normal
idle speed.
NOTE, if you equip your engine with an arrangement that allows you to
lock the throttle in ”increased idle speed position”, this may result in that
the clutch engages when the engine starts. Make sure that this has no
harmful effect, e.g. that your karts start to move away from you.
How to stop the engine
Put the emergency breaker in the ON (stop) position
18
User Manual
Engines with integrated electric start
Technical data for electric start:
Part.No
32156
32076
78013
32170
Description
Start engine FIAM 0,25 kW
Ignition system SELETTRA
Battery 12 V, 7,5 AH
Decompression valve, automatic
RAKET 120 Racing ES is always supplied with complete cables
and battery. To be assembled as per wiring diagram.
RAKET 120 Aero ES is always supplied without cables and battery, depending on different applications.
Always use a cable with a min. diameter of 4 mm2. Also always
use a start switch of high quality, so that no sparks occur.
The stop switch shall be connected to the ignition system so that
the engine stops when earthen.
The battery is not charged via the engine, but has to be charged
through a separate battery charger. E.g. our automatic battery
charger (N.B. only for lead batteries), art.No 7817.
The engine can be started approx. 150-200 times with our battery
of 7,5 AH, without recharging the battery. It is very important to
choose right size of battery depending on how many times you
need to start the engine.
Min 4 mm2
Min 0.7 mm2
FNC
19
12
2V
70(1
)
7AH
User Manual
Troubleshooting
Problem
No fuel is drawn from the tank to the
carburettor
Check
Check that there is fuel in the tank
Check for leaks in the fuel hose or its
connections.
Check if the inlet needle valve in the
carburettor is stuck. You can open it by
pressing down the main diaphragm with a 3
mm wire through a hole in the cover over the
main diaphragm
Change the carburettor pump diaphragm and
the gasket
Carburettor is pumping fuel OK, but engine
doesn’t start. Spark plug is wet.
Check the inlet needle valve function. Is the
valve stuck in open position? Is the inlet needle
valve spring broken? Replace inlet valve and
spring when necessary
Carburettor is pumping fuel OK, inlet valve is
OK, but engine won’t start
Check setting of low speed jet. Normal setting
is 1 turn open from closed position
Clean inside of carburettor
Engine starts, but won’t run at high speed
Check if high speed jet is open. Clean jet if
necessary
Engine won’t start, no spark in the spark plug
Change the spark plug
No spark even after change of spark plug
Check emergency breaker circuit. In OFF
(running) position the contact on the ignition
coil must not be connected to ground
Emergency breaker circuit OK, but still no
spark
Change the complete ignition unit (ignition coil)
Carburettor seems OK, but engine power is
reduced and engine runs erratically
Check piston rings. Normal service life is 200
hours, but can be reduced if no proper air filter
has been used
Check crankshaft sealing rings. If rings are
leaking, operation at both low and high speed
is affected
If the start sprocket doesn’t react
Too low power voltage in the battery or too
small diameter of the cable.
If the engine starts and then stops immediately
Can depend on dirt in the decompression valve
or in the reverse valve on the vacuum hose to
the cylinder
20
User Manual
32022
32016
32017
32018
32023
32024
32026
32019
32025
32022
32021
32029
32040
32039
32029
32013
32014
32035
32043
32045
32046
32047
32038
32044
32013
32014
32015
32016
32017
32018
32019
32020
32022
32023
32024
32025
32026
32027
32028
32029
32031
32032
32035
32036
32037
Plate
Screw
Chokeaxle
Cap
Main diaphgram
Gasket
Screw
Expansion cap
Screw
Axle
Lever
Valve
Spring
Expansion cap
Sirclip
Fuel elbow
High speed mixture screw
Spring
Low speed mixture screw
Spring
Screw
32038
32039
32040
32042
32043
32044
32045
32046
32047
32155
21
Trottleshaft
Bushing
Spring
Filter small
Filter
Screw
Diaphgram
Gasket
Pump cover
Gasketset for carburettor
User Manual
Raket 120 Manual Start
3007
3010
3012
3012-1
32048
3053
3054
3055
3056
32063
32065
32066
3075
3076
3077
3099
3136
3152
3153
3154
3158
32085
32086
32087
32090
32091
32092
32093
3095
3099
3119
3120
3131
3132
3133
3134
3135
31371
3138
31391
32116
32126
32143
32144
32144-1
32144-2
32148
32150
32163
32049
Spring 40 mm
Flex
Silencer
Silencer Catalytic converter
Carburettor Walbro
Exhaust gasket
Screw 5x25
Sparkplug
Sparkplug cap
Carburettor gasket
Flange
Inlet gasket
String lock
Ignition System
Ignition cable
Oil sealing sprocket side
Washer fiber
Start hook
Spring start hook
Spacer start hook
Rubber bushing
Cylinder complete
Pistonring
Piston complete 120 cc
Cylinder gasket
Small end bearing
Crankshaft
Mainbearing SKF 6203
Key
Oilsealing drive side
Stop switch
Stop cable
Axle string disc
Exhaust bend
Starthandle
Stringdisc
Magnapull spring
Start coat
Start string
Start coat complete
Flywheel
Cylinder cover
Clutch
Clutch drum 12 t
Clutch drum 11 t
Clutch drum for aero
Spacer for clutch
Crankcase
Exhaust nut
Throttle cable support
32147
32151
32152
4118
5203
55140
55142
55167
55109
55126
55129
55156
55392
55393
55405
55412
22
Needle bearing clutch drum
Crank case gasket
Decompression valve
Flywheel nut
Carburettor flange
Screw allen key 5 x 45
Screw allen key 5 x 50
Screw allen key countersunk 6 x40
Screw allen key 4 x 20
Screw allen key 5 x 20
Screw allen key 5 x 25
Screw allen key 6 x 22
Countersunk washer
Countersunk washer 6 x 25
Washer M4
Washer M8
User Manual
55167
55392
3012
3056
32126
3054
3055
32063
32065
32085
55129
32066
3007
32152
32163
32090
5203
3053 3120
32086
32049
32048
3131
3134
32143
32144
3158
3135
3075
32091
3133
3119
32087
55147
3010
3132
31391
3136
3138
55393
32092
3095
31371
32093
32147 32148
3099
55156
55129
32093
3076
55140
55142
3077
55405
55109
3099
32151
32150
55412
3154
3153
23
32116
3152
55126
4118
User Manual
Raket 120 Electric Start
3007
3010
3012
3012-1
3029
3053
3054
3055
3056
3099
3095
3119
3132
32063
32065
32066
32048
32059
32063
32065
32066
32076
32089
32085
32086
32087
32090
32091
32092
32093
32049
32112
32116
32143
32144
32144-1
32144-2
32147
32148
32151
32153
32156
32159
32160
32163
32170
32171
32172
32175
4118
Spring 40 mm
Flex
Silencer
Silencer Catalytic converter
Elbow, vacum connection
Exhaust gasket
Screw 5x25
Sparkplug
Sparkplug cap
Oil sealing
Key
Stop switch
Exhaust bend
Carburettor gasket
Flange
Inlet gasket
Carburettor Walbro
Fan cover
Carburettor gasket
Flange
Inlet gasket
Ignition System
Sirclip piston
Cylinder complete
Pistonring
Piston complete 120 cc
Cylinder gasket
Small end bearing
Crankshaft
Mainbearing SKF 6203
Throttle cable support
Start button
Flywheel
Clutch
Clutch drum 12 t
Clutch drum 11 t
Clutch drum for belt-drive
Needle bearing clutch drum
Spacer for clutch
Crank case gasket
Crankcase
Start engine complete
Start sprocket
Hub start sprocket
Exhaust nut
Decompression valve automatic
Valve bushing
Valve tube
Bushing for cover
Flywheel nut
5203
55124
55129
55135
55140
55147
55161
55165
55412
7813
24
Carburettor flange
Screw allen key 5 x 12
Screw allen key 5 x 25
Screw 5x25
Screw allen key 5 x 45
Screw allen key 5 x 50
Screw allen key 5 x 45
Screw allen key 6 x 40
Washer M8
Battery
User Manual
3012
3056
55135
3055
32170
32063
32065
55129
32085
3007
32066
32172
5203
3010
3132
32163 3053
3029
32049
32048
32171
32090
55147
32086
55129
32089
32144-2
32059
32087
32175
55165
32091
32092
32148
55129
3095
32093
32143
32144
32156
32093
32112
3099
32147
55161
55140
32076
55129
3099
32159
32153
32151
32153
3119
55412
55124
32160
FNC
4118
0
127
(12V
)
7AH
7813
32116
25
Radne Motor AB, Box 3035, 136 03 Haninge, Sweden
Tel: +46-8-556 506 90, Fax: +46-8-556 506 91
[email protected]
http://www.radne.se