1
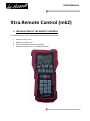
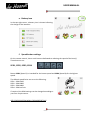
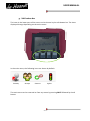
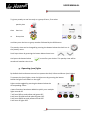
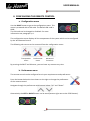
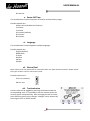
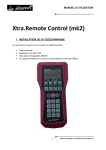
USER MANUAL Xtra.Remote Control (mk2) 1. INSTALLATION OF THE REMOTE CONTROL The following accessories are related to the Remote Control Unit: Remote Control Unit Adapter (1A @ 5V DC) Pair of rechargeable batteries (NiMH) Industrial silicon cover is included by default -1- User Manual Xtra.Remote Control V3.0 USER MANUAL a. Placing the batteries The Xtra.Remote Control Unit can be used with 2 rechargeable NiMH batteries type AA. To insert these batteries, open the cover by unscrewing the lid. Place the batteries according to the symbols + and – labelled in the battery compartment. Close the battery compartment by screwing back the screws just hand tight. Important: Only use rechargeable batteries of the type NiMH Do NOT use conventional batteries Do NOT use alkaline batteries Do NOT use Lithium batteries Do NOT use old and new batteries together Do NOT use batteries from different manufacturers together Batteries contain chemical substances. Treat old batteries as chemical waste and don’t leave them in the vicinity of children. b. Connecting the adapter Connect the provided adapter to the USB port on top of the Xtra.Remote Control unit and plug the adapter into the mains power supply socket. Connecting the adapter to the Remote Control allows it to be used without batteries. The adapter can also be used to charge the NiMH batteries in the Xtra.Remote Control. The Xtra.Remote Control will also charge if it is connected to a PC with a mini-USB cable. -2- User Manual Xtra.Remote Control V3.0 USER MANUAL 2. STARTING THE REMOTE CONTROL a. Switching the Remote Control On/Off Press the ON/OFF button on the keyboard of the Xtra.Remote Control for at least one second to turn the device on. Once on, you can turn the device off by pressing the same button until the device turns off. b. The main menu and navigation After turning on the Xtra.Remote Control, the main menu will appear. -3- User Manual Xtra.Remote Control V3.0 USER MANUAL c. Electro/Fuel In the top-left corner, a fuel or electro icon is shown indicating the current mode of the Xtra.Remote Control. Both electro and fuel karts can be controlled with one Xtra.Remote Control. Please select the type of karts that are used on the active track. Possible options are: Fuel kart (default) Electro kart SEE CONFIGURATION MENU FOR MORE DETAILS d. Track selection In the top centre, 1 to 4 letters are shown. These correspond to the tracks that are activated on the Xtra.Remote Control. By default, track A is activated. If your kart track is near another track, consider changing the track. Tracks can be turned On or Off. This functionality is useful if more karting tracks are located nearby. The tracks are indicated with the characters A, B, C and D. SEE CONFIGURATION MENU FOR MORE DETAILS -4- User Manual Xtra.Remote Control V3.0 USER MANUAL e. Battery icon In the top-right corner, a battery icon is shown indicating the charge of the batteries. f. Speed button settings On the remote control, there are 4 buttons dedicated to reducing the speed of the kart(s). These buttons are: SPD1, SPD2, SPD3, SPD4 Button SPD1 (Speed 1) is intended for the lowest speed and SPD4 (Speed 4) for the highest speed. The default speed limits are set to the following: SPD1 – RPM 2100 SPD2 – RPM 3000 SPD2 – RPM 4000 SPD4 – RPM no limit If required, the RPM settings can be changed according to your own requirements. SEE CONFIGURATION MENU FOR MORE DETAILS -5- User Manual Xtra.Remote Control V3.0 USER MANUAL g. Soft button bar The icons in the lower part of the screen can be chosen by the soft button bar. The icons displayed change depending on the active menu. In the main menu, the following icons are shown by default: Penalty Groups Sectors Lights The main menu can be returned to from any menu by pressing SHIFT followed by the 0 button. -6- User Manual Xtra.Remote Control V3.0 USER MANUAL 3. BASIC OPERATION OF THE REMOTE CONTROL a. Stopping all karts at once Pressing the SHIFT button followed by the STOP button stops all the karts at once. If required, the Xtra.Remote Control can be programmed so that this function can be executed by pressing the STOP button only. All karts (with or without SHIFT as configured) can be stopped directly from any menu. SEE CONFIGURATION MENU FOR MORE DETAILS b. Adjusting the speed of all karts Press one of the SPD buttons without a preceding number. To remove the speed limit, use SPD4. c. Adjusting the speed of an individual kart The speed of individual karts can be adjusted in 2 ways: 1. 2. By entering the serial number of the Xtra.Shutdown Transponder mounted on the kart concerned and then pressing one of the SPD buttons. By entering the kart number and then pressing one of the SPD buttons. Serial numbers range from 65536 to 1048575. Kart numbers range from 1 to 245. Several succeeding kart numbers can be stopped by pressing the first number, then ENTER, then the last number in the sequence followed by the requested SPD button. SEE CONFIGURATION MENU FOR MORE DETAILS -7- User Manual Xtra.Remote Control V3.0 USER MANUAL d. Adjusting the speed of a group of karts Before this function can be used, the user must first assign (one time only) group number(s) to the Xtra.Shutdown Transponder. SEE CONFIGURATION MENU FOR MORE DETAILS The speed of a group of karts can be adjusted by entering the group menu and then pressing the group number and the requested SPD button. Group numbers range from 1 to 5. e. Adjusting the speed in multiple sectors To use this option, the kart must be fitted with an Xtra.Sector Sensor which is connected to the Xtra.Shutdown Transponder through the network. The track must also be subdivided into sectors using the Xtra.Sector Beacon. To adjust the speed of all karts in a specific sector, enter the sector menu, press the number of the sector and finally the SPD button. To adjust the speed in several succeeding sectors, enter the sector menu, press the first sector number and then the ENTER button. Then press the last sector number followed by the SPD button. f. Penalties Penalties (a brief speed limitation) can be given to an individual kart, a group of karts or all karts. Enter the penalty menu by pressing the button below the penalty icon shown on the right. Giving the penalty to all karts is done by pressing the SPD button from this menu without a preceding number. -8- User Manual Xtra.Remote Control V3.0 USER MANUAL To give a penalty to one kart only or a group of karts, first select penalty icon then Kart icon or Group icon and then press the kart or group number followed by the SPD button. The penalty time can be changed by pressing the button below the clock icon in the penalty menu. Scroll up or down by pressing the button below these icons And press the button below saved until another time is set. to confirm your choice. This penalty time will be g. Operating (race) lights By default the Xtra.Remote control can operate the Red, Yellow and Green (race) lights. To operate the (race) lights, enter the light menu by pressing the button below the lights icon shown on the right. Lights can be toggled by pressing the button below the corresponding colour. 4 extra functions have been added to quickly turn multiple lights on and off: 7 will turn RED on and yellow and green OFF. 8 will turn YELLOW on and red and green OFF. 9 will turn GREEN on and yellow and red OFF. 0 will turn all lights OFF. -9- User Manual Xtra.Remote Control V3.0 USER MANUAL 4. CONFIGURING THE REMOTE CONTROL a. Configuration menu Use the RIGHT button to go to the configuration menu. This menu is protected with a PIN code. The default PIN code is 0000. The PIN code can be changed or disabled. For more information see paragraph b, xi. The configuration menu displays all the components of the system which can be configured by the Xtra.Remote Control. The following sub-menus can be accessed from the configuration menu. Transponder menu Preferences menu Advanced functions By pressing the SHIFT and 0 button, you can leave any menu at any time. b. Preferences menu The remote control can be configured to suit your requirements and preferences. Press the button below the icon shown on the right to change the preferences of the remote control. Navigate through the preferences with buttons below “Up” and “Down”. Alternatively the LEFT or RIGHT button can be used (buttons right next to the STOP button). - 10 - User Manual Xtra.Remote Control V3.0 USER MANUAL i. Stop or Shift Stop All karts can be stopped by pressing STOP with or without SHIFT. As this will cause all engines to stop running, pressing STOP by accident on a track with fuel karts is not acceptable. Possible options are: Stop with Shift (default) Stop without Shift ii. Penalty Time The time that a kart is slowed down when given a penalty can be configured from this menu. The same menu is also accessible from the penalty menu itself. Possible options are: 3 seconds 5 seconds 10 seconds (default) 20 seconds 30 seconds iii. Display Brightness The brightness of the LCD screen can be configured in this menu. Remember that a higher brightness will drain the batteries more quickly. Possible options are: Maximum High (default) Medium Low iv. Energy save time The display will dim down if no buttons are pressed for a certain time. This time can be configured here. This feature will make the batteries last longer. Possible options are: Always active (disables this feature) 10 seconds 30 seconds (default) 60 seconds - 11 - User Manual Xtra.Remote Control V3.0 USER MANUAL 90 seconds v. Power Off Time The Xtra.Remote Control can power off itself to reduce battery usage. Possible options are: Always active (disables this feature) 2 minutes 5 minutes 10 minutes (default) 30 minutes 60 minutes vi. Language The Xtra.Remote Control supports multiple languages. Possible options are: English (default) Nederlands Français Deutsch Italiano Español vii. Electro/Fuel Both electro and fuel karts can be controlled with one Xtra.Remote Control. Please select the type of karts used on the active track. Possible options are: Fuel kart (default) Electro kart viii. Track selection Active tracks can be toggled by pressing the button below the corresponding track. It is possible to use the remote control on several circuits simultaneously. After changing the active tracks, press ENTER to confirm the changes. Changes can be undone by pressing the LEFT or RIGHT button - 12 - User Manual Xtra.Remote Control V3.0 USER MANUAL This functionality is useful if more karting tracks are located nearby. The tracks are indicated with the characters A, B, C and D. Activated tracks are shown on the start screen. ix. Speed/RPM settings for fuel karts For fuel karts, the standard RPM values can be modified to the needs of the karts in use or the layout of your track. The default speed limits are set to the following: SPD1 – RPM 2100 SPD2 – RPM 3000 SPD2 – RPM 4000 SPD4 – RPM no limit The first 3 speeds can be changed to any RPM value needed, with a max. value of 8,000 rpm. x. Show commands from others It is possible to display commands sent by other Xtra.Remote Controls, Xtra.Mini Remotes or Xtra.Range Extenders. Possible options are: Show Others Hide others (default) xi. Protect Advanced Functions The configuration menu can be protected with a PIN code. In that case, the PIN code must be entered before access to the configuration menu is granted. The default PIN code is 0000. The PIN code can also be changed or disabled. Select one of the options given: Disable protection Change PIN code With this feature, settings and preferences can only be changed by personnel knowing the PIN code. - 13 - User Manual Xtra.Remote Control V3.0 USER MANUAL xii. Use penalties If penalties are not be used, this function may be removed from the main menu. Possible options are: Disable penalties (the penalty icon will disappear from the start screen) Enable penalties (default) xiii. Use groups If groups are not be used, this function may be removed from the main menu. Possible options are: Disable groups (the group icon will disappear from the start screen) Enable groups (default) xiv. Use sectors If sectors are not be used, this function may be removed from the main menu. Possible options are: Disable sectors (the sector icon will disappear from the start screen) Enable sectors (default) xv. Use lights If no light control board is installed, this function may be removed from the main menu. Possible options are: Disable lights (the light icon will disappear from the start screen) Enable lights (default) - 14 - User Manual Xtra.Remote Control V3.0 USER MANUAL 5. CONFIGURING THE TRANSPONDERS a. Connecting a kart To connect to a kart, enter the configuration menu and press the button below the symbol on the right (transponder menu). The following screen will appear. Connecting to a kart can be done in the following ways. Enter the serial number or short number of the transponder and press the search button. NOTE: the transponder to be configured must be mounted on an active kart! Or power off all karts on the track, except the kart to be configured. Then press the search button without a number. The remote control will now connect to any active kart. Remember that only one kart may be active when using this feature. After a successful connection with a transponder, the following screen will be shown. Use the up and down buttons to navigate through the menu. i. Serial number The serial number corresponds to the serial number on the label of the transponder. The serial number cannot be changed. - 15 - User Manual Xtra.Remote Control V3.0 USER MANUAL ii. Number (kart number) The (kart) number can be changed to any number from 1 to 245. It is advisable to give a unique (kart) number to each kart. Change the (kart) number by entering the new number and press to send the new settings. iii. Group Each transponder can be assigned to between one and 5 groups. To change the group membership of a transponder, select the group line and press the corresponding number to toggle the membership. Press 0 to remove all groups. Change the group number by entering the new number and press to send the new settings. iv. Track selection Each transponder must be assigned to at least one track. To change the tracks of a transponder, select the track line and press: 1 to toggle track A 2 to toggle track B 3 to toggle track C 4 to toggle track D If no tracks are selected, track A will automatically be activated. v. Read Timer The transponder holds an active time timer. To read this timer, select the “Read timer” line and press . vi. Reset Timer To reset the timer, select the “Reset timer” line and press . vii. Read Voltage and rpm The supply voltage and rpm of a transponder can be monitored. There is a difference between Fuel and Electro karts. The Xtra.Remote Control will automatically detect the type of transponder it connects to. A fuel transponder will monitor the Average RPM, the Actual RPM and the supply voltage. An electro transponder will monitor the actual voltage of the battery. The minimum and maximum values are also monitored. - 16 - User Manual Xtra.Remote Control V3.0 USER MANUAL viii. Software Version This line will show the software version of the transponder. ix. Switch table (EV only) The EV transponder holds a table that configures the setting of the relays. Each speed can have its own set of relays settings. This menu has the following options. Recall switch table from remote Store switch table into remote Receive from any transponder Send to any transponder Power up relays settings Stop Kart relays settings Speed 1 relays settings Speed 2 relays settings Speed 3 relays settings Speed 4 relays settings - 17 - User Manual Xtra.Remote Control V3.0 USER MANUAL Warranty 1. De Haardt Electronic Engineering BV guarantees for 12 months after delivery of the goods sold or provided for use that the goods can perform the tasks stated in the manuals, descriptions and documentation; 2. The liability under the guarantee contained in this article is limited at De Haardt Electronic Engineering BV’s choice to remedying material and manufacturing faults free of charge in De Haardt Electronic Engineering BV’s own workshop, supplying new parts free of charge and taking back and acquiring the ownership of the non-functioning parts, or applying a price reduction by agreement with the other party on the goods supplied or provided for use. De Haardt Electronic Engineering BV cannot under any circumstances be obliged to come to the location of the delivered goods to establish defects claimed by the other party. Equally, De Haardt Electronic Engineering BV cannot be compelled to carry out repair work outside its own workshop. 3. The guarantee referred to in the third paragraph does not cover the costs of disassembly, labour costs, transport costs and call-out charges, all in the most general sense. These costs will be charged in all cases. 4. No guarantee is provided if: changes have been made to the goods supplied by or provided for use by De Haardt Electronic Engineering BV other than by De Haardt Electronic Engineering BV itself or persons expressly authorized by De Haardt Electronic Engineering BV, unless De Haardt Electronic Engineering BV has agreed in writing to such changes in advance; the defects in the goods supplied or provided for use by De Haardt Electronic Engineering BV are the result of: neglect of the maintenance of the goods supplied or provided for use by the other party or other users; improper use or use not in accordance with the instructions supplied by De Haardt Electronic Engineering BV for the installation of the goods; incompetent use and/or misuse of the goods supplied or provided for use by the other party or other users; wear and tear; repairs or replacements carried out by persons other than those expressly authorized to do so by De Haardt Electronic Engineering BV, unless De Haardt Electronic Engineering BV has agreed in writing to such repairs or replacements in advance. 5. Work not covered by the guarantee as referred to in this article shall be charged to the other party in accordance with De Haardt Electronic Engineering BV’s relevant current tariffs. 6. Notwithstanding the provisions in the preceding paragraphs, the guarantee provided by De Haardt Electronic Engineering BV does not go beyond any guarantee provided to De Haardt Electronic Engineering BV by the relevant manufacturer or supplier of the hardware and/or software and fulfilled in respect of De Haardt Electronic Engineering BV. De Haardt Electronic Engineering BV shall on the other party’s request inform the latter of the content of the contracts entered into between De Haardt and its suppliers. - 18 - User Manual Xtra.Remote Control V3.0
![Manual Xtra.Emergency Stop Button - Engl[...]](http://vs1.manualzilla.com/store/data/005969304_1-2023db70a6061fe7900a89122ed44562-150x150.png)