1
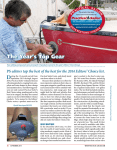
M/Y SARAH BROOKS
Fleming 55-125
OPERATING MANUAL
V 6 3 Sept 2015
FOR SPECIAL CONSIDERATION
Please respect SARAH BROOKS as you would your own boat.
Power Management - focus on this as you familiarize yourself with SARAH
BROOKS.
Be extra alert for logs and deadheads (see “Running SARAH BROOKS”).
Remember to use and center stabilizers (see “Getting Underway” and “Returning
to Port”).
Close macerator seacock before dockside pump out and re-open when done (see
“Head System”).
No Sharpies, Magic Markers, other indelible items for young children’s
artwork (the owners learned the hard way!).
Re-upholstering furniture is time consuming and expensive. Avoid getting sun
lotion or other oils on furnishings and particularly while moving the barrel chairs
around the salon!
Keep metal out of the drawers within 3 feet of the starboard forward corner of
the VIP bed (magnetic fluxgate compass there).
Do not swim under the boat. Take particular care around the stabilizer
fins (location marked "Fin" on each side of hull), as they are protected
by sharp kelp cutters.
Please take note of any equipment issue or maintenance need, large or small,
and report them to NW Explorations (NWE) before getting underway or on your
return. NWE can't address them if they don't know about them!
Most Important: Enjoy this spectacular vessel and the beautiful cruising
grounds of the Pacific Northwest !
Important Notice:
This Operating Manual assumes that the skipper (and crew) deemed
qualified by NWE to bareboat charter SARAH BROOKS have substantial
experience, ideally running 50-60 foot semi-displacement motor yachts,
both out of marinas and at anchor.
The manual attempts to provide important information specific to SARAH
BROOKS and the Pacific Northwest, solely as a convenience to the
charterer and crew. While running to many pages, it is not exhaustive
and cannot be made complete in every detail, given the complexity of the
boat, her systems and the operating challenges of cruising in Pacific
Northwest waters.
The manual may not reflect equipment changes, system upgrades and any
changes in operating characteristics since its publication and the author
assumes no responsibility for any errors or omissions.
No operating suggestions herein should substitute for the charterer's
experience, common sense, proper seamanship, careful navigation and
boat handling. If you have questions, please consult NWE!
As bareboat charterer you are operating at your own risk and are
responsible for the safe and prudent operation of the boat and its
equipment. If you do not feel comfortable undertaking any of the
operations outlined herein, seek help from a competent professional.
TABLE OF CONTENTS
For Special Consideration and Important
Notice
Inside Front Cover/
Overleaf
Sarah Brooks - General Information
3
Access to Boat
4
Electrical System
DC Service Panel
AC Service Panel
Shore Power Connections
Marina Power (only 125V 30A AC Power Available)
Generator (Genset)
Outback Inverter
5-9
5
6
7
8-9
10
12
Fuel Management
13
Fresh Water System
15
Bow Thruster
16
Roll Stabilizer
17
Head System
18
Kabola Diesel Furnace
20
Preparatory to Getting Underway
Routine Engine Room Checks
22
Getting Underway When on 125/250V 50A
Power Up
Start Genset/Disconnect
Shore Power
Navigation System Start Up
Energize Roll Stabilizer
Electronic Engine Controls
Start Main Engines
(continued .../...)
24-31
24
26
27
28
29
30
TABLE OF CONTENTS (continued)
Running Sarah Brooks Underway
Tips for Using Navigation System
Cruising Speed
Engine Instruments - Typical Readings
Engine Room Checks Underway
Pilothouse TV Camera
32
33-37
38
38
39
39
Spending Time at Anchor
40
Anchoring
40-43
Power Management While at Anchor
44-47
Tender: Launching, Using, Recovering
48-51
Safety Equipment
52
Returning to a Marina with 125/250V 50A Power
Connecting to Shore Power
Only 125V AC 30A Power Available
De-Power Instruments
Power Settings While at Marina
53-56
53
8-9, 54
54
55
Galley Notes and Suggestions
57-59
What's Where in the Galley and Salon
60
Operating the Washer and Dryer
62
Water Management
64
Audio/Visual System
65
Location of Key Equipment (by Location)
67-71
3
M/Y "SARAH BROOKS" Operating Manual
V 6 of 3 September 2015
General Information
Fleming 55 (hull 125) 2002
USCG Official Number: 1127197
LOA (hull): 55.8’
Hull No. FAL 55125B202
(incl. bow roller & swim platform): 60.8’
LWL: 50.9’
Beam: 16’
Draft: 5.0’
Displacement: (min) 30.8 mt (~68,000 lbs.)
(laden) 35.4 mt (~ 80,000 lbs.)
Air Draft: VHF antennae up 33.0’ down 23.0’
Main Engines: Twin Cummins 480e TA
s/n port 46156381 stbd 46156377
Cruise Speed: 10-11 kts Fuel consumption at cruise speed: ~10.0 gph
Transmissions: Twin Disc MG5075A reduction ratio 2.53/1
Engine Controls: Glendinning EEC 3s in three locations (PH, FB and cockpit)
Generator: 17kW Onan Model MDKAD-5001437, s/n I010279553
Fuel Capacity (diesel): 655 gallons (in two forward tanks)
Forward: Port 385 g; Starboard 270 g Total Forward: 655 g
Note: Aft tanks (2X185 g) are secured for charter service. Do not fill
Fresh Water Tanks: 300 gallons (in four tanks – cross connected)
Black Water Tank: 100 gallons
4
Access to Boat
Salon Door:
Primary access is through the salon door, using a “skeleton-like” key on a “floatie”.
Slide the right hand door to open.
Pilothouse Wing Doors/Flybridge Doors:
The salon door key will work on the wing doors. The companionway to the flybridge is
generally locked from the inside with deadbolts.
Cockpit Lazarette:
Primary access is through two hatches just aft of the salon door. Open the port hatch
first. A metal drain piece for the hatches may be temporarily removed to allow better
access to the lazarette. Two other cockpit hatches access storage in the aft of the
lazarette.
Engine Room:
Primary access is through a door via the same double hatch for the lazarette. When
not in the engine room always leave the engine room door firmly shut,
particularly underway (needed for the Fireboy fire suppression system and
noise reduction).
Note: There is also access to the engine room via a ladder from a hatch in the forward
end of the salon, just before the steps down to the accommodation spaces.
ER lights are switched on/off in the pilothouse: see “ER Lights” on the AC service panel
and “ER & Lazarette Lights” on the DC service panel. A green light will glow on the
generator control panel if either light set is on. The lights also have bulkhead switches
at each end of the ER. Try these if the pilothouse switches don't seem to work.
5
Electrical System
SARAH BROOKS has four types of electrical power: 125/250V 50A AC , 125V 30A AC,
24V DC and 12V DC.
DC Power The 12V/24V DC supply comes from 12 Lifeline AGM GPL-6CT batteries providing 900
Ah @ 24 V DC (the “House Bank”), located in the ER, starboard side, aft of the
starboard main engine.
The House Bank provides power to various DC circuits through the DC Service panel. It
also powers a 3,500 watt Outback inverter/charger which converts DC voltage to 125V
AC when shore power or generator power is not present. In addition, the House Bank
provides 12 V DC power through a converter for 12 V circuits.
The Outback inverter/charger charges the House Bank when AC power is present. The
House Bank may also be charged by the main engine alternators and, in the event that
the inverter/charger fails, the 24 V charger through an inverter bypass. The system is
regulated by an XPORT regulator.
In addition to the House Bank, there are two sets of batteries (2 8D gel cells each), port
and starboard, which start the main engines, and in case of the starboard battery set,
power the 24 V DC Wesmar bow thruster. The start batteries are charged by the main
engine alternators and/or the 24V charger, when AC power is present. Finally, a
separate 12 V DC battery in the lazarette is dedicated to starting the generator. It is
charged by the 12V charger when AC power is present.
DC Service Panel The DC service panel on the starboard side of the pilothouse controls circuits served by
the House Bank as well as 12V circuits like VHF radios, SAT TV, DC outlets etc. through
the right-hand column of switches. Also on the panel are engine control breakers, on
the top right, protected by metal straps.
The DC service Battery Select knob should always be set to #1 (9 o’clock
position- marked "Leave on 1").
continued.../....
6
Electrical System (continued)
Some of the DC service panel switches are breakers (examples: Port and Stbd. "Engine
Room Blowers" (rarely used in the PNW), “Salon Port (Stbd) Lights” or “Deck Lights”)
which in turn empower on/off switches elsewhere. Other levers act as on/off switches.
Examples:, “Anchor Light”, “Nav Lights”, “Tank Gauges”, “Instruments”, "Macerator
Pump".
Note: Certain switches should be left on at all times: "Alarm System", “Fwd Bilge
Pump”, “ER Bilge Pump”, “Laz Bilge Pump”, “12V Main”. Others will be turned on as
necessary, including the protected port and starboard engine control switches, as well
as switches used for underway operation, which should be secured after returning to
port. More detail will be provided below in sections for getting underway, cruising,
returning to port, launching the tender, etc.
Many of the switches in the column under the "12V Main" switch are for 12V circuits.
In the unlikely event that the "12V Main" switch light isn't illuminated or there appears
to be no 12V power, go to the lazarette. Above the port-hand grey battery control box
you will find a 12V breaker, which may need to be re-set.
AC Power AC power is provided by shore power, or by the 17kW Onan generator ("Port Gen"), or
created by the Outback inverter from the 24V House Bank.
AC Service Panel –
The AC service panel on the port side of the pilothouse controls both the 125V AC and
220-250V AC systems. It features three select switches: “110V Select”, “Shore Select”,
and “220V Select”.
The “110V Select” switch is used to select the source of 110V, either "110V/220V
Shore", "Port Gen.", or "Inv" (inverter).
The “220V Select” switch is used to select the source of 220V, from "220V Shore" or the
generator ("Port Gen") The inverter does not supply 220 V AC.
The “Shore Select” switch is used to select where shore power to the boat will be
connected (most conveniently aft ("AFT 220V") through a Cablemaster unit – see
below).
continued.../...
7
Electrical System (continued)
The 110V AC section is in turn divided between “110 A” for circuits that can be
supplied by the inverter without shore or generator power and “110 B” for 110V
circuits that require either shore or generator power.
The 220V AC section is used to power high load circuits such as the washer/dryer,
cook top and water heater. On the right of the 220V panel are breakers under “220V
Aircon” for the reverse cycle heating/air conditioning system.
Like the 110V B panel, the two 220V circuits require either 125/250V 50A AC shore or
generator power.
Certain circuit breakers on the 110V and 220V panels should be left “on”. These
include: “ERoom Outlets”, “Salon Outlets”, “Salon Lights”, “Computer”, “Refrigerator 2”,
(Amana), "PHFB Outlets", “12V Charger”, “24V Charger” and “Inverter”. Others , such
as "Refrigerator 1" (wine cooler) may be turned on as needed.
Note: "ER & Lazarette Lights” on the DC panel should be turned on when the ER is
monitored underway by the pilothouse camera and/or when working in the ER. The
breaker should otherwise be left off. For additional light to work in the engine room on
the DC panel turn on “Eroom Lights” on the 110 A panel. Remember to turn both off
when done.
Additional instructions on settings on the two electrical service panels will be provided
as part of information on getting underway, cruising and returning to port or
anchorage.
Shore Power Connections
SARAH BROOKS has 125/250V 50A AC shore power connections both forward and aft.
There are also 125V 30A AC connections (secured - see below). When stopping at a
marina ask for 125/250 50A AC power if available.
Note:
Do not use the bow and stern 125V 30A AC connections. See "Two 30A
Outlets Available" and “Only One 30A Outlet Available” below for details on
bringing 125V 30A AC power aboard when 125/250V 50A power is not
available.
continued.../....
8
Electrical System (continued)
Cablemaster (125/250V 50A AC stern connection) –
The after 125/250V 50A AC cable is stored in a Cablemaster unit in the lazarette that is
controlled by a toggle switch under the cockpit fascia on the starboard side of the
transom. Power is supplied by turning on the “Cablemaster” breaker on the 24V panel.
Toggle out to unroll the cable, in to rewind it. The cable end is accessible under the
customary stainless cap found in a compartment on the starboard side of the transom
via the swim platform. A 125V AC 30A connection is also found in this compartment.
Pull out the cable end and unroll it carefully; (don’t drop it in the water!). The
Cablemaster cable is long enough to reach to a little forward of the pilothouse (less far
if trying to reach a portside connection) and should be used if possible for shore power.
Note: Ensure that whatever length is used there is sufficient slack to avoid
damage to the connectors.
If the shore power outlet cannot be reached from the stern, consider backing in to the
slip. If necessary, there is a second 125/250V 50A AC cable in the starboard aft
lazarette that may be connected at the 50A bow connection.
Marinas Without 125/250V 50A Power Available –
At many marinas (particularly those in more remote areas) 125/250V 50A AC power
may not be available, but 125V AC 30A power may be (see below).
Two 30A Outlets Available:
In this case, there is a Hubbell combiner in the starboard aft lazarette with two 30A
cable fittings combining to one 50A cable fitting. If two sources of 30A are available,
this can be used effectively to create ~220V AC at ~50-60A, depending on how the
dock is wired. Summary instructions are on the combiner.
Understand that this may not achieve the same amperage levels as from a single
125/250V 50A AC source, but it may be sufficient to meet the needs of the boat,
provided you are careful with the use of high load appliances.
continued.../...
9
Electrical System (continued)
Note:
In general, it is never good to try to use the washer/dryer, dishwasher,
water heater, reverse cycle heat, cooktop and convection oven all at the
same time!! It is possible to trip a 50A shore breaker or even the breaker on
the genset, rated at 70A (see "Generator" below).
Only One 30A Outlet Available
If using the Hubbell combiner is not possible, connect the 125V 30A AC power cord in
the lazarette to either the bow 50A receptacle or the stern 50A Cablemaster power cord
using the 30A to 50A adapter attached to the 30A cord. Before securing the genset or
switching from the inverter ("Inv"), connect the 30A cord to a 125V 30A dock outlet
(with its switch off if possible). Then turn the "Shore Select" switch to "FWD 220V" or
"AFT 220V (not 110V) as appropriate, and turn on the power at the dock.
With relevant LEDs lit showing shore power to the boat, switch the "110V Select" switch
from either "Port Gen" or "Inv" to "110V/220V Shore" and secure the genset, if running.
This arrangement will supply both the 110V A and 110V B sections of the AC panel,
providing power for all three DC chargers, the refrigerator/freezer, 110V outlets and
lights, and the computer, etc. This should allow you to stay at a marina with only 30A
power without using the genset or the inverter and while charging all batteries, but it
will not supply power for the 220V circuits.
If you wish to use the 220V cooktop/convection oven, washer/dryer, water
heater etc. while plugged into 125V 30A power as above, you will need to
start the generator and select it for all power needs by turning both the "110V
Select" and "220 V select switches to "Port Gen." (see "Generator/Genset" below).
When done, return both 110V and 220V select switches to "110V/220V Shore" and
"220V Shore" respectively, and secure the Genset.
It is not necessary to disconnect the 125V 30A connection while doing this.
10
Generator (“Genset”)
SARAH BROOKS has an Onan 17kW (70A – 250V AC @ 1800 RPM) generator mounted
in the engine room aft of the port main engine. The genset pulls fuel from the port
forward fuel tank. This setting should not be changed.
Starting the Genset:
The unit is controlled from the panel on the far port side of the pilothouse.
Note: The genset panel shows markings and a starting switch for a "Stbd Genset".
Ignore these as there is no longer a second generator installed.
To start, if the engine is cold, toggle the “start-stop/pre-heat” switch on the left down
for a five count to pre-heat, then push it up to start until the green “run” LED light stays
on, then release.
With the genset running with no alarms, move the “110V select” and “220V select”
knobs at the AC service panel to “Port Gen”. If done sharply and simultaneously you
may achieve a seamless transfer of power. Check the 110V and 220V meters for
sufficient voltage and also check to see if there is flow out of the water exhaust to port
just forward of the cockpit.
Note: When changing sources of AC power the meters on the AC panel may ”beep” and
flash. Clear this by pushing the small button at the lower right-hand corner of each
meter. It is a good idea to check for sufficient voltage every time you change the
source of AC power. Use this button on the meters also to cycle through the meter
options, including the amperage draw on each side.
Important Notes:
Do not run the genset for long with no load.
At start up, the red “Raw Water” LED will momentarily light up as the impeller first
starts to supply raw water to the genset. This should shortly go out. The genset has an
internal high temp cut-off sensor which can shut down the engine and is separate from
the “Raw Water” sensor, but without raw water at start up the impeller may be
damaged before the engine shuts itself down.
Therefore if the “Raw Water” LED remains brightly lit, shut down the engine and
investigate (check sea strainer for clogging, etc.) If the light remains lit on start up and
investigation shows the water exhaust has good flow with no evidence of overheating,
there may be a problem with the flow sensor for the alarm. In this case if necessary
11
Generator ("Genset") continued
you could ignore the red light and monitor engine temperature at the unit, but you
should seek the advice of a professional at the earliest opportunity.
The genset has a red emergency on/off switch and another breaker switch on its
control box in the ER. The normal setting for both is “on”. The switches are subject
to elbow bumps which can turn them to “off”. If the genset seems dead,
don’t panic, and check to see if the switches are on.
If the genset breaker is tripped through overload, reduce the load by turning off
offending circuits and reset the breaker on the rear of the genset sound shield.
Securing the Genset:
To stop the genset, toggle its “start-stop/preheat” switch down until the engine stops
and the green “Run” LED goes out.
Running the Genset while Underway
Standard practice is to start the genset prior to main engine start up and run it while
underway. If you plan to anchor overnight, by running the genset you will start the
afternoon with a fully or nearly fully-charged House Bank to run the inverter and other
circuits. This will mean less genset use when you are on the hook and wish to enjoy
the peace and quiet (even though SARAH BROOKS' generator has a sophisticated
muffler system and is pretty quiet).
With the genset running while underway, use of the 220V AC circuits will be seamless
and you won't have to remember to start the genset for anchoring and launching the
tender.
It is acceptable not to run the genset while underway, running instead on the inverter
(see below) for AC power. The main engine alternators will charge the House Bank, but
for the typical 3-4 hour transit the House Bank may not be at full charge after you stop
for the night, particularly if getting underway after a night at anchor. Use your
judgment and exercise sound power management (see "Power Management at
Anchor", page 44).
12
Outback Inverter
SARAH BROOKS is equipped with a 3,500 watt Outback pure sine wave
inverter/charger.
With external power present via shore power or by running the genset, the Outback will
charge the House Bank. With no external power present the Outback will create 110125V AC power by drawing on the House Bank to supply circuits on the "110V A"
section of the AC service panel.
The Outback is monitored and controlled from the pilothouse using a remote display
located just above the AC service panel to the left of the helm. In Outback parlance
this is known as the "MATE".
In normal operation the MATE is simply a monitor, with LEDs showing whether there is
AC power present (the LED above "AC In" will be lit), or whether the inverter is creating
AC power from the House Bank (LED above "Inv" will be lit).
The MATE is set to provide a continuous scroll of five data pages showing the State of
Charge (SOC) in percent, current DC voltage levels, Amp hours (AH) in and out, and
cumulative AH used while the inverter is working. This will provide all the data needed
to monitor the House Bank and the inverting/charging process.
No user adjustments are required for the MATE in normal service.
More detail on use of the MATE and the Outback will provided in the section "Power
Management While at Anchor" (see page 44).
13
Fuel Management
SARAH BROOKS has a total diesel fuel capacity of 1025 gallons in four tanks, with 655
gallons available for charter service:
Port
Starboard
Total
Forward
385 g
270 g
655 g
Aft
185 g
185 g
370 g (Note: empty – secured for
charter service)
Important Note:
Total
1,025 g
For coastal cruising and charter service only the forward tanks are used. The fuel
management system is set so that the port main engine draws from the port forward
tank and starboard main engine draws from the starboard forward tank.
The aft tanks are empty. Do not fill them or attempt to change any setting
on the fuel management panel located at the forward end of the engine
room.
Fuel Consumption:
At cruising speed 10-11 kts. (indicated), fuel consumption with the genset running is
about 5 gph a side for a total of about 10 gph. When using only the forward fuel tanks,
this means that the effective capacity and range depends on the capacity of the smaller
starboard forward tank (270 gallons). With a ~25 gallon reserve (starboard tank) there
will be almost 50 hours of run time before you need to refuel. That should be more
than sufficient for a week’s charter, provided the boat is cruised at the optimal cruising
speed of 10-11 kts.
Filling Fuel Tanks:
All tanks have sight glasses to measure fuel levels. There is also a Computank
electronic tank gauge (port side of PH above the Outback MATE display) so that fuel
levels may be monitored from the pilothouse. NWE will have marked each sight glass to
show "full" when topping up at charter's end. This may be slightly less than the full
reading on the Computank gauge.
continued .../...
14 Fuel Management (continued)
The forward tank deck fills are clearly marked, just aft of the steps on either side of the
salon. Tools for opening the fills are in the starboard cockpit cupboard under the
cockpit control station along with “diapers” to avoid spills on deck. The fill pipe is close
to and directly over each tank, so with careful monitoring of the Computank gauge or
sight gauges during the fill process, fueling without spills is easy.
Use the gauge’s menu button (see below) to select Tank 1 (port forward) or Tank 2
(starboard forward) so the gauge doesn’t scroll through all tanks. A crew member can
then watch the fuel level and shrinking “To Fill” data on the selected tank (#1 Port Fwd.
or #2 Stbd. Fwd.), switch to the ER sight gauges near full and advise the person at the
nozzle when each tank is at the NWE "full" mark.
Selecting One Tank At A Time on the Computank Gauge:
Press “Yes/Menu”
Prompt: “”Select Tank?”
Press “Yes/Menu”
Displays 0 =all
Press “No” once to select Tank #1, twice to select Tank #2
Confirm choice by pressing “Yes/Menu”
Repeat process to select the other tank once the selected tank shows full
Repeat Process and confirm “0 = all” to return to scrolling when fueling is done
Data Records:
After each fueling, keep a record of 1) the amount needed to fill each of the forward
tanks and 2) the starboard engine hour reading (gallons, or Litres in Canada).
This data and a record of engine hours at each re-fueling stop will enable NWE to
monitor fuel burn rates under varying cruising conditions and cross check the engine
instruments, which show fuel usage rates while underway. NWE will also record engine
hours at the end of each charter.
Checking Engine Hours
For historical reasons (replacement of the port engine control module - "ECM") the
actual elapsed engine hours on SARAH BROOKS must be taken from the starboard
engine.
On the starboard engine ECM, with the ignition key on or the engine running, total
engine hours will displayed as one line of data in the basic view. Port engine hours, if
needed, can be read on the port ECM in the same way.
15
Fresh Water System
SARAH BROOKS carries 300 gallons of fresh water in four cross-connected tanks on
both sides of the lazarette at the main access hatches.
All tanks may be filled through the starboard deck fill, located aft of the cockpit control
cabinet. Filling is monitored at the sight glass on the port tanks at the Lazarette/ER
access well.
Water will flow through the cross-connect system to the port as well as starboard tanks.
Ensure the water flow is not too fast as the water may back up before fully filling the
tank. If this happens, stop filling to let the cross-over system catch up and then
continue with lowered water pressure. Fill right to the top of the sight glass.
Water Pressure:
There are two fresh water pumps outboard aft of the port main engine, energized by
the “Fresh Water” breaker on the DC panel.
The system will be set to “Pump #2”, an on-demand Excalibur pump (on the right,
looks like a black football). If Pump #2 fails to work, there will likely be a lighted alarm
LED visible on the end of the unit. Try pressing the re-set button located near the
indicator lights. If this fails to work, switch to the back-up Paragon Senior pump (on
the left) by turning the clearly marked valves to “Pump #1” and selecting Pump # 1 at
the control knob above and outboard of the pumps.
Water Conservation:
SARAH BROOKS has several systems that share the 300 gallon fresh water supply,
including the Headhunter toilets, the sinks and showers, cockpit sink and shower, the
dishwasher and the clothes washer (uses approximately 10 gallons/wash load).
Therefore water management is important, particularly in more remote areas
such as B.C.'s Broughton Archipelago where good clear fresh water may be
hard to find. If you take a multi-week charter that includes the Broughtons,
discuss fresh water options with the NWE check out captain.
Charterers and guests will want to be conservation-minded: taking steps such as “Navy
showers”, care if hand-rinsing dishes, using the saltwater wash down pump to clean
mud off the anchor and chain, and thinking ahead to top up whenever the opportunity
presents itself, etc. will help ensure that fresh water is always at hand.
16
Bow Thruster
SARAH BROOKS is equipped with a 24V DC Wesmar bow thruster. It is controlled by
left/right control levers at all three helm stations.
The bow thruster machinery is accessible under the forward end of the master bed by
raising the bed on its gas shocks. The only reason for charterers to access the thruster
works might be to check the oil level in the system. While there is spare oil for this in
the lazarette, the thruster will be maintained by NWE and fluid levels will have been
checked and topped up if necessary before each charter.
When preparing to get underway, turn on the “Bow Thruster” breaker at the bottom
right of the DC panel. Test the thruster by moving the control lever for a “one count”,
to the left or right.
SARAH BROOKS has powerful 480 hp twin diesels and turning the bow can mostly be
done with the engines. Use the thruster sparingly, only to fine tune the docking process
or to counteract a strong wind, or in extremis.
Note:
Do not run the bow thruster for long periods of time and under no
circumstances use it as the primary means of turning the boat !!
Remember: short bursts and only to fine tune your approach.
When securing at the dock or at anchor secure the bow thruster by switching it off at
the DC panel.
17
Roll Stabilizers
SARAH BROOKS is equipped with adjustable Naiad Marine Multisea II hydraulic
stabilizers, designed to dampen movement in a seaway. The stabilizers should be
energized and active whenever the boat is underway but centered for maneuvers, like
docking or setting an anchor, that might involve backing down.
To energize the stabilizers, turn on the “Stabilizers” breaker on the DC service panel.
When the engine control breakers are switched on, the stabilizer control unit above and
to the left of the helm will power up and self-test (the “Lights” box will glow).
Place the stabilizers in standby (centered) by pressing “Center” then “Bypass” on the
control unit. Once underway and clear of the harbor or marina, press “Active” on the
control panel to activate the stabilizers. To return to standby press “Center” again (see
Important Note below).
The roll rate and roll angle sensitivity may be adjusted, but the default setting is at
about the 11 o’clock position. In heavy following seas, the roll angle sensitivity should
be turned up (3 o’clock position) to make the boat handle better.
Important Note:
Remember that slowing to enter a harbor or marina is a “two-handed” task:
one hand to reduce the throttles to idle and the other to center the stabilizer
fins (by pressing the “Center” button).
This must be done before maneuvering or backing down.
FAILURE TO CENTER THE FINS MAY DO SERIOUS DAMAGE
Once secure at the dock or at anchor, the stabilizers will power down when the engine
control breakers are switched off. Then turn off the “Stabilizers” switch on the DC
panel.
The stabilizer control unit in the ER is on the bulkhead to the left of the door, looking
aft. Check the fluid level during routine ER checks, although the stabilizer system will
have been checked by NWE staff.
18
Head System
SARAH BROOKS is equipped with Headhunter electric marine toilets in both heads.
They utilize strong jets of fresh water to macerate waste before it enters the holding
tank. They are energized by the “Toilets” breaker on the DC panel, and require that the
“Fresh Water Pump” breaker is also energized.
To flush the toilet, push and release the button on the left of the bowl towards the back
and the toilet will flush with a “whoosh” of accelerated water, until the bowl is clean. Do
not hold the button down. The length of flush is controlled by a pre-set solenoid.
The heads will be set always to drain to the holding tank, which holds 100 gallons and
has a Tankwatch 4 level monitor mounted in the genset and bilge pump panel at the far
left of the pilothouse. Monitor the fill level of the holding tank. After it has read “Mid”
for some time, or if it slips into the “Full” level, the holding tank must be pumped out.
Pumping Out the Holding Tank
1) At sea, in areas where pumping the holding tank is not prohibited, the tank may
be pumped out using the boat’s macerator pump, by switching on the “Macerator
Pump” switch on the DC panel.
Note: This switch is not a breaker. When the switch is thrown the macerator
will begin overboard discharge. When the tank is empty (the monitor light
shows green), shut off the macerator pump. If you forget, it is okay for the
pump to run dry for a short period, but please pay attention and secure the
macerator when it has done its job! There is a kitchen timer in one of the
miscellaneous equipment drawers (we call them “crap drawers”, for reasons
unrelated to the holding tank) on the starboard side of the pilothouse. The
macerator will empty the holding tank at a rate of about 5 minutes a segment.
Try setting the timer to 10 minutes as a reminder (e.g. if at yellow).
2) Where you are prohibited from pumping waste overboard (for example in a
number of coves in Desolation Sound and the Discovery Islands, and in much of
the Salish Sea (San Juans and Canadian Gulf Islands), you should arrange for a
dockside pump out. The pump out deck fitting is on the starboard side of the
Portuguese Bridge.
Important Note (next page)
19
Important Note:
The default setting for the macerator seacock is in the open position to
facilitate overboard discharge where allowed. Before you have the holding
tank pumped out dockside you must close the seacock. It is located in the
forward lower cabinet in the third cabin and is plainly marked.
FAILURE TO CLOSE THE SEACOCK WHEN GETTING A PUMP OUT MAY
DAMAGE THE VALVES IN THE MACERATOR PUMP!! PLEASE PAY ATTENTION.
WHEN FINISHED, ENSURE THAT THE SEACOCK IS RE-OPENED.
20
Kabola Diesel Furnace
SARAH BROOKS has a Kabola HR 400 diesel furnace that provides heat and hot water.
The Kabola does not need shore or generator power. It is powered by 230 V AC power
created by a dedicated inverter from 24V DC drawn from the House Bank.
While operating, the furnace burns about 1/4 gallon of diesel fuel/hour from the
starboard forward fuel tank.
The Kabola is an "hydronic" system which heats and circulates a glycol-based solution
throughout the boat. Heat in each space is provided by thermostatically controlled
mini air handlers, so that the master stateroom can call for heat even if none is needed
in the other cabins or elsewhere in the boat.
Operating the Furnace
Controls are in the pilothouse. Energize the system by turning on the "Furnace"
breaker on the DC service panel. Then, at the aft pilothouse bulkhead, turn the "Kabola
Heat" switch to "on" and if you want heat as well as hot water, select "winter mode" on
the bulkhead.
There are separate thermostats/controls in the salon/galley, pilothouse, master cabin,
VIP and third cabin. To operate, turn the control to "heat" and set the temperature as
desired. You may find that the salon/galley will warm up nicely even with its
thermostat set low (and not calling for heat from the heat exchanger) simply because
of the warm glycol circulating below the cabin sole and to the water heater.
As the glycol warms up and the system is ready, the air handlers will cycle on to bring
the space up to the desired temperature then shut off and cycle off and on as needed
to maintain temperature. (just like home!).
If you do not want the furnace to run (for example overnight): 1) turn all the
thermostats to "off" or 2) turn the heat level down, or 3) shut off the system at the
pilothouse bulkhead.
In "winter mode", with the system on, the hydronic circuit is connected to the hot water
tank (using a dedicated thermostat). The water heater also works off 220V AC power
when shore or genset power is present. The two heat sources work together seamlessly
and automatically.
continued.../...
21
Kabola Diesel Furnace (continued)
"Summer Mode"
In the summer, when the furnace heat is not needed, switch the Kabola system to
"Summer Mode" on the pilothouse bulkhead. The system will then just provide hot
water (again, just as in many homes), and there will be ample hot water if you are at
anchor or a marina without 220V 50A power for more than a day or so.
That said, if you plan to spend considerable time in a marina with 220V 50A shore
power, turn off the Kabola system altogether and heat the water electrically by turning
on "water heater" on the 220V AC panel.
Safety Considerations
Extended Absence:
While not particularly relevant to those who are out cruising, if the boat will be left
unattended for an extended period, turn off the Kabola system. If at a dock with 220
V 50A AC shore power, heat and de-humidification can be provided by the reverse
cycle heating system.
Carbon Monoxide (CO) or Smoke Condition:
SARAH BROOKS is equipped with First Alert combination carbon monoxide/smoke
detectors in the salon and in the companionway to the accommodation spaces. They
are connected wirelessly and if one is triggered both will sound off with a loud warning.
Exit the interior of the boat immediately and, if it can be safely done, secure the Kabola
system, any engine that may be running. or other source of either condition.
22
Prepatory to Getting Underway – Routine Engine Room Checks:
Note: There are noise attenuators (“Mickey Mouse Ears”) located on hooks on the
bulkhead to the left of the engine room door. Use these to protect your hearing while
working in the engine room with any engine running.
Before going to the engine room, turn on the lights at the AC and DC panels, take a few
sheets of paper toweling and one of the yellow and black flashlights in the handy tool
kit (at the entrance to the ER) or in the battery spares drawer to the left of the wine
cooler.
Check engine oil and coolant levels on all three engines every 10 hours of running time,
with the engines cool. Besides the time interval mentioned above it is probably a good
idea to poke your head in the engine room every other day or so while cruising, just to
take a look around for anything out of the ordinary (unusual stains on the engine
“diapers”, drips, signs of high water in the bilge, unusual odors particularly of the “hot”
electrical variety, etc.)
Engine Oil Levels (Main Engines):
On the main engines, the oil dipsticks are inboard on each engine. Check them with
the engines cold as you would the engine on your car, taking care not to drip oil on the
deck. Top up oil only when the level is near the bottom of the cross-hatching on the
stick. Be careful not to overfill! There should be a supply of Cummins Specification SAE
15-40W engine oil in the lazarette and possibly a working supply in the engine room
proper. The fills are at the top of each engine cover and will need an adjustable wrench
to open. A funnel is available in a box in the lazarette behind the ER access. When
finished, ensure the fill cap is snug, but do not-over tighten.
Transmission Fluid:
The Twin Disc transmission gear takes high grade SAE 40W oil (usually Chevron Delo
100) which may be found in the lazarette. This will be checked and maintained by
NWE.
For charters over a week you may be asked to check the fluid levels. This is done with
the transmissions warm and the engines running at idle. If the level is low, be careful
not to overfill (plastic fill caps are on top of each transmission above dipstick).
continued.../...
23
Preparatory to Getting Underway - Routine Engine Room Checks (continued)
Coolant Levels:
Check the coolant levels when you check the oil levels with the engines cold. Simply
sight the level of the coolant relative to the black line on the translucent plastic
expansion tanks forward of the engines, near the Racor primary fuel filters.
If the level is at or close to the black line marked on each tank, no action is necessary.
If you must top up the coolant, there is an adequate supply of Cummins pre-mixed
50/50 “ES Compleat” coolant in the lazarette or possibly forward in the ER. Unscrew or
snap off the top of the expansion tank (the coolant is not under pressure) and carefully
pour in the ES Compleat undiluted to bring the level up to or slightly above the mark.
Generally the coolant levels stay very close to the cold mark. If an engine needs
constant topping up, this could be a sign of a serious problem and should be brought
the attention of NWE.
Genset Checks:
The genset is checked the same way except that the oil dipstick is hidden behind an
access hatch in the sound box surrounding the genset. Carefully unlatch and take off
the inboard access covers and you will be able to see the dipstick.
To get better access to the dipstick, gently move the hose blocking access to it by
swinging the hose out from behind the sound cover.
If necessary, fill with the same SAE 15-40W oil as the main engines, stored in the
lazarette.
Check the coolant levels on the expansion tanks relative to the black mark on the tank
and top up if necessary with green pre-mixed 50/50 ES Compleat coolant from the
lazarette
Raw Water Strainers
Check periodically for eel grass or other debris. To clear the strainer, the relevant
seacock must be closed (engine off !). To open the strainer there is a special tool in
the handy tool kit or with the fuel fill tools under the cockpit control station. NWE will
provide a briefing if necessary at check out. Ensure that you fully open the seacock
when done, before engine start up !
24
Getting Underway when on 125/250 50A Shore Power
Covers off instruments/displays at Pilothouse and Flybridge
Power Up
At DC Service Panel:
Leave Service Select Knob at “1” (marked as "Leave on 1')
Leave “Fwd Bilge Pump”, “ER Bilge Pump”, “Laz Bilge Pump” “12V Main", "Alarm
System", “Toilets”, and “Fresh Water” switches “on”.
Turn On:
“Wipers”
“Stabilizers”
“Horn” (you may hear its compressor pressurizing the system)
“Cablemaster”
“Rudder Indicator”
“Autopilot”
“Radar”
“Furuno Plotters”
“Camera”
"ER & Lazarette LIghts"
“Furuno GP 33”
“AIS”
“Tank Gauges”
“Lower VHF”
“Upper VHF”
“Bow Thruster”
Protected Breakers: “Stbd. Engine”, “Port Engine” to the right of the DC
voltmeter
At AC Service Panel:
110V select switch will be set to “110V/220V Shore”
220V select switch will be set to “220V Shore”
“Shore Select Switch” be set at “Aft 220V” or “Fwd 220V”
25
At 110V “A” panel, turn on or leave on:
“ER Room Outlets”
“Salon Outlets”
“Galley Outlets” (2)
“PHFB Outlets”
“Dishwasher” (if use is planned underway)
“Salon Lights”
“Master Outlets”
“Guest Outlets”
“Computer”
“Microwave”
"Refrigerator 1" (salon wine cooler - as needed)
“Refrigerator 2” (Amana refrigerator/freezer)
At 110V “B” Panel:
“12V Charger”, “24V Charger” and “Inverter” switches should be on – LEAVE ON.
Turn on “Compactor”, “Disposer” as necessary. Do not turn on “Engine Heater”
or “Transfer Pump”
At 220V Panel:
“Cooktop” and “Water Heater” may be on. Leave them on as desired. “Washer”
and “Dryer” may be turned on as needed.
At 220V Aircon Panel: Generally off in the PNW. Turn on or leave on if heat or aircon is
needed underway.
110V B, 220V and 220V Aircon circuits all require 220V to be present either through the
genset or shore power. 110V A circuits may be powered by the inverter, genset or
shore power
26
Start Genset, Disconnect Shore Power:
See Genset starting instructions under “Generator/Genset” (see page 10).
With the genset running, at the AC service panel turn “110V” and “220V” select
switches simultaneously to “Port Gen”. If done smartly, you may achieve a seamless
transfer of power. Otherwise one or both meters will self-check and begin blinking (see
note below). Check 110V and 220V meters for adequate voltage.
Note: When you switch AC sources, clear the AC meters if they blink by pressing the
button at the lower right hand corner of each meter and double check for adequate
voltage
Turn off shore power at the dock. Retrieve and secure aft 50A cable with the
Cablemaster switch, stow it carefully and close the cap at the transom, or if the forward
connection was used, retrieve the cable manually and store in the starboard quarter
lazarette.
27
Navigation System Start Up
Nobeltec and Furuno Navnet vx2
The Nobeltec system is powered by a dedicated Toshiba Laptop located in the top
drawer of the chart table. The laptop is powered by 110V AC which charges the laptop
battery. Ensure “Computer” is on at the 110V A panel.
Note: The Toshiba laptop has never been connected to the internet and the only
software on it is for the Nobeltec or other PC-based navigation systems.
Do not disconnect any of the connections to it, try to connect it to the
Internet or use it for any other purpose ! Ignore ("x out") Norton Anitvirus
and Windows updates.
Always boot up Nobeltec first before the Furuno vx2 or other instruments.
Turn on the Furuno GP-33 display unit in the left center of the instrument panel
by pushing its blue power button once. The GP-33’s GPS is dedicated to the
Nobeltec system.
Turn on the laptop – lift cover, press power button on the upper left once.
The 20” NEC monitor should come on, otherwise push its power button on the
lower right of the frame; you may have to toggle input selection to see the
Windows 7 desktop.
At Windows 7 desktop double-click the “Nobeltec Time Zero” icon using the
mouse
The system will load. When prompted select “Navigation”.
Ignore all update notices from Norton Anitvirus (click “stay unprotected” when
prompted at start-up) and Windows (X out of notice).
Now turn on:
“Instrument” on the DC service panel to power up the B&G units (depth/boat
speed and wind).
AP-22 Simrad autopilot by pressing “Standby/PWR” once
Furuno Navnet vx2 chart plotters, first in the pilothouse and then on flybridge by
pressing “Power/Brill” once.
Sony Camera – screen above helm. Use input button to view either the ER or
the stern.
VHF radios – pilothouse and flybridge
Furuno Radar – If use of this radar is anticipated press the power button once
for standby; press “Stby/TX” to use
Tips on operating the Nobeltec and Navnet systems are provided in a
separate section of these notes.
28
Energize Roll Stabilizer: (always use when running)
The control unit above and to the left of the helm should power up when the engine
controls are switched on provided the “Stabilizer” breaker on the DC panel is on (the
“Lights” button will glow).
Place the unit in standby by pressing “Center” then “Bypass”
When underway and free from maneuvering, press “Active” to activate the stabiizers.
Note: ensure the fins are centered (by pressing “Center” button) before
maneuvering or backing down.
Failure to center the fins could do serious ($$) damage to the system!
Remember, slowing down to enter a harbor is a two handed job: one hand
for the throttles, one to press “Center” on the stabilizer control.
29
Electronic Engine Controls
SARAH BROOKS is equipped with Glendinning EEC 3 engine controls. The engine start
procedure should leave pilothouse controls "in command" at engine start. To move to
the flybridge or cockpit control stations (usually the flybridge to dock and undock) it is
necessary to take control if the engines at the new station.
The best way is to leave the engines in neutral, move to the new station, check that the
controls are in neutral and then press and release the "TAKE" button. The "TAKE"
button and gear lights will flash. Press and release "TAKE" again to take control.
An alternative is to slow down to idle, which has a clearly identifiable "detent" position
that is easy to detect at the new station, so that there is no sudden change in boat
speed, and take control at the new station as above.
If you forget and move to a new station without taking control, nothing will happen.
Before pressing "TAKE" twice, think where you left the throttles at the old station and
try to match up the throttle positions at the new station. As before, this is best (and
most safely) done at neutral idle.
The Glendinning controls have "SYNC" and "WARM" modes. After engine start press
the "WARM" mode button, which will light up. The throttles then may be advanced
(only if necessary) without going into forward gear. To exit "WARM" mode (in neutral)
press and release the "WARM" button once.
For safety, Glendinning strongly recommends that the system be placed in "WARM"
mode whenever the boat is docked, with engines running, to avoid putting the engines
in gear inadvertently.
"SYNC" mode synchronizes engine speed and allows both engines to be controlled by
only the right gear handle. Once at desired speed above idle, press and release the
"SYNC" button once (the "SYNC" light will come on). To disengage the "SYNC" mode
match the position of both control handles, press and release the "SYNC" button.
Placing both handles in neutral automatically disengages "SYNC" mode.
Emergency Back Up - If a control head or the primary engine control computer fails,
push the back up button in front of the pilothouse control head. This engages a back
up computer to "get home". Only the pilothouse controls will work, with no lights, no
"SYNC" etc.
30
Start Main Engines:
Ensure engine controls at pilothouse, flybridge and aft cockpit are in Neutral
Turning one or the other of engine ignition keys to the first detent will energize
the engine controls ( buttons will light up).
In the unlikely event that they fail to light up, go to the ER to locate square
boxes on the inboard side of each engine which contain "on"/"off" buttons for
starting/stopping the main engines from the engine room. There are red toggle
switches on each box. They control power to the box and also enable the
Glendinning engine controls. Ensure both red switches are in the "up" (= "on")
position.
With the "TAKE" light flashing press and release "TAKE" to take command at the
pilothouse controls
With ignition keys turned, allow the system to finish a short self-test (apparent
on each display) then start both engines; check for 650 RPM, oil pressure (psi in
the 70’s when cold), no alarms.
If desired, select "WARM" after engine start as outlined above. When ready to
use the engines, press and release the "WARM" button once to gain full control
of the engines.
The boat should be ready to get underway:
Choose which helm station to use to maneuver out of slip (usually the flybridge)
Take control at the chosen helm as outlined above.
Thoughtfully take in docklines (wait for “everyone aboard?” response)
Place rudders amidships (the rudders will be of no use until maneuvering is
done)
Maneuver with main engines only and sparing use of the bow thruster until clear
of slip and marina.
Once clear of the marina, press “Active” on stabilizer control unit
31
Note:
It is important that engine controls are in neutral when switching helm
locations to avoid an unexpected surge in the boat’s movement.
Do not go straight from being in gear in either direction without momentarily
stopping at neutral.
Let the boat’s momentum work for you and anticipate, so you only need to be
in gear for short intervals (maybe a “two count”) at a time.
Fenders:
Alongside a float there will be three ball fenders: one large at the cockpit, a small one
amidships, and a large one just aft of the start of the side rub strake. Each has a fender
hook that will not hurt the teak and makes it easy to move them from one side of the
boat to the other as they will already be at the correct height (just off the water).
These fenders are all that is needed for cruising where floating docks are common,
such as in the PNW.
If other fenders are needed “sausage” fenders and fender hooks will be found in the
Portuguese Bridge lockers, in a deck locker behind the windlass, or under the aft
cockpit hatches.
Docklines:
There are eight white braided docklines: four 50’ (ends whipped in blue) and four 35’
(ends whipped in red). They will be deployed, found stowed in the port Portuguese
Bridge locker or be found made-up and hanging on the hand rail below the pilothouse
windows or on the sides of the cockpit ladder.
This allows for a bow and a stern line and two springs on both sides of the boat. For
more leverage at the stern, consider using a 50’ line run from the float to the outboard
transom chock at an angle that provides a fairlead and doesn’t impinge on the “staple”
on the swim platform or on the transom itself.
32
Running SARAH BROOKS Underway
Important Note:
The most important task in running any cruising yacht in the PNW is to stay
alert for logs, deadheads and other large debris.
This needs two sets of eyes at times. If the helmsman needs to study the
chart to set a waypoint or access AIS data, etc., there must be another
member of the crew looking out for debris.
Be particularly attentive around tide rips and points where current eddies
develop. The debris can come on you suddenly. If this happens, if on
autopilot go quickly to manual steering (see "AP 22 Autopilot" p. 36), slow
down, engines to neutral, and center the stabilizers.
Activate Roll Stabilizers:
When you have finished maneuvering the boat after leaving a marina or anchorage,
remember to activate the Roll Stabilizers by pressing “Active” on the control panel.
The default setting for stabilizer sensitivity is the 11 o’clock position. In following seas
increase the roll angle to a level that seems optimal. For most of the protected waters
of the PNW (exceptions include the Strait of Georgia, down sea) the default position will
suffice.
33
Tips for Using the Navigation System
Note:
The Operating Manual is based on an assumption that a skipper deemed to be qualified
by NWE to bareboat charter SARAH BROOKS will have substantial knowledge of
operating semi-displacement motor yachts, coastal piloting, VHF radio practice, using a
range of navionics systems, etc. The tips below reflect this assumption.
Nobeltec Trident
The Nobeltec Trident system is very powerful, fast to call up information, set and adjust
waypoints, etc. There is a bound Operator’s Manual available at the chart table which
you should review. It is a comprehensive manual. Some functionality described (such
as radar overlay) is not active on the Trident screen on SARAH BROOKS.
When Trident is booted up you should see a chart with two boxes of data displayed.
Along the right margin is the Navigation Pane, accessed if it doesn’t appear by clicking
on “Navigation” on the right margin. This shows tide state, current, bearing to
waypoint (if selected) COG, SOG, distance to waypoint, time to go to waypoint and
ship’s position, and is a critical asset for using the Trident system.
Also on display is the “Cursor Information” box. When you use the mouse to move the
cursor (a white glove icon for some reason) you can see bearing and range to the
cursor. This is handy for getting a quick course to steer manually and for orienting
yourself in unfamiliar harbors, etc.
Waypoints - It is okay to pilot the boat by setting an active waypoint and then adjusting
it or replacing it as necessary, rather than using a route. Simply run the cursor to the
desired waypoint position, right click and select “Go To”. To deactivate a waypoint,
right click on the track line to it and select “End Navigation”. In Nav ("N") mode on the
autopilot if you get off track to a waypoint (perhaps while avoiding driftwood), right
click the track and left click "Restart Navigation" (see "AP22 Autopilot", p. 36).
Tide Graphs- When preparing to anchor, etc., access a local tide graph by right clicking
on the chart to select “Tide Graph”. This is very handy for determining tidal depth
ranges (and desired scope) while anchoring.
Scrolling the Chart/Changing Scale-You will never need to access/use the keyboard on
the computer. Learn to point, click and hold the mouse to use the cursor to scroll and
drag the chart around. Use the roller on the mouse to change scale. To center the boat
continued .../....
34
Tips for Using the Navigation System (continued)
on the chart, go to the toolbar on the left of the chart and click on the top tool, which
centers the vessel icon on the chart.
Ribbons Bar – Point and click on icons on the ribbons bar at the top of the chart to
select Chart Orientation (default is North Up), and the type of chart.
SARAH BROOKS has both Vector and Raster charts for the entire cruising ground (both
US and Canada). Use the chart icon on the ribbons bar to select vector or raster charts
(see p. 9 of the Nobeltec Manual). Vector charts provide better clarity and zooming, but
Raster (NOAA/CHO) charts can also be helpful.
AIS: SARAH BROOKS has AIS B installed. On the Nobeltec Trident you will be able to
see icons showing position, COG and speed of AIS-equipped vessels around you and
they will see the same data from SARAH BROOKS on their displays. This is particularly
helpful in crossing situations with large commercial vessels, particularly in reduced
visibility.
If the AIS shows a Closest Point of Approach ("CPA") graphic, center the cursor on it to
see range, bearing and time to CPA. Right click on the target icon to get other
“properties” data.
Important Note: The Nobeltec Trident will be your primary tool for
navigation. Please do not customize the Trident display if at all possible.
If you must, ensure that you return it to the default settings you found at
start up.
35
Furuno vx2
There are Furuno Model GD-1920C Navnet vx2 chartpotters in the pilothouse and on
the flybridge to back up the Trident system and provide navigation information on the
flybridge. The pilothouse unit is the master. Start it up first. They display AIS data on
the chart and you can select the sounder display for depth information. They are
loaded with C Map Max Sea cartography for the entire cruising ground. Default heading
is "North Up".
The vx2 has a good 4 kW radar which provides an overlay with the chartplotter display
and is a handy adjunct to the powerful stand-alone Furuno radar.
The vx2 is a widely-used system, and many skippers will be familiar with its use, as will
the NWE check out captain. There is an operating manual available at the chart table.
GPS Source Switch The Trident and Furuno systems each have GPS inputs. The Trident gets position data
from the GP-33 GPS unit. A GPS source switch behind the DC service panel is set by
default in the forward position ("Trident/GP-33"). If necessary, it can be switched to
the aft position, ("Furuno") if the primary system fails, but otherwise should not be
touched.
36
AP 22 Autopilot
Press “STBY/PWR” once to turn the unit on. It will start in “S” (standby) mode,
showing ship’s heading. This is a useful electronic compass and is much more accurate
than the boat’s magnetic compasses.
Once you have decided on a course (eyeball, cursor bearing or course to steer (CTS) to
a waypoint), select “Auto”.
An ”A” will appear with the course you have selected and you can change course by
turning the knob left or right in moderate increments. To manually steer (for example
to avoid logs or crab pots, etc.) you must press “STBY”. Turning the wheel in “A” mode
will do nothing.
Nav ("N") Mode: When a waypoint is selected in either the Trident or Furuno systems
**, you can press “Nav” to have the selected system direct the autopilot (best used on
long legs, say in open water, as the system corrects slowly against cross track error).
In “N” mode the unit will first advise how much of a course correction is needed to
follow the track line. Under 5 degrees, press “N” again and the boat will follow the
course line as the autopilot manages cross track error.
If the course correction is too great, press “S” and manually turn the boat to the CTS.
You may also have to restart the route. With the Trident mouse, right click on the
displayed track and select (left click) “Restart Navigation”. This, combined with the
heading correction, should enable an acceptable course change when you select “Nav”
mode again.
Important Autopilot Notes:
** Just above the AP-22 autopilot control is a toggle switch labeled "AP Nav
Mode Source". This selects which of the two navionics systems will supply
waypoint data to the autopilot in Nav Mode. The default selection is Trident
(Nobeltec), or you can select Furuno, for example if you wish to navigate using
Nav Mode from the flybridge. Changing sources is not necessary in "Auto" Mode.
The fluxgate compass that drives the autopilot is located under the
corner (starboard forward) of the queen bed in the VIP cabin. Please
ensure that no metal is placed in either of the two drawers located
there or within three feet of the compass.
37
Furuno Radar
The independent Furuno Radar Model FR-7062/7112/7252 in the pilothouse is a
powerful unit 6kW unit. After powering up the boat it should be in standby. Press
“Standby/TX” to activate. The various functions and adjustments are straightforward
and an operating manual may be found in the file cabinet under the pilothouse settee.
The default heading setting is “North Up”, which protects a target's relative position as
the boat's heading varies.
A useful tool is “Echo Trail”, which can be selected on the radar's control panel. It
provides a quick and easy relative bearing line as a target advances to help eyeball the
target's CPA (helpful if it isn't broadcasting AIS). As noted above, the “North Up” setting
must be selected to provide useful echo trail information as the boat’s heading will be
shifting and will change the relative position of the target if in “Heading or Course Up”
mode.
Wind, Depth, Boat Speed
Use of the other navigation instruments should be intuitive. The B and G displays can
be manipulated to provide a wide array of data, including True and Apparent Wind
speed and angle, Depth (in feet), etc.
Notes:
The B & G depth display is calibrated to show water depth, not depth
below the keel. SARAH BROOKS’ draft is 5 feet. (i.e. if the depth
display shows 5 feet you are likely to feel a bump !)
Periodically you will notice a sudden very shallow depth reading (4-10
feet) when you know the depth is much greater. This is a random
occurrence which may occur when maneuvering to a dock, backing,
and in areas where the water depths are very deep, a common
occurrence in the PNW. The depth transducer may be getting a false
reading from prop wash, fish (or maybe a whale!), or simply not be
strong enough to read great depths. Use common sense and trust your
instincts and the chart!
38
Cruising Speed
Once clear of the harbor, as the engines warm up, come up to cruising speed.
Like all Fleming 55s, SARAH BROOKS is set up to cruise at 10-11 kts. indicated. This is
reached at an RPM of 1480 to 1500. Often there will be no discernible change in speed
at 1480 vs. 1500 RPM, but the fuel burn drops meaningfully.
This is an efficient, optimal speed. The engines burn about 5 gph each (total ~10gph).
You should cruise at this speed, or perhaps in a range of 8-10 kts. indicated.
This of course means that with foul or fair current, SOG could be higher or lower than
indicated boat speed. It is somewhat futile to increase RPM incrementally to maintain
an SOG of 10 kts. with a foul current. Significant changes in RPM above 1500 will net a
very small increase in SOG, but increase the fuel burn substantially.
It is possible to reach a boat speed of 17 kts., "High Cruise", but not in incremental
steps. If it is absolutely necessary to do this (getting out ahead of bad weather,
etc.), set the RPM at 2420 and lower the trim tabs fully. (You will need to turn on
“Trim Tabs” and “Trimdicators” on the DC panel, as they are used so rarely). Do not
bother with interim settings on the trim tabs.
After a bit, the bow will come down and the boat will reach 17-18 kts. indicated.
This is very inefficient, with fuel burn increasing to 45-50 gph.
Do not choose “High Cruise” as your cruising speed, even if you are
indifferent to the fuel cost. Hitting a deadhead or a rock at this speed in a
80,000 lb. boat will really ruin your day, NWE’s and the owners'!
Engine Instruments – Typical Readings
The ECM displays for the main engines are pre-set to show RPM and key engine data.
At cruising speed (1490 RPM) expect engine coolant temperatures to be stable at 159160 degrees, oil pressure at about 50 psi; system voltage will vary but be approximately
26-27V DC. Engine Load will be 25-27% and total fuel burn (both engines) will be
~10.0 GPH. The starboard engine tends to have a slightly higher load and higher fuel
burn as it is driving the power take off for the stabilizers. Note also that, if used, the
Kabola furnace burns a small amount of fuel from the starboard forward tank.
39
Engine Room Checks Underway
It is a good idea to check the engine room underway, preferably every other day or on
long transits just to check for problems with the machinery running.
“ER Lights” will be on at the AC panel, and you may wish to turn on “ER and Lazarette
Lights” on the DC Panel as well.
Be sure to wear the noise attenuators hanging on the hook at the port water
tank. Move around the ER carefully, with attention to loose clothing that
might catch a moving part.
As you scan the ER, look for unusual oil spots on “oilsorbs” under the engine and
running gear, leaks, “hot” smell etc.
The shaft aft of the Aqua Drive units feeds directly through a traditional shaft log which
has been adjusted to lubricate itself by dripping seawater at a controlled rate. Don’t be
alarmed if the “oilsorbs” under the shaft logs are wet and dirty.
Check the Racor primary fuel filters forward of the main engines. The vacuum gauges
on each Racor should read under 11” or so, plainly marked on the gauge.
Below the Racors, check to see if the water level is below the top of the sump. This is
serviced by a large manual bilge pump accessible at and worked from the
accommodation stairs. Check and pump this periodically (water slowly accumulates
from the shaft log).
When you leave the ER always securely close the door so that the Fireboy
system will work (no oxygen to the ER); an open door defeats this!
Pilothouse TV Camera
The Sony TV above the helm has an “input” button to monitor the engine room both
visually and, with volume up, by ear, or to provide a view to the stern when needed. It
should be left set to the ER view while in transit. The “Camera" breaker on the DC
panel and power button should be on. Turn on "ER & Lazarette Lights" on the DC
service panel to provide light for the camera. They are LEDs and provide enough light
for the camera without having to use the "ER Lights" on the AC panel.
40
Spending Time at Anchor
One of the joys of cruising in SARAH BROOKS is the ability to seek out a serene cove
and lie at anchor, overnight or for day stops.
Upon entering the harbor or anchorage: Ensure the stabilizers are centered by pressing
"Center" on the pilothouse control.
Anchoring
SARAH BROOKS is equipped with a Lofrans Falkon 1500W 24V DC anchor windlass set
up to handle a 77 lb. Ultra spade anchor and Hi-Tensile 3/8” chain.
When selecting a spot to drop the hook, consider
Water depth at the highest end of the tide cycle while anchored (include 5’ extra
for the height of the bow roller off the water: "total depth"). This is important
because the tidal ranges in the PNW can be very large. The depth sounder and
the tide graph on the Trident (right click on the chart and select “Tide Graph”)
may be used for this purpose. Total chain to the bitter end is 375'. With a 25'
reserve, the deepest anchorage at 5 to 1 scope would be about 70', or about 85'
at 4 to 1 at high tide.
The amount of scope needed (not less than 4 to 1 on total depth, more in higher
than moderate winds, stormy conditions or open roadsteads)
The swing radius that will result. You will want to ensure that you will not get
too close to other boats at the low tide swinging radius or that the boat cannot
swing into a rock ledge or shallows.
Lowering and setting the anchor
To lower the anchor, connect the windlass control cord (found in the lower drawer by
the port wing door) to the receptacle under the windlass.
Note 1: the double prongs on the connector go on the bottom.
Note 2: There are also up/down switches for the windlass in the pilot house and on the
flybridge, but the view is best from the bow, especially for raising the anchor.
continued.../...
41
Anchoring (continued)
Turn on the windlass breaker, located toward the bottom of the small control panel at
the far left of the pilothouse. Ensure that the genset and the main engines are
running.
Remove the chain stopper from the chain and stow it. To the right of the windlass
brake (the brake control looks like a small steering wheel), is the capstan flywheel.
Check that the flywheel is tight using the long, flat-ended tool in the starboard bow
locker. Insert it in the slots on the flywheel. Pushing forward on the tool (clockwise on
the flywheel) will tighten it ( don't overdo it). Now loosen the brake, not the fly wheel,
so that it will let the windlass run using the windlass control. ** ( see Note 2, next
page)
When at the desired anchoring spot, lower the anchor using the windlass control. The
Ultra anchor is designed to deploy itself. Let the helmsman know when there is
sufficient chain out for the anchor to be on the bottom. The helmsman should then
slowly back down in short (“two count”) reverse bursts at idle while chain is laid out on
the bottom to the desired scope.
The anchor chain is painted every 25’ up to 275’ following a guide found on the
underside of the starboard bow locker hatch cover, and in the left-hand drop down
access panel in the fascia over the pilothouse instruments.
NOTE: For PNW service, 75’ of chain was added, for 375' total. The chain is all red
from 275 to 300’, then unpainted for 50’. The last 25’ is painted with red/yellow
stripes.
When the desired amount of chain is out to the waterline, tighten the brake. The
helmsman should then “set the hook” with a final short reverse of the engines. The
Ultra is quick to set and there should be no doubt that it has when the chain straightens
out and reverse motion stops abruptly.
continued.../....
42
Anchoring (continued)
Setting the chain hook bridle (Ideally with two people).
Having ensured that you are anchored as desired, attach the chain hook (found in the
port bow locker). The chain hook is fitted with two stout lines to form a bridle. Take
one of the lines and run it outboard of the gunwale and railings up through the
starboard hawse hole and make it fast on the large deck cleat, leaving some slack.
Reaching over the bow roller to starboard, attach the hook to the chain while your
helper takes a strain on the line so that the hook stays put. Now pass the other line
from the hook so that there is a fairlead under the bow roller and run it outboard up
through the port hawse hole. Make it fast to the large deck cleat to port.
Loosen the windlass brake. Use the windlass control to pay out chain while taking a
strain on both bridle lines until the chain hook is about 2-3 feet off the water. Make the
bridle lines snug and tie each off so that the chain hook is centered on the bow. Let
out another foot of chain so the boat rides to the bridle. Retighten the brake. Fitting
the chain hook takes the strain off the windlass, increases the effective scope and
reduces chain noise overnight.
Note 1: Always have at least one bridle line attached to the boat to ensure you don't
lose the entire bridle over the side, as the chain hook tends to fall off the chain at
awkward moments !!
** Note 2: In an emergency it is possible to lower the anchor rapidly by loosening the
brake and, using the long, flat-ended tool, release the capstan flywheel by pulling the
tool towards you until the anchor starts to fall. To control the fall, push forward on the
tool to tighten the fly wheel and to slow or stop the chain.
Note 3: When lowering the anchor, the chain may occasionally jam below the chain
pipe because the chain has shifted about and won’t pay out smoothly. Should this
happen, for safety secure the flywheel and the windlass brake, secure the
chain forward of the gypsy with the chain stopper and temporarily turn off
the windlass breaker in the pilothouse. Then carefully shake and tug on the
chain where it comes up out of the chain pipe below the gypsy. This should shift the
pile of chain enough for the chain to run free. There should be a pair of heavy gloves in
one of the bow lockers to help with this process.
If that fails, it may be necessary to open the chain locker accessible through the deck
hatch aft of the windlass. Use a socket wrench to undo all the bolts on the metal plate
covering the chain locker to get full access to the chain and free it. Avoid losing the
bolts and be sure to securely replace the cover when done.
43
Anchoring (continued)
Weighing anchor
Connect the washdown hose stowed in the starboard bow locker to the saltwater tap
and turn on “Salt Water Pump” on the DC panel.
Start the genset, move the "110V select" and "220V select" knobs to "Port
Gen" and start the main engines. Connect the windlass control switch, loosen the
windlass brake and raise enough chain to gain access to the chain hook with a boat
hook. Shake or tap the chain hook free and stow it. If the hook resists being detached
from the chain, raise it further and carefully free it by hand. Always keep at least one of
the bridle lines cleated while doing this.
Using the main engines in short bursts, advance on the chain, turning left or right with
the engines as guided by the bow hand so that the windlass can easily raise the chain.
Never pull the boat forward using the windlass!!
Use the salt water wash down to clean the chain as it comes up, and then the anchor.
A boat hook may be needed to loosen mud on the anchor flukes. The Ultra anchor will
position itself automatically (and miraculously) on the bow roller, just as advertised.
Carefully pull it into place with the windlass, taking care not to jam it home.
When set in place on its cradle, fit the chain stopper on a chain link and tie it snugly to
the cleat on the windlass, stow all tools and kill the windlass breaker in the pilothouse.
44
Power Management While at Anchor
Managing the electrical system to ensure there is sufficient power available is one of the
most important tasks while cruising. Everything depends on the right kind and amount
of power, from the navigation system, to cooking, to lighting, to flushing toilets, to
using fresh water and to being entertained once you’ve had your shower and settled
down with a “cool one” at anchor, in quiet, miles from the nearest shore power cord.
Having carefully anchored, with the windlass secured and shut down, secure the main
engines with the red "kill" buttons; turn off the keys.
Switching to the Inverter for AC Power
When desired, secure the genset (see p. 11) and switch to the inverter for AC power by
turning the "110V Select" knob on the AC service panel from "Port Gen" to "Inv". The
inverter will begin creating 110V AC power from the House Bank. This will supply
power to the "110 A" circuits, such as "Refrigerator 2" (Amana), microwave (short
uses), 110V outlets, computer, wall sconces and the table lamp in the salon and
pilothouse, but not to the "110V B" or 220V circuits.
(Aah! Peace and Quiet)
Monitoring the House Bank:
The House Bank is the source of 24 DC power to run the inverter and serve the "110A"
AC circuits. It also provides 24V and 12V (via a converter) power for a wide variety of
other circuits for lighting, navigation, radios, bilge pumps, toilets, fresh water, stereo,
SAT TV, etc.
The House Bank is charged when underway by the Outback inverter/charger if the
genset is running, or by the main engine alternators if it isn't. At anchor, without AC
power from the genset, the House Bank will slowly discharge. Therefore, while cruising
away from shore power in SARAH BROOKS, it is very important to stay aware of the
state of charge of the House Bank.
The House Bank state of charge ("SOC") is monitored at the pilothouse with DC voltage
level and/or data from the continuously scrolling pages on the Outback MATE display
just above the AC service panel.
continued.../...
45
Power Management While at Anchor (continued)
MATE Scrolling Display
First Page: Provides an "E to F" graphic presentation, State of Charge (SOC) in percent
and whether the House Bank is charging or discharging.
Second Page: "DC NOW" - provides DC voltage levels, SOC in percent and Amps in
(charging) or Amps out (discharging) in real time.
Third Page: "DC TODAY" (since midnight) - provides the minimum SOC during the day
and cumulative Amps In/Out
Fourth Page: "FX TOTAL" monitors multiple systems (may be ignored)
Fifth Page: "DC BAT" - provides voltage level, SOC in percent and the net AH below
900 AH (full charge). This is a useful page to monitor, along with first page, as it
indicates precisely the cumulative AH that has been consumed (see below).
Understanding the MATE Data
SOC in percent - The House Bank is rated at 900 AH @ 24V DC when fully charged,
but only 50% of that (450 AH) is available to power DC circuits and the inverter. This
means that the SOC percentage cannot be allowed to drop below 50%, and in practice
the House Bank should be re-charged well before reaching that level.
The "E to F" graphic on the first scrolling page is a handy way to monitor SOC.
Cumulative AH Used - The "DC BAT" page shows the cumulative Amp hours (AH) used
during discharge ("Net AH"), a precise way of measuring remaining power available.
For example at an SOC of 75%, Net AH will read "-225 AH", indicating that 50% of the
available 450 AH has been used.
In addition to the precise cumulative Net AH and "E to F" gauge, voltage level can be
used as a proxy for the state of charge of the House Bank. Over time, while using the
inverter, the voltage level will slowly drop and, if allowed, eventually approach 24.0 V.
If the level gets to 23.5V (22.5V is considered fully-discharged) there will be an alarm.
continued.../...
46
Power Management While at Anchor (continued)
Note:
The DC voltage level on the MATE display may differ by up to 0.50 volts from the
meter on the DC Service Panel. This is normal.
When the House Bank is fully-charged (at "float" status) the MATE page one will
usually show a filled-in "E to F" graphic, SOC of 100% and "Battery Charging".
However the Outback is programmed at float status to let the SOC cycle between
97% and 100% and the display may, as a result, temporarily indicate "Battery
Discharging", even though AC power is present. This is normal, as the House
Bank is effectively at full charge in this range.
As the House Bank is charged after meaningful discharge, voltage levels will
build possibly to the programmed maximum of 29.2 V. "BAT NOW" will show
about 28.4-29.0 V and SOC will flash as it reaches 100%. Charging is then at
"absorption" stage and voltage will slowly drop to 26.90-27.10 V at float status.
The House Bank's rate of discharge will depend on how many lights and other
power consumers are in use. With prudent consumption a fully-charged House
Bank may go 24 hours before reaching the 50% SOC threshold (Net AH at
-450AH).
A typical overnight at anchor with the genset secured might start with SOC at
100% in the late afternoon, discharging to 85-88% by bedtime and down to
about 75% by breakfast.
Of course use of the genset (to cook or do laundry) would mean less discharge,
as some power would be available to charge the House Bank. As described
above, at 75% SOC you will have used only half of the available AH from a
fully-charged House Bank.
continued.../...
47
Power Management While at Anchor (continued)
So, in practice the cruiser should be easily be able to run on the House Bank/inverter
for sufficient time to have a quiet afternoon, evening and overnight at anchor without
needing to fire the genset, depending on the SOC at anchoring.
Nevertheless, amperage (and voltage) awareness is important. Despite the efficiency
of LED lighting, you cannot afford to leave every light on around the boat. Get in the
habit of turning out any lights and other power consumers that are not actively in use.
Some skippers leave navigation systems on 24/7, including AIS and radar. This eats
power (and lets people know where you are!). Secure the navigation systems unless it
is necessary to have them on for some reason at anchor.
If you've been at anchor for most of the day, you might consider running the genset
for a while after cooking dinner to charge up the House Bank a bit.
Overnight, at anchor, the only lights on should be the anchor light and task lights (for
example in the head). The remaining power need will be to run the refrigerator and
the drinks cooler, 110V outlets and provide standby power to the SAT TV and the
computer.
In the morning, once the crew is awake, starting the genset (perhaps to make
breakfast?) is a good habit, as the House Bank will be at its lowest state of charge
after the overnight. If you plan to stay at anchor for a while you might leave the genset
running to get the House Bank back towards "Float" status. With SOC at 75% (Net AH
at -225), it will take at least 3.5 hours to bring the House Bank SOC to 100%.
Keeping the House Bank sufficiently charged while you enjoy time away from marinas
may seem a daunting task at first. After a few days of paying attention, running the
genset while underway or for charging when necessary, it will become second nature,
and while very important, not something to obsess over.
48
Tender
Launching, Using, Recovering
SARAH BROOKS is equipped with a 12 foot Nautica RIB with a 40 hp Yamaha EFI 4stroke engine. The tender is launched and recovered with a Nautical Structures 24 volt
davit.
The tender may be found with its cover on, secured by bungee cords. It should have a
nearly full internal gas tank. The battery and electrical system should have been
switched off and the transom drain plug loosened to drain any water that may have
accumulated in the bilge.
Launching:
Before proceeding:
Ensure that the genset is running or the boat is on shore power, and
Ensure that the drain plug in the transom is carefully screwed in handtight. This is best done by reaching up from the cockpit. If you find the drain
plug is in place, loosen/remove it to drain any accumulated rainwater and retighten it. Also check the bilge below the seat for water and cycle the bilge pump
if necessary.
Remove the cover if necessary and stow it carefully on the flybridge. Also secure the
bungee cords so that they won’t end up over the side.
Plug in the pistol grip control cable stored in the lower drawer at the far left of the
pilothouse. You will also find the tender’s ignition key there on a white floatie.
Turn on the davit breaker located next to the anchor windlass breaker towards the
bottom of the small electrical panel on the left of the pilothouse.
If the davit cable is not already connected to the tender’s lifting bridle, pay out a small
amount of cable, just enough to unhook the cable and end-weight from the deck pad
eye.
Note: To avoid fouling and possibly damaging the cable, it is very important to keep a
load on the cable at all times. The end-weight exists for this purpose. If during the
launch/recovery/stowing process the end-weight is lying on the deck with the cable
loose, have a helper take a strain on the cable as you run the davit.
49
Tender
Launching, Using, Recovering (continued)
Carefully lift up the crane (made pretty easy by gas-shocks) until there is a black line
showing on its support strut and a green tape mark is visible on the side of the base. If
you raise it too high you will see a red mark become visible. At the proper angle run
the support pin stowed nearby through a hole in the strut, carefully securing it.
There are other possible settings on the crane but the marks will guide you to set the
crane at an angle high enough for the tender to clear its chocks and the edge of the
boat deck when launched and to slip easily into the proper position on its chocks when
stowed.
Swing the crane over the tender and lower the cable until it can be clipped onto the
three point lifting bridle. Slowly take up slack on the cable to check that the bridle has
a fairlead around the instrument panel ( but inside the handhold structure) and that its
carabiner hooks are not hung up.
Disconnect the bow tie-down cables and loosen the tie down straps at the stern.
Take a strain on the cable with the davit control and raise the tender so that the red
mark near the end-weight is just below the end of the crane, taking care not to jam it
up into the roller. Twist the bow of the tender to port and carefully swing the crane out
to a right angle to the boat deck and swing the tender until it is facing aft, parallel to
the boat.
Passing the painter and other lines to a helper below, lower the tender into the water,
double-checking that the drain plug is in!
Be careful when working outboard of the tender and davit, and in particular don’t
assume that the crane is secured. If grabbed it could swing out over the water and
leave you hanging ! With the tender in the water lower the cable to unhook the bridle
and raise the cable back up and connect it to the deck pad eye and take a slight strain
on it to the secure the crane in the “up” position. Turn on the tender's battery ( switch
is behind the access panel on the port side of the console).
Using the switch on the end of the throttle, lower the engine fully. The tender is now
ready for use.
continued.../....
50
Tender
Launching, Using, Recovering (continued)
Note that the tender is equipped with a VHF radio, electric bilge pump, fuel gauge,
anchor and a boarding ladder stowed under the seat. The manual bilge pump switch
should be set to "off" (bottom position). If needed, double check to see that it is off
when done (it is quiet!). Under the seat will be a foot pump and hose for topping up the
pontoons and a dry bag with equipment required by NWE. There is a flashlight in the
compartment on the aft end of the center console at the deck.
Be sure to take a sufficient number of the blue and yellow Type III vests found in each
cabin.
Raising and Stowing the Tender
Bring the tender alongside and facing aft. Again, with the genset running or on shore
power, unhook the davit cable from the deck pad eye and lower it to the bridle, again
checking for a fairlead after taking a strain on the bridle.
Raise the engine fully and turn off the radio, bilge pump and battery switch.
Raise the tender so that the red mark above the end-weight is just below the roller as
before and carefully swing the tender around over its chocks.
Lower the tender to the chocks, lining up marks on the boat with the after chock and
red tape on the nearby stanchions. This will ensure the tender is properly positioned
fore and aft.
Secure the bow tie-down cables, replace and tighten the aft tie-down straps. Remove
the control cable (replace the cap on the crane), stow it in the pilothouse and turn off
the davit breaker when done.
Remember to open the transom plug to drain any accumulated water. Leave
it open. Spare plugs are in the tender dry bag and/or in the pilothouse "crap" drawer.
During the cruise it is okay to leave the crane connected to the bridle to make it easier
to launch the next time, but disconnect it if you wish and secure the cable and endweight on the deck pad eye. Either way do not overly tighten the cable, just bring it up
snug so that the crane doesn’t swing easily.
continued.../...
51
Tender
Launching, Using, Recovering (continued)
Important Note:
Never hook the davit cable to any part of the boat except the deck pad eye !
(i.e do not hook it to the stainless railings !)
Safety Considerations
It is very important that helpers do not stand under the tender as it is raised
and lowered. If you must stop the process do so either when the tender is at
the level of the boat deck or the main deck, not in between when it could
swing into a salon window or hurt a member of the crew.
52
Safety Equipment
SARAH BROOKS has a full complement of safety gear and is inspected each year by the
USCG Auxiliary for compliance with regulations for vessels its size.
For charter service there are six Type I adult PFDs, several Type II adult general
PFDs, located under the flybridge settees, and two Type III blue/yellow West
Marine vests for each cabin, plus two extras, per NWE requirements.
There is a circular life ring on the port side aft with a weighted throwing line.
There is also a Lifesling in a hard case on the port side of the flybridge.
The boat has a fully-stocked ditch bag under the FB helm seat with appropriate
flares, a Pains Wessex 406 GPS EPIRB registered to the boat with NWE in the
calling tree. The ditch bag also contains a handheld GPS, sun reflecting signal
devices, emergency “space blankets”, chemical light sticks, lung-powered signal
horn, sun cream, small First Aid Kit, waterproof flashlight with extra batteries,
Swiss Army knife, matches, etc. It does not have a handheld VHF or water. Take
the portable VHF from the pilothouse.
There are small LED flashlights in every cabin, large Mag lights in custom
brackets in the pilothouse, at the accommodation companionway, and in the
salon, and two flashlights certified for use in the ER.
There is a six person Switlik liferaft, which if necessary can deploy automatically.
A fully-stocked Marine First Aid Kit can be found in the Master head.
SARAH BROOKS is equipped with First Alert combination carbon
monoxide/smoke detectors in the salon and in the companionway to the
accommodation spaces. They are connected wirelessly and if one is triggered
both will sound off with a loud warning.
Safety Consideration
Do not swim under the boat. Take particular care around the stabilizer fins, as they are
protected by sharp kelp-cutters. There are "FIN" markings on both sides of the boat.
The kelp cutters are just forward of the fins.
53
Returning to a Marina with 125/250 50A Shore Power
Approaching Marina:
Ensure stabilizers are centered in standby (by pressing “Center”) !!
Note:
Entering a slip or dock space, try to position the boat so that the power access is no
further forward than amidships, as the Cablemaster pays out from the starboard side of
the transom. If this is not possible use the spare 50A cord, manually connecting it to
the forward 50A connection.
When secure at the dock:
Engines to neutral. Secure engines with red “kill” buttons; turn off keys. Leave
genset running until connected to shore power.
Connecting to shore Power (125/250V 50A):
Pay out aft shore power cord using the Cablemaster, or set up the spare 50A cord if
using the bow connection. Ensure the dock shore power breaker is off, plug in the dock
end of the cord, and then turn on the dock breaker.
At AC Service Panel:
Check LED indicators to see if AC shore power is present. If using the aft power
cable, the “Shore Select” switch should be set at “Aft 220V”. If using the spare
50A cord at the bow connection, "Shore Select" should be set to "Fwd 220".
Turn the 110V Select knob to “110V/220V Shore” and 220V Select knob to "220V
Shore" simultaneously.
Double check the meters for adequate voltage. You may have to press the
button on the lower right corner of the meter to cycle to a voltage reading from
Hz or Amps.
At Genset Panel:
After a few moments for cool down, kill the genset by holding the toggle switch
down at “stop”, until the green “Run” LED goes out.
54
Returning to a Marina with 125/250 50A Shore Power (continued)
Note:
If only 125V 30A AC power is available see "Marinas Without 125/250 50A
Power Available" on page 8.
Ensure all bilge pumps switches on the genset panel remain at “Auto”.
De-Power Instruments:
Roll Stabilizers – press and hold “Center” button to shut down
Nobeltec Trident: right click on “Nobeltec Time Zero” icon on lower task bar,
then left click “Close Window”
Turn off Toshiba laptop: left click “Windows” logo on far left of lower task bar
and select “Shutdown”
Press/hold power on GP 33 and the autopilot to power each off
Furuno Navnet Units – press and hold “Power/Brill” button on each unit to power
off
Furuno Radar – power off by simultaneously pressing and holding “Power” and
“Standby/TX” buttons
At DC Service Panel:
Turn
Off:
Protected Breakers: “Stbd. Engine”, “Port Engine”
“ER & Laz Lights”
“Nav Lights” (if used)
“Wipers”
“Stabilizers”
“Horn”
“Rudder Indicator”
“Autopilot”
“Radar”
“Furuno Plotters”
“Fishfinder”
“Camera”
continued.../....
55
Returning to a Marina with 125/250 50A Shore Power (continued)
“Furuno GP 33”
“AIS”
“Tank Gauges”
“Instrument”
“Lower VHF”
“Upper VHF’
“Bow Thruster’
Power Settings While at Marina:
On DC Service Panel:
After securing circuits used to run the boat as above, select DC service as needed, such
as “Master Stateroom”, “Salon Lights” (port an starboard), “Toilets”, Fresh Water
Pump”, "Furnace" etc. "Salon Refrigerator" should remain "off"cv as it is powered on
the AC service panel: "Refrigerator 1".
Ensure that “ER”, “Fwd” and “Laz” bilge pump breakers are on and that bilge
pump rocker switches at gensets panel are at “Auto”. Ensure that "Alarm
System" breaker is "on".
On AC Service Panel:
110V “A” Panel:
Select circuits as needed, but ensure that “Refrigerator 2” (Amana),
"Refrigerator 1" (if using the wine cooler), “Computer”, “Engine Room Outlets”
and “Salon Outlets” breakers are on.
Note that the only 110V lights on the boat are the wall sconces throughout, the table
lamp in the salon, and the AC engine room lights.
110V “B” Panel:
Select service as needed, but ensure that “12V Charger”, “24V Charger”, and
“Inverter” switches are on.
220V and 220V Aircon Panels:
Select Service as needed (start genset if on 125V 30A power - see p. 9)
56
Returning to a Marina with 125/250 50A Shore Power (continued)
Before Leaving Boat for an extended period:
Turn off Kabola furnace
Cover all instruments with their plastic covers (found in the pilothouse locker aft
of the starboard wing door) re-cover flybridge instrument panel and secure
carefully.
All engine controls to neutral; keys in ignition
Lock pilothouse wing doors
Lock Flybridge access from inside with deadbolts
Slide overhead hatch all the way aft, secure with deadbolts
Note; the rubber insulation strip at the hatch may be loose. Ensure it is in proper
position, enabling the hatch to be fully-closed and sealed
Check interior and turn off lights; lock salon door, key to marina office (or other
safe place)
57
GALLEY NOTES AND SUGGESTIONS
Manuals for almost all of the appliances are in a big translucent plastic file in the
second cabinet to the right from the refrigerator.
MICROWAVE/CONVECTION OVEN
Turn on "Microwave" breaker at 110 V A section of the AC service panel.
Important Note:
Although the microwave may be run for short periods of time (warming
a cup of coffee) by AC power from the inverter, the convection oven
cannot. Either have shore power present or run a genset for any
meaningful cooking or extended use of the microwave as they draw
heavily on the House bank.
Note: Every time the electrical source is interrupted, the microwave clock needs
to be reset before the microwave or convection oven will work. Press CLEAR,
CLOCK, insert current time, then CLOCK, as labeled on the unit.
The microwave works like most. Set time, then power level required, then Start.
Do not use anything metallic when microwaving. Both sets of round plastic
bowls, with and without lids, are microwave safe.
The convection oven is more complicated for someone who is not used to using
one. The very helpful manual explains the “how tos” of many options, with
specific directions for specific foods. Convection ovens bake like standard ovens
but a slightly lower temperature is recommended for cooking anything that takes
more than 20 minutes or so.
Check early for doneness. The round metal racks, located behind the cooktop,
must be used for adequate air circulation. They can be stacked to accommodate
two layers. The turntable can be turned off (see settings on front of door) if the
baking dishes are too big for it to rotate during cooking.
There is a round flat metal pan that fits the racks (and the dishwasher) which
works for cookies, pizzas... and a metal paddle with a rounded handle that is
good for transferring pies, pizzas and anything in the silicone baking containers.
58
KENYON COOKTOP
Have 50A shore power present or run the genset. Turn on the breaker on the
220V AC panel. Directions for using the three burner beveled edge ceramic
cooktop are on pp 11 & 12 of the Kenyon Users Guide. Note specific surface
cleaning instructions. Appropriate cleaning liquid is provided under the sink. For
cooking when the seas are rough, there are fiddles in a white bag on the top left
shelf of the cupboard to the left of the microwave.
REFRIGERATOR
Note:
The mechanism for delivering ice and water through the freezer door does not
work and cannot be replaced. The icemaker inside the freezer section works
very well. Ensure that the “Fresh Water” breaker on the DC panel is “on”. Put
the wire bale at the back of the unit down to start ice making. When the bin is
full, return the bale to the up position.
DISHWASHER
Turn on breaker on the 110V A panel. Technically the dishwasher can be run off
the inverter, but it is good practice to use only on shore power or with the
genset running, perhaps while underway.
A crew of 4-6 people generally fills the dishwasher once a day. The machine
uses approximately 5 gallons of water per load, which is probably well less than
the chief cook and bottle washer would use if doing the dishes by hand. Pots
and pans have been done by hand unless there is extra room in the dishwasher.
Basics: Scrape food off plates. Do not rinse. Check diagram in user’s manual
for loading plans and other suggestions. Because of the low water use and often
soft water in this part of the world, use no more than 1 tablespoon of the
powdered soap provided per load.
DISPOSAL
The boat must be on shore power or have the genset running. Turn on
“Disposer” breaker on 110V B panel Instructions did not come with the boat.
When there is food in the container, put the plastic grid over the hole. Turn on
cold water and the disposer switch to the right of the sinks and pray that no
"non-grindable" objects have made their way into the unit. Turn off switch, then
the water, when the grinding sounds finished.
59
DEALING WITH TRASH AND RECYCLING
Trash Compactor.
Operated properly, with the special purpose (black) Broan heavy-duty bags, the
trash compacter works very well. Using it will substantially reduce the number of
garbage bags to be stowed before they may be properly disposed of.
Turn on “Compactor” breaker on the 110V B for compacting. Either have shore
power present or run the genset.
See the manual for information on running the compactor, mounting a bag in the
unit and removing it when it is full, after several compaction cycles. Also, in
more or less calm waters, use the cork to wedge the catch on the front open.
This will make filling the compactor a one-handed operation. The door has never
opened by itself in a range of sea states, but remove the cork in very heavy
seas and let the spring-loaded latch secure the bin. If you prefer not to go
through the compaction process, please use the heavy white plastic garbage
bags located under the long banquette cushion, or in the cabinet just aft of the
refrigerator.
Recycling. Having said the above about the efficiency of the compactor, try to
recycle everything possible: paper, bottles, cardboard, plastic, cans. There are
recycling opportunities in almost every place ashore throughout the San Juans,
the Gulf Islands, the Sunshine Coast, Desolation Sound and the Discovery
Islands. Glass bottles and tin cans should be held in the white plastic box on the
boat deck under the tender for recycling. Do not put glass bottles and cans in
the compactor.
Sea Compost. Keep a container by the sink and fill it with any leftovers that
will decompose. A noted naturalist advises that nothing will go to waste by the
time the food chain has done its work. Toss the contents from the container
when underway and in deep water. Much of this can be put in the disposal, but
that affects the fresh water supply, which should be conserved.
60
WHAT’S WHERE (OR SHOULD BE) IN THE GALLEY AND ADJACENT SPACE
Top galley drawer: silverware, most-used kitchen tools, knife sharpeners.
Sharp knives in the very back
Bottom galley drawer: non-sharp kitchen tools (except the ice pick which
has a cork on it) plus baggie of twist ties and rubber bands
Above big blue counter: dumbwaiter to flybridge on left, china mugs,
various everyday cups, small bowls, funnels.
Under big blue counter: coffee makers, blender, mini-Cuisinart, mixer,
thermos, water-only carafe, coffee grinder
Under sink: cleaning products, dishwasher soap, folding dish drainer, hook
for dishtowels,
Left of cook top: paper towels, sliding door to plastic food storage
containers
Behind cook top (access carefully if cook top is hot - i.e. plan ahead):
stacking plastic bowls with and without tops, racks for convection oven,
measuring cups, some serving plates, small salad bowl
Cabinet right of cook top: S & P, vinegars, oils, etc
Cabinet left of microwave/convection oven: potholders and mitts, felted and
silicone trivets, fiddles for stove. Big box with jars of spices and herbs, a few
extracts
Narrow cabinet over micro/conv.: plastic wrap, tin foil, parchment paper,
wax paper, zip-locks. Please feel free to replenish supply if you use it up.
Cabinet to right of micro/conv.: sugars, coffee filters, coffee, tea bags
Cabinet below cook top: pots, pans, bakeware, sieves, colander, etc.
Under bottom two steps leading to pilot house: EMPTY (for food storage)
Top locker right of stairs to pilot house: toaster & lots of food storage
61
Middle drawer right of stairs...: dinner & salad plates, cereal/soup bowls
Bottom drawer right of stairs...: dish rags and cloths
Narrow cabinet over refrigerator: placemats and napkins, saved grocery
store bags
1st cabinet right of refrigerator: folding cooler, garbage, Broan trash
compacter and paper bags on top, “crap” boxes on bottom (i.e.
miscellaneous: tape, fasteners, glue, velcro, other “stuff” that is nice to have
around.
2nd cabinet right...: manuals for appliances large and small (in
translucent binder), possibly West Marine and Defender catalogues
3rd cabinet right...: EMPTY (for stowing whatever)
4th cabinet, with double doors, wine and drinks classes
5th cabinet, Audio-Visual System
Drinks locker: bottle storage, corkscrews, jigger, can opener, cocktail
napkins, ice bucket, tiny Nantucket basket tea light holders and tea lights
Middle drawer under drinks locker: batteries and related items
Bottom drawer under drinks locker: Scrabble, cribbage, playing cards, iron,
small ironing pad
Under long banquette cushion (easier for 2 pp to pull out the cushion, or
move the table, stretch both arms out and pull) EMPTY (for storing
whatever)
Under short banquette cushion (food storage drawer facing 1st Cabinet): All
washing machine pods (only one per load) Oxyclean powder (big plastic tub
for soaking in port aft bench).
Barbecue equipment is located under the port aft flybridge settee. Be sure
to store propane canisters there when underway. Put rubber band around
opened but partially-used canisters.
Other ample storage space is under starboard settee on the flybridge.
62
Operating the Washer and Dryer
SARAH BROOKS has an Asko 220V AC washer and dryer set behind a sliding door to
starboard between the guest head and Third Cabin.
Note:
220V AC must be present, either through shore power or usually from the Genset.
Ensure that both the Washer and Dryer breakers are "on" at the 220V AC panel. It is
often convenient to do a load of laundry while underway (total time needed for a load about 2.5 hours). Doing laundry underway gets the task complete without taking up
valuable "down time" at anchor when you'd prefer not to be running the genset.
The Fresh Water pump must be on (DC service panel). Use only the "All" detergent
pods, which will be supplied, and are found in the space next to the drawer under the
short banquette cushion in the forward end of the port settee.
Safety Consideration: Ensure that the supply of detergent pods are kept
securely-stored and out of the reach of children !
There are both summary and full directions for both units in the translucent file folder in
the triangular starboard salon cabinet. These explain which settings are best for which
fabrics, etc.
continued.../...
63
Washer Asko Model W 6221:
Ensure "washer" breaker is on at 220V panel.
At machine press "power" button; the red light will come on.
• Press and release the "door open" button; door will unlock in a few seconds. If it
doesn't, advance the program knob to #11 (drain); press "start/stop" which should
drain any water remaining; when draining is done, press "door open" again. ** This
is to prevent a partially complete wash from flooding the passageway!
• Put in one All detergent pod.
• Load clothes
• Close glass door by pushing in firmly until it clicks to lock.
• Select wash temperature; Default = 105
• Select spin RPM; default = 1200
• Select program; default = 3
• Press start/stop button; you will hear water filling the washer.
• Be sure washer program is completely finished before trying to open the door.
** Note: Occasionally the washer door will not unlock, as noted above. If advancing
the program knob to drain doesn't do the trick or in the unlikely event of a power loss
there are more detailed instructions on p. 21 of the Asko operating manual (in the
translucent appliance binder in the starboard salon cabinet near the refrigerator).
Dryer
Ensure "Dryer " breaker on 220V AC panel is on.
•
•
•
•
•
•
Empty lint screen on inside of the dryer door at the top
Press "power" button; light will glow red
Load wet clothes, close door firmly
Set temp (high or low thermometer graphic)
Set timer; default = 60 minutes (@ high temp)
Press start/stop button
Particularly with the dryer, keep the sliding door open for ventilation by sliding the
stopper on the bottom edge of the door down when using the washer/dryer set.
64
WATER MANAGEMENT
300 sounds like a lot of gallons, especially to sailors, and many if not most
marinas in the NWE cruising grounds have good water available, but remember
that not all will, and conserve accordingly. Here are some suggestions:
Scrape but do not rinse dishes before putting them in the dishwasher, and
do use the dishwasher as it is very water efficient.
Take “Navy” showers: Turn on water and get yourself wet. Turn off
water and lather up. Turn on water and rinse. The warmth of the water
you have chosen will still be there.
Up to a point, remember the old adage: "If it’s yellow, let it mellow", etc.
The Headhunter toilets use up to one gallon per flush.
If you are planning a cruise beyond Desolation Sound (most likely to the
Broughton Archipelago) clean water is particularly hard to find. Discuss
water options with your NWE check out captain.
Some PNW anchorages are quite muddy so you can use a lot of water
washing the anchor chain as it comes up, the anchor and the deck after
that.
Some cruisers feel that fresh water is necessary to clean the
anchor chain in order to minimize odors in the forepeak.
On Fleming yachts the chain locker drains and is completely
separate from the accommodation spaces.
Therefore, use salt water from the SW tap on the bow to wash
the ground tackle, instead of wasting precious fresh water on the
task.
65
AUDIO/VISUAL SYSTEM
Sat TV **
Leave “Salon outlets” on AC panel “on”
Ensure “Sat TV” and “Stereo” on DC panel are “on”
Use white-faced Direct TV universal remote
Ensure sliding switch at top of the remote is hard left (at DTV logo)
Turn on both SAT TV receiver and Samsung TV by pressing “on” under “DTV
TV Power” on upper right corner of remote. If the Sat TV has recently been
used, the last station selected will show. If the SAT TV breaker has just been
turned on the antenna will search for a signal and go through a series of selftests before a picture appears.**
Push “Guide” and scroll to look for desired channels; choose with “Select”.
** If it has been more than a few weeks since the system has been used, you may get
a "722" or "772" message from Direct TV in lieu of a TV signal. If you are told there is
no signal, try re-setting the system. On the right front of the Direct TV box (on top of
the Panasonic DVD player) there is a door behind which is a red reset button. Try
pushing that button. The system will do a complete re-set and search for available
satellites. It takes some time, but they provide encouraging messages.
If you must, try calling 800 531 5000. The account number is 44232312 and the phone
number associated with the account is 401 862 6866.
Sometimes there will be no signal after resetting, etc. At the typical latitudes of PNW
cruising the satellite is relatively low over the southern horizon. Trees, high hills or
even the boat's superstructure may block the signal (at times a signal has been present
with the port side but not the starboard side of the boat facing south).
DVD
Turn on TV (as above) using “on” “off” buttons on upper right of universal
remote.
Ensure the Panasonic DVD player is “on”
On universal remote use “TV input” to select “AV2” by repeatedly pressing the
button. This will select the DVD recorder as the video source.
On DVD recorder use “open/close” to install a DVD
Press “play”, adjust volume with universal remote.
66
Surround Sound
It is possible to listen to the TV or DVD through the salon sound system.
Ensure "Stereo" is on at the DC Service Panel
Open the Audio/Visual cabinet to the left of the TV.
Turn on the Alpine amplifier by pressing the “Source/Power” button.
Flip up the toggle switch labeled “Salon”
Using the “source” button select “AUX on the Alpine unit, then press “Band” until
“AUX 2” appears.
Adjust volume using the small black Alpine remote on by turning the silver dial
on the Alpine unit. Lower volume on the TV to near zero
(Also see "Audio System" below)
Audio System
The audio system is managed at the Alpine receiver unit in the cabinet to the left of the
TV. Ensure “Stereo” at the pilothouse DC panel is on. Using the Alpine unit, select the
following sources by repeatedly pressing the green “Source/Power” button:
TV & DVD (as above)
Tuner (then use “Band” button to select AM and FM 1, FM 2)
“Disc” (single CD played in Alpine unit look for “changer control”)
“Changer” (12 CD Shuttle player) The CD changer is controlled by the Alpine unit
when “Changer” is selected using the numbered buttons across the bottom.
Change tracks by the up/down buttons below the source button
IPod dock (use “Source” to select “AUX” ;“Band” to select “AUX 1”)
Distribute sound to the Master stateroom, pilothouse, flybridge or cockpit by pushing
the respective buttons on the Speaker Selection panel. The salon is selected by the
separate toggle switch, as above.
Turn off the Alpine system by pressing and holding “Source/Power” button for 3
seconds.
Note: Do not try to adjust settings on the 3 button Alpine Pro Logic box at
the bottom shelf or on the “Audio Authority” box to the left of the DTV
receiver and DVD player.
For additional information on the audio/visual system see the manuals in the A/V
cabinet.
67
Location of Key Equipment
(by location)
Portuguese Bridge/Bow:
spare anchor rode on port bow roller (for Fortress anchor)
Bow lockers:
Anchoring equipment, wash down hose, anchor chain depth code
Bow deck locker:
two sausage fenders with fender hooks; access to chain locker
Pilothouse:
Top Drawer to Port Keys of all sorts, well-marked
Fleming Handbook
Shirt cardboard to make Canadian clearance #signs
Lower
Drawer –
Nikon Binoculars
Zeiss Binoculars
Tender Ignition Key on White “Floatie”
Windlass Control Cord
Davit Control Cord
Cardboard Tube to read LED electrical panel lights in bright sunshine
Far Left Drop Down access Panel –
Anchor chain guide for helmsman (doesn’t show 75’ chain add 7/2014) see
“Anchoring”, on page 41 for details
File Drawer Under PH Settee –
Equipment operating manuals and other ship’s papers (excluding galley
equipment – manuals in Salon). Ensure file cabinet is secured in heavy
head seas.
Pilothouse Bookcase –
Waggoners, other guide books
CHO Tides and Currents St. of Juan de Fuca and Georgia – with up to date code
book
Ports and Passes (key reference for hitting slack water in Canadian passes)
Planning Maps
68
Pilothouse (continued)
Top Drawer Chart Table –
Dedicated Toshiba Computer for Nobeltec Trident System
Pens/pencils, micro cloth glass cleaner, misc. other
2nd Drawer Chart Table –
Miscellaneous Navigation supplies (Nautical slide rule, dividers, etc.) USCG Rule
book. U.S. Charts and Chart Kit
3rd Drawer Chart Table –
Canadian Charts, Gulf Islands and Desolation Sound Chart Kits and related
reference maps, book of abbreviations, etc.
4th Drawer Chart Table –
Electrical spares and fasteners; spare Bennett Trim rockers, spare ballast for ER
AC fluorescent lights
Bottom Drawer Chart Table –
Misc. flags and related spares (owner stock)
Starboard Drawers Below Sat Phone (Sat phone not connected)
Two “crap” (miscellaneous but useful stuff) drawers. Explore! If you need
something it is probably there
Cabinet with parts, chargers etc. for spot light, handheld VHF; PH instrument
covers
Pilothouse Closet –
1mm candlepower spot light
Light vacuum battery powered on charger (look for blue light)
Dustbuster on charger, look for red light (may also be found in the third cabin).
Fly swatters
Generic spare burgee bow staff for those who wish to fly yacht club or personal
burgees. Needs a pair of pliers to change out. Spare bolts in a plastic container
in one of the "crap" drawers.
Salon
See “What’s Where (or Should Be) in Galley and Adjacent Space”, above.
69
Flybridge
Cooler with drain on non-skid mat; spare tender gasoline; white receptacle for
recycling; propane tank for crabpot cooker
Starboard Settee
storage space and Type II PFDs
dry food/drinks/other storage
crabpot cooker (propane tank under the tender).
Port Settee –
6 Type I Adult PFDs
BBQ equipment
Coleman Propane Bottles for BBQ Note: store only here; settee is vented
and up high. Put rubber band around partially full bottle
Helm Seat (under- tilt forward)–
Ditch Bag with flares, EPIRB. Etc
110V AC charger for tender battery (if necessary)
Cockpit Area
Cockpit control station and "no dumping" plaque
Starboard Locker –
Groco key to check raw water strainers
Keys for fuel, water and pump out caps
Supply of “ oilsorb diapers” for above
Port Locker Under Sink –
Spare fender hook
BBQ regulators for use with Coleman Propane
Misc. maintenance stuff: WD 40, Boeshield, McCLube, etc.
Misc. cleaning supplies
Spare “Mickey Mouse” noise attenuators
Safety glasses
Other
70
Cockpit Area (continued)
Port aft Cockpit Locker Cleaning supplies
Buckets
Shurhold pads and brushes (long Shurhold pole in Laz)
Cockpit Shower hose
Stbd.
Aft Cockpit Locker –
Cablemaster input
AC Fuse Boxes
two stage water filter for filling water tanks/spare filters
Swim Platform –
Swim Ladder; there is a swim ladder stored underneath the swim platform to
port; it is designed to be deployable from the water by a swimmer (or MOB) for
safety, and also from the swim platform.
Lazarette
Shore
power cords (via starboard quarter hatch)
125/250V AC 50A for use on bow
125V AC 30A with 30A-50A adapter to power 110V A and 110V B panels
Hubbell “Combiner”
Two Water Hoses
Two spares tubs
Extra tools (in box)
“Handy” tool kit (near steps to ER)
Fortress Anchor (under starboard quarter lazarette hatch); spare anchor rode on port
bow roller.
Foldable Roller Box for groceries
Round fenders
Magma BBQ (usually mounted on the Boat Deck for charter service)
Orange Box with Soft Plugs for damage control (just behind entrance to ER)
71
Master Cabin
First Aid Kit with Mouth to Mouth device
Under-deck access to macerator, toilet system, bow tap (salt/fresh) water supply
plumbing; do not change settings without instructions
Porthole screens (below port side closet - some may be in portholes)
VIP
Fluxgate compass for autopilot under corner of the bed NO METAL WITHIN 3 FEET !
Third Cabin
Access to macerator overboard seacock in forward lower cabinet; seacock to right.