1
Adobe
FrameMaker 6.0
®
®
Customizing (Windows)
ii
Contents
Customizing
FrameMaker Products
Locating customization files
Changing Initialization
Files
About initialization files
..................................... 3
......................................... 4
System information about FrameMaker products
................... 5
Basic characteristics of the FrameMaker product
................... 6
Options for your working environment
Folders and setup files
. . . . . . . . . . . . . . . . . . . . . . . . . . . . . . . . . . . . . . . . . 12
Positions for windows and dialog boxes
FDK clients
. . . . . . . . . . . . . . . . . . . . . . . . . 15
. . . . . . . . . . . . . . . . . . . . . . . . . . . . . . . . . . . . . . . . . . . . . . . . . . . 16
Dash patterns
. . . . . . . . . . . . . . . . . . . . . . . . . . . . . . . . . . . . . . . . . . . . . . . . . 17
Thermometer colors
. . . . . . . . . . . . . . . . . . . . . . . . . . . . . . . . . . . . . . . . . . . 18
Document comparison options
Spelling options
. . . . . . . . . . . . . . . . . . . . . . . . . . . . . . . . . . 18
. . . . . . . . . . . . . . . . . . . . . . . . . . . . . . . . . . . . . . . . . . . . . . . 19
Basic font settings
. . . . . . . . . . . . . . . . . . . . . . . . . . . . . . . . . . . . . . . . . . . . . 20
Aliases for Windows fonts
. . . . . . . . . . . . . . . . . . . . . . . . . . . . . . . . . . . . . . 23
Mappings for unavailable fonts
Filters on your system
Changing Menus and
Commands
............................ 6
. . . . . . . . . . . . . . . . . . . . . . . . . . . . . . . . . 24
. . . . . . . . . . . . . . . . . . . . . . . . . . . . . . . . . . . . . . . . . . 25
About menu and command configuration
Customizing commands
Customizing menus
. . . . . . . . . . . . . . . . . . . . . . . . 26
. . . . . . . . . . . . . . . . . . . . . . . . . . . . . . . . . . . . . . . . 31
. . . . . . . . . . . . . . . . . . . . . . . . . . . . . . . . . . . . . . . . . . . 36
Debugging a customized configuration file
Changing menu configurations
. . . . . . . . . . . . . . . . . . . . . . . 42
. . . . . . . . . . . . . . . . . . . . . . . . . . . . . . . . . 42
Removing formatting bar commands and window buttons
. . . . . . . . . 43
Adobe, the Adobe logo, and Adobe FrameMaker are trademarks and Adobe is a service mark of Adobe Systems Incorporated which
may be registered in certain jurisdictions. All other products and trademarks mentioned in this document are the property of their
respective owners. 2000 Adobe Systems Incorporated. All rights reserved.
3
Customizing FrameMaker Products
This manual describes how to customize Adobe FrameMaker products (FrameMaker,
FrameMaker+SGML™, and FrameViewer) by changing settings in initialization files and creating custom
menu configurations. The platforms for which this information applies include Windows 95 and Windows
NT 4.0 or later.
Initialization files contain settings that define your FrameMaker product environment. For example, by
changing settings in an initialization file, you can change dash-pattern choices or define the initial position
of dialog boxes and windows. For information, see “Changing Initialization Files” on page 4
Menu customization files define menus and commands. By changing these files, you can customize the user
interface. For information, see “Changing Menus and Commands” on page 26
Locating customization files
In this manual, install_dir represents the directory in which the FrameMaker product is installed.
Customization files are located in install_dir, install_dir\fminit, and
install_dir\fminit\product, where product represents a product-specific directory such as
maker for FrameMaker or fmsgml for FrameMaker+SGML.
4
Changing Initialization Files
You can customize your FrameMaker product environment in many ways by editing initialization files. In
some cases, you may also want to edit the setup files referred to in these initialization files. This chapter
describes the changes you can make by changing settings in the initialization files.
About initialization files
Initialization files are text files that define many elements of your working environment. You can edit
settings in these files using a FrameMaker product or a text editor such as Notepad.
Important: If you open an initialization file in a FrameMaker product, you’ll see an alert box telling you that
the file is of an unknown type. Make sure that Text is selected in the alert box, and click Convert to convert the
file to a FrameMaker product file. When you’re finished editing the file, save it as Text Only in the Save
Document dialog box.
The FrameMaker product initialization file is in install_dir, and is named after the product. For
example, the FrameMaker initialization file is maker.ini and the FrameMaker+SGML initialization file
is fmsgml.ini. The initialization file contains settings such as default options for the Preferences dialog
box, values for the Zoom pop-up menu, and the names of dashed lines. It also gives the locations of dictionaries and other files that the FrameMaker product needs to find as you work. These initial settings are
made when you install the FrameMaker product on your system.
The settings in the initialization file are grouped under bracketed headings. Each heading tells the system
how to interpret the information that follows. A line that begins with a semicolon (;) is a comment and is
not read by the system.
Special characters
While editing a FrameMaker product initialization file, you may need to type a character not immediately
accessible on a standard keyboard (that is, whose hexadecimal (hex) code is greater than \x7f). For
example, you may need to enter special quotation marks (see “Quotation marks for Smart Quotes” on
page 20). You can do this by typing a backslash followed by the character’s hex code. For example, to
include an acute-accented e (é) in the name of a custom dashed line, you use the hex code for this character
(\x8e). Your entry in might look like this:
8=Sp\x8ecial, 12, 6, 6, 6
The hex codes are listed in the FrameMaker Character Sets online manual. Some special characters might
not display properly in dialog boxes.
ADOBE FRAMEMAKER 6.0 5
Changing Initialization Files
System information about FrameMaker products
The Windows system registry contains information that Windows needs to launch the FrameMaker
product. The system registry includes low-level characteristics that determine cursor blink rate, desktop
pattern, and filename extensions associated with the FrameMaker products. The location of the
FrameMaker product application and its initialization file are also stored here.
Location of the FrameMaker product
There are two entries placed in the system registry when you install a FrameMaker product. One entry
specifies the install path:
HKEY_LOCAL_MACHINE\SOFTWARE\Microsoft\Windows\CurrentVersion\
AppPaths\FRAME.EXE
(default) = <actual path to frame.exe>
The other entry specifies the initialization file for the FrameMaker product:
HKEY_LOCAL_MACHINE\SOFTWARE\Adobe\FrameMaker\5.5\IniFile
(default) = maker.ini
or
HKEY_LOCAL_MACHINE\SOFTWARE\Adobe\FrameMakerSGML\5.5\IniFile
(default) = fmsgml.ini
If you move the install folder or if you move or rename the initialization file, change these entries in the
registry. You can specify an absolute pathname or a pathname relative to install_dir. You edit the
registry by running the Registry Editor (choose Run from the Windows Start menu and then enter
regedit).
If you change the FrameMaker product settings recorded in the registry, the changes will take effect the next
time you start the FrameMaker product.
You may also want to define a new location for some of the setup files. For information about changing the
location of these files, see “Additional settings” on page 12.
Associating filename extensions with FrameMaker products
There are three filename extensions associated with FrameMaker products in the system registry. These
extensions are .fm, .book, and .mif. To associate other extensions with the FrameMaker product, rightclick a file with the extension and choose Open With to display a dialog box in which you can specify which
application to use to open files with this extension.
ADOBE FRAMEMAKER 6.0 6
Changing Initialization Files
Basic characteristics of the FrameMaker product
The [Frame] settings in the FrameMaker product initialization file define a few basic characteristics of the
FrameMaker product on your system:
Version=version
Language=USEnglish
• The Version setting specifies the version of the product that you have installed.
• The Language setting specifies the default language dictionary and the default paragraph language. The
initial setting specifies US English. You can enter the name of one of the other languages available in the
FrameMaker product, but you must have the dictionary for that language installed for the FrameMaker
product to work.
Registration information for the product is specified in the [RegInfo] section of the FrameMaker
product initialization file. This section includes three settings, User, Company, and RegNum, which are set
during installation.
Options for your working environment
The [Preferences] settings in the initialization file specify options for your working environment.
Some of these settings appear in the Preferences dialog box. Some appear in other dialog boxes in the
product. A few are accessible only in the initialization file.
Some of these settings are explained briefly in the following sections. In each section, the default settings
from the initialization file are shown first, followed by an explanation of some or all of the settings. The
order of the settings listed here does not necessarily match the order in which they appear in the initialization file.
Exiting the FrameMaker product
AskExit=Off
• The AskExit setting determines if the FrameMaker product asks for confirmation before exiting.
Saving files automatically
BackupOnSave=On
AutoSave=Off 5
• BackupOnSave determines if a backup file is automatically created when you save a file.
• The value for AutoSave is in minutes and determines how often the FrameMaker product creates a
backup file for the active file, whether or not you have saved it.
Logging errors
ShowErrors=On
ErrorFileName=consfile.txt
• ShowErrors determines if error messages are displayed in the console window when they occur.
ADOBE FRAMEMAKER 6.0 7
Changing Initialization Files
• ErrorFileName specifies the name of the file that error messages are written to if there is a system
crash. If that happens, immediately make a copy of the consfile.txt file. This file will contain
important debugging information, which can help a Technical Support engineer track down the problem.
Be sure to copy this file before restarting, since the file is overwritten with a blank one whenever a
FrameMaker product starts.
Visual display preferences
GreekSize=5
Zoom=25, 50, 80, 100, 120, 140, 150, 160, 200, 400
PenWidths=0.5, 1.0, 3.0, 4.0
• The value for GreekSize is in points and specifies the point size at which text displayed on the screen
is grayed out.
• The Zoom setting defines the values that appear in the Zoom pop-up menu. You can change these values
to any values between 25 and 1600. The values are percentages, with 100 representing a document’s print
size. If the line contains more than 10 values, only the first 10 appear in the pop-up menu. The zoom values
are updated every time you exit the FrameMaker product, using the current settings in the Zoom pop-up
menu.
• The PenWidths setting defines the widths that appear in the Line Widths pop-up menu in the Tools
palette. Each value specifies a line width in points. You can change a width to any value between .015 and
360 points. These values are updated every time you exit the FrameMaker product, using the current
settings in the Line Widths pop-up menu.
DefaultRulerInch=0.125in
DefaultRulerCm=0.5cm
DefaultGridInch=0.5in
DefaultGridCm=1cm
DefaultSnapInch=0.125in
DefaultSnapCm=0.25cm
• The DefaultRuler settings provide the default values for the tick marks on the vertical and horizontal
rulers in new custom documents.The DefaultGrid settings provide default values for spacing of the
visible grid lines. The DefaultSnap settings provide default values for the spacing of the snap grid lines.
There are a pair of settings for each of these items so that both inches and centimeters can be specified. The
values that the FrameMaker product uses depend on the measurement system specified in the Number tab
of the Regional Settings Control Panel in Windows.
Important: You must include a unit of measure (in, ", or cm) with each value.
MonitorSize=Default
ShowQuickAccessBar=Off H
ShowFormattingBar=Off
ADOBE FRAMEMAKER 6.0 8
Changing Initialization Files
• The MonitorSize setting specifies the size of your monitor so that the documents and dimensions you
see on the screen (such as for margins and objects) are very close to their actual size. Initially,
MonitorSize is set to Default. If you want greater precision in the measurements you see on the screen,
fill in the diagonal measure of your monitor. For example:
MonitorSize=17in
Important: You must include a unit of measure (in, ", or cm) with this value.
For more information about this setting, see the online manual Working on Multiple Platforms.
• The ShowQuickAccessBar setting determines if the QuickAccess bar appears when you start the
FrameMaker product. To specify a horizontal or vertical QuickAccess bar, include an H or V after the On
value. This value is updated every time you exit the FrameMaker product, using the current setting in the
View menu.
• The ShowFormattingBar setting determines if the formatting bar appears when you start the
FrameMaker product. This value is updated every time you exit the FrameMaker product, using the
current setting in the View menu.
RememberMissingFontName=On
• The RememberMissingFontName setting determines whether the names of unavailable fonts are
preserved so that the original fonts can reappear when the file is reopened on a computer where they are
installed. For information, see the online manual Working on Multiple Platforms.
Filename conventions
CrossPlatformFileNaming=Windows 95
• The CrossPlatformFileNaming setting controls the file naming convention that is used. The default
is Windows 95. The other choices are Windows 3.1, UNIX, and Macintosh.
For details on these file naming conventions, see the online manual Working on Multiple Platforms.
FrameViewer preferences
The FrameViewer initialization file (fmviewer.ini) contains additional [Preferences] settings.
Alert for a nonwriteable initialization file
When you change some aspects of your Frame environment through the user interface, FrameViewer saves
these changes by writing them to the initialization file when you exit. For example, if you change the zoom
settings that appear in the Zoom pop-up menu when using FrameViewer, these changes are saved in the
fmviewer.ini file. If a user does not have permission to write to the initialization file, such changes are
lost.
FrameViewer displays an alert box during startup if the user cannot write to the initialization file. To
suppress this alert box, in the [Preferences] section of the initialization file, change the On value to Off
in the following line:
NonWriteableIniAlert=On
ADOBE FRAMEMAKER 6.0 9
Changing Initialization Files
Font alert
When you open a document created with fonts that are not available in your environment, FrameViewer
displays an alert box asking whether to reformat the document by replacing the missing fonts with available
ones. The default for the alert box is to display, but you can suppress it by adding the following line to the
[Preferences] section of the initialization file:
SuppressFontAlertOnOpen=On
To enable the font alert box, change the On value to Off.
Language alert
You can choose to have FrameViewer display an alert box when you open a document created with language
dictionaries not available in your environment. By default, the alert box does not display, but you can enable
it by changing the following line in the [Preferences] section of the initialization file:
SuppressLangAlertOnOpen=Off
To disable the language alert box, change the Off value to On.
Using FrameViewer with structured documents
You can choose to keep or remove the structure in a structured FrameMaker+SGML document for viewing
in FrameViewer. The structure affects text selection behavior. If you keep the structure, text selection
(based on structure element boundaries) behaves differently than it does in unstructured documents. If
you choose to remove the structure, FrameViewer presents a document with text selection behavior based
on ranges of text rather than on structure element boundaries.
By default, FrameViewer strips the structure when you open a document. Because FrameViewer cannot
save, stripping the structure does not affect the document on disk.
If there are FDK clients for FrameViewer that need the structure information (see “Enabling FDK client
programs” on page 9), you may add the following line to the [Preferences] section of the
fmviewer.ini file to keep the structure information intact:
StripStructureOnOpen=Off
To remove the structure, change the Off value to On.
Enabling FDK client programs
API=On
• FDK clients are plug-in programs that are integrated with FrameMaker products using the Frame
Developer’s Kit™ (FDK) and Application Program Interface™ (API). The [APIClients] section of the
initialization file contains a list of FDK clients to start when FrameMaker products start. (For more information, see “FDK clients” on page 16).
To start FrameMaker products without starting FDK clients, change this setting to Off. If you do so, the
WordCount document report and the online manuals’ Print Manual buttons won’t work.
ADOBE FRAMEMAKER 6.0 10
Changing Initialization Files
Format preferences
UsePostScript=On
ClipboardFormatsPriorities=FILE,OLE 2,EMF,META,DIB,BMP,MIF,RTF,TEXT
FMImage=Off
• The UsePostScript setting determines if FrameMaker products use built-in methods of generating
PostScript code instead of standard Windows methods. If the product uses the built-in methods, it can
print faster and produce higher quality documents. To use standard Windows methods instead, change this
setting to Off. Also, changing this setting to Off makes FrameMaker products print the preview image of
EPS graphics instead of the PostScript image.
• The ClipboardFormatsPriorities entry controls what format is used when you paste or when you
drop a file into an open document.
An item can be stored on the Clipboard with multiple formats. This entry specifies the order for the
formats used to paste Clipboard items. In this entry, priority in the list goes from left (highest) to right
(lowest). To give a format higher priority, move it farther left in the list. The first format in the list which
matches a format on the Clipboard will be the format used to paste the item.
The FILE format instructs a FrameMaker product to check whether the object being dropped or in the
Clipboard is a file. If it is, the file is opened; if the file is not in a recognized graphic format, it is embedded
as an OLE package.
This precedence applies to all items you paste from the Clipboard. You can override this precedence for
individual paste operations by using Edit > Paste Special rather than Edit > Paste.
If you comment out this line (by starting it with a semicolon), the FrameMaker product uses the first of
the formats associated with the Clipboard item. Depending on what kind of item is on the Clipboard, the
format can vary from one paste to the next.
• The FMImage entry controls whether a FrameImage facet is saved with imported graphics by default.
The initial FMImage setting is off.
Menu preferences
MenuSet=Complete
;MenuSet=Quick
;MenuSet=Custom
• FrameMaker products have two built-in sets of menus. Complete menus are the menus and commands
as described in your user guide and in online Help. Quick menus are a subset of complete menus. You can
also create your own custom menu set. The MenuSet setting defines which set of menus appears when you
start. By default, the Complete menu set is used.
ADOBE FRAMEMAKER 6.0 11
Changing Initialization Files
To change the MenuSet setting, remove the semicolon from the setting you want and insert a semicolon
before the setting you don’t want.
AutoMnemoniseMenus=On
ConfigWarnKbdRedundant=Off
ConfigWarnKbdOverride=Off
StickyPopupThreshold=500
• The AutoMnemoniseMenus setting determines if mnemonic command shortcuts are shown on menus.
Mnemonic shortcuts are underlined letters in command labels. When a menu is open, you can choose a
command by typing the underlined letter (for example, the O underlined in the Open command on the
File menu).
The letter that is underlined is specified in the command configuration files (see “Adding shortcuts for a
command” on page 34). When the product loads these files, it automatically generates the specified
mnemonic shortcuts. To prevent FrameMaker products from creating these command shortcuts, change
the AutoMnemoniseMenus setting to Off.
• Keyboard shortcuts (key sequences) are also defined in command configuration files. You can change the
default shortcuts or add shortcuts in your menu customization file. If you set ConfigWarnKbdRedundant to On, you will see warning messages when you load the customization file if it contains
redundant shortcut definitions. If you set ConfigWarnKbdOverride to On, you will see warning
messages when you load the customization file if it contains shortcut definitions for commands that
already have shortcuts defined for them. The warning messages appear in the console window.
For more information about command configuration files, see “Changing Menus and Commands” on
page 26.
• The StickyPopupThreshold setting controls how long you must hold down the mouse button for
pop-up menus, such as the Zoom menu, to open. The preset value, 500, specifies an interval similar to that
for opening menus in the menu bar.
For more information on customizing menus, see “Changing Menus and Commands” on page 26. For
more information on how to load a menu customization file, see “Menu and command configuration files”
on page 14.
Suppressing filename extensions
SuppressExtensions=fm, book
• Windows 95 hides file extensions for registered file types when filenames are listed in browser windows
or shell windows. You can disable this extension suppression with a view option in the shell. The
FrameMaker product suppresses file extensions in its browsers and in the document and book window
headers if shell suppression is enabled. If shell suppression is disabled, FrameMaker products will also not
suppress the file extensions.
The SuppressExtensions setting controls which file extensions are suppressed when suppression is
enabled. By default, only .fm and .book extensions are suppressed. If you want to disable all file extension
suppression, you can either disable extension suppression in the shell or edit SuppressExtensions to
have a blank value.
ADOBE FRAMEMAKER 6.0 12
Changing Initialization Files
Additional settings
NetworkLock=On
• The NetworkLock setting causes the FrameMaker product to create a lock file (.lck) when you open
a file. The lock file deters others from opening the same file and changing its contents while you have it
open. They can, however, open a view-only copy of the file.
Keep this setting set to On if you’re sharing network files in a workgroup. If this setting is set to Off, it’s
possible for more than one person to open the same file and overwrite each other’s work.
SplashScreen=Off
BannerFont=Arial
• By default, a banner, called a splash screen or a banner screen, appears when you start. You can suppress
it by adding the SplashScreen setting to the [Preferences] section of the initialization file. You can
also specify the default font used in this screen by changing the BannerFont setting in the [Fonts]
section.
Folders and setup files
The [Directories] and [Files] settings in the initialization file specify the names and locations of
certain folders and files. This information is entered for you when you install. You should change the information if you rename or move a folder or file, or if you’re working on a network and have made your own
local copy of a setup file.
The locations in these settings are relative to install_dir. For any of the settings, you can use an
absolute pathname instead.
You may want to modify a file itself rather than its name or location, particularly the dictionaries or the
custom template. For information about changing templates and editing dictionary files, see your user
guide.
Folder names
The following settings are in the [Directories] section of the initialization file:
HelpDir=help
LanguageDir=dict
TemplateDir=templates
FilterDllDir=filters
OpenDirOnStart=
PaletteDir=fminit\product
AlwaysOnTopPaletteDir=
ColorLib=fminit\Color
FontDir=fminit\fonts
FontDirCache=fminit\fonts\.cache
UnicodeDir=fminit\unicode
PluginDir=fminit\Plugins
ADOBE FRAMEMAKER 6.0 13
Changing Initialization Files
• HelpDir specifies the folder that contains the files for the online Help system.
• LanguageDir specifies the folder that contains files with language-specific information, such as
hyphenation settings and language dictionaries for spell-checking.
• TemplateDir specifies the folder that contains the standard templates that come with the product,
except the ones for custom documents and text files. You can change this setting to point to a network
folder that contains templates for your workgroup. For information about the default templates, see your
user’s manual.
• FilterDllDir specifies the folder that contains the filters installed on your system.
• OpenDirOnStart specifies which folder should initially appear in the Open dialog box. Every time you
exit, this is updated to the folder from which you last opened a document.
• PaletteDir and AlwaysOnTopPaletteDir specify palette folders. The values for these settings are
a list of folder names, separated by commas. When you store a document in one of these folders, the
FrameMaker product treats it as a palette (such as the Tools palette or Equations palette). Palettes in
AlwaysOnTopPaletteDir always float in front of documents.
ColorLib specifies the folder that contains color library files. These files are read in at startup and appear
in the Color Libraries pop-up menu in the Color Definitions dialog box. You can add any library file
formatted in the ASCII Color Format (.acf), version 2.1 or earlier, or in the Binary Color Format (.bcf),
version 2.0. You can’t use a FrameMaker product to save a .bcf library file.
• FontDir and FontDirCache specify the folders to scan for variable-width font information for
Japanese fonts. Do not change these settings.
• UnicodeDir specifies the folder that contains Unicode files that are used to support Asian text in
Acrobat bookmarks and other Acrobat features.
• PluginDir specifies the folder that contains API clients. Plug-ins placed in this folder will automatically
be loaded at startup. You can also load API clients by adding entries to the [APIClients] section (see
“FDK clients” on page 16).
Dictionary and setup files
The following settings are in the [Files] section of the initialization file:
UserDictionary=user.dct
SiteDictionary=dict\site.dct
CustomDoc=fminit\custom
CompareDoc=fminit\compare
AsciiTemplate=fminit\txttmplt
• UserDictionary and SiteDictionary give the names and locations of dictionary files.
• CustomDoc specifies the template for new custom documents.
• CompareDoc specifies the template for composite comparison documents.
• AsciiTemplate specifies the template for text files.
ADOBE FRAMEMAKER 6.0 14
Changing Initialization Files
EquationDoc=fminit\equation
ThesaurusDoc=fminit\thesaurs
TemplateBrowserDoc=fminit\tmpltbrw
VerticalQuickAccessBar=fminit\vertqab
ToolBarIniFile=fminit\fmtoolbr.ini
• EquationDoc specifies the Equations palette.
• ThesaurusDoc specifies the Thesaurus dialog box.
• TemplateBrowserDoc specifies the Standard Templates dialog box.
• VerticalQuickAccessBar specifies the vertical QuickAccess bar.
• ToolBarIniFile specifies an initialization file used to determine the layout of the QuickAccess and
formatting bars and the pop-up help text that appears when you point to a tool. You may change the tool
help text but don’t change any other settings.
Resources=fminit\fmres.dll
DialogResources=fminit\fmdlg.dll
AlternateResources=fminit\fmcustom.dll
EPSHeader=fminit\header.ps
FMFont=fminit\fm5font.ttf
FMSmallFont=fminit\fmsmall.fon
• Resources, DialogResources, and AlternateResources define dialog boxes, menus, error
messages, and other resources.
• EPSHeader specifies the PostScript header file. Do not change this setting.
• FMFont specifies the font used for symbols for anchored frames, markers, tabs, and so on. Do not change
this setting. If you move or delete this font, these symbols will be displayed incorrectly on your monitor. If
you need to reinstall the font, reinstall the FrameMaker product application files.
• FMSmallFont contains the font used in the Tools palette. Do not change this setting.
Menu and command configuration files
Menu and command configuration files define menus and commands. The following settings in the
[Files] section define the location of these files:
ConfigCommandsFile=fmint\configui\cmds.cfg
MSWinConfigCommandsFile=fminit\configui\wincmds.cfg
ConfigMathFile=fminit\configui\mathcmds.cfg
ConfigMenuFile=fminit\product\menus.cfg
ConfigCustomUIFile=fminit\configui\customui.cfg
MathCharacterFile=fminit\mathchar.cfg
• ConfigCommandsFile specifies the file that contains commands common to all platforms.
• MSWinConfigCommandsFile specifies the file that contains Windows-specific commands.
• ConfigMathFile specifies the file that contains math commands.
ADOBE FRAMEMAKER 6.0 15
Changing Initialization Files
• ConfigMenuFile specifies the file that contains the standard menus.
• ConfigCustomUIFile specifies the file that contains additional custom menus or changes to existing
menus or commands that you have added. The default file for this setting is customui.cfg. You can
either add your menu customizations to this file, or create your own file and put its path and filename in
this setting.
• The MathCharacterFile specifies the file that defines special math characters.
All these files are loaded at startup. For the order of precedence of these files, see “Precedence of the configuration files” on page 28.
Page size and overview files
The other settings in the [Files] section are:
PageSizesFile=fminit\pagesize.cfg
FirstRunOpenDoc=
PluginCache=fminit\Plugins\.cache
• The PageSizesFile file defines the page sizes for the seven standard page sizes listed in the Page Sizes
popup menu in the Custom Blank Paper and Page Size dialog boxes. For a new custom document, it also
defines the default unit, column gap, and margin settings for each paper size. For more information, see
the instructions in the file.
• FirstRunOpenDoc specifies a document that displays only when you run a FrameMaker product for
the first time. After this document has been displayed once, this setting is reset to have an empty value.
• PluginCache specifies a file used in conjunction with the Plugins folder to track API clients.
Recently visited files
The [RecentlyVisitedFiles] section lists the most recently opened files; the filenames appear at the
bottom of the File menu. These values are updated every time you exit.
Positions for windows and dialog boxes
The [DialogLayout] settings in the initialization file specify a default location on the screen for some
windows and dialog boxes.
ADOBE FRAMEMAKER 6.0 16
Changing Initialization Files
MakerWin=3, -1, -1, -4, -4, 0, 0, 640, 400
PCatalog=500, 40, 130, 180
CCatalog=500, 220, 130, 180
Tools=600, 0
Equation=0, 0
Spell=0, 0
PFormat=0, 0
CFormat=0, 0
Search=0, 0
Table=0, 0
Ruling=0, 0
Markers=0, 0
Hypertext=0, 0
CondText=0, 0
BookKit=0, 0
Help=0, 0
Thesaurus=0, 0
TemplateBrowser=0, 0
VQuickAccessBar=0, 0
• The values for MakerWin specify normal, minimized, and maximized positions. The first value determines which position to use; its value is 1 for normal, 2 for minimized, or 3 for maximized. The next six
values are pairs of x and y offsets that specify the different window positions; the first pair specify the
minimized position, the second pair specify the maximized position, and the third pair specify the normal
position. The last two values are the normal window width and height.
• The settings for the Paragraph Catalog and Character Catalog (PCatalog and CCatalog) specify first
an x and y value for the location of the catalog. The x value specifies the offset in pixels from the left side
of the screen. The y value specifies the offset in pixels from the top of the screen. Optionally, the width and
height of the catalog, in pixels, appear after the x and y values.
• The rest of the settings specify only an x and y value for the left and top offset of the window or dialog box.
If you open and move one of these windows or dialog boxes, the location is modified in the
[DialogLayout] setting when you exit. This becomes the default location the next time.
FDK clients
The [APIClients] settings list FDK clients (plug-ins) to start when the FrameMaker product starts.
Each client description must be on a separate line.
• Descriptions for clients that are not filters use the following format:
client=type, description, DLL_file
where client is the client’s name, type is the type of client, description is a description of the client,
and DLL_file is the pathname of the client’s DLL file. Valid types for clients other than filters are
Standard, TakeControl, and DocReport. DLL_file can specify a full pathname or a relative pathname
based on the product folder.
ADOBE FRAMEMAKER 6.0 17
Changing Initialization Files
For example, the Mailer client setting looks like this:
Mailer=Standard, Send Mail API Client, fminit\mailer.dll
• Clients that are filters use the following format:
client=type, format_ID, format_name, vendor_ID, description, DLL_file, extension
where type is one of TextImport, GFXImport, or ExportFilter; format_id is a string (four characters
or fewer) that uniquely identifies the filter; format_name is the name of the file format supported by the
client; vendor_ID is a string (four characters or fewer) that uniquely identifies the filter vendor; and
extension is the filename extension of the file type the client filters.
For example, the RTF filter client setting looks like this:
RTF=TextImport, RTF, RTF, FAPI, Rich Text Format (RTF) Import, filters\rtfimprt.dll,^.rtf
To create a client, you need the Frame Developer’s Kit (FDK) for Windows. If you are installing an FDK
client, follow instructions provided with the client to add its startup information to the initialization file.
For more detailed information about [APIClients] settings, see the FDK Platform Guide for Windows.
You can also load API clients simply by placing them in the Plugins folder and then starting a FrameMaker
product (see “FDK clients” on page 16).
Dash patterns
The [DashPatterns] settings define the eight dash pattern choices that appear in the Dashed Line
Options dialog box. You can edit these settings to replace the standard choices with custom ones:
1=Dash, 8, 6
2=Hidden, 4
3=Longdash, 16, 10
4=Dot, 2, 4
5=Dash-Dot, 12, 6, 2, 6
6=Dash-Dot-Dot, 12, 6, 2, 6, 2, 6
7=Chain, 12, 6, 6, 6
8=Phantom, 20, 6, 6, 6, 6, 6
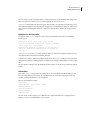
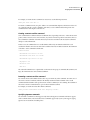
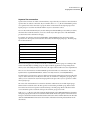
Each dash pattern contains a label that identifies the dash pattern in the Dashed Line Options dialog box
and a repeating series of dash and gap segment lengths. Dashes and gaps are measured in points. The
following illustration shows a dashed line and its segment description. The line is made up of a 12-point
dash, a 6-point gap, a 6-point dash, and another 6-point gap. This pattern repeats to draw a dashed line of
any length.
Dashed line:
Dash segments: 12, 6, 6, 6
The following setting describes the same line:
7=Chain, 12, 6, 6, 6
ADOBE FRAMEMAKER 6.0 18
Changing Initialization Files
If a dash pattern setting contains an odd number of segment lengths, the last dash value is repeated for the
final gap. For example, the following setting describes a dash pattern with 4-point dashes and 4-point gaps:
2=Hidden, 4
The dash pattern label cannot contain spaces or punctuation marks.
Thermometer colors
A thermometer is a horizontal bar that shows progress during operations that can take some time. One
color, on the left of the bar, represents the percentage of the operation that is complete. Another color, on
the right of the bar, represents the percentage remaining. The thermometer updates as the operation
progresses. The [Thermometer] settings specify colors to use in thermometers as red, green, and blue
(RGB) values. You can change these values to specify different colors.
ThermoDoneColor=255, 0, 255
ThermoRemainingColor=192, 192, 192
Document comparison options
The [DocCompare] settings specify options for comparing documents:
CreateSummaryOnly=Off
MarkInsertedText=ConditionInserted
;MarkInsertedText=ConditionTag
;MarkInsertedText=Nothing
InsertConditionTag=Inserted
MarkDeletedText=ConditionDeleted
;MarkDeletedText=ConditionTag
;MarkDeletedText=ReplacementText
DeleteConditionTag=Deleted
DeleteReplacementText=^
• The CreateSummaryOnly setting sets the Create radio buttons in the Compare Documents and
Compare Books dialog boxes. When this setting is On, only a summary document is created. When this
setting is Off, both summary and composite documents are created.
• The MarkInsertedText settings control the standard choice for marking insertions. You can choose
the standard Inserted condition, ConditionInserted; a custom condition, ConditionTag; or
Nothing. Edit the file so the option you want is the only one without a semicolon before it. If you choose
a custom condition for inserted text, specify its tag with the InsertConditionTag setting.
• The MarkDeletedText settings control the standard choice for marking deletions. You can choose the
standard Deleted condition, ConditionDeleted; a custom condition, ConditionTag; or replacement
text, ReplacementText. Edit the file so the option you want is the only one without a semicolon before
it.
• If you choose a custom condition for MarkDeletedText, specify the condition tag in the DeleteConditionTag setting.
ADOBE FRAMEMAKER 6.0 19
Changing Initialization Files
• If you choose replacement text for the MarkDeletedText setting, add the replacement text as a text
string in the DeleteReplacementText setting (in place of the ^).
AddChangeBars=On
InsertHyperTextLinks=On
ThresholdFactor=75
• The AddChangeBars setting specifies if change bars are added to the composite document.
• The InsertHyperTextLinks setting specifies if hypertext links are added to the summary document.
• The ThresholdFactor setting controls when to mark an entire paragraph or table cell as changed. The
preset value is 75; an entire paragraph is marked as changed if 75 percent or more of the words are changed.
You can increase or decrease this percentage.
Spelling options
The [Spelling] settings in the initialization file define the options for spell-checking and specify which
style of quotation marks to use.
Settings for the Spelling Checker Options dialog box
The first group of lines under [Spelling] contains default settings for the Spelling Checker Options
dialog box:
FindRepeatedWords=On
FindUnusualHyphenation=Off
FindUnusualCap=Off
IgnoreSingleCharWords=On
IgnoreAllCaps=On
FindStraightQuotes=On
FindExtraSpaces=On
IgnoreRomanNumerals=Off
IgnoreWordsWithDigits=On
FindTwoInARow=On !,.:;?
IgnoreWordsContaining=On .
FindSpaceBefore=On !%),.:;?]}\xC8\xD3\xD5\xDD
FindSpaceAfter=On $([{\xC7\xD2\xD4\xDC\xE2\xE3
You can change any On setting to Off (and vice versa) and specify different characters in the last four lines.
(For information on entering special characters using hex codes, see “Special characters” on page 4.)
ADOBE FRAMEMAKER 6.0 20
Changing Initialization Files
These values are updated every time you exit, using the current settings in the Spelling Checker Options
dialog box.
Important: If you edit FindTwoInARow, IgnoreWordsContaining, FindSpaceBefore, and
FindSpaceAfter, be sure to leave a space between the On/Off toggle and the character or group of
characters to the right of it.
Quotation marks for Smart Quotes
The last group of lines under [Spelling] determines which characters appear when you press the single
quotation mark (') or double quotation mark (") key with Smart Quotes on. Several types of quotation
mark characters are available: English (‘ ’ and “ ”), German (‘ ’ and „ “), French (‘ ’ and « »), Swedish and
Finnish (’ ’ and ” ”), and Italian (‘ ’ and “ ”).
The Smart Quotes options appear in the file as comments:
;Smart Quote Characters
;SmartQuotes \xd4\xd5\xd2\xd3 ) English curved quotes
;SmartQuotes \xe2\xd4\xe3\xd2 ) German style quotes with base quotes
;SmartQuotes \xdc\xdd\xc7\xc8 ) French style quotes using guillemets
;SmartQuotes \xd5\xd5\xd3\xd3 ) Swedish and Finnish style quotes
;SmartQuotes \xd4\xd5\xd2\xd3 ) Italian curved quotes
Below the comments, one of the styles is already set for you. For example, this is how the setting initially
appears in the English versions of FrameMaker products:
;English curved quotes:
SmartQuotes=\xd4\xd5\xd2\xd3
If you want to revise the setting to use one of the other options, you can copy and paste from the comment
the codes for the style you want. (For information on entering special characters using hex codes, see
“Special characters” on page 4.)
Basic font settings
The [Fonts] settings in the initialization file determine the default fonts, the fonts not used for spellchecking, font sizes in a pop-up menu, and definitions needed to interpret fonts from other platforms.
Several settings determine whether features in Adobe Type Manager Deluxe 4.0 will be used.
Font size
DisplayUsingPrinterMetrics=Off
Sizes=7pt, 8pt, 9pt, 10pt, 11pt, 12pt, 14pt, 18pt, 24pt, 36pt
• The DisplayUsingPrinterMetrics setting determines whether on-screen display uses printer font
metrics or screen font metrics. When printing, printer font metrics are always used to calculate line lengths,
line breaks, and page breaks. However, the default Off value for this setting means that screen font metrics
are used for on-screen display of fonts, which usually results in a better on-screen display but may
introduce a difference between line lengths on-screen and on a printed page.
ADOBE FRAMEMAKER 6.0 21
Changing Initialization Files
If you are trying to position a graphic relative to a character in a line, you should change this setting to On.
This causes printer font metrics to be used when displaying the lines on the screen.
• The Sizes setting defines the values that appear in the Format > Size submenu and in the Size pop-up
menu in the Paragraph Designer and Character Designer. You can edit this line to change the values to any
values between 4 and 400 points. If the line contains more than 10 values, only the first 10 appear in the
menus.
Definitions for the font profile
Several lines under [Fonts] define the terms used for font information. This is how the definitions
initially appear:
Angles=Regular, Kursiv, Slanted, Oblique, Italic, Obliqued
Variations=UltraCompressed, ExtraCompressed, Compressed, Condensed,
Narrow, Regular, Wide, Poster, Expanded
Weights=Thin 100, ExtraLight 200, SemiLight 250, Light 300,Book 300,
Regular 400, SemiBold 600, DemiBold 600, Bold 700, ExtraBold 800,
Heavy 900
• The Variations and Angles settings define the names of variations and angles that may be encountered when opening a document from another platform.
• Windows uses values to define font weights and other terms. The Weights settings associate terms from
other platforms with font weights appropriate for Windows. For example, Thin is interpreted as the weight
100.
You can edit these settings if your document has variations, angles, or weights not specified in the default
settings.
Default fonts
Some of the [Fonts] settings define the default fonts for a new document. If the FrameMaker product
needs to remap characters for fonts that are unavailable and you do not have an appropriate font map
specified, it remaps the characters to the default font.
These are the default font settings:
DefaultSize=12
DefaultFamily=Times, Times New Roman, Tms Rmn
DefaultAngle=Regular
DefaultVariation=Regular
DefaultWeight=Regular
MathFamily=Symbol
You can edit any of these settings to use a different font or other characteristic. If you change the font
family, be sure to use a family installed on your system.
ADOBE FRAMEMAKER 6.0 22
Changing Initialization Files
The following settings define the defaults used to map to unknown Asian fonts:
DefaultJapaneseFamily=MS
DefaultKoreanFamily=
DefaultSimplifiedChineseFamily=
DefaultTraditionalChineseFamily=
Default Asian fonts
the following settings define the defaults used in dialog boxes to map to unknown Asian fonts:
DefaultJapaneseDialogFont=
DefaultKoreanDialogFont=System, 10
DefaultSimplifiedChineseDialogFont=System, 10
DefaultTraditionalChineseDialogFont=System, 10
For information about specifying a font map, see “Mappings for unavailable fonts” on page 24.
Menu fonts
UiCalcFont=MS Sans Serif, 8, 600
This setting in the [Fonts] section tells FrameMaker products what font to use when determining the size
of pop-up menus. You should not change this setting.
Fonts not used in spell-checking
NonTextFamilies=ZapfDingbats, Symbol, WingDings, Monotype Sorts
This setting defines the font families ignored during spell-checking. When you use the Spelling Checker
command, any text in these font families is ignored.
ATM Deluxe 4.5 features
AtmFontAutoActivation=On
AtmFontSubstitution=Off
The AtmFontAutoActivation setting determines whether font sets in Adobe Type Manager Deluxe 4.0
will be automatically activated. This means that if you open a document that uses a font that is installed on
your computer but is not in a font set that’s currently active, the font set will be activated automatically.
The otherwise inactive font is displayed and prints correctly, but it does not appear in font menus.
The AtmFontSubstitution setting determines whether ATM Deluxe will create a stand-in font for one
that is missing by simulating the shape and spacing of the missing font. The simulated font will not be an
exact match but will preserve line breaks and the general look of the uninstalled font. Font substitution
may delay displaying a document on slower computers or if there are many fonts that must be substituted.
ADOBE FRAMEMAKER 6.0 23
Changing Initialization Files
Aliases for Windows fonts
A font in Windows does not always have the same name as the comparable font on another platform. This
often happens because in Windows a variation such as Narrow is part of a font family, whereas on other
platforms the variation is an option independent of the font family. Moreover, Windows uses only regular
and italic for angles, while some fonts on other platforms have additional angles such as oblique. For more
information about cross-platform compatibility, see the online manual Working on Multiple Platforms.
Aliases for font angles and weights
Windows fonts use different font angles and weights, even when font names are the same as on other
platforms. The settings under [FontAngleAliases] and [FontWeightAliases] assign angles and
weights used on other platforms to Windows angles and weights. The defaults are:
[FontAngleAliases]
Obliqued=Oblique
[FontWeightAliases]
Medium=Regular
Roman=Regular
Semi=SemiBold
Demi=DemiBold
Bolded=Bold
Aliases for font names
Each setting under [WindowsToFrameFontAliases] assigns a Windows font to a FrameMaker
product font name. Thus, font information appears in the Windows interface as it does in other versions
of FrameMaker products. For example, Helvetica Narrow is normally a font family in Windows, but with
aliasing Helvetica appears as a font family and Narrow appears as a variation in the Character Designer and
Paragraph Designer.
Font aliasing also makes it possible to go back and forth easily between Windows and other platforms. The
FrameMaker product automatically converts Windows fonts to their FrameMaker product equivalents for
you.
The settings under [WindowsToFrameFontAliases] use this syntax:
Windows-font [angle|*], [weight|*]=Frame-font [angle|*], [weight|*], [variation|*]
Windows-font is a font family available in Windows. The angle for this font can be either Regular or
Italic, and the weight can be one of the weights defined in the font profile under [Fonts]. You can also
use an asterisk (*) to specify no particular angle or weight.
Frame-font is a font family available on the other platforms. The angle, weight, and variation for this
family can be any of the ones defined in the font profile. If you use an asterisk (*), the FrameMaker product
font will use the angle, weight, or variation from the Windows font.
For example, the setting
HelveticaNarrow, *, *=Helvetica, *, *, Narrow
ADOBE FRAMEMAKER 6.0 24
Changing Initialization Files
assigns the Windows font family Helvetica Narrow to the FrameMaker product font name Helvetica with
the Narrow variation. The two asterisks specify that angles and weights are not affected in this alias.
If you do not have an appropriate alias defined for a Windows font, the default alias is used:
Windows-font *, *=Frame-font *, *, *
You can add more aliases to [WindowsToFrameFontAliases] and change existing ones. Follow the
syntax for any changes you make.
Mappings for unavailable fonts
When you open a document that requires fonts not available on your system, an alert box appears telling
you the document uses unavailable fonts. If you click OK, the FrameMaker product opens the document
and substitutes the unavailable fonts with the fonts specified under [UnknownToKnownFontMap] in the
initialization file. Initially, this section has a few lines of comments and some mappings for common
Macintosh® fonts. You can change these mappings and add others.
The mappings under [UnknownToKnownFontMap] must use this syntax:
unavailable_Frame_font [angle|*], [weight|*], [variation|*]=available_Frame_font [angle|*],
[weight|*], [variation|*]
The angles, weights, and variations for these mappings can be any of the ones defined in the font profile
under [Fonts]. You can also use an asterisk (*) to specify no particular angle, weight, or variation.
For example,
Lumina, *, *=Helvetica, *, *, *
Helvetica, *, Light, *=Helvetica, *, Regular, *
Helvetica, *, *, UltraCompressed=Helvetica, *, *, Narrow
If you open a document with unavailable fonts and don’t have substitutes mapped for those fonts, the
FrameMaker product replaces them with the default fonts defined under [Fonts] instead.
Note that the settings under [UnknownToKnownFontMap] map one FrameMaker product font to
another. This is different from [WindowsToFrameFontAliases], which assigns a FrameMaker
product font name to an equivalent Windows font.
Mappings for Japanese fonts
If you open a Japanese document that was created on a Macintosh or in UNIX, you can specify what fonts
to use instead of the original ones.
The following settings apply to UNIX documents:
ADOBE FRAMEMAKER 6.0 25
Changing Initialization Files
The following setting applies to Macintosh documents:
Filters on your system
The [Filters] section in the initialization file contains settings for identifying foreign file formats,
export filters, and import filters. The FrameMaker product provides these settings when you install filters.
If you want to change any of the settings, install the filters again. Do not edit the settings manually in an
initialization file.
26
Changing Menus and Commands
FrameMaker products are configured to display menus and commands as described in your user guide and
in online Help. You can choose to display all the menus and commands or a subset of them called quick
menus. You can change both the complete and quick menu configurations by adding, removing, and
rearranging menus and commands, and by adding, changing, or removing command shortcuts. You can
also create a custom menu bar for document windows.
This chapter describes how to switch between quick, complete, and custom menus; write and use a menu
customization file to change the menus and their contents; and change command shortcuts. It also describes
where FrameMaker products look for menu and command configuration files when starting.
About menu and command configuration
The main FrameMaker product window has a menu bar. Each of the items on the menu bar is a menu.
When you select a menu, a list of menu items appears. A menu item can be a command, another menu, or
a separator.
A menu on a menu is sometimes called a cascading menu or a submenu. When you pause on or select a
menu item that is a menu, you see another menu displayed to the side of the current menu.
When you select a menu item that is a command, a predefined action happens: a dialog box comes up, or
some function is performed. Menu commands correspond either to a built-in function or a program
written to use the FrameMaker API.
A separator on a menu is a line that visually separates menu items into groups. On most menus, they are
visible but have no other function. However, on menu bars, they are invisible and serve a special function
(see “Separator lines on menu bars” on page 39).
Standard configuration files
The contents of menus are determined by four files. All menus are defined in one file. Commands that
appear on these menus are defined in one of three files. All of these definitions could be contained in a
single file. They are separated into multiple files for ease of understanding and maintenance.
A menu definition includes the menu’s unique identifier, its label (as it appears in the user interface), and
a list of its menu items. It also contains an additional specification if the menu is reserved.
The menu definition file is:
• fminit\product\menus.cfg
ADOBE FRAMEMAKER 6.0 27
Changing Menus and Commands
The menus.cfg file specifies two menu sets that can appear in the standard menu bar. One set displays all
menus and commands as they’re described in your user guide. These menus are called the complete menus.
The other set displays a subset of the menus and commands—quick menus—if you aren’t using all the
features. For example, the complete File menu contains the Preferences command and the Import and
Utilities submenus, but the quick File menu does not. See “Changing menu configurations” on page 42 and
“Menu and command configuration files” on page 14 for how to work with these menu sets.
The menus.cfg file can also specify if command buttons appear in the upper-right corner of the
document window.
The command definition files include the complete definition of commands. Each command definition
includes a unique identifier, a keyboard shortcut (optional), and a corresponding function code.
The command definition files are:
• fminit\configui\cmds.cfg
This file contains definitions of commands that are the same on all platforms.
• fminit\configui\mathcmds.cfg
This file contains the commands for equations that have platform-independent keyboard shortcuts.
• fminit\configui\wincmds.cfg
This file contains the commands and shortcuts that are specific to the Windows version of FrameMaker
products.
Customized configuration files
You can create a menu customization file to add, remove, rename, and rearrange menus and menu items
and to change command shortcuts. For example, a menu customization file might rearrange commands
on a menu or put several rarely used commands on a submenu. You can even define a completely custom
menu bar.
In a menu customization file, you need only specify the changes you want to make—not the entire menu
configuration. The contents of your customization file override the information in configuration files that
were read previously.
A menu customization file must be a text file. If you create it with a FrameMaker product, be sure to save
it in Text Only format.
The default location and filename for the menu customization file is
fminit\configui\customui.cfg. You do not have to use this file, however. You can create a menu
customization file in another location. Just be sure to set the ConfigCustomUIFile setting in the initialization file to your file’s path and filename.
You can read a menu customization file to change the standard menus and their menu items at any time
while running a FrameMaker product. The changes described in this additional file are made immediately
to the existing menus. The FrameMaker products can also read a menu customization file on startup.
FrameMaker products come with sample menu customization files. For a sample file that makes a few
changes to the default menus and commands, see the sample.cfg file in
install_dir\fminit\configui.
ADOBE FRAMEMAKER 6.0 28
Changing Menus and Commands
Keep in mind that changing menus and commands will make the interface inconsistent with the standard
interface, so that information in printed documentation and in online Help may no longer be accurate.
Precedence of the configuration files
When a FrameMaker product starts, it first reads the standard menu and command configuration files in
the FrameMaker product installation directory and then it reads a menu customization file, either the
default or a custom one. The information in each file overrides the information in files read previously.
FrameMaker products read these files in the following order:
1 fminit\configui\cmds.cfg
2 fminit\configui\mathcmds.cfg
3 fminit\configui\wincmds.cfg
4 fminit\product\menus.cfg
5 The file specified by the ConfigCustomUIFile setting in the initialization file. The default is
fminit\configui\customui.cfg.
The names of these configuration files are specified in the initialization file for the FrameMaker product
(see “Menu and command configuration files” on page 14).
Plug-ins (API clients) can also customize menus and commands. For example, a plug-in can add menus
and commands. When you start a FrameMaker product, menu customizations that you set up override the
customizations specified by plug-ins. For example, if a plug-in adds the command NewItem to the Special
menu, and your menu customization file adds NewItem to the View menu, then NewItem appears on the
View menu and not on the Special menu. For information on plug-in menu customizations, see the
documentation you received with the client.
Using menu customizations
If you create a menu customization file, you have several choices for reading the information into the
FrameMaker product. The FrameMaker product can read the file in automatically when it starts up, or you
can load it yourself once the product is running.
The customizations take effect as soon as the file is read. Any errors in the customization file are reported
in the FrameMaker product console window. Each error message contains the line number in the file and
a description of the problem. Even if an error is found, the rest of the file will be read.
• Reading a menu customization file at startup
If you want a menu customization file to be read at startup, set the ConfigCustomUIFile setting in the
initialization file to the path and name of your menu customization file. If you have defined a custom menu
bar and you want it to replace the FrameMaker product’s menu bar, you also change the MenuSet setting
in the initialization file to Custom. Then restart the FrameMaker product.
• Reading a menu customization file interactively
To load a menu customization file when the FrameMaker product is already running, choose View >
Menus > Modify. Then choose a menu customization file and click OK.
ADOBE FRAMEMAKER 6.0 29
Changing Menus and Commands
To remove all customizations you read in interactively, restart your FrameMaker product. If you set up a
menu customization file to be read at startup, you must remove the pathname of your customization file
as the value of the ConfigCustomUIFile setting in the initialization file and then restart the
FrameMaker product.
Configuration file statements
A configuration file consists of a series of statements that define the menu names, menu items, and the
order of those items. The statements that name the menus and menu items specify both an identifier and
a label. FrameMaker products use the identifiers internally and display the labels as menu and command
names. Other statements that refer to these items use the identifiers.
All statements have the following characteristics:
• Statements are case-sensitive.
• Each statement is enclosed in angle brackets (< and >).
Where nested angle brackets are required, every left angle bracket must have a corresponding right angle
bracket. To include a right angle bracket as part of a menu or command identifier or label, precede it with
a backslash (\).
• Statements must appear in a particular order.
For example, you must define a menu before adding it to the menu bar or another menu. You must add a
command to a menu before moving the command.
• Each statement begins with a special word that indicates what that statement does.
• Text outside angle brackets is treated as a comment. Don’t include angle brackets in comments.
The rest of this chapter contains many examples of statements. You will find examples of the following
statements:
Statement
What statement does
Menu
Defines a new menu
ReservedMenu
Defines a new reserved menu
Add
Adds a menu item to a menu
Modify
Defines a new label for a menu or menu item
Remove
Removes a menu or menu item
Command
Defines a command
ShiftCommand
Defines a command for a menu item that is chosen while the Shift key is held down
KeySequence
Defines a keyboard shortcut for a command
KeySeqLabel
Defines a label for the shortcut which appears next to the command name on the menu
Definition
Defines the function to be called when a command is chosen
Mode
Defines whether a command is a general command, a FrameMath command, or both.
Label
Defines a label for a menu or command that is visible in the user interface
ADOBE FRAMEMAKER 6.0 30
Changing Menus and Commands
Statement
What statement does
ReservedLabel
Defines a context-sensitive label for a menu or menu item.
Order
Defines a particular place for a menu item on a menu.
IconBarOn
Defines if the buttons from the upper-right corner of the document window are displayed.
Reserved menus
Many of the menus defined in the standard menu files for the FrameMaker product are reserved menus.
The FrameMaker product has intrinsic knowledge about reserved menus; it can refer to these menus
directly by name.
Reserved menus are defined with the ReservedMenu statement. By convention, the names of reserved
menus in the Frame menu configuration file all begin with an exclamation point (!). Some of the reserved
menus in the FrameMaker product menu configuration file are listed in the next two subsections.
Important: To avoid name conflicts with these reserved menus, do not begin any of your custom menu names
with an exclamation point.
Permanent menus
The FrameMaker product relies on the following menus existing. They are all menu bars or are associated
with the Formatting bar. You cannot remove these menus from the menu configuration file. The FrameMaker
product will not work properly without them.
Menu ID
Description
!BookMainMenu
Menu bar for complete menus (book window active)
!CustomMakerMainMenu
Menu bar for custom menus (document window active)
!MakerMainMenu
Menu bar for complete menus (document window active)
!QuickBookMainMenu
Menu bar for quick menus (book window active)
!QuickMakerMainMenu
Menu bar for quick menus (document window active)
!ViewerPopup
View-only document window pop-up menu
!RulerAlignMenu
Alignment pop-up menu in the formatting bar
!RulerControlMenu
Formatting bar
!RulerParaMenu
Paragraph Formats pop-up menu in the formatting bar
!RulerSpaceMenu
Spacing pop-up menu in the formatting bar
!ViewOnlyMainMenu
Menu bar for view-only document
ADOBE FRAMEMAKER 6.0 31
Changing Menus and Commands
Context menus
There are a number of reserved menus that appear when you use the right mouse button to click or drag.
These menus are context-sensitive; they contain menu choices appropriate to the selected object or
location of the click. The default context (shortcut) menu for a particular selection does not contain every
possible command you can do to the selection. If a menu item is not applicable to the selection and the
current state of the product, it will be grayed out. Keyboard shortcuts appear to the right of the commands
on these menus, just as they do in regular menus.
Context menus can also be displayed by pressing Shift+F10. In this case, the menu that appears depends
on whether there is a selected object, an insertion point, or neither.
Context Menu ID
Description
!AnchoredFrameContextMenu
The context menu for an anchored frame
!BookContextMenu
Context menu for a book window
!DocumentContextMenu
The context menu for the document as a whole (no active insertion point and nothing
selected)
!EmbeddedObjectContextMenu
The context menu for an OLE object
!GraphicsContextMenu
The context menus for all graphic objects except an anchored frame. The second
menu is for a grouped object.
!MultiGraphicsContextMenu
!MathContextMenu
The context menu for an equation
!QuickBookContextMenu
Context menu for a book window when QuickMenus are the current menu set
!StructureContextMenu
The context menu for the Structure View in FrameMaker+SGML
!StructuredTextContextMenu
The context menu for text in a structured text flow in FrameMaker+SGML
!TableContextMenu
The context menu for a table
!TableTextContextMenu
The context menu for text in a table
!TextContextMenu
The context menu for text
!TextLineContextMenu
The context menus for a text line. The first menu applies to text lines selected as text.
The second menu applies to text lines selected as graphic objects.
!TextLineGraphicContextMenu
!ViewerPopup
View-only document window context menu
!ViewOnlyBookContextMenu
View-only book window context menu
Customizing commands
The commands that appear on the standard menus are defined in the three command configuration files
listed in “Standard configuration files” on page 26. Each menu command corresponds either to a built-in
function or a call to a program that uses the API. The built-in functions are defined by the FrameMaker
product. The definition of a command includes the identifier of the built-in function or program.
ADOBE FRAMEMAKER 6.0 32
Changing Menus and Commands
This section tells you how to change the standard commands, remove them, and add additional commands
to the menus. For information on how to write programs that use the API, see the FDK Programmer’s
Guide, which is included in the Frame Developer’s Kit.
Important: If you want to edit the menus.cfg file using a FrameMaker product, you must first move the
file out of its directory. Then open the file and save it in Text Only format, and return it to its directory. Alternatively, you can use a text editor to edit it in its own directory.
Creating a new command
You can create a new command on a menu. You can specify a number of things when you create a new
command. The example below is the definition of the New command which appears on the File menu.
<Command New
<Label New...>
<KeySequence \!fn>
<Definition \x300>
<Mode All>>
You can nest statements in other statements. In the above example, there are four statements nested within
the overall Command statement. Each one of these determines one characteristic of the new command.
The first line creates a command called New. This is the command’s identifier, the name by which the
command will be referenced in other statements. The command identifier must be one word. Notice that
the closing angle bracket (>) for this statement is on the last line.
The second line gives this command a label of New... which is how it will be shown on
the menu.
The third line sets the keyboard shortcut for this command. The \! stands for the Esc key, so the shortcut
consists of three characters: Esc, f, and n.
The fourth line defines the actual function that is called when the command is chosen on the menu. This
function is specified by its function code number, called an f-code. The f-codes for all the built-in functions
are listed in a header file, fcodes.h, which is part of the Frame Developer’s Kit. This file is located in the
include directory under the FDK installation directory.
The last line means the command is both a FrameMath command and a regular Frame command.
Renaming a command
You can change the label of a command that appears on a menu. You can change the label everywhere it
appears, or in only one of several places.
To rename a command everywhere it appears, use the following statement:
<Modify ItemID <Label NewLabel>>
ItemID is the identifier of the command you want to rename. NewLabel is the new label.
ADOBE FRAMEMAKER 6.0 33
Changing Menus and Commands
For example, to rename the New command to Create New, use the following statement:
<Modify New <Label Create New...>>
To rename a command in only one place, define a new command that duplicates the function of the old
one (using the same key sequence, definition, and mode), but use a different label. Then put the new
command on the menu in place of the old one.
Creating a context-sensitive command
Some commands have a different label, and a different effect, depending on the state—where the insertion
point is, what is selected, and so on. For instance, if you have an insertion point in a text frame, there is a
Select All in Flow command on the Edit menu. If you have the text frame itself selected, this command
changes to Select All in Frame.
In these cases, the command has one overall identifier, followed by an identifier and label for each
condition in which it can be chosen. Each of the conditions has a ReservedLabel statement. The definition
of the Edit > Select command looks like this:
<Command SelectAll
<ReservedLabel Flow Select All in Flow>
<ReservedLabel Frame Select All in Frame>
<ReservedLabel Page Select All on Page>
<KeySequence \!ea>
<Definition \x327>
<Mode All>>
The SelectAll command acts as a placeholder on the menu for the group of commands: Flow, Frame, and
Page, all of which have the same command definition.
Renaming a context-sensitive command
You rename the SelectAll command in the same way you rename any other command. To rename one of
the context-sensitive commands, include in the Modify statement both the identifier of the overall
command and the identifier of the specific context-sensitive command you are renaming. The identifier of
the context-sensitive command must be part of a ReservedLabel statement.
For example, to rename the Select All in Frame command:
<Modify SelectAll <ReservedLabel Frame Select Everything in Frame>>
Specifying Japanese commands
You can define a command so that it appears only when other Japanese commands and features appear,
such as combined fonts, rubi, and tsume. These commands appear only if your system supports typing
Japanese text in documents and dialog boxes.
ADOBE FRAMEMAKER 6.0 34
Changing Menus and Commands
To define an Japanese-only command, use the <AsianFonts Yes> statement. For example, the
following statements define the Format > Document > Combined Fonts command:
<Command CombinedFonts
<Label Combined Fonts...>
<KeySequence \!oco>
<Definition \x338>
<AsianFonts Yes>
<Mode All>>
The <AsianFonts No> statement has the same effect as omitting the statement. If the AsianFonts
statement is set to No or is not specified, the command applies to all configurations.
Removing a command
You can remove commands from a menu. Removing a command from a menu doesn’t remove the actual
command or its associated keyboard shortcut from FrameMaker products. Only the menu changes.
Removing a command also doesn’t affect other commands, even though they may seem to be related. For
example, if you remove the Group command, the Ungroup command doesn’t disappear.
To remove a command, use the following statement:
<Remove ItemID <Menu MenuID>>
ItemID is the identifier of the command that you’re removing. MenuID is the identifier of the menu
containing the item you want to remove.
If a command appears on more than one menu and you want to remove it from each menu, use one
Remove statement for each menu. For instance, to remove the Reshape command from both the quick and
complete Graphics menus, use the following statements:
<Remove GraphicsReshape <Menu GraphicsMenu>>
<Remove GraphicsReshape <Menu QuickGraphicsMenu>>
Adding shortcuts for a command
There are two ways to specify a shortcut for a command. One is to specify a mnemonic shortcut and the
other is to specify a key sequence. A mnemonic shortcut is a one-character shortcut; the character must
occur somewhere in the label for the command. A key sequence shortcut usually consists of more than one
key.
• Adding mnemonic shortcuts
A mnemonic shortcut is an underlined character in a command label. When the menu is open, you can
press the underlined key to execute the command. For example, when the File menu is open, you can press
x to choose the Exit command.
To specify a mnemonic shortcut for a command, find the statement in which the command’s label is
specified and place an ampersand before the letter of the label which you wish to underline.
ADOBE FRAMEMAKER 6.0 35
Changing Menus and Commands
For example, the identifier for the Exit command on the File menu is TerminateMaker. In the cmds.cfg
file this command is given the label Quit. This value is overridden in the wincmds.cfg file with the
following statement (notice the & before the x):
<Modify TerminateMaker <Label E&xit>>
The mnemonic shortcuts will not be displayed unless the AutoMnemoniseMenus setting in the product
initialization file is set to On (see “Menu preferences” on page 10).
• Adding key sequences
You can add a key sequence for any command, even if it also has a mnemonic shortcut. You add a key
sequence for a command with a KeySequence statement. This statement can be included within the
command definition statement or in a Modify statement:
<Modify CommandID < KeySequence Sequence>>
The keys in the sequence can be any key on the keyboard. Most keys are represented in the sequence simply
by their character. For instance, if you wanted a key sequence to consist of the A key followed by the 3 key,
the sequence would be A3.
You represent some keys in the key sequence in a special way. You use symbols for modifier keys—for
example, + for Shift, ^ for Control, and ~ for Alt. The Esc key is used quite often and has a special abbreviation of a backslash followed by an exclamation point: \!
You can add the shortcut Control-a Control-c for the Copy command with this statement:
<Modify Copy <KeySequence ^a^c>>
If you want to use these special characters as actual characters in a key sequence, you precede them with a
backslash (\). For instance, a + in a key sequence means the Shift key, while a \+ means the plus key. A key
sequence of \!\+c means the Esc key, followed by the + key, followed by the c key. A key sequence of \!+c
means the Esc key, followed by the Shift and the c keys.
You represent other special keys with keysyms. A keysym is a keyword that denotes a special key on the
keyboard. Keysyms are always preceded by a forward slash (/). Valid keysyms are Up, Down, Left, Right,
Home, End, PgUp, PgDn, Return, Tab, BkSp, Space, Delete, Insert, F1 through F16, and Escape. For
instance, to include the Tab key as part of a key sequence, you use /Tab.
You might also want the new shortcut to appear on the menu next to the command label, as a reminder to
the user. You do this with a KeySeqLabel statement. The following statement adds a useful reminder for the
Copy shortcut:
<Modify Copy <KeySeqLabel Ctrl+a Ctrl+c>>
If a command does not have a KeySeqLabel statement, the command will be displayed on the menu with
no shortcut. This does not mean the shortcut does not exist; it just means the shortcut is not displayed on
the menu.
A command can have more than one shortcut. Adding a shortcut for a command or changing the shortcut
label that appears on a menu doesn’t disable other shortcuts for a command. As long as a unique shortcut
is defined in a configuration or menu customization file, it will work.
ADOBE FRAMEMAKER 6.0 36
Changing Menus and Commands
If you set ConfigWarnKbdRedundant to On in the product initialization file (see “Menu preferences” on
page 10), you will see warning messages when you load a customization file that contains shortcut definitions for commands that already have shortcuts defined for them. The warning messages appear in the
console window.
To change the label that appears for a shortcut on a menu without changing the shortcut itself, use the
following statement:
<Modify CommandID <KeySeqLabel Label>>
Label is the label you want to appear next to the command on a menu. The label changes everywhere the
command appears on a menu.
Removing shortcuts for a command
To remove a mnemonic shortcut for a command, remove the ampersand character in the Label statement
for the command.
To remove a key sequence for a command, delete its KeySequence and KeySeqLabel statements from the
command configuration files, and then restart the FrameMaker product.
Shortcuts on the Equations palette
The shortcuts that appear on the Equations palette won’t change to reflect any customizations. This palette
is actually a special view-only document containing hypertext commands.
Customizing menus
Creating a new menu
You create a new menu with the following statement:
<Menu MenuID <Label MenuLabel>>
MenuID is the identifier used in other statements to refer to the menu. MenuLabel is the label that appears
in the interface.
The menu identifier must be unique. Make sure your menu identifier doesn’t match an existing menu or
command identifier. You’ll find it easier to read the menu customization file later if your menu identifier
uses Menu as a suffix. Also, you’ll type the menu identifier whenever you add menu items to the menu, so
keep the identifier short and easy to type.
Creating a custom menu bar
To define a custom menu bar that replaces the standard menu bar, use the following statement:
<ReservedMenu !CustomMakerMainMenu <Label MyOwnMenus>>
Then add the menus that you want to appear on your menu bar. You can use existing menus or define your
own. If you define your own, you must define the menu first before adding it to your custom menu bar.
ADOBE FRAMEMAKER 6.0 37
Changing Menus and Commands
Adding a menu to the menu bar or another menu
Once a menu is created, you can add it to the menu bar as a main menu, or to an existing menu as a
submenu. For example, you may want to create a new menu on the menu bar for some commands you use
frequently. Or you may want to add an existing menu as a submenu. FrameMaker products use no more
than one level of submenus in their default configurations, but you can use more than one level.
To add the menu to a menu bar or to another menu, use the following statement:
<Add MenuID <Menu DestinationMenuID>>
MenuID is the identifier of the menu you are adding. DestinationMenuID identifies the menu bar or
menu to which you’re adding the other menu.
For example, to define and add a submenu labeled Other Commands to the Graphics menu, use the
following statements:
<Menu ExtraGraphicsCommands <Label Other Commands>>
<Add ExtraGraphicsCommands <Menu GraphicsMenu>>
The menu bar is defined as a menu, so you add a menu to the menu bar the same way you add a submenu
to an existing menu. When you add a menu to the menu bar, it appears after the existing menus (except for
the Help menu, which is always at the right of the menu bar). When you add a submenu to an existing
menu, it appears at the end of the menu.
After you add a menu, you can move it. For details, see “Rearranging menu items” on page 40.
Adding a command to a menu
You add a command to a menu with an Add statement, the same way you add a menu to a menu.
<Add CommandID <Menu MenuID>>
CommandID is the identifier of the command you’re adding. MenuID is the identifier of the menu to which
you want to add the command.
For example, to add the Find/Change command to the Special menu, use the following statement:
<Add Find/Change <Menu SpecialMenu>>
When you add a command, it appears at the bottom of the menu. After you add a command, you can move
it. For details, see “Rearranging menu items” on page 40. You can’t add a command directly to the menu
bar. The command must be on a menu.
You can also specify a Shift command—a command that replaces another command when you display the
menu while holding down the Shift key. For example, when you hold down Shift and pull down the File
menu, the Save command appears as Save All Open Files.
To add a Shift command to a menu, use the following statement:
<ShiftCommand UnshiftedCommand ShiftedCommand>
ADOBE FRAMEMAKER 6.0 38
Changing Menus and Commands
UnshiftedCommand is the identifier of the command as it normally appears. ShiftedCommand is the
identifier of the command you want to appear when you hold down the Shift key. For example, if you want
the Ungroup command to appear in place of the Group command on the Graphics menu when you press
Shift, use the following statement:
<ShiftCommand GraphicsGroup GraphicsUngroup>
Adding hypertext commands to a menu
You can use the Hypertext keyword to add hypertext commands to the menu. For example, the following
statements define an alert message that can be displayed by pressing the assigned shortcut keystroke
(Esc x x x) or selecting the command from the View menu:
<Command Test
<Label Hello>
<KeySequence \!xxx>
<Hypertext alert Hello there>>
<Add Test <Menu ViewMenu>>
For information on hypertext commands, see “Chapter 18: Hypertext and View-Only Documents” in the
FrameMaker User Guide.
Adding a separator between items on a menu
To add a separator line to a menu, use the following statement:
<Add Separatorn <Menu MenuID>>
MenuID is the identifier of the menu to which you want to add a separator, and n is the separator number
from 1 to 5. You cannot add duplicate separators to the same menu; each one must have a unique name.
You can define more separators by defining a command which is defined with the F12 function code. For
example:
<Command Separator6 <Definition \xF12>>
If you add a separator to a menu bar, the separator will be invisible. Separators are used on the menu bars
to define menu groupings for OLE 2 integration with other applications (see “Separator lines on menu
bars” on page 39).
Removing a separator between items on a menu
To remove a separator line to a menu, use the following statement:
<Remove Separatorn <Menu MenuID>>
MenuID is the identifier of the menu from which you want to remove the separator, and n is the separator
number.
Before removing a separator line from a menu bar, read “Separator lines on menu bars” on page 39.
ADOBE FRAMEMAKER 6.0 39
Changing Menus and Commands
Separator lines on menu bars
Separator lines on menus are visible as horizontal lines, except when they are added to a menu bar. When
separator lines are added to a menu bar, they are invisible. The menu.cfg file for a FrameMaker product
uses separator lines on the menu bars to group the menus on the menu bar into logical groups. These
logical groups are used when an embedded OLE 2 object in a document is edited.
You can edit an embedded OLE object by double-clicking it in the FrameMaker product. When you do this,
the menus that contain the functions you need to edit the object will replace some of the FrameMaker
product menus. This is called menu merging.
For example, the complete menu bar for FrameMaker (!MakerMainMenu) has nine menus and five
separators on it. The separators divide the nine menus into the following logical groups. The third group
has no menu items in it.
Logical grouping
Menus
File group
File
Edit group
Edit, Format, View
Container group
<none>
Object group
Special, Graphics, Table
Window group
Window
Help group
Help
When menu merging occurs, the menus in the File, Container, and Window groups are unchanged. The
menus in the Edit, Object, and Help groups are replaced with the application’s corresponding menus.
When you are done editing the object and deselect it, the replaced menus will revert to the original menus.
There are two other menu bars in the FrameMaker products that make use of this feature. They are the
Quick menu bar (!QuickMakerMainMenu) and the View-Only menu bar (!ViewOnlyMainMenu).
If a menu bar does not have these separators defined, menu merging will not happen when an embedded
object is double-clicked. If you modify these menu bars, be careful not to change these groupings. If you
define your own custom menu bar, menu merging will not take place unless you use separators to define
these logical groups.
The order of the Add statements for a menu bar determines which menus are in which logical groups.
Menus added in statements before the first separator is added belong in the FIle group. Menus added
between the first and second separator statements belong to the Edit group. Menus added between the
second and third separator statements belong to the Container group, and so forth.
In the menus.cfg file, the order of the statements which add items to the !MakerMainMenu bar determines
the logical groupings shown above. The statements which add the menus and separators to this menu bar are
interspersed with other Add statements that add menu items to the menus and their submenus. The lines that
define the !MakerMainMenu menu bar are shown below, without the intervening Add statements for the
other menus.
ADOBE FRAMEMAKER 6.0 40
Changing Menus and Commands
<ReservedMenu !MakerMainMenu <Label FrameMaker>>
<Add FileMenu <Menu !MakerMainMenu>>
<Add Separator1 <Menu !MakerMainMenu>>
<Add EditMenu <Menu !MakerMainMenu>>
<Add FormatMenu <Menu !MakerMainMenu>>
<Add ViewMenu <Menu !MakerMainMenu>>
<Add Separator2 <Menu !MakerMainMenu>>
<Add Separator3 <Menu !MakerMainMenu>>
<Add SpecialMenu <Menu !MakerMainMenu>>
<Add GraphicsMenu <Menu !MakerMainMenu>>
<Add TableMenu <Menu !MakerMainMenu>>
<Add Separator4 <Menu !MakerMainMenu>>
<Add !MSWindowMenu <Menu !MakerMainMenu>>
<Add Separator5 <Menu !MakerMainMenu>>
<Add !HelpMenu <Menu !MakerMainMenu>>
Rearranging menu items
You can rearrange menus on the menu bar and menu items on a menu. You can also move a menu item
from one menu to another. However, you cannot move the Help and Window menus. In the following
statements, ItemID refers either to a menu identifier or to a command identifier.
You can rearrange items on a menu with a combination of statements. The first statement is always an
Order statement. Embedded in this statement is another statement that specifies the exact location in the
menu to place the item. The following examples show how to do this.
To put an item first on a menu, use the following statement:
<Order MenuID1.ItemID <First MenuID2>>
To put an item last on a menu, use the following statement:
<Order MenuID1.ItemID <Last MenuID2>>
In the above statements, MenuID1 is the identifier of the menu that contains the item (menu or command)
you want to move. ItemID is the identifier of the item you want to move. MenuID2 is the identifier of the
menu to which you to want to move the item.
If you are moving an item to a different place on the same menu, MenuID1 and MenuID2 will be the same
identifier. For example, to move the Footnote command to the top of the Special menu, use the following
statement:
<Order SpecialMenu.Footnote <First SpecialMenu>>
ADOBE FRAMEMAKER 6.0 41
Changing Menus and Commands
To put the Special menu last on the menu bar (for complete menus), use the following statement:
<Order !MakerMainMenu.SpecialMenu <Last !MakerMainMenu>>
To put one item before another item on a menu, use the following statement:
<Order MenuID1.ItemID1 <Before MenuID2.ItemID2>>
To put one item after another item on a menu, use the following statement:
<Order MenuID1.ItemID1 <After MenuID2.ItemID2>>
In the above statements, MenuID1 is the identifier of the menu that contains the item (menu or command)
you want to move. ItemID1 is the identifier of the item you want to move. MenuID2 is the identifier of
the menu to which you to want to move the item. ItemID2 is the identifier of the item before or after
which you want to place ItemID1.
For example, to put the Thesaurus command above the Find/Change command in the Edit menu, use the
following statement:
<Order EditMenu.Thesaurus <Before EditMenu.Find/Change>>
To put the Graphics menu after the Format menu (for complete menus), use the following statement:
<Order !MakerMainMenu.GraphicsMenu <After !MakerMainMenu.FormatMenu>>
Renaming a menu
You can rename a menu. This changes the label of the menu; it does not change the menu’s identifier. To
rename a menu, use the following statement:
<Modify MenuID <Label NewLabel>>
MenuID is the identifier of the menu you want to rename. NewLabel is the new label for the menu. For
example, to rename the Page Layout submenu on the Format menu to Page Design, use the following
statement:
<Modify PageLayoutMenu <Label Page Design>>
Removing a menu or a menu item
You can remove menus from the menu bar and commands from a menu. The only exceptions are the
permanent reserved menus that can never be removed. (See “Permanent menus” on page 30 for a list.)
Removing a menu from a menu bar or another menu does not remove the definition of the menu.
Similarly, removing a command from a menu doesn’t remove the command itself or its associated
keyboard shortcuts. Only the menu on which the item belonged changes.
Removing a menu item also doesn’t affect other menu items, even though they may seem to be related. For
example, if you remove the Group command, the Ungroup command doesn’t disappear.
ADOBE FRAMEMAKER 6.0 42
Changing Menus and Commands
To remove a menu item from a menu, use the following statement:
<Remove ItemID <Menu MenuID>>
ItemID is the identifier of the item that you’re removing. MenuID is the identifier of the menu containing
the item you want to remove.
If a menu command appears more than once and you want to remove it from each instance, use separate
Remove statements. For example, to remove the Special menu from both the quick and complete menus,
use the following statements:
<Remove SpecialMenu <Menu !MakerMainMenu>>
<Remove QuickSpecialMenu <Menu !QuickMakerMainMenu>>
To remove the Reshape command from the Graphics menu in the quick menus, use the following
statement:
<Remove GraphicsReshape <Menu QuickGraphicsMenu>>
Debugging a customized configuration file
If you’re writing a lengthy menu customization file, consider writing and testing the customizations a few
at a time. This will make it much easier to locate problems in the statements you write. As you create the
file, you can save the file and then read it into a FrameMaker product to test your statements.
To display error messages when you load a menu customization file, set the ShowErrors setting in the
initialization file to On. You can also turn on the keyboard shortcut alerts, as discussed in “Menu preferences” on page 10.Error messages appear in the console window. If you find errors, you can fix them
immediately and continue writing.
When you read the same menu customization file again, you’ll see error messages about redefining a
command (because the same statements are being read again). Don’t worry about these messages.
Use comments throughout the menu customization file to document your work. Others may need to edit
the file later.
Changing menu configurations
You can switch to a custom menu by choosing View > Menus > Modify, and then selecting a menu file. For
information on setting your custom menus as the default see “Menu preferences” on page 10.
ADOBE FRAMEMAKER 6.0 43
Changing Menus and Commands
Removing formatting bar commands and window buttons
You can remove items from the formatting bar at the top of the document window. You can also remove
the buttons from the upper-right corner of the document window.
To remove the Paragraph Format pop-up menu, use the following statement:
<Remove !ShowRulerParagraphTags <Menu !RulerControlMenu>>
To remove the Alignment and Spacing pop-up menus and the tab wells, use the following statement:
<Remove !ShowRulerAlignmentSpacingAndTabs <Menu !RulerControlMenu>>
To remove the buttons from the upper-right corner of the document window, use the following statement:
<IconBarOn No>
To redisplay the buttons, use the following statement:
<IconBarOn Yes>