1
Section 1: Tips for Taking Successful Source Images
Section 1: Tips for Taking Successful Source Images
A great final HDR photograph starts with several differently exposed Low Dynamic Range (LDR)
source images of the same scene.
Photographs can be made with compact digital cameras, advanced-feature digital SLR
cameras, or film-based SLR cameras (from images scanned into your computer). Photomatix
can merge 8- and 16-bit photographs in JPEG, PSD or TIFF format into HDR images.
Two pieces of universal advice for creating LDR source images:
1) Still subjects work best. Any moving object will be 'ghosted' and may show up ghosted
in different places in your blended HDR image. An exception to this may be flowing
water, which follows a rhythmic pattern and can produce a soft, dreamy effect with long
exposures.
2) It is suggested to use a tripod to keep your images completely aligned. Photomatix
incorporates Image Alignment functions, but using a tripod is still recommended.
Auto-Exposure Bracketing (AEB) method for DSLR and compact digital cameras
It is recommended to shoot with available light. A flash may try to balance the exposure
of all the images, when a range of exposures is the goal.
Select a low ISO to minimize image noise.
Select Continuous shooting mode on the camera’s drive setting to ensure that the
bracketed photos will be captured with a single depression of the shutter button.
o Consult the camera manual for model-specific instructions on choosing this
setting.
If possible, use the camera’s self-timer setting, or a cable release to minimize camera
shake.
Set the camera to Auto Exposure Bracketing (AEB), which takes several photographs of
a scene in a row: one at the proper exposure, some underexposed, and some
overexposed.
o Most current DSLRs and compact digital cameras allow the user to select the
amount of over/under exposure in one-third or one-half increments. The
suggested exposure increment is +/- 2 for optimal exposure range. Consult the
camera manual for model-specific instructions on choosing this setting.
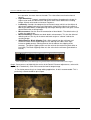
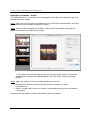
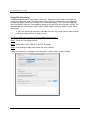
DSLR LCD window showing AEB icon with +/-2 increments selected.
Photomatix Pro User Manual
Page 1