1
User Manual
August 2013
EAZ0075L06C Rev. A
Trademarks
Snap-on, ShopStream, and ShopStream Connect, are trademarks of Snap-on Incorporated.
All other marks are trademarks or registered trademarks of their respective holders.
Copyright Information
©2013 Snap-on Incorporated. All rights reserved.
Disclaimer of Warranties and Limitation of Liabilities
The information, specifications and illustrations in this manual are based on the latest information available at the
time of printing. While the authors have taken due care in the preparation of this manual, nothing contained herein:
• Modifies or alters in any way the standard terms and conditions of the purchase, lease, or rental agreement
under the terms of which the equipment to which this manual relates was acquired.
• Increases in any way the liability to the customer or to third parties.
Snap-on reserves the right to make changes at any time without notice.
IMPORTANT:
Before operating or maintaining this unit, please read this manual carefully paying extra attention to the safety
warnings and precautions.
Visit our websites at:
http://diagnostics.snapon.com (North America)
www1.snapon.com/diagnostics/uk (United Kingdom)
snapontools.com.au (Australia and New Zealand)
For Technical Assistance
Call:
1-800-424-7226 (North America)
+44 (0) 845 601 4736 (United Kingdom)
1800-810-581(Australia and New Zealand)
E-mail:
[email protected] (North America)
[email protected] (United Kingdom)
[email protected] (Australia and New Zealand)
For technical assistance in all other markets, contact your selling agent
ii
Safety Information
For your own safety and the safety of others, and to prevent damage to the equipment and
vehicles upon which it is used, it is important that the accompanying Important Safety Instructions
be read and understood by all persons operating, or coming into contact with, the equipment. We
suggest you store a copy near the unit in sight of the operator.
This product is intended for use by properly trained and skilled professional automotive
technicians. The safety messages presented throughout this manual are reminders to the
operator to exercise extreme care when using this test instrument.
There are many variations in procedures, techniques, tools, and parts for servicing vehicles, as
well as in the skill of the individual doing the work. Because of the vast number of test applications
and variations in the products that can be tested with this instrument, we cannot possibly
anticipate or provide advice or safety messages to cover every situation. It is the automotive
technician’s responsibility to be knowledgeable of the system being tested. It is essential to use
proper service methods and test procedures. It is important to perform tests in an appropriate and
acceptable manner that does not endanger your safety, the safety of others in the work area, the
equipment being used, or the vehicle being tested.
It is assumed that the operator has a thorough understanding of vehicle systems before using this
product. Understanding of these system principles and operating theories is necessary for
competent, safe and accurate use of this instrument.
Before using the equipment, always refer to and follow the safety messages and applicable test
procedures provided by the manufacturer of the vehicle or equipment being tested. Use the
equipment only as described in this manual.
Read, understand and follow all safety messages and instructions in this manual, the
accompanying safety manual, and on the test equipment.
Safety Message Conventions
Safety messages are provided to help prevent personal injury and equipment damage. All safety
messages are introduced by a signal word indicating the hazard level.
'$1*( 5
Indicates an imminently hazardous situation which, if not avoided, will result in death or serious
injury to the operator or to bystanders.
:$51 ,1*
Indicates a potentially hazardous situation which, if not avoided, could result in death or serious
injury to the operator or to bystanders.
&$87,21
Indicates a potentially hazardous situation which, if not avoided, may result in moderate or minor
injury to the operator or to bystanders.
iii
Safety Information
Important Safety Instructions
Safety messages contain three different type styles.
• Normal type states the hazard.
• Bold type states how to avoid the hazard.
• Italic type states the possible consequences of not avoiding the hazard.
An icon, when present, gives a graphical description of the potential hazard.
Example:
:$51 ,1*
Risk of unexpected vehicle movement.
• Block drive wheels before performing a test with engine running.
A moving vehicle can cause injury.
Important Safety Instructions
For a complete list of safety messages, refer to the accompanying safety manual.
SAVE THESE INSTRUCTIONS
iv
Contents
Chapter 1: Using This Manual ................................................................................................... 3
Conventions.................................................................................................................................. 3
Bold Text ................................................................................................................................ 3
Symbols ................................................................................................................................. 3
Terminology ........................................................................................................................... 4
Notes and Important Messages ............................................................................................. 4
Procedures............................................................................................................................. 4
Chapter 2: Introduction.............................................................................................................. 5
Functional Description .................................................................................................................. 5
Technical Specifications ............................................................................................................... 7
Control Keys ................................................................................................................................. 8
Accept (Y/a) Key ................................................................................................................... 8
Directional Keys ..................................................................................................................... 8
Cancel (N/X) Key ................................................................................................................... 9
S (Shortcut) Key..................................................................................................................... 9
Power Key.............................................................................................................................. 9
Power Sources ............................................................................................................................. 9
Internal Battery Pack.............................................................................................................. 9
AC/DC Power Supply........................................................................................................... 10
Vehicle Power ...................................................................................................................... 10
The Stand ................................................................................................................................... 10
Chapter 3: Getting Started....................................................................................................... 11
Powering Up ............................................................................................................................... 11
Home Screen.............................................................................................................................. 11
Home Screen Buttons .......................................................................................................... 12
The Demonstration Program................................................................................................ 13
Powering Down .......................................................................................................................... 13
Emergency Shutdown .......................................................................................................... 13
Chapter 4: Navigation .............................................................................................................. 14
Screen Layout ............................................................................................................................ 14
Title Bar................................................................................................................................ 14
Toolbar ................................................................................................................................. 15
Main Body ............................................................................................................................ 16
Screen Messages....................................................................................................................... 17
Loading and Connecting Messages..................................................................................... 17
Confirmation Messages ....................................................................................................... 17
Warning Messages .............................................................................................................. 17
Error Messages.................................................................................................................... 17
Chapter 5: Scanner................................................................................................................... 18
Vehicle Identification................................................................................................................... 18
Alternative Vehicle Identification .......................................................................................... 20
1
Contents
Connecting to a Vehicle.............................................................................................................. 20
Cables .................................................................................................................................. 21
No Communication Message ............................................................................................... 21
Operations .................................................................................................................................. 22
Codes Menu......................................................................................................................... 23
Data Display......................................................................................................................... 25
Functional Tests................................................................................................................... 32
Troubleshooter ..................................................................................................................... 33
Exiting the Scanner .................................................................................................................... 33
Chapter 6: OBD-II/EOBD .......................................................................................................... 34
OBD Health Check ..................................................................................................................... 34
Global OBD II Code Check .................................................................................................. 35
Global OBD II Clear Codes .................................................................................................. 36
Readiness Monitors ............................................................................................................. 36
Connector Information ......................................................................................................... 37
OBD Diagnose............................................................................................................................ 37
Start Communication ........................................................................................................... 38
Select Communication Protocol ........................................................................................... 42
Connector Information ......................................................................................................... 43
Chapter 7: Previous Vehicles and Data.................................................................................. 44
Vehicle History............................................................................................................................ 44
View Saved Data ........................................................................................................................ 45
Delete Saved Data ..................................................................................................................... 46
Chapter 8: Tools ....................................................................................................................... 47
Tools Menu................................................................................................................................. 47
Connect to PC...................................................................................................................... 47
Configure Shortcut Key ........................................................................................................ 48
System Information .............................................................................................................. 48
Settings ................................................................................................................................ 49
Chapter 9: Maintenance ........................................................................................................... 56
Cleaning and Inspecting the Scan Tool...................................................................................... 56
Cleaning the Touch Screen ................................................................................................. 56
Battery Service ........................................................................................................................... 56
Battery Safety Guidelines .................................................................................................... 57
Replacing the Battery Pack.................................................................................................. 57
Disposing of the Batteries .................................................................................................... 58
2
Chapter 1
Using This Manual
This manual contains tool usage instructions. Some of the illustrations shown in this manual may
contain modules and optional equipment that are not included on your system. Contact your sales
representative for availability of other modules and optional equipment.
1.1 Conventions
The following conventions are used.
1.1.1 Bold Text
Bold emphasis is used in procedures to highlight selectable items such as buttons and menu
options.
Example:
• Press the OK button.
1.1.2 Symbols
Different types of arrows are used.
The “greater than” arrow (>) indicates an abbreviated set of selection instructions.
Example:
• Select Tools > Connect-to-PC.
The example statement abbreviates the following procedure:
1. Select Tools from the home screen.
2. Highlight Connect-to-PC on the Tools menu.
3. Select Connect-to-PC.
The solid arrows (e, c, d, b) are navigational instructions referring to the four directions of the
directional arrow keys.
Example:
• Press the down d arrow.
3
Using This Manual
Conventions
1.1.3 Terminology
The term “select” means highlighting a button or menu item and pressing the Accept, OK, Yes, or
other similar button to confirm the selection.
Example:
• Select Brightness.
The above statement abbreviates the following procedure:
1. Navigate to and highlight the Brightness selection.
2. Press the OK, or similar, button.
1.1.4 Notes and Important Messages
The following messages are used.
Notes
A NOTE provides helpful information such as additional explanations, tips, and comments.
Example:
i
NOTE:
For additional information refer to...
Important
IMPORTANT indicates a situation which, if not avoided, may result in damage to the test
equipment or vehicle.
Example:
IMPORTANT:
Do not disconnect the data cable while the Scanner is communicating with the ECM.
1.1.5 Procedures
An arrow icon in the left-margin area indicates a procedure.
Example:
z
To change screen views:
1. Select the Graph icon.
The dropdown menu displays.
2. Select an option from the menu.
The screen layout changes to the format selected.
4
Chapter 2
Introduction
The Scanner interfaces with the electronic control system of a vehicle to retrieve diagnostic
trouble codes (DTCs), access serial data stream information, and command bi-directional tests.
Various vehicle control systems, such as engine, transmission, and antilock brake system (ABS),
are readily diagnosed using this scan tool. The Scanner is capable of graphing up to four live data
parameters on a single screen, and also includes an extensive database of vehicle-specific
troubleshooting information.
This chapter describes the construction of the scan tool and addresses the use of the basic
hardware controls and features in the following sections:
•
•
•
•
•
Functional Description
Technical Specifications‚ on page 7
Control Keys‚ on page 8
Power Sources‚ on page 9
The Stand‚ on page 10
2.1 Functional Description
1
2
3
4
5
1— N/X Key (No, Cancel, or Return)
2— Y/a Key (Yes, Accept, or Continue)
3— Directional Key; left (e), right (c), up (b), down (d)
4— Shortcut Key
5— Power Key
Figure 2-1 Front view
5
Introduction
Functional Description
1
2
3
1— DC Power Supply Input Port
2— Battery Status Indicator LED (light emitting diode)
3— Mini USB Client Port
4— Micro secure digital (uSD) Card Port
5— Data Cable Port
Figure 2-2 Top view
1
2
1— Collapsible Stand (closed)
2— Battery Compartment Cover
Figure 2-3 Back view
6
4
5
Introduction
Technical Specifications
2.2 Technical Specifications
Touch Screen
Resistive Touch Panel
Display:
7.0 inch diagonal, Color LCD
800 x 480 resolution SWVGA
Battery:
Rechargeable lithium-ion battery pack
Approximately 2 hour run time
Approximately 5 hour charge time
DC Jack Operating Voltage
10V and 28V DC
Dimensions:
Width:
11.2 inches
285.0 mm
Height:
5.98 inches
151.8 mm
Depth:
2.0 inches
50.9 mm
Weight (including battery pack):
2.6 lbs.
1.18 kg
Operating Temperature Range (ambient):
At 0 to 90% relative humidity (non-condensing)
32 to 113°F
0 to 45°C
Storage Temperature (ambient):
At 0 to 70% relative humidity (non-condensing)
–4 to 140°F
–20 to 60°C
Environmental Conditions:
This product is intended for indoor use only
This product is rated for Pollution Degree 2 (normal conditions)
Power Supply:
Supply Rating; 15 VDC, 2A
7
Introduction
Control Keys
2.3 Control Keys
There are five control keys located on the right side of the unit near the handgrip:
Key
Icon
Description
Accept, Yes
Selects a menu or program, advances to the
next screen, or provides a yes answer to a
question on the screen.
Directional, Arrows
Moves the highlight on the display screen up,
down, left, and right, as indicated by the arrows.
Cancel, No
Exits a menu or program, returns to the
previous screen, or provides a no answer to a
question on the screen.
Shortcut
A function key that can be programmed to
provide a shortcut for performing a variety of
routine tasks.
Power, On/Off
Turns the unit on and off. Also, press and hold
for 5 seconds for emergency shutdown.
All other tool operations are controlled through the touch screen.
2.3.1 Accept (Y/a) Key
The Y/a key is used to do the following:
• To select an item that was highlighted using the directional arrow keys.
• To advance to the next screen in a series.
• To answer “Yes” when a yes or no choice is given.
2.3.2 Directional Keys
The directional, or arrow, keys move the cursor or highlight in their respective directions:
•
•
•
•
Up (b)
Down (d)
Left (e)
Right (c)
8
Introduction
Power Sources
2.3.3 Cancel (N/X) Key
The N/X key is used to do the following:
• To exit a menu or program.
• To close an open list and return to the previous menu.
• To answer “No” when a yes or no choice is given.
2.3.4 S (Shortcut) Key
Use the Shortcut key to quickly perform routine tasks, such as capturing an image of the current
screen, with a single key stroke. The Shortcut, or S, key can be programmed to perform a number
of functions. refer to Configure Shortcut Key‚ on page 48 for additional information.
2.3.5 Power Key
The Power key powers up the tool, and turns it off.
2.4 Power Sources
Your Display Device can receive power from any of the following sources:
• Internal Battery Pack
• AC/DC Power Supply
• Vehicle Power
2.4.1 Internal Battery Pack
The scan tool can be powered from the internal rechargeable battery pack. A fully charged
standard battery pack provides sufficient power for about 2 hours of continuous operation.
A multi-color LED on top of the unit (Figure 2-2) illuminates to indicate battery status. Interpret the
LED as follows:
• Green indicates the battery is fully charged
• Red indicates the battery is being charged
• Amber indicates a battery or battery charging issue.
An amber LED is usually caused by excessive battery temperature (above 104°F/40°C), which
disables charging. Allow the unit to cool down and make sure the ventilation ports are not
obstructed if the LED is amber.
9
Introduction
The Stand
2.4.2 AC/DC Power Supply
The scan tool can be powered from a standard wall socket using the AC/DC power supply and
power adapter. The jack on the output cable of the AC/DC power supply attaches to the DC power
supply input port on top of the scan tool. Use only the AC/DC power supply provided.
2.4.3 Vehicle Power
The scan tool receives power from the test vehicle when it is connected to a powered data link
connector (DLC) with the data cable. All OBD-II/EOBD compliant vehicles are required to have
battery power available on the DLC. If the scan tool does not power on when connected to an
OBD-II/EOBD DLC, there may be a circuit problem on the vehicle. Check the green LED on the
data cable (see Cables‚ on page 21 for additional information). If the LED is not illuminated,
suspect a problem on the DLC power circuit.
Certain vehicles do not provide vehicle power on the DLC. For these applications, a separate
cable adapter and power cable are needed to power the unit. Optional data cable adapters are
available for a number of vehicle manufacturers. Contact your sales representative for availability.
The power cable connects to a port on the cable adapter.
IMPORTANT:
Never connect the optional power cable or the AC/DC power supply to the DC power supply input
on top of the unit when the scan tool is communicating with a vehicle.
2.5 The Stand
The built-in stand extends from the back of the unit to allow hands-free viewing. The stand clips
into the unit for storage and pivots out so the display is at a 35 degree angle when in use.
10
Getting Started
Chapter 3
Make sure the scan tool has a charged battery pack, is connected to a powered vehicle data link
connector (DLC), or is connected to an AC power supply.
3.1 Powering Up
Press the Power key on the front of the unit to switch the scan tool on. The system boots up, then
opens the Home screen (Figure 3-1).
3.2 Home Screen
The main body of the Home screen has four selectable buttons, one for each of the primary scan
tool functions. These are explained briefly in the next section and discussed in detail in the
Navigation chapter.
1
2
Scanner
1
Titlebar
2
Main Body
OBD-II/EOBD
Previous
Vehicles & Data
Figure 3-1 Sample Home screen
11
Tools
Getting Started
Home Screen
The title bar, which runs across the top of the screen, provides information about the current
screen or a description of the defined test vehicle. The title bar contains no selectable items. An
icon at the right edge of the toolbar shows the status of the tool power supply:
Table 3-1 Power supply icons
Icon
Definition
Indicates power is being supplied by
the internal battery pack
Indicates the internal battery pack is
weak and needs recharging
Indicates power is being supplied by
the AC/DC power supply
Indicates power is being supplied by
the vehicle
Indicates the scan tool is actively
communicating with a vehicle
Indicates the scan tool is actively
communicating with a personal
computer
3.2.1 Home Screen Buttons
The Home screen buttons allow you to select which of the primary scan tool functions to use. The
table below gives brief descriptions of the button operations.
Table 3-2 Home screen buttons
Name
Button
Description
Scanner
Open a list of vehicle manufacturers to begin the
process of establishing a communications link to the
test vehicle. See "Scanner‚" on page 18 for details.
OBD-II/EOBD
Performs generic OBD-II/EOBD system tests without
first identifying a test vehicle. See "OBD-II/EOBD‚"
on page 34 for details.
Previous
Vehicle & Data
Use to connect to a recently tested vehicle, or to
access saved data files. See "Previous Vehicles and
Data" for details.
Tools & Setup
Select to adjust tool settings to your personal
preferences, to access scan tool system
information, and perform other special
operations. See "Tools" for details.
Select from the Home screen buttons to begin testing.
12
Getting Started
Powering Down
3.2.2 The Demonstration Program
The Scanner demonstration program allows you to become familiar with many of the test
capabilities of the tool without connecting to a vehicle. The demonstration contains actual data
captured while driving a 2001 Chevrolet Tahoe.
z
To start the demonstration program:
1. From the Home screen, tap the Scanner icon.
The manufacturer menu, which lists all of the makes available for testing, displays.
2. Tap the Demonstration button included on the manufacturer menu.
3. A screen advising you are in simulation mode displays, select Continue.
IMPORTANT:
Do not connect a vehicle to the scan tool while in the Demonstration mode.
4. Follow the on-screen instructions and select as needed until the confirmation screen displays.
5. Select OK on the confirmation screen to load the demonstration database.
6. Select OK from the Demo mode message screen.
A systems menu, which shows all of the systems available for testing, displays
7. Select from any of the systems listed, then select from the submenus.
i
NOTE:
There is also an OBD-II/EOBD demonstration, select “OBD Training Mode” in OBD-II/EOBD.
3.3 Powering Down
Use the Power key to turn the scan tool off.
IMPORTANT:
All vehicle communication must be terminated before shutting down the scan tool. A warning
message displays if you attempt to shut down while the Scanner is communicating with the
vehicle. Forcing a shut down while communicating may lead to ECM problems on some vehicles.
Exit vehicle communications before powering down.
z
To power off the unit:
1. Press N/X or Back until you reach the Home screen.
A “stopping communication” message appears briefly before the Home screen displays.
2. Disconnect the Scanner Data Cable from the vehicle test connector.
3. Press the Power key.
The Turn off dialog box displays.
4. Press Y/a to turn the power off, or press N/X to cancel and test a different vehicle.
3.3.1 Emergency Shutdown
In case of emergency, press and hold the Power key for five seconds to force a shutdown.
13
Chapter 4
Navigation
This chapter describes the scan tool screen layout, and to make selections using screen menus
and buttons, and the various types of messages that display while using the tool.
4.1 Screen Layout
Scan tool screens (Figure 4-1) typically include the following sections:
1
2
3
1— Title bar—shows test and tool status
2— Toolbar—contains test controls
3— Main body—displays menus and test data
Figure 4-1 Sample scan tool screen
4.1.1 Title Bar
The title bar at the top of the screen, provides basic information about current tool operating
conditions. Title bar options vary depending upon vehicle make and model, what test is being
performed or what menu is selected. Title bar information may include:
•
•
•
•
The identification (ID) of the test vehicle
The name of the active menu or database
A power source indicator
A vehicle communication indicator
Depending upon what is being displayed in the main body of the screen, either the vehicle ID or
the active menu is shown at the left side of the title bar.
An icon at the far right side of the title bar indicates whether the tool is being powered by the
internal battery pack, the test vehicle, or the AC/DC power supply.
A communication icon displays to the left of the power source indicator whenever the scan tool is
actively communicating with a vehicle or a personal computer.
14
Navigation
Screen Layout
4.1.2 Toolbar
The toolbar, located under the title bar, contains a number of selectable buttons that control tool
functions. What buttons appear on the toolbar varies, as only buttons that are active or available
for the current screen and test mode display. A brief description of common toolbar button
operations are shown in Table 4-1. Additional buttons appear on the toolbar when special
operations are available. These buttons are explained in the Operations chapter.
Table 4-1 Data toolbar buttons (part 1 of 2)
Button
Icon
Function
Back
Returns to the previously viewed screen. This button
is always at the left-hand edge of the toolbar.
Home
Returns to the Home screen. This button is always
alongside the Back button on the left of the toolbar.
Pause
Indicates live data from the vehicle is being
displayed. Selecting pauses data collection.
Record
Indicates the data being displayed is paused and not
being updated. Selecting resumes data collection.
Clear
Erases all the data in the buffer and begins a new
recording. Selecting opens a confirmation message.
Sort
Determines the order in which the data parameters
are listed on the screen.
PID Triggering
Opens a menu that allows you to set, arm, and clear
threshold values that automatically trigger a data
movie recording.
Zoom
Incrementally increases and decreases the scale of
the data graphs.
Custom Data List
Opens a menu for selecting which parameters
display in the data list. This button displays when
viewing a data list.
Graph
Switches between parameter list and graph display
modes. This button displays when viewing a data list.
Lock/Unlock
Locks or unlocks the highlighted parameter. This
button displays when viewing a data list.
Save
Saves the current screen information, such as a
Scanner movie, to tool memory.
15
Navigation
Screen Layout
Table 4-1 Data toolbar buttons (part 2 of 2)
Button
Icon
Function
Tools
Opens the tools menu, which allows you to adjust
basic tool settings.
Previous Frame
Moves back one frame at a time when viewing
recorded or paused data. Hold the button down to
keep moving back through the data.
Next Frame
Moves forward one frame at a time when viewing
recorded or paused data. Hold the button down to
keep moving forward through the data.
Back 10 Frames
Moves back 10 frames at a time when viewing
recorded or paused data. Hold the button down to
keep moving back through the data.
Forward 10 Frames
Moves forward 10 frames at a time when viewing
recorded or paused data. Hold the button down to
keep moving forward through the data.
When a selectable item on the screen is highlighted, a yellow frame surrounds the item to indicate
that it is in focus.
4.1.3 Main Body
The main body of the screen is the lower portion, which displays either a menu of available tests
or data from the vehicle. A vertical scroll bar appears along the right-hand edge of the main body
when there is additional data either above or below what is currently on the screen (Figure 4-2).
1
2
3
4
5
1— Go to beginning
2— Go up 1 page
3— Slider (position indicator)
4— Go down 1 page
5— Go to end
Figure 4-2 Sample scroll bar
16
Navigation
Screen Messages
Tap the arrowheads at the ends of the scroll bars to move through the data in the direction of the
arrow one page at a time. Selecting an arrowhead that points to a line moves you directly to the
beginning or end of the data. The slider in the center portion of the scroll bar indicates the relative
position of the current screen to the total available data.
4.2 Screen Messages
There are four types of on-screen message:
•
•
•
•
Loading and connecting
Confirmations
Warnings
Errors
4.2.1 Loading and Connecting Messages
Loading and connecting messages display when the scan tool is performing an internal operation,
such as loading a database, initiating a test, or establishing communications with the vehicle. The
message automatically clears once the internal operation is complete.
4.2.2 Confirmation Messages
Confirmation messages inform you when you are about to perform an action that cannot be
reversed or when an action that requires your confirmation to continue has been initiated.
When a response is not required, the message displays briefly, then disappears.
4.2.3 Warning Messages
Warning messages inform you when completing the selected action may result in an irreversible
change or loss of data.
4.2.4 Error Messages
Error messages inform you when a system or procedural error has occurred.
Examples of possible errors include:
• A cable is disconnected.
• A peripheral, such as a printer is powered off.
17
Chapter 5
Scanner
The Scanner establishes a data link to the electronic control systems of the vehicle being
serviced. This allows you to retrieve diagnostic trouble codes (DTCs) view live data parameters,
and perform tests. Scanner testing requires connecting the scan tool to the test vehicle using the
data cable and test adapters. On screen instructions tell you how to connect the Scanner.
Additional connection information can be found in the appropriate vehicle communication
software manual for the test vehicle. Vehicle communication software manuals are available on
the internet at: http://diagnostics.snapon.com/usermanuals.
5.1 Vehicle Identification
The Scanner information presented is provided by the ECM of the vehicle. Therefore, certain
attributes of the vehicle must be entered into the scan tool to ensure the test data displays
correctly. This vehicle identification sequence is menu driven, simply follow the screen prompts to
make a series of choices. Each selection advances you to the next screen. Exact procedures may
vary by the make, model, and year of the test vehicle.
z
To identify a vehicle for Scanner testing:
1. Tap the Scanner button on the Home screen.
A list of manufactures displays (Figure 5-1).
Figure 5-1 Sample manufacturer list
The list includes Demonstration, which opens the Demonstration program (see The
Demonstration Program, on page 13).
2. Select the vehicle manufacturer from the list.
18
Scanner
Vehicle Identification
A model year menu displays.
3. Select the vehicle year from the menu.
A list of vehicle types or models displays. Several selections may be required to complete the
vehicle identification, follow the screen prompts to enter the required information.
A confirmation screen displays once all the required data has been entered (Figure 5-2).
Figure 5-2 Sample confirmation dialog box
4. From the Confirm Vehicle screen select:
a. OK to continue.
b. Cancel to return to the engine list.
When Yes is selected list of systems available for testing on the identified vehicle displays.
5. Select a system from the list to continue (Figure 5-3).
Figure 5-3 Sample available systems list
19
Scanner
Connecting to a Vehicle
i
NOTE:
Only the systems available for testing on the identified vehicle are included in the list.
The identification sequence is now complete.
5.1.1 Alternative Vehicle Identification
Occasionally, you may identify a test vehicle that the Scanner does not recognize, the database
does not support, or has some unique characteristics that prevent it from communicating with the
Scanner through the normal channels. In these instances, a menu of alternate choices displays.
Alternate choices allow you to establish communication with the vehicle by other means. The
following alternatives are available:
• Manufacturer—allows you to begin diagnosing by first selecting from a list of makes.
• OBDII/EOBD—allows you to perform generic OBD-II or EOBD tests. See OBD-II/EOBD, on
page 34 for additional information.
• Select by Database—allows you to begin the vehicle identification by first selecting which
database to load. Selecting opens a menu of available databases.
5.2 Connecting to a Vehicle
Instructions for connecting the Scanner to the vehicle with the data cable are shown once a
selection is made from the list of systems available for testing (Figure 5-4).
Figure 5-4 Sample vehicle connection message
If an optional cable adapter is needed, the instructions tell you which one to use, and also where
to locate the vehicle diagnostic connector to perform the selected tests.
20
Scanner
Connecting to a Vehicle
5.2.1 Cables
One of two data cables, one for OBD-II/EOBD compliant vehicles and an optional one for
non-OBD-II/EOBD models, is used to connect the scan tool to the test vehicle. The 26-pin end of
either cable attaches to the data cable port on the top of the scan tool. The connector is secured
with captive screws. The 16-pin end of the OBD-II/EOBD cable directly plugs into the data link
connector (DLC) of the test vehicle. With the non-OBD-II/EOBD cable, a cable adapter attaches
to the 15-pin end of the cable and the adapter then plugs into the vehicle test connector.
On-screen instructions on the scan tool tell you which cable, and adapter if needed, to use once a
vehicle has been identified. The screen message also includes the location of the vehicle
diagnostic connector the cable attaches to for testing the selected system.
A replaceable 7.5 amp blade-type fuse is installed in the vehicle connector end of the cable to
protect the unit from high circuit voltage and current. A green LED, also on the vehicle connector
end of the cable, illuminates whenever power is supplied to the cable. An LED that fails to
illuminate indicates either a problem on the vehicle power circuit or a blown data cable fuse.
All OBD-II/EOBD vehicles have vehicle battery power (B+) available on the DLC. The optional
auxiliary power cable supplies power for testing non-OBD-II/EOBD models that do not have B+
available on the diagnostic connector. The optional cable and adapters are required for testing
non-OBD-II/EOBD models.
z
To connect the data cable to the vehicle:
1. Follow the on-screen instructions for connecting to the vehicle (Figure 5-4).
2. Once connected, select Continue.
The Scanner establishes communication then displays a list of available tests. If the Scanner
is unable to establish a communications link, a “no communications” message displays.
3. Select from the available tests to open a submenu of test options.
5.2.2 No Communication Message
When the screen displays a “no communication” message, it means the scan tool and the vehicle
control module cannot communicate with each other for some reason.
The following conditions cause a “no communication” message to display:
•
•
•
•
•
•
•
The Scanner is unable to establish a communication link with the vehicle.
You selected a system for testing that the vehicle is not equipped with.
There is a loose connection.
There is a blown vehicle fuse.
There is a wiring fault on the vehicle.
There is a circuit fault in the data cable or adapter.
Incorrect vehicle identification was entered.
Refer to the Vehicle Communication Software manuals for manufacturer-specific problems.
21
Scanner
Operations
5.3 Operations
The Scanner allows you to establish a data link to the electronic control systems of the vehicle
being serviced in order to view live data parameters and perform tests. Data may be available from
multiple systems, such as engine, transmission, antilock brake system (ABS), and others.
Functional tests, troubleshooting tips, and trouble code information are typically available.
The Scanner has two main functions:
1. Scanner—provides access to vehicle systems to perform functions such as reading codes,
viewing data, and conducting functional tests.
2. Fast-Track Troubleshooter—provides the diagnostic power of Fast-Track Troubleshooter, a
database of experience based information developed by master technicians.
After a system is selected and the Scanner establishes communication with the vehicle, a
Scanner Main menu, which lists available tests, displays.
Figure 5-5 Sample Scanner Main menu
Main menu options vary slightly by the year, make, and model of the test vehicle. The main menu
may include:
• Data Display— displays data parameter information from the vehicle control module.
Selecting may open a submenu of viewing options.
• Codes Menu—displays diagnostic trouble code (DTC) records from the vehicle control
module. Selecting may open a submenu of viewing options.
• Clear Codes—erases DTC records and other data from the ECM. This selection is found on
a Codes submenu for some models.
• Functional Tests—provides specific subsystem and component tests. The tests vary
depending on the manufacturer and model.
• Actuator Tests—similar to functional tests, checks the operation of certain actuators, such as
solenoid valves and relays.
• Memory Resets—allows you to reprogram adaptive values for certain components after
making repairs. Selecting opens a submenu. These options are found on the Functional Tests
Menu for some models.
22
Scanner
Operations
• System Tests—provides specific subsystem testing. Performing these tests is similar to
functional tests.
• Generic Functions—lets you access certain available Generic OBD II functions from a
proprietary menu (1996 and newer vehicles only).
• Troubleshooter—provides step-by-step procedures, integrating parameter data and
retrieving trouble codes when appropriate, for specific symptoms of the identified vehicle.
z
To perform a Scanner test
1. Launch the Scanner—Tap Scanner on the Home screen.
2. Identify the vehicle—Identify the test vehicle by selecting from the menu options.
3. Select the system—Select the system to be tested from the systems menu.
4. Connect the data cable to the vehicle—Follow the on-screen connection instructions to
connect the scan tool unit to the test vehicle.
5. Select the test from the Scanner main menu—Select the desired test.
5.3.1 Codes Menu
This selection may appear as Codes, Codes Menu, Codes Only, Codes (No Data), Service Codes
or something similar on the menu. Selecting opens a list of data parameter viewing options that
includes:
• Display Codes
• Clear Codes, on page 24
• Freeze Frame/Failure Records, on page 24
Display Codes
Selecting opens either a list of diagnostic trouble codes (DTCs) stored in the selected electronic
control module (ECM), or a submenu of DTC viewing options. Submenu options include:
• Trouble Code Information—opens a list of codes in ECM memory
• History Codes—opens a list codes whose symptoms are not currently present. History codes
indicate an intermittently occurring problem.
• Failed This Ignition—opens a list of codes that set during the current ignition cycle.
• MIL SVS or Message Requested—displays ECM requests to turn on the malfunction
indicator lamp (MIL) or service vehicle soon (SVS) lamp, or display a driver information alert.
• Last Test Failed—displays a complete list of failed tests.
• Test Failed Since Code Cleared—displays a list of tests that failed since the last time codes
were cleared from ECM memory.
A code list includes the DTC and a brief description (Figure 5-6).
23
Scanner
Operations
Figure 5-6 Sample code list
Clear Codes
The Scanner clears emissions-related codes from the control module memory on some vehicles.
If this function is not available on the test vehicle, Clear Codes does not appear as a menu option.
i
NOTE:
Clear Codes is also available from OBD-II Health Check (see OBD Health Check, on page 34).
z
To clear codes:
1. Select Clear Codes from the Codes Menu.
A confirmation message displays.
2. Make sure any conditions shown on the confirmation message are met, then select Yes.
A “codes cleared” message displays once the operation is complete.
3. Select Continue to return to the Codes Menu.
IMPORTANT:
Clearing codes erases all temporary ECM information, including Freeze Frame/Failure Records.
Make sure no vital information will be lost before clearing codes.
Freeze Frame/Failure Records
This selection displays the DTC that was set, along with corresponding data, when the ECM
commanded the malfunction indicator lamp (MIL) to turn on.
24
Scanner
Operations
5.3.2 Data Display
Select Data to view live datastream parameters from the vehicle ECM. In data display mode the
screen has a toolbar and a main body (Figure 5-7).
Figure 5-7 Sample data display screen
The buttons on the toolbar operate as shown in Table 4-1 on page15 while viewing data.
During data display the main body of the screen is divided into two columns; the left-hand column
has a description of the parameter and the right-hand column shows the parameter value or state.
Parameters are listed in the order in which they are transmitted by the ECM, so expect variations
between years, makes, and models.
Up to three parameters can be locked, or fixed, at the top of the list. Locked parameters do not
change as you scroll through the parameter list. The Lock/Unlock button on the toolbar selects
which parameters are fixed (see Locking Parameters, on page 28).
Pausing Data Collection
You may “pause” the collection of data from the vehicle control module to more closely examine it.
When data is paused, all of previous frames of data stored in the scan tool memory buffer are
available for review.
z
To pause data collection:
1. While viewing live data, touch the Pause button.
On the toolbar, the Record button replaces the Pause button and the Previous Frame and
Next Frame buttons display. A frame counter displays at the top of the main body of the
screen, and a vertical line indicates your position when in the graph mode (Figure 5-8).
25
Scanner
Operations
1
2
3
4
5
1— Previous Frame button
2— Next Frame button
3— Record button
4— Frame counter (current frame/total frames)
5— Position indicator
Figure 5-8 Sample paused frame of data
2. Scroll to review the data in the frame.
3. To switch frames, touch Previous Frame or Next Frame. Each button touch moves one
frame in the selected direction.
z
To resume collecting data:
• Touch the Record button.
The display changes to live data and the Pause icon is shown on the toolbar.
i
NOTE:
The Shortcut button can be set to perform the Pause/Play function. See Configure Shortcut Key,
on page 48 for additional information.
Sorting Data
The Sort button on the toolbar allows you to arrange the parameter list three ways:
• Factory Sort—lists parameters in the order they are transmitted by the ECM
• A-Z Sort—lists parameters alphabetically in ascending order
• Z-A Sort—lists parameters alphabetically in descending order
26
Scanner
Operations
z
To sort the data list:
1. Select the Sort button on the toolbar.
2. Select from the dropdown menu using either the touch screen or the arrow and Y/a keys.
i
NOTE:
Any locked parameters are unlocked whenever a selection is made from the Sort button.
Customizing the Data List
The Custom Data List button on the Scanner Toolbar is used to determine which specific
parameters display. Minimizing the number of parameters on the data list allows you to focus on
any suspicious or symptom-specific data parameters. You can add or remove most parameters
from the list. Certain vital parameters cannot be removed. These appear in gray at the top of the
list along with a lock icon, and they cannot be selected.
i
NOTE:
Limiting the number of parameters that displays to those that apply to a particular situation results
in a faster data refresh rate, and reduces the amount of memory used for saved files.
z
To create a custom data list:
1. Tap the Custom Data List button on the toolbar to select it.
The data selection screen displays and two new buttons appear on the toolbar. Check marks
to the left of the parameter description indicates which parameters are selected for display. A
second smaller check box indicates a parameter that is locked.
The toolbar buttons provide options for selecting and deselecting which parameters to include
or remove from the custom data list:
Button
Description
Select/Deselect, use to mark individual
parameters to hide or display.
Select All/Deselect All, use to hide or
display all of the parameters in the list. Any
locked parameters cannot be hidden.
2. Create a custom data list by touching the parameters to include. A parameter that displays
has a check mark alongside the name, a parameter that does not display does not:
a. Touching the Select All/Deselect All button immediately changes all of the parameters to
the same condition, a second touch changes them all back.
b. Touching the Select/Deselect button activates it. Now you can add or remove
parameters by touching individual entries in the list.
Keep the following in mind:
–
–
–
–
Items at the top of the list that cannot be highlighted are locked and cannot be turned off.
Use the Select All button to display the complete list.
Use the Deselect All button to remove all of the highlights.
Use the Cancel button to return to the data display.
3. Select OK to display the updated data list.
27
Scanner
Operations
Changing Screen Views
Selecting the Graph button opens a dropdown menu of options:
•
•
•
•
PID List
1 Graph
2 Graph
4 Graph
The PID (parameter identification) List view is a 2-column display with the name of the parameters
in the left column and their current values in the right column (Figure 5-7).
The 1, 2, and 4 Graph views divide the screen horizontally to simultaneously display data graphs
for the indicated number of parameters (Figure 5-9). Use the scroll bar or the up (b) and down (d)
keys to view other parameters.
Figure 5-9 Sample 4 Graph view screen
Any previously set conditions, such as held data or locked lines of data, remain in effect when the
screen view is changed.
Locking Parameters
Use the Lock/Unlock button to lock selected lines of the data in place and prevent them from
scrolling, or to release previously locked lines of data. Up to three lines of data may be held at a
time. This feature allows you to position related parameters together, making it easier to monitor
their values and spot inconsistencies.
Locked parameters display as the top frames on the main body of the display screen, as well as
at their usual position within the data list (Figure 5-10). A lock icon appears to the left of the
parameter name to indicate it is locked.
28
Scanner
Operations
z
To lock parameters:
1. Highlight the parameter to be locked.
2. Tap the Lock/Unlock button on the toolbar to lock it.
A copy of the locked parameter is now shown at the top of the data list, and a lock icon
appears alongside the parameter name.
3. Highlight and select additional parameters to lock.
Up to three parameters can be locked at a time. Once locked, a parameter remains locked
until it is manually unlocked or communication with the vehicle stopped.
Figure 5-10 Sample locked parameters
i
NOTE:
If three parameters are locked, one of them must first be unlocked before another parameter can
be locked.
z
To unlock parameters:
1. Scroll through the data list and highlight the parameter to be unlocked, or released.
2. Tap the Lock/Unlock button on the toolbar.
The released parameter and the lock icon disappear from the list at the top of the data list.
3. Repeat Step 1 and Step 2 to release other parameters if needed.
Saving
The Save button is used to record movies of vehicle datastream values. Saving helps when trying
to isolate an intermittent problem or to verify a repair during a road test. Saved files also provide
documentation that helps you explain driveability problems to your customers.
A number of data movies can be stored, which can later be opened by selecting the Previous
Vehicles and Data button on the home screen.
Saved files can also be downloaded from the scan tool to a personal computer (PC) through the
Mini USB port. Once connected to the PC, SOLUS Ultra files can be printed, transferred, and
29
Scanner
Operations
copied using ShopStream Connect. ShopStream Connect is a PC application that creates an
interface between the scan tool and a PC. The ShopStream Connect application is a free
download available at: http://diagnostics.snapon.com/SSC.
z
To save a movie:
• Select Save.
A save movie dialog box displays while data is being saved. The movie is saved when the
message box disappears.
Figure 5-11 Sample save dialog box
i
NOTE:
The Shortcut key can be programmed to perform the Save Screen or Save Movie function. See
Configure Shortcut Key, on page 48 for details.
Setting Trigger Levels
The PID Trigger button on the toolbar allows you to configure the scan tool to automatically
capture data when a parameter value crosses a threshold value. When triggering is armed, a
“trigger event” pauses data collection and records a data movie. Triggered movies are similar to
an OBD-II/EOBD freeze-frame event, but include much more information.
Selecting the PID Trigger button opens a menu that includes:
• Set Trigger—establishes upper and lower signal values to initiate an event capture for the
highlighted parameter.
• Arm Trigger—activates the scan tool to capture an event when the signal crosses a
threshold value.
• Clear All Triggers—deletes all previously set trigger levels.
30
Scanner
Operations
If triggers are set the menu options are:
• Clear Trigger—deletes set trigger levels for the highlighted parameter.
• Disarm Trigger—de-activates event capture capability.
• Clear All Triggers—deletes all previously set trigger levels.
z
To set trigger levels:
1. Highlight the parameter to be used for triggering the recording.
2. Tap the PID Trigger button.
3. Select Set Trigger from the dropdown menu.
A graph of the highlighted parameter with a trigger toolbar above it fills the main body of the
screen. The trigger level line displays as a solid line running horizontally across the data graph
(Figure 5-12). An upper and lower trigger level must be set, the upper level is set first.
Figure 5-12 Sample trigger set screen
4. Tap the plus (+) and minus (–) buttons on the toolbar, or use the up b and down d arrow
buttons to position the upper trigger level to where you want it on the graph.
5. Tap a on the toolbar, or press the Y/a key, to set the upper threshold.
A lower trigger level line now appears at the mid-point of the graph.
6. Tap the plus (+) and minus (–) buttons on the toolbar, or use the up b and down d arrow keys
to position the lower trigger level line to where you want it on the graph.
7. Tap a on the toolbar, or press the Y/a key, to set the lower threshold.
8. Press Y/a once the lower trigger is set to exit.
The display returns to the live data view and the trigger points appear as horizontal lines across
the designated parameter graph. Repeat this procedure to establish trigger points for other
parameters if desired. Once armed, any data points that register outside of your set conditions
pause data collection and save a recording.
i
NOTE:
Only three parameters can have trigger levels set at one time, but only one of the conditions needs
to be satisfied for triggering to occur.
31
Scanner
Operations
z
To arm triggers:
1. Tap the PID Trigger button on the toolbar.
2. Select Arm Triggers from the dropdown menu.
The trigger lines on the data graphs change color to indicate an armed condition.
Triggers for all of the graphs are armed simultaneously. Once triggering is armed, it remains in that
state until you switch it off. If trigger settings are modified or are added for other parameters, they
are armed as soon as you exit the setting screen.
5.3.3 Functional Tests
The Functional Tests selection is used to access vehicle-specific subsystem and component
tests. Available tests vary by manufacturer, year, and model. Only the tests available for the
identified vehicle display in the menu.
There are four general types of functional test:
• Information Tests—these are read-only tests, like selecting “VIN” from a Functional Tests
menu to display the VIN of the identified vehicle.
• Toggle Tests—these tests switch a component, such as a solenoid, relay, or switch, between
two operating states.
• Variable Control Tests—these tests command a certain value for a system or component,
such as varying spark timing in 1° increments or EGR valve duty cycle in 10% increments.
• Reset Tests—these tests reset the adaptive, or learned, values that are stored in the ECM
• Scripted Tests—these tests are software routines that place the vehicle into special
operating modes for performing certain repairs, such as bleeding brakes with ABS.
Selecting Functional Tests opens a menu of test options that varies by make and model. Selecting
a menu option either activates the test or opens a submenu of additional choices. Follow all
screen instructions while performing tests. How and what information is presented on the screen
varies according to the type of test being performed.
Some toggle and variable control tests display functional test controls at the top of the screen with
datastream information below. Functional test controls allow you manipulate the test signal as
shown in Table 5-1.
Table 5-1 Sample functional test control buttons
Name
Button
Description
OK
Activates the test.
Cancel
Cancels the test.
Minus
Switches an item off or low, or incrementally reduces
a variable signal.
Plus
Switches an item high or on, or incrementally
increases a variable signal.
32
Scanner
Exiting the Scanner
5.3.4 Troubleshooter
Fast-Track® Troubleshooter is a database of experience-based information. The database is
composed of validated real-world repair strategies that have been compiled by top-notch
technicians since 1988. The Troubleshooter system simplifies the diagnosis process, as it
contains information on virtually all common diagnostic trouble code (DTC) problems and
driveability symptoms for most vehicles covered by the vehicle communication software.
Information is organized into a series of diagnostic tips that are designed to quickly lead you to the
root cause of a particular problem. The tips are vehicle-specific, which means only tips that relate
to the identified vehicle are presented. Selecting opens a menu that typically includes:
• Code Tips—provides detailed information on setting conditions, testing, and interpreting test
results for specific codes.
• Symptom Tips—provides diagnostic tests and procedures based on vehicle operation.
• Time Savers—provides supplemental information, such as firing order and #1 cylinder
location, that may be needed to make a diagnosis.
• Common Problems—provides advice and remedies for certain “pattern failures” that have
been experienced on vehicles of the same model.
• Tests and Procedures—explains how to perform certain tests on the specific test vehicle.
Some tips provide specifications and installation information as well.
• Fast-Track Data Scan (Normal Values)—contains information and guidelines on how to
quickly validate data readings for certain sensors and actuators, live data values are provided
for comparison.
Certain live data parameter values display directly within the tip when performing Troubleshooter
tests and procedures. A tip may also contain a hyperlink to a another test or procedure or a
supplemental operation, such as Clear Codes. Hyperlinks are shown in blue, and tapping them
opens the link.
5.4 Exiting the Scanner
The Scanner remains open as long as there is an active communication link with the vehicle. You
must interrupt this communication link in order to exit from Scanner tests and power down the
scan tool. A warning message displays if you attempt to shut down while the Scanner is
communicating with the vehicle.
i
z
NOTE:
Damage to the vehicle electronic control module (ECM) may occur if communication is disrupted.
Make sure the data cable is properly connected at all times during testing. Exit all tests before
disconnecting the data cable or powering down the tool.
To exit the Scanner:
1. From an active screen, select Exit from the Scanner Toolbar to return to the Systems Menu.
2. From the Systems Menu, select Back from the Scanner data menu.
A “stopping communications” message briefly displays followed by the Scanner main menu.
Now, the Scanner is no longer communicating with the vehicle and it is safe to return to the Home
screen and power down the scan tool.
33
Chapter 6
OBD-II/EOBD
This Home screen option allows you to access Generic OBD-II/EOBD Scanner tests without
completing a vehicle identification. This presents a quick way to check for diagnostic trouble codes
(DTCs), isolate the cause of an illuminated malfunction indicator lamp (MIL), check monitor status
prior to emissions certification testing, verify repairs, and perform a number of other emissionsrelated services. OBD-II/EOBD is also used for testing OBD-II compliant vehicles that are not
included in the Scanner databases.
OBD-II/EOBD is a Scanner function, and the scan tool must be connected to the test vehicle and
communicating with it. Keep in mind, this function provides generic OBD-II information only. Select
from the Vehicle Manufacturers Menu for enhanced OBD-II functions.
Selecting OBD-II/EOBD on the Home screen opens a menu with two options:
• OBD Health Check
• OBD Diagnose
6.1 OBD Health Check
The OBD-II Health Check offers a way to quickly check for and clear generic DTCs, and to check
readiness monitors for emissions testing. Selecting opens a connection message, then a
submenu of test options (Figure 6-1).
Figure 6-1 Sample OBD Health Check menu
34
OBD-II/EOBD
OBD Health Check
6.1.1 Global OBD II Code Check
Global OBDII Code Check displays stored emission related generic DTCs reported by the ECM.
Selecting this option opens a submenu with two choices: Codes and Pending Codes. Selecting
either option opens a code list.
Figure 6-2 Sample code list
Codes
The Codes option displays a list of current emission related DTCs.
OBD-II/EOBD Codes have a priority according to their emission severity, with higher priority codes
overwriting lower priority codes. The priority of the code determines the illumination of the MIL and
the code erase procedure. Vehicle manufacturers have implemented the ranking differently, so
there are differences between makes.
Pending Codes
The purpose of this service is to enable the scan tool to obtain “pending” or maturing diagnostic
trouble codes. These are codes whose setting conditions were met during the last drive cycle, but
need to be met on two or more consecutive drive cycles before the DTC actually sets.
Use this service following a vehicle repair and code clearing procedure to verify test results after
a single drive cycle.
• If a test failed during the drive cycle, the DTC associated with that test is reported. If the
pending fault does not occur again within 40 to 80 warm-up cycles, the fault is automatically
cleared from memory.
• Test results reported by this service do not necessarily indicate a faulty component or system.
If test results indicate another failure after additional driving, then a DTC is set to indicate a
faulty component or system, and the MIL is illuminated.
Refer to and the Global OBD Vehicle Communication Software Manual for additional information.
35
OBD-II/EOBD
OBD Health Check
6.1.2 Global OBD II Clear Codes
This option is used to clear all emission related diagnostic data, such as DTCs, freeze frame data,
and test results, from the memory of the selected ECM. Although OBD-II/EOBD displays generic
OBD-II/EOBD data only, clearing codes erases all of the stored data, including any enhanced
codes and freeze frame information.
A confirmation screen displays when the clear codes option is selected to prevent accidental loss
of data. Select Yes from the confirmation screen to continue. Refer to the Global OBD Vehicle
Communication Software Manual for additional information.
6.1.3 Readiness Monitors
Use to check the readiness status of the monitoring system. An OBD-II /EOBD system checks the
status of emission-related subsystems by running continuous or periodic tests. Two viewing
options are available once Readiness Monitors is selected:
• Monitors Complete Since DTC Cleared—displays the status of all monitors that have run
since the last time DTCs were erased.
• Monitors Complete This Cycle—displays the status of the monitors that ran during the
current drive cycle only.
Select either option and test results are shown in the data viewer (Figure 6-3).
Figure 6-3 Sample readiness monitor test report
Scroll to view the entire list of Readiness Monitors to ensure that all tests are complete. It is
possible to save the monitor report as part of the vehicle records. Select Save from the toolbar and
follow the screen prompts.
36
OBD-II/EOBD
OBD Diagnose
6.1.4 Connector Information
This option opens a database of vehicle diagnostic connector locations that includes most makes
and models. The menu driven interface leads you quickly to the difficult to find test connector.
z
To locate a vehicle diagnostic connector:
1. Select Connector Information from the System menu.
A list of vehicle manufacturers displays.
2. Select a manufacturer from the list.
A list of models available from the selected manufacturer displays.
3. Select a model from the list.
If a cable adapter is needed, which one and how to connect it displays.
4. Select Continue.
Information on where to locate the vehicle diagnostic connector displays.
Figure 6-4 Sample diagnostic connector location
5. Select Continue to return to the System menu.
6.2 OBD Diagnose
Selecting OBD Diagnose opens a menu with the following options:
• Start Communication—initiates a test session
• Select Communication Protocol—establishes which communication protocol to use
• Connector Information—provides data link connector (DLC) location details
37
OBD-II/EOBD
OBD Diagnose
6.2.1 Start Communication
Use the following procedure to begin an OBD-II/EOBD test session:
z
To perform an OBD-II/EOBD Test:
1. Select Start Communications from the OBD-II/EOBD menu.
A vehicle type options list displays:
– 12V Light Duty Vehicle
– 24V Heavy Duty/Goods Vehicle
2. Select an option from the vehicle type list.
A connection message displays.
3. Connect the data cable to the test vehicle.
4. Select Continue.
The scan tool establishes a communication link with the test vehicle, then displays an
information screen that shows how many control modules were detected, which ECM is
communicating, and which communication protocol is being used (Figure 6-5).
Figure 6-5 Sample protocol information screen
5. Select Continue.
A Select Service menu of available tests displays, options include:
–
–
–
–
–
–
–
–
–
–
Readiness Monitors‚ on page 39
MIL Status‚ on page 39
($01) Display Current Data‚ on page 39
($02) Display Freeze Frame Data‚ on page 40
($03) Display Trouble Codes‚ on page 40
($04) Clear Emissions Related Data‚ on page 40
($05, 06, 07) Display Test param./Results‚ on page 41
($08) Request Control of On-board System‚ on page 41
($09) Read Vehicle Identification‚ on page 41
($0A) Emission Related DTC with Permanent Status‚ on page 42
38
OBD-II/EOBD
OBD Diagnose
IMPORTANT:
All service modes are not supported by all vehicles, so the available menu selections will vary.
6. Select a test to continue.
Readiness Monitors
Use this menu item to check the readiness of the monitoring system. If a monitor system is not
supported, it is not displayed. Scroll, if needed, to view the entire list of monitors (Figure 6-3).
Selecting Readiness Monitors opens a submenu with two choices:
• Monitors Complete Since DTC Cleared—displays the results of all monitor tests that have
run since the last time the electronic control module (ECM) memory was cleared.
• Monitors Complete This Cycle—displays only the results of monitor tests that ran during the
current drive cycle, they reset when the ignition is switched off.
MIL Status
This item is used to check the current condition of the malfunction indicator lamp (MIL). Additional
information, such as which ECM commanded the MIL on and the distance driven while the MIL is
on (if supported), can also be displayed. It is also possible to save the MIL Status report.
($01) Display Current Data
Use this item to display the current emission related data from the selected electronic control
module (ECM) of the vehicle. The main body of the screen has two columns; the left-hand column
is a description of the parameter and the right-hand column is the parameter value or state.
Figure 6-6 Sample current data display
39
OBD-II/EOBD
OBD Diagnose
($02) Display Freeze Frame Data
Freeze frame data provides a “snapshot” of critical parameter values at the time a DTC set.
This item is used to display freeze fame data for any stored emission related diagnostic trouble
code (DTC). In most cases the stored frame is the last DTC that occurred. Certain DTCs, those
that have a greater impact on vehicle emission, have a higher priority. In these cases, the highest
priority DTC is the one for which the freeze frame records are retained.
($03) Display Trouble Codes
This is used to display any stored emission related DTCs reported by the ECM. The display is
similar to a Scanner code display (see Display Codes‚ on page 23 for details) The list does not
include enhanced DTCs in this mode.
($04) Clear Emissions Related Data
This item is used to clear all emission related diagnostic data, such as DTCs, freeze frame data,
and test results, from the memory of the selected ECM.
z
To clear emission related Data:
1. Select Clear Emissions Related Data from the menu.
A confirmation message displays to help prevent loss of any vital data (Figure 6-7).
Figure 6-7 Sample clear codes confirmation
2. Continue from the confirmation message.
The screen updates several times as ECM memory is erased, then a “data has been cleared”
message displays.
3. Select Continue to return to the Select Service menu.
40
OBD-II/EOBD
OBD Diagnose
($05, 06, 07) Display Test param./Results
This option opens a submenu of parameters and test results form various sensors, monitor test
results, and a record of DTC setting conditions detected during the last drive cycle. The submenu
includes:
• ($05) Oxygen Sensor Monitoring
• ($06) Specific Monitored Systems
• ($07) DTCs Detected During Last Drive
($05) Oxygen Sensor Monitoring
This option opens a menu of tests available for checking the integrity of the oxygen sensors.
Making a selection displays all of the pertinent O2S parameters for the specific test. The test
identification (ID) displays at the top of the data list.
($06) Specific Monitored Systems
This option opens a menu of available test results on monitored systems. The data available is for
specific systems and components that the onboard diagnostic system either continuously
monitors, such as misfire, or non-continuously monitors, such as the catalyst system. Making a
selection displays the test results.
($07) DTCs Detected During Last Drive
This selection opens a record of any DTCs that set during the last completed drive cycle. Select
to open the DTC list.
($08) Request Control of On-board System
This service enables bidirectional control of the ECM. The purpose of this service is to allow the
Scanner to control the operation of an onboard system, test, or component. Select a test and
follow the on-screen instructions.
($09) Read Vehicle Identification
The purpose of this service is to enable the Scanner to request and display vehicle-specific
information, such as the vehicle identification number (VIN), the calibration identification, and the
calibration verification number (CVN), of the test vehicle. Select a menu item to retrieve the
information. Select Return to go back to the menu.
($09) In-use Performance Tracking
This option displays the “In-use Performance Tracking” of data. It is a record of the number of
times each of the monitor tests have been completed. Select Return to go back to the menu.
41
OBD-II/EOBD
OBD Diagnose
Figure 6-8 Sample performance tracking display
($0A) Emission Related DTC with Permanent Status
This option displays a record of any “permanent” codes. A permanent status DTC is one that was
severe enough to illuminate the MIL at some point, but the MIL may not be on at the present time.
Whether the MIL was switched off by clearing codes or because the setting conditions did not
repeat after a specified number of drive cycles, a record of the DTC is retained by the ECM.
Permanent status codes automatically clear after repairs have been made and the related system
monitor runs successfully.
6.2.2 Select Communication Protocol
A communication protocol is a standardized way of data communication between an ECM and a
scan tool. Global OBD may use the following communication protocols:
•
•
•
•
•
ISO 9141-2 (K-LINE)
SAE J1850 PWM (Pulse Width Modulation)
SAE J1850 VPW (Variable Pulse Width)
ISO 14230-4 (Keyword Protocol 2000)
SAE J2284/ISO 15765-4 (CAN)
Touch Select Communication Protocol to open a menu of options (Figure 6-9).
42
OBD-II/EOBD
OBD Diagnose
Figure 6-9 Sample communication protocol menu
When the All Protocols setting is used the Scanner attempts to establish communication using
each protocol in order to determine which one the vehicle is broadcasting on.
Select Back or press the N/X key to return to the OBD-II/EOBD Main menu.
6.2.3 Connector Information
Opens the connector database discussed in Connector Information‚ on page 37.
43
Chapter 7
Previous Vehicles and Data
The Previous Vehicles and Data Home screen selection allows you to quickly configure the scan
tool to the identity of a recently tested vehicle, and to access saved data files. A menu with three
options opens when Previous Vehicles and Data is selected:
• Vehicle History
• View Saved Data‚ on page 45
• Delete Saved Data‚ on page 46
7.1 Vehicle History
The scan tool stores the identification of the last twenty-five vehicles tested, so there is no need to
go through the complete vehicle identification sequence when performing a retest after repairs
have been made. The oldest vehicle record is deleted when a new vehicle is identified once there
are twenty-five vehicles on file.
Figure 7-1 Sample vehicle history list
z
To select from the vehicle History:
1. Select Previous Vehicles and Data from the Home screen.
2. Select Vehicle History from the menu.
A list of up to 25 previously tested vehicles displays. Each vehicle is given a unique file name
that includes the vehicle ID, date, and time. Use the scroll bar to view the entire list.
3. With the item to be opened highlighted, either tap the vehicle ID or press the Y/a key.
The appropriate software loads and a vehicle ID confirmation screen displays.
4. Select OK or press Y/a to continue.
44
Previous Vehicles and Data
View Saved Data
A connection message displays.
5. Connect the data cable to the vehicle, then select OK or press Y/a to continue.
The menu for the last system tested on the selected vehicle displays.
7.2 View Saved Data
Selecting the View Saved Data menu option opens a list of all the data movies and screen images
that are stored in the scan tool memory. Saved files are listed in chronological order by the date
and time that they were created with the most recent files are at the top of the list. The vehicle ID
characteristics are included in the listings as well.
Figure 7-2 Sample saved data list
Saved files can either be opened directly on the scan tool, or downloaded to a personal computer
and opened using ShopStream Connect.
z
To review a movie:
1. Select Previous Vehicles and Data from the Home screen.
2. Select View Saved Data from the menu.
3. Select a movie from the list of saved files.
The movie opens and plays in real time. The Play button changes to the Pause button at the
end of the movie.
Movie reviewing tips:
• The Pause/Play and Graph toolbar buttons are active while a movie is playing, so you can
stop the movie or switch between list and graph view at any time.
• The Previous Frame and Next Frame buttons are active if the data is paused.
45
Previous Vehicles and Data
Delete Saved Data
7.3 Delete Saved Data
This menu option is used to permanently erase saved files from scan tool memory when they are
no longer needed.
z
To delete a saved file:
1. Select Previous Vehicles and Data from the Home screen.
2. Select Delete Saved Data from the menu.
A list of saved files displays.
i
NOTE:
The Select/Deselect and Select All/Deselect All buttons become available on the toolbar so that
you can either delete individual files or clear the entire memory buffer all at once.
3. Select a file from the list and a confirmation message displays.
4. Select an option from the confirmation message:
– OK—deletes the selected file and returns to the saved files list, which no longer includes
the deleted file.
– Cancel—returns to the saved files list without deleting the selected file.
5. Select Back on the toolbar to return to the Previous Vehicles and Data menu, select Home to
return to the Home screen.
46
Chapter 8
Tools
The Tools option on the home screen is used to configure the scan tool for your personal
preferences. Tap the Tools button to open a menu of options.
Figure 8-1 Sample Tools menu
8.1 Tools Menu
The following options are available from the Tools menu:
•
•
•
•
Connect to PC—use to transfer and share files with a personal computer (PC)
Configure Shortcut Key‚ on page 48—use to change the functionality of the shortcut key
System Information‚ on page 48—use to display configuration information for your scan tool
Settings‚ on page 49—use to configure certain characteristics of the scan tool
8.1.1 Connect to PC
Connect-to-PC opens a menu of three choices:
• Connect -to-PC
• Connect-to-ShopStream
• Connect-to-J2534
The Connect-to-PC option allows you to access the saved files on your diagnostic tool through
your personal computer. For shops that use the ShopStream network, Connect-to-ShopStream
allows you to connect into the system as a scanner. Connect-to-J2534 allows configures the
diagnostic tool to act as a pass-through device for flash programming electronic control modules
on OBD-II vehicles. Additional optional equipment is required for flash programming, contact your
sales representative for details.
47
Tools
Tools Menu
The optional ShopStream Connect™ software, which lets you view data files on a personal
computer, transfer files between the tool and PC, and download software updates from the PC to
the tool, offers an ideal way to manage saved data files. ShopStream Connect is a free software
program that can be downloaded from the Internet at: http://diagnostics.snapon.com/SSC.
z
To connect the diagnostic tool to a PC:
1. Select Tools from the Home screen to open the menu.
2. Select Connect-to-PC from the Tools and Setup menu.
3. Select Connect-to-PC from the Connect-to-PC menu.
4. Follow the instructions on the screen to complete the operation.
A USB cable, supplied with your scan tool kit, is used to link the scan tool to the PC. A
communications icon appears on the right edge of the title bar when the scan tool is properly
connected to the PC.
8.1.2 Configure Shortcut Key
This feature allows you to change the functionality of the Shortcut key. Options are:
• Brightness—increases the screen backlighting in incremental steps from lowest to highest, then
returns to the lowest setting and continuously repeats.
• Save Screen—takes a snapshot of the current screen. A snapshot includes the visible screen
only, and is saved as a graphic image.
• Save Movie—saves a recording of vehicle data (buffered data plus data transmitted after
triggering) in scan tool memory.
• Show Shortcut Menu—opens the Configure Shortcuts menu when the Shortcut key is
pressed so you can quickly select from any of the available functions.
• Toggle Record/Pause—programs the Shortcut key to work as the Pause and Record
buttons. The first press pauses data collection and the second press resumes live data.
z
To assign a function to the Shortcut key:
1. Select Tools from the Home screen.
The Tools menu opens.
2. Select Configure Shortcut key from the menu.
3. Select a function from the menu.
4. Select the Back on the toolbar or press the N/X key to return to the options menu.
8.1.3 System Information
The System Information option lets you view configuration information for your scan tool.
z
To display the System information screen:
1. Select Tools from the Home screen to open the menu.
2. Select System Information from the menu.
The System Information screen displays.
48
Tools
Tools Menu
Figure 8-2 Sample system information screen
3. Select Back on the toolbar or press the N/X key to return to the options menu.
8.1.4 Settings
This Tools selection allows you to adjust certain basic diagnostic tool functions to your personal
preferences. Selecting opens an additional menu that offers the following:
• System Settings‚ on page 49
• Configure Scanner‚ on page 54
• Configure Units‚ on page 55
System Settings
Selecting System Settings opens a menu with two options; Display and Date & Time. Either
selection opens an additional menu.
Display options include:
•
•
•
•
•
•
Brightness‚ on page 50—adjusts the intensity of the screen back lighting.
Color Theme‚ on page 50—changes the background color of the screen display.
High Contrast Toolbar‚ on page 51—enhances toolbar graphics for poor lighting conditions.
Font Type‚ on page 51—switches between standard and bold text for better visibility.
Backlight Time‚ on page 52—adjusts how long the screen stays on with an idle unit.
Touch Calibration‚ on page 52—calibrates the touch screen display.
49
Tools
Tools Menu
Date & Time options include:
•
•
•
•
•
Time Zone‚ on page 53—sets the internal clock to the local time standard.
Clock Settings‚ on page 53—sets the time on the internal clock.
Daylight Savings Time‚ on page 54—configures the clock for Daylight Savings Time.
Time Format‚ on page 54—switches the time displays between a 12 or 24 hour clock.
Date Format‚ on page 54—configures how the month, date, and year displays.
Brightness
Selecting this option opens the brightness setting screen for adjusting the back lighting of the
display (Figure 8-3).
Figure 8-3 Sample brightness setting screen
Each tap of the Plus and Minus buttons, or the up (b) and down (d) arrows, incrementally
changes the back lighting up or down respectively.
Select Back from the toolbar or press the N/X key to exit.
Color Theme
This option allows you to select between a white and black background for the screen. The black
background can be beneficial when working under poor lighting conditions.
Selecting opens a menu with two choices: Day Theme (white background) and Night Theme
(black background). Make a selection and a “please wait” message momentarily displays followed
by the Home screen. The new toolbar setting is now active.
50
Tools
Tools Menu
Figure 8-4 Sample Night Theme menu screen
High Contrast Toolbar
This option allows you to switch to a high contrast toolbar. This toolbar features black and white
buttons with crisp graphics that are easier to see in poor lighting conditions or bright sunlight.
Figure 8-5 Sample high-contrast toolbar
Selecting opens a menu with two choices; Color Toolbar and High Contrast Toolbar. Select and a
“please wait” message displays followed by the Home screen. The new setting is now active.
Font Type
This option allows you to select between standard and bold faced type for the display screen. Bold
type makes screen writing more legible under poor lighting or bright sunlight conditions.
51
Tools
Tools Menu
Selecting opens a menu with two choices: Normal Font and Bold Font. Tap a menu item, or scroll
with the keypad and Press Y/a, to make a selection. The change is instantaneous. Select the
Back or Home button on the toolbar to return to either the Settings menu or the Home screen.
Backlight Time
This option allows you to configure how long the screen backlight remains on when the tool is
inactive. The following choices are available:
•
•
•
•
•
Always On
15 Seconds
30 Seconds
45 Seconds
60 Seconds
Tap the menu item desired, or scroll with the keypad and Press Y/a, to make a selection. Select
Back or Home on the toolbar to return to either the Settings menu or the Home screen.
Touch Calibration
Calibrating the touch screen maintains the accuracy of the touch-sensitive display. Perform the
following procedure on a routine basis to keep your diagnostic tool in good working order.
z
To calibrate the touch screen:
1. Select Tools from the Home screen to open the menu.
2. Select Settings from the menu.
3. Select Touch Calibration from the menu.
The calibration screen opens (Figure 8-6).
Figure 8-6 Sample calibration screen
4. Touch each box on the screen as it displays.
The display returns to the Settings menu once the screen calibration procedure is complete.
52
Tools
Tools Menu
IMPORTANT:
It is critical to complete the touch screen calibration sequence once it has begun. Never power
down the unit while a screen calibration is in process, serious damage to the unit may result.
Time Zone
This option opens a menu of time zone settings. Scroll to highlight, then select the local time zone.
The display returns to the Settings menu once a time zone is selected.
Clock Settings
This option opens a window for resetting the time on the real-time clock.
z
To set the clock:
1. Select Tools from the Home screen to open the menu.
2. Select Settings from the menu.
3. Select Clock Settings from the menu.
A warning message briefly displays followed by the Clock Settings screen (Figure 8-7).
Figure 8-7 Sample Clock Settings screen
4. Tap the up (+) button on the screen or press the up (b) key on the keypad to incrementally
increase the number in the highlighted field. Tap the down (–) button on the screen or press
down (d) on the keypad to incrementally decrease the number.
5. Tap the check (a) button on the screen or press the Y/a key on the keypad to move the
highlight to the next field.
6. Repeat Step 4 and Step 5 until the correct time is displayed.
7. Tap the Back on the toolbar or press the Y/a on the keypad to close the Clock Settings
window and return to the Settings menu.
53
Tools
Tools Menu
Daylight Savings Time
This option opens a menu to configure the internal clock for Daylight Savings Time. Choose from:
• ON—sets the clock for Daylight Savings time.
• OFF—sets the clock for standard time.
Make either selection, then tap the Back button or press the N/X key to return to the menu.
Time Format
This option determines whether time is displayed on a 12 or 24 hour clock. Selecting opens a
menu with two choices:
• 24 Hour Format
• 12 Hour Format
Make either selection, then tap the Back button or press the N/X key to return to the menu.
Date Format
This option allows you to select how date information is displayed. Select from:
• (MM_DD_YYYY)—Month, Day, Year
• (DD_MM_YYYY)—Day, Month, Year
• (YYYY_MM_DD)—Year, Month, Day
Make a selection, then tap the Back button or press the N/X key to return to the menu.
Configure Scanner
This option determines whether or not the scales are displayed on the data graphs when using the
Scanner. Scales are the graduations and values that display on the horizontal axis at the base of
the parameter graphs. The waveform to fill the entire graph area with scales switched off.
Figure 8-8 Sample scanner screen with scales hidden
54
Tools
Tools Menu
z
To switch scanner scales:
1. Select Tools from the Home screen.
2. Select Settings from the Tools and Setup menu.
3. Select Configure Scanner from the Settings menu.
4. Highlight either menu entry to make a selection:
– Show Graph Scale—to switch the scales on.
– Hide Graph Scale—to switch the scales off.
5. Tap the Back button or press the N/X key to return to the Settings menu.
Configure Units
Selecting opens a dialog box that allows you to choose between US customary or metric units of
measure for temperature, vehicle speed, air pressure, and other pressures.
Figure 8-9 Sample Configure Units menu
z
To change the units setup:
1. Select Tools from the Home screen to open the menu.
2. Select Configure Units to open the menu.
3. Select an item from the Configure Units menu.
–
–
–
–
Temperature
Vehicle Speed
Pressure, Air (Scanner)
Pressure, Other (Scanner)
4. Select a setting from the listed choices.
5. Select Back on the toolbar or press the N/X key to return to the options menu.
55
Chapter 9
Maintenance
This chapter covers how to care for your scan tool.
9.1 Cleaning and Inspecting the Scan Tool
When using the scan tool perform the following tasks to keep it in top shape:
• Check the housing, wiring, and connectors for dirt and damage before and after each use.
• At the end of each work day, wipe the scan tool housing, wiring, and connectors clean with a
damp cloth.
IMPORTANT:
Do not use any abrasive cleansers or automotive chemicals on the unit.
9.1.1 Cleaning the Touch Screen
The touch screen can be cleaned with a soft cloth and a mild window cleaner.
IMPORTANT:
Do not use any abrasive cleansers or automotive chemicals on the touch screen.
9.2 Battery Service
Follow all safety guidelines when handling the battery pack.
:$51 ,1*
Risk of electric shock.
• Prior to recycling the battery pack, protect exposed terminals with heavy insulating tape
to prevent shorting.
• Disconnect all test leads and turn diagnostic tools off before removing the battery pack.
• Do not attempt to disassemble the battery pack or remove any component projecting
from or protecting the battery terminals.
• Do not expose the unit or battery pack to rain, snow, or wet conditions.
• Do not short circuit the battery terminals.
Electric shock can cause injury.
:$51 ,1*
Risk of explosion.
• Use the proper factory lithium battery pack only, incorrect replacement or tampering
with the battery pack may cause an explosion.
Explosion can cause death or serious injury.
56
Maintenance
Battery Service
9.2.1 Battery Safety Guidelines
IMPORTANT:
The battery pack contains no user serviceable components. Tampering with the battery pack
terminals or housing will void the product warranty.
Keep the following in mind when using and handling the battery pack:
• Do not short circuit battery terminals.
• Do not immerse the scan tool or battery pack in water, or allow water to enter the unit or
battery compartment.
•
•
•
•
•
•
i
Do not crush, disassemble, or tamper with the battery pack.
Do not heat the battery pack to over 100°C (212°F), or dispose of it in a fire.
Do not expose the battery pack to excessive physical shock or vibration.
Keep the battery pack out of reach of children.
Do not use a battery pack that appears to have suffered abuse or damage.
Store the battery pack in a cool, dry, well ventilated area.
NOTE:
The battery pack should be used within a short period of time (about 30 days) after charging to
prevent loss of capacity due to self-discharging.
If long-term storage of the battery pack is necessary, it should be stored in a in cool, dry, well
ventilated place with a 30 to 75 percent state of charge to prevent loss of characteristics.
To prolong the life of your battery, power off the unit when not in use. The scan tool has a built in
charger that recharges the battery on demand whenever it is connected to a power source.
9.2.2 Replacing the Battery Pack
If the battery pack no longer holds a charge, contact your sales representative to order a new one.
IMPORTANT:
Replace the battery pack with original Snap-on replacement parts only.
z
To replace the battery pack:
1. Loosen the two captive screws that secure the battery pack to the back of the unit.
2. Lift up and tilt to raise the battery cover from the scan tool housing.
3. Slide the battery pack to the left to disconnect the contacts, then lift it clear of the unit.
4. Position the new battery pack and slide it into position in the battery compartment.
5. Make sure the battery pack is fully seated.
6. Fit the battery cover.
7. Tighten the two captive screws.
57
Maintenance
Battery Service
1
2
1— Battery Cover
2— Captive Screws
Figure 9-1 Battery pack replacement
9.2.3 Disposing of the Batteries
Always dispose of a lithium-ion battery pack according to local regulations, which vary for different
countries and regions. The battery pack, while non-hazardous waste, does contain recyclable
materials. If shipping is required, ship the battery pack to a recyling facility in accordance with
local, national, and international regulations. For additional information contact:
• North America—Rechargeable Battery Recycling Corporation (RBRC) at http://www.rbrc.org
or http://www.call2recycle.org, or call 1(800) 822-8837 (USA)
• United Kingdom—Electrical Waste Recycling Company at http://www.electricalwaste.com
Products bearing the WEEE logo (Figure 9-2) are subject to European Union regulations.
Figure 9-2 sample WEEE logo
i
NOTE:
Always dispose of materials according to local regulations.
Contact your sales representative for details.
58
Index
A
E
AC/DC power supply 10
Accept key 8
Actuator tests 22
Arrow buttons 8
Emergency shutdown 13
F
Fast-Track Troubleshooter 23, 33
Freeze Frame/Failure Records 24
Functional description 5–6
Functional tests 22, 32
B
Battery 9
Disposal 58
Handling 57
Recycling 58
Replacing 57
Specifications 7
Battery replacement 56
Battery service 56–58
Brightness, adjusting 50
Buttons
Toolbar 15
G
Generic functions 23
H
Home screen 11–12
Home screen buttons 12
I
Identifying a test vehicle 23
Information tests 32
C
Cancel button 9
Changing screen views 28
Cleaning 56
Clear codes 22, 36
Clearing codes 24
Codes menu 22
Codes. See Diagnostic trouble codes (DTCs)
Communication protocol 42
Configure units 55
Connect to PC 47
Connecting to a vehicle 20, 23
Connector Information 37
Control keys 8–9
L
Locking parameters 28
M
Manual conventions
Description 3
Notes 4
Memory resets 22
Messages
Safety iii–iv
O
OBD Diagnose 37–43
OBD Health Check 34–37
Operating temperature 7
Operations
Connecting to a vehicle 20, 23
Identifying a test vehicle 23
Selecting a system to test 23
Selecting tests 23
D
Data display 22, 25
Data parameters
Displaying 22, 23
Demonstration program 13
Diagnostic connector 37
Location 37
Diagnostic trouble codes (DTCs) 22
Dimensions, unit 7
Directional buttons 8
Display screen, specifications 7
P
Parameters. See Data parameters
Pausing data 25
PC, connect to 47
59
Index
T
PID trigger
set levels 31
PIDs. See Data parameters
Power button 9
Power sources 9–10
AC/DC power supply 10
Powering off 13
Powering on 11
Temperature
Operating 7
Storage 7
Tests
Actuator 22
Functional 22
functional 32
Selecting 23
System 23
Time settings 53–54
Title bar 14
Toggle tests 32
Tool settings 49–52
Tool setup options 47–55
Toolbar 15–16
Touch Screen
Calibrating 52
viewing options 51–52
Touch screen calibration 56
trigger. See PID trigger
Trouble codes. See Diagnostic trouble codes (DTCs)
Troubleshooter 23, 33
R
Readiness monitors 36
Reset tests 32
S
Safety iii–iv
Saved data 44–46
Saved vehicle data 45
Saving 29
Scanner
Actuator tests 22
Checking codes 35
Clear codes 22, 24, 36
Codes menu 22, 23–24
Communication protocol 42
Connecting 20
Custom data list 27
Data display 25–29
Demonstration program 13
Exiting 33
Functional tests 22, 32
Generic functions 23, 34–43
Memory resets 22
OBDII testing 34–43
Operations 18–33
Pending codes 35
Readiness monitors 36
System selecting 23
System tests 23
Title bar 14
Troubleshooter 23, 33
Vehicle ID 23
Screen layout 14–17
Screen messages 17
Selecting a system to test 23
Selecting tests 23
Shortcut button 9
Configuring 48
Sorting data 26
Specifications 7
Stand, the 10
Storage temperature 7
System Information 48
System information 48
System tests 23
V
Variable control tests 32
Vehicle diagnostic connectors 20
Vehicle history 44
W
Weight, unit 7
60



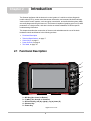
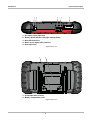



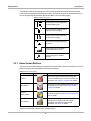

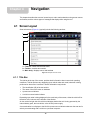
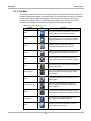




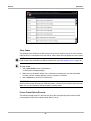

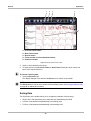


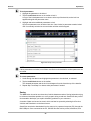
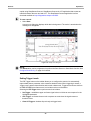
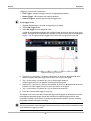
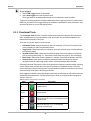


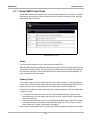
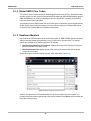
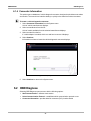
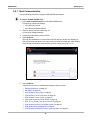
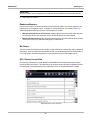


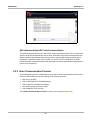
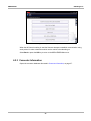
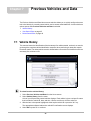
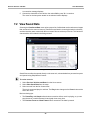
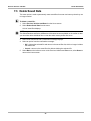
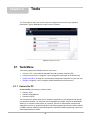
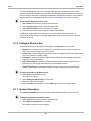
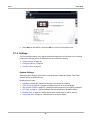
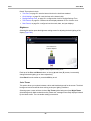
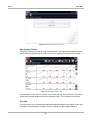
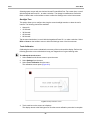
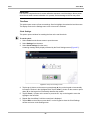
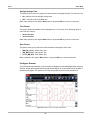
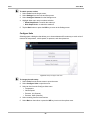
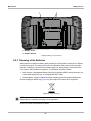


![VERUS PRO User Manual [3980kb PDF File] - Snap](http://vs1.manualzilla.com/store/data/005690474_1-9ff68923f14d7698ce72469cabae3990-150x150.png)