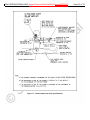
1
SAE has provided this Draft document for the SAE Committee. This document is SAE-copyrighted, intellectual property. It may not be shared, downloaded, duplicated, or transmitted in any matter outside of the SAE Committee without SAE’s approval. Please contact your staff representative for additional information. SURFACE VEHICLE INFORMATION REPORT PropDft JAN2015 SEP2009 J2856 Issued Revised 2009-09 Proposed Draft 2015-01-20 Superseding EA-23 APR2005J2856 SEP2009 User's Manual for the 50th Percentile Male Hybrid III Dummy RATIONALE Rationale Required The 1986 version of Engineering Aid 23 focused on differences between the Hybrid III and its predecessor, the Hybrid II dummy. The 1998 revision of EA-23 removed the differences between the Hybrid II and Hybrid III, as most users had experience in using the Hybrid III. Instead of presenting two variations on the calibration procedures that were included in the 1986 version, only the currently accepted practice is listed. It included modifications which are based on many years' experience with the Hybrid III, and addresses changes incorporated into the dummy. The most significant differences result from some changes in the Hybrid III dummy. One change now calls for using feet with a 45 degree range of motion rather than 30 degrees; the feet also have a prescribed force-deflection characteristic. The other major change is a redesigned upper femur, which makes the hip joint range of motion more symmetric and biofidelic, and also prevents metal-to-metal contact between the hip bone and the femur. These part changes require additional procedures to ensure the proper range of motion at the hip joint. SAE J2856 replaced EA-23 in 2009. In addition to the format change and the correction of typographical errors, the following corrections were made to this Information Report: References to SAE J211 were changed to SAE J211-1 throughout the report Section 2 REFERENCES was added Section 3.1 – corrected the reference to the drawing package from “the updated 1997 engineering drawing package” in EA-23 to “the engineering drawing package dated August 30, 1998” Section 3.1 – corrected the reference to the drawing package from “The latest drawing package for the Hybrid III dummy was issued in 1997” in EA-23 to “The latest drawing package for the Hybrid III dummy was issued in 1998” th Section 3.2 – added title “HYBRID III 50 PERCENTILE MALE DUMMY INSTRUMENTATION” to Table 1 Section 3.7 – corrected inconsistency in terminology from “chest jacket” in EA-23 to “chest flesh” Section 3.7 – Figure 12 was replaced to more clearly show the correct orientation of the nodding blocks __________________________________________________________________________________________________________________________________________ SAE Technical Standards Board Rules provide that: “This report is published by SAE to advance the state of technical and engineering sciences. The use of this report is entirely voluntary, and its applicability and suitability for any particular use, including any patent infringement arising therefrom, is the sole responsibility of the user.” SAE reviews each technical report at least every five years at which time it may be revised, reaffirmed, stabilized, or cancelled. SAE invites your written comments and suggestions. Copyright © 2015 SAE International All rights reserved. No part of this publication may be reproduced, stored in a retrieval system or transmitted, in any form or by any means, electronic, mechanical, photocopying, recording, or otherwise, without the prior written permission of SAE. TO PLACE A DOCUMENT ORDER: SAE WEB ADDRESS: Tel: 877-606-7323 (inside USA and Canada) Tel: +1 724-776-4970 (outside USA) Fax: 724-776-0790 Email: [email protected] http://www.sae.org SAE values your input. To provide feedback on this Technical Report, please visit http://www.sae.org/technical/standards/PRODCODE SAE INTERNATIONALJ2856 revised Proposed Draft JAN2015Issued SEP2009 Page 2 of 72 Section 3.9 – changed the disassembly instructions for the sternum from “Detach the bib assembly after loosening the set screw (Figure 27) on the chest displacement slider arm at the displacement pot” to “Detach the bib assembly. Do not loosen the set screw (Figure 27) because this will invalidate the chest pot calibration of SAE Recommended Practice J2517.” Section 3.13 – corrected the inspection of buttock compression from “apply a 335 N (75 lbf) force to the bottom of the pelvis, parallel to the ground” to “apply a 334 N (75 lbf) force to the bottom of the pelvis, perpendicular to the ground” Section 3.16 – changed the assembly instructions for the pin that holds the optional displacement potentiometer displacement rod to the slider from “tightened reasonably” to “tight” Section 3.17 – corrected an error in lumbar cable torque from “1.2 to 1.4 N⋅m” in EA-23 to “1.1 to 1.4 N⋅m” Section 3.17 – corrected inconsistency in terminology from “chest jacket” in EA-23 to “chest flesh” Section 3.18 – added title “CENTERS OF GRAVITY” to Table 2 Section 3.18 – revised headers of Table 2 consistent with SAE format guidelines Section 3.18 – corrected Center of Gravity Location for the foot in Table 2 from “2.30” inches along the X-axis in EA-23 to “2.20” inches. The metric dimension was correct Section 3.18 – corrected Center of Gravity Location for the foot in Table 2 from “-52.7” mm and “-2.20” inches along the Z-axis in EA-23 to “-53.3” mm and “-2.10” inches Section 4.1 (A) – corrected inconsistency in terminology from “chest skin” in EA-23 to “chest flesh” Section 4.1 (C) – changed from “Torque the two spine cables to 1.1 N⋅m (10 in⋅lbf)” in EA-23 to “Torque the two lumbar cables to 1.1 to 1.4 N⋅m (10 to 12 in⋅lbf)” to be consistent with Section 3.17 Section 4.1 (L) – corrected inconsistency in terminology from “chest skin” in EA-23 to “chest flesh” Section 4.2 (A) – corrected inconsistency in terminology in Table 4 from “Upper Torso Assembly with Torso Jacket” in EA-23 to “Upper Torso Assembly with Chest Flesh” Section 4.2 (A) – corrected description of Lower Torso Assembly in Table 4 from “(includes femurs and their lower lumbar adapting plate)” in EA-23 to “(includes femurs and lower lumbar adapting plate)” Section 4.2 (A) – corrected mass of Upper Arm Assembly, Left and Upper Arm Assembly, Right in Table 4 from “4.4 ± 0.1” lb and “2.00 ± 0.05“ kg in EA-23 to “4.4 ± 0.2” lb and “”2.00 ± 0.09” kg in SAE J2856 Section 4.2 (A) – corrected terminology in Table 4 from “Total Dummy Weight” in EA-23 to “Total Dummy Mass” Section 4.3 (E) 1 – changed torque specification for skull cap screws from “18 N·m (160 in·lbf)” to “18 N·m minimum (160 in·lbf minimum)” Section 4.3 (E) 2 – changed environment temperature for head drop test from “18.9 to 25.6 °C (66 to 78 °F)” to “20.6 to 22.2 °C (69 to 72 °F)” Section 4.4 (E) 3 – added title “PENDULUM IMPULSE FOR THE NECK FLEXION TEST” to Table 5 Section 4.4 (F) 3 – added title “PENDULUM IMPULSE FOR THE NECK EXTENSION TEST” to Table 6 Section 4.5 (A) – corrected inconsistency in terminology from “vest and panty” in EA-23 to “shirt and pants” Section 4.5 (B) – updated the test probe description to include “the mass of rigid attachments and the lower 1/3 of the suspension cable mass” SAE INTERNATIONALJ2856 revised Proposed Draft JAN2015Issued SEP2009 Page 3 of 72 Section 4.5 (C) – changed the filter channel class for the thorax impact test from “Filter all data channels using Channel Class 180 phaseless filters” in EA-23 to “Filter pendulum force using a Channel Class 180 phaseless filter and chest deflection using a Channel Class 600 phaseless filter” for consistency with SAE J211-1 Section 4.5 (D) 1 – corrected inconsistency in terminology from “chest skin” in EA-23 to “chest flesh” Section 4.5 (D) 1 – changed from “Torque the spine cables to 1.2 to 1.4 N⋅m (10 to 12 in⋅lbf)” in EA-23 to “Torque the two lumbar cables to 1.1 to 1.4 N⋅m (10 to 12 in⋅lbf)” to be consistent with Section 3.17 Section 4.5 (D) 6 – corrected inconsistency in terminology from “chest skin” in EA-23 to “chest flesh” in two places Section 4.5 (D) 7 – corrected inconsistency in terminology from “chest skin” in EA-23 to “chest flesh” in three places Section 4.5 (D) 11 – corrected inconsistency in terminology from “chest skin” in EA-23 to “chest flesh” Section 4.5 (E) 3 – added “as shown in Figure 72.” Inserted a new figure and the figure title “FIGURE 72 – HYSTERESIS REGIONS.” Indexed the figure numbers of Figures 72 through 78 from EA-23 Section 4.6 (B) – updated the test probe description to include “the mass of rigid attachments and the lower 1/3 of the suspension cable mass” Section 4.6 (D) 2 – changed environment temperature for knee impact test from “between 18.9 to 25.6 °C (66 to 78 °F)” to “of 20.6 to 22.2 °C (69 to 72 °F)” Section 4.6 (D) 3 – changed “Torque the load cell simulator bolts to 40.7 N·m (30 ft·lbf)” to “Torque the mounting bolts to 40.7 N·m minimum (30 ft·lbf minimum)” Section 4.7 (B) – corrected and tightened the specification on the knee slider test probe mass from “12.0 kg ± 0.14 kg (26.5 lb ± 0.3 lb)” to “12.00 kg ± 0.02 kg (26.46 lb ± 0.04 lb)” Section 4.7 (B) – updated the probe description to include “the mass of rigid attachments and the lower 1/3 of the suspension cable mass” Section 4.7 (B) – corrected an error in the diameter of the impacting face of the knee slider test probe from “75 mm ± 0.2 mm” in EA-23 to “76.2 mm ± 0.3 mm” Section 4.7 (C) – replaced Figure 74 with corrected probe mass and hole diameters. The figure was Figure 73 in EA-23. Section 4.7 (D) 2 – changed environment temperature for knee slider test from “between 18.9 to 25.6 °C (66 to 78 °F)” to “of 20.6 to 22.2 °C (69 to 72 °F)” Section 4.7 (D) 4 – changed the torque specification for the femur load cell mounting bolts from “40.7 N·m (30 ft·lbf)” to “40.7 N·m minimum (30 ft·lbf minimum)” Section 4.7 (E) 1 – added title “FORCE VERSUS DISPLACEMENT FOR THE KNEE SLIDER TEST” to Table 7 Section 4.7 (E) 1 – corrected errors in Table 7, by changing knee slider displacements from “10.0 mm” and “18.0 mm” to “10.2 mm” and “17.8 mm” respectively Section 4.8 (C) – replaced Figure 75 to remove incorrect loading rate from EA-23. The figure was Figure 74 in EA-23 Section 4.8 – deleted the reference “NOTE: For details of the procedure development, reference the Final Report of the SAE Hip Calibration Task Group (August 1995).” Section 4.9 – corrected source information for EC Directive 96/79/EC Section 5.1 – Inserted new section “Low-speed Thorax Impact Test,” referring to SAE Recommended Practice J2779 as an additional inspection test. Contents of EA-23 Section 5.1 were moved to Section 5.3 in SAE J2856 SAE INTERNATIONALJ2856 revised Proposed Draft JAN2015Issued SEP2009 Page 4 of 72 Section 5.2 – Inserted new section “Low-speed Knee Slider Test,” referring to SAE Recommended Practice J2876 as an additional inspection test. Contents of EA-23 Section 5.2 were moved to Section 5.4 in SAE J2856 Section 5.3 (D) 1 – Was section 5.1 (D) 1 in EA-23. Changed environment temperature for foot test from “between 18.9 to 25.6 °C (66 to 78 °F)” to “of 20.6 to 22.2 °C (69 to 72 °F)” Section 5.4 (E) 2 – Was section 5.2 (E) 2 in EA-23. The notation on the angle referenced in the bottom of Figure 79 was corrected from “50° REF” to “90° REF.” The figure was Figure 78 in EA-23 Section 5.4 (E) 4 – Was section 5.2 (E) 4 in EA-23. Changed environment temperature for ankle motion test from “between 18.9 to 25.6 °C (66 to 78 °F)” to “of 20.6 to 22.2 °C (69 to 72 °F)” FOREWORD A group of Hybrid III users met at an SAE workshop held in June, 1984 to learn more about the design and use of the th Hybrid III 50 percentile male dummy. They noted that a user's manual would be helpful. In response, the SAE Dummy Testing Equipment Subcommittee of the Human Biomechanics and Simulation Standards Committee prepared a User's Manual which became SAE Engineering Aid 23, published in June 1986. It has since become the basis for manuals on the entire Hybrid III family of dummies. TABLE OF CONTENTS To Come SAE INTERNATIONALJ2856 revised Proposed Draft JAN2015Issued SEP2009 Page 5 of 72 1. SCOPE The purpose of this document is to provide the user with the procedures needed to properly assemble and disassemble the 50th percentile male Hybrid III dummy, certify its components and verify its mass and dimensions. Also within this manual are guidelines for handling accelerometers, repairing flesh and setting joints. 2. REFERENCES 2.1 Applicable PublicationsDocuments The following publications form a part of this specification to the extent specified herein. latest version of SAE publications shall apply. 2.1.1 Unless otherwise indicated, the SAE Publications Available from SAE International, 400 Commonwealth Drive, Warrendale, PA 15096-0001, Tel: 877-606-7323 (inside USA and Canada) or 724-776-4970 (outside USA), www.sae.org. Foster, Kortge and Wolanin, 1977, “Hybrid III - A Biomechanically Based Crash Test Dummy,” Stapp Car Crash Conference SAE J211-1 Instrumentation for Impact Test - Part 1 - Electronic Instrumentation SAE J1733 Sign Convention for Vehicle Crash Testing SAE J2517 Hybrid III Family Chest Potentiometer Calibration Procedure 2.2 Related Publications The following publications are provided for information purposes only and are not a required part of this SAE Technical Report. The following publications are provided for information purposes and are not a required part of this document. 2.2.1 SAE Publications Available from SAE International, 400 Commonwealth Drive, Warrendale, PA 15096-0001, Tel: 877-606-7323 (inside USA and Canada) or 724-776-4970 (outside USA), www.sae.org. SAE J2570 Performance Specifications for Anthropomorphic Test Device Transducers SAE J2779 Low Speed Thorax Impact Test Procedure for the HIII 50th Male Dummy SAE J2876 Low Speed Knee Slider Test Procedure for the Hybrid III 50th Male Dummy 3. ASSEMBLY AND DISASSEMBLY PROCEDURES FOR THE HYBRID III 50TH PERCENTILE MALE DUMMY 3.1 Introduction The General Motors (GM) Hybrid III dummy (Figure 1) was an advancement of the ATD-502 dummy, developed in 1973 by GM under a NHTSA contract. The objective of the Hybrid III program was to produce a practical test dummy that would respond to an impact environment approximately as a human, based on the biomechanical data then available. The first version of this dummy became available in 1976 and was documented by Foster, Kortge and Wolanin in a 1977 Stapp Conference paper entitled "Hybrid III – A Biomechanically Based Crash Test Dummy." A number of improvements have followed. This Information Report should be used in conjunction with the engineering drawing package dated August 30, 1998, which details the parts and assemblies of the dummy. SAE INTERNATIONALJ2856 revised Proposed Draft JAN2015Issued SEP2009 Page 6 of 72 Figure 1 - Assembled hybrid III dummy The head of the Hybrid III dummy is anthropometrically shaped and responds in a similar manner to cadaver heads dropped on rigid surfaces. The head skin thickness is constant over the skull surface. The neck matches neck angletorque response data in forward (flexion) and rearward (extension) directions for humans seated in automotive posture. Although not required, many users choose to use a neck shield during out-of-position testing to prevent possibly nonbiofidelic interaction with air bags. Several styles of neck shield have been used, but none is yet universally accepted. If used, the neck shield should not change the neck bending response or provide a load path that bypasses the neck load cell. The shoulders show durability under shoulder belt loading. The shoulder joint torque remains essentially constant after adjustment. Most movable joints are of the constant friction type, and most have Delrin™-on-steel (or aluminum) surfaces. The adjustments should be checked before each test. The chest matches the force-deflection characteristics (with rib fracture) of human cadavers from blunt chest impacts, with the force levels increased by 700 N to compensate for the cadavers’ lack of muscle tone. The knee also matches cadaver response data. The lumbar spine is curved forward to add humanlike "slouch" to the seated dummy. The spine uses two laterally spaced cables which help stabilize the dummy in the lateral direction. An elastomeric insert over the machined knee and under the outer knee flesh simulation helps provide a soft, humanlike response. The abdomen is constructed of vinyl-encased foam. The feet now have a 45 degree range of motion, which matches human ankle range of motion in dorsiflexion. They also have a new construction which controls the response of the sole of the foot to loading. The Hybrid III hip joint range of motion also matches the range of a human hip joint. In addition, the hip joint incorporates a bumper that prevents metal-to-metal contact between the femur and hip bone. Test procedures for the foot and ankle compliance have been added as inspection procedures. SAE INTERNATIONALJ2856 revised Proposed Draft JAN2015Issued SEP2009 Page 7 of 72 As a supplement to the calibration procedures included in this manual, European regulations include some additional calibration tests. They essentially involve dynamic impacts to the lower extremities. Users should be aware of these additional tests when using dummies to certify vehicles in Europe. Information about obtaining these procedures is found at the end of the calibration section. The latest drawing package for the Hybrid III dummy was issued in 1998. It will be updated as modifications are accepted. The numbers in parentheses after a named part refer to the drawing number in the drawing package. The drawing package is available from Reprographic Technologies, 2000 ‘L’ Street N.W., Washington, D.C. 20036, Voice (202) 331-0576, Fax (202) 331-0985. Shop hours: Monday – Friday, 8:00 AM to 10:00 PM http://www.repro-tech.com/ The Hybrid III dummy has many optional but recommended transducers listed in Table 1. On the lower extremities, they allow measurement of knee shear (tibia-femur displacement), knee clevis axial load (relative to the knee and ankle joints), and tibia-ankle shear and bending moments, plus three forces. For the neck (both top and bottom) spine, six-channel transducers that measure three moments and three forces are becoming the preferred transducers. 3.2 Special Tools The following special tools will allow assembly, disassembly and calibration of the Hybrid III 50th percentile male dummy: a. Neck compression tool b. Ball hex wrench set c. Lumbar cable nut wrench d. Pelvis angle measurement tool (78051-532) e. Head skin thickness gauge f. Chest depth gauge (83-5006-007) g. Clavicle washer alignment tool h. Iliac bolt removal tool (for submarining pelvis only) For information concerning tool availability, contact the dummy manufacturers. SAE INTERNATIONALJ2856 revised Proposed Draft JAN2015Issued SEP2009 Table 1 - Hybrid III 50th percetile male dummy instrumentation Page 8 of 72 SAE INTERNATIONALJ2856 revised Proposed Draft JAN2015Issued SEP2009 3.3 Page 9 of 72 Disassembly and Inspection Every newly purchased Hybrid III dummy should be completely disassembled and compared against the latest engineering drawing package. Pay particular attention to parts critical to the performance of the dummy qualification tests. The following procedure will help verify that the newly purchased dummy conforms to the engineering drawing package. This procedure will also provide the basis to validate the dynamic component responses of the dummy. 3.4 Whole Dummy Several guidelines and procedures apply to various parts throughout the dummy, and are included in the appendices for easier reference. First, when handling an instrumented dummy, improper techniques can damage instrumentation, particularly accelerometers. Appendix A contains guidelines for safe handling of accelerometers. Second, the vinyl flesh of dummies can be damaged, but is often repairable. Appendix B contains instructions for repairing dummy flesh. Third, procedures for adjusting the joints throughout the dummy are included in Appendix C. In addition to the attached appendices, other SAE publications are particularly useful when working with the Hybrid III dummy. SAE J211-1 provides the most recent guidelines and procedures for dummy instrumentation and filtering. SAE Information Report J1733 illustrates the instrumentation available for the Hybrid III dummy, along with descriptions of how to apply the positive right-hand rule sign convention. 3.5 Clothing When used in testing, the dummy should wear a snug-fitting cotton knit T-shirt and pants. The neckline should be small enough to prevent contact between a shoulder belt and the dummy’s skin. The pants should end above the dummy’s knee. The T-shirt and pants should each weigh no more than 0.27 kg (0.6 lbm). Garments similar to thermal underwear (trimmed to be short-sleeved and above the knee) usually meet these requirements. To improve the quality of high-speed films taken of the dummy during testing (by avoiding excessive glare), the garments are usually dyed to a light pink. The shoes used with the 50th percentile male dummy are men’s dress oxfords, size 11XW that meet military specification MIL-S-13192P. Each shoe weighs 0.613 kg ± 0.09 kg (1.35 lb ± 0.2 lb). 3.6 Arms Remove each arm at the shoulder by unscrewing the 1/2x1-1/4 in long socket head shoulder screw (Figure 2). If necessary, clean the Delrin bushing and washers with a chlorinated solvent. Never lubricate any of the plastic bushings. Figure 2 - Shoulder yoke assembly Push out the steel pivot nut in each shoulder yoke (Figures 3 and 4) (78051-255). If the nut does not slide out freely, use the just-removed shoulder screw to help pull it out. Make sure the nut slides freely in its hole. Inspect each yoke to make sure each one contains five alignment dowel pins and one rubber bumper (Figures 2 and 3). SAE INTERNATIONALJ2856 revised Proposed Draft JAN2015Issued SEP2009 Page 10 of 72 Figure 3 - Exploded view of the shoulder yoke assembly Figure 4 - Shoulder yoke pivot nut Separate the lower arms from the upper arms and examine the elbow joints, noting the condition and position of the various parts as for the shoulder joints. Look to see that the two elbow rubber stops (78051-198) are in place. Remove the elbow pivot nut (78051-202) and check that the nut slides freely in the hole. Detach the hands from the lower arms and disconnect the wrist rotation joint. The elbow and wrist rotation joints have no stops. Lubricate these two rotation joints with Moly Lub Anti-Seize lubricant made by Bel-Ray Co., P.O. Box 526, Farmingdale, N.Y. 07727, or an equivalent. Examine all metal parts for burrs and sharp edges and remove them as necessary. Inspect vinyl-to-foam adhesion, cracked or cut vinyl skin, cracked or damaged bushings, and the condition of the threaded holes. 3.7 Head and Neck Although not required nor universally recommended, some generic suggestions regarding neck shields are included here. Neck shields have usually been constructed of foam or another material that wraps around the dummy’s neck and fills in or covers the gap in the chin. The seam of the neck shield is then secured with duct tape, rubber bands, or Velcro, but is generally not connected to the head or neck to avoid changing the neck’s response. Begin the head and neck disassembly by removing the neck shield. SAE INTERNATIONALJ2856 revised Proposed Draft JAN2015Issued SEP2009 Page 11 of 72 Remove the chest flesh to permit easier access to the base of the neck bracket. Remove the 3/8-16x1 in long cap screw (Figure 5) that holds the upper neck bracket to the lower portion of the neck bracket and permits adjustment of the neck angle. Check the condition of the curved steel washer (78051-305) and note how it fits on the neck bracket. Tilt the head and neck forward and remove the neck cable nut and four 1/4-20 x 5/8 in long socket head cap screws that hold the upper neck bracket to the base of the neck (Figure 6). If they are missing, install steel washers (78051-252) between these four socket head cap screws and upper neck bracket on reassembly. The neck and head assembly is now disconnected from the plastic sternum-to-rib cage bib assembly. Figure 5 - Neck angle adjustment screw and curved washer Figure 6 - Neck-to-upper-neck bracket attachment hardware Remove four 1/4-20x5/8 in long cap screws from the rear skull cap. For the three-axis neck transducer or its structural replacement (78051-383), remove the three 1/4-20x3/4 in long socket head cap screws underneath the skull. Separate the head from the transducer or its structural replacement. Do not stress the neck transducer cable. Loosen the two 10-32x1/4 in long set screws. Reinstall the transducer to the head. Mount the nodding block compression tool (Figure 7) to the back of the skull. Slip the round end of the tool over the cable (Figure 8) and turn the knob until the neck is just being compressed. A different tool for this operation can be constructed, as shown in Figure 9. For the six-channel neck transducer or its structural replacement, loosen two small 8-32x1/4 in long socket head set screws (Figure 10) which secure the head-to-neck pivot pin (Figure 11) (78051-339). Slowly increase the compression on the neck until the hinge pin can be pushed or lightly tapped out with a minimum of effort. Remove the nodding joint (78051-297) and disassemble the neck. The rubber sections of the neck are permanently bonded to the aluminum spacers and cannot be disassembled. SAE INTERNATIONALJ2856 revised Proposed Draft JAN2015Issued SEP2009 Page 12 of 72 In particular, check the two rubber neck nodding blocks (78051-351) on the top of the nodding joint (Figure 12). The blocks must conform to the drawing which specifies a durometer between 80-90 Shore A. The 90 degree surfaces of the nodding blocks fit opposite, rather than inside, the 90 degree grooves of the head-to-neck adaptor bracket. A drawing of the nodding block orientation appears in Figure 13. Figure 7 - Neck compression tool Figure 8 - Neck compression tool assembled to the head and neck Figure 9 - Three-channel neck load cell optional compression tool SAE INTERNATIONALJ2856 revised Proposed Draft JAN2015Issued SEP2009 Figure 10 - Neck pivot pin set screws Figure 11 - Neck pivot pin installed Figure 12 - Neck rubber nodding blocks on nodding joint Page 13 of 72 SAE INTERNATIONALJ2856 revised Proposed Draft JAN2015Issued SEP2009 Page 14 of 72 Figure 13 - Drawing of nodding block orientation Inspect the neck cable for imperfections. No evidence of the cable pulling through the end fittings should exist. Examine the machined metal parts and compare the rubber sections of the neck against the drawing. Remove the lower portion of the neck bracket. A steel washer under each of the cap screws helps to protect the aluminum from being galled by the steel screws. If the axial integrity of the neck is in question, the neck without its cable can be pull tested to 7 kN (1575 lbf). No separation should occur. Replace as required. Assemble the two sections of the neck bracket (78051-303 and -307) with the adjustment set to 0 degree and measure the bracket angle. The angle should be 13° 45' ± 30' (Figure 14) relative to the bottom surface of the lower neck bracket. Figure 14 - Neck bracket angle measurement When using either optional neck transducer (3- or 6-channel), the lug on the nodding joint must fit very tightly in the slot in the bottom of the neck load cell (Figure 15). The tightness is controlled by a brass washer on each side of the yoke. These washers must be lapped to produce a 0.000 to 0.025 mm (0.000 to 0.001 in) interference fit at assembly. Because the inside diameter of these washers is also critical, validate this dimension against drawing number 78051-253. SAE INTERNATIONALJ2856 revised Proposed Draft JAN2015Issued SEP2009 Page 15 of 72 Figure 15 - Neck load cell pivot joint (slot) and attaching cap screws In separating the 6-channel load cell from the head, remove the four 1/4x28-7/8 in long cap screws from the bottom (Figure 16). Special 1/4 ID x 3/8 OD x 1/16 thick washers are provided and must be used under the load cell attachment bolts. Larger washers will interfere with load cell operation. Use of ball hex wrenches (Figure 17) is recommended. Figure 16 - Special washers for the six-channel neck transducer Figure 17 - Ball hex wrenches SAE INTERNATIONALJ2856 revised Proposed Draft JAN2015Issued SEP2009 Page 16 of 72 Remove the skin from the skull and skull cap and check for tears and general quality. Inspect the skull for smoothness and freedom from flat spots and pits. Examine the bond of the skull ballast. If the ballast must be reinstalled or changed, see drawing number 78051-61 for instructions. Replace the skin on the skull and cap. Measure the thickness of the skin in the locations shown in drawing 78051-61. The thickness must be 11.2 mm ± 0.8 mm (0.441 in ± 0.031 in) as measured by the special thickness tool (Figure 18). Figure 18 - Skin thickness measuring tool Install the neck transducer and accelerometer block with simulated accelerometers as shown in drawing 78051-61. Install the skull cap. Weigh the assembly. The weight and center of gravity (c.g.) must conform to drawing 78051-338. If the head assembly does not comply with these weight and c.g. requirements, see number 78051-61 for instructions. In addition, Table 2 summarizes the c.g. specifications for the whole dummy. 3.8 Shoulder-Clavicles The right and left shoulder-clavicle and link assemblies consist of three main sections that bolt to each other and then to the thoracic spine. These three sections permit arm rotation, up-down motion at the shoulder, forward-rear excursion (hunching), and up-down motion of the entire shoulder-clavicle unit. See drawing 78051-89 for details of this assembly. We already have discussed the disassembly of the arm at the shoulder yoke. by rotating at the outer end of the clavicle. This same yoke provides shoulder rotation Detach the shoulder-clavicle unit from the thoracic spine assembly by reaching through a hole in the plastic chest "bib" and removing the socket head shoulder screw (78051-239) at the extreme top of the thoracic spine (Figure 19). Pull the clavicle unit straight up. Check for the urethane washer at the rear of the cavity in the thoracic spine and for two Delrin washers isolating the clavicle from the spine. Make sure the pivot nut slides out freely. A Delrin bushing should also be present in the hole through the clavicle link. At this time, use a pair of needlenose pliers to remove the rubber bump stop (Figure 20) from the thoracic cavity. The stop should be free from tears or permanent deformation, and should be symmetrical in cross section. The durometer of this bump stop should fall between 75 - 85 Shore A. Figure 19 - Clavicle link-to-spine attachment shoulder screws SAE INTERNATIONALJ2856 revised Proposed Draft JAN2015Issued SEP2009 Page 17 of 72 Figure 20 - Thoracic bump stop Remove the 1/2x1 in long shoulder screw (Figure 21) and its steel washer that holds the two aluminum sections of the clavicle and its link together. Top and bottom thin Delrin strips (Figure 22) should isolate the two sections. A urethane spring "stop" (Figure 23) should be located at the back of the cavity in the inner clavicle section. Figure 21 - Clavicle-to-clavicle link shoulder screw Figure 22 - Clavicle spacer SAE INTERNATIONALJ2856 revised Proposed Draft JAN2015Issued SEP2009 Page 18 of 72 Figure 23 - Urethane spring "stop" The durometer of this fore and aft bump stop is 40-45 Shore A. Be careful not to install this stop backwards. Examine the plastic parts for physical damage. Check the shoulder yoke for a rubber bumper (Figure 24) at the rear outer edge of the outer clavicle section for control of arm rotation. Figure 24 - Shoulder rotation bump stop Remove the nut from the cavity on the bottom side of the outer clavicle section (Figure 25). Pull out the shoulder yoke and check for its two-piece Delrin bushing, elastomeric washer, and large and small steel washers upon which the nut tightens (Figure 26). Look to see if eight dowel pins are there. Check for a steel stop on the rim of the shoulder yoke, held by two 10-24x3/8 in long screws (Figure 24). The stop can be installed in two positions: one for the right side and the other for the left. Inspect clavicle aluminum parts for porosity and cracks. SAE INTERNATIONALJ2856 revised Proposed Draft JAN2015Issued SEP2009 Page 19 of 72 Figure 25 - Shoulder yoke-to-clavicle nut Figure 26 - Exploded view of the clavicle and shoulder yoke 3.9 Ribs and Sternum Remove the twelve 10-32x5/8 in long button head cap screws holding the front of the ribs to the bib. Inspect the thin steel strips under the bolt heads for cracks. Check the thicker, slightly bent strips behind the rib ends for cracks. Note the way the strips fit the chest. The bend is not symmetrical; the upper portion is shorter than the lower. Detach the bib assembly. Do not loosen the set screw (Figure 27) because this will invalidate the chest pot calibration of SAE Recommended Practice J2517. Figure 27 - Displacement transducer and set screw SAE INTERNATIONALJ2856 revised Proposed Draft JAN2015Issued SEP2009 Page 20 of 72 Remove the twelve 10-32x5/8 in long screws holding the Delrin slider assembly to the bib (Figure 28). Examine the slider for damage and ensure that the slider ball moves freely in its track. Inspect the aluminum plate to which the slider assembly bolts. Check that the "V" shaped groove is at the bottom (Figure 29). Three rubber bumps stops prevent the sternum assembly from striking the spine box during testing. The two lower stops can be mounted to either the sternum assembly (Figures 29 and 30) or to the spine box (Figure 31). Mounting the stops to the spine box reduces the possibility of interaction with the sternal deflection rod. Figure 28 - Slider assembly attached to bib Figure 29 - Sternum installed on dummy SAE INTERNATIONALJ2856 revised Proposed Draft JAN2015Issued SEP2009 Page 21 of 72 Figure 30 - Sternum assembly with rubber sternum stops Figure 31 - Sternum stops mounted to the spine (spine box highlighted white) Inspect the bib for cracks, tears and imperfections. Compare the shape to the drawing. Clean all parts with isopropyl alcohol or an equivalent. Detach the six ribs (Figure 32) and their rear rib supports (Figure 33) by removing the twelve 10-32x1/2 in long screws at the rear of the thoracic spine assembly. Carefully examine each rib and the rib damping material for cracks. Check for gaps or other failures of the epoxy bond between the rib damping material and the rib metal (Figure 34). Verify the contours of each rib against a template made from the information obtained from the rib drawings. When the rib ends are matched to the template, the rib contour should be within ±1.50 mm (0.060 in) of the template. Minor reshaping of the ribs may be done by hand. Measure rib thickness. The Rockwell C hardness of each rib and rib support should fall between 44 and 46 at the center of the metal between the two screw holes. When reassembling, make sure the rib supports (78051-304) are not bent or damaged and are mounted the correct way. SAE INTERNATIONALJ2856 revised Proposed Draft JAN2015Issued SEP2009 Page 22 of 72 Figure 32 - Rib assembly Figure 33 - Rear rib supports Figure 34 - Steel rib and bonded damping material After assembling the ribs, or when checking rib condition, use the special tool (83-5006-007) to check for correct chest depth (Figure 35). The gauge is used to check the chest cavity depth at number one and number six ribs. The gauge should be pressed against the back edge of the spine box (not the rear rib supports). If the gauge probe contacts the front rib end threaded strip (78051-234), the condition is unacceptable and the ribs should be replaced. The gauge has two separate calibrated surfaces for the number one and number six ribs. SAE INTERNATIONALJ2856 revised Proposed Draft JAN2015Issued SEP2009 Page 23 of 72 Figure 35 - Chest depth gauge 3.10 Thoracic Spine Remove the four 1/4-20x3/4 in cap screws that attach the lumbar spine to the thoracic spine assembly and lift off the thoracic spine. From the bottom of the thoracic spine, remove the two 1/4-20x5/8 in long screws that hold the chest accelerometer adapter assembly, ballast weight, and chest displacement pot assembly (Figure 36) to the bottom of the spine box. Before separating this unit from the spine box, remove the two 10-32x1/3 in long flat head screws (78051-225) located about midway up the front of the box. Slide the assembly out of the bottom of the spine box. On earlier versions of the Hybrid III dummy, this is the only way to reach the chest accelerometer package. Dummies built more recently should have a series of holes on the side of the spine (Figure 37) to allow removal of the accelerometer block mounting screws so the block can be removed from the upper rear spine opening. These holes have been incorporated into the drawing package. Figure 36 - Thoracic instrumentation adaptor SAE INTERNATIONALJ2856 revised Proposed Draft JAN2015Issued SEP2009 Page 24 of 72 Figure 37 - Spine assembly holes - modified for easy removal of accelerometers Install the accelerometer block package and make sure no interference with the accelerometers occurs. Check the two larger rubber bumpers protecting the chest displacement pot (Figure 31). Carefully remove the chest deflection transducer assembly from its bearing. A 1/4-20x1/2 long button head screw and washer hold it in place. The assembly should easily push out. The chest deflection transducer assembly appears in Figure 38. Check the bearing for smooth operation. Figure 38 - Chest deflection transducer assembly SAE INTERNATIONALJ2856 revised Proposed Draft JAN2015Issued SEP2009 Page 25 of 72 3.11 Lumbar Spine The lumbar spine is more easily accessed if the legs are detached. Remove the 5/8x1-3/4 in long shoulder screw (one per leg) holding the rear of the upper leg to the brass femur. These bolts are located through holes in the flesh at the side and front of the pelvis (Figure 39). Detach the leg assemblies. Figure 39 - Upper leg access hole to femur Remove the four 10-24x3/8 in long screws holding the pelvic instrument cavity cover. Separate the lumbar spine and its lumbar-to-pelvic adaptor from the pelvis by removing two 3/8-16x3/4 in long cap screws from the front of the adaptor (Figure 40) and two 3/8-16x1-1/4 in long cap screws through the pelvic instrumentation cavity (Figure 41). Figure 40 - Lumbar spine assembly SAE INTERNATIONALJ2856 revised Proposed Draft JAN2015Issued SEP2009 Page 26 of 72 Figure 41 - Removal procedure for rear screws holding lumbar adaptor Separate the lumbar spine from the adaptor by removing three 1/4-20x5/8 in long cap screws from the bottom of the lumbar adaptor. Check the upper and lower surfaces of the lumbar adaptor. The lower surface must be flat and smooth. The upper surface for mounting the lumbar spine must be flat and smooth and have two hemispherical clearance depressions for the ends of the lumbar cables (Figure 42). Confirm that the corners formed by the square holes are parallel and perpendicular with the bottom of the bracket within ±0.5 degree. Verify this by inserting the pelvis angle gauge and using a protractor or inclinometer. Figure 42 - Lumbar spine adaptor Detach the two lumbar cables by removing the two 1/2-20 hex and jam nuts on the top of each cable (Figure 40) and pulling the cables through the spine. A special thin wrench is required for this job. These cables are not interchangeable with the neck cable. Check the top and bottom end plates for flatness and for complete adhesion to the rubber. Make sure sufficient clearance between the swaged balls and the hemispherical seats exists. Before measuring the included angle between the two plates of the spine, the spine must be allowed to sit free of the dummy for at least 24 hours. The angle must be 45.5 degrees ± 0.5 degree (Figure 43). 3.12 Abdomen Examine the abdominal insert (78051-52) for skin-to-foam separation, for tears and/or cuts in the vinyl skin, and for airtightness. Air-shipped inserts are only partially sealed and must be fully sealed by the user. 3.13 Pelvis and Upper Femurs Remove the femur ball and flange assembly (78051-114,-115) shown in Figure 44 from each side of the pelvis by unscrewing three 1/4-20x3/4 in long cap screws per side. Access is gained through the three one-half in diameter holes in each side of the pelvic flesh. First remove the two rear screws and then rotate the femur assembly towards the pelvic center to allow access to the third screw. A tool made to fit in place of the upper leg bone will simplify this task. When removing the femurs, be careful not to tear the urethane bumpers (78051-498-1,-2) on the top of each femur. A small amount of talcum powder can be used on the bumpers to reduce friction. Remove the two 8-32x3/8 screws holding the bumpers in place (Figure 45). Inspect the bumpers for tears or cracks and replace if necessary. SAE INTERNATIONALJ2856 revised Proposed Draft JAN2015Issued SEP2009 Figure 43 - Measuring lumbar spine included angle Figure 44 - Femur ball and flange assembly Page 27 of 72 SAE INTERNATIONALJ2856 revised Proposed Draft JAN2015Issued SEP2009 Page 28 of 72 Figure 45 - Removal of upper femur bumpers for inspection The new upper femur (78051-110,-111) is designed to prevent metal-to-metal contact between the femur and the flange/screws that hold the femur, when the femur is rotated towards the pelvis. This holds true when the femur is parallel to the midsagittal plane, as well as 7 degrees inboard and outboard of this plane. The dummy manufacturers should confirm the impossibility of metal-to-metal contact with new pelvises before the flesh is molded around the hip bone, as well as when remolding older pelvises. Trying to check the full range of motion when the pelvis flesh is on is not advisable, as this procedure quickly degrades the pelvis flesh and increases its range of motion beyond an acceptable level. Instead, once an older hip bone is shown to be compatible with the new femur design, the femur height should be inspected regularly to ensure that the femur has not deformed excessively. Femur deformation might change the geometry enough to allow metal-to-metal contact. Remove the accelerometer block. Ensure that the accelerometer mount will properly house the desired accelerometers. Confirm that the lead ballast in the top of the pelvic casting (Figure 46) does not project above the surrounding aluminum structure. Check the femur sockets and femur ball for galling. Confirm that the nylon-tipped femur friction adjusting screws are not damaged. Figure 46 - Potted lead shot in cavity on top of pelvis Examine the pelvis for flesh tears and/or cuts, and the skin for foam separation. If the pelvis cavity for the femur shows signs of deterioration such as these, it will probably not pass the range of motion calibration test, and the pelvis should be remolded. Check the buttock compression by mounting an adaptor to the top of the pelvis. Invert the pelvis and apply a 334 N (75 lbf) force to the bottom of the pelvis, perpendicular to the ground, through a 400x400 mm (16x16 in) plate covering the entire buttock area. After 5 minutes, the distance between the adaptor-to-pelvic interface and the 400x400 mm plate must be 124.0 to 127.0 mm (4.88 to 5.00 in). SAE INTERNATIONALJ2856 revised Proposed Draft JAN2015Issued SEP2009 Page 29 of 72 If the optional submarining pelvis (which has three load bolts per side) is used, the following procedure is required. The ends of the load bolts project beyond the front edge of each ilium to indicate belt position on the ilium. Remove each load bolt with the tool provided and ensure that each bolt turns freely on its threads. 3.14 Upper Legs and Knees Separate the upper leg sections by removing the two 3/8-16 screws, (one 1-3/4 in long and the other, 2 in long), that secure the load cell or the femur load cell simulator to the femur. The longer screw is nearest to the knee. Detach the lower leg from the machined knee (79051-22) by removing eight 1/4-28x7/16 in long flat head cap screws. See Figures 47 and 48. Figure 47 - Side of knee with adjustment screw and stop Figure 48 - Side of knee that holds optional potentiometer Take off the knee skin and rubber knee insert (Figure 49). Examine these flesh parts for cuts and tears. Clean the inside and outside of the insert and adjoining knee skin with isopropyl alcohol or equivalent. A pair of six-channel femur load cells are available for use in place of the single-axis femur load cells. Either type of load cell directly replaces the femur load cell simulator in each leg. The six-channel load cells measure axial and shear loads, and moment in three axes, while the single-axis load cells measure axial load only. 3.15 Lower Legs and Feet Separate the 45 degree foot and ball joint ankle assembly (78051-614 & 615) by removing the 3/8x1 in long shoulder screw at the foot-lower leg intersection. Remove the heel insert (Figure 50, 78051-608) and inspect for deterioration. Make sure that the ankle bumper (78051-610) is in place and inspect for deterioration. SAE INTERNATIONALJ2856 revised Proposed Draft JAN2015Issued SEP2009 Page 30 of 72 Figure 49 - Knee skin and insert Figure 50 - 45 degree foot/ankle with heel insert and ankle bumper 3.16 Non-Instrumented and Optional Force-Indicating Lower Legs Each Hybrid III lower leg assembly consists of the sliding knee (with an optional potentiometer to measure displacement), a lower leg (either standard or an optional instrumented one), and a 45 degree foot. Another knee design with a ball-slider mechanism is also available. The instrumented lower leg option can measure knee (tibia-to-femur) shear, knee clevis axial loads (inside and outside the knee), upper leg fore-aft and lateral moments plus shear and axial forces, and lower leg fore-aft and lateral moments plus shear. Load cells with four channels to measure various combinations of forces and moments are available for the upper and lower tibias. The knees can be attached so the potentiometer mounts either inboard or outboard. Figure 51 shows the knees configured to hold the potentiometer inboard, while Figure 52 shows the knees set up to place the potentiometer outboard. Mounting the potentiometer inboard provides easier access to the knee adjustment screw when seating the dummy. However, some test conditions may be more likely to damage the potentiometers when they are located inboard, so the test engineer can specify an outboard mounting location. The drawings dealing with the potentiometer location (7905116, -24, -25) are inconsistent regarding the “inboard” and “outboard” sides of the knee. Separate the lower leg from the machined knee by removing eight 1/4-28x7/16 in long flat head cap screws from the clevis. This exposes the knee slider assembly. The slider is detached by removing the 3/8x3/8 in long shoulder screw which has a metal and a urethane washer (Figure 53). The two parts of the slider assembly then can be taken off of the machined knee (Figures 54, 55, 56). Ensure that the knee rotation stop is in place (Figure 53). Add a graphite-based dry film lubricant or equivalent to the sliding tracks (Figures 54 and 55). The pin that holds the optional displacement potentiometer displacement-rod to the slider should be tight. The standard lower leg (Figure 57) is a welded assembly which can be replaced with an optional instrumented leg (Figure 58, 59, 60). The following describes the assembly of the optional instrumented lower leg. SAE INTERNATIONALJ2856 revised Proposed Draft JAN2015Issued SEP2009 Figure 51 - Knees assembled to allow inboard potentiometer placement Figure 52 - Knees assembled to allow outboard potentiometer placement Figure 53 - Knee slider assembly and lower leg rotation stop Page 31 of 72 SAE INTERNATIONALJ2856 revised Proposed Draft JAN2015Issued SEP2009 Figure 54 - Half of the sliding knee transducer assembly that holds the optional linear potentiometer Figure 55 - Remaining half of the sliding knee transducer assembly Figure 56 - Exploded view of the knee slider assembly Page 32 of 72 SAE INTERNATIONALJ2856 revised Proposed Draft JAN2015Issued SEP2009 Figure 57 - Standard (non-instrumented) welded lower leg assembly Figure 58 - Optional instrumented lower-leg-to-knee clevis Figure 59 - Optional heavy-wall aluminum tube and tibia multi-axis load cells Page 33 of 72 SAE INTERNATIONALJ2856 revised Proposed Draft JAN2015Issued SEP2009 Page 34 of 72 Figure 60 - Lower tibia transducer with extra slot at bottom for 90 degree rotation of transducer The upper part of the lower leg consists of the clevis which is bolted to the upper tibia load cell by four 1/4-28x5/8 long socket head cap screws (Figure 58). The optional upper and lower tibia load cells are separated by a heavy wall aluminum tube which protects the load cell connectors (Figure 59). The upper and lower tibia load cells are each attached to the tube by four modified 1/4x28 button head cap screws. The lower load cell may be rotated 90 degrees if lateral shear and moment are preferred, by using the second slot in the ankle-to-tibia adaptor (Figure 60), or this load cell may be purchased with both moment measurements built in. No adjustments are possible except for a friction adjustment at the ankle ball. 3.17 Assembly The assembly of the dummy is a reversal of the disassembly process. Remarks will be confined to special considerations that are unique to assembly. When assembling the knees with the standard, non-instrumented lower legs, the shoulder bolt head can be on the outboard (Figure 51) or inboard (Figure 52) side of both knees. The modified 3/8 diameter shoulder bolt (79051-30) for the machined knee acts as a control for the motion between the lower leg and knee. If the dummy does not have the holes drilled in the side of the spine box to aid in the chest accelerometer mount installation, drill the holes as shown in Figure 37 and in the drawing package. Torque the lumbar cables to 1.1 to 1.4 N⋅m (10 to 12 in⋅lbf). Install the lumbar adaptor assembly (with the thorax weight and transducers) into the bottom of the thoracic spine. Install the thoracic spine, with adaptor assembly, to the lumbar spine. Attach the ribs and rear rib supports to the thoracic spine assembly. Do not tighten the screws. Attach the bib to the ribs using the rib stiffeners (Figure 61). Install the aluminum sternum to the inside surface of the bib and attach the Delrin track. Ensure that the chest displacement rod ball engages the Delrin track properly (Figure 29). Check the spacing and alignment of the ribs and then tighten the screws. A 3/8 diameter rod can be used as a spacer control for the space between the ribs. SAE INTERNATIONALJ2856 revised Proposed Draft JAN2015Issued SEP2009 Page 35 of 72 Figure 61 - Thick and thin rib stiffeners at the bib When mounting the lower neck bracket to the top of the spine, ensure that the cap screws have metal washers to protect the aluminum. Assemble the shoulder yokes, clavicles, and clavicle links. The long flat Delrin strips are easily damaged during assembly. An alignment tool will assist in this operation. Assemble the clavicles to the thoracic spine assembly. The flat spots on the flat Delrin washers are on the side nearest the centerline of the spine. The following procedure uses two 15 cm (6 in) C-clamps to assemble the clavicles more easily. As shown in Figure 62, insert the clavicular link nuts (78051-238) followed by the urethane washer nuts (78051-237) into the holes provided on the spine box. Place the clavicular washers (78051-236) onto the clavicular link (78051-188,-189) with the flats in a vertical position toward the center, as illustrated in Figure 63. With the upper neck bracket removed, and the clavicle (78051-141, -142) and clavicular link already assembled, place the clavicular link into the slot provided on the spine box and position the C-clamp as shown in Figure 64. If the holes on the clavicular link and the spine box are not aligned after the previous step, use the second C-clamp in the manner shown in Figure 65. Figure 62 - Installing clavicular link nuts and urethane washer nuts Figure 63 - Adding clavicular washers SAE INTERNATIONALJ2856 revised Proposed Draft JAN2015Issued SEP2009 Page 36 of 72 Figure 64 - Using the first c-clamp Figure 65 - Using the second c-clamp to help align clavicle holes Mount the head and neck assembly. The neck cable should be torqued to 1.36 N⋅m ± 0.27 N⋅m (1.0 ft⋅lbf ± 0.2 ft⋅lbf). Install the chest flesh. Assemble the upper and lower arms and attach the arms to the shoulder yokes. The correct sequence of shoulder and elbow washers is shoulder bolts, steel flat washer, one half of yoke, Delrin bushing, arm boss, Delrin bushing, urethane washer, other half of yoke, steel sliding pivot/nut. The upper arm has a cutout on the upper inner side. 3.18 General Comments When ordering a new dummy, inform the dummy manufacturer of the type and model of accelerometer you intend to use. This will ensure that you obtain the correct accelerometer mounting blocks for the head, chest and pelvis. When purchasing a new head (or an original dummy), inform the manufacturer which neck transducer (3- or 6-channel) you intend to use. The skulls are not interchangeable. The centers of gravity of the dummy's eight segments are listed on drawing number 78051-338, sheets 1 and 2. Origins and axis locations are shown on the assembly drawing for each component. However, since some of them are unclear, Table 2 summarizes the center of gravity information. SAE INTERNATIONALJ2856 revised Proposed Draft JAN2015Issued SEP2009 Page 37 of 72 Table 2 - Centers of gravity Center of Gravity Location and Tolerance (mm) 63.5 ± 2.5 Center of Gravity Location and Tolerance (in) 2.50 ± 0.10 35.6 ± 2.5 -5.1 ± 2.5 1.40 ± 0.10 -0.20 ± 0.10 50.8 ± 2.5 94.0 ± 5.1 2.00 ±0.10 3.70 ± 0.20 -50.8 ± 5.1 -2.00 ± 0.20 Segment Head Head Head Neck Neck Neck Upper Torso Upper Torso Upper Torso Axis X Y Z X Y Z X Y Z Lower Torso X -7.6 ± 5.1 -0.30 ± 0.20 Lower Torso Lower Torso Y Z 7.6 ± 5.1 0.30 ± 0.20 Upper Arm Upper Arm Upper Arm Lower Arm Lower Arm Lower Arm Hand Hand Hand Upper Leg Upper Leg X Y Z X Y Z X Y Z X Y -1.5 ± 5.1 -0.06 ± 0.20 -132.1 ± 5.1 87.9 ± 5.1 -5.20 ± 0.20 3.46 ± 0.20 -5.3 ± 5.1 57.2 ± 5.1 -0.21 ± 0.20 2.25 ± 0.20 -1.5 ± 5.1 -159.0 ± 5.1 -0.06 ± 0.20 -6.26 ± 0.20 Upper Leg Z 19.3 ± 5.1 0.76 ± 0.20 Lower Leg Lower Leg Lower Leg Foot Foot Foot X Y Z X Y Z -5.1 ± 5.1 -0.2 ± 0.20 -200.7 ± 5.1 55.9 ± 5.1 -7.9 ± 0.20 2.20 ± 0.20 -53.3 ± 5.1 -2.10 ± 0.20 Reference Interface surface between skull and skull cap Midsagittal plane Bottom surface of skull CL of hole in UNB for neck cable CL of hole in UNB for neck cable Top surface of the UNB which contacts the bib simulator Rear surface of spine box upper back plate (78051-187) Midsagittal plane of dummy CL of bottom holes on spine box upper back plate (78051-187) Line connecting centers of two front lumbar to pelvic adapter mounting holes in the pelvic bone Midsagittal plane Top surface of the pelvic bone, where the lumbar to pelvic adapter attaches Line connecting shoulder pivot point and elbow pivot point Line connecting shoulder pivot point and elbow pivot point Shoulder pivot point Elbow pivot point Line connecting elbow pivot point and wrist pivot point Line connecting elbow pivot point and wrist pivot point Center of wrist pivot Center of wrist pivot Midpoint between the two sides of the wrist clevis Knee pivot point Line through knee pivot point, passing 23.75 mm (0.935 in) below centerline of upper leg bone and parallel to midsagittal plane Line through knee pivot point, passing 23.75 mm (0.935 in) below centerline of upper leg bone and parallel to midsagittal plane Line connecting knee pivot and ankle pivot Line connecting knee pivot and ankle pivot Knee pivot point Center of ankle pivot Center of ankle pivot Center of ankle pivot SAE INTERNATIONALJ2856 revised Proposed Draft JAN2015Issued SEP2009 TH 4. CALIBRATION PROCEDURES FOR THE HYBRID III 50 Page 38 of 72 PERCENTILE MALE DUMMY Calibration tests are specified for dummy responses which could affect dummy measurements that are used by governments and safety engineers to assess occupant injury potential. Calibration tests are performed by the dummy manufacturer to assure that a new component or assembly meets the SAE specified response requirements. The crash dummy user will periodically perform the calibration tests to assure the dummy is maintained at the SAE specified performance levels. 4.1 External Measurements (A) Remove the dummy's chest flesh and abdominal insert. (B) Place the dummy on a flat, rigid, smooth, clean, dry, horizontal surface, as shown in Figure 66. The seating surface must be at least 406 mm (16 in) wide and 406 mm (16 in) deep, with a vertical section at least 406 mm (16 in) wide and 914 mm (36 in) high attached to the rear of the seating fixture. The dummy's midsagittal plane is vertical and centered on the test surface. (C) Remove the four socket head cap screws which attach the lumbar spine to the thoracic spine. Torque the two lumbar cables to 1.1 to 1.4 N⋅m (10 to 12 in⋅lbf). NOTE: At this point, inspect the thorax for damage. If required, remove the thorax displacement transducer for calibration. Use extreme caution to avoid damaging the instrumentation cables. (D) Reassemble the lumbar spine to the thoracic spine. (E) Secure the dummy to the test fixture so the rear surfaces of the upper thorax and buttocks are tangent to the rear vertical surface of the fixture (or as near tangent as possible). The dummy's midsagittal plane should be vertical. (F) Secure the upper thorax to hold the dummy in position. Extend the neck to position the dummy's head so the occiput is 43.2 mm (1.7 in) ± 2.5 mm (0.1 in) forward of the test fixture's rear vertical surface. Secure the head in this position. SAE INTERNATIONALJ2856 revised Proposed Draft JAN2015Issued SEP2009 Page 39 of 72 Figure 66 - External dimensions setup specification (G) Position the upper and lower legs parallel to the midsagittal plane so the centerline between the knee pivot and the screw attaching the ankle to the lower tibia is vertical. (H) Position the feet parallel to the dummy's midsagittal plane, with the bottoms horizontal and parallel to the seating surface. (I) Position the upper arms vertically so the centerline between the shoulder and elbow pivots is parallel to the rear vertical surface of the fixture. (J) Position the lower arms horizontally so the centerline between the elbow and wrist pivots is parallel to the seat surface. SAE INTERNATIONALJ2856 revised Proposed Draft JAN2015Issued SEP2009 Page 40 of 72 (K) Record the following dimensions. (The symbols and description for each measurement are indicated in Figure 66.) C - H-point height above seat surface (Reference). D - H-point from seat's rear vertical surface (Reference). H - Skull cap skin to seat rear vertical surface (Reference). A - Sitting Height - Seat surface to highest point on top of the head. F - Thigh Clearance - Seat surface to highest point on the upper femur segment. K - Buttock to Knee Length - The most forward surface of the knee flesh to the fixture's rear vertical surface. L - Popliteal Height - Seat surface to the horizontal plane at the bottom of the feet. M - Knee Pivot to Floor Height - Knee pivot to the horizontal plane of the bottom of the feet, in line with the knee and ankle pivots. P - Foot Length - Tip of toe to rear of heel. R - Foot Breadth - The widest part of the foot. E - Shoulder Pivot from Backline - Center of the shoulder clevis to the fixture's rear vertical surface. V - Shoulder Width - Between outside edges of shoulder clevises, in line with the shoulder pivot bolt. B - Shoulder Pivot Height - Centerline of shoulder pivot bolt to the seat surface. J - Elbow Rest Height - The flesh below the elbow pivot bolt to the seat surface. I - Shoulder to Elbow Length - The highest point on top of the shoulder clevis to the lowest part of the flesh on the elbow, in line with the elbow pivot bolt. G - Back of Elbow to Wrist Pivot - The back of the elbow flesh to the wrist pivot bolt. N - Buttock Popliteal Length - The rearmost surface of the lower leg to the fixture's rear vertical surface. W - Hip width at H-point. O - Chest depth at the top of the third rib. (L) Reinstall the chest flesh and abdominal insert. Reposition the dummy on the test fixture. You do not need to level the head as specified for the previous measurements. (M) Mark the locations and record the chest and waist circumference dimensions. Y - Chest Circumference - Measured 431.8 mm (17 in) above the seat surface, approximately at the top of the 5th rib. Z - Waist Circumference - Measured 228.6 mm (9 in) above the seat surface. (N) Compare measured dimensions to dimensions in Table 3 to determine conformance to specifications. SAE INTERNATIONALJ2856 revised Proposed Draft JAN2015Issued SEP2009 TABLE 3 - EXTERNAL DIMENSIONS Page 41 of 72 SAE INTERNATIONALJ2856 revised Proposed Draft JAN2015Issued SEP2009 4.2 Page 42 of 72 Mass Measurements (A) Check the masses of the various dummy segment assemblies on initial inspection. They should conform to the masses specified in Table 4. (B) After replacing parts or accelerometers, recheck the mass of the pertinent segment. TABLE 4 - ASSEMBLY MASSES ASSEMBLY Head Assembly Neck Assembly Upper Torso Assembly with Chest Flesh (includes from lower neck bracket to bottom of spine box) Lower Torso Assembly (includes femurs and lower lumbar adapting plate) Upper Leg Assembly, Left Upper Leg Assembly, Right Lower Leg Assembly, Left (includes foot) Lower Leg Assembly, Right (includes foot) Upper Arm Assembly, Left Upper Arm Assembly, Right Lower Arm/Hand Assembly, Left Lower Arm/Hand Assembly, Right Total Dummy Mass 4.3 MASS lb MASS kg 10.0 ± 0.1 3.4 ± 0.1 37.9 ± 0.3 4.54 ± 0.05 1.54 ± 0.05 17.19 ± 0.36 50.8 ± 0.3 13.2 ± 0.2 13.2 ± 0.2 12.0 ± 0.3 12.0 ± 0.3 4.4 ± 0.2 4.4 ± 0.2 5.0 ± 0.2 5.0 ± 0.2 171.3 ± 2.6 23.04 ± 0.36 5.99 ± 0.09 5.99 ± 0.09 5.44 ± 0.14 5.44 ± 0.14 2.00 ± 0.09 2.00 ± 0.09 2.27 ± 0.09 2.27 ± 0.09 77.70 ± 1.18 Head Drop Test (A) This test measures the forehead response to frontal impact with a hard surface. (B) The head assembly consists of: a. head assembly (78051-61) b. neck transducer or a structural replacement; can be 3-channel or 6-channel (78051-383 or C-1797) c. head-to-neck pivot pin (78051-339) d. three accelerometers The mass of the head assembly is 4.54 kg ± 0.05 kg (10.0 lb ± 0.1 lb). (C) The test fixture consists of a structure to suspend the head assembly and a rigidly supported, flat, horizontal, steel plate. The square plate should be 50.8 mm ± 2 mm (2.0 in ± 0.08 in) thick, with a length and width of 610 mm ± 10 mm (24 in ± 0.4 in), and have a smooth surface finish of 8 to 80 microinches/inch rms. A surface finish close to 8 microinches/inch rms is preferred. The suspension system and accelerometer cable masses should be as light as possible to minimize the external forces acting on the head. [Effective suspension cable and accelerometer cable masses are to be less than 25 g (0.05 lb). Effective mass can be estimated by multiplying the mass/unit length of the cable by the length of cable between the head and the first support.] (D) The Data Acquisition System, including transducers, must conform to the specifications of the latest revision of SAE Recommended Practice J211-1. Filter all data channels using Channel Class 1000 phaseless filters. SAE INTERNATIONALJ2856 revised Proposed Draft JAN2015Issued SEP2009 Page 43 of 72 (E) Test Procedure 1. Visually inspect the head skin for cracks, cuts, abrasions, etc. Replace or repair the head skin if abrasions or cuts to the frontal area are more than superficial. Torque the 1/4-20 skull cap screws to 18 N⋅m minimum (160 in-lbf minimum) and the 10-24 accelerometer mount cap screws to 7.5 N⋅m (66 in-lbf). 2. Soak the head assembly in a controlled environment with a temperature of 20.6 to 22.2 °C (69 to 72 °F) and a relative humidity from 10 to 70% for at least 4 hours prior to a test. The test environment should have the same temperature and humidity requirements as the soak environment. 3. Mount the accelerometers in the head on the horizontal transverse bulkhead so the sensitive axes intersect at the center of gravity point as defined by Drawing 78051-338, Page 2 of 2. One accelerometer is aligned with the sensitive axis perpendicular to the horizontal bulkhead in the midsagittal plane (Z-axis). The second accelerometer is aligned with the sensitive axis parallel to the horizontal bulkhead in the midsagittal plane (X-axis). The third accelerometer is aligned with its sensitive axis parallel to the horizontal bulkhead and perpendicular to the midsagittal plane (Y-axis). Ensure that all transducers are properly installed, oriented and calibrated. 4. Prior to the test, clean the impact surface of the skin and the impact plate surface with isopropyl alcohol or an equivalent. The impact surface and the skin must be clean and dry for testing. 5. Suspend the head assembly in a manner similar to that shown in Figure 67. The lowest point on the forehead is 12.7 mm ± 1 mm (0.5 in ± 0.04 in) below the lowest point of the dummy's nose when the midsagittal plane is vertical. The 1.6 mm (0.062 in) diameter holes located on either side of the head are used to ensure that the head is level with respect to the impact surface. 6. Drop the head assembly from a height of 376 mm ± 1 mm (14.8 in ± 0.04 in) by a means that ensures a smooth, clean release onto the impact surface. 7. Wait at least 2 hours between successive tests on the same head assembly. 8. Time-zero is defined as the point of contact between the head and the impact surface. All data channels should be at the zero level at this time. SAE INTERNATIONALJ2856 revised Proposed Draft JAN2015Issued SEP2009 Figure 67 - Head drop test setup specification Page 44 of 72 SAE INTERNATIONALJ2856 revised Proposed Draft JAN2015Issued SEP2009 Page 45 of 72 (F) Performance Specifications 1. The peak resultant acceleration should be between 225 G and 275 G, inclusive. 2. The resultant acceleration versus time history curve shall be unimodal to the extent that oscillations occurring after the main acceleration pulse are less than 10% (zero to peak) of the main pulse. 3. The lateral acceleration vector should not exceed 15 G. 4.4 Neck Tests (A) The components required for the neck tests are: a. head assembly (78051-61) b. neck assembly (78051-90) c. upper neck bracket (78051-307) d. lower neck bracket (78051-303) e. bib simulator (78051-84) f. three- or six-channel neck transducer to measure the X-axis force and the Y-axis moment g. transducers to measure the rotation of the D-plane (horizontal plane through the base of the skull) with respect to the pendulum's longitudinal centerline h. three actual or simulated accelerometers in the head to maintain the proper weight and center of gravity location; data from the accelerometers are not required (B) The test fixture pendulum arm with specifications appears in Figure 68. The aluminum honeycomb material is commercial grade, 0.8 kg (1.8 lb) per cubic ft with 19 mm (0.75 in) diameter cells. Mount the accelerometer with its sensitive axis aligned with the arc formed at a radius 1657.4 mm (65.25 in) from the pivot point. SAE INTERNATIONALJ2856 revised Proposed Draft JAN2015Issued SEP2009 Figure 68 - Neck pendulum arm specifications Page 46 of 72 SAE INTERNATIONALJ2856 revised Proposed Draft JAN2015Issued SEP2009 Page 47 of 72 (C) The data acquisition system, including transducers, must conform to the specifications of the latest revision of SAE Recommended Practice J211-1. Using phaseless filters, filter the neck force data channel using Channel Class 1000, the neck moment data channel using Channel Class 600, the pendulum acceleration data channel using Channel Class 180, and the neck rotation data channels using Channel Class 60. (D) Test Procedure 1. Soak the neck assembly in a controlled environment at a temperature between 20.6 to 22.2 °C (69 to 72 °F) and a relative humidity from 10 to 70% for at least 4 hours prior to a test. The test environment should have the same temperature and humidity requirements as the soak environment. Check that internal neck temperature reaches the soak temperature by placing a thermo-sensor into one of the holes in the neck. 2. Inspect the neck assembly for cracks, cuts, and separation of the rubber from the metal segment. 3. Inspect the nodding blocks (78051-351) for any deterioration and replace as necessary. Replace the blocks if they are less than 80% of their original height. The durometer should be 80 to 90 Shore A. Ensure that the nodding blocks are installed correctly, as shown in Figure 13. 4. Inspect the nodding joint washers, Drawing 78051-253, for an interference fit. Adjust or replace as required. 5. Mount the head-neck assembly on the pendulum so the midsagittal plane of the head is vertical. As shown in Figure 69 for the Flexion test and Figure 70 for the Extension test, the midsagittal plane should coincide with the plane of motion of the pendulum's longitudinal centerline. 6. Install the transducers or other devices for measuring the D-plane rotation with respect to the pendulum longitudinal centerline. These measurement devices should be designed to minimize their influence on the performance of the head-neck assembly. 7. Torque the jam nut (78051-64) on the neck cable (78051-301) to 1.36 N⋅m ± 0.27 N⋅m (1.0 lb-ft ± 0.2 lb-ft) before each test on the same neck. SAE INTERNATIONALJ2856 revised Proposed Draft JAN2015Issued SEP2009 Figure 69 - Neck flexion test setup specification Page 48 of 72 SAE INTERNATIONALJ2856 revised Proposed Draft JAN2015Issued SEP2009 Page 49 of 72 Figure 70 - Neck extension test setup specification 8. The number of cells in the honeycomb material required to produce the pendulum input pulse will be different for the flexion and extension tests. The number of cells required may also vary for each sheet and/or batch of material. Prior to the test, it is an option to pre-crush the honeycomb material by lightly impacting it so 90 to 100% of the projected honeycomb surface contacts the pendulum strike plate. 9. With the pendulum resting against the honeycomb material, adjust the neck bracket until the longitudinal centerline of the pendulum is perpendicular within ±1 degree to the D-plane on the dummy's head. 10. Wait at least 30 minutes between successive tests on the same neck. SAE INTERNATIONALJ2856 revised Proposed Draft JAN2015Issued SEP2009 Page 50 of 72 11. Calculate the moment about the occipital condyles for both flexion and extension tests using the formulae: For a three-channel neck transducer: Metric Units Moment (N⋅m) = [My (N⋅m)] - [0.008763 m] [Fx (N)] English Units Moment (ft-lbf) = [My (ft-lbf)] - [0.02875 ft] [Fx (lbf)] For a six-channel neck transducer: Metric Units Moment (N⋅m) = [My (N⋅m)] - [0.01778 m] [Fx (N)] English Units Moment (ft-lbf) = [My (ft-lbf)] - [0.05833 ft] [Fx (lbf)] NOTE: The formulae are based on the sign convention contained in the latest revision of SAE Recommended Practice J211-1, and SAE Information Report J1733. (E) Performance Specifications - Neck Flexion 1. Release the pendulum and allow it to fall freely from a height to achieve a velocity of 6.89 to 7.13 m/s (22.6 to 23.4 ft/s), measured at the center of the accelerometer. 2. Time-zero is defined as the time of initial contact between the pendulum striker plate and the honeycomb material. All data channels should be at the zero level at this time. 3. Stop the pendulum from the initial velocity with an acceleration versus time pulse which meets the velocity change as specified in Table 5. Integrate the pendulum acceleration data channel to obtain the velocity versus time curve. Table 5 - Pendulum impulse for neck flexion test 4. The maximum rotation of the head D-plane should be 64 to 78 degrees with respect to the pendulum and should occur between 57 and 64 milliseconds after time zero. The decaying head rotation versus time curve should cross the zero angle between 113 and 128 milliseconds after time-zero. 5. The moment about the Y-axis of the head, measured with respect to the occipital condyles, has a maximum value between 88.1 and 108.4 N⋅m (65 and 80 ft-lbf) and should occur between 47 and 58 milliseconds. The decaying moment versus time curve should first cross zero between 97 and 107 milliseconds after time-zero. SAE INTERNATIONALJ2856 revised Proposed Draft JAN2015Issued SEP2009 Page 51 of 72 (F) Performance Specifications - Neck Extension 1. Release the pendulum and allow it to fall freely from a height to achieve an impact velocity of 5.94 to 6.19 m/s (19.5 to 20.3 ft/s), measured at the center of the accelerometer. 2. Time-zero is defined as the time of initial contact between the pendulum striker plate and the honeycomb material. All data channels should be at the zero level at this time. 3. Stop the pendulum from the initial velocity with an acceleration versus time pulse which meets the velocity change as specified in Table 6. Integrate the pendulum acceleration versus time curve to determine the velocity versus time curve. Table 6 - Pendulum impulse for neck extension test 4. The maximum rotation of the head D-plane should be 81 to 106 degrees with respect to the pendulum and should occur between 72 and 82 milliseconds after time-zero. The decaying head rotation versus time curve should cross the zero angle between 147 and 174 milliseconds after time-zero. 5. The moment about the Y-axis of the head, measured with respect to the occipital condyles, should have a maximum value between -52.9 and -80.0 N⋅m (-39 to -59 ft-lbf) and should occur between 65 and 79 milliseconds. The decaying moment versus time curve should first cross zero between 120 and 148 milliseconds after reaching its peak value. 4.5 Thorax Impact Test (A) The complete dummy assembly (78051-218) is required, including the clothing [shirt and pants], but without the shoes (78051-294 left and 78051-295 right). (B) The fixture consists of a smooth, clean, dry, steel seating surface and a test probe. The test probe mass is 23.36 kg ± 0.02 kg (51.5 lb ± 0.05 lb), including instrumentation, rigid attachments, and the lower 1/3 of the suspension cable mass. The diameter of the impacting face is 152.4 mm ± 0.25 mm (6.0 in ± 0.01 in) and has a flat, right angle face with an edge radius of 12.7 mm ± 0.3 mm (0.5 in ± 0.01 in). Mount an accelerometer to the probe with its sensitive axis in line with the longitudinal centerline of the test probe. (C) The data acquisition system, including transducers, must conform to the specifications of the latest revision of SAE Recommended Practice J211-1. Filter pendulum force using a Channel Class 180 phaseless filter and chest deflection using a Channel Class 600 phaseless filter. (D) Test Procedure 1. Remove the chest flesh and visually inspect the thorax assembly for cracks, cuts, abrasions, etc. Pay particular attention to the rib damping material, chest displacement transducer assembly, and the rear rib supports. Torque the two lumbar cables to 1.1 to 1.4 N⋅m (10 to 12 in⋅lbf). SAE INTERNATIONALJ2856 revised Proposed Draft JAN2015Issued SEP2009 Page 52 of 72 2. Soak the test dummy in a controlled environment with a temperature of 20.6 to 22.2 °C (69 to 72 °F) and a relative humidity from 10 to 70% for at least 4 hours prior to the test, until the rib temperature has reached the soak temperature. The test environment should have the same temperature and humidity requirements as the soak environment. 3. Check that all transducers are properly installed, oriented, and calibrated. 4. Seat the dummy (without the chest skin but with the pants) on the test fixture surface. The surface must be long enough to support the pelvis and outstretched legs. 5. Align the upper and lower neck bracket index marks to the zero position. 6. Place the arm assemblies horizontal (±2 degrees) and parallel to the midsagittal plane. Secure the arms by tightening the adjustment nut which holds the arm yoke to the clavicle assembly. If necessary, prop the arms up with a rod that will fall away during the test. Level the ribs both longitudinally and laterally ±0.5 degree and adjust the pelvis angle to 13 degrees ± 2 degrees. (Use the special tool which inserts into the pelvic structure and extends outward beyond the pelvic skin surface. The tool permits the use of an angle measurement device to determine the pelvis angle.) The midsagittal plane of the dummy is vertical ±1 degree and within 2 degrees of being parallel to the centerline of the test probe. The longitudinal centerline of the test probe is centered on the midsagittal plane of the dummy within 3 mm ± 0.25 mm (0.12 in ± 0.01 in). Align the test probe so its longitudinal centerline is 12.7 mm ± 1 mm (0.5 in ± 0.04 in) below the horizontal centerline of the No. 3 rib and is within 0.5 degree of a horizontal line in the dummy's midsagittal plane. After completing the initial setup, record reference measurements from locations such as the rear surfaces of the thoracic spine and the lower neck bracket. These reference measurements are necessary to ensure that the dummy remains in the same position after installing the chest flesh. When using a cable-supported test probe, the dummy must be moved rearward from the test probe to account for the thickness of the chest flesh, so the probe will impact at the lowest point on its arc of travel. The test setup appears in Figure 71. SAE INTERNATIONALJ2856 revised Proposed Draft JAN2015Issued SEP2009 Figure 71 - Thorax impact test setup specifications Page 53 of 72 SAE INTERNATIONALJ2856 revised Proposed Draft JAN2015Issued SEP2009 Page 54 of 72 7. Install the chest flesh and shirt and reposition the dummy as described in the preceding paragraph using the recorded reference measurements. The reference locations must be accessible after installation of the chest flesh, so it may be necessary to leave the chest flesh unzipped until the references are checked, and then fasten it just prior to the test. 8. Impact the thorax with the test probe so the probe's longitudinal centerline is within 2 degrees of a horizontal line in the dummy's midsagittal plane at the moment of impact. 9. Guide the probe so no significant lateral, vertical or rotational motion takes place during the impact. 10. The test probe velocity at the time of impact is 6.71 m/s ± 0.12 m/s (22 ft/s ± 0.4 ft/s). 11. Time-zero is defined as the time of initial contact between the test probe and the chest flesh. All data channels should be at the zero level at this time. 12. Wait at least 30 minutes between successive tests on the same thorax. (E) Performance Specifications 1. The maximum sternum-to-spine deflection, as measured by the chest displacement transducer should lie between 63.5 and 72.6 mm (2.50 to 2.86 in). 2. The maximum force applied to the thorax by the test probe should measure between 5160 and 5894 N (1160 to 1325 lb). THORAX RESISTIVE FORCE 3. The internal hysteresis ratio should be greater than 69% but less than 85%. The hysteresis ratio, determined from the force versus deflection curve, is the ratio of the area between the loading and unloading portions of the curve to the area under the loading portion of the curve as shown in Figure 72. G IN AD LO DI A LO UN NG CHEST DISPLACEMENT Figure 72 - Hysteresis regions SAE INTERNATIONALJ2856 revised Proposed Draft JAN2015Issued SEP2009 4.6 Page 55 of 72 Knee Impact Test (A) The components required for the knee impact test include: a. knee cap (79051-22) b. knee flesh and skin assembly (78051-5 & 6) c. knee insert (78051-27) d. knee slider assembly (79051-16); optional e. lower leg assembly (87-5001-001 & -002); optional f. femur load cell (78051-265) or structural replacement (78051-319); optional (B) The test fixture consists of a rigid test probe and a method of rigidly supporting the knee and lower leg assembly. The probe mass is 5.0 kg ± 0.01 kg (11.0 lb ± 0.02 lb), including instrumentation, rigid attachments, and the lower 1/3 of the suspension cable mass. The diameter of the impacting face is 76.2 mm ± 0.25 mm (3.0 in ± 0.01 in) with an edge radius of 0.5 mm (0.02 in). Mount an accelerometer on the end opposite the impacting face, with its sensitive axis collinear to the longitudinal centerline of the test probe. (C) The data acquisition system, including transducers, must conform to the requirements of the latest revision of SAE Recommended Practice J211-1. Filter all data channels using Channel Class 600 phaseless filters. (D) Test Procedure 1. Inspect the knee assembly for cracks, cuts, abrasions, etc. If the machined knee is cracked or broken in the impact area, replace the machined knee. If the insert is cut, replace the insert. 2. Soak the knee assembly in a controlled environment with a temperature of 20.6 to 22.2 °C (69 to 72 °F) and a relative humidity from 10 to 70% for at least 4 hours prior to a test. The test environment should have the same temperature and humidity requirements as the soak environment. 3. Mount the knee/lower leg assembly to the fixture using a femur load cell or load cell simulator. Torque the load cell simulator bolts to 40.7 N⋅m minimum (30 ft-lbf minimum) to prevent slippage of the assembly during the impact. When using the lower leg assembly, adjust the lower leg so the line between the knee and ankle pivots is at an angle of 24 degrees ± 1 degree rearward of vertical. Do not let the foot contact any exterior surface. The test setup appears in Figure 73. SAE INTERNATIONALJ2856 revised Proposed Draft JAN2015Issued SEP2009 Page 56 of 72 Figure 73 - Knee impact test setup specifications 4. Align the longitudinal centerline of the test probe so it is collinear (within 2 degrees) with the longitudinal centerline of the load cell simulator at the time of impact. 5. Guide the probe so no significant lateral, vertical or rotational movement at time-zero. 6. Time-zero is defined as the time of initial contact between the test probe face and the knee skin. All data channels should be at the zero level at this time. 7. Impact the knee so the longitudinal centerline of the test probe is within 0.5 degree of a horizontal line parallel to the load cell simulator at time-zero. 8. The test probe velocity at the time of the impact is 2.1 m/s ± 0.03 m/s (6.9 ft/s ± 0.1 ft/s). 9. Wait at least 30 minutes between successive tests on the same knee. (E) Performance Specifications 1. The peak impact force (defined as the product of the test probe mass and the deceleration) should lie between 4715 and 5782 N (1060 and 1300 lbf). SAE INTERNATIONALJ2856 revised Proposed Draft JAN2015Issued SEP2009 4.7 Page 57 of 72 Knee Slider Test (A) The components required for the knee slider test are: a. left and right knee assemblies (79051-16) b. displacement transducer (79051-29) c. femur load cell (78051-265) (B) The test fixture consists of a rigid test probe and a method of rigidly supporting the knee assembly. The test probe mass is 12.000 kg ± 0.020 kg (26.460 lb ± 0.044 lb), including instrumentation, rigid attachments, and the lower 1/3 of the suspension cable mass. The diameter of the impacting face is 76.2 mm ± 0.3 mm (3.0 in ± 0.01 in) with an edge radius of 0.5 mm (0.02 in). A load distribution bracket is required to transmit the impact energy into the slider assembly, as seen in Figure 74. (C) The data acquisition system, including transducers, must conform to the specifications of the latest revision of SAE Recommended Practice J211-1. Filter the displacement data channel using Channel Class 180 phaseless filters. SAE INTERNATIONALJ2856 revised Proposed Draft JAN2015Issued SEP2009 Figure 74 - Knee slider test set-up Page 58 of 72 SAE INTERNATIONALJ2856 revised Proposed Draft JAN2015Issued SEP2009 Page 59 of 72 (D) Test Procedure 1. Inspect the knee assembly for damage. Pay particular attention to the left and right side slider assemblies to ensure the tracks are clean and free from damage which could affect the operation. The pot shaft should slide freely when the pot is installed. 2. Soak the knee assembly in a controlled environment with a temperature of 20.6 to 22.2 °C (69 to 72 °F) and a relative humidity from 10 to 70% for at least 4 hours prior to a test. The test environment should have the same temperature and humidity requirements as the soak environment. 3. Check that all transducers are properly installed, oriented, and calibrated. 4. Mount the knee assembly to the fixture using a femur load cell. Torque the two mounting bolts to 40.7 N⋅m minimum (30 ft-lbf minimum) to prevent slippage of the assembly during impact. Attach the load distribution bracket to the slider assembly. The bracket is attached to the inboard and outboard slider assemblies in the same manner as the knee clevis, so the impacted bracket will slide rearward in the track. 5. Align the longitudinal centerline of the test probe so at the time of impact, it is collinear (within 2 degrees) with the longitudinal centerline between the load cell and the load distribution bracket. The test probe longitudinal centerline should be horizontal 0.5 degree. The test setup appears in Figure 74. 6. Guide the probe so no significant lateral, vertical or rotational motion occurs at the time of contact between the test probe face and the load distribution bracket. 7. The test probe velocity at the time of impact is 2.75 m/s ± 0.05 m/s (9.02 ft/s ± 0.18 ft/s). Allow one break-in test before the calibration test. 8. Time-zero is defined as the time of initial contact between the test probe and the load distribution bracket. All data channels should be at zero level at this time. 9. Wait at least 20 minutes between successive tests on the same knee slider assembly. (E) Performance Specifications 1. A plot of femur load versus knee slider deflection should fall in the corridor described in Table 7. Table 7 - Force versus displacement corridor for the knee slider test Displacement Minimum Force Maximum Force 10.2 mm (0.4 in) 1.26 kN (283 lbf) 1.72 kN (387 lbf) 17.8 mm (0.7 in) 2.27 kN (510 lbf) 3.10 kN (696 lbf) SAE INTERNATIONALJ2856 revised Proposed Draft JAN2015Issued SEP2009 4.8 Page 60 of 72 Hip Joint Range of Motion Test (A) The test monitors the moment versus angle relationship of the upper femur and pelvis when each femur is rotated toward the pelvis. (B) The parts required for testing are: a. left and right upper femur assemblies (78051-114 and 78051-115) b. pelvis (78051-59) Optional components that may be in place during testing are a. lumbar spine and lumbar adaptor (78051-66) b. upper torso assembly (78051-89) c. neck assembly (78051-90) d. head assembly (78051-61) e. arm assemblies (78051-123 & 124) (C) The test fixture consists of a structure to hold the pelvis and upper femur assembly, and a device to apply a moment through each upper femur. A generalized test set-up appears in Figure 75. The fixture's structure must be secured to prevent movement during the test. An adaptor mounted to the pelvis instrument cavity should mount the pelvis to the fixture and align it. The fixture should hold the pelvis so the bottom and rear skin of the pelvis do not contact the fixture. The fixture should hold the pelvis rigidly and prevent motion throughout the test. To ensure that the pelvis is restrained, an additional clamp to the fixture that is mounted through the two front bolt holes for the lumbar adaptor should be used. The moment arm should extend straight out of the upper femurs and have a disk (78051-23) the same size and mass as that on the femur bone (78051-43 or 44). The disk should also be in the same location relative to the upper femurs as it is on the femur bone. The fixture should compensate for the effect of the mass of the moment arm, or include the effect when determining the applied torque. A guiding system is required to keep the moment arm aligned throughout the test. (D) The Data Acquisition System, including transducers, must conform to the requirements of the latest version of SAE Recommended Practice J211-1. Filter the data with SAE Class 60 phaseless filters. (E) Test Procedure 1. Clean the inside and front flesh of the pelvis with isopropyl alcohol or equivalent before initial assembly. Inspect the urethane stops (78051-498-1,-2) for damage. Replace if necessary. Inspect the pelvis flesh inside and outside the femur cavity for tears. If the pelvis flesh or foam is torn or disintegrated in this area, it should be replaced. Insert the urethane stops into the upper femurs. Use a small amount of talcum powder applied to the pelvis flesh and urethane bumper as a lubricant (to prevent tearing of the urethane bumper) and insert the upper femurs (78051-110,-111) into the pelvis. The femur friction adjustment screws (78051-259) should be removed. SAE INTERNATIONALJ2856 revised Proposed Draft JAN2015Issued SEP2009 Page 61 of 72 Figure 75 - Hip joint range of motion calibration set-up 2. Mount the pelvis assembly on the fixture. Surface D on drawing 78051-60 should be perpendicular to the midsagittal plane within ±0.3 degree. 3. Insert the moment arm into one of the upper femurs, and place the moment arm within the guiding system. The moment arm and upper femur should be parallel to the midsagittal plane within ±0.5 degree, initially and throughout the test. Initially, the moment arm should be positioned so the bolt connecting the moment arm to the femur is perpendicular to the midsagittal plane within ±0.5 degree. The guiding system should constrain the moment arm to prevent twist about the moment arm axis of more than ±0.5 degree. The moment arm/guiding system should transmit the torque to the hip joint to a certainty of 13.6 N⋅m (10 ft-lbf). 4. Install the moment and angle measuring transducers. All measurements should be taken relative to the D surface of the pelvis. The origin of the angle measurement should be located at the H-point within 2.5 mm (0.1 in) as referenced on the drawing package. Marking the H-point on the pelvis flesh to use as a reference is not sufficient for this test. 5. Time zero is defined as the point at which the moment arm is parallel to the D surface of the pelvis. All data channels should be at the zero level at this time after filtering. However, the test must begin at a location approximately 10 degrees below horizontal to eliminate any static friction effects and allow time to achieve the correct load rate. 6. Apply a torque to the loading arm until a torque of at least 203 N⋅m (150 ft-lbf) is achieved. The applied torque should not be significantly above this value to prevent damage to the pelvis flesh. The rate of application should be between 5 and 10 degrees/second. 7. Testing should be performed on each femur separately. Each femur should be tested with the moment arm parallel to the midsagittal plane. 8. Wait at least 10 minutes between successive tests on the same femur. SAE INTERNATIONALJ2856 revised Proposed Draft JAN2015Issued SEP2009 Page 62 of 72 (F) Performance Specifications 1. The measured angle should be between 40 and 50 degrees, inclusive, at an applied torque of 203 N⋅m (150 ft-lbf). In addition, the torque must remain below 95 N⋅m (70 ft-lbf) at angles up to 30 degrees. 4.9 European Calibration Tests th The additional European calibration tests of the Hybrid III 50 Percentile Male Dummy are included in the latest version of the document originally titled: EC Directive 96/79/EC “On the protection of occupants of motor vehicles in the event of a frontal impact” This document can be obtained from the following sources: Techstreet web site: www.techstreet.com IHS Standards Store web site: www.global.ihs.com 5. INSPECTION PROCEDURES FOR THE HYBRID III 50TH PERCENTILE MALE DUMMY Inspection tests are supplemental to the calibration tests to insure that a component meets its design intent. They are performed by the dummy manufacturer on new parts. The dummy user may conduct inspection tests when a part is damaged or replaced. 5.1 Low-Speed Thorax Impact Test A low-speed thorax impact test is available as an additional inspection test. performance specifications are given in SAE Recommended Practice J2779. 5.2 The complete test procedure and Low-Speed Knee Slider Test A low-speed knee slider test is available as an additional inspection test. The complete test procedure and performance specifications are given in SAE Recommended Practice J2876. 5.3 Foot Test (A) The components required for the foot tests are: a. foot assembly (78051-612) b. heel pad foam (78051-608) (B) The test fixture consists of a compression testing machine equipped with a load cell and displacement gage. An example set-up appears in Figure 76. An ankle adaptor bracket is needed to attach the foot to the compression testing machine. To allow adjustment of the foot angle, two standoffs are inserted into the bolt holes in the foot weldment provided for this purpose. (C) The data acquisition system, including transducers, must conform to the specifications of the latest revision of SAE Recommended Practice J211-1. Using phaseless filters, filter the force and displacement channels using Channel Class 60. SAE INTERNATIONALJ2856 revised Proposed Draft JAN2015Issued SEP2009 Page 63 of 72 Figure 76 - Foot test set-up (D) Test Procedure 1. Soak the foot assembly in a controlled environment at a temperature of 20.6 to 22.2 °C (69 to 72 °F) and a relative humidity from 10 to 70% for at least 4 hours prior to a test. The test environment should have the same temperature and humidity requirements as the soak environment. 2. Inspect the foot assembly for cracks, cuts, and separation of the rubber from the metal segment. Inspect the heel pad foam for signs of deterioration. 3. Attach the standoffs on the foot. Install the ankle adaptor bracket to the foot, and attach it to the compression testing machine. 4. Lower the foot until it first contacts the base of the test fixture. Using an angle measurement device positioned on the standoffs, position the foot so it is level (relative to the test fixture) in the transverse and longitudinal directions within ±1 degree. 5. Wait at least 30 minutes between tests on the same foot. (E) Performance Specifications 1. Load the foot at a rate of 15 mm/min ± 1 mm/min (0.59 in/min ± .04 in/min) until the deflection reaches 8.9 mm (0.35 in). 2. Time-zero is the time when the loading force measures 4.45 kg (1 lbf). The displacement channels should be at the zero level at this time. 3. The force versus displacement characteristics must fall within the corridor plotted in Figure 77. SAE INTERNATIONALJ2856 revised Proposed Draft JAN2015Issued SEP2009 Page 64 of 72 Figure 77 - Foot compression test performance specifications 5.4 Ankle Motion Test (A) The test monitors the range of motion and resistance to motion of the ankle joint in dorsiflexion, plantar flexion, eversion, and inversion. (B) The parts required for testing are: – ankle assembly (78051-614 & -615) (C) The test device consists of a rigid fixture that will hold the ankle shell. Two standoffs are mounted into the foot. Attached to the standoffs is a plate or bar that will allow a reference for angle measurement and a means for transmitting moment to the ankle joint. (D) The Data Acquisition System, including transducers, must conform to the requirements of the latest version of SAE Recommended Practice J211-1. (E) Test procedure 1. Inspect the ankle bumper for uneven wear, tears, or other damage. Replace if necessary. Ensure that the ankle bumper is installed correctly, with the front part visibly thicker than the rear part. Adjust the ankle ball joint set screw so it applies no friction to the ball joint. Check for smooth rotation of the ankle shell on the ball. If rotation is not smooth, replace the ankle assembly. The tests are run with the ankle set screw loose. 2. As seen in Figures 78 and 79, an ankle reference plane is defined as the plane parallel to the sole plate of the foot that passes through the ankle ball joint center. This plane is 47.7 mm ± 0.2 mm (1.88 in ± 0.01 in) above the bottom of the standoff holes. SAE INTERNATIONALJ2856 revised Proposed Draft JAN2015Issued SEP2009 Figure 78 - Pertinent dimensions for ankle motion test Page 65 of 72 SAE INTERNATIONALJ2856 revised Proposed Draft JAN2015Issued SEP2009 LINE CONNECTING KNEE PIVOT AND ANKLE PIVOT Page 66 of 72 TIBIA IS OPTIONAL FOR THIS TEST. 47.7 mm ±0.2 mm [1.88" ±0.01" ] 90° REF Figure 79 - Initial foot position for ankle test 3. Mount the ankle shell to a rigid fixture using the existing 19 mm hole intended for attaching the ankle to the tibia. Insert the standoffs into the foot. Attach a device to the standoffs for applying the moment and providing an angle measurement reference surface. 4. Soak the ankle assembly in a controlled environment with a temperature of 20.6 to 22.2 °C (69 to 72 °F) and a relative humidity between 10 and 70% for at least 4 hours prior to a test. The test environment should have the same temperature and humidity requirements as the soak environment. 5. Install the moment and angle transducers. Angle and moment data should be measured continually throughout all tests. 6. Adjust the foot so the angle between an anterior/posterior line on the ankle reference plane and the longitudinal centerline of the ankle shell is 81 degrees ± 1 degree. In addition, the foot should be adjusted so a lateral/medial line on the ankle reference plane is perpendicular ±1 degree to the ankle shell longitudinal centerline. The medial/lateral centerline of the ankle shell should be perpendicular to the centerline of the foot within ±1 degree. (The centerline of the foot is 26.4 degrees from a centerline through the two standoffs.) 7. Time zero is defined as the point at which the initial angles meet the requirements specified in item 6. All data channels should be at the zero level at this time. 8. Dorsiflexion Test: apply a moment through the standoffs that rotates the toe towards the ankle shell about the ankle’s medial/lateral axis until a moment of at least 40 N⋅m (29.5 lbf-ft) is reached at a rate not to exceed 5 degrees per second. 9. Plantar flexion test: apply a moment through the standoffs that rotates the toe away from the ankle shell about the ankle’s medial/lateral axis until a moment of at least 4 N⋅m (2.95 lbf-ft) is reached at a rate not to exceed 5 degrees per second. SAE INTERNATIONALJ2856 revised Proposed Draft JAN2015Issued SEP2009 Page 67 of 72 10. Inversion test: apply a moment through the standoffs that rotates the foot inward relative the ankle shell about the ankle’s anterior/posterior axis until a moment of at least 4 N⋅m (2.95 ft-lbf) is reached at a rate not to exceed 5 degrees per second. 11. Eversion test: apply a moment through the standoffs that rotates the foot outward relative the ankle shell about the ankle’s anterior/posterior axis until a moment of at least 4 N⋅m (2.95 ft-lbf) is reached at a rate not to exceed 5 degrees per second. 12. Testing should be performed on each ankle joint separately. 13. Wait at least 5 minutes between successive tests on the same ankle. (F) Performance Specifications 1. Dorsiflexion: at a moment of 40.0 N⋅m (29.5 ft-lbf), the angle should measure 45 degrees ± 2 degrees. The moment in dorsiflexion up to 34 degrees must be less than 6 N⋅m (4.42 ft-lbf). 2. Plantar flexion: at a moment of 4.0 N⋅m (2.95 ft-lbf), the angle should measure 33 degrees ± 2 degrees. 3. Inversion: at a moment of 4.0 N⋅m (2.95 ft-lbf), the angle should measure 22 degrees ± 1 degree. 4. Eversion: at a moment of 4.0 N⋅m (2.95 ft-lbf), the angle should measure 22 degrees ± 1 degree. 6. NOTES 6.1 Marginal Indicia A change bar (l) located in the left margin is for the convenience of the user in locating areas where technical revisions, not editorial changes, have been made to the previous issue of this document. An (R) symbol to the left of the document title indicates a complete revision of the document, including technical revisions. Change bars and (R) are not used in original publications, nor in documents that contain editorial changes only. PREPARED BY THE SAE DUMMY TESTING EQUIPMENT COMMITTEE OF THE SAE HUMAN BIOMECHANICS AND SIMULATION STANDARDS STEERING COMMITTEE SAE INTERNATIONALJ2856 revised Proposed Draft JAN2015Issued SEP2009 Page 68 of 72 APPENDIX A - ACCELEROMETER HANDLING GUIDELINES A.1 GENERAL The accelerometers used in anthropomorphic test dummies, such as the Hybrid III Dummy Family, are small, low mass piezoresistive accelerometers. Because of their design and inherent mechanics, certain precautions must be observed when handling and mounting accelerometers to avoid damaging them. When handling and mounting the accelerometer, avoid dropping the accelerometer or striking the unit against hard surfaces. Keep the unit in its protective sleeve until the unit is installed. A.2 PRELIMINARY CHECK-OUT Before installing any accelerometer into the dummy, check that it operates properly. Three simple tests that require minimal test equipment should be conducted: 1. Impedance Test Read the input impedance (Red to Black) and output impedance (Green to White) with an ohmmeter. Compare the measured values to those on the accelerometer Calibration Data Sheet. The measured impedance should be within ±25% of the calibrated value. 2. Insulation Resistance If the input and output impedances are within acceptable limits, use a multimeter, ohmmeter, or megohmmeter set at 50 volts maximum. Measure the insulation resistance between: 1. all leads connected together and the cable shield 2. all leads connected together and the accelerometer case 3. cable shield and the transducer case. All three readings should be at least 100 megohms. Be careful when connecting 50 VDC to eliminate the possibility of voltage spikes. 3. Zero Measurand Output After the impedance and insulation resistance tests, measure the output of the accelerometer with 0 G acceleration. With the unit still in its sleeve, turn the unit on its side so the accelerometer mounting surface is perpendicular to the table top (sensitive axis horizontal and perpendicular to the gravity field.) Apply the specified excitation voltage to the accelerometer and measure its output with a DC millivolt meter. Allow the unit to warm-up for 2 minutes. The accelerometer should have a Zero Measurand Output (ZMO) within the manufacturer’s specified limits. If any of these initial checks do not give proper readings, indicating a possible malfunction, remove the excitation source immediately and take the following measurements. 1. Check and record leg 1, leg 2, leg 3, and leg 4 resistances. 2. Disconnect, check and record excitation voltage from the source. 3. Reconnect, check, and record excitation with the unit connected. SAE INTERNATIONALJ2856 revised Proposed Draft JAN2015Issued SEP2009 Page 69 of 72 4. Check and record ZMO again. 5. Check and record static outputs +1 G and -1 G and compare to calibrated sensitivity. 6. Check that the temperature and environment fall within accelerometer specification. 7. Check to see if the accelerometer case is under stress. 8. Check leads for abrasion or cuts. If the reason for the erroneous reading cannot be found, contact the accelerometer manufacturer. A.3 INSTALLATION When mounting or removing the accelerometer, you must use the proper techniques and tools. The mounting surface should be clean and free of burrs. A recommended surface roughness is 32 microinch rms or less. Make sure that no dirt or particles can be clamped between the unit and mounting surfaces. Remove the unit from the protective sleeve. With the sleeve absent, handle the unit by the case, not the cable. This will prevent the unit from slapping the mounting surface during installation. Place the unit on the mounting surface and align the mounting holes. Correct torque is important to ensure correct mounting and performance. When mounting the accelerometer, use only the materials and parts which are supplied with the accelerometer. Always use the proper mounting torque recommended by the accelerometer manufacturer. If applicable, use the supplied mounting washers and screws, or mounting stud. Using the supplied wrench, turn the screws into the mounting holes to the recommended torque. Usually, this is roughly equivalent to finger tight with the supplied wrench. Installation of the unit with higher torque values, dry threads, or thread adhesives is not recommended as excessive torque will be required to break the screw loose when the accelerometer is dismounted. EXCESSIVE TORQUE CAN CREATE AN OVERRANGE TRANSIENT SHOCK PULSE, UPON REMOVAL OF THE UNIT, WITH SUFFICIENT HIGH FREQUENCY CONTENT TO DAMAGE OR DESTROY THE UNIT. Do not over torque the screws. Do not use snap type torque wrenches. Do not cement the unit to the mounting structure. Where practical, tie down the cable within 4 to 6 cm (1.6 to 2.4 in) of the unit. Whipping of the cable during vibration and shock will strain the cable unnecessarily at the unit. Connect the unit to the signal conditioner and check for proper functioning through the use of standard techniques such as shunt calibration across the passive arms of the accelerometer. A.4 RECALIBRATION Sensitivity and Zero Measurand Output calibrations should be performed at 6 to 12 month intervals, depending on usage. Usually, 12 month intervals are sufficient if you know the accelerometer has not been used beyond its rated specifications. If the unit is used under severe environments, the shorter calibration interval may be desirable. A.5 CLEANING Dirty units may be wiped clean using a damp cloth and a solvent such as acetone. DO NOT SOAK OR IMMERSE the unit in any solvent or water. Do not use any sharp tool such as a screwdriver to remove dirt or contaminants. If tools such as pliers are needed to handle the accelerometer, cover the jaws with masking tape to prevent unwanted metal to metal contact. SAE INTERNATIONALJ2856 revised Proposed Draft JAN2015Issued SEP2009 Page 70 of 72 APPENDIX B - GUIDELINES FOR REPAIRING FLESH Dummy flesh is often damaged, but can be repaired. The most common types or flesh damage are punctures, tears, and scrapes. Scrapes can be fixed by rubbing an iron, at low temperature, over the affected area several times. Punctures and tears require patching. To repair the flesh, use an iron to bond the dummy’s flesh to patches of repair materials. The iron is similar to a standard electronic soldering iron. Its output should range from 60 to 90 watts. The best tip is a broad, flat paddle tip like the one in the dummy tool kit provided by the dummy manufacturers. For best results, a variable power supply should be used to control the heat output from the iron. Without this control, repairs will be more difficult and may be unsightly from black flakes of burnt flesh imbedded in the flesh. These flakes are caused by overheating the flesh, which happens when an iron is too hot or remains in one position too long. Another cause of black residue in the flesh is improper or infrequent cleaning of the iron tip. The tip should be cleaned frequently during the repair job, between each melting of flesh if possible. The best method for doing this is to tap the iron quickly on a buffing wheel. Conduct all flesh preparations and repairs in a well-ventilated area. When patching, first clear away any loose material which may be hanging from the damaged areas, such as shredded vinyl or foam. Clean the area with 99% solution isopropyl alcohol and dry for 15 minutes. Any residue from tape or chalk must be removed. If it remains after the initial cleaning, continue to clean with isopropyl alcohol until the area is completely clean. Since isopropyl alcohol is flammable, make sure the surface is dry before applying heat. Do not use soldering flux or any other chemical on the flesh or repair iron. After preparation, a patch can be bonded to the flesh. Cut a patch of adequate size from the material provided in the dummy tool kit. The patch should be approximately 10 mm (0.5 in) wider than the damaged area on all sides. To check that the iron is at a usable temperature, test it on a small piece of patch material. The flesh should easily melt but not instantly burn. With the patch held over the damaged area, slide the iron between the patch and dummy flesh. Hold the iron in position until you see both materials melting. When both the patch and the flesh look like a gel, move the iron to a new point while holding the patch in place until they have both cooled. Continue this all the way around the damaged area until the patch is completely bonded to the flesh. For large areas, or areas where the patch must bend to conform to the dummy part, it may be easier to “tack” a few points around the edge of the patch to hold it in place, then return to fill in the unbonded sections. Once you bond the patch to the flesh, you need to blend the patch into the flesh. This will eliminate any protruding edges that may later snag and ruin the repair. To blend the patch, work the iron tip around the patch edges in a circular motion, blending the patch material into the flesh as you work your way around the patch. If the iron is too hot, black flakes will appear; if it is too cold, the patch will not readily melt, and the patch is probably not very well bonded to the flesh. Continue working the patch into the flesh until the repair is fairly well hidden and let it cool. After the area cools, you can return to touch-up any areas. If a certain area of flesh is frequently damaged and is not expected to contribute significantly to dummy response, duct tape can be placed on the flesh but under the clothing to help protect it. Tape should not be used on any area which directly affects the test data, such as head, neck, ribs, or spine. The engineer running the test should approve use of additional reinforcement such as tape before conducting tests. SAE INTERNATIONALJ2856 revised Proposed Draft JAN2015Issued SEP2009 Page 71 of 72 APPENDIX C - JOINT ADJUSTMENT PROCEDURES The joints of the Hybrid III dummies are adjusted to a “1 G suspended setting.” This is defined as a torque level on the joint where the friction will allow an assembly to move toward the earth when a small force is applied to the unsupported end of the assembly. For example, when the dummy’s arm is fully extended laterally so it is perpendicular to the body, the shoulder yoke clevis bolt should be tight enough to support the weight of the arm, but loose enough so when you tap the dummy’s wrist, the whole arm will slowly fall towards the dummy. The following sections describe how to position the body parts and which joints to tighten to allow a 1 G setting; they appear in Figure C1. C.1 HANDS AND ARMS 1. Extend complete arm laterally outward to a horizontal position. Twist the arm so the elbow cannot rotate downward. Tighten the shoulder yoke clevis bolt so the arm is suspended at 1 G. 2. Rotate the complete arm assembly so it points forward and is horizontal. Twist the arm so the elbow cannot rotate downward. Adjust the shoulder yoke rotation hex nut so the arm is suspended at 1 G. 3. Bend the elbow 90 degrees so the hand moves toward the chest. Adjust the elbow rotation bolt through access in the upper arm to hold the lower arm horizontally suspended at 1 G. 4. Reposition the arm so it points forward and is horizontal. Twist the lower arm at the elbow, so the lower arm can pivot downward to vertical. Adjust the elbow pivot bolt through access holes in the lower arm flesh at the elbow to hold the lower arm suspended at 1 G. 5. Extend the arm and twist the palm so it faces down. Adjust the wrist pivot bolt at the base of the hand so it is suspended at 1 G. 6. Adjust the wrist rotation bolt through access in the wrist flesh to hold it suspended at 1 G. 7. Repeat procedure for other hand and arm. C.2 LEGS AND FEET 1. Remove abdominal insert. 2. With the lower leg at 90 degrees to the upper leg, and the dummy in a seated position, lift the upper leg assembly above the horizontal. Adjust the femur ball set screw so the upper leg is held suspended at 1 G. 3. Rotate the lower leg assembly so it is horizontal. Adjust the knee clevis bolt so the lower leg is held suspended at 1 G. 4. Adjust the ankle ball joint set screw so the foot is held suspended at 1 G. The ankle adjustment is not critical and is determined by individual feel. 5. Repeat procedure on other leg and foot. SAE INTERNATIONALJ2856 revised Proposed Draft JAN2015Issued SEP2009 Figure C1 - Hybrid III joints requiring adjustment Page 72 of 72