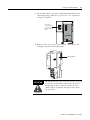
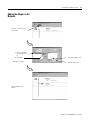
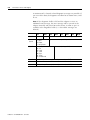
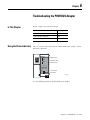
1
POINT I/O
PROFIBUS Adapter
Module
Cat. No. 1734-APB
User Manual
Important User Information
Because of the variety of uses for the products described in this
publication, those responsible for the application and use of this
control equipment must satisfy themselves that all necessary steps
have been taken to assure that each application and use meets all
performance and safety requirements, including any applicable laws,
regulations, codes and standards.
The illustrations, charts, sample programs and layout examples shown
in this guide are intended solely for purposes of example. Since there
are many variables and requirements associated with any particular
installation, Allen-Bradley does not assume responsibility or liability
(to include intellectual property liability) for actual use based upon
the examples shown in this publication.
Allen-Bradley publication SGI-1.1, Safety Guidelines for the
Application, Installation and Maintenance of Solid-State Control
(available from your local Allen-Bradley office), describes some
important differences between solid-state equipment and
electromechanical devices that should be taken into consideration
when applying products such as those described in this publication.
Reproduction of the contents of this copyrighted publication, in whole
or part, without written permission of Rockwell Automation, is
prohibited.
Throughout this manual we use notes to make you aware of safety
considerations:
ATTENTION
!
Identifies information about practices or
circumstances that can lead to personal injury or
death, property damage or economic loss
Attention statements help you to:
• identify a hazard
• avoid a hazard
• recognize the consequences
IMPORTANT
Identifies information that is critical for successful
application and understanding of the product.
Allen-Bradley, RSNetworx and POINT I/O are trademarks of Rockwell Automation
PROFIBUS is a trademark of PROFIBUS Trade Organization
Preface
About This User Manual
Purpose of This Manual
Who Should Use This
Manual
This manual describes how to install, configure and troubleshoot your
PROFIBUS Adapter module.
For information about:
See:
What is the PROFIBUS Adapter
Chapter 1
Installing the PROFIBUS Adapter
Chapter 2
Configuring the POINT I/O System
Chapter 3
Communication and I/O Table Mapping
Chapter 4
Grouped Modules
Chapter 5
Troubleshooting the PROFIBUS Adapter
Chapter 6
Specifications
Appendix A
Default Data Maps
Appendix B
You must be able to use your selected configuration software to set up
and calibrate these modules. You must have the capability to
download and use files.
We assume you know how to do this in this manual. If you do not,
refer to your software user manuals or online help before attempting
to use these modules.
Related Products and
Documentation
1
The following table lists related 1734 products and documentation.
Description
Cat. No.
Publication
POINT I/O Technical Data
1734-Series
1734-2.1
Sink Input Module Installation Instructions
1734-IB2, -IB4
1734-IN051
Source Output Module Installation Instructions
1734-IV2, -IV4
1734-IN052
220V ac Input Module Installation Instructions
1734-IM
1734-IN008
120V ac Input Module Installation Instructions
1734-IA2
1734-IN010
120/220V ac Output Module Installation Instructions
1734-OA2
1734-IN009
Analog Current Input Module Installation Instructions
1734-IE2C
1734-IN053
Publication 1734-UM005B-EN-P - June 2001
Preface
2
Description
Cat. No.
Publication
Analog Current Output Module Installation Instructions
1734-OE2C
1734-IN054
Analog Voltage Input Module Installation Instructions
1734-IE2V
1734-IN001
Analog Voltage Output Module Installation Instructions
1734-OE2V
1734-IN002
Very High Speed Counter Module Installation Instructions
1734-VHSC24
1734-IN003
Very High Speed Counter Module Installation Instructions
1734-VHSC5
1734-IN004
5V Encoder/Counter Module Installation Instructions
1734-IJ
1734-IN005
24V Encoder/Counter Module Installation Instructions
1734-IK
1734-IN006
Relay Output Module Installation Instructions
1734-OW2
1734-IN055
Protected Output Module Installation Instructions
1734-OB2E, -OB4E
1734-IN056
DeviceNet Communication Interface Installation Instructions
1734-PDN
1734-IN057
POINT I/O 24V dc Expansion Power Supply Installation Instructions
1734-EP24DC
1734-IN058
Field Potential Distributor Installation Instructions
1734-FPD
1734-IN059
General Installation Instructions
All 1734
1734-IN510
Wiring Base Assembly Installation Instructions
1734-TB, -TBS
1734-5.11
Wiring Base Assembly Installation Instructions
1734-TB3, -TB3S
1734-IN013A
Cold Junction Wiring Base Assembly Installation Instruction
1734-TBCJC
1734-IN583
8 dc Input/8 Output Module Installation Instructions
1734D-IB8XOB8
1734-5.20
8 dc Input/8 Relay Output Module Installation Instructions
1734D-IB8XOW8
1734-5.21
8 ac Input/8 OutputModule Installation Instructions
1734D-IA8XOA8
1734-5.22
8 ac Input/8 Relay Output Module Installation Instructions
1734D-IA8XOW8
1734-5.23
16 ac Input Module Installation Instructions
1734D-IA16
1734D-IN001
16 dc Input Module Installation Instructions
1734D-IB16
1734D-IN002
Publication 1734-UM005B-EN-P - June 2001
Preface
European Communities (EC)
Directive Compliance
3
If this product has the CE mark it is approved for installation within
the European Union and EEA regions. It has been designed and tested
to meet the following directives.
EMC Directive
This product is tested to meet the Council Directive 89/336/EC
Electromagnetic Compatibility (EMC) by applying the following
standards, in whole or in part, documented in a technical construction
file:
• EN 50081-2 EMC — Generic Emission Standard, Part 2 — Industrial
Environment
• EN 50082-2 EMC — Generic Immunity Standard, Part 2 —
Industrial Environment
This product is intended for use in an industrial environment.
Environmental/Safety Protection
Open style devices must be provided with environmental and safety
protection by proper mounting in enclosures designed for specific
application conditions. See NEMA Standards publication 250 and IEC
publication 529, as applicable, for explanations of the degrees of
protection provided by different types of enclosures. Refer to
Allen-Bradley publication 1770-4.1, Industrial Automation Wiring and
Grounding Guidelines for more information.
Publication 1734-UM005B-EN-P - June 2001
Preface
4
Publication 1734-UM005B-EN-P - June 2001
Table of Contents
Preface
Important User Information . . . . . . . . . . . . . . . . . .
Purpose of This Manual. . . . . . . . . . . . . . . . . . . . .
Who Should Use This Manual . . . . . . . . . . . . . . . .
Related Products and Documentation. . . . . . . . . . .
European Communities (EC) Directive Compliance
EMC Directive . . . . . . . . . . . . . . . . . . . . . . . . .
Environmental/Safety Protection . . . . . . . . . . . .
.
.
.
.
.
.
.
.
.
.
.
.
.
.
.
.
.
.
.
.
.
.
.
.
.
.
.
.
.
.
.
.
.
.
.
.
.
.
.
.
.
.
.. 2
P-1
P-1
P-1
P-3
P-3
P-3
Chapter 1
What is the PROFIBUS Adapter
General . . . . . . . . . . . . . . . . . . . . . . . . . . . . . . . . . . . . . .
PROFIBUS Adapter Overview . . . . . . . . . . . . . . . . . . . . . .
Communicating through the Adapter . . . . . . . . . . . . . .
I/O Module Removal and Insertion Under Power . . . . .
Startup Procedure . . . . . . . . . . . . . . . . . . . . . . . . . . . . . . .
Set the Adapter Node Address . . . . . . . . . . . . . . . . . . .
Configure the Adapter for PROFIBUS Communication . .
Configure the I/O Modules for PointBus Communication
Diagnostic Indicators . . . . . . . . . . . . . . . . . . . . . . . . . .
Network Connector. . . . . . . . . . . . . . . . . . . . . . . . . . .
Chapter Summary and What’s Next . . . . . . . . . . . . . . . . . .
1-1
1-1
1-2
1-2
1-2
1-2
1-3
1-3
1-4
1-4
1-4
Chapter 2
Installing the PROFIBUS Adapter
General . . . . . . . . . . . . . . . . . . . . . . . . . . . . . . . .
Installing the PROFIBUS Adapter . . . . . . . . . . . . . .
Installing a Replacement PROFIBUS Adapter to an
Existing System . . . . . . . . . . . . . . . . . . . . . . . . . . .
Wiring the PROFIBUS Adapter. . . . . . . . . . . . . . . .
Module Power . . . . . . . . . . . . . . . . . . . . . . . . .
Wiring Connections . . . . . . . . . . . . . . . . . . . . .
PROFIBUS Connection Plug Wiring . . . . . . . . .
Chapter Summary and What’s Next . . . . . . . . . . . .
. . . . . . 2-1
. . . . . . 2-2
.
.
.
.
.
.
.
.
.
.
.
.
.
.
.
.
.
.
.
.
.
.
.
.
.
.
.
.
.
.
.
.
.
.
.
.
2-4
2-6
2-6
2-8
2-9
2-9
Chapter 3
Configuring the POINT I/O System In This Chapter . . . . . . . . . . . . . . . . . . . . . . . . . . . . . . . . . 3-1
Configuration Overview . . . . . . . . . . . . . . . . . . . . . . . . . .
Installing the GSD File. . . . . . . . . . . . . . . . . . . . . . . . . . . .
Adding the Master to the Network . . . . . . . . . . . . . . . . . . .
Adding the Adapter to the Network . . . . . . . . . . . . . . . . . .
Adding I/O Modules to the Adapter. . . . . . . . . . . . . . . . . .
Configuring I/O Modules. . . . . . . . . . . . . . . . . . . . . . . . . .
Enable/Disable Diagnostic Functionality for
your Modules . . . . . . . . . . . . . . . . . . . . . . . . . . . . . . .
Configure Fault Action/Value for your Output Modules .
Configure Idle Action Value for your Output Modules . .
Download to Master System . . . . . . . . . . . . . . . . . . . . . . .
Chapter Summary and What’s Next . . . . . . . . . . . . . . . . . .
i
3-1
3-2
3-3
3-5
3-6
3-8
3-10
3-10
3-11
3-13
3-14
Publication 1734-UM005B-EN-P - June 2001
Table of Contents
ii
Chapter 4
Communication and I/O Table
Mapping
In This Chapter . . . . . . . . . . . . . . . . . . . . . . .
Image Table Mapping . . . . . . . . . . . . . . . . . .
How Data Communication Takes Place . . . . .
Set_Parameter . . . . . . . . . . . . . . . . . . . . .
Check_Configuration . . . . . . . . . . . . . . . .
Get_Configuration . . . . . . . . . . . . . . . . . .
Global_Command . . . . . . . . . . . . . . . . . .
Data_Exchange . . . . . . . . . . . . . . . . . . . .
Slave_Diag. . . . . . . . . . . . . . . . . . . . . . . .
Grouping Modules for Memory Management .
Chapter Summary and What’s Next . . . . . . . .
.
.
.
.
.
.
.
.
.
.
.
.
.
.
.
.
.
.
.
.
.
.
.
.
.
.
.
.
.
.
.
.
.
.
.
.
.
.
.
.
.
.
.
.
.
.
.
.
.
.
.
.
.
.
.
.
.
.
.
.
.
.
.
.
.
.
.
.
.
.
.
.
.
.
.
.
.
.
.
.
.
.
.
.
.
.
.
.
.
.
.
.
.
.
.
.
.
.
.
.
.
.
.
.
.
.
.
.
.
.
4-1
4-1
4-2
4-3
4-6
4-8
4-8
4-9
4-9
4-16
4-16
In This Chapter . . . . . . . . . . . . . . . . . . . . . . . . . .
General . . . . . . . . . . . . . . . . . . . . . . . . . . . . . . .
How to Configure the Adapter for Grouped Mode
Configuration Example. . . . . . . . . . . . . . . . . .
Chapter Summary and What’s Next . . . . . . . . . . .
.
.
.
.
.
.
.
.
.
.
.
.
.
.
.
.
.
.
.
.
.
.
.
.
.
.
.
.
.
.
.
.
.
.
.
5-1
5-1
5-2
5-3
5-4
.
.
.
.
.
.
.
.
.
.
.
.
.
.
.
.
.
.
.
.
.
.
.
.
.
.
.
.
6-1
6-1
6-3
6-3
Chapter 5
Grouped Mode
Chapter 6
Troubleshooting the PROFIBUS
Adapter
In This Chapter . . . . . . . . . . . . . . .
Using the Status Indicators. . . . . . .
Using PROFIBUS Diagnostics. . . . .
Chapter Summary and What’s Next
.
.
.
.
.
.
.
.
.
.
.
.
.
.
.
.
.
.
.
.
.
.
.
.
.
.
.
.
.
.
.
.
.
.
.
.
.
.
.
.
.
.
.
.
Appendix A
Specifications
Specifications . . . . . . . . . . . . . . . . . . . . . . . . . . . . . . . . . . . A-1
Appendix B
Default Data Maps
Publication 1734-UM005B-EN-P - June 2001
.....................
1734-IB2 Sink Input Module
Product Code: 0081h . . .
Data Map: . . . . . . . . . . .
Configuration Data: . . . .
Diagnostic Data . . . . . . .
1734-IB4 Sink Input Module
Product Code: 0082h . . .
Data Map: . . . . . . . . . . .
Configuration Data: . . . .
Diagnostic Data . . . . . . .
.
.
.
.
.
.
.
.
.
.
.
.
.
.
.
.
.
.
.
.
.
.
.
.
.
.
.
.
.
.
.
.
.
.
.
.
.
.
.
.
.
.
.
.
.
.
.
.
.
.
.
.
.
.
.
.
.
.
.
.
.
.
.
.
.
.
.
.
.
.
.
.
.
.
.
.
.
.
.
.
.
.
.
.
.
.
.
.
.
.
.
.
.
.
.
.
.
.
.
.
.
.
.
.
.
.
.
.
.
.
.
.
.
.
.
.
.
.
.
.
.
.
.
.
.
.
.
.
.
.
.
.
.
.
.
.
.
.
.
.
.
.
.
.
.
.
.
.
.
.
.
.
.
.
.
.
.
.
.
.
.
.
.
.
.
.
.
.
.
.
.
.
.
.
.
.
.
.
.
.
.
.
.
.
.
.
.
.
.
.
.
.
.
.
.
.
.
.
.
.
.
.
.
.
.
.
.
.
.
.
.
.
.
.
.
.
.
.
.
.
.
.
.
.
.
.
.
.
.
.
.
.
.
.
.
.
.
.
.
.
.
.
.
.
.
.
.
.
.
.
.
.
.
B-1
B-2
B-2
B-2
B-2
B-2
B-3
B-3
B-3
B-3
B-3
Table of Contents
1734-IV2 Source Input Module. . . . . . . . . . . . . . . .
Product Code: 0083h . . . . . . . . . . . . . . . . . . . .
Data Map: . . . . . . . . . . . . . . . . . . . . . . . . . . . .
Configuration Data: . . . . . . . . . . . . . . . . . . . . .
Diagnostic Data . . . . . . . . . . . . . . . . . . . . . . . .
1734-IV4 Source Input Module. . . . . . . . . . . . . . . .
Product Code: 0084h . . . . . . . . . . . . . . . . . . . .
Data Map: . . . . . . . . . . . . . . . . . . . . . . . . . . . .
Configuration Data: . . . . . . . . . . . . . . . . . . . . .
Diagnostic Data . . . . . . . . . . . . . . . . . . . . . . . .
1734-OB2E Electronically Protected Output Module
Product Code: 0085h . . . . . . . . . . . . . . . . . . . .
Data Map: . . . . . . . . . . . . . . . . . . . . . . . . . . . .
Configuration Data: . . . . . . . . . . . . . . . . . . . . .
Diagnostic Data . . . . . . . . . . . . . . . . . . . . . . . .
1734-OB4E Electronically Protected Output Module
Product Code: 0086h . . . . . . . . . . . . . . . . . . . .
Data Map: . . . . . . . . . . . . . . . . . . . . . . . . . . . .
Configuration Data: . . . . . . . . . . . . . . . . . . . . .
Diagnostic Data . . . . . . . . . . . . . . . . . . . . . . . .
1734-OW2 Relay Sink/Source Output Module. . . . .
Product Code: 0087h . . . . . . . . . . . . . . . . . . . .
Data Map: . . . . . . . . . . . . . . . . . . . . . . . . . . . .
Configuration Data: . . . . . . . . . . . . . . . . . . . . .
Diagnostic Data . . . . . . . . . . . . . . . . . . . . . . . .
1734-IE2C Analog Current Input Module . . . . . . . .
Product Code: 0018h . . . . . . . . . . . . . . . . . . . .
Data Map: . . . . . . . . . . . . . . . . . . . . . . . . . . . .
Configuration Data: . . . . . . . . . . . . . . . . . . . . .
Diagnostic Data . . . . . . . . . . . . . . . . . . . . . . . .
1734-OE2C Analog Current Output Module . . . . . .
Product Code: 0019h . . . . . . . . . . . . . . . . . . . .
Data Map: . . . . . . . . . . . . . . . . . . . . . . . . . . . .
Configuration Data: . . . . . . . . . . . . . . . . . . . . .
Diagnostic Data . . . . . . . . . . . . . . . . . . . . . . . .
1734-IE2V Analog Voltage Input Module . . . . . . . .
Product Code: 0018h . . . . . . . . . . . . . . . . . . . .
Data Map: . . . . . . . . . . . . . . . . . . . . . . . . . . . .
Configuration Data: . . . . . . . . . . . . . . . . . . . . .
Diagnostic Data . . . . . . . . . . . . . . . . . . . . . . . .
1734-OE2V Analog Voltage Output Module . . . . . .
Product Code: 0019h . . . . . . . . . . . . . . . . . . . .
Data Map: . . . . . . . . . . . . . . . . . . . . . . . . . . . .
Configuration Data: . . . . . . . . . . . . . . . . . . . . .
Diagnostic Data . . . . . . . . . . . . . . . . . . . . . . . .
.
.
.
.
.
.
.
.
.
.
.
.
.
.
.
.
.
.
.
.
.
.
.
.
.
.
.
.
.
.
.
.
.
.
.
.
.
.
.
.
.
.
.
.
.
.
.
.
.
.
.
.
.
.
.
.
.
.
.
.
.
.
.
.
.
.
.
.
.
.
.
.
.
.
.
.
.
.
.
.
.
.
.
.
.
.
.
.
.
.
.
.
.
.
.
.
.
.
.
.
.
.
.
.
.
.
.
.
.
.
.
.
.
.
.
.
.
.
.
.
.
.
.
.
.
.
.
.
.
.
.
.
.
.
.
.
.
.
.
.
.
.
.
.
.
.
.
.
.
.
.
.
.
.
.
.
.
.
.
.
.
.
.
.
.
.
.
.
.
.
.
.
.
.
.
.
.
.
.
.
.
.
.
.
.
.
.
.
.
.
.
.
.
.
.
.
.
.
.
.
.
.
.
.
.
.
.
.
.
.
.
.
.
.
.
.
.
.
.
.
.
.
.
.
.
.
.
.
.
.
.
.
.
.
.
.
.
.
.
.
.
.
.
.
.
.
.
.
.
.
.
.
.
.
iii
B-4
B-4
B-4
B-4
B-4
B-5
B-5
B-5
B-5
B-5
B-6
B-6
B-6
B-6
B-6
B-7
B-7
B-7
B-7
B-7
B-8
B-8
B-8
B-8
B-8
B-9
B-9
B-9
B-9
B-10
B-11
B-11
B-11
B-11
B-11
B-12
B-12
B-12
B-12
B-13
B-14
B-14
B-14
B-14
B-14
Publication 1734-UM005B-EN-P - June 2001
Table of Contents
iv
1734-IA2 120V ac Input Module. . . . . .
Product Code: 1111h . . . . . . . . . . .
Data Map: . . . . . . . . . . . . . . . . . . .
Configuration Data: . . . . . . . . . . . .
Diagnostic Data . . . . . . . . . . . . . . .
1734-IM2 220V ac Input Module . . . . .
Product Code: 1112h . . . . . . . . . . .
Data Map: . . . . . . . . . . . . . . . . . . .
Configuration Data: . . . . . . . . . . . .
Diagnostic Data . . . . . . . . . . . . . . .
1734-OA2 120/220V ac Output Module
Product Code: 1113h . . . . . . . . . . .
Data Map: . . . . . . . . . . . . . . . . . . .
Configuration Data: . . . . . . . . . . . .
Diagnostic Data . . . . . . . . . . . . . . .
Publication Problem Report
Index
Back Cover
Publication 1734-UM005B-EN-P - June 2001
.
.
.
.
.
.
.
.
.
.
.
.
.
.
.
.
.
.
.
.
.
.
.
.
.
.
.
.
.
.
.
.
.
.
.
.
.
.
.
.
.
.
.
.
.
.
.
.
.
.
.
.
.
.
.
.
.
.
.
.
.
.
.
.
.
.
.
.
.
.
.
.
.
.
.
.
.
.
.
.
.
.
.
.
.
.
.
.
.
.
.
.
.
.
.
.
.
.
.
.
.
.
.
.
.
.
.
.
.
.
.
.
.
.
.
.
.
.
.
.
.
.
.
.
.
.
.
.
.
.
.
.
.
.
.
.
.
.
.
.
.
.
.
.
.
.
.
.
.
.
.
.
.
.
.
.
.
.
.
.
.
.
.
.
.
.
.
.
.
.
.
.
.
.
.
.
.
.
.
.
.
.
.
.
.
.
.
.
.
.
.
.
.
.
.
.
.
.
.
.
.
.
.
.
.
.
.
.
.
.
B-15
B-15
B-15
B-15
B-15
B-16
B-16
B-16
B-16
B-16
B-17
B-17
B-17
B-17
B-17
Chapter
1
What is the PROFIBUS Adapter
General
PROFIBUS Adapter
Overview
This chapter describes the purpose of the POINT I/O PROFIBUS
adapter, and what tasks have to be performed after installing the
adapter.
For more information about:
See page:
PROFIBUS Adapter Overview
1-1
Startup Procedure
1-2
Chapter Summary and What’s Next
1-4
The POINT I/O 1734-APB adapter resides on the PROFIBUS network
and the POINT I/O backplane (PointBus) simultaneously. From this
position, the adapter interfaces between the PROFIBUS network and
the POINT I/O modules. The illustration below shows the adapter on
the PROFIBUS network and the PointBus.
The adapter functions are:
• PROFIBUS - adapter serves as a slave that exchanges I/O data
with a PROFIBUS master.
• PointBus - the adapter serves as a master that communicates
with up to 63 POINT I/O modules
1
Publication 1734-UM005B-EN-P - June 2001
1-2
What is the PROFIBUS Adapter
Communicating through the Adapter
Output data is sent from the master across the PROFIBUS network to
the 1734-APB adapter. The adapter automatically transfers the data
across the PointBus backplane to the output modules.
Inputs from the input modules are collected by the PROFIBUS adapter
via the backplane and sent across the PROFIBUS network to the
master.
I/O Module Removal and Insertion Under Power
I/O modules can be removed under power from their positions in the
backplane without interfering with the communication with the other
modules. When reinserting the removed module, communication is
automatically started up again if the following criteria is fulfilled:
1. The inserted module is the same type as the one removed.
2. If more than one module is removed, communication will not be
regained until all modules are inserted in their correct positions
again.
Startup Procedure
Starting the adapter module consists of:
•
•
•
•
Installing the adapter in the system
setting the adapter node address
configuring the adapter for PROFIBUS communication
configuring the I/O modules for PointBus communication
Set the Adapter Node Address
Set the node address using the 2-position thumbwheel switch. Valid
settings range from 01 to 99. Use a pen to press either the + or –
buttons to change the number.
0 1
Publication 1734-UM005B-EN-P - June 2001
What is the PROFIBUS Adapter
1-3
Configure the Adapter for PROFIBUS Communication
•
•
•
•
Install the GSD file you received into your configuration tool
add the adapter to your configuration
select the node address and baud rate
add I/O modules to the configuration
For more information, refer to Chapter 3 - Configuring the POINT I/O
System.
Configure the I/O Modules for PointBus Communication
You must configure each I/O module to establish its actions on the
PointBus. Each module has a set of parameters that can be set (i.e.
Idle value, Fault value, etc.).
For more information, refer to Chapter 3 - Configuring the POINT I/O
System.
Node Address
Thumbweel
0 1
Adapter
Status
Adapter Status
PROFIBUS
Status
PROFIBUS Status
PointBus
Status
PointBus Status
1734-APB
System Power
Field Power
System
Power
Field
Power
NC
Profibus
Connector
NC = No Connection
CHAS GND = Chassis Ground
C = Common
V = Supply
CHAS GND
NC
CHAS GND
C
C
V
V
Publication 1734-UM005B-EN-P - June 2001
1-4
What is the PROFIBUS Adapter
Diagnostic Indicators
Diagnostic indicators are located on the front panel of the adapter
module. They show both normal operation and error conditions in
your POINT I/O system. The indicators are:
•
•
•
•
•
Adapter status
PROFIBUS status
PointBus status
System power
Field power
Upon power-up, the adapter goes to an initialization state and
performs a self-test (memory check, data memory clear, firmware
integrity). The indicators also go through a self-test sequence. If a
failure occurs, the adapter transitions to a faulted state and waits for
reset (cycle power). Otherwise, the adapter begins monitoring the
network (run state) for messages. Chapter 6 describes the diagnostic
indicators and how to use them for troubleshooting.
Network Connector
Use the 9-pin D-shell connector (shown below) to connect your
adapter to the PROFIBUS network.
Connections are provided for connecting the required 24V dc power
to the front of the module.
Refer to Chapter 2 or the Installation Instructions (pub. no.
1734-IN014) you received with your adapter to learn how to install
and wire the adapter.
Chapter Summary and
What’s Next
Publication 1734-UM005B-EN-P - June 2001
This chapter provided a brief overview of the 1734-APB PROFIBUS
adapter. Go to chapter 2 to learn how to install and wire your adapter.
Chapter
2
Installing the PROFIBUS Adapter
General
This chapter describes how to install and wire your adapter.
For information about:
See page:
Installing the PROFIBUS Adapter
2-2
Installing a Replacement PROFIBUS Adapter to an Existing System
2-4
Wiring the PROFIBUS Adapter
2-6
Chapter Summary and What’s Next
2-9
When properly installed, POINT I/O is grounded through the DIN rail
to chassis ground. Use zinc plated, yellow chromated steel DIN rail to
assure proper grounding.
Other DIN rail material (such as aluminum, plastic, etc.) can corrode
or oxidize and are poor conductors that may result in improper or
intermittent platform grounding.
If you choose not to use zinc plated, yellow chromated steel DIN rail
for your POINT I/O, periodically clean the DIN rail to prevent or
lessen the effects of oxidation and corrosion.
1
Publication 1734-UM005B-EN-P - June 2001
2-2
Installing the PROFIBUS Adapter
Installing the PROFIBUS
Adapter
To install the adapter on the DIN rail prior to installing other base
units, proceed as follows.
1. Position the adapter vertically above the DIN rail.
2. Press down firmly to install the adapter on the DIN rail. (The
locking mechanism will lock the adapter to the DIN rail.)
1734-APB communication interface
DIN rail
Orange screw slot
3. Insert the PROFIBUS network plug and tighten the holding
screws.
Holding screws
Profibus network plug
Publication 1734-UM005B-EN-P - June 2001
Installing the PROFIBUS Adapter
2-3
4. Set the node address using the 2-position thumbwheel switch.
Valid settings range from 01 to 99. Press the + or - buttons to
change the numbers.
Network Node
Address Thumbwheel
Press either the + or buttons to change the
number
Adapter
Status
0 1
PROFIBUS
Status
PointBus
Status
1734-APB
System
Power
Field
Power
5. Slide the safety end cap (9) up to remove. This exposes the
backplane and power interconnections.
Safety end cap
ATTENTION
!
Do not discard the safety end cap. Use this end cap
to cover the exposed interconnections on the last
mounting base on the DIN rail. Failure to do so
could result in equipment damage or injury from
electric shock.
Publication 1734-UM005B-EN-P - June 2001
2-4
Installing the PROFIBUS Adapter
Installing a Replacement
PROFIBUS Adapter to an
Existing System
1. Remove the existing adapter from the DIN rail as follows:
A. Pull up on the removable terminal base (RTB) removal
handle (7) to remove the terminal block.
RTB removal handle
B. Loosen the screws holding the PROFIBUS network plug and
pull up to remove.
Loosen holding screws
PROFIBUS network plug
C. Remove the adjacent module from its base.
Remove adjacent
module.
Publication 1734-UM005B-EN-P - June 2001
Installing the PROFIBUS Adapter
2-5
D. Use a small bladed screwdriver to rotate the DIN rail locking
screw (5) to a vertical position. This releases the locking
mechanism.
E. Pull straight out to remove.
2. Set the desired node address on the replacement adapter.
3. Slide the safety end cap up and remove it from the replacement
adapter. This exposes the backplane and power connections.
Safety end cap
4. Position the replacement adapter vertically above the DIN rail.
(Make certain the DIN rail lock is in the horizontal position.)
Slide the adapter down, allowing the interlocking side pieces to
engage the adjacent module.
Align the
interlocking side
pieces and slide
adapter into place
on the DIN rail.
Publication 1734-UM005B-EN-P - June 2001
2-6
Installing the PROFIBUS Adapter
5. Press firmly to seat the adapter (1) on the DIN rail. The adapter
locking mechanism will snap into place.
6. Insert the PROFIBUS network plug and tighten the holding
screws.
7. Insert the end opposite the handle into the base unit. This end
has a curved section that engages with the wiring base.
8. Rotate the terminal block into the wiring base until it locks itself
in place.
9. Replace the adjacent module in its base.
Wiring the PROFIBUS
Adapter
Refer to the figure below when wiring the PROFIBUS adapter.
Node Address
Thumbweel
0 1
Adapter
Status
Adapter Status
PROFIBUS
Status
PROFIBUS Status
PointBus
Status
PointBus Status
1734-APB
System Power
Field Power
System
Power
Field
Power
NC
Profibus
Connector
NC = No Connection
CHAS GND = Chassis Ground
C = Common
V = Supply
CHAS GND
NC
CHAS GND
C
C
V
V
Module Power
The adapter supplies 5V logic power to POINT I/O modules by
converting the applied 12/24V dc field power to PointBus 5V power.
You can connect up to 63 I/O modules to each adapter, and you can
power up to 14 I/O modules from the adapter (with a maximum of
10A of field power). Add up the current requirements of the modules
you want to use, and determine that they do not exceed the amperage
limit of the 1734-APB. (Note: Total expansion up to 63 modules - 14
modules (with 75mA current draw) maximum with 1734-APB - add
1734-EP24DC modules for additional 14 modules (or less based on
current requirements), up to 63 module maximum)
Publication 1734-UM005B-EN-P - June 2001
Installing the PROFIBUS Adapter
2-7
After the 14th (or last) module, you must insert an expansion
power supply (cat. no. 1734-EP24DC) to power additional I/O
modules.
Refer to the table below for various POINT I/O modules current
requirements.
POINT I/O Cat. No.
PointBus Current
Requirements
1734-IB2
1734-IB4
1734-IV2
1734-IV4
1734-OB2E
1734-OB4E
1734-OW2
1734-IE2C
1734-OE2C
1734-IE2V
1734-OE2V
1734-IA2
1734-IM2
1734-OA2
1734-IJ2
1734-IK2
1734-IR2
1734-IT2
1734-VHSC5
1734-VHSC24
75mA
75mA
75mA
75mA
75mA
75mA
80mA
75mA
75mA
75mA
75mA
75mA
75mA
75mA
160mA
160mA
220mA
175mA
180mA
180mA
For more information on the Expansion Power Supply, cat. no.
1734-EP24DC, refer to:
• POINT I/O Technical Data, publication 1734-TD001A
• POINT I/O Expansion Power Supply Installation Instructions,
publication 1734-IN058A
Publication 1734-UM005B-EN-P - June 2001
2-8
Installing the PROFIBUS Adapter
Wiring Connections
12/24V dc
Do not connect 120/240V ac
power to this supply.
NC
NC
0 1
CHAS GND
CHAS GND
2 3
NC = No Connection
CHAS GND = Chassis Ground
C = Common
V = Supply
C
C
4 5
V dc
This dc supply will be
connected to the
internal power bus.
V
V
6 7
Terminal
Description
Notes
0
No connection
Reserved
1
No connection
2
Chassis Ground
3
Chassis Ground
4
Common
5
Common
6
Voltage Input
7
Voltage Input
Apply 12/24V dc. Connects to
the internal power bus.
Proceed as follows. Make all connections to the removable terminal
block (RTB).
1. Connect chassis ground to terminal 2.
2. Connect 12/24V supply positive lead to terminal 6.
3. Connect 12/24V negative lead to terminal 4.
External power applied across terminal 6 (+) and 5 (-) connects
to the internal power bus.
Do not connect anything to terminals 0 and 1. These are
reserved terminals.
4. Connect the PROFIBUS connector plug to the D-shell on the
adapter. Tighten the screws to secure.
Publication 1734-UM005B-EN-P - June 2001
Installing the PROFIBUS Adapter
2-9
PROFIBUS Connection Plug Wiring
PROFIBUS connection
Pin 6 - +5V
Pin 8 - RX/TX Data Pin 3 - RX/TX Data +
Pin 4 - Request to send (RT
Pin 5 - Data Ground
Chapter Summary and
What’s Next
Pin Number
Name
Description
Housing
Shield
Connected to Chassis Ground
1
Not connected
2
Not connected
3
RX/TX Data +
Positive RX/TX data line
4
RTS
Request to send
5
Data Ground
Isolated ground
6
+5V BUS
Isolated +5V from RS485 side
7
Not connected
8
RX/TX Data -
9
Not connected
Negative RX/TX data line
In this chapter, you learned how to install and wire your adapter.
Move to chapter 3 for information on configuring the POINT I/O
system.
Publication 1734-UM005B-EN-P - June 2001
2-10
Installing the PROFIBUS Adapter
Publication 1734-UM005B-EN-P - June 2001
Chapter
3
Configuring the POINT I/O System
In This Chapter
Configuration Overview
This chapter describes how to configure your adapter for PROFIBUS
communication and how to configure the POINT I/O modules.
For more information about:
See page
Configuration Overview
3-1
Installing the GSD File
3-2
Adding the Master to the Network
3-3
Adding the Adapter to the Network
3-5
Adding I/O Modules to the Adapter
3-6
Configuring I/O Modules
3-8
Download to Master System
3-13
Chapter Summary and What’s Next
3-14
Since the POINT I/O adapter is compatible with any master system,
you can use any configuration tool available on the market. Just
import the GSD file included on the diskette you received with your
shipment of the adapter into your configuration tool. The
configuration tool uses the GSD file to help you set up the system.
The file is in raw ASCII format and you can view it with any text
editor.
Throughout this chapter, we use the Sycon configuration software
from HMS Industrial Networks as an example of how to configure the
adapter. For information on how to configure your system, refer to the
documentation associated with your master and configuration tool.
You must follow these steps during configuration:
1. Install the GSD file
2. Add the adapter to your PROFIBUS network
3. Add I/O modules to the adapter
4. Configure the modules
5. Download to master system
1
Publication 1734-UM005B-EN-P - June 2001
3-2
Configuring the POINT I/O System
Installing the GSD File
1. Open
the
file.
Select the GSD file
(173404EF.GSD) included
on the diskette you received
with your shipment of the
adapter.
This dialog indicates that the GSD
file was successfully imported into
the configuration tool.
(Click “Okay” to
continue.)
Publication 1734-UM005B-EN-P - June 2001
Configuring the POINT I/O System
3-3
Adding the Master to the
Network
Select the “Master” entry in
the “Insert” menu.
1. Select “PROFIBUS-DP
Master” in the list
called “Available
Masters.”
2. Click “Add>>”.
Select station address here.
Type a description here.
The master appears on the
network.
Publication 1734-UM005B-EN-P - June 2001
3-4
Configuring the POINT I/O System
Select the master icon
Select the “Bus Parameters”
entry in the “Settings” menu.
lSelect the required baud rate
from the list.
(Click “OK” to continue.)
Publication 1734-UM005B-EN-P - June 2001
Configuring the POINT I/O System
3-5
Adding the Adapter to the
Network
Select the “Slave” entry in the
“Insert” menu.
1. Select “1734-APB” in
the “Available Slaves”
list.
2. Click “Add>>”.
(Click “OK” to continue.)
Select station address here.
Type a description here.
The slave appears on the
network.
Publication 1734-UM005B-EN-P - June 2001
3-6
Configuring the POINT I/O System
Adding I/O Modules to the
Adapter
After you add the adapter, you must add the POINT I/O modules
connected to the adapter in the backplane.
You can select any of 5 different types:
1. Modules with Configuration Data
If you select modules with configuration data (i.e. 1734-IB2), the
configuration data would be available for you to manually
modify. Refer to “Configuring I/O Modules” later in this chapter.
2. Modules without Configuration Data
If you select modules without configuration data (i.e.1734-IB2/
No config data), you will not be able to change the
configuration data. This data would be set to a default setting.
However, you can still disable the diagnostic functionality for
the module.
3. Empty Slot Modules
If you have a gap in the backplane, you should use an empty
slot module (i.e. 1734-IB2/Empty slot). The empty slot module
reserves memory space in your master for addition of a module
at a later date.
4. Grouped Modules
In order to use memory more efficiently, modules can be
grouped together in a single byte. The modules must be inserted
next to each other and be of the same module family. Each
module will have the same configuration as the first module in
the group. Eight channels (1 byte) is the maximum allowed.
Refer to chapters 4 and 5 for “Grouped Mode” information.
When configured for grouped mode, you can save user
parameter data and I/O data.
5. Grouped Empty Slot Modules
If you have a gap in the backplane where the missing modules
belong to a group, use a grouped empty slot module. Refer to
chapter 4 for more information.
NOTE: In the following example, only modules with configuration
data are used.
The modules you select are transferred to the adapter with the
PROFIBUS Check_Config service. For a detailed description of the
Check_Config service, refer to Chapter 4.
Publication 1734-UM005B-EN-P - June 2001
Configuring the POINT I/O System
3-7
To add modules, double-click on the slave icon.
Double click on the slave icon to
add modules to your adapter.
1. Double click on the
module you wish to add.
2. The module appears in
the list below.
Publication 1734-UM005B-EN-P - June 2001
3-8
Configuring the POINT I/O System
Configuring I/O Modules
Most I/O modules have configuration data associated with them. This
configuration data can be set manually. For a detailed description of
the configuration data supported for different modules, refer to
Appendix B.
The configuration you select is transferred to the adapter with the
PROFIBUS Set_parameter service. (Set_parameter service is described
in chapter 4.)
Note: Download of new configuration data is only possible in the
offline mode.
Note: If you added modules without configuration data, the only
parameter you can edit is Extended diagnostics. All other parameters
retain their default settings. (Refer to Appendix B for default settings.)
To configure I/O modules, click on the Parameter Data button in the
Slave Configuration window.
Click on the “Parameter Data”
button to open the Parameter
Data window.
Publication 1734-UM005B-EN-P - June 2001
Configuring the POINT I/O System
Parameter Data in hexadecimal.
3-9
To configure a module, click
on the “Module” button.
Select the module you wish to
configure.
(Click “OK” to continue.)
Module Parameters
From the list, select the
parameter you wish to
change.
(Click “OK” to continue.)
Example: To change the
“Range” parameter, select
“Range” in the list and click
“OK.”
Select the value you wish to
use, and click “OK.”
Available parameters are module dependant. However, some
parameters are common for all module types. These parameters are:
Extended Diagnostics, Fault Action and Idle Action.
Publication 1734-UM005B-EN-P - June 2001
3-10
Configuring the POINT I/O System
Enable/Disable Diagnostic Functionality for your Modules
The diagnostic functionality is enabled at default, but may be turned
off (disabled) at the module level. When the diagnostic is disabled,
the module will not report any diagnostic information to the adapter.
Refer to chapter 4 for more information on module diagnostics.
Select the “Extended
Diagnostics” parameter.
(Click on “OK” to
continue.)
Module parameters
Select “Enable” to enable
and “Disable” to disable
the diagnostic
functionality of an I/O
module.
(Click on “OK” to
continue.)
Configure Fault Action/Value for your Output Modules
When communication between master and adapter is lost, the adapter
puts all connected I/O modules in their Fault state.
Select the “Fault Action”
parameter.
Module parameters
Select the desired state.
Possible settings are “Fault
Value,” and “Hold Last State
(HLS).
(Click on “OK” to continue.)
Publication 1734-UM005B-EN-P - June 2001
(Click on “OK” to continue.)
Configuring the POINT I/O System
3-11
If you select “Hold Last State,” the module outputs are frozen in their
current state. If you select “Fault Value,” you need to define the Fault
Value parameter. Possible settings are: digital modules - ON/OFF;
analog modules - any value within a predefined range.
Select the “Fault Value” parameter.
(Click on “OK” to continue.)
Module parameters
Enter the value you wish to use.
(Click on “OK” to continue.)
Configure Idle Action Value for your Output Modules
When the adapter receives a clear command from the master, the
adapter puts all connected I/O modules into their Idle state.
Select the “Idle Value”
parameter.
(Click on “OK” to continue.)
Module parameters
Select the desired state.
Possible settings are “Idle
Value,” and “Hold Last State
(HLS).
(Click on “OK” to continue.)
Publication 1734-UM005B-EN-P - June 2001
3-12
Configuring the POINT I/O System
If you select “Hold Last State,” the module outputs are frozen in their
current state if power to the module is lost. If you select “Idle Value,”
you need to define the Idle Value parameter. Possible settings are:
digital modules - ON/OFF; analog modules - any value within a
predefined range.
Select the “Idle Value”
parameter.
(Click on “OK” to continue.)
Module parameters
Enter the value you wish to
use.
(Click on “OK” to continue.)
Publication 1734-UM005B-EN-P - June 2001
Configuring the POINT I/O System
Download to Master
System
3-13
When you are finished setting parameters, you must download the
configuration data into the master
Select the “Download” entry in
the “Online” menu.
Select the “CIF Serial Driver.”
(Click “OK” to continue.)
Select port “COM 2.
(Click “OK” to continue.)
If the download is done during
bus operation, the
communication between master
and slave is stopped.
Confirm the download by clicking
“Yes.”
Downloading...
Publication 1734-UM005B-EN-P - June 2001
3-14
Configuring the POINT I/O System
Chapter Summary and
What’s Next
Publication 1734-UM005B-EN-P - June 2001
In this chapter, you learned how to configure the POINT I/O system.
Go to chapter 4 for information about communication and I/O table
mapping.
Chapter
4
Communication and I/O Table Mapping
This chapter describes the communication process and I/O image
table mapping as they occur through the 1734-APB adapter.
Image Table Mapping
For more information about:
See page:
Image Table Mapping
4-1
How Data Communication Takes Place
4-2
Grouping Modules for Memory Management
4-16
Chapter Summary and What’s Next
4-16
The adapter must map the data it receives to its internal memory
before passing it to the appropriate module. The image table map for
a module is divided into:
• Read bytes - input and status bytes
• Write bytes - output and configuration bytes
The length of each module’s read bytes and write bytes vary in size
depending on module complexity. The following illustration shows
how the adapter maps information. Refer to appendix B for the data
maps of the different POINT I/O modules.
1
Publication 1734-UM005B-EN-P - June 2001
4-2
Communication and I/O Table Mapping
How Data Communication
Takes Place
Before any data transfer can take place, the adapter has to verify and
accept the PROFIBUS services Set_Parameter and
Check_Configuration that are sent from the master at startup. If the
adapter accepts these services, data transmission is executed
automatically in a cyclic manner with the Data_Exchange service. In
addition to these 3 services, the adapter may notify the master of its
current status by means of the Slave_Diagnostic service.
The master can read the actual configuration with the
Get_Configuration service and send control commands to the adapter
by means of the Global_Command service.
Publication 1734-UM005B-EN-P - June 2001
Communication and I/O Table Mapping
4-3
This section describes how the adapter handles the following services:
•
•
•
•
•
•
Set_Parameter
Check_Configuration
Get_Configuration
Data_Exchange
Global_Command
Slave_Diagnostic
Set_Parameter
The master uses this service to identify itself with the adapter and to
specify how the adapter is to operate. Set_parameter data is
comprised of a series of octets (maximum of 244). Octet 0-6 is defined
in the DIN 19245-3 standard, while octet 7-243 contain specific
information for the adapter itself (referred to as User Parameter Data).
The module configuration you previously selected is passed on to the
adapter and I/O modules via the User Parameter data.
Octet
Value
Description
0
-
Station Status (see DIN 19245-3)
1
1-255
Watchdog Factor 1
2
1-255
Watchdog Factor 2
3
0-255
Minimum Station Delay (TSDR)
4
4
Vendor (High byte)
5
239
Vendor (Low byte)
6
-
Group Identification (see DIN 19245-3)
7-243
See below
User Parameter Data
User Parameter Data
Octet 7 in the parameter data is reserved for the Profibus-DP ASIC
onboard and must equal 00h.
Beginning at octet 8, each configured module allocates a minimum of
three bytes of user parameter data as shown in the following table.
The first two bytes define the product code for the installed module,
the third byte defines the control byte followed by configuration data
(if used).
Publication 1734-UM005B-EN-P - June 2001
4-4
Communication and I/O Table Mapping
Octet
Bit 7
Bit 6
Bit 5
Bit 4
Bit 3
7
Reserved
8
Product Code High Byte of First Module
9
Product Code Low Byte of First Module
10
Control Byte for First Module
11
Configuration Data for First Module*
...
...
X
Product Code High Byte for last Module
X+1
Product Code Low Byte for last Module
X+2
Control Byte for Last Module
X+3
Configuration Data for Last Module*
Bit 2
Bit 1
Bit 0
* Present only if selected module has configuration data. Refer to “Adding I/O Modules to your Configuration.”
Product Code
The product code is used to determine the identity of the module
installed in each slot. The code is defined in the GSD file and is
automatically extracted by the configuration tool when you add the
modules to your configuration. (Refer to appendix B for module
product codes.) If an installed module does not match the product
code for that slot, the slot is considered faulty and the adapter will
respond to the Set_Parameter service with a negative
acknowledgement. This will cause the master to set the Parameter
fault bit in the Slave_Diagnostic service.
Note: Data exchange is not possible if the product code and installed
module do not match.
Control Byte
The control byte is used to determine how the module should
operate. The control byte is included in the GSD file.
Bit 7
Bit 6
Bit 5
Bit 4
Bit 3
Bit 2
Bit 1
Bit 0
Diagnostic
ON/OFF
Module
Type
Configuration data size (bytes); or number of bits allocated
to the opened byte (in bit-stuffing)
Bit 7 - This bit is used to enable/disable the diagnostic function for the
module.
Publication 1734-UM005B-EN-P - June 2001
Bit Value
Description
0
Disable diagnostics
1
Enable diagnostics
Communication and I/O Table Mapping
4-5
Bit 6 - This bit is used to enable/disable the module grouping feature
for the module.
Bit Value
Description
0
Grouped module disabled
1
Grouped module enabled
Bit 0-5 - Without grouped modules - Defines the number of
configuration data bytes for the module. With grouped modules Defines the number of bits the module should allocate in the opened
byte.
Configuration Data
Configuration data is passed on to each I/O module using User
Parameter Data. The data is module dependant (see Appendix B).
IMPORTANT
Using your PROFIBUS configuration tool, it is
possible to select modules with no configuration
data. If you use this type of module, the
configuration data for that module will be a default
value. (See Appendix B.)
The following table is an example of how User Parameter Data might
look with a 1734-OB2E in slot 1, 1734-IB4 in slot 2, and 1734-OE2C in
slot 3. All modules in this example use Configuration Data.
Octet
Value
Description
7
00h
Reserved
8
00h
1734-OB2E Product Code High Byte
9
85h
1734-OB2E Product Code Low Byte
10
81h
1734-OB2E Control Byte
11
10h
1734-OB2E Configuration Data
12
00h
1734-IB4 Product Code High Byte
13
82h
1734-IB4 Product Code Low Byte
14
81h
1734-IB4 Control Byte
15
00h
1734-IB4 Configuration Data
16
00h
1734-OE2C Product Code High Byte
17
19h
1734-OE2C Product Code Low Byte
18
C9h
1734-OE2C Control Byte
19
03h
1734-OE2C Configuration Data byte 1
20
06h
1734-OE2C Configuration Data byte 2
Publication 1734-UM005B-EN-P - June 2001
4-6
Communication and I/O Table Mapping
Octet
Value
Description
21
66h
1734-OE2C Configuration Data byte 3
22
1Fh
1734-OE2C Configuration Data byte 4
23
FFh
1734-OE2C Configuration Data byte 5
24
00h
1734-OE2C Configuration Data byte 6
25
00h
1734-OE2C Configuration Data byte 7
26
00h
1734-OE2C Configuration Data byte 8
27
00h
1734-OE2C Configuration Data byte 9
Check_Configuration
After the set_parameter service, the master sends a
check_configuration service to the adapter. This service causes the
adapter to check its default configuration (determined at powerup),
against the actual configuration specified in the master configuration.
If the actual configuration does not match the default configuration,
the master will respond to the Check_configuration service with a
negative acknowledgement, which causes the master to set the
Configuration fault bit in the Slave_diagnostic service.
Note: Data exchange is not possible as long as the actual
configuration does not match the default configuration.
The POINT I/O PROFIBUS adapter is a modular slave, which means
that the size of the I/O block is flexible and not tied to a specific block
length. Each I/O module is represented by an identifier byte. This
byte defines the input- and/or output data length as well as the data
consistency of the I/O data.
The identifier bytes for all POINT I/O modules are contained in the
GSD file and are automatically extracted by the configuration tool
when you add the modules to your configuration.
The identifier byte is described below. More information is contained
in the PROFIBUS-DP standard (DIN 19245-3).
Bit 7
0 = Consistency of byte/word
1 = Consistency of entire length
0 = Byte
1 = Word
Publication 1734-UM005B-EN-P - June 2001
Bit 0
Length of Data
0 = 1 byte/word
15 = 16 bytes/words
Input/Output
00 = Special Format
01 = Input
10 = Output
11 = Input and Output
Communication and I/O Table Mapping
4-7
Without Grouped Modules
The table below shows an example of how the identifier bytes would
look for a configuration with a 1734-OB2E in slot 1; a 1734-IE2C in
slot 2; a 1734-OE2C in slot 3; and a 1734-IA2 in slot 4.
Identifier Byte
Value
Description
0
20h
1734-OB2E; 1 byte out, consistency over byte
1
51h
1734-IB4; 1 byte in, consistency over byte
2
61h
1734-OE2C; 2 words out, consistency over word
3
10h
1734-IA2, 2 byte in, consistency over byte
With Grouped Modules
If using grouped modules, the following table shows an example of
how the identifier bytes would look for a configuration with four
1734-OB2E modules.
Slot
Number
Description
Identifier Byte User Parameter Data Buffer
Buffer
1
1734-OB2E
Byte 1 = 0x20; 1 Byte 1 = 0x00; product code (high byte)
byte output
Byte 2 = 0x85; product code (low byte)
Byte 3 = 0x81; control byte (diagnostics enabled, no bit
stuffing, 1 byte of configuration data follows)
Byte 4 = 0x10; configuration data
2
1734-OB2E/grouped
Byte 2 = 0x00; 0 Byte 5 = 0x00; product code (high byte)
bytes of I/O
Byte 6 = 0x85; product code (low byte)
data
Byte 7 = 0xC2; control byte (diagnostics enabled, bit
stuffing module, 2 bits (channels) to store in the opened
byte.
3
1734-OB2E/grouped
Byte 3 = 0x00; 0 Byte 8 = 0x00; product code (high byte)
bytes of I/O
Byte 9 = 0x85; product code (low byte)
data
Byte 10 = 0xC2; control byte (diagnostics enabled, bit
stuffing module, 2 bits (channels) to store in the opened
byte.
4
1734-OB2E/grouped
Byte 4 = 0x00; 0 Byte 11 = 0x00; product code (high byte)
bytes of I/O
Byte 12 = 0x85; product code (low byte)
data
Byte 13 = 0xC2; control byte (diagnostics enabled, bit
stuffing module, 2 bits (channels) to store in the opened
byte.
Publication 1734-UM005B-EN-P - June 2001
4-8
Communication and I/O Table Mapping
Get_Configuration
This service permits the master to read out the Identifier bytes for the
actual adapter configuration. (Refer to the previous section for the
format of the identifier byte.)
The table below shows an example of how the identifier bytes from a
Get_configuration response would look like when you have the
following modules in the backplane: slot 1 = 1734-OB4E; slot 2 =
1734-IE2C; slot 3 = 1734-OE2C; and slot 4 = 1734-IA2.
Identifier Byte
Value
Description
0
20h
1734-OB4E; 1 byte out, consistency over byte
1
51h
1734-IE2C; 2 words in, consistency over word
2
61h
1734-OE2C; 2 words out, consistency over word
3
10h
1734-IA2; 1 byte in, consistency over byte
Global_Command
Sync/Freeze
In addition to the cyclic data exchange, which is executed
automatically by the master, the master can send control commands to
a single slave, a group of slaves or all slaves simultaneously. These
control commands are transmitted as multicast commands and permit
use of sync and freeze modes for event-controlled synchronization of
the slaves.
The POINT I/O adapter begins sync mode when it receives a sync
command from the assigned master. The output channels of all I/O
modules are then frozen in their current state. During subsequent user
data transmissions, the output data are stored at the adapter, but the
output states remain unchanged. The stored output data is not sent to
the outputs until the sync command is receivied. Sync mode is
concluded with the unsync command.
Similarly, a freeze control command causes the adapter to assume
freeze mode. In this operating mode, the states of the input channels
of all I/O modules are frozen at the current value. Input data is not
updated again until the master sends the next freeze command.
Freeze is concluded with the unfreeze command.
Publication 1734-UM005B-EN-P - June 2001
Communication and I/O Table Mapping
4-9
Operating States
The general system behavior is determined by the operating status of
the master. The 3 main states are:
• Stop - No data transmission occurs between the master and the
slaves.
• Operate - The master is in the data transfer phase. In cyclic data
communication , inputs of the slaves are read, and output
information is written to the slaves.
• Clear - The master reads the information of the slaves and sets
the outputs to an idle state. (Refer to “Configure Idle Action
Value for Your Output Modules,” page 3-11.)
Data_Exchange
After correct set_parameter and check_configuration services, the
master automatically starts exchanging data with the adapter by means
of the data_exchange service.
Slave_Diag
The adapter may notify the master of its current state by means of the
slave_diag service. The information received from this service request
can be divided into 3 parts:
• Standard diagnostic information according to the PROFIBUS
standard DIN 19245-3
• Module related diagnostics indicates which I/O module has
diagnostic events pending.
• Channel related diagnostics, give more detailed information of
the actual cause of the event (wire-break, overcurrent, etc.).
Publication 1734-UM005B-EN-P - June 2001
4-10
Communication and I/O Table Mapping
Structure of Slave_Diagnosis
Octet
Description
0
Station Status 1
1
Station Status 2
2
Station Status 3
3
Master PROFIBUS address
4
Identifier number (high byte)
5
Identifier number (low byte)
6
Module-related header byte
7-14
Module-related diagnostic block
15-17
1st channel-related diagnostic message
18-20
2nd channel-related diagnostic message
.
.
.
.
42-44
10th channel-related diagnostic message
IMPORTANT
Publication 1734-UM005B-EN-P - June 2001
The length of the diagnostic frame varies between 15
and 45 bytes since the length of the channel-related
part is dynamic in its structure.
Communication and I/O Table Mapping
4-11
Station Status 1, 2 and 3
Station status 1, 2 and 3 provide an overview of the status of the slave.
Station Status 1
Bit
Description
Cause
0 - Station nonexistent
The master cannot be
addressed by the master
1 - Station not ready
Adapter not yet ready for
data exchange
Wait for the adapter to start up.
2 - Configuration fault
Configuration data sent by
the master to the adapter
does not match the
backplane configuration.
Do the modules installed in the
backplane match the modules entered
in the master configuration?
3 - Extended diagnostic
Diagnostics available for the Evaluate the module-related and/or
master
channel-related diagnostics.
This bit is cleared (0) when there are no
diagnostic messages available.
4 - Function not supported
The requested function is
Trying to set PROFIBUS address over
not supported by the module the network?
5 - Invalid slave response
The master has received an
invalid response
Check the bus setup.
6 - Parameter fault
Parameters sent by the
master are containing
wrong or insufficient data.
Do the modules installed in the
backplane match the modules entered
in the master configuration?
7 - Master lock
The adapter has already
been parameterized by
another master and is
locked in its access.
Check if another master is present on
the network, and delete its
assignments to the adapter or remove
the other assigned master from the
network to get the communication with
the adapter run.
• Correct node address set on the
adapter?
• Bus connector connected?
• Bus cable pin configuration
correct (Pin 3 to 3 and pin 8 to 8)?
• Power to the slave switched on?
• Is the RS485 repeater set
correctly?
Publication 1734-UM005B-EN-P - June 2001
4-12
Communication and I/O Table Mapping
Station Status 2
Bit
Description
Cause
0 - Parameterization
requested
The slave has forced the
master system to do a new
parameterization.
This bit is set as long as new
parameterization must be performed.
1 - Static diagnostic
The adapter cannot provide
valid I/O data.
The backplane bus communication is
terminated. This bit will not be cleared
(0) until the power to the adapter is
cycled.
2 - Not used
Always set to 1.
3 - Watchdog on
Watchdog control is the
adapter is active to
supervise its corresponding
master connection.
4 - Freeze mode
The adapter has received a
freeze command.
5 - Sync mode
The adapter has received a
sync command.
6 - Reserved
Always set to 0.
7 - Slave deactivated
The adapter has been
marked inactive in its
parameter set and has been
removed from cyclic I/O
processing.
Check bus settings in the configuration
tool.
Station Status 3
Bit
Description
0 to 6 - Not used
These bits are always 0.
7 - Diagnostic overflow
There are more diagnostic
messages than the adapter
can store.
Publication 1734-UM005B-EN-P - June 2001
Cause
More than 10 channel-related
messages present at the same time.
Note: New messages are queued in
the adapter and are passed on to the
master as soon as ther is space in the
diagnostic buffer.
Communication and I/O Table Mapping
4-13
Master PROFIBUS Address
In this octet (byte 3), the address of the master that has done the
parameterization of the adapter is entered. If the adapter is not
parameterized from any master, the adapter writes the address 255
(decimal) here.
Identity Number
The identity number (byte 4-5) is a unique code that describes the
type of DP-slave. The identity number for the 1734-APB adapter is
04EF (hexidecimal).
Module-related Diagnostics
The module-related diagnostics indicates if any of the connected I/O
modules reports errors. More detailed information of the error can be
found by further evaluation of the channel-related diagnostic message.
Bit Value
Module Status
0
Module is OK
1
Module reports error
Octet
Bit 7
Bit 6
Bit 5
Bit 4
Bit 3
Bit 2
Bit 1
Bit 0
6
0
1
0
0
1
0
0
1
7
Module 8
Module 7
Module 6
Module 5
Module 4
Module 3
Module 2
Module 1
8
Module 16 Module 15 Module 14 Module 13 Module 12 Module 11 Module 10 Module 9
9
Module 24 Module 23 Module 22 Module 21 Module 20 Module 19 Module 18 Module 17
10
Module 32 Module 31 Module 30 Module 29 Module 28 Module 27 Module 26 Module 25
11
Module 40 Module 39 Module 38 Module 37 Module 36 Module 35 Module34
12
Module 48 Module 47 Module 46 Module 46 Module 44 Module 43 Module 42 Module 41
13
Module 56 Module 55 Module 54 Module 53 Module 52 Module 51 Module 50 Module 49
14
Not used
...
Module 33
Module 63 Module 62 Module 61 Module 60 Module 59 Module 58 Module 57
Channel Related Diagnostics
These diagnostics give information on channel errors of the I/O
modules and expand on the module related diagnostics. The message
entry length is 3 bytes.
Publication 1734-UM005B-EN-P - June 2001
4-14
Communication and I/O Table Mapping
A maximum of 10 channel related diagnostic messages are possible. If
you exceed the limit, the diagnostic overflow bit in station status 3 will
be set.
Note: If the diagnostic buffer is full and the adapter receives an
additional error message, this new message will be queued in the
adapter internally and passed on to the master as soon as space is
available in the diagnostic buffer (i.e. when older messages are
deleted).
Publication 1734-UM005B-EN-P - June 2001
Bit 7
Bit 6
Bit 5
Bit 4
Bit 3
Bit 2
Bit 1
Byte 15
1
0
Slot number of the module that reports diagnostics (1-63)
Byte 16
Channel Direction
01 - Input
10 - Output
11 - Input/Output
Type of channel that reports diagnostics
Error codes (see Appendix B)
Byte 17
Channel Type:
001 = Bit
010 - 2 bits
011 - 4 bits
100 - Byte
101 - Word
110 - Double word
Byte 18-20
2nd channel specific message (same assignments as bytes 15-17)
Byte 42-44
10th channel specific message (same assignments as bytes 15-17)
Bit 0
Communication and I/O Table Mapping
4-15
Viewing Diagnostic Data within the Configuration Tool
Select the “Start Debug Mode”
entry in the “Online” menu.
Double click on the slave icon.
Station status 1 - 3
Station status 1 - 3
Interpreted view of diagnostic
messages
1. Select error message
Error details
2. A detailed description
appears
Complete diagnostic message
in hexadecimal.
(Click on “OK” to exit.)
Publication 1734-UM005B-EN-P - June 2001
4-16
Communication and I/O Table Mapping
Grouping Modules for
Memory Management
You can install up to 8 of the same type of module (identical product
code) next to each other and use only one word of input or output
memory. The module requirements are:
•
•
•
•
the modules must be next to each other
the modules must be members of the same module family
must total 8 channels or less
the modules will share the same configuration data.
You select the option 4, bit stuffing module, in the hardware catalog
in the configuration tool.
1. Select the 1734-OB2E (hardware type 1) from the hardware catalog.
The adapter will open a byte and store the first 1734-OB2E module there.
2. Select the 1734-OB2E (hardware type 4 - grouped) from the hardware catalog.
The adapter will store the second 1734-OB2E in the opened byte.
3. Select the 1734-OB2E (hardware type 4 - grouped) from the hardware catalog.
The adapter will store the third 1734-OB2E in the opened byte.
4. Select the 1734-OB2E (hardware type 4 - grouped) from the hardware catalog.
The adapter will store the fourth 1734-OB2E in the opened byte.
Note that the grouped modules will share the same configuration data
as the first module in the group. If the first module has no
configuration data, the other three modules will have no configuration
data.
Chapter Summary and
What’s Next
Publication 1734-UM005B-EN-P - June 2001
In this chapter, you learned about communication and I/O table
mapping. Move to chapter 5 for troubleshooting.
Chapter
5
Grouped Mode
In This Chapter
In this chapter, you will learn about:
For more information about:
See page:
General
5-1
How to Configure the Adapter for Grouped Mode
5-2
Configuration Example
5-3
Chapter Summary and What’s Next
General
5-4
In order to use master memory most effectively, and reduce data
transfer between the POINT I/O adapter and the master, you can
group several modules in a single byte.
To configure the adapter for grouped mode you must:
1. insert modules adjacent to each other
2. Modules must be in the same module family
Groups may exist as follows:
• 1734-IB2, 1734-IV2, 1734-IM2 and 1734-IA2 can be grouped
together
• 1734-IB4 and 1734-IV4 can be grouped together
• 1734-OW2, 1734-OA2 and 1734-OX2 can be grouped together
The following modules cannot be grouped with any other
module type:
• 1734-OB2E can only be grouped with 1734-OB2E modules
• 1734-OB4E can only be grouped with 1734-OB4E modules
3. A maximum of 8 channels (1 byte) per group
4. Modules in a single byte will have the configuration of the first
module in the group. (Exception: Extended diagnostics can be
enabled/disabled on a per module basis.)
1
Publication 1734-UM005B-EN-P - June 2001
5-2
Grouped Mode
How to Configure the
Adapter for Grouped Mode
You can select the following modules in the configuration tool:
1. Module without configuration data (e.g. 1734-OB2E/no config)
2. Module with configuration data (e.g. 1734-OB2E/with config)
3. Empty slot module (e.g. 1734-OB2E/empty slot)
4. Grouped module (e.g. 1734-OB2E/grouped)
5. Grouped empty slot module (e.g. 1734-OB2E/grouped empty
slot)
By combining these modules, groups can be created in 3 different
ways:
1. A group of modules with configuration data
2. A group of modules without configuration data (default
configuration will be used for all modules in the group)
3. A group of empty slot modules
The following example illustrates how to group modules in a single
byte.
1. Select the 1734-OB2E (hardware type 1) from the hardware catalog.
The adapter will open a byte and store the first 1734-OB2E module there.
Bit
7
6
5
4
3
2
1
0
Output Byte
2. Select the 1734-OB2E (hardware type 4 - grouped) from the hardware catalog.
The adapter will store the second 1734-OB2E in the opened byte.
Bit
7
6
5
4
3
2
1
0
Output Byte
3. Select the 1734-OB2E (hardware type 4 - grouped) from the hardware catalog.
The adapter will store the third 1734-OB2E in the opened byte.
Bit
7
6
5
4
3
2
1
0
Output Byte
4. Select the 1734-OB2E (hardware type 4 - grouped) from the hardware catalog.
The adapter will store the fourth 1734-OB2E in the opened byte.
Bit
7
6
5
4
3
2
1
0
Output Byte
If more modules are to be grouped, a new byte has to be opened (repeat steps 1 through 4).
Publication 1734-UM005B-EN-P - June 2001
Grouped Mode
5-3
Note that the grouped modules will share the same configuration data
as the first module in the group. If the first module has no
configuration data, the other modules in the group will have no
configuration data.
The configuration for the above example will look like the following
in the configuration tool.
Configuration Example
8
1734-OB2E Output Module/Grouped
1734-OB4E/Empty slot
1734-OB4E/Grouped Empty slot
1734-IB2 Input Module
1734-IB2 Input Module/Grouped
9
10
11
12
13
14
1734-IB4 Input Module
7
1734-IB4 Input Module/Grouped
6
1734-IB4 Input Module/No config
5
1734-IE2C Input Module
4
1734-OE2C Output Module
3
1734-IV2 Input Module/Grouped
2
1734-OB2E Output Module/Grouped
1
1734-OB2E Output Module
PROFIBUS Adapter
Slot
1734-OB2E Output Module/Grouped
The following example shows how modules can be grouped together,
and how the I/O data is mapped in the PROFIBUS adapter.
Publication 1734-UM005B-EN-P - June 2001
5-4
Grouped Mode
Configuration table and memory map
Note the following module groups:
•
•
•
•
slots 1, 2, 3 and 4 - A group of modules with configuration data
Slots 7, 8 and 9 - A group of modules with configuration data
Slots 5 and 6 - A group of empty slots
Slots 12 and 13 - A group of modules without configuration data
(default configuration data)
In this example, the input/output addresses start at byte 0.
Slot
Module
I/O Address
Input
Output
1
1734-OB2E
0.0 to 0.1
2
1734-OB2E/grouped
0.2 to 0.3
3
1734-OB2E/grouped
0.4 to 0.5
4
1734-OB2E/grouped
0.6 to 0.7
5
1734-OB4E/empty slot
1.0 to 1.3
6
1734-OB4E/grouped empty slot
1.4 to 1.7
7
1734-IB2E
0.0 to 0.1
8
1734-IB2E/grouped
0.2 to 0.3
9
1734-IV2E/grouped
0.4 to 0.5
10
1734-OE2C
11
1734-IE2C
12
1734-IB4/no configuration
5.0 to 5.3
13
1734-IB4/grouped
5.4 to 5.7
14
1734-IB4
6.0 to 6.3
Chapter Summary and
What’s Next
Publication 1734-UM005B-EN-P - June 2001
Notes
Same configuration data as first
module in group (slot 1).
Same configuration data as first
module in group (slot 7).
2 to 5
1 to 4
Default configuration data
In this chapter, you learned how to group modules for reduced
memory space. Move to chapter 6 for information on troubleshooting
your adapter.
Chapter
6
Troubleshooting the PROFIBUS Adapter
In This Chapter
Using the Status Indicators
In this chapter, you will learn about:
For more information about:
See page:
Using the Status Indicators
6-1
Using PROFIBUS Diagnostics
6-3
Chapter Summary and What’s Next
6-3
You can use the status indicators to troubleshoot your adapter. These
indicators consist of:
Adapter
Status
PROFIBUS
Status
PointBus
Status
Adapter Status
PROFIBUS Status
PointBus Status
1734-APB
System
Power
Field
Power
System Power
Field Power
1734apbfrt
Use the following table to troubleshoot your adapter.
1
Publication 1734-UM005B-EN-P - June 2001
6-2
Troubleshooting the PROFIBUS Adapter
Indicator
Indication
Probable Cause
System Power
Off
Not active.
Field power is off; or dc-dc converter problem.
Green
System power on.
Dc-dc converter active (5V).
Off
Not active.
Field power not applied.
Green
Power on, 24V present.
Off
No power supplied.
Hardware check in progress.
Initialization in progress.
Green
Adapter operating normally
Red
Hardware check fault.
Off
No power supplied.
Adapter is off-line (no data exchange with the
PROFIBUS master).
Green
Adapter is online (data exchange with the PROFIBUS
master).
Flashing Green
Adapter is in CLEAR mode and has set the connected
I/O modules into an idle state.
Red
No POINT I/O modules installed in the backplane.
Flashing Red
Set_Parameter telegram rejected.
Maximum number of user parameter bytes overridden.
Off
No power applied to adapter
PointBus initialization in progress.
Green
Normal operation.
Flashing Red
Incorrect POINT I/O module installed or
POINT I/O module removed from backplane.
Red
Critical link failure. Adapter detected error that
prevents its communication on the PointBus.
Field Power
Adapter Status
PROFIBUS Status
PointBus Status
Publication 1734-UM005B-EN-P - June 2001
Troubleshooting the PROFIBUS Adapter
Using PROFIBUS
Diagnostics
6-3
PROFIBUS diagnostics provides detailed information about the
adapter and the I/O modules. (Refer to Slave_Diag in chapter 4 for
detailed information about diagnostic capabilities of the adapter.)
Pay special attention to the following indications in the diagnostic
response.
Chapter Summary and
What’s Next
Station
Bit
Response
Reason
Station Status 1
0
Station nonexistent
Wrong node address.
Bus cable problem.
Incorrect pin configuration.
2
Configuration fault
Wrong module installed.
Identifier bytes for one or more
modules does not match master
configuration identifier bytes.
3
Extended diagnostic
One or more modules report errors.
(To find out reasons for the error
indication, evaluate the module and
channel related diagnostic.)
6
Parameter fault
Wrong module installed.
Product code for one or more
modules does not match master
configuration product code.
Station Status 2
1
Static diagnostic
PointBus communication
terminated. Adapter cannot provide
valid data.
Station Status 3
7
Diagnostic overflow
More than 10 channel related
messages present at the same time.
In this chapter, you learned how to troubleshoot your adapter. Move
to Appendix A for adapter specifications.
Publication 1734-UM005B-EN-P - June 2001
6-4
Troubleshooting the PROFIBUS Adapter
Publication 1734-UM005B-EN-P - June 2001
Appendix
A
Specifications
Specifications - 1734-APB PROFIBUS Adapter Module
Communication Interface Specifications
Expansion I/O Capacity
Up to 13 modules (13 times 75mA = 0.975, just under the limit
of 1.0A). The actual number of modules can vary. Add up the
current requirements of the modules you want to use to make
sure they do not exceed the amperage limit of the 1734-ADN.
(Note: Total expansion up to 63 modules - 13 modules maximum
with 1734-APB - add 1734-EP24DC modules for an additional 17
modules (or less based on current requirements), up to 63
module maximum)
Cat. No.
PointBus Current Requirements
1734-IB2
75mA
1734-IB4
75mA
1734-IV2
75mA
1734-IV4
75mA
1734-OB2E
75mA
1734-OB4E
75mA
1734-OW2
80mA
1734-IE2C
75mA
1734-OE2C
75mA
1734-IE2V
75mA
1734-OE2V
75mA
1734-IA2
75mA
1734-IM2
75mA
1734-OA2
75mA
1734-IJ2
160mA
1734-IK2
160mA
1734-IR2
220mA
1734-IT2
175mA
1734-VHSC5
180mA
1734-VHSC24
180mA
Module Location
Starter module - left side of 1734 system
Power Supply Specifications
Power Supply
Note: In order to comply with CE Low Voltage Directives (LVD),
you must use either a NEC Class 2, a Safety Extra Low Voltage
(SELV) or a Protected Extra Low Voltage (PELV) power supply to
power this adapter.A SELV supply cannot exceed 30V rms, 42.4V
peak or 60V dc under normal conditions and under single fault
conditions. A PELV supply has the same rating and is connected
to protected earth.
Input Voltage Rating
24V dc nominal
10-28.8V dc range
Field Side Power Requirements 24V dc (+20% = 28.8V dc maximum) @ 400mA maximum
Inrush Current
6A maximum for 10ms
PointBus Output Current
1A maximum @ 5V dc ±5% (4.75 - 5.25)
Input Overvoltage Protection
Reverse polarity protected
Interruption
Output voltage will stay within specifications when input drops
out for 10ms at 10V with maximum load.
Specifications continued on next page.
1
Publication 1734-UM005B-EN-P - June 2001
A-2
Specifications
General Specifications
Indicators
Power Consumption
Power Dissipation
Thermal Dissipation
Isolation Voltage
Field Power Bus
Nominal Voltage
Supply Voltage Range
Supply Current
Dimensions
Inches
(Millimeters)
Environmental Conditions
Operational Temperature
Storage Temperature
Relative Humidity
Shock Operating
Non-operating
Vibration
Conductors Wire Size
Category
Terminal Base Screw Torque
Field Wiring Terminations
PROFIBUS
Power Supply
3 red/green status indicators
Adapter status
PROFIBUS status
PointBus status
2 green power supply status indicators:
System Power (PointBus 5V power)
Field Power (24V from field supply)
8.1W maximum @ 28.8V dc
2.8W maximum @ 28.8V
9.5 BTU/hr maximum @ 28.8V dc
1250V rms/V ac
24V dc
10-28.8V dc range,
10A maximum
3.0H x 2.16W x 5.25L
(76.2H x 54.9W x 133.4L)
-10 to 55oC (14 to 131°F)
-40 to 85oC (-40 to 185°F)
5 to 95% noncondensing
30g peak acceleration, 11(±1)ms pulse width
50g peak acceleration, 11(±1)ms pulse width
Tested 5g @ 10-500Hz per IEC 68-2-6
14 AWG (2.5mm2) - 22 AWG (0.25mm2) solid or stranded copper
wire rated @ 75°C or higher
3/64 inch (1.2mm) insulation maximum
21
7 pound-inches (0.6Nm)
1 - Not connected
6 - +5V Bus
2 - Not connected
7 - Not connected
3 - +RTX/TX data line 8 - Negative RTX/TX
4 - Request to send 9 - Not connected
5 - Ground Bus
Housing - Earth ground
0 - No Connection
1 - No Connection
2 - Chassis Ground
3 - Chassis Ground
4 - Common
5 - Common
6 - Supply
7 - Supply
9.0 oz/255 grams
CE marked for all applicable directives
C-Tick marked for all applicable acts
Mass
Agency Certification (when
product is marked)
1 Use this conductor category information for planning conductor routing as described in publication 1770-4.1, “Industrial
Automation Wiring and Grounding Guidelines.”
Publication 1734-UM005B-EN-P - June 2001
Appendix
B
Default Data Maps
I/O messages are sent to (consumed) and received from (produced)
the POINT I/O modules. These messages are mapped into the
processor’s memory. This appendix lists the default maps for 1734
POINT I/O modules.
1
For more information:
See page:
1734-IB2 Sink Input Module
B-2
1734-IB4 Sink Input Module
B-3
1734-IV2 Source Input Module
B-4
1734-IV4 Source Input Module
B-5
1734-OB2E Electronically Protected Output Module
B-6
1734-OB4E Electronically Protected Output Module
B-7
1734-OW2 Relay Sink/Source Output Module
B-8
1734-IE2C Analog Current Input Module
B-9
1734-OE2C Analog Current Output Module
B-11
1734-IE2V Analog Voltage Input Module
B-12
1734-OE2V Analog Voltage Output Module
B-14
1734-IA2 120V ac Input Module
B-15
1734-IM2 220V ac Input Module
B-16
1734-OA2 120/220V ac Output Module
B-17
Publication 1734-UM005B-EN-P - June 2001
B-2
Default Data Maps
1734-IB2 Sink Input Module Product Code: 0081h
Data Map:
Output size: 0 bytes; Input size: 1 byte
7
6
5
Produces (Rx)
4
3
2
Not used
Consumes (Tx)
1
0
CH1
state
CH0
state
No consumed data
Where: CH0 = input channel 0, CH1 = input channel 1; 0 = OFF, 1 = ON
Configuration Data:
7
6
5
4
Reserved
3
2
1
0
Filter
Meaning of bits described below
Filter Values
Value
Definition
00
1ms
01
0.33ms
10
3ms
11
10ms
Default: H00 (1ms)
Diagnostic Data
Possible Error Codes:
Publication 1734-UM005B-EN-P - June 2001
Error Code
Error Type
16
Module incorrect or missing. Reported on channel 0 and applies to
whole module.
Default Data Maps
B-3
1734-IB4 Sink Input Module Product Code: 0082h
Data Map:
Output size: 0 bytes; Input size: 1 byte
7
6
Produces (Rx)
5
4
Not used
Consumes (Tx)
3
2
CH3
state
CH2
state
1
0
CH1
state
CH0
state
No consumed data
Where: CH0 = input channel 0, CH1 = input channel 1; 0 = OFF, 1 = ON
Configuration Data:
7
6
5
4
Reserved
3
2
1
0
Filter
Meaning of bits described below
Filter Values
Value
Definition
00
1ms
01
0.33ms
10
3ms
11
10ms
Default: H00 (1ms)
Diagnostic Data
Possible Error Codes:
Error Code
Error Type
16
Module incorrect or missing. Reported on channel 0 and applies to
whole module.
Publication 1734-UM005B-EN-P - June 2001
B-4
Default Data Maps
1734-IV2 Source Input
Module
Product Code: 0083h
Data Map:
Output size: 0 bytes; Input size: 1 byte
7
6
5
Produces (Rx)
4
3
2
Not used
Consumes (Tx)
1
0
CH1
state
CH0
state
No consumed data
Where: CH0 = input channel 0, CH1 = input channel 1; 0 = OFF, 1 = ON
Configuration Data:
7
6
5
4
Reserved
3
2
1
0
Filter
Meaning of bits described below
Filter Values
Value
Definition
00
1ms
01
0.33ms
10
3ms
11
10ms
Default: H00 (1ms)
Diagnostic Data
Possible Error Codes:
Publication 1734-UM005B-EN-P - June 2001
Error Code
Error Type
16
Module incorrect or missing. Reported on channel 0 and applies to
whole module.
Default Data Maps
1734-IV4 Source Input
Module
B-5
Product Code: 0084h
Data Map:
Output size: 0 bytes; Input size: 1 byte
7
6
Produces (Rx)
5
4
Not used
Consumes (Tx)
3
2
CH3
state
CH2
state
1
0
CH1
state
CH0
state
No consumed data
Where: CH0, CH1, CH2, CH3 = input channel 1; 0 = OFF, 1 = ON
Configuration Data:
7
6
5
4
Reserved
3
2
1
0
Filter
Meaning of bits described below
Filter Values
Value
Definition
00
1ms
01
0.33ms
10
3ms
11
10ms
Default: H00 (1ms)
Diagnostic Data
Possible Error Codes:
Error Code
Error Type
16
Module incorrect or missing. Reported on channel 0 and applies to
whole module.
Publication 1734-UM005B-EN-P - June 2001
B-6
Default Data Maps
1734-OB2E Electronically
Protected Output Module
Product Code: 0085h
Data Map:
Output size: 1 bytes; Input size: 0 byte
7
6
5
4
)Produces (Rx)
3
2
1
0
No produced data
Consumes (Tx)
Not used
CH1
state
CH0
state
Where: CH0 = output channel 0, CH1 = output channel 1; 0 = OFF, 1 = ON
Configuration Data:
7
6
Reserved
5
4
3
2
RM
NL
IV
IA
1
0
FV
FA
Meaning of bits described below
FA = Fault Action
FV = Fault Value
Value
Definition
Value Definition
0
Fault Value
0
OFF
1
Hold Last State
1
ON
IA = Idle Action
IV = Idle Value
Value
Definition
Value Definition
0
Idle Value
0
OFF
1
Hold Last State
1
ON
NL = No Load Enble
RM = Reset Mode
Value Definition
Value Definition
0
Disable
0
Latch
1
Enable
1
Auto Retry
Default: H10 (Default: Fault/Idle value = OFF, No load, Latch)
Diagnostic Data
Possible Error Codes:
Publication 1734-UM005B-EN-P - June 2001
Code
Error Type
4
Overload
6
Wire Break
16
Module incorrect or missing. Reported on channel 0, applies to whole module.
Default Data Maps
1734-OB4E Electronically
Protected Output Module
B-7
Product Code: 0086h
Data Map:
Output size: 1 bytes; Input size: 0 byte
7
6
5
4
)Produces (Rx)
3
2
1
0
No produced data
Consumes (Tx)
Not used
CH3
state
CH2
state
CH1
state
CH0
state
Where: CH0, CH1, CH2, CH3; 0 = OFF, 1 = ON
Configuration Data:
7
6
Reserved
5
4
3
2
RM
NL
IV
IA
1
0
FV
FA
Meaning of bits described below
FA = Fault Action
FV = Fault Value
Value
Definition
Value Definition
0
Fault Value
0
OFF
1
Hold Last State
1
ON
IA = Idle Action
IV = Idle Value
Value
Definition
Value Definition
0
Idle Value
0
OFF
1
Hold Last State
1
ON
NL = No Load Enble
RM = Reset Mode
Value Definition
Value Definition
0
Disable
0
Latch
1
Enable
1
Auto Retry
Default: H10 (Default: Fault/Idle value = OFF, No load, Latch)
Diagnostic Data
Possible Error Codes:
Code
Error Type
4
Overload
6
Wire Break
16
Module incorrect or missing. Reported on channel 0, applies to whole module.
Publication 1734-UM005B-EN-P - June 2001
B-8
Default Data Maps
Product Code: 0087h
1734-OW2 Relay
Sink/Source Output Module Data Map:
Output size: 1 bytes; Input size: 0 byte
7
6
5
4
)Produces (Rx)
3
2
1
0
No produced data
Consumes (Tx)
Not used
CH1
state
CH0
state
Where: CH0 = output channel 0, CH1 = output channel 1; 0 = OFF, 1 = ON
Configuration Data:
7
6
5
4
Reserved
3
2
IV
IA
1
0
FV
FA
Meaning of bits described below
FA = Fault Action
FV = Fault Value
Value
Definition
Value Definition
0
Fault Value
0
OFF
1
Hold Last State
1
ON
IA = Idle Action
IV = Idle Value
Value
Definition
Value Definition
0
Idle Value
0
OFF
1
Hold Last State
1
ON
Default: H00 (Default: Fault/Idle value = OFF)
Diagnostic Data
Possible Error Codes:
Publication 1734-UM005B-EN-P - June 2001
Code
Error Type
16
Module incorrect or missing. Reported on channel 0, applies to whole module.
Default Data Maps
1734-IE2C Analog Current
Input Module
B-9
Product Code: 0018h
Data Map:
Output size: 0 Words; Input size: 2 Words
7
6
5
4
Produces (Rx)
3
2
1
0
Input Channel 0
Input Channel 1
Consumes (Tx)
No consumed data
Configuration Data:
7
6
5
4
Reserved DF
3
2
AD
R
Engineering Units Low (high byte)
Default value = 06h
Engineering Units Low (low byte)
Default value = 66h
Engineering Units High (high byte)
Default value = 3Fh
Engineering Units High (low byte)
Default value = FFh
Low Alarm Threshold (high byte)
Default value = 0Ch
Low Alarm Threshold (low byte)
Default value = 29h
High Alarm Threshold (high byte)
Default value =40h
High Alarm Threshold (low byte)
Default value = A3h
1
0
Notch Filter NF
Meaning of bits described below
NF = Notch Filter Values
Value
Definition
00
50Hz
01
60Hz (default)
10
250Hz
11
500Hz
AD = Alarm Disable
R = Range
Value
Definition
Value
Definition
0
Enable (default)
0
4 to 20mA (default)
1
Disable
1
0 to 20mA
Publication 1734-UM005B-EN-P - June 2001
B-10
Default Data Maps
DF = Definition
Value
Definition
000
No filtering (default
001
5ms
010
10ms
011
50ms
100
100ms
101
250ms
110
500ms
111
1s
Diagnostic Data
Possible Error Codes:
Publication 1734-UM005B-EN-P - June 2001
Code
Error Type
2
Undercurrent
3
Overcurrent
6
Wire Break
7
High Alarm Exceed
8
Low Alarm Exceed
16
Module incorrect or missing. Reported on channel 0, applies to whole module.
Default Data Maps
1734-OE2C Analog Current
Output Module
B-11
Product Code: 0019h
Data Map:
Output size: 2 Word; Input size: 0 Word
7
6
5
4
Produces (Rx)
3
2
1
0
Output Channel 0
Output Channel 1
Consumes (Tx)
No consumed data
Configuration Data:
7
6
5
4
Reserved
3
2
AD
R
1
0
IA
Engineering Units Low (high byte)
Default value = 06h
Engineering Units Low (low byte)
Default value = 66h
Engineering Units High (high byte)
Default value = 1Fh
Engineering Units High (low byte)
Default value = FFh
Fault Value (high byte)
Default value = 00
Fault Value (low byte)
Default value = 00
Idle Value (high byte)
Default value = 00
Idle Value (low byte)
Default value = 00
FA
Meaning of bits described below
FA = Fault Action
IA = Idle Value
Value
Definition
Value
Definition
0
Hold Last State
0
Hold Last State
1
Fault Value (default)
1
Idle Value (default)
R = Range
AD = Alarm Disable
Value
Definition
Value
Definition
0
4 to 20mA (default)
0
Enable (default)
1
0 to 20mA
1
Disable
Diagnostic Data
Possible Error Codes:
Code
Error Type
6
Wire Break
16
Module incorrect or missing. Reported on channel 0, applies to whole module.
Publication 1734-UM005B-EN-P - June 2001
B-12
Default Data Maps
1734-IE2V Analog Voltage
Input Module
Product Code: 0018h
Data Map:
Output size: 0 Words; Input size: 2 Words
7
6
5
4
Produces (Rx)
3
2
1
0
Input Channel 0
Input Channel 1
Consumes (Tx)
No consumed data
Configuration Data:
7
6
5
4
Reserved DF
3
2
AD
R
Engineering Units Low (high byte)
Default value = 06h
Engineering Units Low (low byte)
Default value = 66h
Engineering Units High (high byte)
Default value = 3Fh
Engineering Units High (low byte)
Default value = FFh
Low Alarm Threshold (high byte)
Default value = 0Ch
Low Alarm Threshold (low byte)
Default value = 29h
High Alarm Threshold (high byte)
Default value =40h
High Alarm Threshold (low byte)
Default value = A3h
1
0
Notch Filter NF
Meaning of bits described below
NF = Notch Filter Values
Publication 1734-UM005B-EN-P - June 2001
Value
Definition
00
50Hz
01
60Hz (default)
10
250Hz
11
500Hz
AD = Alarm Disable
R = Range
Value
Definition
Value
Definition
0
Enable (default)
0
-10 to +10V (default)
1
Disable
1
0 to +10V
Default Data Maps
B-13
DF = Definition
Value
Definition
000
No filtering (default
001
5ms
010
10ms
011
50ms
100
100ms
101
250ms
110
500ms
111
1s
Diagnostic Data
Possible Error Codes:
Code
Error Type
2
Undercurrent
3
Overcurrent
6
Wire Break
7
High Alarm Exceed
8
Low Alarm Exceed
16
Module incorrect or missing. Reported on channel 0, applies to whole module.
Publication 1734-UM005B-EN-P - June 2001
B-14
Default Data Maps
1734-OE2V Analog Voltage
Output Module
Product Code: 0019h
Data Map:
Output size: 2 Word; Input size: 0 Word
7
6
5
4
Produces (Rx)
3
2
1
0
Output Channel 0
Output Channel 1
Consumes (Tx)
No consumed data
Configuration Data:
7
6
5
4
Reserved
3
2
AD
R
1
0
IA
Engineering Units Low (high byte)
Default value = 06h
Engineering Units Low (low byte)
Default value = 66h
Engineering Units High (high byte)
Default value = 1Fh
Engineering Units High (low byte)
Default value = FFh
Fault Value (high byte)
Default value = 00
Fault Value (low byte)
Default value = 00
Idle Value (high byte)
Default value = 00
Idle Value (low byte)
Default value = 00
FA
Meaning of bits described below
FA = Fault Action
IA = Idle Value
Value
Definition
Value
Definition
0
Hold Last State
0
Hold Last State
1
Fault Value (default)
1
Idle Value (default)
R = Range
AD = Alarm Disable
Value
Definition
Value
Definition
0
-10 to +10V (default)
0
Enable (default)
1
0 to +10V
1
Disable
Diagnostic Data
Possible Error Codes:
Publication 1734-UM005B-EN-P - June 2001
Code
Error Type
6
Wire Break
16
Module incorrect or missing. Reported on channel 0, applies to whole module.
Default Data Maps
1734-IA2 120V ac Input
Module
B-15
Product Code: 1111h
Data Map:
Output size: 0 bytes; Input size: 1 byte
7
6
5
Produces (Rx)
4
3
2
Not used
Consumes (Tx)
1
0
CH1
state
CH0
state
No consumed data
Where: CH0 = input channel 0, CH1 = input channel 1; 0 = OFF, 1 = ON
Configuration Data:
7
6
5
4
Reserved
3
2
1
0
Filter
Meaning of bits described below
Filter Values
Value
Definition
00
1ms
01
0.33ms
10
3ms
11
10ms
Default: H00 (1ms)
Diagnostic Data
Possible Error Codes:
Code
Error Type
16
Module incorrect or missing. Reported on channel 0, applies to whole module.
Publication 1734-UM005B-EN-P - June 2001
B-16
Default Data Maps
1734-IM2 220V ac Input
Module
Product Code: 1112h
Data Map:
Output size: 0 bytes; Input size: 1 byte
7
6
5
Produces (Rx)
4
3
2
Not used
Consumes (Tx)
1
0
CH1
state
CH0
state
No consumed data
Where: CH0 = input channel 0, CH1 = input channel 1; 0 = OFF, 1 = ON
Configuration Data:
7
6
5
4
Reserved
3
2
1
0
Filter
Meaning of bits described below
Filter Values
Value
Definition
00
1ms
01
0.33ms
10
3ms
11
10ms
Default: H00 (1ms)
Diagnostic Data
Possible Error Codes:
Publication 1734-UM005B-EN-P - June 2001
Code
Error Type
16
Module incorrect or missing. Reported on channel 0, applies to whole module.
Default Data Maps
1734-OA2 120/220V ac
Output Module
B-17
Product Code: 1113h
Data Map:
Output size: 1 bytes; Input size: 0 byte
7
6
5
4
)Produces (Rx)
3
2
1
0
No produced data
Consumes (Tx)
Not used
CH1
state
CH0
state
Where: CH0 = output channel 0, CH1 = output channel 1; 0 = OFF, 1 = ON
Configuration Data:
7
6
5
4
Reserved
3
2
IV
IA
1
0
FV
FA
Meaning of bits described below
FA = Fault Action
FV = Fault Value
Value
Definition
Value Definition
0
Fault Value
0
OFF
1
Hold Last State
1
ON
IA = Idle Action
IV = Idle Value
Value
Definition
Value Definition
0
Idle Value
0
OFF
1
Hold Last State
1
ON
Default: H00 (Default: Fault/Idle value = OFF)
Diagnostic Data
Possible Error Codes:
Code
Error Type
16
Module incorrect or missing. Reported on channel 0, applies to whole module.
Publication 1734-UM005B-EN-P - June 2001
B-18
Default Data Maps
Publication 1734-UM005B-EN-P - June 2001
Numerics
1734-IA2 data map B-15
1734-IB2 data map B-2
1734-IB4 data map B-3
1734-IE2C data map B-9
1734-IE2V data map B-12
1734-IM2 data map B-16
1734-IV2 data map B-4
1734-IV4 data map B-5
1734-OA2 data map B-17
1734-OB2E data map B-6
1734-OB4E data map B-7
1734-OE2C data map B-11
1734-OE2V data map B-14
1734-OW2 data map B-8
A
address switch 1-2
B
bit-stuffing, an example using 1734-OB2E modules
4-16
bit-stuffing, example of 4-7
bit-stuffing, memory management 4-16
C
CE directives P-3
channel related diagnostics 4-13
check_configuration telegram 4-6
configure the adapter 1-3
configure the I/O modules 1-3
connecting wiring 2-6
connection plug wiring 2-9
connector, network 1-4
control byte 4-4
D
data map, 1734-IA2 B-15
data map, 1734-IB2 B-2
data map, 1734-IB4 B-3
data map, 1734-IE2C B-9
data map, 1734-IE2V B-12
data map, 1734-IM2 B-16
data map, 1734-IV2 B-4
data map, 1734-IV4 B-5
data map, 1734-OA2 B-17
data map, 1734-OB2E B-6
data map, 1734-OB4E B-7
data map, 1734-OE2C B-11
data map, 1734-OE2V B-14
data map, 1734-OW2 B-8
diagnostic indicators 1-4
DIN rail mounting 2-2
directives, European Union P-3
G
grouped module, control word bit 6 4-5
grouping 5-1, 5-2
grouping example 5-3
H
how to in a single byte 5-2
I
indicators, diagnostic 1-4
M
memory management, using bit-stuffing 4-16
modules in the configuration tool 5-2
N
network connector 1-4
node address 1-2
P
product code 4-4
PROFIBUS module description 1-1
R
replacing an adapter module 2-4
S
set_parameter data 4-3
specifications A-1
starting the adapter 1-2
T
types of 5-1
W
wiring connections 2-8
wiring, connection plug 2-9
Publication 1734-UM005B-EN-P - June 2001
2
Publication 1734-UM005B-EN-P - June 2001
Allen-Bradley
Publication Problem Report
If you find a problem with our documentation, please complete and return this form.
Pub. Title/Type
POINT I/O PROFIBUS Adapter Module User Manual
Cat. No.
1734-APB
Check Problem(s) Type:
Pub. No.
1734-UM005B-EN-P
Pub. Date
June 2001
Part No.
Internal Use Only
Describe Problem(s)
Technical Accuracy
text
Completeness
procedure/step
illustration
definition
info in manual
example
guideline
feature
(accessibility)
explanation
other
What information is missing?
illustration
info not in manual
Clarity
What is unclear?
Sequence
What is not in the right order?
Other Comments
Use back for more comments.
Your Name
Location/Phone
Return to: Marketing Communications, Allen-Bradley., 1 Allen-Bradley Drive, Mayfield Hts., OH 44124-6118Phone:(440) 646-3176
FAX:(440) 646-4320
Publication ICCG-5.21- August 1995
PN 955107-82
PLEASE FASTEN HERE (DO NOT STAPLE)
PLEASE FOLD HERE
NO POSTAGE
NECESSARY
IF MAILED
IN THE
UNITED STATES
BUSINESS REPLY MAIL
FIRST-CLASS MAIL PERMIT NO. 18235 CLEVELAND OH
POSTAGE WILL BE PAID BY THE ADDRESSEE
1 ALLEN-BRADLEY DR
MAYFIELD HEIGHTS OH 44124-9705
PLEASE REMOVE
Other Comments
Back Cover
Publication 1734-UM005B-EN-P - June 2001 7
Supersedes 1734-UM005A-EN-P - January 2001
PN 957564-10
© 2001 Rockwell International Corporation. Printed in the U.S.A.