1
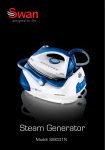
STEAM STATION
Model: G-1120ST-PI
Instruction Manual
IMPORTANT SAFEGUARDS
1. Make sure to read all the safety precautions
below and look at the illustrations before you
start using the appliance.
2. Use the appliance for its intended use only
described in this manual.
3. The appliance is intended for household use
only.
4. In order to protect against the risk of electric
short, do not immerse iron power base into
water or any other liquids.
5. Connect the appliance only to an alternating
current of the voltage specified on the rating
plate and only to an earthed socket. To avoid
a circuit overload, do not operate another
high wattage appliance in the same circuit.
6. Turn the appliance to OFF before plugging
or unplugging from outlet. Never yank cord
to disconnect from outlet; instead, grasp plug
and pull to disconnect.
7. Do not allow power cord or supply hose to
touch hot surface.
8. Unplug the appliance from main socket
before filling or empty or when not in use.
9. Do not operate the appliance with a
damaged cord or if the appliance has been
dropped or damaged. To avoid a hazard
such as the risk of electric shock, do not
disassemble the appliance, it must be taken
to a qualified serviceman or manufacturer or
its service agent for examination and repair.
Incorrect re-assembly can cause a risk of
electric shock when the iron is used.
10. Place the iron out of reach of children; close
supervision is necessary for any appliance
being used by or near children. Do not leave
the iron unattended while connected to the
supply mains.
11. During use, always place its stand on a
stable, level and horizontal surface or ironing
board.
12. Always place the iron on its stand, and do
not allow the hot soleplate touch power cord
or supply hose.
13. Burns can occur from touching hot metal
parts, hot water or steam. Use caution when
using the appliance.
14. Never use the iron facing towards people
because the steam can cause burns.
15.
The surfaces are liable to get hot during
use.
16. Never twist the supply hose during use.
17. The appliance must be used and rested on a
stable, level and horizontal surface.
18 .The iron shall be placed on the separate
stand only.
19. When placing the iron on its stand, ensure
that the surface on which the stand is placed
is stable.
20. The iron is not to be used if it has been
dropped, if there are visible signs of damage
or if it is leaking.
21. The iron must not be left unattended while it
is connected to the supply mains.
22. The appliance must be rest or stocked on a
stable, level and horizontal surface.
23. During use, if no water in the reservoir, it will
produce noise<70dBA.
24. This appliance can be used by children aged
from 8 years and above and persons with
reduced physical, sensory or mental
capabilities or lack of experience and
knowledge if they have been given
supervision or instruction concerning use of
the appliance in a safe way and understand
the hazards involved, children shall not play
with the appliance. cleaning and user
maintenance shall not be made by children
without supervision.
25. Keep the iron and its cord out of reach of
children less then 8 years of age when it is
energized or cooling down.
PARTS AND FEATURES
1
2
3
4
5
6
7
8
9
Steam button assembly (Steam button, lock button)
Steam trigger
Temperature control dial
Power cord/supply hose
Power Cord
Power switch
Steam rate selector
Pump working indicator light
12
Water tank
14
13
10 Iron rest
11 Soleplate
15
12 Heating indicator light
13 Steam button
16
14 Steam lock
15 Filter
16 Water tank Lock
1
2
3
4
11
10
9
5
6
8
7
FABRIC SETTING CHART
Temperature
Setting(Low)
Fabric
Ironing
Instructions
Steam selection
Setting
(Medium)
Synthetics, silk,
Nylon, Arcylic,
Acetate
Dry Iron on the
opposite side of
the fabric
Off
(MAX) /
Wool, Polyester
Rayon Cotton,
Linen
Use a press cloth
and Steam iron on
the opposite
side of the fabric
Iron while fabric
is still damp
MIN
MIN ~
Ironing Temperature
Setting Guide
1.
2.
3.
4.
5.
Follow up the ironing instructions on the garment label. If there is not any
instruction label, but you know what kind of the fabric is, please refer to the
fabric setting chart described in this instruction manual.
The fabric setting chart is only valid for plain fabrics and not for materials to
which finishes, glosses etc, have been applied. Textile to which some kind
of finish has been applied (gloss, crinkle, relief etc.) is best ironed at lower
temperature.
First sort laundry according to ironing temperature setting guide: wool with
wool, cotton with cotton, etc.
The iron heats up more quickly than it cools down. Therefore, start ironing
articles that need to be ironed at the lowest temperature, such as those
made of synthetic fibres.
If the fabric consists of various kinds of fibres, always select the
temperature required by the most delicate fibres, i.e. the lowest
temperature. for example, an article consists of 60% polyester and 40%
cotton, according to the fabric setting chart it should be ironed for polyester
and without steam.
6. If you do not know what kind of fabric the article is made of, iron a piece of
the material which is not visible when you wear to find out the appropriate
temperature for your articles.
7. Pure woollen fabrics (100% wool) should be ironed with the iron setting to
steam ironing position. It is advisable to set the temperature control button
to “Max” position and use a dry pressing cloth.
8. When steam ironing woollen fabrics, shiny patches may occur. You may
prevent this by turning the article inside out and ironing the reverse side.
9. After using of steam ironing for cotton fabrics, do not iron articles required
by lower temperature (such as nylon etc.) Immediately. It is advisable to
adjust the temperature button to the lower setting, waiting for about 2-4
minutes till the power indicator light turn off,and then you can start ironing.
IMPORTANT HINTS
Do not fill water tank with vinegar, starch, chemically descaled water or
descaling agents.
Prepare the appliance for use
1.
Check if the voltage indicated in the rating plate corresponding to the main
voltage in your home.
2. Fully unwind and straighten the power cord and the supply hose.
3. Place the appliance on a stable, level and horizontal surface such as ironing
board.
4. Iron should be well placed on iron rest,(shown as Fig.A) do not allow its
soleplate touch iron test. (shown as Fig.B)
Fig.A
Fig.B
Fill Water Tank
1.
Press upwards the release button at the
water tank and slide the detachable water
tank outwards from the base. (See Fig.1)
2. Fill the water tank up to or below the
“MAX” fill line with the clean tap water.
(See Fig.2)(You can take filter out of the
opening for filling water into water
tank,(See Fig.3) or fill water into water
tank directly with the filter existing in the
opening.
3. Replace the water tank into the base unit
again. It will be locked in place with the
base unit until a “click” sound is provided.
(See Fig.4)
4. Always pour out the remaining water
after use.(See Fig.5)
Note: When the water level reaches a low
level or empty, pump will provide
sound to indicate refilling. It must stop to
use the appliance immediately and
refill water tank as the methods
mentioned above.
Fig.1
MAX
Fig.2
Fig.3
Click
Fig.4
Fig.5
Steam function setting
After power on, if steam is necessary, set temperature control dial to steam
ironing position according to fabric setting chart.When temperature control dial
is set at “
” or “Max” position. Steam adjustable knob should be set at
“MIN” ~ ”
” range. When temperature control dial is set at “
” , steam
adjustable knob should be set at “MIN” position. If water leakage happens
during use, set temperature control dial at higher temperature position or steam
adjustable knob to lower position. When temperature control dial set at “ ”, do
not use steam ironing, otherwise, water leakage will happen from soleplate.
Steam ironing cannot be activated until heating indicator light turn off.
Steam ironing
1.
2.
3.
4.
5.
6.
7.
Fill the water tank with clean tap water refer to above filling instructions.
(Note: For every first use of the filter, please immerse it in water for better
performance)
Connect the appliance into suitable socket outlet. Press the power switch at
base control panel until power indicator light turn on to show the
connection of the power supply.
Set temperature control dial at the steam ironing setting according to fabric
setting chart. Temperature indicator light ON to indicate the iron being
heated up(Refer to image), when temperature indicator light OFF ,the
required temperature has been reached, the unit is ready for use. During
use, it is normal that the temperature indicator light will cycle from ON to
OFF and then OFF to ON.This shows that steam chamber automatically
keep temperature constant.
Before every first use, it is proposed that the iron will be cleaned as
following procedure: Select adjustable steam knob to Max steam setting,
hold the iron and press the steam switch underneath the handle for 20
seconds, and then release for 30 seconds, do this for two cycles. When
heating indicator light OFF, it is ready for ironing.
During steam ironing, adjust steam rate according to requirements based
on above steam function setting
After use, turn temperature control dial to “MIN” ,put iron back onto base
unit, Switch off the unit by pressing the power switch and then unplug the
appliance from the outlet.
Take water tank out of the base unit and pour out remaining water from
water tank.
NOTES:
a. For every first time use, it is normal that a slightly vibration sound may be
occurred from electrical pump inside the base unit for a few seconds when
steam ironing started. It is because the water has been being just pumped
into the heating chamber. If this abnormal conditions continuously happen
for more than 30 seconds, please check whether water tank and filter
assembled correctly or not.
b. Every first time use, please set adjustable steam knob to Max position to
allow steam escape quickly
c. After steam ironing,place iron back onto the base unit,a"sh"sound may be
heard along with little of visible smoke,this does not indicate defect or
hazard.
Dry Ironing
1.
Connect the appliance to a suitable socket outlet. Press the power switch at
base control panel until power indicator light turn ON to show the
connection of the power supply.
2. Turn steam control dial at the iron to desired position according to fabric
setting chart, The iron’s red light will go on to indicate the iron being heated
up. It will go off when the required temperature is reached. During the dry
ironing stage, the temperature indicator will cycle from ON to OFF and then
OFF to ON automatically due to the iron is automatically heat preservation.
3. After use, turn the temperature control dail to “MIN” position. Then, turn off
the power switch and unplug the appliance from the outlet.
Note:When changing your Temp setting from high setting to lower, it is
proposed that not to start ironing immediately since there may be any
burns caused on your fabrics by high temperature. It is proposed no to use the
unit until temperature indicator light on iron unit ON . Otherwise burns will be
caused to your fabrics.
Vertical steam ironing
Follow the steam ironing process, and then hold the iron in vertical position
between 5cm and 15cm away from the hanged fabrics. Press down steam
switch, this will create vertical steam. This feature is especially used for
removing creases from hanging clothes and curtains. Never directly perform
steam ironing on people. (See Fig.6)
NOTE: During vertical steam ironing, hold the iron in a less than 90°angle from
vertical position. Do not use the appliance continuously for more than 2
minutes. Otherwise, water leaking will happen.
Fig.6
Steam button auto lock function
If long time steam ironing is needed, please press down lock button and then
push it afterward, steam button will automatically lock. Steam will escape
continuously. If you want to stop steam escaping, please push lock button
forward.
Notice: When steam button auto lock function is activated, users can not left
steam escape unattended. During steam ironing, if water has been used up,
pump will provide sound to indicate refill. Please unlock lock button and refill
again.
Pump overheat protection function
Overheat protection equipment installed in pump. When water in water tank
has been used up. Pump will be hot, and when temperature of pump being
heated up exceeds its’ Max limit, overheat protection will automatically activate
to protect pump being burnt. At this moment, pump working indicator light will
turn off, please turn power switch on base unit off at first ,and then check if
water tank has sufficient water or water tank has been well assembled. If not,
please refill water tank and re-assemble water tank well into base unit. 30
minutes later, it will re-work again.
Replacement of Filter
Follow below procedure to replace the filter:
i. Slide out the water tank from the base,(See Fig.7) and then take out the
filter from the water tank. (See Fig.8)
ii. Replace it with a new one.
iii. Re-install it into the water tank. (See Fig.9)
iv. Fill water into water tank up to MAX fill level,(See Fig.10)and slide water
tank into the power base again. (See Fig.11)
Fig.7
Fig.8
Fig.9
Click
MAX
Fig.11
Fig.10
Anti-Scale system
1.
Filter is designed to reduce the build-up of limescale which occurs during
steam ironing, this will prolong the working life of your iron. However,
please note that the filter will not completely stop the natural process of
limescale build-up.
2. Filter should be replaced with a new one after about 2 months’ use.(base:
1.0L / times x 2 times / week) Working life of filter depends on local water
you used. If working life exceed its Max limit, the appliance can be used
continuously, but limescale will be built up in steam chamber. So it is
proposed to replace with a new filter as soon as possible or mix your tap
water with distilled water at a proportion of 50%,if your local water is hard .
Emptying and storing
1.
After use, slide out the water tank and pour out all the remaining water.
(See Fig.12)
2. Disconnect the appliance from the power supply and allow the appliance to
cool down for 60 minutes at least.
3. The iron should be placed on the iron rest plate of the power base and they
should be stored together.
Cleaning and Maintenance
1. Unplug the appliance from the main supply and let the iron cool down.
2. Clean the iron with a damp cloth. (See Fig.13)
3. Wipe off scale and any other deposits on the soleplate with a damp
cloth or non-brasive(liquid) cleaner.
4. Never clean the appliance under the tap water.
5. Since steam vents are smaller,to protect steam vents being blocked by
limescale for long time use,please clean steam vents by a 1.5mm steel pin
after every 3-5 monthes’s use.(See Fig.14)
Fig.12
Fig.13
Fig.14
Trouble Shooting Guide
Problems
Iron won’t
heat
Possible causes
Solution
The appliance has not been
plugged into power supply
Connect the appliance to
power supply.
The temperature control
button is set at “Min”
position.
Select the required ironing
temperature as indicated in
the temperature guide table.
The appliance has not been
switched on
Switch appliance on by
pressing the power switch
button at the base
Any unknown
factor
Stop use and take the appliance
to manufacturer or its service
agent for examination
The water tank is empty
The appliance
Filter does not be placed in
does not
water tank.
produce
steam
Water tank does not
assembled well
Adjustable steam knob set
at “MIN”
Pump overheat protection
During steam ironing,
temperature control dial set
Droplets of
at a lower temperature
water escape position for steam ironing
from the
Desired temperature has
soleplate
not been reached
Adjustable steam knob
set too high
Refill the water tank
Assemble filter into water tank
Pull water tank out and then
insert it back into base unit, it
will be lock in place until a “click”
sound produced.
Set adjustable steam knob
to MAX
Allow it cool down for 30 minutes
Select the required
temperature according to
fabric setting chart.
It is ready for use when
heating indicator light on
base unit turn off.
Set adjust steam knob to the
lower position
Product specification table
Voltage
Wattage
220 -240V~ 50Hz/60Hz
2000 - 2400W
Exposed power cord length
1.7-1.8M
Max water capacity
1000ml
Steam Rate
90g
Product net weight
2.85Kg
Size of iron
260 x 107.5 x 139.2mm
(L X W X H)
Size of base
383 x 215x 150mm
(L X W X H)
Size of gift box
408 x 242 x 312mm
(L X W X H)
Never dispose of your product with other
household waste. Please inform yourself about
the local rules on the separate collection of
electrical and electronic products. The correct
disposal of your old product helps prevent
potentially negative consequences on the
environment and human health.