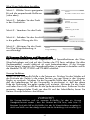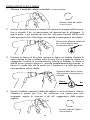
1
OK Industries
Division of Jonard Industries Corp.
Batter y Powered Tool
Electric Power ed Tools
(Model # PTX —
note: battery sold
separately)
(Models # PTX-1, PTX-2,
PTX-1BF, PTX-2BF, PTX-2-UK, PTX2BF-UK, PTX-48, PTX-48BF)
Batter y Char ger
Long-Life Batter y
(Models # PTX-BC1
PTX-BC2 or PTX-BC2-UK)
(Model # PTX-B)
Holster
Batter y Power ed Tool Kits
(Model # H-1000)
(Models # PTX-KIT1, PTX-KIT2, PTX-KIT2I or PTX-KIT2-UK include: PTX tool,
PTX-BC1, PTX-BC2 or PTX-BC2-UK charger, and two PTX-B batteries)
P/N 21553 REV D
PTX Series
Ergonomic Wire Wrapping Tools - User’s Guide
Outils de connexion enroulée ergonomiques - Mode d'emploi
Ergonomische Wire-Wrap Geräte - Bedienanleitung
Attrezzi ergonomici per Wire Wrapping - Guida per l’utilizzatore
TABLE OF CONTENTS
Overview . . . . . . . . . . . . . . . . . . . .
Product Selection . . . . . . . . . . . . . .
Operation . . . . . . . . . . . . . . . . . . .
Product Specifications . . . . . . . . . . .
Spare Parts . . . . . . . . . . . . . . . . . .
Warranty, Repair & Technical Support
Wire Wrapping Technology . . . . . . .
.
.
.
.
.
.
.
.
.
.
.
.
.
.
.
.
.
.
.
.
.
.
.
.
.
.
.
.
.
.
.
.
.
.
.
.
.
.
.
.
.
.
.
.
.
.
.
.
.
.
.
.
.
.
.
.
.
.
.
.
.
.
.
.
.
.
.
.
.
.
.
.
.
.
.
.
.
.
.
.
.
.
.
.
.
.
.
.
.
.
.
.
.
.
.
.
.
.
.
.
.
.
.
.
.
.
.
.
.
.
.
.
.
.
.
.
.
.
.
.
.
.
.
.
.
.
.
.
.
.
.
.
.
.
.
.
.
.
.
.
.
.
.
.
.
.
.
.
.
.
.
.
.
.
.
.
.
.
.
.
.
.
.
.
.
.
.
.
.
.
.
.
.
.
.
.2
.3
.4
.8
10
11
11
Over view: PTX Series Tools from OK Industries
OK Industries, the worldwide leader in wire wrapping products, offers a
complete range of manual, electric and battery powered tools, bits & sleeves
and other accessories. For more information, please visit our web site at
www.okindustries.com.
The PTX Series wire wrapping and unwrapping tools have been developed to
address ergonomic requirements and boost operator efficiency. With worker
safety in mind, we consulted a certified ergonomist and added features
including the lightweight, well-balanced construction, a dual-finger short-throw
trigger, and a long handle to mitigate pressure on the palm. These features
result in an industry-leading design from a comfort and safety standpoint. The
recessed wrap/unwrap switch is easy to access at the rear face of
the housing, and is protected from impact if the tool
is dropped. The rugged housing encases
a high-torque planetary gear drive
that can wrap or unwrap 18 to 30
AWG (1.0 to .25mm) wire, and
is compatible with the full range
of industry standard bits and
sleeves.
The PTX Series is
available in 115 volt and 230V volt
electric versions, as well as a
battery version that is
powered by a long-life 3.6V
NiMH cell and incorporates
an LED indicator for low
battery voltage. Backforce is
an available option, to help
prevent overwrapping caused by
excessive force applied by the
operator; batteries and battery
chargers are sold individually.
2
Product Selection
Item
Description
PTX
Battery Powered Wrap/Unwrap Tool
PTX-1
115V Electric Wrap/Unwrap Tool
PTX-1BF
115V Electric Wrap/Unwrap Tool with Backforce
PTX-2
230V Electric Wrap/Unwrap Tool
PTX-2BF
230V Electric Wrap/Unwrap Tool with Backforce
PTX-B
Battery for PTX Battery Powered Tool
PTX-BC1
115V Charger for PTX Batteries
PTX-BC2
230V Charger for PTX Batteries
PTX-KIT1
115V kit including: PTX Battery Tool, PTX-BC1 Charger, and two
(2) PTX-B Batteries
PTX-KIT2
230V kit including: PTX Battery Tool, PTX-BC2 Charger, and two
(2) PTX-B Batteries
H-1000
Holster (cordura pouch which holds a PTX or a manual squeeze tool;
manual wrap/unwrap tool; bit/sleeve; and 2-3 other misc. tools)
PTX-48
48V Electric Wrap/Unwrap Tool
PTX-48BF
48V Electric Wrap/Unwrap Tool with Backforce
PTX-2-UK
230V Electric Wrap/Unwrap Tool with UK Plug
PTX-2BF-UK
230V Electric Wrap/Unwrap Tool with Backforce and UK Plug)
PTX-KIT2I
230V kit including:PTX Battery Tool, PTX-BC2 Charger, and one
PTX-B battery)
PTX-KIT2-UK
230V kit including: PTX Battery Tool, PTX-BC2-UK Charger, and
two (2) PTX-B batteries)
The product range includes both battery and electric powered tools, as well as
proprietary batteries and a battery charger. Tool selection is generally determined by
user preference, and includes considerations such as availability of electrical power
outlets and the convenience of cordless operation. The battery powered version (model
# PTX) employs one battery (model # PTX-B) which requires a charger (PTX-BC1, PTXBC2 or PTX-BC2-UK); these are sold separately, but can also be purchased with the tool
in a kit (see models and descriptions above).
All of the tools in the PTX Series have reversible motors, allowing the user
to use the tools to unwrap a wire wrapped termination. (NOTE: unwrapping requires a
separate bit and sleeve or a dedicated manual unwrapping tool; DO NOT attempt to unwrap
with a bit and sleeve that is used for wrapping, this will damage the bit and sleeve and is
detrimental to the reliability of the connection). The Backforce option, available only in the PTX48BF (48V), PTX-1BF (115V) and the PTX-2BF and PTX-2BF-UK (230V) electric powered tools,
is a feature that helps to prevent overwrapping. A spring that is mounted internally in the
collet/shaft assembly of the tool helps to absorb pressure that an untrained operator may apply
while wrapping (see page 12 for an illustration of an overwrapped termination).
3
Operation
A) Preparing The Wrap/Unwrap Tool
The PTX Series power tools require no assembly and are ready for use out of the
box. The battery powered version (model # PTX) requires an initial charge of the
battery of at least 8 hours. The LED will illuminate to indicate that the battery is
present in the charger. The LED remains lit as long as the battery is present, even
after full charging, but there is no danger in leaving the battery in the charger
for longer than eight hours. Simply plug the charger (115V
model # PTX-BC1 or 230V model # PTX-BC2 or PTX-BC2-UK)
into a power outlet and place the
battery (model # PTX-B) in the charger.
After approximately 500-750 uses,
the battery should be disposed of
and replaced.
Charger
(shown with Battery)
Terminals
of Batter y
When the battery is not mounted in the tool or charger, it is important to ensure
that the terminals are not shorted by any metal or other conductive object. The
battery could otherwise short circuit, potentially causing fire, burns or battery
damage. The PTX-B is an environmentally friendly NiMH battery which can be
disposed of along with normal refuse.
CAUTION!
Do not attempt to use any other manufacturer’s battery with the PTX, as it will not
perform properly and can damage the tool. Always use model # PTX-B batteries,
employing the model # PTX-BC1, PTX-BC2 or PTX-BC2-UK battery charger, both
manufactured by OK Industries.
Do not use the battery charger with a damaged cord or plug, or in wet or damp or
any outdoor environments, or in the vicinity of sinks or basins or other water
sources. Do not disassemble charger, there are no consumer serviceable parts
inside.
4
When the battery is charged, remove it from the charger, insert it into the
handle of the PTX tool and rotate the end cap of the battery 90 degrees in the
counterclockwise direction to engage the cap (see below);
then pull back slightly to lock it into the handle of the
tool. To remove battery from tool, press inward
on battery end cap, rotate battery
Tool Handle
90 degrees clockwise and pull out.
Battery
End Cap
Rotate Counter-clockwise to
engage battery
Rotate Clockwise to Remove
Battery
When the battery begins to lose its charge (at about 3.3V), the red LED indicator
located on the top surface of the tool will begin to glow. At this point,
depending on the application, the battery should still contain enough charge for
several hundred additional wrapping or unwrapping operations.
B) Wire Wrapping
Wire wrapping technology, when properly used, provides an interconnection
that is superior in reliability than one made using alternative methods, yet is
easily removed if necessary. It is a process by which a bare end of a wire is
wrapped in a tight helix around a metal terminal. This requires the use of a
proper bit and sleeve in conjunction with the power tool. The selection of the
bit and sleeve should follow the process outlined below:
BIT & SLEEVE SELECTION PROCESS:
1. Determine wire gauge: 18 to 30 AWG
2. Determine terminal post dimensions:
a) Telecom: usually .045” X .045” or .030” X .060”
b) Other: usually .025” X .025”
3. Decide on regular vs. modified wrap:
a) Telecom: usually regular wrap, 22-26 AWG wire
b) Electronics: usually modified wrap, 26-30 AWG wire
4. Once bit is identified, sleeve is listed alongside bit part number in
the Bit & Sleeve Chart (see page 9 -10)
Additional information regarding regular vs. modified wraps, and
other technical aspects relating to the wrapping process and the resulting
interconnection, can be found in the Section below entitled “Wire
Wrapping Technology.”
5
BIT & SLEEVE INSTALLATION:
1. Loosen collet nut by rotating it in the clockwise direction (see below).
Loosen Collet Nut
in Clockwise Direction
2. Insert the bit into the chuck, and rotate the bit while pushing it into
the chuck, until the bit is seated in the drive mechanism. At this point,
the smaller of the two holes in the face of the bit will be at the
twelve o’clock position.
Small hole in bit face in twelve
o’clock position
3. Place the sleeve over the bit and slide the sleeve into the collet. Rotate the
sleeve as you are sliding it into the chuck until the sleeve has engaged with
the locating pin (internal to the collet); the sleeve will then slide further in
and, when fully seated, will be such that the spouted portion of the sleeve
end is in the twelve o’clock position.
Spouted portion of sleeve in
twelve o’clock position
Sleeve
Bit
4. Tighten the collet by rotating the collet nut in the counterclockwise
direction.
The tool is now ready for use. To make a wire wrapped
connection, follow the instructions and helpful hints on the pages ahead.
6
Tighten Collet Nut in Counterclockwise
Direction
MAKING A WIRE WRAP CONNECTION:
Step 1
Select the Proper Bit and
Sleeve (see above).
Step 1
Bit, Sleeve and
Pre-Stripped Wire
Step 2
Insert the wire into the
Wire Slot.
Step 2
Wire Insertion
Step 3
Anchor the Wire.
Step 3
Wire Anchoring
Step 4
Insert terminal into
large center hole of bit.
Step 4
Terminal Insertion
Step 5
Actuate the wrapping tool.
The connection is completed.
Step 5
Finished Connection
C) Unwrapping and Backfor ce
Unwrapping and backforce are special features for wire wrapping, and are
available with the PTX Series. All models of the tool, whether battery or electric
powered, have the unwrapping feature built in; the backforce feature is optional,
and is found in models PTX-1BF, PTX-2BF, PTX-2BF-UK and PTX-48BF.
USING THE UNWRAPPING FEATURE:
Install unwrapping bit/sleeve in the collet. Flip the switch on the rear face of the
tool into the down position, which reverses the motor direction to change from
‘wrap’ to ‘unwrap.’ Place the unwrapping bit/sleeve over the terminal so that
the hook-shaped portion of the unwrapping bit is positioned to engage the top
end of the wire coil that is to be unwrapped. Squeeze the trigger of the tool
and hold it stationary, allowing the bit to do the work of unraveling the wire coil.
Be sure to remove all of the unwrapped wire from the bit and the work area prior
to proceeding to additional unwrap operations.
CAUTION!
Unwrapping requires a special bit and sleeve or a dedicated manual
unwrapping tool; DO NOT attempt to unwrap with a bit and sleeve that is used
for wrapping only, this will damage the bit and sleeve and is detrimental to the
reliability of the connection.
7
USING THE BACKFORCE FEATURE:
‘Backforce’ is a feature that compensates for the unnecessary application of downward
pressure on the tool during wire wrapping. A wire wrapping tool will perform the
wrapping function properly without any downward pressure applied, in fact, such
pressure results in a tendency to ‘overwrap’ (refer to Section entitled Wire Wrapping
Technology for further details). A tool with the backforce option contains a spring
mechanism to absorb downward pressure that an unskilled operator might apply.
Product Specifications:
Power Tools*
Item
PTX
PTX-1
PTX-1BF
PTX-2
PTX-2BF
PTX-2-UK
PTX-2BF-UK
PTX-48
PTX-48BF
Voltage
3.6V battery powered
115V electric
115V electric
230V electric
230V electric
230V electric
230V electric
48V electric
48V electric
Size
1.5"
1.5"
1.5"
1.5"
1.5"
1.5"
1.5"
1.5"
1.5"
W
W
W
W
W
W
W
W
W
X
X
X
X
X
X
X
X
X
6"
6"
6"
6"
6"
6"
6"
6"
6"
H
H
H
H
H
H
H
H
H
X
X
X
X
X
X
X
X
X
6.5"
6.5"
6.5"
6.5"
6.5"
6.5"
6.5"
6.5"
6.5"
L
L
L
L
L
L
L
L
L
Weight
0.74 lb.
0.86 lb.
0.86 lb.
1.0 lb.
1.0 lb.
1.0 lb.
1.0 lb.
0.86 lb.
0.86 lb.
RPM
3700
3700
3700
4200
4200
4200
4200
3700
3700
*Typical operating cycle is 2 seconds on and 18 seconds off (varies with application).
Batter y Char gers
Item
PTX-BC1
PTX-BC2
PTX-BC2-UK
Voltage
115V electric
230V electric
230V electric
Size
4.0" round X 2.7" high
4.0" round X 2.7" high
4.0" round X 2.7" high
Weight
0.7 lb.
0.7 lb.
0.7 lb.
Cord
6.0” long
6.0” long
6.0” long
Batter y
Item
PTX-B
Voltage
3.6V
Size
1" diameter X 4.5" L
Weight
0.36 lb.
CAUTION! — ALL PTX TOOLS
This equipment is for indoor industrial/laboratory use only at altitudes up to 2000 m, maximum RH of 80% up to 31°C
decreasing to 50% RH at 40°C. Pollution degree 2 in accordance with IEC644. Installation category II. Temperature range:
5°C to 40°C. The user must be aware that, if the equipment is used in any manner not specified by the manufacturer, safety
may be impaired. When using electric tools, basic safety precautions should be used to reduce the risk of fire, electric shock
and personal injury. Keep work areas clean, well lit, off limits to children and visitors. Disconnect unused tools and store them.
Never use accessories or attachments unless recommended by the original manufacturer. If the supply cord is damaged, or
servicing is required, this work must be carried out by the manufacturer or its service agent or a similarly qualified person in
order to avoid a hazard.
230V Tools (PTX-2 & PTX-2BF)
If required, replace the fuse in the main unit with the correct type: T250mA. If a fused mains plug is to be used, ensure
the fuse is of the high breaking capacity type and has a value of no more than: 1A 250V. Any mains plug that requires
removal or replacement must be destroyed by removal of any fuse and fuse carrier and disposed of immediately, as a
plug with bared wires is hazardous if engaged in a live socket.
48V PTX Tools
The 48V tools include cords without plugs, and must never be connected to anything but a 48V A/C or D/C power
source.
8
Bits and Sleeves Chart (AWG) Inches
REGULAR
WIRE
MODIFIED
BIT
GAUGE
PART NO.
SLEEVE
PART NO.
18
•
KB18
P194
• WB20M P194LN
20
20-22 •
KB2075
P2224
22
• WB22MLD P212
22
•
KB22LT
P2224
22
•
KB22
P2224
22
• WB2275M P2224
22-24 •
KB224LH P2224
22-24 •
KB224-1 P2224
22--24 •
KB224
P2224
22-24
• WB224M P2224
24
•
*KB2444 P3032LN
24
• WB24DH P2224
24
•
KB24
P2426
24
• *WB24SM P3032LN
24
• WB24DHM P2224
24-26
• WB2426M P2224
KB2466 OK8519
24-26 •
26
•
*KB2639 P26LN
26
•
KB26
P2426
• *WB26SM P26LN
26
26
•
WB26M P2224
26
•
*WB2644MP3032LN
26
•
WB2669M P2426
28
•
WB2870M P2426
• *WB2829M P3032L
28-29
• *SB30MSH-B P3032
30
•
*SB30MMK P3032
30
30-32
• *WB3032M P3032
* These tools are recommended for .025”
MAXIMUM MINIMUM MAXIMUM TERMINAL
TERMINAL
INSULATION TERMINAL TERMINAL
HOLE EFFECTIVE HOLE
DIAMETER DIAGONAL DIAGONAL
DEPTH
RADIUS DIAMETER
INCHES
INCHES
INCHES
INCHES INCHES INCHES
—
0.06
0.073
1
0.059
0.042
0.073
1
—
0.042
0.073
1
0.58
0.049
0.073
1
—
0.061
0.085
1
—
0.054
0.073
0.75
0.052
0.049
0.074
1
—
0.061
0.085
1
—
0.054
0.073
1
—
0.054
0.073
0.807
0.05
0.049
0.074
1.25
—
0.024
0.043
1
0.046
0.054
0.073
1.75
—
0.055
0.074
0.75
0.044
0.024
0.043
0.75
0.05
0.049
0.068
1.12
0.046
0.054
0.073
0.75
—
0.054
0.065
1
—
0.023
0.038
0.75
—
0.058
0.073
1
0.031
0.023
0.038
0.75
0.046
0.054
0.073
1
0.046
0.024
0.043
0.75
0.041
0.053
0.068
1
0.034
0.053
0.068
1
0.036
0.033
0.038
0.75
0.027
0.031
0.035
0.75
0.023
0.031
0.035
0.75
0.027
0.034
0.038
0.75
square terminals on .100” centers.
0.15
0.15
0.123
0.136
0.125
0.117
0.132
0.117
0.111
0.111
0.121
0.083
0.117
0.1
0.098
0.118
0.118
0.098
0.068
0.1
0.075
0.118
0.098
0.109
0.103
0.091
0.064
0.064
0.064
0.075
0.075
0.075
0.075
0.086
0.075
0.075
0.086
0.075
0.075
0.075
0.044
0.075
0.075
0.044
0.069
0.075
0.066
0.04
0.075
0.04
0.075
0.044
0.069
0.07
0.04
0.036
0.036
0.04
Extended Length (5“) Bits and Sleeves Chart
REGULAR
WIRE
MODIFIED
BIT
SIZE
AWG mm.
PART NO.
22 0.65
24 0.50
26 0.40
•
•
•
KB22-5
KB24-5
KB26-5
MAXIMUM MINIMUM MAXIMUM TERMINAL
INSULATION TERMINAL TERMINAL
HOLE
SLEEVE
DIAGONAL DIAGONAL DIAGONAL
DEPTH
PART NO.
In.
In.
In.
In.
P2224-5
P2426-5
P2426-5
—
—
—
0.54
0.55
0.58
.073
.073
.073
Insulated Sleeves (1000V dielectric coating)
WIRE SIZE
PART NO.
22-24 AWG
24-26 AWG
P2224-INS (or P2224-5INS for 5” version)
P2426-INS (or P2426-5INS for 5” version)
9
.750
.750
.750
TERMINAL
EFFECTIVE HOLE
RADIUS DIAMETER
In.
In.
.117
.100
.100
.075
.075
.075
Spare Parts for PTX Series
2
5
4
7
1
3
6
ITEM PART
DESCRIPTION
1
21362 Low-battery PCB assembly, PTX
2
21328
16746
16772
16771
Motor,
Motor,
Motor,
Motor,
ITEM PART
PTX battery tool
PTX-1 or PTX-1BF
PTX-2 or PTX-2BF
PTX-48 or PTX-48BF
3
21363 Wrap-Unwrap switch assembly,
PTX battery tool
21403 Wrap-Unwrap switch assembly,
PTX electric tools
4
21676 Clutch assembly, PTX tools w/backforce
21677 Clutch assembly, PTX tools w/out backforce
5
16765 Gear box assembly, PTX-1, PTX-1BF,
PTX-48 or PTX-48BF
10
DESCRIPTION
6
21406 Trigger switch assembly, PTX battery
tool
20419 Trigger switch, electric wrap tools
7
21407 Collet assembly (Collet, collet nut
and set screw)
8
16762 Power PCB assembly, PTX-1 or
PTX-1BF (not shown)
18416 Power PCB assembly, PTX-2 or
PTX-2BF (not shown)
18217 Power PCB assembly, PTX-48 or
PTX-48BF (not shown)
9
12446 Power cord, PTX-1 or PTX-1BF
(not shown)
21402 Power cord, PTX-2 or PTX-2BF
(not shown)
21475 Power cord, PTX-2BF-UK or PTX-2BF-UK
(not shown)
Warranty, Repair and Technical Support
Each PTX power wrapping and unwrapping tool, as well as the battery chargers, are covered with
a six-month warranty from date of purchase.
Repair service and technical support are available from OK Industries, Tuckahoe, NY 10707, phone:
914-793-0700, fax: 914-793-4527. Service and repair may be obtained from one of our many
worldwide facilities, and technical support can be provided by our representatives and distributors.
Please visit our web site at www.okindustries.com to contact a representative in your region.
Wire Wrapping Technology
Wire wrapping is a method of making a wire connection by coiling the bare wire around the sharp
corners of a terminal under mechanical tension. The technology was developed as an alternative to
soldering, which presents various safety and reliability problems in many applications. A principal
advantage of wire wrapping is that it provides a high-reliability connection that is also easily
removed to correct or modify a wiring layout.
Wire wrapping requires a rotating tool, called a bit. The bit has a large central hole in the face for
slipping the tool over the terminal, and it marks the point around which the bit rotates. The top of
the bit has a slot which accepts the wire to be wrapped. The front or face of the bit is shaped to
apply the proper tension to the wire during the wrap. This
contour also guides the wire into a helix that is tightly
spaced and uniform. During use, the bit is housed in a
metal tube called a sleeve. The sleeve retains the bit in the
collet of a wire-wrapping tool, which drives the bit as it
spins. It also keeps the wire in the slot during the wrapping
process and protects the worker from the rotating bit.
Wire wrapping subjects the wire to tremendous tension
and compression forces, typically 100,000 PSI at the
terminal’s edge. The wrapping action causes the oxide layer on both wire and terminal to be
crushed or sheared, resulting in a clean, oxide-free metal-to-metal contact. The number of turns is a
function of the length of uninsulated wire. Pre-stripped wire saves time and improves reliability, since
there is a specified minimum number of’ turns required for each particular wire size. These relate
directly to electrical conductivity and mechanical strength. However, if a manufacturing specification
requires a wrap with more turns, wire with correspondingly longer lengths of bare wire or further
hand stripping may be required.
There are two types of wire-wrapped connections: regular and modified. In a “regular” connection,
only bare (uninsulated) wire is wrapped around the terminal. A “modified” wrap, which requires a
modified bit, coils about 1.5 turns of insulated wire around the terminal in addition to the bare wire.
This method greatly improves a connection’s mechanical stability, such as resistance to vibration, in
cases where the wire diameter is small and its mechanical strength is low. The most important
element to consider when choosing either wrap method, then, is the size wire being used. A
standard wrap is generally used for 24 AWG and larger diameter wires; a modified wrap is
sometimes used for 26 AWG and smaller wires, and is used almost exclusively for 28 to 30 AWG
wires.
The four most common wire wrapping mistakes are (a) pressing too hard, which can lead to
overwrapping; (b) not pushing the stripped end of the wire all the way into the bit, which causes
insufficient turns; (c) removing the tool before completing the wrap, which can result in spiral and
open wraps; and (d) choosing the wrong bit and sleeve, which can cause problems ranging from
pigtails to loose wraps.
11
TABLE DES MATIERES
Présentation générale
Choix d'un produit
. . . . . . . . . . . . . . . . . . . . . . . . . . . . . . . . . . . . . . . . . . 12
. . . . . . . . . . . . . . . . . . . . . . . . . . . . . . . . . . . . . . . . . . . . 13
Fonctionnement . . . . . . . . . . . . . . . . . . . . . . . . . . . . . . . . . . . . . . . . . . . . . . . 14
Spécifications d'un produit . . . . . . . . . . . . . . . . . . . . . . . . . . . . . . . . . . . . . . . 18
Pièces détachées . . . . . . . . . . . . . . . . . . . . . . . . . . . . . . . . . . . . . . . . . . . . . . 20
Garantie, réparations et support technique
. . . . . . . . . . . . . . . . . . . . . . . . . . . 21
Technologie du Wrapping . . . . . . . . . . . . . . . . . . . . . . . . . . . . . . . . . . . . . . . 21
Présentation générale : Les Outils PTX d'OK Industries
OK Industries, le leader mondial des outils de câblage par fil enroulé (wire wrapping), offre une
gamme complète d'outils manuels, électriques et sur batterie, de douilles et guide-fil et autres
accessoires. Pour plus d'informations, visitez notre site Web: www.okindustries.com.
La série d'outils de câblage et de décâblage à fil enroulé PTX a été développée pour répondre aux
demandes d'ergonomie et augmenter l'efficacité de l'opérateur. Ayant la sécurité du travailleur à
l'esprit, nous avons consulté un ergonomiste certifié et ajouté des caractéristiques comme une
construction légère et bien équilibrée, un déclencheur à faible course à deux doigts et une grande
poignée pour répartir la pression dans la paume. Ces caractéristiques conduisent à une conception
leader de l'industrie du point de vue du confort et de la sécurité. L'interrupteur
d'enroulement/déroulement en retrait est facile à manipuler en face arrière du boîtier et
est protégé contre les impacts si l'outil tombe. Le boîtier robuste
comporte une boîte de vitesse à engrenages
planétaires qui peut enrouler ou dérouler du
fil de diamètre 1,0 mm à 0,25 mm (18 à
30 AWG), et est compatible avec la
gamme complète de douilles et guide-fil
standards de l'industrie. La série PTX est
disponible en versions électriques 115
volts et 230 volts ainsi que sur batterie
longue durée NiMH 3,6 V et intègre un
indicateur DEL de tension de batterie
faible. Une limitation de force est
disponible en option pour éviter un
enroulement excessif causé par une
force
excessive
appliquée
par
l'opérateur. Les batteries et les chargeurs
de batteries sont vendus séparément.
12
Choix du produit
Référence
Description
PTX
Outil Wrap/Unwrap alimenté sur batterie
PTX-1
Outil Wrap/Unwrap 115V
PTX-1BF
Outil Wrap/Unwrap 115 V avec limiteur de force
PTX-2
Outil Wrap/Unwrap 230 V
PTX-2BF
Outil Wrap/Unwrap 230 V avec limiteur de force
PTX-B
Batterie pour outil PTX alimenté sur batterie
PTX-BC1
Chargeur 115 V pour batteries PTX
PTX-BC2
Chargeur 230 V pour batteries PTX
PTX-KIT1
Kit 115 V comprenant : outil PTX alimenté sur batterie, chargeur
PTX-BC1 et deux (2) batteries PTX-B
PTX-KIT2
Kit 230 V comprenant : outil PTX alimenté sur batterie, chargeur
PTX-BC2 et deux (2) batteries PTX-B
H-1000
Holster (pochette cuir pour un outil PTX ou un outil de serrage manuel,
outil manuel Wrap/Unwrap, douille et guide-fil et 2 ou 3 autres outils).
PTX-48
Outil Wrap/Unwrap 48 V
PTX-48BF
4Outil Wrap/Unwrap 48 V avec limiteur de force
PTX-KIT2I
Kit 230 V comprenant:outil PTX alimenté sur batterie, chargeur PTXBC2 , et une (1) batterie PTX-B)
La gamme de produits comporte des outils alimentés sur batterie et sur secteur, ainsi que
des batteries et un chargeur de batteries spécifiques. Le choix des outils est
généralement déterminé par la préférence de l'utilisateur et prend en compte des
éléments comme la disponibilité de prises de courant et la facilité du fonctionnement sur
batterie. La version alimentée sur batterie (modèle PTX) utilise une batterie (modèle PTXB) et nécessite un chargeur de batterie (PTX-BC1 ou PTX-BC2) qui sont vendus
séparément mais qui peuvent aussi être achetés avec l'outil sous forme de kit (voir
modèles et descriptions plus haut).
Tous les outils de la série PTX ont des moteurs réversibles, permettant à l'utilisateur de
démonter une connexion enroulée. (Note : ce démontage nécessite une douille et un
guide-fil séparés ou un outils manuel spécial de déroulement. NE PAS essayer de
déconnecter avec une douille et un guide-fil qui sont utilisés pour l'enroulement, ceci
pourrait endommager la douille et le guide-fil et compromettre la fiabilité de la
connexion. L'option de limitation de force (Backforce) disponible uniquement sur les
outils sur secteur PTX-1BF (115 V) et PTX-2BF (230 V), est une fonction qui permet
d'éviter un enroulement excessif. Un ressort monté à l'intérieur de l'assemblage
bague/axe de l'outil permet d'absorber la pression qu'un opérateur peu entraîné peut
appliquer lors de l'enroulement.
13
Fonctionnement
A) Préparation de l'outil d'enroulement/déroulement
Les outils de la série PTX ne nécessitent aucun assemblage et sont prêts à être
utilisés dès le déballage. La version alimentée sur batterie (modèle PTX) nécessite
une charge initiale de la batterie d'au moins 8 heures. La DEL s'allume pour
indiquer que la batterie est présente dans le chargeur. Elle reste allumée tant que
la batterie est présente, même une fois la charge complète, mais il n'y a aucun
danger à laisser la batterie dans le chargeur plus longtemps que
huit heures. Branchez simplement le chargeur (modèle 115 V
PTX-BC1 ou modèle 230 V PTX-BC2) dans une prise
de courant et placez la batterie dans le
chargeur. Après environ 500 à 750
utilisations, la batterie doit être retirée
et
remplacée.
Chargeur
(montré avec une batterie)
Ter minaisons
de batterie
Quand la batterie n'est pas montée dans l'outil ou le chargeur, il est important de
s'assurer que ses terminaisons ne sont pas mises en court circuit par un objet
métallique ou conducteur. Un court circuit de la batterie peut provoquer un incendie,
des brûlures ou endommager la batterie. La batterie PTX-B est un modèle NiMH qui
peut être jetée et incinérée sans effet nocif pour l'environnement.
ATTENTION!
N'essayez pas d'utiliser avec le PTX une batterie d'un autre fabricant, parce qu'elle
ne fonctionnerait pas correctement et pourrait endommager l'outil. Toujours utiliser
des batteries modèle PTX-B, avec le chargeur de batterie PTX-BC1 ou PTX-BC2 tous
fabriqués par OK Industries.
Ne pas utiliser la batterie avec un cordon ou une prise endommagés, dans un
environnement humide ou extérieur, ou à proximité de réservoirs ou bassins ou
d'autres sources d'eau. Ne pas démonter le chargeur, il n'y pas de composants
réparables à l'intérieur. .
14
Quand la batterie est chargée, la retirer du chargeur, l'insérer dans la poignée de
l'outil PTX et tourner le capuchon à l'extrémité de la batterie de 90 degrés dans le
sens inverse des aiguilles d'une montre pour engager le capuchon (voir ci-dessous),
puis le tirer légèrement en arrière pour le verrouiller dans la
poignée de l'outil. Pour retirer la batterie de l'outil, presser
vers l'intérieur le capuchon à l'extrémité de la batterie,
tourner la batterie de 90 degrés
dans le
sens des aiguilles d'une
montre
Poignée de l'outil
et la tirer vers l'extérieur.
Capuchon
de la
Tourner dans le sens inverse des
batterie
aiguilles d'une montre pour engager
la batterie.
Tourner dans le sens des aiguilles
d'une montre pour retirer la batterie.
Quand la batterie commence à être déchargée (à environ 3,3 V), l'indicateur
DEL rouge situé sur la face supérieure de l'outil commence à rougir. A ce
point, selon l'application, la batterie contient encore suffisamment d'énergie
pour plusieurs centaines d'enroulements ou de déroulements.
B) Connexion à fil enroulé (Wir e Wrapping)
La connexion à fil enroulé, lorsqu'elle est utilisée correctement, fournit une
interconnexion dont la fiabilité est supérieure à celle des autres méthodes tout
en étant facile à démonter si nécessaire. C'est un processus par lequel
l'extrémité dénudée d'un fil est enroulée en hélice serrée autour d'une
terminaison métallique. Ceci nécessite l'utilisation d'une broche et d'un mandrin
appropriés en plus de l'outil de bobinage. La choix de l’enrouleur et manchon
doit être effectué selon le processus indiqué ci-dessous :
CHOIX DE L’ENROULEUR ET DU MANCHON :
1. Déterminer la section du fil : 1,0 mm à 0,25 mm (18 à 30 AWG)
2. Déterminer les dimensions de la terminaison :
a) Télécom : habituellement 1,14 mm X 1,14 mm ou 0,76 mm X 1,52 mm
b) Autres : habituellement 0,63 mm X 0,63 mm
3. Se décider sur une connexion ordinaire ou modifiée :
a) Télécoms : habituellement une connexion ordinaire en fil 22 - 26 AWG
b) Electronique : habituellement une connexion modifiée en fil 26 - 30 AWG
4. Une fois l’enrouleur identifié le guide-fil est listé en regard du numéro de
référence de l’enrouleur dans le tableau des enrouleurs et manchons.
Des informations supplémentaires concernant les connexions ordinaires ou
modifiées et d'autres aspects techniques concernant le processus de connexion
par fil enroulé et les interconnexions obtenues peuvent être trouvées dans le
chapitre plus loin : "Technologie de connexion par fil enroulé".
15
INSTALLATION DE LA DOUILLE ET DU GUIDE-FIL :
1. Desserrer l'écrou de la bague en le tournant dans le sens inverse des aiguilles
d'une montre
Desserrer l'écrou de la bague dans le
sens des aiguilles d'une montre
2. Insérer le guide-fil dans le mandrin et tourner la douille tout en la poussant
dans le mandrin jusqu'à ce que le guide-fil soit placé dans le mécanisme
de commande. A ce point, le pus petit des deux trous en face du guide-fil
est en position douze heures.
Le petit trou en face du guide-fil est
en position douze heures
3. Placer le guide-fil sur la douille et glisser la douille dans la bague. Tourner la
douille lorsque vous la glissez dan le mandrin jusqu'à ce que la douille soit
engagée avec la broche de localisation (interne à la bague). La douille va
ensuite glisser encore et, une fois totalement en place, sera telle que la partie
en saillie de l'extrémité de la douille soit dans la position douze heures.
La portion en saillie de la douille est
en position douze heures
Sleeve
Bit
4. Serrer la bague en tournant l'écrou tournant dans le sens inverse des aiguilles
d'une montre. L'outil est maintenant prêt à être utilisé. Pour faire une connexion
par fil enroulé, suivre les instructions et lire les astuces utiles sur les pages qui
suivent.
Serrer l'écrou de la bague dans le
sens inverse des aiguilles d'une
montre
16
EFFECTUER UNE CONENXION PAR FIL ENROULE :
Etape 1
Choisir la douille et le guide-fil
appropriés (voir plus haut).
Etape 1
Bit, Sleeve et fil prédénudé
Etape 2
Insérer le fil dans le trou de fil.
Etape 2
Insertion du fil
Etape 3
Accrocher le fil.
Etape 3
Accrochage du fil
Etape 4
Insérer la terminaison dans le
grand trou de centrage du guide-fil.
Etape 5
Actionner l'outil de connexion.
La connexion est achevée.
Etape 4
Insertion de la terminaison
Etape 5
Connexion terminée
C) Déroulement et limitation de for ce
Le déroulement et la limitation de force sont des fonctions spéciales qui sont
disponibles sur la série PTX. Tous les modèles de l'outil, qu'ils soient sur batterie
ou sur secteur, ont la fonction déroulement intégrée. La fonction de limitation de
force est en option, et est disponible sur les outils PTX-1BF, PTX-2BF et PTX-48BF.
UTILISATION DE LA FONCTION DECONNEXION :
Installer la douille et le guide-fil de déroulement dans la bague. Placer
l'interrupteur sur la face arrière de l'outil dans la position bas, qui inverse le
sens du moteur d'enroulement à déroulement. Placer la douille et le guide-fils
de déroulement sur la terminaison de manière à ce que la partie en forme de
crochet du guide-fils de déroulement soit positionnée pour engager l'extrémité
en haut du bobinage qui doit être déroulé. Presser la gâchette de l'outil et la
maintenir appuyée, permettant au guide-fil de dérouler le fil. S'assurer de bien
retirer tout le fil déroulé du guide-fil et de la zone de travail avant de procéder
à d'autres opérations de déroulement.
ATTENTION !
Le déroulement nécessite un jeu de douille/guide-fil séparé ou un outil de
déroulement manuel, ou dans le cas de la série DFB, voir à la page 12, mais ne
JAMAIS essayer de déconnecter avec un jeu de douille/guide-fil qui est
normalement utilisé pour la connexion, parce que cela pourrait endommager la
douille et le guide-fil et compromettre la fiabilité de la connexion.
17
UTILISATION DE LA FONCTION LIMITATION DE FORCE :
La limitation de force (Backforce) est une fonction qui compense l'application non
nécessaire d'une pression vers le bas sur l'outil pendant l'enroulement du fil. Un outil de
connexion enroulée assure correctement l'enroulement du fil sans nécessiter de pression
vers le bas, en fait, une telle pression a tendance à sur-enrouler (voir le chapitre
Technologie de la connexion par fil enroulé pour de plus amples détails. Un outil avec
l'option limitation de force contient un mécanisme à ressort pour absorber la pression
vers le bas qu'un opérateur inexpérimenté peut appliquer.
SPECIFICATIONS DES PRODUITS :
Outils*
Référence
PTX
PTX-1
PTX-1BF
PTX-2
PTX-2BF
PTX-2-UK
PTX-2BF-UK
PTX-48
PTX-48BF
Tension
Taille
Alimenté sur batterie 3,6 V
secteur
secteur
secteur
secteur
secteur
secteur
secteur
secteur
115 V
115 V
230 V
230 V
230 V
230 V
48 V
48 V
38 mm X 152 mm X 165 mm
38 mm X 152 mm X 165 mm
38 mm X 152 mm X 165 mm
38 mm X 152 mm X 165 mm
38 mm X 152 mm X 165 mm
38 mm X 152 mm X 165 mm
38 mm X 152 mm X 165 mm
38 mm X 152 mm X 165 mm
38 mm X 152 mm X 165 mm
Poids
336 g
390 g
390 g
454 g
454 g
454 g
454 g
390 g
390 g
Tr/mn
3700
3700
3700
4200
4200
4200
4200
3700
3700
*Cycle de fonctionnement typique de 2 secondes "on" et de 18 secondes "off" (varie avec l'application).
Char geurs de batterie
Référence
PTX-BC1
PTX-BC2
PTX-BC2-UK
Tension
secteur 115 V
secteur 230 V
secteur 230 V
Taille
diamètre 102 mm x 69 mm
diamètre 102 mm x 69 mm
diamètre 102 mm x 69 mm
Poids
317 g
317 g
317 g
Cordon
1,80 m
1,80 m
1,80 m
Batterie
Item
PTX-B
Tension
3.6V
Taille
diamètre 254mm x 114mm
Poids
163 g
ATTENTION ! — TOUS OUTILS PTX
Cet équipement est destiné à une utilisation industrielle ou en laboratoire à l'intérieur, à des altitudes inférieures à 2000 m, avec une
humidité relative de 80 % jusqu'à 31 °C, se réduisant à 50 % à 40 °C. Degré de pollution 2 conformément à la norme IEC644.
Catégorie d'installation II. Gamme de températures : 5 °C à 40 °C. L'utilisateur est averti que si l'équipement est utilisé d'une
manière non spécifiée par le fabricant, la sécurité peut être compromise. Lors de l'utilisation d'outils électriques, les précautions
de sécurité de base doivent être prises pour réduire les risques d'incendie, choc électrique et blessures. Maintenez les zones de
travail propres, bien éclairées, hors d'atteinte des enfants et des visiteurs. Déconnectez les outils non utilisés et rangez-les.
N'utilisez jamais des accessoires ou des fixations qui ne sont pas recommandés par le fabricant. Si le cordon secteur est
endommagé, ou si une réparation est nécessaire, ce travail doit être effectué par le fabricant ou une personne habilitée pour ce service, ou encore une
personne qualifiée de façon similaire pour éviter tout danger..
PRECAUTIONS SUPPLEMENTAIRES ! — Outils 230 V (PTX-2 & PTX-2BF)
Si nécessaire, remplacez le fusible de l'unité principale par le modèle correct : T250 mA. Si une prise de courant à fusible est utilisée, assurezvous que le fusible a une capacité de coupure supérieure et a une valeur qui n'est pas supérieure à : 1 A, 250 V. Toute prise de courant
nécessitant un démontage ou un remplacement doit être détruite par démontage de tous les fusibles et porte fusibles et jetée immédiatement. De
même, une prise avec des fils dénudés est dangereuse si elle est branchée sur le secteur.
OUTILS PTX 48 V
Le pistolet 48 V est fournit avec un cordon sans prise et ne doit en aucun cas être raccordé à une alimentation autre que 48V
A/C ou D/C
18
Enrouleurs et Manchons (AWG) mm
REGULAR
WIRE
MODIFIED
BIT
GAUGE
PART NO.
18
20
20-22
22
22
22
22
22-24
22-24
22--24
22-24
24
24
24
24
24
24-26
24-26
26
26
26
26
26
26
28
28-29
30
30
30-32
•
•
•
•
•
•
•
•
•
•
•
•
•
•
•
•
•
•
•
•
•
•
•
•
•
•
•
•
•
SLEEVE
PART NO.
KB18
P194
WB20M P194LN
KB2075
P2224
WB22MLD P212
KB22LT
P2224
KB22
P2224
WB2275M P2224
KB224LH P2224
KB224-1 P2224
KB224
P2224
WB224M P2224
*KB2444 P3032LN
WB24DH P2224
KB24
P2426
*WB24SM P3032LN
WB24DHM P2224
WB2426M P2224
KB2466 OK8519
*KB2639 P26LN
KB26
P2426
*WB26SM P26LN
WB26M P2224
*WB2644MP3032LN
WB2669M P2426
WB2870M P2426
*WB2829M P3032L
*SB30MSH-B P3032
*SB30MMK P3032
*WB3032M P3032
MAXIMUM MINIMUM MAXIMUM TERMINAL
TERMINAL
INSULATION TERMINAL TERMINAL
HOLE EFFECTIVE HOLE
DIAMETER DIAGONAL DIAGONAL
DEPTH
RADIUS DIAMETER
INCHES
INCHES
INCHES
INCHES INCHES INCHES
—
1,499
—
1,473
—
—
1,321
—
—
—
1,27
—
1,168
—
1,118
1,27
1,168
—
—
—
0,787
1,168
1,168
1,041
0,863
0,914
0,685
0,584
0,685
1,524
1,067
1,067
1,245
1,549
1,372
1,245
1,549
1,372
1,372
1,245
0,609
1,372
1,397
0,609
1,245
1,372
1,372
0,584
1,473
0,584
1,372
0,609
1,346
1,346
0,838
0,787
0,787
0,863
1,854
1,854
1,854
1,854
2,159
1,854
1,88
2,159
1,854
1,854
1,88
1,092
1,854
1,88
1,092
1,727
1,854
1,651
0,965
1,854
0,965
1,854
1,092
1,727
1,727
0,965
0,889
0,889
0,965
25,4
25,4
25,4
25,4
25,4
19,05
25,4
25,4
25,4
20,5
31,75
25,4
44,45
19,05
19,05
28,45
19,05
25,4
19,05
25,4
19,05
25,4
19,05
25,4
25,4
19,05
19,05
19,05
19,05
3,81
3,81
3,124
3,454
3,175
2,972
3,353
2,972
2,819
2,819
3,073
2,108
2,972
2,54
2,489
2,997
2,997
2,489
1,727
2,54
1,905
2,997
2,489
2,769
2,616
2,311
1,626
1,626
1,626
1,905
1,905
1,905
1,905
2,184
1,905
1,905
2,184
1,905
1,905
1,905
1,118
1,905
1,905
1,118
1,753
1,905
1,676
1,016
1,905
1,016
1,905
1,118
1,753
1,778
1,016
0,914
0,914
1,016
* Ces outils sont recommandés pour des terminaisons carrées de 0,635mm espacées de 2,54mm.
Enrouleurs et Manchons grande longueur (127mm)
WIRE
REGULAR
MODIFIED
BIT
SIZE
AWG mm.
PART NO.
22 0.65
24 0.50
26 0.40
•
•
•
KB22-5
KB24-5
KB26-5
MAXIMUM MINIMUM MAXIMUM TERMINAL
INSULATION TERMINAL TERMINAL
HOLE
SLEEVE
DIAGONAL DIAGONAL DIAGONAL
DEPTH
PART NO.
In.
In.
In.
In.
P2224-5
P2426-5
P2426-5
—
—
—
13,72
13,97
14,73
1,854
1,854
1,854
Manchons isolés (revêtement diélectrique 1000 V)
WIRE SIZE
PART NO.
22-24 AWG
24-26 AWG
P2224-INS (ou P2224-5INS pour la version 127mm )
P2426-INS (ou P2224-5INS pour la version 127mm )
19
TERMINAL
EFFECTIVE HOLE
RADIUS DIAMETER
In.
In.
19,05 2,972
19,05 2,54
19,05 2,54
1,905
1,905
1,905
Pièces détachées pour la série PTX
2
5
4
7
1
3
6
REFERENCE
DESCRIPTION
REFERENCE
DESCRIPTION
1
21362 Circuit imprimé batterie faible, PTX
6
2
21328
16746
16772
16771
21406 Assemblage interrupteur gâchette,
outil PTX sur batterie
20419 Interrupteur gâchette, outils de
connexion sur secteur
7
3
21363 Assemblage commutateur WrapUnwrap, outils PTX sur batterie
21403 Assemblage commutateurWrapUnwrap outils PTX sur secteur
21407 Assemblage de bague (Bague, écrou
de bague et jeu de vis)
8
16762 Assemblage circuit imprimé alimentation,
PTX-1 ou PTX-1BF (non montré)
18416 Assemblage circuit imprimé alimentation,
PTX-2 ou PTX-2BF (non montré)
18217 Assemblage circuit imprimé alimentation,
PTX-48 ou PTX-48BF (non montré)
9
12446 Cordon secteur, PTX-1 ou PTX-1BF
(non montré)
21402 Cordon secteur, PTX-2 ou PTX-2BF
(non montré)
21475 Cordon secteur, PTX-2BF-UK ou
PTX-2BF-UK non montré)
Moteur,
Moteur,
Moteur,
Moteur,
outil PTX sur batterie
PTX-1 ou PTX-1BF
PTX-2 ou PTX-2BF
PTX-48 ou PTX-48BF
4
21676 Assemblage embrayage, outils PTX
avec limiteur de force
21677 Assemblage embrayage, outils PTX
sans limiteur de force
5
16765 Assemblage boîte de vitesse, PTX-1,
PTX-1BF, PTX-48 or PTX-48BF
20
Garantie, réparation et support technique
Chaque outil de connexion et de déconnexion à fil enroulé PTX, ainsi que les chargeurs de batterie
sont garantis six mois à partir de la date d'achat.
Un service de réparation et un support technique sont disponibles chez OK Industries ; visitez notre
site Web à www.okindustries.com pour contacter un représentant dans votre région.
Technologie de la connexion à fil enroulé (wire wrapping)
La connexion à fil enroulé est une méthode de connexion par enroulement sous tension mécanique
d'un fil dénudé autour des arêtes vives d'une terminaison. Cette technologie a été développée
comme alternative à la soudure qui pose divers problèmes de sécurité et de fiabilité dans de
nombreuses applications. Un avantage principal de la connexion par fil enroulé est qu'elle fournit
une connexion de haute fiabilité qui peut être facilement démontée pour corriger ou modifier
l'implantation d'un câblage.
TENSION MOYENNE
La connexion par fil enroulé nécessite un outil tournant
TENSION MAXIMUM
ZONE
appelé guide-fil (bit). Ce guide-fil a un grand trou central
NEUTRE
pour englober la terminaison et qui constitue l'axe de
rotation du guide-fil. La partie supérieure du guide-fil a
COMPRESSION
une fente dans laquelle passe le fil à enrouler. La face
MAXIMUM
avant du guide-fil est formée de façon à appliquer une
TERMINAISON
tension adéquate au fil lors de l'enroulement. Ce contour
guide également le fil pour qu'il forme une hélice à pas uniforme et serré. Lors de l'utilisation, le
guide-fil est logé dans un tube métallique, la douille (sleeve). Cette douille maintient le guide-fil
dans la bague de l'outil de connexion par fil enroulé qui entraîne le guide-fil en rotation. Elle
maintient aussi le fil dans la fente pendant le processus d'enroulement et protège l'opérateur de la
rotation du guide-fil.
La connexion par fil enroulé soumet le fil à des forces de traction et de compression importantes,
habituellement 700 newtons par mm2. L'enroulement écrase et cisaille la couche d'oxyde sur le fil
et la terminaison, réalisant un contact propre, sans oxyde, métal à métal. Le nombre de tours est
fonction de la longueur de fil dénudé. Du fil pré-dénudé permet d'économiser du temps et améliore
la fiabilité, parce qu'un nombre de tours minimum est nécessaire pour chaque taille de fil, en
fonction de la conductivité électrique et de la force mécanique. Toutefois, si une spécification du
fabricant nécessite un enroulement avec plus de tours, des fils avec des longueurs dénudées plus
grandes ou un dénudage manuel peuvent être nécessaires.
21
INHALTSVERZEICHNIS
Überblick . . . . . . . . . . . . . . . . . . . . . . . . . . .
Produktauswahl . . . . . . . . . . . . . . . . . . . . . . .
Bedienung . . . . . . . . . . . . . . . . . . . . . . . . . .
Produktspezifikationen . . . . . . . . . . . . . . . . .
Ersatzteile . . . . . . . . . . . . . . . . . . . . . . . . . .
Garantie, Reparatur & technische Unterstützung
Wire-Wrap-Technologie . . . . . . . . . . . . . . . . .
.
.
.
.
.
.
.
.
.
.
.
.
.
.
.
.
.
.
.
.
.
.
.
.
.
.
.
.
.
.
.
.
.
.
.
.
.
.
.
.
.
.
.
.
.
.
.
.
.
.
.
.
.
.
.
.
.
.
.
.
.
.
.
.
.
.
.
.
.
.
.
.
.
.
.
.
.
.
.
.
.
.
.
.
.
.
.
.
.
.
.
.
.
.
.
.
.
.
.
.
.
.
.
.
.
.
.
.
.
.
.
.
.
.
.
.
.
.
.
.
.
.
.
.
.
.
22
23
24
28
30
31
31
Over view: PTX Series Tools from OK Industries
OK Industries, marktführender Anbieter von Wire-Wrap-Produkten, bietet eine
vollständige Palette manueller, elektrisch und batteriebetriebener Geräte,
entsprechender Bits & Muffen und anderem Zubehör. Detaillierte Informationen
finden Sie auf unserer Website www.okindustries.com.
Die Wire-Wrap- und Unwrap Geräte der PTX Serie wurden entwickelt, um
ergonomischen Anforderungen zu entsprechen und die Bedienereffizienz zu
steigern. Mit Blick auf die Arbeitssicherheit haben wir einen zertifizierten
Ergonomiespezialisten konsultiert und zu dessen Empfehlungen weitere
Merkmale hinzugefügt; wie die leichte, gut ausbalancierte Konstruktion, der
Zwei-Finger Triggerschalter und einen verlängerten Griff zur Reduzierung des
Drucks auf den Handballen. Unter den Gesichtspunkten Komfort und Sicherheit
weisen diese Geräte damit ein marktführendes Design auf. Der versenkte
Wrap/Unwrap-Schalter kann problemlos auf der Rückseite des
Gehäuses betätigt werden und ist durch seine
Versenkung
gegen
Aufprallschäden
geschützt. Das stabile Gehäuse
umfaßt ein Planetengetriebe mit
hohem Drehmoment, mit dem 18
bis 30 AWG Drähte (1,0mm bis
25mm) verbunden oder getrennt
werden können. Das Gerät ist mit
allen Standard Bits & Muffen
kompatibel. Geräte der PTX Serie
sind als 115V und 230V Versionen
erhältlich
sowie
als
batteriebetriebenes Modell,
das von einer Langzeit- 3,6V
NiMH Batterie betrieben wird
und eine LED Anzeige für
Niederspannung
aufweist.
Gegendruck ist eine verfügbare
Option, die Overwrapping durch
zu hohe Kraftausübung des
Bedieners zu vermeiden hilft.
Batterien und Batterieladegeräte
werden separat angeboten.
22
Produktauswahl
Produkt
Beschreibung
PTX
Batteriebetriebenes Wrap/Unwrap Gerät
PTX-1
115V Elektrisch betriebenes Wrap/Unwrap Gerät
PTX-1BF
115V Elektrisch betriebenes Wrap/Unwrap Gerät mit Gegendruck
PTX-2
230V Elektrisch betriebenes Wrap/Unwrap Gerät
PTX-2BF
230V Elektrisch betriebenes Wrap/Unwrap Gerät mit Gegendruck
PTX-B
Batterie für PTX batteriebetriebenes Gerät
PTX-BC1
115V Ladegerät für PTX Batterien
PTX-BC2
230V Ladegerät für PTX Batterien
PTX-KIT1
115V Kit, einschließlich: PTX Batteriebetriebenes Gerät, PTX-BC1
Ladegerät und zwei (2) PTX-B Batterien
PTX-KIT2
230V Kit, einschließlich: PTX Batteriebetriebenes Gerät, PTX-BC2
Ladegerät und zwei (2) PTX-B Batterien
H-1000
Halfter (Tasche aus Cordura für ein PTX oder ein Handklemmgerät;
manuelles Wrap/Unwrap Gerät; Bit/Muffe und 2-3 sonstige Geräte.)
PTX-48
48V Elektrisch betriebenes Wrap/Unwrap Gerät
PTX-48BF
48V Elektrisch betriebenes Wrap/Unwrap Gerät mit Gegendruck
PTX-KIT2I
230V Kit, einschließlich: PTX Batteriebetriebenes Gerät, PTX-BC1
Ladegerät und ein (1) PTX-B Batterie
Die Produktpalette umfaßt sowohl elektrisch wie auch batteriebetriebene Geräte sowie
die entsprechenden Batterien und Batterieladegeräte. Die Auswahl des richtigen Geräts
wird hauptsächlich von Bedienervorlieben bestimmt und schließt solche Aspekte wie
Verfügbarkeit von elektrischer Stromversorgung vor Ort und die Bequemlichkeit des
schnurlosen Betriebs ein. Die batteriebetriebene Version (Modell PTX) arbeitet mit einer
Batterie (Modell PTX-B), und erfordert ein Ladegerät (PTX-BC1 oder PTX-BC2); diese
werden separat verkauft bzw. sind im Komplettpaket enthalten (siehe Modelle und
Beschreibung oben).
Alle Geräte der PTX Serie sind mit Umkehrmotoren ausgestattet, so daß mit den Geräten
Wire-Wrap-Verbindungen auch gelöst werden können. (Hinweis: Das UnwrapVerfahren erfordert separate Bits und Muffen oder ein spezielles manuelles Unwrap
Gerät; versuchen Sie NICHT, eine Verbindung mit Wrap-Bit oder Muffe zu trennen. Bit
und Muffe werden dabei beschädigt und die Zuverlässigkeit des Anschlusses
beeinträchtigt). Mit der Gegendruckoption (nur für die Elektro-Geräte PTX-48BF (48V),
PTX-1BF (115V) und PTX-2BF (230V) verfügbar) kann Overwrapping vermieden
werden. Eine Feder, die innerhalb der Patronen/Schafteinheit angebracht ist, nimmt
einen Teil der überschüssigen Kraft auf, die ein Bediener eventuell während des WrapVerfahrens ausübt.
23
Bedienung
A) Vorber eitung des Wrap/Unwrap Geräts
Die Geräte der PTX Serie werden betriebsbereit geliefert und erfordern keine
Montage. Die batteriebetriebene Version (Modell PTX) muß vor dem Ersteinsatz
mindestens 8 Stunden aufgeladen werden. Die LED Anzeige leuchtet und zeigt
damit an, daß die Batterie momentan im Ladegerät ist. Die LED Anzeige leuchtet
immer, wenn die Batterie geladen wird, auch nach Ablauf der 8 Stunden. Es
besteht kein Schadensrisiko, wenn Sie die Batterie über diesen
Zeitraum hinaus im Ladegerät lassen. Schließen Sie das Ladegerät
(115V Modell PTX-BC1 oder 230V Modell PTX-BC2)
einfach an eine Stromquelle an und
stecken Sie die Batterie (Modell Nr. PTXB) in das Ladegerät. Nach etwa 500750 Arbeitseinsätzen sollte die Batterie
entsorgt und eine neue eingesetzt
werden.
Ladegerät
(mit Batterie abgebildet))
Batteriepole
Wenn die Batterie sich weder im Gerät noch im Ladegerät befindet, müssen
Sie sicherstellen, daß die beiden Pole nicht durch ein Metallstück oder ein
anderes leitendes Material kurzgeschlossen werden. Sonst kann ein
Kurzschluß möglichweise zu Brand, Verbrennungen und Batterieschäden
führen. PTX-B ist eine umweltfreundliche NiMH Batterie, die problemlos
entsorgt werden kann.
VORSICHT!
Benutzen Sie keine Batterien eines anderen Herstellers in dem PTX Gerät, da dies
den ordungsgemäßen Betrieb des Geräts beinträchtigt und zu Geräteschäden
führen kann. Benutzen Sie immer die PTX-B Batterien und die PTX-BC1 oder PTXBC2 Batterieladegeräte, die beide von OK Industries hergestellt werden.
Benutzen Sie das Ladegerät nicht, wenn Kabel oder Stecker beschädigt sind, unter
feuchten Bedingungen, außerhalb von Gebäuden oder in der Nähe von
Spülbecken oder einer anderen Wasserzufuhr. Nehmen Sie das Ladegerät nicht
auseinander, es enthält keine austauschbaren Ersatzteile.
24
Nachdem die Batterie aufgeladen ist, entfernen Sie sie aus dem Ladegerät und
setzen Sie sie in den Griff des PTX Geräts ein. Drehen Sie den Batteriedeckel um
90° gegen den Uhrzeigersinn, bis er einrastet (siehe unten); und
ziehen Sie ihn dann leicht zurück, so daß er in den
Gerätegriff einrastet. Um die Batterie aus dem Gerät
zu entfernen, drücken Sie auf den Batteriedeckel,
drehen die Batterie um 90° im
Werkzeuggriff
Uhrzeigersinn und ziehen sie
heraus.
Batteriedeckel
Gegen den Uhrzeigersinn
drehen, bis die Batterie einrastet
Drehen Sie den Einsatz im Uhrzeigersinn
um die Batterie zu entfernen
Sobald sich die Batterieladung verringert (bei etwa 3,3V), leuchtet die roten LED
Anzeige auf der Oberseite des Geräts auf. Zu diesem Zeitpunkt sollte die
Batterie noch immer genug Ladung (abhängig von der jeweiligen Anwendung)
für mehrere Hundert weitere Wrap- oder Unwrap-Vorgänge aufweisen.
B) Wire-Wrap-Ver fahr en
Bei ordnungsgemäßer Ausführung bildet die Wire-Wrap-Technologie eine
Verbindung, die gegenüber alternativen Methoden eine höhere Zuverlässigkeit
aufweist und dabei problemlos wieder gelöst werden kann. Bei dem Verfahren
wird das freiliegende Ende eines Drahts in einer engen Spirale um einen
metallenen Anschluß gewickelt. Dazu müssen geeignete Bits und Muffen
zusammen mit dem Gerät benutzt werden. Wählen Sie ein geeignetes Bit und
eine geeignete Muffe gemäß dem folgenden Verfahren aus:
Auswahl von Bit & Muffe:
1. Bestimmen Sie die Drahtstärke: 18 bis 30 AWG (American Wire Gauge)
2. 2. Bestimmen Sie die Maße des Anschlußstifts:
a) Telekom: üblicherweise 1,14mm X 1,14mm oder 0,76mm X 1,52mm
b) Sonstige: üblicherweise 0,63mm X ,63mm
3. Entscheiden Sie sich zwischen regulärer oder modifizierter Wicklung:
a) Telekom: üblicherweise reguläre Wicklung, 22-26 AWG Draht
b) Elektronik: üblicherweise modifizierte Wicklung, 26-30 AWG Draht
4. Wenn das Bit dementsprechend definiert ist, können Sie die
entsprechende Muffe neben der Artikelnummer des Bits in der Bit &
Muffen Tabelle ablesen
Zusätzliche Informationen bzgl. regulärer oder modifizierter Wicklung sowie
anderer technischer Aspekte des Wrap-Verfahrens und der resultierenden
Verbindungen finden Sie unter “Wire-Wrap-Technologie”.
25
Installation von Bit & Muffe:
1. Lösen Sie die Patronenmutter, indem Sie sie im Uhrzeigersinn drehen (siehe
unten).
Patronenmutter im
Uhrzeigersinn lösen
2. Setzen Sie das Bit in das Futter ein. Drehen Sie es, während Sie es
gleichzeitig in das Futter drücken, bis es im Antriebsmechanismus sitzt. Das
kleinere der beiden Löcher auf der Stirnseite des Bits sollte nun in der 12
Uhr Position (oben) sein.
Kleines Loch auf der Stirnseite
des Bits auf 12 Uhr
3. Schieben Sie die Muffe über das Bit und in die Patrone. Drehen Sie die
Muffe, während Sie sie in das Futter schieben, bis die Muffe an dem
Positionierstift (innerhalb der Patrone) eingerastet ist; die Muffe gleitet
dann weiter in die Patrone hinein. Wenn sie ihre entgültige Position
erreicht, ist die angespitzte Seite der Muffe in der 12 Uhr Position (oben).
Angespitzte Seite der Muffe auf
12 Uhr
Muffe
Bit
4. Ziehen Sie die Patrone fest, indem Sie die Patronenmutter gegen den
Uhrzeigersinn drehen. Das Gerät ist nun betriebsbereit. Um eine WireWrap-Verbindung herzustellen, befolgen Sie die Anleitungen und
hilfreichen Tips auf den folgenden Seiten.
Patronenmutter gegen den
Uhrzeigersinn festziehen
26
Wire-Wrap-Verbindung herstellen:
Schritt 1: Wählen Sie ein geeignetes
Bit und die ensprechende Muffe aus
(siehe oben).
Schritt 1
Bit, Muffe und abisolierter Draht
Schritt 2 : Schieben Sie den Draht
in den Drahtschlitz.
Schritt 2
Einsetzen des Drahts
Schritt 3
Verankerung des Drahts
Schritt 3 : Verankern Sie den Draht.
Schritt 4
Schritt 4 : Schieben Sie den Anschluß
in die größere Öffnung des Bits.
Schritt 5 : Aktivieren Sie das Gerät.
Die Wire-Wrap-Verbindung ist
vervollständigt.
Einsetzen des Anschlusses
Schritt 5
Fertige Verbindung
C) Unwrap-Ver fahren und Gegendr uck
Das Unwrap-Verfahren und der Gegendruck sind Spezialfunktionen der WireWrap-Technologie und sind auf den Geräten der PTX Serie verfügbar. Bei allen
Gerätemodellen, sowohl elektrisch als auch batteriebetrieben, ist die UnwrapFunktion bereits integriert; die Gegendruckfunktion ist optional zu bestellen und für
die Modelle PTX-1BF, PTX-2BF und PTX-48BF erhältlich.
Unwrap-Verfahren:
Setzen Sie die Unwrap-Bit/Muffe in die Patrone ein. Drücken Sie den Schalter auf
der Rückseite des Geräts in die untere Position, um vom Wrap- in den UnwrapModus zu wechseln. Schieben Sie die Unwrap-Bit/Muffe über den Anschluß, so
daß der hakenförmige Teil des Unwrap-Bits so positioniert ist, daß das obere
Ende der Drahtspule, die gelöst werden soll, einrastet. Aktivieren Sie das Gerät
und halten Sie es still, so daß das Bit die Spule abwickeln kann. Entfernen Sie den
gesamten, abgewickelten Draht von dem Bit und der Arbeitsfläche, bevor Sie
weitere Unwrap-Verfahren durchführen.
VORSICHT!
Bei Unwrap-Verfahren muß ein separates Bit/Muffen Set oder ein UnwrapHandgerät benutzt werden – bzw. bei Geräten der DFB Serie, siehe Seite 12.
Benutzen Sie hierfür NIE ein Bit/Muffen Set, das für Wrap-Verfahren ausgelegt ist,
da Bit und Muffe sonst beschädigt werden und die Verbindung nicht zuverlässig ist.
27
Gegendruckfunktion
‘Gegendruck’ ist eine Funktion, mit der überschüssige, nach unten gerichtete Kraft, die
auf das Gerät ausgeübt wird, kompensiert wird. Ein Wire-Wrap Gerät führt die Wrapfunktion ordnungsgemäß aus, ohne daß Kraft auf das Gerät ausgeübt werden muß.
Tatsächlich führt überschüssige Kraftausübung zu ‘Overwrap’ (weitere Informationen
hierzu unter ‚Wire-Wrap-Technologie’). Ein Gerät mit der Gegendruckfunktion enthält
einen Federmechanismus, der die Kraft aufnimmt, die ein unerfahrener Bediener
eventuell ausübt.
PRODUKTSPEZIFIKATIONEN:
Elektro-Geräte*
Produkt
PTX
3,6V Batterie betrieben
Spannung
PTX-1
PTX-1BF
PTX-2
PTX-2BF
PTX-2-UK
PTX-2BF-UK
PTX-48
PTX-48BF
115V elektrisch
115V elektrisch
230V elektrisch
230V elektrisch
230V elektrisch
230V elektrisch
48V elektrisch
48V elektrisch
Maße
38mm B X 152mm H X 165mm L
38mm B X 152mm H X 165mm L
38mm B X 152mm H X 165mm L
38mm B X 152mm H X 165mm L
38mm B X 152mm H X 165mm L
38mm B X 152mm H X 165mm L
38mm B X 152mm H X 165mm L
38mm B X 152mm H X 165mm L
38mm B X 152mm H X 165mm L
Gewicht
336g
390g
390g
454g
454g
454g
454g
390g
390g
RPM
3700
3700
3700
4200
4200
4200
4200
3700
3700
*Typischer Betriebszyklus ist 2 Sekunden an und 18 Sekunden aus (vaiiert je nach Anwendung).
Batterieladegeräte
Produkt
PTX-BC1
PTX-BC2
PTX-BC2-UK
Spannung
115V elektrisch
230V elektrisch
230V elektrisch
Maße
102mm Umfang X 69mm hoch
102mm Umfang X 69mm hoch
102mm Umfang X 69mm hoch
Gewicht
317g
317g
317g.
Maße
254mm Durchmesser X 114mm L
Gewicht
163g
Kabel
1,8m lang
1,8m lang
1,8m lang
Batterie
Produkt
PTX-B
Spannung
3.6V
Vorsicht! — Alle PTX Geräte
Diese Geräte sind ausschließlich für den industriellen/Laborbetrieb in Innenräumen bestimmt, für Höhen bis zu 2000m, bei einer maximalen Luftfeuchte
von 80% und Temperaturen bis 31°C, abfallend auf 50% Luftfeuchte bei 40°C. Verschmutzungsgrad 2 gemäß IEC644. Installationskategorie II.
Temperaturbereich: 5°C bis 40°C. Jede Person, die mit oder in der Nähe des Geräts arbeitet, muß wissen, daß nicht ordnungsgemäßer Betrieb gemäß
dieser Bedienanleitung zu Sicherheitsrisiken führen kann. Während des Betriebs elektrischer Geräte müssen zu jeder Zeit grundlegende
Sicherheitsmaßnahmen angewendet werden, um Brandgefahr, Elektroschock und Personenschäden zu vermeiden. Halten Sie den Arbeitsbereich
sauber, gut beleuchtet und verbieten Sie den Zugang für Kinder und Besucher. Trennen Sie nicht benutzte Geräte von der Stromzufuhr und räumen Sie
sie weg. Benutzen Sie kein Zubehör oder Anbauten, die nicht vom Hersteller empfohlen oder genehmigt sind. Ein schadhaftes Stromkabel muß repariert
werden; diese Reparatur muß durch den Hersteller oder einen Servicerepräsentanten des Herstellers oder einer entsprechend qualifizierten Person
durchgeführt werden, um Gefahren zu vermeiden.
VORSICHT! — 230V Geräte (PTX-2 & PTX-2BF)
Falls erforderlich, ersetzen Sie die Sicherung in der Haupteinheit mit dem korrekten Sicherungstyp: T250mA. Wird ein abgesicherter Netzstecker
eingesetzt, stellen Sie sicher, daß die Sicherung eine hohe Abschaltfähigkeit und einen Wert von nicht mehr als 1A 250V aufweist. Alle
Netzstecker, die entfernt oder ausgetauscht werden, müssen durch Entfernen der Sicherung und des Sicherungschalters betriebsunfähig gemacht
und ordnungsgemäß entsorgt werden, da ein schadhafter Stecker, der in eine stromführende Steckdose gesteckt wird, ein hohes Risiko darstellt.
48V Geräte
Die 48 Volt Wickelpistole wird mit einer Netzleitung ohne Netzstecker geliefert und darf nur an einer Stromquelle mit 48 V Gleich-oder
Wechselstrom angeschlossen werden.
28
Bits und Muffen Tabelle (AWG) mm
REGULÄR
DRAHT
MODIFIZIERT
STÄRKE
BIT
ARTIKELNR
MUFFE
ARTIKELNR
MAXIMALER
MINIMALE MAXIMALE ANSCHLUSS
ANSCHLUSS
ISOLIERANSCHLUSS- ANSCHLUSS
LOCH EFFEKTIVER LOCH
DURCHMESSER DIAGONALE DIAGONALE
TIEFE
RADIUS DURCHMESSER
MM
MM
MM
MM
MM
MM
18
•
KB18
P194
—
• WB20M P194LN 1,499
20
20-22 •
KB2075
P2224
—
22
• WB22MLD P212
1,473
22
•
KB22LT
P2224
—
22
•
KB22
P2224
—
22
• WB2275M P2224 1,321
22-24 •
KB224LH P2224
—
22-24 •
KB224-1 P2224
—
22--24 •
KB224
P2224
—
22-24
• WB224M P2224
1,27
24
•
*KB2444 P3032LN
—
24
• WB24DH P2224 1,168
24
•
KB24
P2426
—
24
• *WB24SM P3032LN 1,118
24
• WB24DHM P2224
1,27
24-26
• WB2426M P2224 1,168
KB2466 OK8519
—
24-26 •
26
•
*KB2639 P26LN
—
26
•
KB26
P2426
—
• *WB26SM P26LN 0,787
26
26
•
WB26M P2224
1,168
26
•
*WB2644MP3032LN 1,168
26
•
WB2669M P2426
1,041
28
•
WB2870M P2426
0,863
• *WB2829M P3032L 0,914
28-29
• *SB30MSH-B P3032 0,685
30
•
*SB30MMK P3032
0,584
30
30-32
• *WB3032M P3032 0,685
* Diese Geräte sind für 0,635mm Rechteckanschlüsse
1,524
1,854
25,4
3,81
1,067
1,854
25,4
3,81
1,067
1,854
25,4 3,124
1,245
1,854
25,4 3,454
1,549
2,159
25,4 3,175
1,372
1,854
19,05 2,972
1,245
1,88
25,4 3,353
1,549
2,159
25,4 2,972
1,372
1,854
25,4 2,819
1,372
1,854
20,5 2,819
1,245
1,88
31,75 3,073
0,609
1,092
25,4 2,108
1,372
1,854
44,45 2,972
1,397
1,88
19,05 2,54
0,609
1,092
19,05 2,489
1,245
1,727
28,45 2,997
1,372
1,854
19,05 2,997
1,372
1,651
25,4 2,489
0,584
0,965
19,05 1,727
1,473
1,854
25,4
2,54
0,584
0,965
19,05 1,905
1,372
1,854
25,4 2,997
0,609
1,092
19,05 2,489
1,346
1,727
25,4 2,769
1,346
1,727
25,4 2,616
0,838
0,965
19,05 2,311
0,787
0,889
19,05 1,626
0,787
0,889
19,05 1,626
0,863
0,965
19,05 1,626
mit 2,54mm Raster ausgelegt.
1,905
1,905
1,905
1,905
2,184
1,905
1,905
2,184
1,905
1,905
1,905
1,118
1,905
1,905
1,118
1,753
1,905
1,676
1,016
1,905
1,016
1,905
1,118
1,753
1,778
1,016
0,914
0,914
1,016
Erweiterte (127mm) Bits und Muffen Tabelle
DRAHT
STÄRKE
REGULÄR
MODIFIZIERT
AWG mm.
22 0.65
24 0.50
26 0.40
•
•
•
BIT
ARTIKELNR.
KB22-5
KB24-5
KB26-5
MAXIMALE
MINIMALE MAXIMALE ANSCHLUSSTERMINAL
ISOLIER
ANSCHLUSS- ANSCHLUSSLOCH
EFFEKTIVER HOLE
SLEEVE
DIAGONALE DIAGONALE DIAGONALE
TIEFE
RADIUS DIAMETER
ARTIKELNR..
MM
MM
MM
MM
MM
MM
P2224-5
P2426-5
P2426-5
—
—
—
13,72
13,97
14,73
1,854
1,854
1,854
Isolierte Muffen (1000V dielektrische Beschichtung)
DRAHTSTÄRKE
22-24 AWG
24-26 AWG
ARTIKEL-NR.
P2224-INS (oder P2224-5INS für 127mm Version)
P2426-INS (oder P2426-5INS für 127mm Version)
29
19,05 2,972
19,05 2,54
19,05 2,54
1,905
1,905
1,905
Ersatzteile für die PTX Serie
2
5
4
7
1
3
6
ARTIKEL-NR.
BESCHREIBUNG
1
21362 Niederspannung PCB Einheit
2
21328
16746
16772
16771
Motor,
Motor,
Motor,
Motor,
6
PTX Gerät Batteriebetrieb
PTX-1 oder PTX-1BF
PTX-2 oder PTX-2BF
PTX-48 oder PTX-48BF
3
21363 Wrap-Unwrap Schaltereinheit,
PTX Batteriebetriebenes Gerät
21403 Wrap-Unwrap Schaltereinheit,
PTX Elektro-Geräte
4
21676 Kupplungseinheit, PTX Geräte mit
Gegendruck
21677 Kupplungseinheit, PTX Geräte ohne
Gegendruck
5
ARTIKEL-NR.
BESCHREIBUNG
21406 Triggerschaltereinheit, PTX Gerät
Batteriebetrieb
20419 Triggerschaltereinheit, Elektro-Wrap Geräte
16765 Getriebeinheit, PTX-1, PTX-1BF,
PTX-48 oder PTX-48BF
30
7
21407 Patroneneinheit (Patrone,
Patronenmutter und Einstellschraube)
8
16762 Strom-PCB-Einheit, PTX-1 oder
PTX-1BF (nicht abgebildet)
18416 Strom-PCB-Einheit, PTX-2 oder
PTX-2BF (nicht abgebildet)
18217 Strom-PCB-Einheit, PTX-48 oder
PTX-48BF (nicht abgebildet)
9
12446 Stromkabel, PTX-1 oder PTX-1BF
(nicht abgebildet)
21402 Stromkabel, PTX-2 oder PTX-2BF
(nicht abgebildet)
21475 Stromkabel, PTX-2BF-UK or
PTX-2BF-UK (nicht abgebildet)
Garantie, Reparatur und Technische Unterstützung
Jedes PTX Wrap und Unwrap Gerät sowie alle Batterieladegeräte sind mit einer sechsmonatigen
Garantie ab Kaufdatum abgedeckt.
Reparaturservice und technische Unterstützung sind verfügbar von OK Industries ; Über unsere
Website unter www.okindustries.com können Sie einen Repräsentanten in Ihrer Nähe kontaktieren.
Wire-Wrap-Technologie
Das Wire-Wrap-Verfahren ist eine Methode der Drahtverbindung, bei der ein bloßer Draht unter
mechanischer Spannung um die scharfen Kanten eines Anschlusses gewickelt wird. Diese
Technologie wurde als Alternative zum Löten entwickelt, das bei vielen Anwendungen verschiedene
Sicherheits- und Zuverlässigkeitsprobleme mit sich bringt. Einer der Hauptvorteile des Wire-WrapVerfahrens ist, daß es eine äußerst zuverlässige Verbindung produziert, die gleichzeitig problemlos
wieder gelöst werden kann, wenn dies für Korrekturen oder Modifikationen notwendig ist.
Das Wire-Wrap-Verfahren erfordert eine Drehwerkzeug, das Bit genannt wird. Dieses Bit weist eine
große, mittig angeordnete Öffnung auf der Stirnseite auf,
MITTLERE
SPANNUNG
über die das Werkzeug über den Anschluß gestülpt wird
und die den Punkt darstellt, um den das Bit rotiert. Im
MAXIMALE
SPANNUNG
NEUTRALE
ZONE
oberen Bereich des Bit ist ein Schlitz, in den der Draht für
den Wire-Wrap-Vorgang eingesetzt wird. Die Stirnseite
des Bits ist so geformt, daß während des Wrap-Vorgangs
eine angemessene Spannung auf den Draht ausgeübt
wird. Durch diese Formgebung wird der Draht außerdem
MAXIMALEN
DRUCK
TERMINAL
in Spiralform aufgewickelt, die eng und gleichmäßig ausgebildet wird. Während des Betriebs
befindet sich das Bit in einer Metallhülse, der Muffe. Die Muffe fixiert das Bit in der Patrone des
Wire-Wrap Geräts, das die Rotation des Bits antreibt. Außerdem hält sie den Draht während des
Wire-Wrap-Prozesses in dem dafür vorgesehenen Schlitz und schützt den Bediener vor dem
rotierenden Bit.
Der Draht wird während des Verfahrens einer enormen Spannung und hohen Druckkräften
ausgesetzt, normalerweise 100.000 PSI (6.895 bar) an der Anschlußkante.
Durch den Wrap-Prozeß wird die Oxidschicht auf dem Draht und dem Anschluß zerdrückt oder
abgeschert, so daß ein sauberer, oxidfreier Metall-an-Metall Kontakt zustande kommt. Die Anzahl
der Windungen ist eine Funktion aus der Länge des abisolierten Drahts. Vor-abisolierte Drähte
ersparen Zeit und optimieren die Zuverlässigkeit der Verbindung, da es eine bestimmte
Mindestanzahl von Windungen für jede spezifische Drahtstärke gibt. Diese haben direkte
Auswirkung auf die elektrische Leitfähigkeit und mechanische Festigkeit. Wenn allerdings eine
Anwendungsspezifikation mehr Wicklungen erforderlich macht, sind eventuell Drähte mit einem
längeren abisolierten Bereich notwendig.
31
INDICE ARGOMENTI
Panoramica
....................
Lista dei Prodotti . . . . . . . . . . . . . . . . . .
Modalità d’uso . . . . . . . . . . . . . . . . . .
Specifiche di prodotto . . . . . . . . . . . . .
Parti di Ricambio . . . . . . . . . . . . . . . . .
Garanzia, Riparazioni & Supporto Tecnico
Tecnologia Wire Wrapping . . . . . . . . . .
.
.
.
.
.
.
.
.
.
.
.
..
.
.
.
.
.
.
.
.
.
.
.
.
.
.
.
.
.
.
.
.
.
.
.
.
.
.
.
.
.
.
.
.
.
.
.
.
.
.
.
.
.
.
.
.
.
.
.
.
.
.
.
.
.
.
.
.
.
.
.
.
.
.
.
.
.
.
.
.
.
.
.
.
.
.
.
.
.
.
.
.
.
.
.
.
.
.
.
.
.
.
.
.
.
.
.
.
.
.
.
.
.
.
.
.
.
.
.
.
.
.
.
.
.
.
.
.
.
.
.
.
.
.
.
.
.
.
.
.
.
.
.
.
.
.
.
.
.
.
.
.
32
33
34
38
40
41
41
Panoramica: Attr ezzi della Serie PTX da OK Industries
OK Industries, leader a livello mondiale di prodotti per wire wrapping, offre una
completa gamma d’attrezzi manuali, elettrici e con alimentazione a batteria, bit
& sleeve ed altri accessori. Per ulteriori informazioni, vogliate visitare il nostro
sito web www.okindustries.com.
Gli attrezzi per wrapping e unwrapping della Serie PTX sono stati sviluppati
tenendo conto dei requisiti ergonomici e per aumentare l’efficienza
dell’operatore. Tenendo ben presente la sicurezza dell’operatore, abbiamo
consultato un noto ergonomista ed aggiunto prestazioni che includono la
costruzione leggera e ben bilanciata, oltre ad una lunga impugnatura per
minimizzare la pressione sul palmo. Queste caratteristiche hanno portato ad
un progetto all’avanguardia nell’industria, dal punto di vista della comodità e
della sicurezza. L’interruttore wrap/unwrap, in posizione rientrata sulla parte
posteriore del corpo attrezzo, è di facile accesso; è inoltre protetto dai colpi,
nel caso l’attrezzo debba cadere. Il robusto contenitore
include un ingranaggio planetario ad alta
coppia, che può wrappare (wrap avvolgere) o swrappare (unwrap svolgere) fili di diametri compresi
fra AWG 18 ed AWG 30 (da
1,0 a 0,25mm), ed è compatibile
con l’intera gamma di bit e
sleeve, standard industriali. La
Serie PTX è disponibile nelle
versioni 115V e 230V, oltre che
nella versione a batteria, che è
alimentata da una cella NiMH
da 3,6V di lunga durata, ed
incorpora un LED per la
segnalazione di batteria
scarica.
E’
disponibile
l’opzione “backforce” (forza
opposta), che aiuta a
prevenire l’overwrapping (sovra
avvolgimento),
causato
dall’eccessiva forza applicata da
parte dell’operatore; le batterie ed
i carica batterie sono venduti
singolarmente.
32
Lista dei prodotti
Item
Descrizione
PTX
Attrezzo per Wrap/Unwrap Alimentato a Batteria
PTX-1
Attrezzo per Wrap/Unwrap con Alimentazione da Rete 115V
PTX-1BF
Attrezzo per Wrap/Unwrap con Backforce ed Alimentazione da Rete 115V
PTX-2
Attrezzo per Wrap/Unwrap con Alimentazione da Rete 230V
PTX-2BF
230V
Attrezzo per Wrap/Unwrap con Backforce con Alimentazione da Rete
PTX-B
Batteria per Attrezzo PTX Alimentato a Batteria
PTX-BC1
Caricabatterie a 115V per Batterie PTX
PTX-BC2
Caricabatterie a 230V per Batterie PTX
PTX-KIT1
Kit 115V includente: Attrezzo PTX a Batteria, Caricabatterie PTX-BC1,
e due (2) Batterie PTX-B
PTX-KIT2
Kit 230V includente: Attrezzo PTX a Batteria, Caricabatterie PTX-BC2,
e due (2) Batterie PTX-B
H-1000
Fondina (tasca in velluto a coste che puo contenere un attrezzo PTX od
uno manuale; un attrezzo a mano per wrap/unwrap; bit/sleeve; e 2-3
altri attrezzi vari)
PTX-48
Attrezzo per Wrap/Unwrap con Alimentazione da Rete 48V
PTX-48BF
Attrezzo per Wrap/Unwrap con Backforce ed Alimentazione da Rete 48V
PTX-KIT2I
Kit 230V includente: Attrezzo PTX a Batteria, Caricabatterie PTX-BC2,
e 1 Batterie PTX-B
La gamma di prodotti include sia gli attrezzi alimentati a batteria sia quelli alimentati
dalla rete, oltre alle batterie specifiche e ai carcabatterie. La scelta dell’attrezzo è
generalmente determinata dalla preferenza dell’utente, ed include considerazioni quali
la disponibilità di prese di corrente oppure la praticità di lavorare senza cavi
d’alimentazione. La versione alimentata a batteria (modello # PTX) utilizza una batteria
(modello # PTX-B) che richiede un caricabatterie (PTX-BC1 oppure PTX-BC2); questi
ultimi sono venduti a parte, ma possono anche essere acquistati con l’attrezzo, sotto
forma di kit (vedi i modelli e le descrizione sopra riportate).
Tutti gli attrezzi nella Serie PTX sono dotati di motori reversibili, che permettono di usare
gli attrezzi per svolgere (unwrap) una terminazione wrappata (avvolta). (NOTA: la
swrappatura richiede un bit ed uno sleeve specifici, oppure un apposito attrezzo
manuale per swrappare; NON provate a swrappare con i bit e gli sleeve usati per
wrappare; ciò danneggerà il bit e lo sleeve, oltre a pregiudicare l’affidabilità della
connessione). L’opzione Backforce, disponibile solamente negli attrezzi con
alimentazione elettrica PTX-48BF (48V), PTX-1BF (115V) e PTX-2BF (230V), è una
prestazione che aiuta a prevenire l’overwrapping. Una molla, montata internamente nel
gruppo colletto/albero dell’attrezzo, aiuta ad assorbire la pressione che un operatore
non addestrato può applicare mentre wrappa (vedi pagina 12, dove è riportata la
figura di una terminazione affetta da overwrapping).
33
Modalità d’uso
A) Preparazione dell’Attr ezzo per Wrappar e/Swrappar e
Gli attrezzi della Serie PTX alimentati da rete non richiedono assemblaggi e
sono pronti per l’uso, appena estratti dalla confezione. La versione alimentata
a batteria (modello # PTX) richiede una carica iniziale della batteria di almeno
8 ore. Il LED si illuminerà per indicare che la batteria è montata nel
caricabatterie. Il LED resta acceso per tutto il tempo di presenza della batteria,
anche dopo che è a pieno carico, ma non vi è pericolo se si
lascia la batteria nel caricabatterie per oltre 8 ore. Inserite
semplicemente la spina del caricabatterie (modello #
PTX-BC1 a 115V oppure modello #
PTX-BC2 a 230V) in una presa elettrica
e mettete la batteria (modello # PTX-B)
nel caricabatterie. Dopo circa 500750 ricariche, la batteria dovrebbe
essere
tolta
e
sostituita.
Caricabatterie
(mostrato con la batteria)
Ter minali
della Batteria
Quando la batteria non è montata nell’attrezzo o nel caricabatterie, è importante
che i terminali non siano messi in corto circuito da parte di qualsiasi metallo o di
altri oggetti conduttivi. La batteria andrebbe altrimenti in corto circuito, rischiando
di prendere fuoco, bruciare o danneggiarsi. La batteria PTX-B al NiMH è
ecologica, e può essere smaltita come normale rifiuto.
ATTENZIONE!
Non provate ad utilizzare alcuna batteria di altri produttori con il PTX, poiché non
funzionerà correttamente, e potrà danneggiare l’attrezzo. Usate sempre batterie
modello # PTX-B, assieme ai caricabatterie modello # PTX-BC1 oppure PTX-BC2,
entrambi prodotti da OK Industries.
Non utilizzate il caricabatterie se il cavo di rete o la spina sono dannaggiati, né in
ambienti bagnati o umidi, o all’esterno, o in prossimità di pozzi o bacini od altre
sorgenti d’acqua. Non smontate il caricabatterie, al suo interno non vi sono parti
riparabili dall’utente.
34
Quando la batteria è carica, toglietela dal caricabatterie, inseritela
nell’impugnatura dell’attrezzo PTX e girate il cappuccio terminale della batteria di
90 gradi in senso antiorario, per ingaggiare il cappuccio (vedi
sotto); tiratela poi leggermente indietro, per bloccarla
nell’impugnatura dell’attrezzo. Per togliere la batteria
dall’attrezzo, premete nella direzione del
Impugnatura
cappuccio della batteria, ruotate l
a
dell’attrezzo
batteria di 90 gradi in
Cappuccio
senso orario e tiratela
terminale
fuori.
della
batteria
Ruotate in senso Antiorario per
ingaggiare la batteria
Ruotate in senso Orario per
rimuovere la Batteria
Quando la batteria comincia a perdere la sua carica (a circa 3,3V), il LED rosso
posto nella parte alta dell’attrezzo inizierà a lampeggiare. A questo punto, a
seconda delle applicazioni, la batteria dovrebbe ancora contenere una carica
sufficiente per alcune centinaia di operazioni di wrappatura o swrappatura.
B) Wrappatura del Filo (Wir e Wrapping)
La tecnologia del wire wrapping, se usata correttamente, fornisce un
interconnessione che è superiore, in termini d’affidabilità, a quelle realizzate
usando metodi alternativi, ed è pure facile da rimuovere, se necessario. E’ un
processo dove la terminazione nuda di un filo è avvolta con una stretta elica
attorno ad un terminale metallico. Ciò richiede l’uso di appositi bit e sleeve,
oltre che di un apposito attrezzo. La scelta del bit e dello sleeve dovrebbe
avvenire seguendo il processo riportato sotto:
PROCESSO DI SCELTA PER BIT & SLEEVE
1. Determinate il diametro del filo: da AWG 18 ad AWG 30
2. Determinate le dimensioni del terminale su cui sarà avvolto il filo
a) Telecomunicazioni: generalmente 1,14mm X 1,14mm o 0,76mm X 1,52mm
b) Altri: generalmente 0,63mm X 0,63mm
3. Decidete se eseguire la wrappatura regolare oppure quella modificata:
a) Telecomunicazioni: generalmente wrappatura regolare, con filo AWG 22-26
b) Elettronica: generalmente wrappatura modificata, con filo AWG 26-30
4. Una volta identificato il bit, lo sleeve è listato a fianco del numero di
codice del bit, nella Tabella Bit & Sleeve
Ulteriori informazioni riguardanti la wrappatura regolare rispetto a quella
modificata, ed altri aspetti tecnici relativi al processo di wrappatura e
dell’interconnesisone che ne deriva, possono essere trovati nella sezione più a
valle, intitolata “Tecnologia Wire Wrapping”.
35
INSTALLAZIONE DI BIT & SLEEVE
1. Allentate il dado del colletto ruotandolo in senso orario
Allentate il Dado del Colletto
in senso Orario
2. Inserite il bit nella frizione, e ruotate il bit mentre lo spingete nella frizione,
fino a quando il bit sia posizionato nel meccanismo di pilotaggio. A
questo punto, il più piccolo dei due fori sulla parte frontale del bit sarà
nella posizione che sull’orologio corrisponde a mezzogiorno (ore dodici.
Il foro piccolo sulla parte frontale del
bit si troverà nella posizione
corrispondente ad ore
dodici
3. Piazzate lo sleeve sul bit e fate scorrere lo sleeve nel colletto. Ruotate lo
sleeve mentre lo fate scivolare nella frizione fino a quando lo sleeve ha
ingaggiato il piolino di posizionamento (interno al colletto); lo sleeve a
questo punto scorrerà ancora e, quando completamente posizionato, si
troverà in modo tale che la parte con il beccuccio sia nella posizione
corrispondente ad ore dodici.
Il beccuccio dello sleeve si troverà
nella posizione corrispondente ad
ore dodici
Sleeve
Bit
4. Serrate il colletto ruotando il dado del colletto in senso antiorario. Adesso
l’attrezzo è pronto per l’uso. Per realizzare una connessione wire
wrappata, seguite le istruzioni e gli utili suggerimenti delle pagine
seguenti.
Serrate il Dado del Colletto in
senso Antiorario
36
REALIZZAZIONE D’UNA CONNESSIONE WIRE WRAP
Step 1
Scegliete il bit e
lo Sleeve adatti (vedi sopra).
Step 1
Bit, Sleeve e
filo pre-spellato
Step 2
Inserite il filo nel
foro per il filo.
Step 2
Inserimento del filo
Step 3
Ancorate il filo.
Step 3
Ancoraggio del filo
Step 4
Inserite il terminale nel
grande foro centrale del bit.
Step 4
Inserzione sul terminale
Step 5
Azionate l’attrezzo di wrappatura.
La connessione è completata.
Step 5
Connessione finita
C) Unwrapping e Backforce
La swrappatura (unwrapping) e la prestazione backforce sono caratteristiche
speciali del wire wrapping, e sono disponibili con la Serie PTX. Tutti i modelli
d’attrezzo, sia quelli a batteria sia quelli con alimentazione da rete, hanno la
prestazione di swrappatura già a bordo; la prestazione backforce è opzionale,
e si trova nei modelli PTX-1BF, PTX-2BF, PTX-2BF-UK e PTX-48BF.
USO DELLA PRESTAZIONE DI SWRAPPATURA
Installate i bit/sleeve di swrappatura nel colletto. Portate l’interruttore sul lato
posteriore dell’attrezzo in posizione bassa, invertendo così la direzione del
motore da “wrap” a “unwrap”. Posizionate i bit/sleeve di swrappatura sul
terminale in modo che la parte terminale del bit a forma d’uncino ingaggi la
terminazione del filo avvolto che deve essere swrappato. Azionate l’interruttore
dell’attrezzo e tenetelo ben fermo, permettendo al bit di svolgere il filo avvolto.
Assicuratevi di rimuovere tutto il filo swrappato dal bit e dall’area di lavoro,
prima
di
procedere
ad
altre
operazioni
di
swrappatura.
ATTENZIONE!
La swrappatura richiede un apposito set di bit/sleeve, oppure un attrezzo
manuale per swrappatura – o nel caso della Serie DFB, fate riferimento alla
pagina 12 – ma non tentate MAI di swrappare con un set di bit/sleeve che è
usato normalmente per il wrapping, poiché ciò danneggerà il bit e lo sleeve,
oltre a pregiudicare l’affidabilità della connessione.
37
UTILIZZO DELLA PRESTAZIONE BACKFORCE
“Backforce” è una prestazione che compensa l’inutile applicazione di pressione
sull’attrezzo, durante il wire wrapping. Un attrezzo per wire wrapping eseguirà
correttamente la funzione di wrapping senza applicare alcuna pressione in avanti;
infatti, tale pressione favorisce la tendenza ad “overwrapping” (fate riferimento alla
Sezione intitolata Tecnologia Wire Wrapping per ulteriori dettagli). Un attrezzo dotato
dell’opzione backforce contiene un meccanismo a molla che assorbe la spinta in avanti,
applicata a torto da un operatore non addestrato.
SPECIFICHE DI PRODOTTO:
Attrezzi Elettrici*
Item
PTX
PTX-1
PTX-1BF
PTX-2
PTX-2BF
PTX-2-UK
PTX-2BF-UK
PTX-48
PTX-48BF
Tensione
Dimensioni
3.6V alimentato a batteria
38 mm X 152 mm X 165 mm
115V elettrici
115V elettrici
230V elettrici
230V elettrici
230V elettrici
230V elettrici
48V elettrici
48V elettrici
38 mm X 152 mm X 165 mm
38 mm X 152 mm X 165 mm
38 mm X 152 mm X 165 mm
38 mm X 152 mm X 165 mm
38 mm X 152 mm X 165 mm
38 mm X 152 mm X 165 mm
38 mm X 152 mm X 165 mm
38 mm X 152 mm X 165 mm
Peso
336g
390g
390g
454g
454g
454g
454g
390g
390g
Giri al minuto
3700
3700
3700
4200
4200
4200
4200
3700
3700
*Il ciclo tipico di lavoro è di 2 secondi ON e 18 secondi OFF (varia con l’applicazione).
Caricabatterie
Item
PTX-BC1
PTX-BC2
PTX-BC2-UK
Tensione
115V elettrici
230V elettrici
230V elettrici
Dimensioni
102mm diametro X 69mm altezza
102mm diametro X 69mm altezza
102mm diametro X 69mm altezza
Peso
317g
317g
317g
Cavo
6.0” long
6.0” long
6.0” long
Batteria
Item
PTX-B
Tensione
3.6V
Dimensioni
254mm diametro X 114mm L
Weight
163g
ATTENZIONE! — TUTTI GLI ATTREZZI PTX
Quest’apparecchiatura è per uso interno industriale / di laboratorio, a quote fino a 2000 m, RH massima dell’80% fino a 31°C,
scendendo al 50% di RH a 40°C. Grado d’inquinamento 2, secondo IEC644. Categoria d’installazione II. Gamma di temperatura:
da 5°C a 40°C. L’utente deve sapere che, se l’apparecchio è usato in modo diverso da quello specificato dal fabbricante, la
sicurazza può venire a meno. Quando si usano apparecchi elettrici, si dovrebbero usare le precauzioni di sicurezza di base per
ridurre il rischio di fuoco, scossa elettrica e danni al personale. Tenete le aree di lavoro pulite, ben illuminate, non a portata di
bambini e visitatori. Sconnettete gli attrezzi non utilizzati e riponeteli a magazzino. Non usate mai accessori o parti aggiunte, a
meno che siano raccomandate dal costruttore originale. Se il cavo d’alimentazione è danneggiato, od occorre ripararlo, questo
lavoro deve essere eseguito dal fabbricante o dal proprio personale di manutenzione, o da persone simili qualificate, allo scopo
di evitare pericoli.
Attrezzi a 230V (PTX-2 & PTX-2BF)
If required, replace the fuse in the main unit with the correct type: T250mA. If a fused mains plug is to be used, ensure the
fuse is of the high breaking capacity type and has a value of no more than: 1A 250V. Any mains plug that requires removal
or replacement must be destroyed by removal of any fuse and fuse carrier and disposed of immediately, as a plug with bared
wires is hazardous if engaged in a live socket.
Attrezzo elettrico PTX a 48 V
Gli attrezzi elettrici a 48V includono il cavo di alimentazione senza spina e devono essere alimentati esclusivamente a
48V AC o DC.
38
Tabella dei Bit e Sleeve (AWG) in mm
REGOLARE
DIMENSIONE MODIFICATO CODICE
FILO
BIT
CODICE
SLEEVE
MASSIMO
DIAMETRO
ISOLANTE
MM
MINIMA
MASSIMA PROFONDITA’
DIAMETRO
DIAGONALE DIAGONALE
FORO RAGGIO FORO
TERMINALE TERMINALE EFFETTIVO EFFETTIVO TERMINALE
MM
MM
MM
MM
MM
18
•
KB18
P194
—
1,524
1,854
25,4
3,81
20
• WB20M P194LN 1,499 1,067 1,854 25,4 3,81
20-22 •
KB2075
P2224
—
1,067
1,854
25,4 3,124
22
• WB22MLD P212
1,473
1,245
1,854
25,4 3,454
22
•
KB22LT
P2224
—
1,549
2,159
25,4 3,175
22
•
KB22
P2224
—
1,372
1,854
19,05 2,972
22
• WB2275M P2224 1,321 1,245 1,88
25,4 3,353
22-24 •
KB224LH P2224
—
1,549
2,159
25,4 2,972
22-24 •
KB224-1 P2224
—
1,372
1,854
25,4 2,819
22--24 •
KB224
P2224
—
1,372
1,854
20,5 2,819
22-24
• WB224M P2224
1,27
1,245
1,88
31,75 3,073
24
•
*KB2444 P3032LN
—
0,609
1,092
25,4 2,108
24
• WB24DH P2224 1,168 1,372 1,854 44,45 2,972
24
•
KB24
P2426
—
1,397
1,88
19,05 2,54
24
• *WB24SM P3032LN 1,118 0,609 1,092 19,05 2,489
24
• WB24DHM P2224
1,27
1,245
1,727
28,45 2,997
24-26
• WB2426M P2224 1,168 1,372 1,854 19,05 2,997
24-26 •
KB2466 OK8519
—
1,372
1,651
25,4 2,489
26
•
*KB2639 P26LN
—
0,584
0,965
19,05 1,727
26
•
KB26
P2426
—
1,473
1,854
25,4
2,54
• *WB26SM P26LN 0,787 0,584 0,965 19,05 1,905
26
26
•
WB26M P2224
1,168
1,372
1,854
25,4 2,997
•
*WB2644MP3032LN 1,168
0,609
1,092
19,05 2,489
26
26
•
WB2669M P2426
1,041
1,346
1,727
25,4 2,769
28
•
WB2870M P2426
0,863
1,346
1,727
25,4 2,616
• *WB2829M P3032L 0,914 0,838 0,965 19,05 2,311
28-29
30
• *SB30MSH-B P3032 0,685 0,787 0,889 19,05 1,626
30
•
*SB30MMK P3032
0,584
0,787
0,889
19,05 1,626
30-32
• *WB3032M P3032 0,685 0,863 0,965 19,05 1,626
*Questi attrezzi sono raccomandati per terminali quadri 0,635mm a passo 2,54mm
1,905
1,905
1,905
1,905
2,184
1,905
1,905
2,184
1,905
1,905
1,905
1,118
1,905
1,905
1,118
1,753
1,905
1,676
1,016
1,905
1,016
1,905
1,118
1,753
1,778
1,016
0,914
0,914
1,016
Tabella per Bit e Sleeve lunghi (127mm)
REGOLARE
DIMENSIONE MODIFICATO
FILO
22 0.65
24 0.50
26 0.40
•
•
•
CODICE
BIT
KB22-5
KB24-5
KB26-5
CODICE
SLEEVE
P2224-5
P2426-5
P2426-5
MASSIMO
DIAMETRO
ISOLANTE
MM
—
—
—
MINIMA
MASSIMA PROFONDITA’
DIAMETRO
FORO RAGGIO FORO
DIAGONALE DIAGONALE
TERMINALE TERMINALE EFFETTIVO EFFETTIVO TERMINALE
MM
MM
MM
MM
MM
13,72
13,97
14,73
1,854
1,854
1,854
Sleeve Isolati (rivestimento isolante 1000V)
DIMENSIONE FILO
22-24 AWG
24-26 AWG
CODICE
P2224-INS (o P2224-5INS per la versione 127mm)
P2426-INS (o P2224-5INS per la versione 127mm)
39
19,05 2,972
19,05 2,54
19,05 2,54
1,905
1,905
1,905
Parti di ricambio per la Serie PTX
2
4
5
7
1
3
6
ITEM PARTE DESCRIZIONE
ITEM PARTE DESCRIZIONE
1
21362 Scheda Batteria Scarica, PTX
6
2
21328
16746
16772
16771
21406 Gruppo grilletto, attrezzo a batteria
PTX
20419 Gruppo grilletto, attrezzi elettrici per
wrapping
7
3
21363 Gruppo interruttore Wrap-Unwrap,
attrezzo a batteria PTX
21403 Gruppo interruttore Wrap-Unwrap,
attrezzi elettrici PTX
21407 Gruppo colletto (Colletto, dado del
colletto e set di viti)
8
16762 Scheda Alimentatore, PTX-1 o PTX-1BF
(non mostrata)
18416 Scheda Alimentatore, PTX-2 o PTX-2BF
(non mostrata)
18217 Scheda Alimentatore, PTX-48 o
PTX-48BF (non mostrata)
9
12446 Cavo rete, PTX-1 o PTX-1BF
(non mostrata)
21402 Cavo rete, PTX-2 o PTX-2BF
((non mostrata)
21475 Cavo rete, PTX-2BF-UK o PTX-2BF-UK
(non mostrata)
Motore,
Motore,
Motore,
Motore,
attrezzo a batteria PTX
PTX-1 o PTX-1BF
PTX-2 o PTX-2BF
PTX-48 o PTX-48BF
4
21676 Gruppo frizione, attrezzi PTX con backforce
21677 Gruppo frizione, attrezzi PTX senza backforce
5
16765 Gruppo scatola ingranaggi, PTX-1,
PTX-1BF, PTX-48 o PTX-48BF
40
Garanzia, Riparazioni & Supporto Tecnico
Ciascun attrezzo elettrico PTX per wrapping ed unwrapping, così come i caricabatterie, sono coperti
con una garanzia di sei mesi dalla data dell’acquisto.
Il servizio riparazioni ed il supporto tecnico sono disponibili da OK Industries ; Vogliate visitare il
nostro sito web www.okindustries.com per contattare un rappresentante nella vostra area.
Tecnologia Wire Wrapping
Il wire wrapping è un metodo per realizzare una connessione filata avvolgendo il filo nudo
attorno ai bordi taglienti di un terminale, in presenza di tensione meccanica. La tecnologia fu
sviluppata come alternativa alla saldatura, tecnica che presenta numerosi problemi di sicurezza
ed affidabilità in molte applicazioni. Uno dei principali vantaggi del wire wrapping è che esso
fornisce una connessione d’alta affidabilità, ed è anche facile da rimuovere, per correggere o
modificare un layout di cablaggio.
Il wire wrapping richiede un attrezzo rotante, chiamato
TENSIONE MEDIA
bit. Il bit ha un gran foro centrale sul fronte, per far
TENSIONE
MASSIMA
scorrere l’attrezzo sopra il terminale; esso segna il punto
ZONA
NEUTRALE
attorno al quale il bit ruota. La cima del bit ha una
scanalatura cha accetta il filo che deve essere wrappato.
Il fronte, o faccia del bit, è sagomato per applicare la
giusta tensione al filo durante l’avvolgimento. Questo
contorno guida anche il filo secondo un’elica a passo
COMPRESSIO
NE MASSIMA
TERMINALE
fitto ed uniforme. Durante l’utilizzo, il bit è contenuto in un tubo
di metallo chiamato sleeve. Lo sleeve trattiene il bit nel colletto di un attrezzo da wire wrapping,
che pilota il bit appena inizia a ruotare. Esso tiene anche il filo nella scanalatura durante il
processo di wrappatura e protegge l’operatore dalla rotazione del bit.
Il wire wrapping sottopone il filo a notevoli forze di tensione e compressione, tipicamente
100.000 PSI su tutti gli spigoli del terminale. L’azione di wrapping fa sì che lo strato d’ossido, sia
del filo sia del terminale, si rompa o sia asportato, dando origine ad un contatto metallo con
metallo, pulito e privo d’ossidi. Il numero di giri è in funzione della lunghezza della porzione di
filo non isolato. Il filo pre-spellato fa risparmiare tempo e migliora l’affidabilità, poiché vi è un
numero minimo specificato di giri richiesto per ciascuna particolare dimensione di filo. Tali giri
sono direttamente correlati alla conduttività elettrica ed alla tenuta meccanica. In ogni caso, se
una specifica di fabbricazione richiede un avvolgimento con più giri, può essere necessario un
filo con una corrispondente maggiore lunghezza di spellatura, o può essere necessaria
un’ulteriore spellatura a mano.
41
OK Industries
Division of Jonard Industries Corp.
134 Marbledale Road
Tuckahoe, NY 10707
Tel: (914) 793-0700
Fax: (914) 793-4527
www.okindustries.com