Download The Chromacaster User`s Manual & Guide THE NECK
Transcript
Page 1
The Chromacaster User's Manual & Guide
THE NECK/REVERSE MODEL
What it is:
The Chromacaster is a six-position ROTARY switch that expands the potential pickup combinations available
in your Stratocaster or other "S-type" guitar. It installs where one of your old tone controls was. The
Chromacaster does NOT replace your 5-way pickup selector switch - your 5-way still works just like it always
did. The Chromacaster works in conjunction WITH the 5-way to give you new combinations. You lose a tone
control, but gain a lot of tones! The Neck/Reverse scheme is the same switch as the regular Chromie, but the
installation instructions have been changed so that it runs the neck pickup, instead of the bridge pickup.
The traditional Strat 5-way selector gives you only five of the seven parallel combinations possible, and no
series or out-of-phase connections. With a Chromacaster, you can all possible parallel combos, plus some
series and out of phase combos. The Neck/Reverse model is designed to ALSO give you the other two (aside
from the bridge humbucker solo) "Gibson-esque" combos that your HSS Strat is capable of.
The Neck/Reverse Chromacaster scheme will work with any HSS Strat, including those with a two-conductor
bridge humbucker - even if it has the vintage-style braided shield lead. In fact, it will work with any threepickup Strat that has a compatible neck pickup.
NOTE! The Neck/Reverse Chromacaster scheme does not have a provision to coil-shunt the pickup.
However, if you have a four-conductor bridge pickup, the scheme is fully compatible with a coil-shunt on an
additional switch – usually a push/pull or mini-toggle. Add a coil-shunt switch, and you can expand your tonal
palette by another eleven nuances.
If you use a mini-toggle for the coil-shunt option, wire an on/ON/on 3-way with Seymour Duncan’s
series/shunt/parallel wiring - which adds an additional eleven nuances over the simple coil-shunt option.
That's a lot of tones!
BEST OF ALL, NO NEW HOLES!
Just put your old tone knob back on the Chromacaster switch, and your Strat looks completely stock!
Your stock wiring probably looks like this:
page 2
INSTALLATION:
Take off your pickguard. Start at the 5-way, wiring for a master volume and tone:
1. If necessary, remove all the leads from the second pole of the 5-way (NOT the pole (side) with the
pickup hot leads). See drawing.
2. Solder the lower tone control’s lead to a common lug on 5-way, and run a jumper between the 5-way’s
common lugs. Run a jumper from the other common lug to your master volume.
3. Remove the grounds from the center tone pot, and clip any jumpers between the center pot and anything
else. Remove the center pot from the pickguard.
4. IF NECESSARY, remove the capacitor from the center tone pot and wire it to your new MASTER
TONE pot, with one leg on the center lug and one leg grounded to the back of the pot (some HSS Strats
have separate tone caps, making this step unnecessary).
5. Mount the Chromacaster switch in the place of the center tone pot.
6. Run an insulated ground wire from the back of the volume pot to the back of your new master tone pot,
with enough slack to go around the Chromacaster.
DO NOT OVERTIGHTEN THE MOUNTING NUT!
You will notice that the switch is NOT perfectly round, more egg-shaped - align it so that it's widest parts
"point" to the other two controls. If your control cavity is shielded, be sure that the lugs on the switch DO NOT
touch/short out on the shielding.
NOTE: While my rotary kits are a "straight swap" on genuine Fender guitars, others may have to slightly enlarge the hole in the
pickguard, and still others have reported that the control cavity must be routed a little deeper to accommodate the switch, which is
"deeper" than a normal pot. YMMV… NOTE:
These instructions assume that you have a working Strat with a standard 5-way switch – same as used in most Fender Strats,
including the (MIM) FAT Strat – which is the most common five-way for scratch builds or conversions from SSS to HSS. This is NOT
the five-way superswitch that is used in the Fender Lonestar or American Deluxe models. If you have one of those superswitch models
(or are using a superswitch), contact me and I will supply instructions on how to rewire the superswitch so that it can be used with the
Neck-Reverse Chromacaster.
page 3
Wiring the neck pickup to the Chromacaster Switch:
THE NECK/REVERSE MODEL: Unsolder the neck pup leads from where they are currently in your guitar
and solder them to the center lugs on the Chromacaster Switch. Be sure you get the "+" (positive, hot) side
(usually white, it is the lead soldered to the five-way pickup selector) on lug “1,” the lug with the string through
it.
The "-" (negative (aka ground), usually soldered to the back of the volume pot) goes on lug "2" (see drawing).
Now your neck pup goes through the Chromacaster Switch.
NOTE: Sometimes there is not enough wire on the leads to make it to the Chromie, so just add on a little "tail"
to the lead to get there. Be sure you insulate the solder joint on this "tail" to prevent contact with the pots or any
other grounded surface in the control cavity - black electrical tape or heat shrink tubing will do the trick.
What about THREE-wire pickups?
Some guitars and many after-market pickups are wired with THREE conductors:
The coil's "+" lead, the coil's "-" lead, and the shield/ground lead.
In these cases, remember that the shield/ground STAYS on the guitar's ground, and you will be lifting the coil's
"-" lead - which is often "twisted" with the shield/ground lead - to move it over to the rotary switch. How to tell
which is the coil's "-" and which is the ground lead? IF you don't have any "paperwork" color-code indicating
which is which, a simple test is to use your multimeter. With the two leads/conductors unsoldered from ground
(typically the back of the volume pot) and separated, set your multimeter in the 20k ohm range. With one probe
on the lead that you know is the coil's "+" lead (it's the one on the pup selector switch), one of the other two
leads will show you a 5k -10k reading when touched with the other probe. That's the resistance number for your
pup, and that's the coil's "-" lead. It is the lead you will move over to the rotary switch - the other one is
soldered back to ground.
page 4
The Chromacaster’s pre-wired leads: The Neck/Reverse Model:
The WHITE lead from the Chromacaster Switch goes to the neck pup’s spot on the 5-way - where you just
removed its "positive" (hot) lead.
The BLACK lead is added to the bridge pup's lug on the 5-way. It's the wire that will route the "negative" lead
of the neck pup back through the bridge pup for "series" settings.
The GREEN lead is added to the middle pup's lug on the 5-way. It's the wire that will route the "negative" lead
of the neck pup back through the middle pup for "series" settings.
The RED lead is soldered to the 5-way switch. It goes on the “bridge” lug of the second pole of the selector
switch (the side commonly used to connect the tone pots, or run the auto-shunt). Run a jumper from this lug to
the “neck” lug on this side of the 5-way (see drawing).
The bare wire is soldered to (any) ground.
Put your pickguard back on, and you're ready to rip!
page 5
How it works:
Basically, the Neck-Reverse Chromacaster re-routes the leads of the neck pickup to various places in the
guitar's circuitry. Each of its six "clicks" connects the leads to a specific point in the circuit to get the desired
combination of phase, series or parallel wiring. These "clicks" - called the "NOTCHES" - are named for how
they route the pickup into the circuit.
To reference these instructions, we'll say that the pickup selections on the 5-way are:
(1) = neck; (2) = neck and middle; (3) = middle; (4) = middle and bridge; (5) = bridge.
NOTCH ONE (tone knob on "10")
… is "NORMAL"
With the Chromacaster turned completely clockwise, it routes the Neck pup's hot to the 5-way switch (where it
would be, stock), and its ground to the guitar's ground. Plain ol' Strat combos, with the bridge as a humbucker.
The difference is that you now have a master tone control.
NOTCH TWO (tone knob on "9")
… is "NECK on with BRIDGE"
It is the first "click" as you turn the knob COUNTER-CLOCKWISE (10 to 9, indicated on the old tone knob).
This re-routes the neck pup's hot lead to the neck AND bridge ends of the 5-way, so that when you play the
Bridge pup, you get the Neck pup, too, giving you the “missing” two tones of the magnificent seven (all
possible parallel in-phase combos). As you work the your Strat's 5-way pup selector switch from neck to bridge,
here's what you will hear at each 5-way throw:
#1 Neck
#2 Middle and Neck;
#3 Middle;
#4 Neck, Middle and Bridge;
#5 Bridge and Neck.
Those last two tones are the tones EVERY Strat player sez they wish they had!
NOTCH THREE (tone knob on "8")
… is "NECK SERIES with BRIDGE"
At the next click counter-clockwise, when you select throw #1, Neck pickup (or #4, Neck and Middle) on the 5way, instead of just the Neck pup you will get the Bridge and Neck pup in series. This is fattest and warmest
tone in the scheme, and you may notice a slight boost in gain. As you throw the 5-way back from the Neck
position, you will get:
#1 Neck SERIES Bridge;
#2 <Neck SERIES Bridge> parallel to the Middle;
#3 Middle;
#4 Middle and Bridge;
#5 Bridge
page 6
NOTCH FOUR (tone control at "7")
… is "NECK SERIES with MIDDLE & ON with BRIDGE"
At the next click counter-clockwise, when you select throw #1 on the 5-way, instead of just the Neck pup you
will get the Neck and Middle pups in series. The Middle and Neck coils become rather like a single humbucker,
but the distance between the coils makes for a little "Strat Quack" rather than just being Gibson-y (to my ears).
As you throw the 5-way back from the Neck position, you will get:
#1 Neck SERIES Middle;
#2 Middle ONLY;
#3 Middle;
#4 Middle and Bridge;
#5 <Neck SERIES Middle> parallel to Bridge.
As you can see, throw #5 is rather like a Gibson dual-humbucker axe with the pup selector toggle centered
(playing both pickups). It won't sound like an SG, but this is as "Gibson-esque" as an HSS Strat can get.
NOTCH FIVE (tone knob at "6")
… is "NECK OUT-OF-PHASE, in SERIES with BRIDGE"
Here, the Neck pup is again wired in series with the Bridge pup, but out-of-phase. This gives you:
#1 Neck out of phase/series, with Bridge
#2 <Neck out of phase/series with Bridge> parallel to Middle;
#3 Middle;
#4 Middle and Bridge;
#5 Bridge.
When one pickup is out of phase with another, a lot of frequencies are "cancelled out" - the positive voltage one
pickup creates is negated by the negative voltage the other creates. Usually, lots of the "fundamental" is
cancelled out, and the only frequencies that "escape" to be heard are the frequencies that are harmonically
different between the two pickups - so you usually get thin and nasally tones.
NOTCH SIX (tone knob at "5")
… is "NECK OUT-OF-PHASE, ON with BRIDGE"
Here, the Neck pup is again out-of-phase with the other pickups, but played parallel, and is on with the Bridge
pup. This gives you:
#1 Neck
#2 Neck out of phase with Middle
#3 Middle;
#4 Neck out of phase with < Middle and Bridge>;
#5 Neck out of phase with Bridge
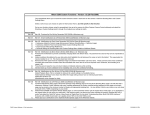
NECK/REVERSE Chromacaster TONE CHART
NOTCH NAME
(across)
5-way (down)
(1) neck
(2) middle+neck
(3) middle
(4) bridge+middle
(5) bridge
On with
Bridge
Series with
bridge
Series-Middle/
on with Bridge
Series-Bridge/
out of phase
Out of phase/
on with Bridge
(10)
(9)
(8)
(7)
(6)
(5)
n
n
N*B
N*M
-N*B
n
m+n
m
b+m
b
m+n
m
(N*B)+M
m
b+m
b
m
m
b+m
(-N*B)+M
m
b+m
b
-N+M
m
Normal
Tone knob
B+M+N
B+N
(N*M)+B
The Chromacaster changes the way the NECK pickup is wired into the circuit.
The NAMES of the NOTCHES describe HOW the bridge pickup is wired...
KEY:
+ = wired parallel
* = wired in series
- = wired out of phase
lower case letters = "stock" strat tones
UPPER CASE BOLD = new Chromacaster tones
Questions, comments or suggestions?
E-mail me at: [email protected]
B+M+(-N)
B+(-N)
Here are a few additional common Strat 5-ways:
A common "import" in-line 5-way:
The non-CLR 5-way from Stewart-MacDonald and others.
Note that the common lugs are at the opposite end of the switch from the stock Fender 5-way:
The Mega–S switch’s lugs are in a completely different configuration:
If NONE of these 5-ways matches yours, e-mail me at [email protected]
and we’ll figure out a scheme & drawing to git-r-done!


