1
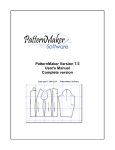
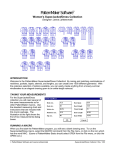
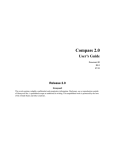
FALL 2015
18 week Course
September 9, 2015 – January 28, 2015
Instructor: Joan McKenna
[email protected]
619-588-2244
Blog: www.sewalongwithjoanie.com
Computer Patternmaking
Using Patternmaker 7.5
www.patternmakerusa.com
Wednesdays &Thursdays 5:30 – 9:00 pm
Location: West City Campus
3249 Fordham Street
San Diego, CA 92110
Room 209 & 208.
ALL My Syllabi are ALWAYS subject to change.
First Day of Class: Print out this Syllabus, the Patternmaking Glossary & Classroom Etiquette
and take it to class. Be prepared to take notes and fill out registration cards. Bring a 4 GIG (or
bigger) USB. I have important handouts for you.
YOU ARE RESPONSIBLE FOR THESE.
Mission Statement for Hospitality and Consumer Science:
Students completing courses or programs in Continuing Education’s Hospitality and Consumer
Sciences department will gain knowledge and skills in any of the possible subject matter offerings
(foods / nutrition / culinary arts / hospitality / fashion production / fashion merchandising / textiles /
interior design / life management / consumer issues and personal development) in order to prepare
for vocational careers and positively affect one’s quality of life.
SDCE Student Learning Outcomes:
Fashion Department Student Learning Outcome:
1
Students completing a fashion or fashion production course or program will be able to understand
and apply concepts, technologies, related skills and techniques by successfully completing class
projects in order to prepare for fashion careers.
Course Student Learning Outcome:
Students will demonstrate their Fundamentals of Patternmaking course learning and competencies by
using a computer patternmaking program to plot a master pattern, edit their measurement charts,
design and construct their own original design.
Course Goals:
Upon successful completion of the course the student will be able to:
1. Embrace industry specific nomenclature, reading, writing, math, communication and teamwork
skills used to interact successfully with employers, customers, family and friends.
2. Evaluate and problem solve using computer patternmaking methods and techniques.
3. Combine computer patternmaking skills with other forms of patternmaking to attain the most
efficient way of designing a garment.
4. Assess information on entry level employment opportunities in the apparel and costume
industry.
5. Synthesize computer patternmaking skills for an entrepreneurial sewn product business
venture, family, friends and personal use.
Patternmaking Course Objectives:
Students will demonstrate their class acquired learning and competencies through practical
applications, plus written and oral communications. At the end of the course, with reasonable
attendance, the student should be able to demonstrate the ability to:
1. Define, describe, and demonstrate computer patternmaking nomenclature, basic patternmaking
tools and techniques.
2. Design a garment on a croqui silhouette drawing that flatters the body proportions of the fit model.
3. Measure a man, woman, child, or dog and convert the measurements into a well-fitting pattern
using a computer patternmaking program.
4. Employ the principles of computer patternmaking to pattern and problem solve an original design
that fits your fit model.
5. Use their newly acquired skill, throughout the course, by completion of assigned project(s).
6. Demonstrate time saving equipment and techniques used in pattern production, such as but not
limited to: planning, organizing, and sequencing.
7. Purchase appropriate fabric and findings for a given fashion design to create the finished image
desired.
2
8. Identify skills that are transferable to the career market including but not limited to: research,
communication, diplomatic teamwork, and patternmaking competencies.
9. Attendance and punctuality. Missing more than 20% of the course hours will affect learning,
grade, and certificate earning ability.
Method of Instruction:
Methods of Instruction may include, but are not limited to: classroom lectures, classroom
discussions, collaborative learning, peer training, demonstrations, internet resource websites and
links for research, software programs, books on disk, text books, library building books, written
information handouts, audio-visual presentations, fandango field trips, guest speakers, completion of
portfolios, personalized attention, and student projects. To get Individualized Help: Write your name
on the white board in descending order under the word "Help."
Patternmaking Student Syllabus and Needs List
Week 1: Wed Sept 9: room 208 – First Day of Class. Introductions. Online registration. Do NOT
use your Social Security Number. Use your CSIDs number. Student Learning Outcome Sheets.
Patternmaker Handouts. Things to Download and Print for Thursday. If you use a fit model, they will
need to come to class several times for fittings. Classroom Etiquette. All Levels Welcome. Tools
and Equipment supplied by the School. Fit-Models. The syllabus. Slopers, and final Toiles project
which will consist of at least 2 pieces. (Talk to me if you have other ideas.) Handouts and Resources
on a USB. Bring your USB to EVERY CLASS!!! Keep up with assignments. Homework. This is
NOT a certificated course. Sewing & Cutting in room 209. Computers in Room 208. Access to a
sewing machine or TLC for the school’s machines. Signing out Sewing Machines to use & EROs.
Recommended Text(s). Using the instructor for guidance and resources. Receiving help and
learning from each other. Always list your topic on the “Help” board. Buying your project needs:
fabric, notions, patternmaking rulers, & lifetime sewing kit. Email your absences to me. Cleaning up
at end of EACH class: 8:45 PM. Students need to Sweep and make sure the tables are spray
cleaned before they go home. Spring Fashion Show put on by Mesa College. Today's
Lesson: Overview of Patternmaker program. www.patternmakerusa.com. Always save on your
flash drive: SAVE often and “save as:” Version 2, 3 etc. There is NO STUDENT SAVE in room 208.
Cute PDF free software and Plotter/Printer Discussion. HOMEWORK: Download and Print from
Blog. Obtain supplies needed for THURSDAY, September 10.
Thurs Sept 10: room 209 – Taught by Jeanne Reith. Do NOT miss this class. If you are
going to be working with a fit model, he/she needs to come. All fit models who enter this classroom,
must be human and over the age of 18. Wear or bring a bathing suit, body suit, leggings, a tight Tshirt, or exercise wear. You will need socks. We will be taking measurements to enter into
Patternmaker and plot close fitting master patterns. Note: We will ONLY be measuring the main
charts: Women’s, and Men’s. Dogs and children will have to be measured at home. Everyone
needs to be at least 18 years old to be in the classroom. Remember: The program plots patterns
based on measurements. They need to be very accurate. The class will break up into groups of 3:
The Victim, the Scribe, & the Measurement taker. Then, we will change positions until the entire
group of 3 has been measured. Come prepared !!!!! Read your syllabus cover to cover !!!
There are directions for this class and supplies that are needed! DO NOT LEAVE WHEN YOU
ARE DONE. Jeanne will be Taking CROQUI PICTURES OF YOU.
Measuring Recommendations:
3 people are necessary to take measurements:
3
The Measurement Taker, the Scribe, and the Victim.
This will get the job done in a timely manner. Remember the “victim” gets tired. Do not let
them lose their perfect posture. Being FAST and ACCURATE is a necessity.
We will ONLY be measuring the main chart for Women or Men. There is a handout.
Review all instructions BEFORE you take measurements.
ALWAYS put the victim’s name and the date on their measurement chart.
Remember: Always measure at/to the bottom of the elastic.
Do the following prep before measuring: (Can be done before CLASS)
You will need an elastic for your: Bust, Natural Waist, Abdomen, Hips.
Fasten ends together with a safety pin BEFORE coming to class.
Mark the bust elastic “BUST” and put your name on it.
Mark the waist elastic “WAIST” and put your name on it.
Mark the abdomen elastic “ABDOMEN” and put your name on it.
Mark the hip elastic “HIP” and put your name on it.
Supplies needed to MEASURE for Patternmaker: Bring to next class – September 10.
1 inch wide elastic. Buy enough elastic to encompass your bust, NATURAL
waist, abdomen, and hips. You will need 4 pieces of elastic.
Bring a leotard, bathing suit, leggings, close fitting knit shorts, a close fitting knit tank top, T-shirt,
Socks (Measurements are taken without shoes on.)
Great fitting bra
Wash off marker. If you do not mind marks on your body: Sharpie FINE POINT Marker
Pencils & Eraser
NEW measuring tape that will go around the largest part of your body
Underarm/Pant Inseam tape measure
An EVERYTHING scissors
Weighted cord
6 inch sewing gauge
Calculator
4 large safety pins
NICE TO HAVE ON HAND: Extra Safety Pins, 3” x 3” Post it notes, Dry line correction tape
Week 2: Wed Sept 16: room 208 - BRING YOUR USB TO EVERY CLASS. Work on making
personal Croqui with Paint.Net and Joan McKenna. http://www.getpaint.net/. Introduction to
Paint.net software. Complete your 4-view Croqui in Paint. Print it out @ home. Room 208 has no
printer. Trace it. Put your name & date on it. If you give me your original croqui, I will PDF and make
10 copies of your croqui.
Thurs Sept 17: room 208 - BRING YOUR USB TO EVERY CLASS. Download complete 7.5
Patternmaker Documentation. Complete your croqui. In-between working with your sloper, put
pictures of what you want to pattern, in Patternmaker, on your USB. Use the pictures for inspiration.
Draw your design on your croqui. One style to one croqui. You need to show the same style on all 4
views of 1 croqui. These pictures can be colored or just sketched. You will need the approval of the
instructor to pattern what you have drawn. (Trust me, I will NOT let you choose something that is
above your skill level.) You will need to draw 5 garments. 2 will be chosen to be patterned. It can be
a jacket and skirt. A Historical Creation from 1795 with panniers, a corset, bodice, underskirt and
skirt. Or a dress with a bolero jacket. Gentlemen can draw a shirt and pants. Bathing trunks and a
shirt. Your final toile will be of woven fabric. (So will your final collection.) Design accordingly. Take
this class period to finish the croqui and become inspired !!!!! FINAL Croqui approval date: Oct 22
4
Week 3: Wed Sept 23: room 208 - Introduction to Patternmaker software. Learn Patternmaker’s
Tools.
Thurs: Sept 24: room 208 - Introduction to Patternmaker software. Learn MORE
Patternmaker’s Tools.
Week 4: Wed Sept 30: room 208 - BRING YOUR USB and a fairly new TAPE MEASURE TO
EVERY CLASS. Introduction to computer slopers.
*Bring Your Measurements, Cut Function Key Strip, tape measure and USB
Remember to Save OFTEN to your USB
You will be creating your sloper(s). In this way, you will be checking whether or not your
patternmaker measurements are correct.
Open Patternmaker Program
Commands: Purple color…inactive. Green is active.
Blue bar: Tells you exactly what you have to do.
Open Macro: Input your Measurements in Create Measurements.
Copy your measurements file to your USB.
Designer: Leena
Women 1 Collection
Fitting Bodice
Choose your measurements when program asks for MTBs
Choose minimum ease
Choose “0” seam allowances
Keep track with NOTES as to what happens when the pattern appears
Analyze. 100% OF THE TIME…. It is one or two measurements that are wrong.
Yes, the program requires tweaking !!!!
Once you get the sloper correct, the program is MUCH easier to work.
Then all you need to worry about is the design and it’s changes to get that way……
Keep notes as to what you are changing. There is always a way to get it to do what you want.
Ask Instructor for help. Don’t let your frustration level go up.
When ANY pattern creates, save to USB. Version 1, 2, etc.
When you are satisfied, Choose “1 inch” seam allowances.
ALWAYS Save to USB. Version Final.
When you are satisfied, it is time to move on and try the Pant with darts.
Print or Plot. Your choice. Move the fitting bodice and pants patterns to 34 x 108 paper Save.
ALWAYS GET THE OKAY FROM THE INSTRUCTOR TO PLOT OR PRINT. This is your safety
check.
File
Print Set up
Choose: HP 500
Go into Properties
Paper Options
Choose 34 inches by 108 inches (This may not be long enough.)
Paper Quality
Make sure source is a roll
Press Custom Button
5
Sometimes there is a “Select From” Place
If not, we can input the 34 inches by 108 inches
Press OK for the set up
Notice the page lines changed on the main patternmaker screen
Press “page up” to zoom out (Or use your function keys)
“Move” one piece at a time and put pattern pieces all on the page.
Sleeve “sometimes” needs to be turned 90 degrees.
You can input the 90 degrees or rotate around the grainline.
Sometimes you can get kicked out of the program. (Fixed in version 7.5)
Need to save your work….often. Remember to save to USB
Press “page down” to zoom in (Or use your function keys)
Add your name to each piece before you print. Save.
Print to Cute PDF and save to your USB. You should be able to print PDFs @ home.
You can plot at Staples, Fed Ex, Office Depot. Some places are better than others.
Rancho San Diego Staples is the best !!!! The cost is between $15 & $20 per pattern.
Never EVER: Turn off your computer until you check that ALL your pattern(s) /
PDFs are on your USB.
Supplies needed immediately after the initial pattern printing:
Paper scissors and ¾ inch Scotch magic tape (green label.)
One Dritz patternmaking ruler or if this will be future business: A set of patternmaking rulers.
Be prepared to “tweak”
Thurs: Oct 1: room 208 - Continue to Work on perfecting your Computer Pattern Slopers.
Work with No Seam Allowances. We will put them on at the end before plotting. Make sure you text
your name on each pattern piece.
Week 5: Wed Oct 7: room 208 - Continue to Work on perfecting your Computer Pattern Slopers.
Work with No Seam Allowances. We will put them on at the end before plotting. Make sure you text
your name on each pattern piece.
Thurs: Oct 8: room 208 - Work on perfecting your Pattern Computer Slopers. Add 1 inch
seam allowances. Plot/print to Cute PDF, put on your USB, and have the pattern plotted at Staples
or FedEx or print at home.
*****Saturday, October 10, 2015 Fandango Field Trip to the LA Garment District with Sew Pros.
$50 to ride their bus. It’s worth it !!!! Call Rosemary or Deana at the Clairemont Store for details:
858-279-2500. Bring your pattern envelope and syllabus. You can buy the rest of your supplies and
fabrics for your garments.
Week 6 Wed Oct 14: room 209 - Cut out your paper sloper patterns. Place on your ON GRAIN
toile fabric. (Usually muslin.) Sew it up with the school’s Pfaffs or Berninas. Sew with NONmatching thread. Have a fitting with the instructor. You may or may not have additional changes to
make to your patternmaker measurements before you start patterning your design. Note: Your
inputted measurements must be as accurate as possible before you start patternmaking your original
design.
Thurs: Oct 15: room 209 - Continue to sew sloper toiles.
Week 7: Wed Oct 21: room 209 - Continue to sew sloper toiles.
6
Thurs: Oct 22: room 209 - Continue to sew sloper toiles. Final Date to have your final
garment toile croqui approved by the instructor.
Week 8: Wed Oct 28: room 208 - In Patternmaker, let’s find macros that are close to what you want
your designs to look like. Input your measurements. Cute PDF the patterns with “FIT to Page.” You
will use these patterns to show the instructor (in quarter size) the patternmaking technique to achieve
your final garment designs. Print your PDFs at home. I will photocopy them for you tomorrow.
Thurs: Oct 29: room 209 - Bring paper scissors, ¾ inch scotch magic tape. Let’s practice
what you are going to do with Patternmaker’s tools. I will supply colored paper. I will approve what
you want to do. This will make your project time in room 208 much more productive.
Week 9: Wed Nov 4: room 209 - ***We may need to continue the flat patternmaking lesson. If not,
we will go to room 208 to begin our Computer Pattern final toile project.
Thurs: Nov 5: room 208 - Start to Computer Pattern final toile project. Remember
interfacings, facings and other details. Pattern your final garment toiles without seam allowances.
Week 10: Wed Nov 11: NO CLASS. Veterans Day.
Thurs: Nov 12: room 208 - Pattern your final garment toiles without seam allowances.
Week 11: Wed Nov 18: room 208 - Pattern your final garment toiles without seam allowances.
Thurs: Nov 19: room 208 - Pattern your final garment toiles without seam allowances.
Thanksgiving Week Nov 23 – Nov 27: NO CLASSES
Week 12: Wed Dec 2: room 208 - For those of you who have completed your patterns for
your final toile project, move on to the Grading component of Patternmaker. Grade your final patterns
without seam allowances. For the rest of us: Pattern your final garment toiles without seam
allowances.
Thurs: Dec 3: room 208 - Pattern your final garment toiles without seam allowances.
Week 13 Wed Dec 9: room 208 - Pattern your final garment toiles without seam allowances.
Thurs: Dec 10: room 208 - Pattern your final toile toiles without seam allowances.
Week 14: Wed Dec 16: room 208 - Pattern your final garment toile toiles without seam allowances.
Thurs: Dec 17: room 208 - Work on perfecting your 2 Pattern Garment toiles. Add 1 inch
seam allowances. Plot/print to Cute PDF, put on your USB, and have the pattern plotted at Staples
or FedEx or print at home.
Winter Break: Monday Dec 21 – January 5 NO CLASSES
Week 15: Wed Jan 6: room 209 - Sew final Toiles. Have a fitting with the instructor.
Thurs: Jan 7: room 209 - Sew final Toiles. Have a fitting with the instructor.
Week 16: Wed Jan 13: room 209 - Sew final Toiles. Have a fitting with the instructor.
Thurs: Jan 14: room 209 - Sew final Toiles. Have a fitting with the instructor.
Mon 18 Martin Luther King’s Birthday. NO CLASS.
Week 17: Wed Jan 20: room 209 - Sew final Toiles. Have a fitting with the instructor.
Thurs: Jan 21: room 209 - Sew final Toiles. Have a fitting with the instructor.
7
Week 18: Wed Jan 27: room 209 - Sew final Toiles. Have a fitting with the instructor.
Thurs: Jan 28: room 209 - Final Day of Computer Patternmaking. Pictures will be taken.
Computer Patternmaking Needs: (Hopefully this is complete)
1 of 2. Supplies needed to MEASURE for Patternmaker: Bring to next class –
September 10.
1 inch wide elastic. Buy enough elastic to encompass your bust, NATURAL
waist, abdomen, and hips. You will need 4 pieces of elastic.
Bring a leotard, bathing suit, leggings, close fitting knit shorts, a close fitting knit tank top or T-shirt,
etc.
Socks (Measurements are taken without shoes on.)
Great fitting bra
Wash off marker. If you do not mind marks on your body: Sharpie FINE POINT Marker
Pencils & Eraser
NEW measuring tape that will go around the largest part of your body
Underarm/Pant Inseam tape measure
An EVERYTHING scissors
Weighted cord
6 inch sewing gauge
Calculator
4 large safety pins
NICE TO HAVE ON HAND: Extra Safety Pins, 3” x 3” Post it notes, Dry line correction tape
2 of 2. Supplies needed for Week 2, and thereafter.
4 GIG (or larger) USB Flash Drive. Bring to every class !!!!!
Function Key Strip (3 are attached to this syllabus)
Access to a Staples, Office Depot or Fed Ex
3/4-inch Magic Tape.
Rubber Bands.
Variety of Pens and Pencils.
Set of 4 Colored Sharpie Markers - Ultra-fine point
Paper Scissors
1 – 2 Pattern Hooks
Recommended Text Book
Fairgate Plastic Ruler: 01-128(P) There is also one made by Dritz.
The following are nice to have…..but ONLY if you are going into this as a career.
Item #12-124 Vary Form Curve
Kit #15-102 Fashion Designer’s Kit:
L-Square, Hip Curve, Armhole Curve, 18-inch C-Thru Ruler, Booklet.
Patternmaking Tools:
Awl; 1/4” x 1/16” Notcher
Complete Basic Sewing Kit.
One bobbin for a Pfaff 2036, or Bernina 130.
New or fairly new Tape Measure
Broadcloth or Muslin (INEXPENSIVE, non-stretch, solid color, woven)
I KNOW you want me to tell you how much to buy. I always by a bolt at a time. I would use your
50% off coupon from Joanne’s. I would start off with 8 yards.
Access to a sewing machine
8
Access to a computer and printer that can see Adobe PDFs and print them.
Non-Matching Thread
Straight Pins
Fabric Shears
Thread Nips or Scissors
Paper Scissors
Scrap Fabric
*****All sewing notions and supplies for final project to be discussed in class*****
Recommended - Computer Patternmaking Text
Custom Patternmaking with Patternmaker Software: A Step by Step Manual for the
Professional Studio With an Introduction to Macro Generator by Jennifer K. Smith Less than
$20 Copyright 2011.
ISBN-10: 1463755988
ISBN-13: 978-1463755980
Create Space Independent Publishing Platform (January 18, 2012)
Recommended Text - Patternmaking
The Practical Guide to Patternmaking for Fashion Designers:
Juniors, Misses, and Women by Lori Knowles. More than $40 Copyright: 2005.
ISBN # 1-56367-328-2
Fairchild Publications
Note: Lori Knowles also published a Patternmaking book for men entitled:
The Practical Guide to Patternmaking for Fashion Designers: Menswear
Check for books on www.Amazon.com
STRONGLY Recommended Print from the 52 Patternmaker PDFs:
PatternMaker Version 7.5 Quick Start Manual. It is 30 pages.
Course Assessment
A student’s completion/competency from this course will be based on multiple measures of
performance. Assessment will measure the development of independent critical thinking and
demonstrable basic patternmaking skills. Final course evaluation of the student’s ability will be based
on, but not limited to, the following criteria:
1. Completion of a self-evaluation of Course Student Learning Outcomes and evaluate the
achievement of said outcomes upon completion of the course.
2. Design a garment on a croqui silhouette drawing that flatters the body proportions of the fit model.
3. Measure a man, woman, child, or dog and convert the measurements into well-fitting patterns
using a computer patternmaking program.
4. Employ the principles of computer patternmaking to pattern and problem solve an original design
that fits your fit model.
5. Use their newly acquired skill, throughout the course, by completion of assigned project(s).
9
6. Demonstrate time saving equipment and techniques used in pattern production, such as but not
limited to: planning, organizing, and sequencing.
7. Purchase appropriate fabric and findings for a given fashion design to create the finished image
desired. In this course, we are making toiles. (In Collections, we are making the final garments,
unless you cannot take the Collections class.)
8. Identify skills that are transferable to the career market including but not limited to: research,
communication, diplomatic teamwork, and patternmaking competencies.
9. Attendance and punctuality. Missing more than 20% of the course hours will affect learning,
grade, and certificate earning ability. (Total Class Hours: 122.5. 80% = 98 hours.)
Future Classes and Events:
October 10, 2015: Sew Pro’s next LA Fandango Field Trip. 1-858-279-2500. $50.00
Spring Courses: Sewing Fundamentals and Collections.
May 2016: Mesa’s Fashion Show. Yes, we can show in the show !!!!!
Croqui Silhouette in Paint.Net
8-24-2013
Make sure you have the required 4 pictures: front view, left side view, right side view and back view.
Each picture should be complete from toe through hair. (Cell phone pictures work well.)
Save often to your USB in jpg format.
Select new art board. Landscape Orientation: 11 x 8.5 inches.
Resolution should be 300 – if you know how to do this.
Put the first picture on in the center. Use the side view.
Keep the scale correct….BUT CROP to make pictures long and narrow. Do not lose feet and hair.
Put the first cropped picture on the art board toward the center. Use a side view.
Program will ask you to scale. Keep this even.
Select and import other 3 pictures.
Save with new name.
Make sure the 4 pictures are all the same size: from head to toe. 7 to 8 inches.
The art board, should be canvas size 11 x 8.5.
From left to right, you should have: Front View, Side Views and Back View.
Save croqui picture in jpg format. Print completed picture 2 or 3 times.
Trace around the 4 silhouettes, manually. Now you will have a silhouette of each view: Front, 2
Sides, and
Back on one sheet of paper. Use this as your original Croqui. Put in clear sheet protector.
Photocopy the original and design on your personal croqui. Give the instructor
a copy of your croqui. I will PDF and give it for you.
Download FREE Paint.net @ http://www.getpaint.net/ for use at home.
10
Fractions to Decimals
Commit to Memory
If you do not have this committed to memory now, you will - by the end of this course.
(There will be a pop quiz.)
1/16 inch = .0625
1/8 inch = .125
3/16 inch = .1875
¼ inch = .25
5/16 inch = .3125
3/8 inch = .375
7/16 inch = .4375
½ inch = .5
9/16 inch = .5625
5/8 inch = .625
11/16 inch = .6875
¾ inch = .75
13/16 inch = .8125
7/8 inch = .875
15/16 inch = .9375
1 inch = 1.0
Good to Know: 1/32 inch = .03125
1/64 inch = .015625
11
Generic Croqui with 4 Poses
12
PatternMaker Software
Quick Guide to general PatternMaker concepts
Select command first, then select object(s) or point(s) to which the command will be applied
Left-click to select things, or to execute a command
Points to move, object to rotate, etc.
Right-click to stop selecting things, or to Cancel
Finish a selection set, or abort a command
Check the status bar to see the current command or
most recent command. A command name appears in purple
if it is active (the current command), and appears in green if it
is inactive (the most recent command).
Check the command line for information on what the
program is expecting you to do
The prompt returns to "Command:" when the previous
procedure is completed.
Edit object commands found on the Edit menu
These commands affect entire objects (Move, Rotate, Cut,
Erase, etc.)
Edit point commands found on the Point menu
These commands affect individual points (Delete Vertex, Move Vertex, etc.)
Use keyboard to enter precise coordinates
Relative, absolute, polar, or relative polar
Turn on yardage grid to estimate necessary fabric Set fabric width on the "Configure" form on the Settings
menu.
Use "Print To Single Page" to create reference sheets
Automatically shrinks the entire drawing to fit on one piece of paper. Great for fabric layout diagrams!
Use special print commands to print or re-print specific parts of your pattern
Print Select prints one or more individual pattern pieces; Print Region prints a rectangular area of the drawing.
Read the User's Manual and use the Help file to find answers to your questions.
13
14