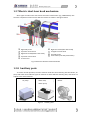
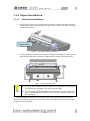
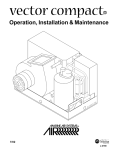
1
Owner's Manual NestCutting Series Machine For:CMA1325/CMA1625/CMA2222 Copyright Statement GD Han’s Yueming Laser Technology co.,Ltd. All rights reserved. GD Han’s Yueming Laser Technology co.,Ltd (Han’s Yueming Laser hereafter) reserves the right to modify the products and product specifications described in this manual without advance notice. Han’s Yueming Laser is not responsible to any direct, indirect, or consequential damage or liability caused by improper use of this manual or the product. Han’s Yueming Laser owns the patent, copyright or any other intellectual property right of this product and the related software. No one shall duplicate, reproduce, process or use this product and its parts, unless authorized by Han’s Yueming Laser . All the name refered in this manual only for identification, if belongs to other company’s registered trademark or copyright, proprietary rights of the name belongs to their respective holder. I Disclaimer and Responsibility Statement Whole using the machine from our company, users are required to ensure integrity and independence of the product including but not limited to: mechanical, electrical, optical, control software and accessories. Unauthorized modification is strictly prohibited. It is a must to satisfy operating environment and operating specifications specified in the owner’s manual. For the followings: Machine modified with no authorization (including but not limited to: add, remove, modify, unauthorized disassembly, replacing parts); Use the machine in the environment failing to satisfy the operating requirements; Operate disobeying the specifications of our company; Unauthorized use the machine parts, accessories and auxiliaries on to other machine or in other places; Viciously disassemble, destroy, decode hardware and software of the machine from our company Our company shall not undertake any direct, indirect or joint responsibility. Our company reserves the rights to ascertain legal responsibility for the serious consequences or economic losses or reputation losses caused by what mentioned above. II Foreword Thanks for purchasing the laser engraving machine control system of our company. Before operating, please read this manual carefully to ensure proper operation. Please keep the manual properly for reference. Since the configs are different, certain models do not have the functions listed in this manual. Please refer to the specific functions for details. Due to the constantly tech update, the specification for reference only, subject to the real standard. Tags in this book: Special Attention: User must follow and perform as the manual; otherwise, it could lead to errors or relatively serious problem. Warming Note: User should comply with the attention and suggestion in this manual; it could bring much easier operation. Note III Safety Precautions ◆Before using the machine, users are required to carefully read this manual and other operating requirements, strictly abide by the operating specifications. Professional are required for operating the machine. Attention Attention ◆ The machine uses class 4 laser (strong laser radiation). The laser radiation may possibly cause the following accidents: ① emblaze the surrounded flammable materials; ② generate other radiations and toxic or hazardous gas by processed objects during laser processing; ③ direct irradiation of laser radiation cause harm to human body. Therefore, fire fighting devices are required in the operating place of the machine. Stacking flammable or explosive objects near the machine is strictly prohibited. Good ventilation is a must. Only the qualified personnel are authorized to approach the machine. ◆ The processed objects and discharged materials are required to satisfy requirements as per local laws and regulations. Attention Attention Laser processing is with potential risks. Users should carefully make sure if the processed objects are suitable for laser processing. There is high voltage and potential risk in the laser machine. Unauthorized disassembly by unqualified personnel is prohibited. Reliable earthing is required for the machine and related other machine before power-on. During operating, removing any cover of the machine is strictly prohibited. During operating, the operators are required to observe working status of the machine all the time. In case of any abnormality, it is immediately to disconnect power supply and take active and corresponding measures. After power-on, special personnel are required for monitoring. Unauthorized leaving is strictly prohibited. It is a must to disconnect the power supply before leaving. It is strictly prohibited to placing any unrelated all-reflective or diffusion reflective objects in the machine to prevent laser reflecting to human body or flammable materials. The environment for the machine should be dry, free of interference and influences from pollution, vibration, high voltage and strong magnet. The operating ambient temperature ranges 5-40℃, and the humidity ranges 5-95% (no dew); Attention Attention IV Attention The machine should be far from electric appliances sensitive to electromagnetic interference; Operating voltage: AC220V, 50Hz. Power-on is strictly prohibited in case of unstable voltage of the power grid or unspecified voltage. Chapter two of this manual is for Safety Rules. Please refer to the chapter more details concerning safe operation of the machine. Users are required to carefully read and abide by all the requirements of safety. V Contents Copyright Statement .......................................................................................................... I Disclaimer and Responsibility Statement .......................................................................... II Foreword .......................................................................................................................... III Safety Precautions ............................................................................................................ IV Chapter 1 Machine Introduction ................................................................................... - 1 1.1 Instructions of machine model ....................................................................... - 1 - 1.2 Machine compositions ................................................................................... - 1 - 1.2.1 Compositions of the machine ................................................................. - 2 - 1.2.2 Man-machine interface........................................................................... - 4 - 1.2.3 Compositions of movement mechanism ................................................ - 5 - 1.2.4 Working platform .................................................................................... - 6 - 1.2.5 Compositions of optical mechanism ....................................................... - 7 - 1.2.6 Brush-pencil mechanism ......................................................................... - 7 - 1.2.7 Electric dual-laser head mechanism ....................................................... - 8 - 1.2.8 Auxiliary parts ......................................................................................... - 8 - 1.3 Machine parameters .................................................................................... - 10 - 1.4 System configuration .................................................................................... - 12 - 1.5 Operating environment ................................................................................ - 13 - 1.6 Suitable materials ......................................................................................... - 13 - 1.7 Applicable fields............................................................................................ - 13 - Chapter 2 Safety Rules................................................................................................. - 14 2.1 Product safety............................................................................................... - 14 - 2.2 Safe equipment ............................................................................................ - 14 - 2.3 Safety awareness .......................................................................................... - 14 - 2.4 Requirements for personnel......................................................................... - 15 - 2.4.1 Definition of terms ................................................................................ - 15 - 2.4.2 Qualifications ........................................................................................ - 15 - 2.4.3 Responsibility ........................................................................................ - 15 - -1- 2.4.4 2.5 Personal protective devices .................................................................. - 16 - Special product risks ..................................................................................... - 16 - 2.5.1 Laser radiation risk ................................................................................ - 16 - 2.5.1.1 Common mode................................................................................... - 16 - 2.5.1.2 Maintenance mode ............................................................................ - 17 - 2.5.1.3 Direct laser ......................................................................................... - 17 - 2.5.1.4 Reflection and diffuse radiation ......................................................... - 18 - 2.5.2 High voltage risk .................................................................................... - 18 - 2.5.3 Risk of electric shock ............................................................................. - 18 - 2.5.4 Hazard of processing outgrowth........................................................... - 19 - 2.5.5 Risk of optical system............................................................................ - 20 - 2.5.5.1 Routine operation .............................................................................. - 20 - 2.5.5.2 Warning for fire accident.................................................................... - 21 - 2.5.6 Other risks ............................................................................................. - 21 - 2.5.7 Measures for emergency ...................................................................... - 21 - 2.5.7.1 Measures for personal injury ............................................................. - 21 - 2.5.7.2 Measures for fire accident ................................................................. - 21 - Chapter 3 Machine Installation and Debugging .......................................................... - 23 3.1 Machine Installation ..................................................................................... - 23 - 3.1.1 Steps of unpacking ................................................................................ - 23 - 3.1.2 Unpacking check ................................................................................... - 24 - 3.1.3 Preparations for machine installation .................................................. - 25 - 3.1.4 Steps of installation............................................................................... - 26 - 3.1.4.1 Laser tube installation ........................................................................ - 26 - 3.1.4.2 Cooling system installation ................................................................. - 28 - 3.1.4.3 Air pump installation .......................................................................... - 29 - 3.1.4.4 Air compressor installation................................................................. - 30 - 3.1.4.5 Blower installation.............................................................................. - 30 - 3.1.4.6 Machine earthing ............................................................................... - 30 - -2- 3.2 3.1.4.7 Software and machine drive installation ............................................ - 31 - 3.1.4.8 Other auxiliary part installation ......................................................... - 32 - Instructions of machine button and indicator light...................................... - 32 - 3.2.1 Master switch of power supply .......................................................... - 32 - 3.2.2 Emergency stop button......................................................................... - 32 - 3.2.3 Operation panel .................................................................................... - 33 - 3.2.4 Working indicator light ......................................................................... - 36 - 3.3 Machine debugging ...................................................................................... - 37 - 3.3.1 Sequence of power-on and power-off .................................................. - 37 - 3.3.2 Movement debugging ........................................................................... - 38 - 3.3.2.1 Motor shaft movement ...................................................................... - 38 - 3.3.2.2 Pulse setting ....................................................................................... - 39 - 3.3.2.3 Stroke, limit and reset ........................................................................ - 42 - 3.3.2.4 Straightness and perpendicularity ..................................................... - 42 - 3.3.3 Laser debugging .................................................................................... - 43 - 3.3.3.1 Light emitting test .............................................................................. - 43 - 3.3.3.2 Light route adjustment ....................................................................... - 44 - 3.3.4 Trial operation of processing ................................................................ - 46 - Chapter 4 System Maintenance .................................................................................. - 47 4.1 Mechanical maintenance ............................................................................. - 47 - 4.1.1 Guide rail, linear shaft, slide block assembly (metal guide pulley), nylon guide pulley - 47 4.1.2 Synchronous belt, synchronous belt wheel .......................................... - 48 - 4.1.3 Fasten screws and coupling .................................................................. - 49 - 4.2 Electric maintenance .................................................................................... - 49 - 4.2.1 Limit switch ........................................................................................... - 49 - 4.2.2 Emergency stop button......................................................................... - 49 - 4.2.3 Other button and indicator light maintenance..................................... - 50 - 4.3 Light route maintenance .............................................................................. - 50 - 4.4 Auxiliary parts maintenance ......................................................................... - 51 - -3- 4.4.1 Water replacement and water tank cleaning ....................................... - 51 - 4.4.2 Blower cleaning ..................................................................................... - 51 - 4.4.3 Water chiller maintenance ................................................................... - 51 - Chapter 5 Trouble Shooting ........................................................................................ - 53 Appendix ...................................................................................................................... - 55 Appendix 1 Electric wiring diagram for No.3 controller .......................................... - 55 Appendix 2 The control figure of main power supply for CMA1625F.................. - 56 - Appendix 3 The control panel and I/O config for CMA1625F .............................. - 57 - Appendix 4 Export Config of CMA1625F ................................................................. - 59 Post .............................................................................................................................. - 60 - -4- Chapter 1 Machine Introduction NestCutting series laser machine is laser processing device for large breath of garment cloth developed by Guangdong Han’s Yueming Laser Technology Co., Ltd. The machine is mainly equipped with sealed 80W-150W CO2 glass laser tube or metal radio-frequency tube with the function of cutting large breadth garment cloth, leather or wood and with the wide scope of application in the field of garment, advertisement and lamp. It is a large breath of laser cutting machine with high speed and high breath. 1.1 Instructions of machine model Indications of Han’s Yueming laser machine model: CMA XXXX X Series: Processing breadth: CMA:CMA series …… 1325:1300mm X 2500mm 1625:1600mm X 2500mm 1628:1600mm X 2800mm Instructions of auxiliary models: F: Automatic feeding …… 2222:2200mm X 2200mm 2240:2200mm X 4000mm …… Fig.1-1 Instruction of machine model 1.2 Machine compositions Due to different models and improvement of products, the industrial design and details of some types of machine may be different. The compositions are subject to the actual product. The following takes general CMA1325 as an example for the compositions of the machine. The standard config of CMA1325/1625/2222 is No.3 control system, it can running independently without company, and the working platform is strip soleplate. Note The standard config of CMA1625F (auto feeding machine) is No.4 control system, it must running with computer, the working platform are vacuum adsorption soleplate and feeding mesh belt. The standard config of CMA2240 is No.4 control system, it must running with computer, the working platforms are vacuum adsorption soleplate and Strip soleplate. -1- 1.2.1Compositions of the machine Front view of the machine is as shown in the figure below: 10 ○ 9 ○ 12 ○ 11 ○ 1 ○ 2 ○ 7 ○ 3 ○ 6 ○ 5 ○ 4 ○ 8 ○ 1 Main unit 7 Laser power supply control cabinet ○ ○ 2 Electric control box 8 Master switch of power supply ○ ○ 3 Versatile ball (some) 9 Emergency switch (each two at front and back) ○ ○ 4 USB or network interface 10 Cutting table (Beehive soleplate, Strip soleplate, mesh belt) ○ ○ 5 Control panel 11 Crossbeam (X/Y movement mechanism and laser tube) ○ ○ 12 Laser cutting head 6 Footmaster caster (6 in all) ○ ○ Fig.1-2 Front view of the machine Back view of the machine is as shown in the figure below: 17 ○ 18 ○ 13 ○ 14 ○ 16 ○ 13 Water chiller ○ 14 Air pump ○ 15 turbine exhaust blower ○ 15 ○ 16 Exhaust blower ○ 17 Indicator ○ 18 side cover of machine (each 3 at left and right) ○ Fig.1-3 Back view of the machine -2- CMA1625 is shown as following figure: Fig.1-4 Illustration of CMA1625 CMA1625F is shown as following figure: Fig.1-5 Illustration of CMA1625F CMA2240 is shown as following figure: Fig.1-6 Illustration of CMA2240 -3- Machine control is as shown in the figure below: Machine structure Control system Optical mechanism Movement mechanism Air pump Blower Fig.1-7 Illustration of machine control 1.2.2 Man-machine interface Man-machine of CMA1325 is shown as following figure: Fig.1-8 Man-machine of CMA1325 Man-machine of CMA1625 is shown as following figure: Fig.1-9 Man-machine of CMA1625 Man-machine of CMA1625F is shown as following figure: -4- Water chiller Fig.1-10 Man-machine of CMA1625F The control panel of CMA2240 is shown as follow: Fig.1-11 Control panel of CMA2240 1.2.3 Compositions of movement mechanism Plane movement mechanism is composed of X-axis and Y-axis movement mechanisms in vertical relation as shown in the figure below: -5- 8 ○ 10 ○ 9 ○ 11 ○ 5 ○ 12 ○ 7 ○ 6 ○ 2 ○ 3 ○ 4 ○ 1 ○ 1 X-axis motor 7 Y-axis guide rail beam (each one at left and right) ○ ○ ○2 X-axis beam and guide rail ○8 Y-axis drive shaft ○3 X-axis timing belt ○9 Y-axis motor 1○0 Y-axis sensor (Reset or limit signal) ○4 Dolly (connecting to cutting head) 11 Y-axis timing belt (each one at left and right) ○5 X-axis sensor (Reset or limit signal) ○ 12 Support board of beam 6 Y-axis guide rail (each one at left and right) ○ ○ Fig.1-12 Illustration of movement mechanism 1.2.4 Working platform Working platforms of NestCutting series laser machine are mainly strip soleplate or feeding belt. Feeding belt is mainly used for placing soft materials like cloth or leather, while strip soleplate is mainly for hard materials like organic glass or thick plank. Strip soleplate Feeder mesh belt Fig.1-13 Working platform -6- 1.2.5 Compositions of optical mechanism NestCutting laser machine is single-path laser light route; the light mechanism is as shown in the figure below: 1 ○ 5 ○ 2 ○ 3 4 ○ ○ 7 ○ 10 ○ 8 ○ 6 ○ 9 ○ ○1 Laser tube bracket ○2 Laser tube ○3 Water circulation joint (an outlet and inlet) ○4 Laser outlet ○5 No. 1 reflector 6 No. 2 reflector ○ ○7 No. 3 reflector ○8 Focus ○9 Blowing pipe 1○0 Cycled cooling tube Fig.1-14 Illustration of optical mechanism 1.2.6Brush-pencil mechanism Some types of machine are with brush-pencil function (e.g. CMA1610ETP). The brush-pencil mechanism is as shown in the figure below: 1 ○ 2 ○ 3 ○ Fig.1-15 Brush-pencil mechanism -7- Brush-pencil Electric magnet Brush-pencil fastener 1.2.7Electric dual-laser head mechanism Some types of machine are with electric dual-laser head function (e.g. CMA2222EFT). The structure composition of the electric dual-laser head is as shown in the figure below: 8 ○ 9 ○ 1 ○ 7 ○ 2 ○ 6 ○ 3 ○ 4 5 ○ ○ 6 ○ 7 ○ 8 ○ 9 ○ 1 Right dolly head ○ 2 X positive sensor block ○ 3 Right laser head (Master laser head) ○ 4 Z positive sensor block ○ 5 Z-axis sensor ○ Right laser head (Slave laser head) X negative sensor block Left dolly head Z-axis motor (Left dolly head motor) Fig.1-16 Electric dual-laser head mechanism 1.2.8 Auxiliary parts To ensure normal operation, the laser machine needs also some auxiliary parts like blower, air pump and water tank. Different types of machine are with different auxiliary parts, and those are subject to the actual machine. Air pump pump Air Water tank, Water tank, water pump Water pump Fig.1-17 Auxiliary parts -8- Blower For the feeding machine CMA1625F, in order to the users to feeding conveniently, the machine config feeding and dossal mechanism as the following figure: Dossal stand Feeding stand Fig.1-18 Feeding stand and dossal stand Due to the cloth is not regularity or the piece goods under the uneven power, the feeding cloth may offset left or right, our company has collocated auto correct excursion machine to correct excursion when feeding. The frame of correct excursion machine is shown as follow: Fig.1-19 Auto correct excursion machine The feeding machine (CMA1625F) has the control interface of auto correct excursion machine; it is convenient for the users to use and control. -9- Feeding stand and auto correct excursion machine are not the normal schemes; please contact our sellers to buy it if you need. Note Please refer to auto correct excursion machine user’s manual about how to use the auto correct excursion machine. 1.3 Machine parameters Machine parameters quite differ from each other due to different types and configurations. The parameters are subject to the ex-factory nameplate attached to the machine. The nameplate is generally stuck to the back or left side of the machine. The following is a nameplate of CMA1325 type: Fig.1-20 Machine nameplate Instructions of each parameter on the nameplate of the machine: Machine name: name of machine; Machine type: type of the machine. Refer to section 1.1 in this manual for instructions of machine type; Laser type: laser type configured on the machine mainly including two types as CO2 and YAG; Laser power: Rated power of the laser machine; Total power: the rated power during working; - 10 - Power supply: the master imputer power supply of the machine. They are generally AC220V. However, the exported types differ from each other due to the countries exported to; Series No.: the unique number of each machine; Manufacture Date: the date on which the machine is produced; In addition, each device is attached with an independent ex-factory parameter list usually stuck on the inner part of right end cover of the machine. The parameter lists are different from each other due to the differences of type of machine and configured controller. The following is a parameter list for CMA1325: Type Ⅲ machine ex-factory parameter list Item □A axis □Z axis √Y axis Pulse/mm √X axis 328.98 157.82 Max. stroke (mm) 2500 1300 Control method P+D P+D Max. speed (mm/s) 300 400 Max. acceleration (mm/s2) 3000 16000 - + Reset direction Zero (limit) level (Note 1) Algorism numerical value (240) - + - + - + - + 1 1 1 1 0 0 0 0 □Laser head 2 √Laser head 1 Power control signal □PWM □Frequency √Analog □PWM □Frequency □Analog Energy regulation method √Dynamic energy □Dynamic energy □Constant Energy □Constant Energy PWM frequency (Hz) (Note 2) Pre-voltage (V) (Note 2) 1.0 Focus (mm) 63.5 Space between two laser heads (mm) Note 1: level trigger signal; high level trigger is o, low level trigger is 1, and suspension is 1; - 11 - Note 2: when power control signal is PWM, PWM power setting is required; when control signal is analog, pre-voltage setting is required. Table1-1 Ex-factory parameters of No.3 controller The above is a parameter list of No.3 controller (for CMA1325/1625), and the followings are an introduction to the parameters: Pulse equivalent: Pulse required for each 1mm forward of the movement shaft. Correctness of movement length is depended on this parameter; Max. stroke: The maximum stroke of each movement shaft of the machine; Control method: Control methods differ from each other due to different motors configured, and general method is pulse + direction mode (P+D); Max. Speed: The maximum movement speed of each movement shaft. Speed beyond this value may possibly cause failure of motion to the machine; Max. Acceleration: The maximum acceleration of each movement shaft. Acceleration beyond this value may possibly cause failure of motion to the machine; Reset direct: Reset direction of the machine. Aero position may differ due to different machine; Zero (limit) level: Trigger level of sensor differs due to different types of machine and configurations. Setting based on actual need is required; Power control signal: Power control method of laser device including PWM, frequency and analog; Energy regulating method: Energy regulating method during cutting and processing including dynamic energy and constant energy; PWM frequency: When the configured laser device is a metal radio frequency tube, this parameter is required to be set; Pre-voltage: When the configured laser device is a glass tube, and laser power control signal is an analog, this parameter is required to be set; Focus: Set it according to model of focus lens configured on the machine, and it indicates focus of the focus lens; Space between two laser heads: Electric dual-laser head machine is required to set this parameter, and it indicates the minimum space between the two laser heads; Please refer to Han’s Yueming User Manual of 3rd Control System for more details. Note 1.4 System configuration Component Movement system Parts Type Motor Step, servo - 12 - Manufacturer China-made or imported Note Optional Transmission mechanism Timing belt Guide rail linear guide rail Reflector Molybdenum reflector Focus lens 75、63.5、50.8 Exhaust blower 750W Air blower pump Water tank +water pump Large, medium, small Water tank, industrial water chiller China Optional China Optional Controller No. III, IV controller SmartCarve4 series Our company Our company Optical system Pneumatic system Cooling system Control system Dust disposal Control software Dust and smoke collector China-made or imported China-made or imported China China-made or imported China China Optional Optional Optional Table1-2 System configuration list 1.5 Operating environment Humidity: 5%~95% (no dew) Temperature: 5℃-40℃ Power supply: AC220V;50/60Hz Earthing: Grounding resistance should be less than 5Ω Environment of the machine should be dry, and free of interference like dust, pollution, vibration, high power and strong magnetic field; Air pressure: 86-106kpa Working table load capacity: 50Kg/m2 1.6 Suitable materials NestCutting series machine are suitable for the materials with good absorption of CO2 laser, e.g. non-metal material like cloth, leather, organic glass, wooden product, plastic, rubber ceramic tile, crystal, bowlder, and bamboo product. 1.7 Applicable fields NestCutting series machine are applicable for professional users with high speed for cutting and high requirements for processing effect in the industry of wood, cloth, leather, model, craft, advertisement decoration, building decoration, package printing, and paper product. - 13 - Chapter 2Safety Rules This chapter mainly introduces safety warnings for protecting personnel and the machine. The machine is already equipped with sufficient safety guarantee, yet it is still with certain risk. All the operators are required to carefully read through and well understand the safety rules. 2.1 Product safety The following conditions are required to be satisfied to ensure safe work: Abide by operation manual and instruction signs; Operators and maintenance personnel have received training held by machine manufacture; In case of operation by couples of person at the same time, division of responsibility should be made and followed; No admission to the working area for the unauthorized personnel; Avoid any working method breaking the safety rules; Timely eliminate all the failures possibly causing lower safety coefficient; Abide by maintenance regulations of the machine. 2.2 Safe equipment Safety machines are used for protecting personnel, and unauthorized disassembly, bridge-group or by-pass connection are strictly prohibited; in case of failure with the safety machine, professional are required for repair. If part replacement is needed, the product with same model, specification and from the same manufacture is required; otherwise, written consent from the manufacturer is required. 2.3 Safety awareness The machine can be operated only by skilled personnel or under supervision of them. Improper use or operation may possibly be very dangerous and cause damage to the machine. Therefore, the followings are strictly prohibited: Placing heavy objects or stepping on the working table of the machine; Used for processing the materials unapproved by manufacturer; Staying of unauthorized personnel in the dangerous area (It is the responsibility of operators to ensure keeping unauthorized personnel away from the working area.); Block of using emergency stop button (Regular check is required to ensure a good condition for the emergency stop button.); - 14 - 2.4 Requirements for personnel After trail operation, maintenance personnel from the manufacturer may perform training on the operators; It is the responsibility of machine owner to have operators trained at corresponding level; We have prepared ready a series of training course for your option. Please make phone call to our Customer Training Center for details. 2.4.1 Definition of terms All the personnel using or operating the machine are called User in the manual; Different requirements are for different users. Users are classified into the followings: Owner Owner means the authorized person or representative to sign contract with the manufacturer. With authorization, the owner has rights to sign the agreement with binding force of law; Operator Operator means the personnel trained for operating the machine. Training of the operator includes participation of training held by the manufacturer. Maintenance personnel Maintenance personnel mean the technicians having received formal training for machine and electric engineering. The maintenance personnel are responsible for daily maintenance of the machine, and repair at low level if needed. Training on the maintenance personnel contains participation training held by manufacturer. 2.4.2 Qualifications The operator is required to accept guidance and training of the owner, and the operator is responsible for the safety of a third party in the working area; the personnel required for further training and guidance are required work or operate the machine under supervision of the operators. 2.4.3 Responsibility It is a must to clarify the related responsibilities of each performance (operation, maintenance, parameter setting), and carry it out. Unclarified responsibilities will cause safety hidden risks. Owner is required to provide operation manual for the operators and maintenance personnel, and ensure that they have read and understood the operation manual. - 15 - 2.4.4 Personal protective devices When technology or measures fail to absolutely avoid risk of health, the owner is required to provide personal protective devices for operator and maintenance personnel. For example, Boot with steel cover Protective gloves Laser-proof goggle Light respirator Personal protective devices shall not be provided together with the machine. Note 2.5 Special product risks 2.5.1 Laser radiation risk Based on level of potential risk of laser radiation, the national standard GB 7247.1-2001 makes classification for them. Laser class applicable for this laser cutting machine depends on operation mode. The followings are abstract of laser device classification prescribed by the state: Class 1: safe laser device under reasonable and foreseeable working conditions Class2: laser device emitting visible light at wave length of 400nm-700nm. Generally, avoidance response including blink reflection provides protection; Class 3A: safe laser light visible to naked eyes. Generally, avoidance response including blink reflection provides protection. Harm to naked eyes of other wave lengths will be less Class 1 laser device. Class 3A light beam internal observation with optical device (e.g. glasses, telescope, and microscope) may be dangerous. Class 3B: dangerous laser device is to directly and internally see light beam. Generally, observation of diffuse reflection is safe. Class 4: laser device with diffuse reflection causes danger. They may possibly cause skin burn, or fire accident. Great care is required to use this kind of laser device. 2.5.1.1 Common mode In the normal operating mode, the laser cutting machine equals to Class 1 laser radiation. In this operating mode, there will no harm of laser radiation to eyes and skin; however, you are recommended to wear goggles with antiglare filter in case of long-term exposure to cutting light beam. - 16 - Note It is a must to ensure normal operating mode; Correct installation of all protective covers; Keep upper cover of crossbeam closed; Correct operation of the laser cutting machine; Materials to be processed have been verified suitable for CO2 laser processing 2.5.1.2 Maintenance mode In case of having opened the safety cover (e.g. door) or having removed (e.g. crossbeam cover) or short connected of the crossbeam protective cover and crossbeam organic glass cover opened, the laser cutting machine is in a maintenance mode, no matter the purpose of the operation is for checking work, cleaning or maintenance. Attention In maintenance mode, laser radiation is not entirely shielded. At this time, the laser cutting machine equals to Class laser device radiation. Direct laser beam and reflection radiation will cause unrecoverable harm or skin burn. The operation at this time can only be performed by trained and qualified maintenance personnel; All the unauthorized and unqualified personnel are prohibited to come into the dangerous area; Cover or remove the reflective objects; Remove the flammable materials; Avoid generation of explosive solvent gas; Wear laser-proof glasses 2.5.1.3 Direct laser You are required to pay attention to the followings while operating the laser machine: It is strictly prohibited to directly expose any parts of human body, explosive object and flammable objects to direct laser; Modification of fasteners on the optical parts is strictly prohibited; Unauthorized change of light route is strictly prohibited; Abide by all instructions prescribed in the operation manual. - 17 - 2.5.1.4 Reflection and diffuse radiation Avoid exposing eyes and skin to mirror reflection and diffuse radiation. In the maintenance mode, the maintenance personnel are required to wear laser-proof glasses, and the laser-proof glasses should satisfy the requirements as per EU standard EN207A1:2002. Version of glasses wearing Standard design Fig.2-1 Picture of laser-proof glasses Wavelength of CO2 laser device of this class is 10.6 micron and light density is 4+; You are recommended to use SD-5 type of protective glasses made by Shield Company. Note Attention You are prohibited to directly watch strong light and laser even with laser-proof glasses on; Laser-proof glasses are made from high polymer material, and dipping into organic solvent or cleaning with it are prohibited; It is a must to replace the laser-proof glasses at the expiration. 2.5.2 High voltage risk Laser module (laser power supply and its high voltage line) will generate high voltage at 15,000V. There is the risk of electric shock. Attention High voltage 15,000V! The voltage over 50V and the current over 20mA are with the risk of danger and may cause death. Only the maintenance personnel from the manufacturer are permitted to perform operation on the inner parts. 2.5.3 Risk of electric shock Attention While operating electric machine or device, mis-operation or neglect during operation may possibly cause serious hurt or human body or even death; Technicians with related qualifications are required for operating the electric machine or device or perform operation under their supervision. - 18 - The followings are required for operating of installing the electric machine: It is a must to use the specified fuse provided by the manufacture; Immediate disconnection of power supply is required in case of power failure; Unless otherwise prescribed, power disconnection of the electric part is required for maintenance; First check if there is live power on the insulated part, and then perform the treatment of earthing and open circuit, and perform insulation for the nearby live (charge) parts; Make regular check on the electric equipment. Timely correct failure like poor contact or burnt power cord; While operating live (charge) parts, minimum two persons are required at the site for pressing the emergency stop button or disconnecting power supply if necessary; Mark the working area with red-and-white band and warning sign; It is a must to use insulation tools. 2.5.4 Hazard of processing outgrowth During laser processing, outgrowth may possibly generated, and their hazard must satisfy the requirements specified in Appendix A for example of processing outgrowth as national standard GB 18490-2001 laser processing machine. The abstract is as below: ceramic processing Al2O3, Mg, oxide of Ca and Si; BeO (virulent poison); silicon slice processing Crumb of silicon and silicon monoxide suspended in the air (possibly breathed into lungs causing silicosis); metal processing In a view of iatrology, minimum the following metals and their compounds are influential: Mn, Ni, Co, Al, Zn, Cu, Be, Pb, Sb Medical influences are as below: 6- Toxic Allergic reaction, burn caused by metal smoke Cr ,Mn,Co Lung fibrosis Be Carcinogenesis Cr , NiO Zn, Cu 6+ Metal beryllium is very dangerous, especially cutting alloy or metal containing Zn in open air will generate heavy metal smoke. Plastic cutting - 19 - When cutting plastics, various kinds of substances with potential risks may be generated. At lower temperature, aliphatic hydrocarbon is produced; at higher temperature, aromatic hydrocarbon (e.g. benzene PAH) and polyhalo-polynuclear hydrocarbon (e.g. dioxin, furan) are increased. Some of these substances may possibly generate cyanide, isocyanate (PU), acrylate (PMMA) and hydrogen chloride (PVC). Medical influences include: --------Toxic: Cyanide, CO, derivative of benzene ------- Allergy source/irritation: isocyanate, acrylate ------- Respiratorytract irritation: formaldehyde, acradehyde, amine; ------- Carcinogenesis: benzene, some PAH substances Surface modification Generally, there is no noticeable outgrowth, but sometimes heavy metal steam is generated. Cutting paper and wood General fibrin outgrowth, ester, acid ethanol, benzene Attention Note During laser cutting, the smoke generated may be very toxic. The smoke is removed by upper exhaust blower system; Cutting with abnormal blower system is prohibited. Make frequent check on the ventilation system; Make regular cleaning and maintenance for the ventilation system; Foreign matter coming into duct of the ventilation system is strictly prohibited; Ensure a good ventilation and a through removal of exhaust air in the working room; Ensure a necessary disposal of the exhaust air to satisfy emission requirements prescribed by the state and local government 2.5.5 Risk of optical system 2.5.5.1 Routine operation The reflector of the optical system is the gold plating silicon reflector, and the focus of the cutting head is made from zinc selenide. In normal condition, these optical parts are free of danger. However, polluted focus or focus with damaged coating will cause thermal decomposition by laser beam over 400℃ together with toxic smoke generated. At this time, the laser device must be powered off, mechanical movement and blowing air to the lens must be stopped. At this moment, cleaning and parts replacement should be performed. When gold plating silicon reflector is decomposed by high temperature laser beam due to pollution or damaged coating, the decomposition will generate dust and smoke containing - 20 - silicone monoxide, steam of heavy metal. At this time, it is a must to power the laser device off, stop running the machine and keep good ventilation. When all the smoke and dust are removed, it is to perform cleaning and replacement of lens. During cleaning, please wear on goggle and gloves. The damaged parts must be sealed in a container and properly packaged, and then returned to the manufacturer. Good ventilation is required in case of any damage of the parts. Note 2.5.5.2 Warning for fire accident Damaged machine or improper operation of the machine will cause risk of fire accident. Fire extinguisher must be equipped according to fire control regulations prescribed by the state. Attention Atomizer or flammable or explosive substances are strictly prohibited to approach the machine, make regular check on the fire extinguishers to ensure a good condition. 2.5.6 Other risks To ensure safety, modification or changing use of the machine with no consent from the manufacturer is strictly prohibited; any change of operating software or function to the machine is strictly prohibited, or it is strictly prohibited to perform integration of the machine with other system. 2.5.7 Measures for emergency 2.5.7.1 Measures for personal injury In case of personal injury, the followings should be performed: Stop hurting (e.g. stop the machine, disconnect the power supply) It is a must to take first aid measures; Notify professional medical personnel; Notify the competent management department; Abide by the related regulations prescribed by the state and the company 2.5.7.2 Measures for fire accident In case of fire accident, the following measures should taken: Emergency stop of the machine, disconnection of power supply; - 21 - Control of fire with the fire extinguisher, evacuation of personnel; Notify the competent management department; Abide by the related regulations prescribed by the state and the company - 22 - Chapter 3 Machine Installation and Debugging 3.1 Machine Installation 3.1.1 Steps of unpacking Before installation, unpacking the wooden box for the machine from our company is needed in the following steps: Fig.3-1 Machine packing box 1. Use the crowbar (users prepare it ) to prize up the packing box of machine, the unpacking gradation: upper cover, covers of left and right side, covers of front and back side, the plank for fixing foot caster. - 23 - Crowbar Fig.3-2 The packing box of machine unit 2. Lift the machine from the pallet with forklift and move the destination; and fixing by foot caster. 3. Then open the accessory box and laser tube box. Fig.3-3 Accessory box and laser tube box 3.1.2 Unpacking check Check on the machine and auxiliary parts after unpacking is required to ensure them free of failure caused during transportation. Items to check are as below: 1. Check on machine model Please make sure that machine model is just what purchase. 2. Check in machine appearance Please make sure that the machine is free of scratch, damage, distortion and corrosion by appearance. - 24 - 3. Check on machine case Remove the upper, left and right cover to make sure that the machine is free of parts or cable caused by poor contact or internal damage. 4. Check on machine parts and auxiliary parts Open the auxiliary case and laser tube packing box to verify parts following the packing list and check if there is damaged accessory or accessory with distortion. Unauthorized unpacking is prohibited. If unpacking by user is needed, prior consent from our after-sales personnel or Attention salesman is required. Otherwise, our company shall not be liable for any accidents caused. In case of the problems above found after unpacking, please timely notify our after-sales personnel or salesman, or directly contact our company. Attention Unauthorized disposal is prohibited. 3.1.3 Preparations for machine installation Preparations for installation are as below: Installation site There are requirements for site and working environment to the laser machine. Please make sure if the site satisfies the related requirements from our company as specified in Section 1.5; Personnel Our company requests that the personnel for installation are professional customer service personnel from our company. If installation by customer is needed, the installation personnel are required to have received all trainings held by our company and grasped the related key points relating to the installation of our laser machine. Tools The related tools for installation are attached to the machine. In addition, users should prepare some installation and testing tools if necessary, e.g. screwdriver, multimeter, etc. Others Water, electricity, exhaust air channels, sample material, computer and power socket relating to the machine should be prepared ready in advance by users. During installation by our customer service personnel, the customer is required to participate from the beginning to the end. Machine installation and debugging are Attention parts of training, and the customers are required to learn them well. - 25 - 3.1.4 Steps of installation 3.1.4.1 Laser tube installation Install the laser tube on the motorial beam of machine, unpacking the right side cover and back side cover of beam; and open the upper cover of beam, you can see two laser tube bracket as follow: V-shape bracket Fig.3-4 Laser tube installation position Firstly open the two brackets and carefully insert light outlet (negative end) of the laser tube toward reflector No. 1 into the V-shape bracket as shown in the figure below: Fig.3-5 Note Placed the laser tube The laser tube installation mode is different for CMA1625 series machine, only need to open the upper cover to lie in the laser tube. The laser power supply of CMA1325 series machine is lie in the machine unit inner, but CMA1625 series machine is on the beam, please pay attention when installing. Adjust the distance between front and back of laser tube (about 35mm away from No.1 reflector), then button the upper cover part of the laser tube support and screw down the bolt, fixing the laser tube as follow: - 26 - Upper cover part Fig.3-6 Fixing laser tube Fix the laser tube with proper force to avoid damage against it. It is a must to keep the water inlet (light outlet end) at lower part of the tube. Attention After fixation of the laser tube, connect the water inlet end with water protection to water inlet at negative end of the laser tube, and connect another water inlet hose reliably to water outlet with high pressure. Ensure the water inlet adown and the water outlet up as shown in the figure below: High pressure end Water outlet Light outlet Negative end Water inlet Fig.3-7 Reliable connection of each water hose is required to avoid leakage; Keep water hose in good order free of twist for smooth water flow. Attention Finally, install the laser tube power cord with high voltage and earthing at the position of two ends (as figure 3-7). - 27 - Attention Laser power box and the high voltage cord which control the laser tube are with high voltage (20,000V) and static electricity radiation. The cable must be insulated and closed off; and earthing well. Or the machine may be effected by striking fire and interferential phenomena, serious creepage may hurt the human safety. Attention During operation of the machine and after power-off, please do not touch the high voltage line with hand. Otherwise, electric shock or even death may be caused. Prohibit anyone except the person from our company to operate the power supply box of laser and the high voltage line which control the laser tube. 3.1.4.2 Cooling system installation Fill up the water chiller with pure water. Link the “water inlet” of machine and “water outlet” of water chiller by the silica gel tube, link the “water outlet” of machine and “water inlet” of water chiller. Fig.3-8 After checking and it is no error, turn-on the water inlet/outlet valve of water chiller. Connect the power supply of water chiller to the opposite interface of left side of the machine, and power on the water chiller. - 28 - Fig.3-9 Turn on the water chiller, you can see the water filling up the laser tube at this moment, water chiller works normally if the current of water outlet flow swimmingly. Attention In order to make sure the cooling water cycle of laser tube normally, water sensor is installed in the water cycle system. If the current is not smooth or the water chiller works unconventionally, the machine will enter the protective status automatically and the laser tube will not laser out. Therefore, please pay attention to clear the water pump and water pipe at daily maintenance. The laser tube of water cooling type must be ensuring the water cycle works normally, or the laser tube may be bombed out. Attention 3.1.4.3 Air pump installation Connect air outlet of the air pump (or air compressor) to air inlet of the machine with an air pipe, and connect through the power supply as shown in the figure below: Fig.3-10 The air pump (or air compressor) is very important in the system. High pressure air is jetted out from light outlet in the laser head through air pipe. On one hand, this ensures focus lens clean. On the other hand, it plays the function to prevent from being burning of the material caused by laser. Therefore, during daily maintenance, users are recommended to keep the air pipe straight free of twist. Otherwise, abnormal blowing may cause burning of the materials. - 29 - 3.1.4.4 Air compressor installation Connect the air outlet of air compressor and the air inlet of oil-water filter at the machine left mid side by the incidental PU tube of machine. 3.1.4.5 Blower installation Firstly connect air inlet of the blower to dust inlet of the carving machine with an air pipe, and securely buckle it. Then, connect another air pipe with air outlet of the blower and stretch it outside the room, and finally reliably connect the power cord of the blower as shown in the figure below: This end is connected to dust inlet of the carving machine. Fig.3-11 3.1.4.6 Machine earthing Safe earthing is strictly required for power supply system of laser machine. Power supply of users must satisfy safety regulations of the local government: Fig.3-12 L: Live line of 220V AC system. Safety electric switch is required for this line (The switch is required to be mounted on the live line.) N: It is popularly named as null line with the function of completing power supply together with the live line. E: Earthing line. All casings (earthing end) of electric parts are connected to this line to ensure safety. Earthing resistance should be less than 5Ω. Users are required to consult professional electric equipment installer (electrician), and have the professional electric equipment installer check and determine if the earthing is reliable. Attention Poor earthing may cause high rate of failure to the machine. In addition, safety accident may also be caused. Our company shall not be liable for the accidents and failure caused it. - 30 - If your power supply system is not with an earthing, it is a must for you to have professional electric equipment installer mount a safety earthing net in the following method: It is a must to use 2-4 pieces of 4×35×1500mm angle iron hammered into any wet place surrounding the house as earthing. Distance between each two angle iron is 1m. And then use a 3×30mm flat plate leads each angle iron out from earth surface to form a good earthing net. After completing the earthing net, measure earthing resistance with an apparatus, the standard value is 3-5 ohm. After measuring the resistance, connect one end of the RVV2.5mm2 copper core cable to the eduction of the earthing net, one end is connected to the earthing of the carving machine and earthing hole of the socket as shown in the figure below: Earthing terminal Fig.3-13 3.1.4.7 Software and machine drive installation The controllers of NestCutting series machine: No.3 controller and No.4 controller. No.3 controller is the built-in control system; it can run independently without computer and do not need to install any driver. No.4 controller is the athletic controller of PCI bus-mastering, you should insert it to the computer to running, and you should install the driver progress of controller before using. For the No.4 controller, we equip a special control table (including computer), the operation system (Windows XP) and machine driver have been installed at-ex-factory. If you want to install again, please follow the following principles: The operation system, software and driver of machine have been installed and debugged at-ex-factory. Please do not install again if the necessary instance; The machine has mirrored the system at-ex- factory; it can be restored by one key. If users want to install the operation system again, try to restore by one key first. At- ex-factory, the machine has backup the installation bag of correlative software (SmartcarveInstall4.X.X.exe file), system parameter (config.xml file) and driver progress of controller, please do not delete. The installation and config of the software and driver, please to Han's YM User Manual of NestCutting. - 31 - Attention Please properly keep the CD and software encoder encryption dog attached. In case of missing, please cont our company for purchasing. Reinstallation of the software may cause parameter loss of the system. Please perform backup of the related parameters before reinstalling the software or system. Attention Please protect the using environment of computer, do not insert U-disk optionally, and avoid poisoning. For the familiar hardware fault and software fault of computer, users should have the basal disposal ability. Users can not use the computer to install other software or take the computer to other use; we won’t answer for the aftereffect. 3.1.4.8 Other auxiliary part installation Some types of machine are attached with other auxiliary parts (e.g. foot switch of auto correct excursion machine) as per request from customers, and these parts should be installed by our customer service personnel. Moreover, users shall install scanner, printer and other machine prepared by themselves. 3.2 Instructions of machine button and indicator light 3.2.1 Master switch of power supply Power switch is at the right bottom of the machine, it is a red knob switch as follow: Fig.3-14 Master power switch Master power switch control the working power supply of machine and the fan of electric control box. When turn it on, the head lamp of machine inner will be light automatically. 3.2.2 Emergency stop button The machine equipped stop electrocircuit, emergency stop button is at the two sides’ cover of the machine. Press any stop button to stopping when the emergency appears. All the dynamic - 32 - power supply of machine will be switched off after you press the stop button, the machine stay at “stop” status. Fig.3-15 Emergency stop button After press the stop button, the system will switch off all the dynamic power supply (e.g. machine power supply and laser power supply), controlled power supply is still electrifying. Necessarily, if you want to switch off the power supply of the whole machine, you should turn off the switch of total power supply even pull out the electric cable of total power supply. You can loosen the stop button and continue to operating only when the emergency has been removed and all the flaws have been rectified or the breakdown has been restored. Attention Note After get rid of the emergency, reset the stop button by rotating clockwise to relieve stop. You should restart the software to restore the machine to work after relieve stop. 3.2.3 Operation panel Control panel is mainly control the power on/off of every model of machine and operate the machine, including control panel, emergency stop button, power switch of movement system and key switch. The inner indicator light of some buttons indicates the current power on status of machine. Due to different controller, the control panel of NestCutting series machine is different. Presently, No.3 controller and No.4 controller are collocated. Please refer to 1.2.2 about the frame and shape of every control panel. The following is the detail of every controller. The standard config of CMA1325 is No.3 controller, the operation panel is shown as follow: - 33 - Emergency stop button Ampere meter Adjusting knob of ampere Control panel Laser power supply switch Power supply switch of movement system Key switch Fig.3-16 Control panel of No.3 controller The functions of every button explain follows: Control panel: also named operation panel or man-machine interface, operate and control the No.3 controller. Emergency stop button: refer to the above section for more detail; press this button to switch off the power supply of laser and movement system. Ampere meter: indicate the current ampere of laser tube, show the current laser power. Adjusting knob of ampere: rotate this knob to adjust the ampere of laser tube; also means adjust the laser power. Key switch: the master switch of laser power supply and power supply of movement system. The power supply switch of laser and movement take effective only open this switch. The key switch shown as follow: Fig.3-17 Key switch Note The owner of machine must keep appropriately and using reasonably for the key of key switch, operator should take the warrant from the owner if you want to gain the key and operate the machine. Laser power supply: red indicator light is inside it, used to control to power on the laser power supply. - 34 - Power supply switch of movement system: green indicator light is inside it, used to control to power on the movement system. The button indicator light indicates the power on status of current system as follow: Fig.3-18 Button indicator light Green indicator light: the primary heat transport system and control system has powered on (main contactor linking) when it lights (green light). Red indicator light: laser power supply indicator, the laser has powered on when it lights (red light). Attention Indicator light only indicates the power on status of controlled part; the machine is not out of power completely. Please check whether the indicator light all right, and dispose it. CMA1625 is collocated the No.3 controller, the operation panel is shown as follow: Control panel Ampere meter Adjusting knob of ampere Emergency stop button Power on switch of system Laser power supply switch Power off switch of system USB interface Fig.3-19 The button position and function definition of the operation panel of CMA1625 is different from CMA1325, definition follows: Power on switch of system: power on the whole system, press this button, the control system and movement system power on, the switch of laser power supply is activated. At this moment, press the switch of laser power supply to power on the laser. Power off switch of system: power off the whole system, press this button, the machine power off. - 35 - Laser power supply switch: it takes effective if you press the power on switch of system, used to control the power on/off of laser power supply. The function definition of other button and module are the same as CMA1325, no more narrate here; The controller of CMA1625F is No.4 controller, except the operation panel of figure3-19, it has another special operation table (including computer), and the configuration is shown as follow: Display PC power on Emergency stop button Operation table of keyboard and mouse USB interface Host computer box Fig.3-20 Operation table of No.4 controller The modules of operation table narrate as follow: Host computer box: placed the host computer and other electric parts. Display: used to show and operate the software interface. Operation table of keyboard and mouse: place the keyboard and mouse to operate for users. USB interface: USB and network interface, used to export data. PC power on: press this button, power on the computer. Emergency stop button: power off the power supply of system when the emergency happens, the machine stop to move and light. 3.2.4 Working indicator light Working indicator light indicate the current working status of machine, install at the right side of the top of the machine beam as follow: - 36 - Fig.3-21 Indicator light Laser output when it lights, users need to attention. 3.3 Machine debugging After completing installation, machine debugging and processing test are needed. The machine debugging is mainly to complete status test of each nodule if the machine including movement module, laser module and electric IO module. 3.3.1 Sequence of power-on and power-off There is an instruction of sequence of power-on and power-off stuck on the master power switch. Sequence of power-on: Master power supply of the machine→ Water chilling system→ Laser power supply→ Computer→ Other auxiliary parts Power-off is in the reverse sequence as: Other auxiliary parts→ Computer→ Laser power supply→ Water chilling system→ Master power supply of the machine Insert the power supply (behind the machine) into the electrical outlet, electrify the electrical outlet, then rotate the total power supply switch by 90°clockwise to power on the machine as follow: Rotate it to power on by 90°clockwise, Rotate it to power off by 90° counterclockwise Fig.3-22 Master power supply switch After the master power supply of machine power on, the control system of machine will power on automatically, at this moment, you can see the system start interface of control panel. - 37 - Then put the key to key switch and rotate it clockwise to make the switch of laser power supply and movement system in effect; Cooling system supply power independently, insert the power line of water chiller into electrical outlet and electrify it; After the cooling system working normally, press the red laser power supply switch of the power supply control panel to power it on. The red indicator light will lighting if it is normal; or the laser power supply trouble when power on, you should look-over it (e.g. whether the cooling system works normal or not). Press the green button of control panel, power on the movement system, the green light lights when power on successfully. Finally, switch on the power supply of auxiliary machine, e.g. air blower. For the above steps, the start operations of whole machine have finished, the close operation is opposite with the start operation. Users should operate following the requirements as per power-in and power-off sequence. Otherwise, failure may be caused to the machine. Attention 3.3.2Movement debugging Movement debugging is mainly to check if movement status of each movement shaft is normal. At ex-factory, movement debugging has been performed. In case of no accident occurred during transportation and installation, there will be no any problems with the machine. The followings are instructions for motor shaft movement, resolution setting, strike and limit configuration, test on straightness and perpendicularity. 3.3.2.1 Motor shaft movement After normal power-on of the machine, if automatic reset is set on the No.3/4 controller, they will also reset after power-on. After completing of reset, the system will enter s standby state. In standby mode, it is to press the four directional keys (X+, X-, Y+, Y-) on the control panel for manually controlling movement of the laser head. If the four directional keys are normal in movement, it means X-axis and Y-axis motor are normal in movement. Please refer to the operation instructions of the related control system for movement testing. In case of failure found with the motor shaft movement, please contact customer service personnel from our company for a solution. The following is an illustration of control panel of No.3 controller: (for CMA1325/1625, etc.) - 38 - Fig.3-23 Illustration of 3rd control panel The software control panel figure of auto feeding machine is shown as follow (for CMA1625F): Fig.3-24 Control panel of auto feeding machine Please refer to operation instructions for control system of each controller for more details concerning the operation of the control panel. Note 3.3.2.2 Pulse setting The pulse is not only decide the precision of motion, but also decide whether the motion right or not. - 39 - Attention At ex-factory, the machine has calculated the pulse, please do not modify unless you know the meanings of parameter, or it will lead the axis motion not right or the size of processing graph wrong. The pulse parameter of No.3 controller is in the motion parameter of machine parameter, the unit is pulse/mm, means the pulse number which sent out from control system every one mm the motion axis go forward,. At the same time, you can modify the correlative parameter directly through the control panel of No.3 controller as follow: Fig.3-25 Motion parameter setting interface of No.3 controller After modify the motion parameter of No.3 controller through the above interface, “write” it to No.3 controller through network and restart the system. You must make sure the network communication is normal. If the machine haven’t connect the network, you can export the parameter file of system to the U-disk, and then copy the parameter file to No.3 controller through the U-disk, restart the system. In addition, you can modify the correlative motion parameter in the system parameter setting interface directly through the control panel of No.3 controller, and then restart the system to finish as follow: X 轴行程:1600.0 Y 轴行程:2500.00 Con X: 160.00 Con Y: 160.00 Set technics para Set working para Set manual para Set system parameters Fig.3-26 set the motion parameter through the control panel directly - 40 - The pulse parameter of auto feeding machine is at the motor parameter of factory config as the following figure: Fig.3-27 Parameter setting of auto feeding machine You need to modify the number of pulse when the motion is not right and the size of graph is wrong, the software support auto calculate, please refer to the control system operation manual about the detailed operation. The manner to test whether the axis motion right or not: control the machine go scale (e.g. a rectangle with 100mm X 100mm), test whether the distance of every side is 100mm or not, the setting of pulse number is trouble if it is error. You should restart the software after modify the factory parameter. SmartCarve4 can control many controllers and machines of our company by compatibility mode, user should set the opposite controller before install first time, Note or the parameter setting and data created may be error. - 41 - 3.3.2.3 Stroke, limit and reset Different models of machine are with different working breadth, and setting stroke of each shaft of the machine will play the function of breadth protection (equals to software limit). Stroke parameter setting is shown in figure 3-23 and figure 3-25 respectively for No.3 controller and No.4 controller. Wrong stroke setting will possibly cause fail to have a full breadth work or “overreaching” of the laser head. Taking CMA1325 type of machine as an example: theoretically the effective processing breadth of the machine is 1300mm X 2500mm. Then, strike of X-axis should be set to 1300, and Y-axis to 2500. Due to the less difference caused during production and assembly of the machine, the actual strike of each shaft on the same type of machine may be with a small difference. Stroke setting is subject to the actual stroke. Attention Limit switch is the hardware sensor equipped on limit position of the two ends of each shaft. After detecting limit triggering signal, the movement shaft will perform emergency stop to avoid “overreaching”. Minimum one limit switch is needed for each shaft to indicate limit position of the current shaft. In figure 1-10, you can find the installation position of the limit sensor. The installation position of limit switch may differ due to different types of machine, so the triggering signal. Therefore, configuration is needed. Zero point of the machine is a referential point of a certain hardware fixed in processing breadth. Generally, after power-on, “reset” is needed for the machine to create coordinate of lathe. NestCutting series machines from our company generally take the limit switch position of each movement shaft as the zero point of the machine. Attention 3.3.2.4 At ex-factory, configuration of parameters for stroke, limit and reset has been already performed. Unauthorized change of parameters by user before making clear its meaning is prohibited. Otherwise, failure of the machine may possibly be caused. Straightness and perpendicularity Before starting formal processing,testing of movement straightness of each movement shaft and perpendicularity of X-axis and Y-axis are needed. The straightness ensures movement accuracy and stability of movement for this shaft. The testing shaft can be controlled to move along a straight line. If the straight line is measure unstraight, it means twittering exists during movement of the shaft, and a solution is required. Reasons for straightness of single shaft frequently lie in transmission of the motor or mechanical movement and machine vibration. Movement coordinate system of NestCutting series machine is a rectangular Cartesian coordinate system. Theoretically, X-axis and Y-axis should ensure be in absolute uprightness to ensure processing accuracy. If case of large tolerance for the straightness, distortion of the processed figure will be caused. Method of measuring the straightness is to have the control machine go a rectangle frame on the surface of processing, and measure if the length of four sides and diagonal are the same. Method of adjusting perpendicularity is to make adjustment of assembly of X-axis and Y-axis movement mechanism. - 42 - Attention Debugging of straightness of perpendicularity of each shaft has been already performed at ex-factory of the machine. In case of problems found by users, please timely contact our customer service personnel for a solution. Unauthorized disassembly of the machine is prohibited. 3.3.3 Laser debugging Laser debugging contains two aspects: light emitting test and light route adjustment. The followings are the details for them: 3.3.3.1 Light emitting test After normal start up in case of power-on, with “laser switch” button on the control panel of the machine, you can test if laser emitting is normal. Light emitting energy and spot spray time can be directly set on the panel to check if laser spot spray power is normal. If there is no laser emitting from the spot spray laser tube, it means that there is problems with the laser emitting, and check is required. In case of laser emitting found from the laser tube, but no laser emitting from the cutting head, it means improper position of the light route, and adjustment of light route is needed. When no laser emitting from the spot spray, firstly make check on setting of the related parameters of the laser device. The following is interface for setting parameters of No.3 controller: Fig.3-28 Interface of setting laser parameters for No.3 controller Refer to the operation instructions for the related controller for more details about laser parameters. (The laser parameter interface of software about auto feeding machine is similar with the above figure).Wrong laser parameter setting may possibly cause abnormal light emitting - 43 - or fail of adjusting laser power. In case of no light emitting under the condition of making sure that laser parameters are set to correct values, check on hardware is needed. You may use red “test” button on the back of laser power supply from our company to check if laser power supply and laser tube are normal. In case of no laser emitting, plug out the controller control cable from the laser power supply, open the laser power supply, and press the light emitting button. If there is laser output from the glass tube at this time, it means that laser power supply and laser tube are normal in working. At this time, check on the controller and laser control line is needed. In case of no light emitting, further check on the laser power supply of the laser tube is needed. The control panel of some types of machine is equipped with ammeter. With the ammeter, you can check if the power is normal. Theoretically, the maximum power Note 3.3.3.2 of 80W laser tube is corresponding to the current roughly 25mA, and the 130W laser tube to 30mA of the current. Light route adjustment Due to vibration during transportation, aberrancy of light route may possibly be caused. At this time, light route correction is needed. Light route of NestCutting series laser machine is as shown in the figure below: Laser generator Reflector #1 Reflector #3 Reflector #2 Focus Fig.3-29 Illustration of laser route After being emitted from the laser generator, laser successively passes through reflector #1, #2 and #3, and finally emitted to working table after be focused by the focus. Transmission of the laser is actually a course of multiple reflection and focusing. During this course, in case of loosen reflector, laser route deviation will be caused make the laser fail in finally output through the jet cup. The adjustment steps follow: Firstly, adjust the laser tube; make its light outlet and the middle of No.1 reflector face to face. Through the adjustment of laser tube stents to ensure that light spot in the No. 1 reflector center. - 44 - Then, adjust reflector #1. The position of reflector #2 and reflector #1 are riveted comparatively. Adjust the eyeglass angle through adjust the three screws at the back of reflector #1, let the light stay at the middle of reflector #2. Adjusting bolt of reflector Fig.3-30 Reflector base Then, adjust reflector #2, in the same way to move the laser head to the closest point to lens #2 and make a light spot, and then move the furthest point and to the furthest spot overlap on the first light spot. Attention The positions of the light spots above are recommended to emit at the center of lens, but not the edge. In case of being at the edge, further adjustment is needed till being at the center. Finally check if the light spots are overlapped if the laser heads are located at different peaks. In case of fail of overlap, please make further adjustment in the way above till achieved. After adjusting four spots overlapped, let’s check if this point is emitted at center of light inlet of the laser head. If no, please power off the laser; adjust position of the laser tube. In case of deviation leftward or rightward, adjust to this direction if deviation towards it. For example, in case of leftwards deviation, adjust the laser tube to the left side; in case of rightward deviation, and then move the laser head to the right side. In case of up or down deviation, adjust to the opposite direction, meaning that in case of up deviation; adjust the laser tube downward, in case of down deviation, then to adjust upward. ) The adjustment above is only for negative pole end of the laser tube (light outlet end). In case that positive pole end of the laser tube needed to achieve the same effect, the direction is the opposite.) Attention Laser is invisible light and with direct harm to human body. While adjusting the light route, the operator is required to pay great care. The operator is not permitted to make adjustment until having received professional training. During adjustment, pay attention to the lens to have them free of pollution by smoke and dust. - 45 - 3.3.4 Trial operation of processing After completing debugging of the movement IO and laser module with the steps above, you can start figure trail processing now. Firstly start up the machine according to the sequence of power-in, start up the auxiliary machine like air pump and blower; And then prepare ready the materials to be processed, and place the materials horizontally on to the surface of working table; Adjust distance of the laser head to make laser focus located on surface the materials to be processed; Move the laser head to the start point of processing (set positioning point); Open upper computer software (SmartCarve4), make figure (or figure data lead-in) and set ready the processing parameters and processing path; Carving output (Or generate processing data to transmit to the controller) Move the cutting head to the process start point and start processing. The above are the basic processing steps. Refer to control system operation manual of each controller and operation instructions of the related computer software for detailed processing operation. - 46 - Chapter 4 System Maintenance Stable and normal operation of the machine is closely related to daily correct operation and maintenance. This chapter mainly introduces the way of daily maintenance. 4.1 Mechanical maintenance Mechanical maintenance mainly includes the maintenance of: guide rail, linear shaft, slide block assembly (metal guide pulley), nylon guide pulley, synchronous belt, synchronous belt wheel, screw and coupling. It is a must to the followings well done for maintenance: After completing use every day, cleaning all parts of the machine and oiling sliding mechanism like guide rail with lubricant are required. Make irregular check on the machine to mainly check if there is poor contact of the joints. In case of abnormality, timely treatment is needed to avoid causing serious problems. The followings are detailed information concerning maintenance of each mechanical part. 4.1.1 Guide rail, linear shaft, slide block assembly (metal guide pulley), nylon guide pulley Guide pulley and linear shaft are core parts of the machine. Their function is for direction leading and supporting. To ensure a higher processing accuracy of the machine, higher direction leading accuracy and stable movement of the guide pulley and linear shaft are required. During operation, plenty of corrosive powder and smoke are generated from the processed workplace. In case of long-term stay of the smoke and dust in the surface of the guide pulley and linear shaft, the accuracy of the machine will be greatly lowered, and corrosive points will be formed on the surface of the linear shaft causing lifespan of the machine shortened, even rusty and burn. To keep normal operation of the machine and ensure processing quality, daily maintenance shall be well done. Cleaning and maintenance of the linear guide rail: Disconnect the power supply of the machine, move the laser head to the rightmost (leftmost), repeatedly clean the linear shaft along with it with a piece of cotton cloth till the linear shaft free of dust; and then move the laser head to the leftmost (or rightmost), repeatedly clean the linear shaft along with it with a piece of cotton cloth till the linear shaft free of dust. Finally, apply proper amount lubricant (or sewing machine oil, but machine oil is prohibited) on to the linear shaft, slowly push the laser head along leftward and rightward repeatedly for couples of time to make the lubricant equal on the linear shaft. In the same way, it is to clean the linear shafts on left and right rail beams. Base on the using frequency of machine, check whether the lube enough or not termly (every 15 days or 2 months one time), lubricate the linear guide rail by the lube with 32-150cst. Operation steps: Power off the machine and switch off the power supply. Apart corresponding shield (or synchronous belt), make the oil nozzle of linear guide rail exposed; - 47 - Use oil gun, make the oil nozzle of oil gun aim at the oil nozzle like oil gun manual shows, oil it; Pack to return the apart shield (or synchronous belt); Switch on the power, start-up machine. Oil nozzle Fig.4-1 Linear guide rail oil 4.1.2 Synchronous belt, synchronous belt wheel Synchronous belt and synchronous belt wheel are the main mechanical parts of the machine, and they control movement track of the laser head. After movement for a certain period, the synchronous belt will frequently be longer and loose in a small size. That will lower the accuracy and sensibility of the laser head; therefore, timely adjusting the transmission belt is needed. Adjustment method: Adjustment of X direction and Y direction synchronous belt should achieve a proper tension of it; adjustment of drive motor synchronous belt is to achieve that when pressing middle part of the synchronous belt, the sinking level is 3% to 5% of the central distance between the belt wheels at the two ends. Attention: ① If to adjust the transmission belt too tight, the belt is not only easily made distortion but also cause more severe abrasion of the bearing; if too loose, transmission accuracy and sensibility will be lowered. Therefore, you should adjust the synchronous belt at a proper tension. While adjust Y direction synchronous belt, it is to achieve a proper ten for the synchronous belt and make the left and right synchronous belts at the same tension. Only by this way, a stable transmission synchronous belt can be achieved to ensure a good carving and cutting effect of the product. ② Keep the synchronous belt away from oil, pr chemicals. Contact with acid, alkali, oil and organic solvent is prohibited. Keep the synchronous belt dry and clean. ③ There is problem of aging with rubber of the synchronous belt. In case of serous aging (or abrasion), timely replacing with a new one is required. Please note that synchronous belt wheel should also be replaced if to replace the synchronous belt. After using the synchronous belt for a certain period, loose belt and abrasion will also be caused, and then timely replacement and lockup are needed. Please note that the new synchronous belt should match with the synchronous belt wheel. - 48 - 4.1.3 Fasten screws and coupling After working for a certain period, the screws at movement joints and the coupling of the movement system may be loosen causing low stability of mechanical movement. Therefore, during movement of the machine, you should observe if there is abnormal sound or other abnormality with the movement parts. In case of problems found, timely fastening and maintenance are needed. Meanwhile, the screws of the machine should be tightened one by one with tool after a certain period of use. The first fixation should be performed roughly one month later after using. 4.2 Electric maintenance Electric maintenance mainly includes the maintenance for electric parts, sensor, operation buttons and working indicator of the machine. 4.2.1 Limit switch Minimum once a month to make check on the effectiveness of limit switch of the X-axis and Y-axis. The limit switch plays the role of restraining the limit position of the movement to avoid machine impact (overreaching) causing damage to the machine. It is a must to make regular check on working state following the steps below: Start up the machine to have the laser head reset; Operate the machine to make the movement shaft move to the limit positions. If the movement shaft stops at the limit position, it means a normal operation of the limit switch. If it keeps moving while reaching the limit position, it means that the limit switch is out of order. In case of hard impact occurs, please immediately press the emergency stop button to stop the machine, and find a solution for it. Note 4.2.2 Emergency stop button Emergency stop button is the safe emergency components of the laser cutting machine, related to the security of personnel property and machine. Users must follow the following procedure to testing at the maintenance interval time in this operation manual. Turn on the laser cutting machine and cutting. Press emergency stop button. If all the electrical equipment of the load power supply is cut off, then an emergency stop safety circuit works normally. Frame and operation terminal are installed in two urgent stop switch, must check it according to this method one by one. Reset emergency stop button, restart machine. - 49 - 4.2.3 Other button and indicator light maintenance Disconnect the electrical connection, use multimeter to measure the button contacts connect and disconnect action is normal or not. Touch all kinds of work and to trigger alarm status, test whether the signal and indicator light normal. 4.3 Light route maintenance Light route system of the laser engraving machine is completed by reflector together with focus of the focusing lens. The focusing lens is free of the problem of deviation in light route. However, three reflectors are fixed by mechanical parts with large possibility of deviation. Although deviation is not frequently caused, users are recommended to have a check on the light route before working each time. Although the optical lenses in CO2 laser system are easily worn products, we still wish you try to use it less as possible to prolong lifespan of the laser device and lower cost of using lens. During replacement, pay attention to placing, testing, installing the optical lens to keep it free of damage and pollution. After installing a new lens, regular cleaning is needed. This is very simple. Proper operation will prolong lifespan of the lens and lower cost. Otherwise, the lifespan will be shortened. During laser working, it is inevitable to prevent the optical parts from contacting the suspended particles. When cutting the materials, engraving and marking with laser, processing surface will release plenty of gas and flying objects. The gas and flying objects may cause harm to the lens. When dirt falls on surface of the lens, it will absorb energy from the laser beam causing thermal-lens effect. In case of no thermal stress formed on the lens, the operator may take it down and clean it. Of course, a certain method capable of avoiding damage and further pollution should be applied. General rules of operation During cleaning and installing the lens, any matter stuck on or even nail print or oil droplet may higher absorption of the lens and shorten lifespan of it. Therefore, the following prevention measures must be taken: 1) Suction or blowing device are prohibited to avoid scratch on surface of the lens caused; 2) Do not touch film layer of the lens when taking it out, but to hold its edge; 3) Keep the lens at dry and clean place for testing and cleaning. A good working table should be equipped with several layers of cleaning paper or lens cotton paper on the surface; The operator shall not speak over the lens, and keep food, beverage and other pollution matter with potential risk away from the working environment. Correct leaning method During cleaning the lens, the only objective is to remove pollution on the lens, but not cause further pollution and damage to the lens. To achieve this goal, people usually take the method with less risk. The followings are just for this purpose: Firstly, use air balloon to blow off particles on surface of the lens, especially the micro particles and floccules on the lens. This is a necessary step. Yet, compressed air of the production - 50 - line is strictly prohibited. This is because the air from it contains oil and moister, and that will cause further pollution to the lens. Secondly, gently clean the lens with acetone or absolute alcohol (Absolute alcohol is necessary. It may lower the possibility of pollution to the lens.) After soaking acetone, use the lens paper to clean the lens under sunshine and move in a circle. When the paper gets dirty, it is ma must to replace it. Cleaning must be done in a one-off way to avoid scratch caused. Certainly, some pollution and lens damage cannot be removed by cleaning, e.g. film burn by dirt, film peeling off by dew or condensate water. To recover its good performance, the only way is to replace the lens. 4.4 Auxiliary parts maintenance 4.4.1 Water replacement and water tank cleaning Water quality of the circulation water will directly influence lifespan of the laser tube. You are recommended to use purified water, and keep the water at a temperature below 35℃. In case of over 35℃, water replacement is needed, or place ice into the water to lower its temperature. (You are recommended to select water chiller or use two water tanks.) It is recommended to clean the water tank and replace the circulation water once a week. Water tank cleaning: firstly disconnect the power supply, plug water inlet pipe out, have the water inside the laser tube automatically flow into the water tank, open the water tank, take the water pump out, and clean dirt on the water pump. Thoroughly clean the water tank, replace ready the circulation water, place the water pump back into the water tank, insert water pipe connecting the water pump into water inlet, well arrange all the connectors. Separately connect power through to the water pump for running 2-3 minutes (make the laser tube fill up with water.) 4.4.2 Blower cleaning For every 15 days, it is to clean the air pipe, and blower to prevent foreign matters accumulated from lowering effect of air out. Check if there is leakage, foreign matter, perform repair or maintenance. Long-term use of blower will cause plenty of solid dust accumulated inside the it causing large noise and lower effect of air exhaustion ventilation and smell elimination. In case of insufficient suck force causing unsmooth smoke expelled, firstly power it off, remove the air-in pipe and air-out pipe from the blower, remove dust inside them, and then turn the blower upside down, and push the blade of it till it getting clean, and then assembly the blower ready for use. 4.4.3 Water chiller maintenance Water quality and temperature of the cooling water will directly relate to lifespan of the laser tube or radio frequency tube. Cooling water must the purified water at temperature below 35℃; the cooling water must be kept clean and regularly replaced (minimum once a month). Check if the cooling water gets muddy, with deposit, at over high temperature, or water - 51 - replacement required; during processing, frequently check water level to ensure sufficient water or if the water temperature is over high (higher than 35℃). Steps of replacing cooling water: Power off the machine and stop the laser device; Unscrew valve of water outfall of the water chiller for a thorough drainage of water from the water chiller; Open protective cover of the water chiller and pour purified water into the water chiller; Start up the machine, observe if the laser tube is filled up with water. After circulation for five minutes, if there are still plenty of air bubbles in the laser tube, it is to open the discharge valve inside the machine to expel air from the laser tube making cooling water fill up with the laser tube. - 52 - Chapter 5 Trouble Shooting No. 1 2 3 4 5 6 Failure Analysis Method Check whether the emergency Machine cannot stop button pressed or not power on Laser power supply cannot power on Solution Loosen the emergency stop button The master contactor inside the electrical box trip Reset master contactor The cooling system hasn’t been turned on normally Open the water cycle system Water protection trigger (the sensor broken) Check the sensor of water protection The air switch of laser power Close the air switch of laser supply inside the electrical box trip power supply If parameters of the controller Correct parameters of Alarm given are correct the controller after power-on Machine alarm signal is Check alarm signal triggered source of the machine Check if water circulation is Clean water tank, dredge smooth water hose Laser pause during working Install a stabilizer to input If power voltage is table power supply PLT plotter unit out from User adopts PLT output in CoreIDraw software should CoreIDraw software. In HGPL match with resolution of dialogue box, if unit of plotter in SmartCarve software lead-in page option is set correct PLT option Wrong figure User adopts PLT output in size CoreIDraw software. In HGPL Change to 100% dialogue box, if zooming in page option is 100% Crash to the machine and unexpected engraving If resolution of the controller parameters are correct Discharge and sparkle of the laser tube (high voltage line ) to case Set to the correct resolution or equivalent Reconnect the laser tube high voltage line Fail to connect earthing for the Connect earthing, eliminate controller or other interferences the interference Over high temperature causes crash to the controller - 53 - Add more measures for lowering temperature 7 8 Reverse direction of motor shaft movement Fail in movement of motor shaft or twittering of it during movement If lines from the drive to the motor are connected improperly Improper setting of motor parameters cause missing step to the motor Damaged drive or motor Motor line broken or poor contact Set to the correct movement parameters Change the drive or motor Reconnect the motor and drive line Check electric earthing Please refer to operation instructions of the control system for the related controller for more details concerning failure diagnosis. Note - 54 - Appendix DC I/O Laser device Appendix 1 Electric wiring diagram for No.3 controller 3rd controller - 55 - Appendix 2 The control figure of main power supply for CMA1625F Power supply socket of water chiller Power supply socket of 1# exhaust blower Power supply socket of 2# exhaust blower Power supply socket of volute blower Power supply socket of air blower Laser tube Ampere indicator Laser power supply - 56 - Appendix 3 The control panel and I/O config for CMA1625F Orientation Reset Start/pause Repeat - 57 - Reset Start/pause Repeat - 58 - Appendix 4 Export Config of CMA1625F Air blower enable Exhaust blower enable Pen and Electric magnet enable 1# Exhaust blower over loading 2# Exhaust blower over loading - 59 - Post All final right of interpretation of this manual belongs to GD HAN’S YUEMIGN LASER TECH CO., LTD; we will do our utmost efforts to ensure the accuracy of the contents of this manual. We do not assume any responsibility caused by misspellings and typing errors. Your comments will be highly appreciated. All rights reserved! Reprinting or copy without permission is prohibited. We reserve the right of lawing. 07020100900 CNY:50.00 - 60 -