1
13. NAMING THE DATA STORAGE LABELS
1.
2.
3.
4.
5.
6.
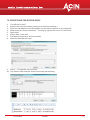
Connect de microSD card using the USB or SD adapter with
your computer
Open the file ‘names.txt’with a text editor like WordPad. This
file should already be on the micro SD card.
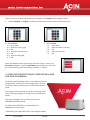
The labels for the buttons are listed where each label is given in
square brackets like [kitchen].
All these identifiers can be edited to your wish (so project
name / apartment type / room / grill type)
IMPORTANT: take care always to use these [] brackets around
the labels. For instance [kitchen]
Save the file to the microSD card overwriting the old file
14. EMERGENCY STOP
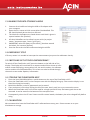
If for any reason it is needed to interrupt the measurement just press the red button shortly.
15. SWITCHING OFF OF THE FLOWFINDER MK2®
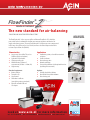
To switch off the FlowFinder mk2® press the button on the left side of the
display. The display will turn black for a moment and will then show an information screen displaying, among other info, the serial number, the software
version and the last calibration date. This screen can also be found through
the touch screen under Options, Information.
16. STORING THE FLOWFINDER MK2®
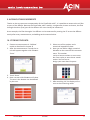
1. 2. 3. 4. 5. 6. Place the hood 230x230x145mm upside down over the top of the FlowFinder mk2®.
Place the FlowFinder mk2® in the transport case with the display facing up. Take care the display is not
tilted, but laying horizontally.
Behind the elastics in the lid, paperwork can be stored.
If any resistance is felt when closing the lid of the case, don’t push, but try to remove the cause.
When the FlowFinder mk2® will not be used for a longer period of time, the battery pack has to be
removed. It can be stored in the bottom of the transport case.
Consequently, when the FF hasn’t been used for several weeks, the battery has to be charged fully before
using.
17. CALIBRATION
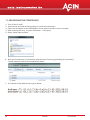
We recommend to have the FlowFinder mk2® calibrated once every year. Please contact us or your
distributor to arrange
12
manual
19-11-2013