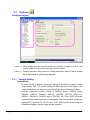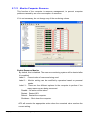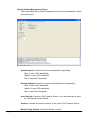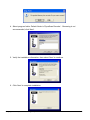
1
DynaScan AP3 Software User’s Manual 360°LED Video Display Edition 6 Table of Contents 1. INTRODUCTION ......................................................................................................................................................5 2. INSTALLATION ........................................................................................................................................................6 3. VERSION..................................................................................................................................................................8 4. START PROGRAM ..................................................................................................................................................8 5. OPERATION.............................................................................................................................................................9 MAIN MENU CONFIGURATION AND FUNCTION BUTTONS ................................................................................................9 5.1 Player ............................................................................................................................................12 Introduction.....................................................................................................................................................................12 Main menu......................................................................................................................................................................12 5.1.1 Media ..................................................................................................................................................................14 5.1.2 Capture ...............................................................................................................................................................18 5.1.3 Flash ...................................................................................................................................................................21 5.1.4 Power Point.........................................................................................................................................................23 5.1.5 Web Page ...........................................................................................................................................................25 5.1.6 DVB-T .................................................................................................................................................................26 5.1.7 Picture.................................................................................................................................................................28 5.1.8 Monitor ................................................................................................................................................................29 5.1.9 Additional Information .........................................................................................................................................30 5.2 Layout .............................................................................................................................................32 Introduction.....................................................................................................................................................................32 Configure layout .............................................................................................................................................................32 Edit Layout .....................................................................................................................................................................34 Creating a New Layout ...................................................................................................................................................34 5.3 Sequence .......................................................................................................................................39 Introduction.....................................................................................................................................................................39 Configure layout .............................................................................................................................................................39 Edit layout.......................................................................................................................................................................41 Add, edit and Delete layout ............................................................................................................................................41 5.4 Schedule ........................................................................................................................................49 Introduction.....................................................................................................................................................................49 Configure layout .............................................................................................................................................................49 Edit layout.......................................................................................................................................................................51 5.5 Shutdown ........................................................................................................................................59 Introduction.....................................................................................................................................................................59 Configure layout .............................................................................................................................................................59 Edit layout.......................................................................................................................................................................60 5.6 Plugin ..............................................................................................................................................63 Introduction.....................................................................................................................................................................63 Configure layout and operation.......................................................................................................................................63 Marquee setup................................................................................................................................................................64 LightNum Plugin .............................................................................................................................................................66 5.7 Options ...........................................................................................................................................68 Configure layout .............................................................................................................................................................68 5.7.1 Startup Setting ....................................................................................................................................................68 5.7.2 Startup Run .........................................................................................................................................................73 5.7.3 Display Position ..................................................................................................................................................75 5.7.4 Monitor System ...................................................................................................................................................77 5.7.4.1 Operator...........................................................................................................................................................77 5.7.4.2 Functions of Advance Control Panel ................................................................................................................83 5.7.4.3 Monitor System Schedule ................................................................................................................................87 5.7.4.4 Event Log.........................................................................................................................................................93 5.7.4.5 Recording.........................................................................................................................................................95 5.7.5 ISC Control .........................................................................................................................................................97 5.7.6 Default Path ........................................................................................................................................................98 5.7.7 Capture Setting .................................................................................................................................................100 5.7.8 Volume Control .................................................................................................................................................104 5.7.9 Color Adjust.......................................................................................................................................................105 5.7.10 Network Setting...............................................................................................................................................106 5.7.10.1 General ........................................................................................................................................................106 5.7.10.2 SMTP Setting ...............................................................................................................................................109 5.7.11 Power Control ................................................................................................................................................. 111 5.7.12 Monitor Computer Resource ........................................................................................................................... 112 5.7.13 Test Pattern..................................................................................................................................................... 114 5.7.14 About............................................................................................................................................................... 115 6. INTRODUCTION OF ACCESSORIAL PROGRAMS...........................................................................................116 6.1 AP3 Register........................................................................................................................................................ 116 6.2 AP3 Config (Client) ..............................................................................................................................................120 6.3 AP3 Config (Server) .............................................................................................................................................123 6.4 File Transmit Client ..............................................................................................................................................125 6.5 File Transmit Server .............................................................................................................................................131 6.6 ECU .....................................................................................................................................................................145 6.7 Message Editor ....................................................................................................................................................147 6.8 Billing Report........................................................................................................................................................151 6.9 Decoder Installation .............................................................................................................................................156 Appendix ..........................................................................................................................................................158 DynaScan Models Resolution List ................................................................................................................................158 1. Introduction DynaScan AP3 is a set of front-desk play control software of advertisement publishing application system, for use with DynaScan 360 degree video displays. This software may also be used for other various general display devices. This software can be installed in ordinary desktop computers, industrial computers or computers with built-in operating systems to provide basic media play functions, playing media files, picture files, Power Point files, and Flash files, as well as traditional analog videos and satellite digital video. This software has been designed with advanced functions such as maintaining a record of commercial ads played, displaying marquees, and various other functions. If installed in advanced computers with ideal performance, the software supports the function of displaying multiple videos simultaneously, which users can independently arrange the position of pictures, as well as adjusting their size, overlapping, etc. DynaScan AP3 includes online operation (optional). If a computer is connected to internet/intranet with AP3 NetPlayer function, the user may obtain real-time play status and play records, change play content immediately, or schedule files to transmit and play video content. Managing play equipment via a remote location can more efficiently utilize the equipment by significantly reducing labor and time. System Requirements and Installation Direction System Requirements Recommended Hardware Configuration: P4-1.6G CPU and above 512MB Memory 100MB hard disk and above Video card supporting DirectX 9.0c and above (NVIDIA-5200 or ATI-9200 and above) Sound output hardware in accordance with AC97 standard CD-ROM or DVD-ROM Software: Microsoft Windows XP Professional SP1 and above DirectX 9.0c and above should be installed. IE 6.0 SP1 and above (for Flash play) PowerPoint Viewer 97 (for PowerPoint) Copyright © 2008 DynaScan Technology Corp. 5 2. Installation 1. Left double-click DynaScan AP3_0249R_Standard.exe (*Note) to install executive file, and click ‘Next’ after entering installing interface. [*Note]: [0.2.4.9] in the name of installation executive file refers to the released version. Please refer to the actually installed version of AP3. 2. Select destination directory. Default directory is C:\Program Files\DynaScan AP3. Select ‘Next’. 3. The Setup Dialog box asks if you want to create a new directory. Select ‘Yes’ to create directory and ‘No’ to return back to modify the directory. Copyright © 2008 DynaScan Technology Corp. 6 4. Select program folder: Default folder is ‘DynaScan AP3’ . Renaming is not recommended, click ‘Next’. 5. Verify the installation information, then select ‘Next’ to continue. 6. If you wish to run the AP3 Config application, please check the ‘Run the installed application now’ box, click ‘Next’ to complete installation. Copyright © 2008 DynaScan Technology Corp. 7 3. Version Except the Version of AP3, it is distinguished by the Edition of Embedded or Standard, which is applied to DynaScan Embedded IPC or Windows XP Professional, respectively. There are Client and Server types for AP3 Standard, but AP3 Embedded is for Client only. and it can connect to AP3 Standard Server. 4. Start program If this is your fist time running AP3, please run “AP3 Config” (Start > Program Files > DynaScan AP3 > AP3 Config) to setup initial settings before running “AP3 DSPlayer” for the first time. Please refer to the instructions of AP3 Config (Client) (Page.120) or AP3 Config (Server) (Page.123) for more detailed information. To start AP3, click “Start > Program Files > DynaScan AP3 > DSPlayer”. Copyright © 2008 DynaScan Technology Corp. 8 5. Operation Main Menu Configuration and Function Buttons Main menu configuration consists of four sections, Label 1 – Main function buttons Illustration of function buttons from left to right: Preview Player Layout editor Sequence editor Schedule editor Scheduled shutdown control Plug-ins management Options Play All: play startup run settings in option Stop All: stop playing Copyright © 2008 DynaScan Technology Corp. 9 Label 2 –Operational function section of played contents provides function buttons like ‘Play’, ‘Pause’, ‘Stop’, ‘backward’, ‘forward’, ‘jump to beginning’, and ‘jump to end’. The section also provides the track bar of file progression, and a Current Time Indicator (CTI) that will move along the timeline. Clicking and dragging the CTI will change play progress accordingly. To the right of buttons is relevant information column of files. The left time displays the current played time and the right number represents total length of file. This is followed by a display of the file name and current playing status. The last drop down box lists all currently played files for users to select objects of operational function section, as AP3 is capable of simultaneously playing different files in subpictures with different sizes by dividing several ‘displays’ or one ‘display’. Label 3 – operational area of each function. Please refer to detailed introduction of functions for illustration of each item in operational area. Label 4 – Feedback of status of the DynaScan equipment. This includes temperature sensor, power status, motor status, thermal alarm, tilt alarm, preheat, precool and excool. • Temperature sensor will detect the temperature (centigrade) in the to represent normal machine body, displaying a green number temperature and a red number when the temperature exceeds safety settings. • Power status displays (grey) when power is off; power is on, and unexpected power status display Models) (green) when (yellow). (for certain • Motor status displays (grey) when motor is off, (green) when (red) when motor is abnormal. If an abnormal motor is on, and condition be detected, the display will be shut down automatically. • Thermal alarm will show (red) when detecting over-temperature. If it is higher than the safety setting, the LED display modules will be turned off with the motor continuously running to cool machine. Once the temperature returns to a normal level, the LED display modules will turn on again. • Tilt alarm will show (red) and turn off the display when a tilt of the machine body over 15 degrees is detected. • If the drum temperature is below 5°C when the DynaScan display starts, it will enter into a “Preheat” mode, showing (yellow) and motor turned off. It will then turn into normal mode after the drum temperature is above 5°C or after 8 minutes. (Only for certain display Copyright © 2008 DynaScan Technology Corp. 10 models) • If the drum temperature is above 35°C when the DynaScan display (blue), with starts, it will turn into “Precool” mode with showing motor running and the LED display modules off. It will turn into normal mode after the drum temperature is below 35°C or after 5 minutes (Only for certain display models). • When shutting down DynaScan display (power is on), it will turn into (blue), with the motor running and “Excool” mode with showing LED modules off for approximately 6 minutes. It will then automatically power off the display automatically and the icon will disappear. (Only for certain display models) Copyright © 2008 DynaScan Technology Corp. 11 5.1 Player Introduction The Player allows users to preview files before arranging for formal play, as well as monitoring the play screen. When a compatible graphic card is installed, and the display mode has been set to “dual view” or “extended desktop”, the software interface will not be shown on the ‘displaying equipment’, hiding operation from public view. Main menu Label 1 – Extended function section includes all keys of extended functions provided by each function button. Label 2 – Parameter setup section defines playing parameters of contents that vary according to different play modes. Please refer to below chapters for detailed illustration. (Page 14) Label 3 – Preview window is used to preview selected play content. The size of window is related to ‘displaying equipment’ and will change according to different machine models set up in ‘Options’. Label 4 – Preview. Copyright © 2008 DynaScan Technology Corp. 12 Preview Operation (Label 4) 1. Label A – Function keys of play control Play :Start or continue to play previewed file. Pause:Pause file preview. Stop :Stop playing previewed file. 2. Label B – Track bar of file preview can present playing progress by the movement of Current Time Indicator with the timeline. Clicking and dragging the CTI will change the progress of preview accordingly. 3. Label C – Shows relevant information of previewed files. Played time on the left and total file length on the right, followed by file name and playing status. 4. Label D – Start and stop Preview. The previous chapter mentions partial play is available to preview window. Video content may be viewed in preview window to avoid size error detected after pressing (Play key). Illustration of Function Buttons (Label 1) Play – Immediately transmits image of Media File, Capture, Flash, Power Point, Satellite and Picture to play screen. Set Startup – Sets current play items and their parameters as default. For example: If Startup Run is set up as Capture in Option, enabled AP3 will automatically play Capture settings in current editing section. With the exception of Sequence, Schedule and Layout, only Capture can be specified as Startup Default. Copyright © 2008 DynaScan Technology Corp. 13 5.1.1 Media Content Click to open the file browser window and select media content. Preview or play selected files with supported image compression formats. The corresponding decoder must be installed to the system for proper media playback. AP3 has been equipped with decoders for MPEG-1, MPEG-2, and MS-CRAM for AVI files. Start / End Time After choosing a video file, pull Current Time Indicator (CTI) under preview button beside ‘Start Time’ to set up mode to desired start point of file, Click start point, then pull the CTI to desired end point of file, and Click button beside ‘End Time’ to set up end point. The blue range in Track bar represents the played scope of selected file. Once pressing (Play), played content will start from and end at set points. If ‘Preview’ has been selected, the specified time layout will be previewed in the Preview window. Note: End Time setting must be later than Start Time. If detecting incorrect time settings, AP3 will automatically play the full file. Copyright © 2008 DynaScan Technology Corp. 14 Volume / Balance Moving Volume Control slider will adjust the audio level of played content. Slide it the left to reduce the volume and right to increase. Centering the balance slider will produce even output in left and right audio channels. Moving the slider to left will reduce output from right sound channel, and to right will reduce output from left channel. Moving the slider to one end will cause audio to be output on a single channel. Doing so will allow two video files to output monaural audio simultaneously. Accelerator Select the video hardware accelerator used to play content. When selecting ‘Default’, AP3 will default to the accelerator setting in the ‘Options’. If an accelerator is specified, only the current content will adopt the accelerator setting, and no other content will be affected, nor will the accelerator setting be changed in ‘Options’. For more information about accelerators, please see page 30. Copyright © 2008 DynaScan Technology Corp. 15 Maintain Aspect Ratio By default, the picture will stretch video content to fit the size of the view window. As a result of different aspect ratio of original file, the image may be distorted. To maintain the original aspect ratio, check the "Maintain aspect ratio" box. Because the aspect ratio of the content may differ from the view window, black margins around picture may appear. Copyright © 2008 DynaScan Technology Corp. 16 Copyright © 2008 DynaScan Technology Corp. 17 5.1.2 Capture TV Channel Input code of desired TV channel, and Tuner should be set up prior to Video Input. Then press Enter in keyboard to complete TV channel appointment. Video Input Select input terminal based on different video sources, including three types as Composite (AV), S-Video and Tuner. Default value is determined by Capture settings in ‘Options’. Video Format Select input video format. Currently RGB format is supported but YUV is not. If Default value is selected, Capture settings in ‘Options’ will be automatically adopted. Analog Format Set up analog video format based on location. Three main specifications of TV video transmission consist of NTSC, PAL and SECAM. NTSC :30 frames per second displaying 525 scan lines, adopted in U.S.A, PAL Canada, Japan, Taiwan, and parts of Central and South America. :25 frames per second displaying 625 scan lines, adopted in UK, Copyright © 2008 DynaScan Technology Corp. 18 Germany, most European countries, Australia, and parts of Central and South America. SECAM:25 frames per second displaying 625 scan lines, adopted in France, east Europe, Russia and some middle-east countries. Volume / Balance Volume: Volume control. Balance: Balance control between left and right sound channels. Enable Quality Setting If default is set as “Disable”, the program will comply with Capture Default Setting in the ‘Options’ while playing. If set as “Enable”, new settings may be selected, and image quality may be adjusted. Default Quality Click the button to retrieve the default Quality. Please make sure the Preview function is running before it is pressed, otherwise the below error dialog will be displayed. Adjust Video Quality Brightness Adjust the brightness of image. Brightness is decreased by moving the slider to the left, and increased by moving the slider to the right. Contrast Adjust the contrast of the image. Contrast is decreased by moving the slider to the left, and increased by moving the slider to the right. Hue The change of hue will affect color. The hue may be shifted toward purpleorientation by moving the slider to the left, and green-orientation by moving the slider to the right. Saturation Change of saturation of color. The color saturation may be decreased by moving the slider to the left and increased by moving the slider to the right. Copyright © 2008 DynaScan Technology Corp. 19 Sharpness Change sharpness of the image. The image may be blurred by moving the slider to the left, and sharpened by moving the slider to the right. Accelerator Select the video hardware accelerator used to play content. When selecting ‘Default’, AP3 will default to the accelerator setting in the ‘Options’. If an accelerator is specified, only the current content will adopt the accelerator setting, and no other content will be affected, nor will the accelerator setting be changed in ‘Options’. For more information about accelerators, please see page 30. Maintain Aspect Ratio By default, the picture will stretch video content to fit the size of the view window. As a result of different aspect ratio of original file, the image may be distorted. To maintain the original aspect ratio, check the "Maintain aspect ratio" box. Because the aspect ratio of the content may differ from the view window, black margins around picture may appear. Resolution Default will use resolution set in “Capture Setting” of “Options”. Only current Capture will used specified resolution setting. No other content will be affected, nor will the default resolution setting be changed in “Options”. High resolution refers to 640x480; Low resolution refers to 320x240; Auto function is disabled. Device ID AP3 supports Multiple Capture Cards that enables the user to appoint ID and input image via the Capture Card corresponding to the ID. Please refer to Capture Direction in Option for ID setup approach. (Page 100) [*Note]: Selecting Device ID will turn the settings into default. Set to Default The settings will be set as the Capture Setting of Option for default after the button pressed with the success message shown to the right. The settings of Volume, Balance, Accelerator and Maintain Aspect Ratio will not be set as default. Copyright © 2008 DynaScan Technology Corp. 20 5.1.3 Flash Content Click to open the file browser window and select the desired Flash file for playback. Screen Scope Input number of pixels and press Enter key to change scope. Top – Moves screen upward. Left – Moves screen leftward. Bottom – Moves screen downward. Right – Moves screen rightward. Accelerator Select the video hardware accelerator used to play content. When selecting ‘Default’, AP3 will default to the accelerator setting in the ‘Options’. If an accelerator is specified, only the current content will adopt the accelerator setting, and no other content will be affected, nor will the accelerator setting be changed in ‘Options’. For more information about accelerators, please see page 30. Copyright © 2008 DynaScan Technology Corp. 21 Note For Playing Flash Files Only Flash files with a .swf filename extension may be played in AP3, and require IE6.0 SP1 or later. Because a Flash file aspect ratio cannot be altered, the resolution of the Flash file resolution must match the native resolution of the display. When producing Flash files, users should refer to Appendix「DynaScan Models Resolution List」 for size considerations, in order to achieve the best playback result. (Page 158) Copyright © 2008 DynaScan Technology Corp. 22 5.1.4 Power Point Content Click to open the file browser window and select the desired Power Point file for playback. Screen Scope Input number of pixels and press Enter key to change scope. Top – Moves screen upward. Left – Moves screen leftward. Bottom – Moves screen downward. Right – Moves screen rightward. Accelerator Select the video hardware accelerator used to play content. When selecting ‘Default’, AP3 will default to the accelerator setting in the ‘Options’. If an accelerator is specified, only the current content will adopt the accelerator setting, and no other content will be affected, nor will the accelerator setting be changed in ‘Options’. For more information about accelerators, please see page 30. Copyright © 2008 DynaScan Technology Corp. 23 Note on Power Point File Playback PowerPoint Viewer 97 is required to play Power Point files. Because the aspect ratio of a Power Point file cannot be altered, the resolution of the Power Point file resolution must match the native resolution of the display. When producing Power Point files, users should refer to Appendix 「DynaScan Models Resolution List」 for size considerations, in order to achieve the best playback result. (Page 158) Copyright © 2008 DynaScan Technology Corp. 24 5.1.5 Web Page Content Enter the destination URL of website. e.g.: http://www.dynsacanusa.com Screen Scope Input number of pixels and press Enter key to change scope. Top – Moves screen upward. Left – Moves screen leftward. Bottom – Moves screen downward. Right – Moves screen rightward. Accelerator Select the video hardware accelerator used to play content. When selecting ‘Default’, AP3 will default to the accelerator setting in the ‘Options’. If an accelerator is specified, only the current content will adopt the accelerator setting, and no other content will be affected, nor will the accelerator setting be changed in ‘Options’. For more information about accelerators, please see page 30. Copyright © 2008 DynaScan Technology Corp. 25 5.1.6 DVB-T Content Click to open the Select File browser. select the setting file for satellite TV. Then it can preview or play after Volume / Balance Moving Volume Control slider will adjust the audio level of played content. Slide it the left to reduce the volume and right to increase. Centering the balance slider will produce even output in left and right audio channels. Moving the slider to left will reduce output from right sound channel, and to right will reduce output from left channel. Moving the slider to one end will cause audio to be output on a single channel. Doing so will allow two video files to output monaural audio simultaneously. Accelerator Select the video hardware accelerator used to play content. When selecting ‘Default’, AP3 will default to the accelerator setting in the ‘Options’. If an accelerator is specified, only the current content will adopt the accelerator setting, and no other content will be affected, nor will the accelerator setting be changed in ‘Options’. Copyright © 2008 DynaScan Technology Corp. 26 For more information about accelerators, please see page 30. Maintain Aspect Ratio By default, the picture will stretch video content to fit the size of the view window. As a result of different aspect ratio of original file, the image may be distorted. To maintain the original aspect ratio, check the "Maintain aspect ratio" box. Because the aspect ratio of the content may differ from the view window, black margins around picture may appear. Creating a Setting File for the Channel Use Windows NotePad, you may create a settings file as shown below. Save it and change filename suffixed with “.dvt” as the extension. Example: Direct DVBT 6 545000 8350 26 203 Explanation BDA Type Bandwidth Frequency ONID TSID SID Copyright © 2008 DynaScan Technology Corp. 27 5.1.7 Picture Content Click to open the file browser window and select picture file you wish to play. The software currently supports BMP and JPG formats. Accelerator Select the video hardware accelerator used to play content. When selecting ‘Default’, AP3 will default to the accelerator setting in the ‘Options’. If an accelerator is specified, only the current content will adopt the accelerator setting, and no other content will be affected, nor will the accelerator setting be changed in ‘Options’. Maintain Aspect Ratio By default, the picture will stretch video content to fit the size of the view window. As a result of different aspect ratio of original file, the image may be distorted. To maintain the original aspect ratio, check the "Maintain aspect ratio" box. Because the aspect ratio of the content may differ from the view window, black margins around picture may appear. Note on Displaying Picture Files Displaying an image file resolution higher than 「1024 x 768」may result in a black screen or other display error. Copyright © 2008 DynaScan Technology Corp. 28 5.1.8 Monitor When a compatible graphic card is installed, and the display mode has been set to “dual view” or “extended desktop”, the software interface will not be shown on the DynaScan display, hiding operation from public view. Because users may not be able to directly view the DynaScan, Monitor allows for real-time viewing of what content is being shown on the DynaScan display. Monitor Target When computer system supports over two display equipments, monitored screen by selecting it from the drop down box. Once selected, the monitoring screen to the right immediately shows the layout of monitored target. Presently, up to three screen numbers (Screen1 - Screen3) are available. Sample Rate Refresh rate of the monitoring screen. 5 times / 1 second - The highest sample rate 2 times / 1 second 1 time / 1 second - Default 1 time / 2 second 1 time / 5 second - The lowest sample rate Copyright © 2008 DynaScan Technology Corp. 29 Note on High Sample Rates The Monitoring function significantly occupies CPU usage. A higher sample rate requires more CPU capacity. In order to maintain smooth video playback, sample rate may not be set to a refresh rate higher than 5 times/second. When not using the Monitoring function, exiting the Montinor by switching to another function (e.g. Media File) will help avoid video playback issues. Not applicable to all conditions Some graphic cards will adopt Overlay as display pattern under certain accelerating mode in order to achieve better efficiency in real-time picture play. However, current monitoring function does not display Overlay image, which may cause a normal picture on the DynaScan, but appear blacked out on the monitoring screen. 5.1.9 Additional Information What is an accelerator? The accelerator helps to through different imaging choosing an inappropriate abnormal display. ◆ Lower, Middle, Highest achieve better video playback and efficiency techniques and hardware support. However, accelerator may cause low efficiency and even and VMR7_RL are 2D accelerating functions, in which, Lower has highest speed but poorest video quality, Highest has best video quality but slower speed. ◆ D3DVR, VMR7, VMR9 and VMR9_WL are 3D accelerators. Hardwareaccelerated graphic cards supporting Direct 3D perform better in layout quality and efficiency than those supporting 2D. ◆ Clone and Clone3 are special versions using an imaging technique of VMR9 Renderless, and is capable of simultaneously displaying several instances of images horizontally or vertically 360° LED Video Displays. Application Directions VMR9_WL is recommended for newer 3D graphic accelerator chipsets. D3DVR is recommended for older 3D graphic accelerator chipsets, or when experiencing improper playback using VMR9_WL. Graphic cards that do not support 3D function or 3D function is not complete, Copyright © 2008 DynaScan Technology Corp. 30 using the “Middle” setting is recommended. Clone (3) should be used while displaying several of the the same content in one screen, which can work more efficiently than appointing the same contents in different screens. Clone serves as the only method to display multiple Captured images. Appoint the Scope of Played Contents Unecessary areas of an image may cropped out by adjusting the scope of content. For instance, noise may be removed in the upper and lower edges of Capture, black margins that have been added to screen in order to maintain aspect ratio may be removed, or a small area may be extracted from a larger image. Simply move your mouse to any yellow point in preview window, right click the drag to change the size and position of trim layout. Only the area within the red box will be displayed. Not applicable to all conditions The ability to crop content will depend on accelerator setting and appointed playing screen. Generally, accelerators work when main screen serves as the main video playback screen. If content is played on secondary or tertiary screens (while using multi-screen graphic cards), VMR9 may not function properly. Copyright © 2008 DynaScan Technology Corp. 31 5.2 Layout Introduction The layout editor provides a way to divide the DynaScan display’s play area into several sub-areas, each with its own picture position and played content. Configure layout Label 1 – Extended function section Label 2 – Saved Layout Selection Area Label 3 – Layout Editing Area Label 4 – View Manager Label 5 – View Settings Copyright © 2008 DynaScan Technology Corp. 32 Function Buttons (Label1) Extended function section New – Create a new, blank layout. Save – Saves changes to the current layout. Save as – Saves current layout as a new layout file. Path – Open a dialog box of directories to change the folder saving layout files in Layout Option. Play – Play content immediately, based on layout configuration and settings in current editing section. Startup – Sets layout as default startup play item. The system will confirm if the layout in editing section needs to be saved. Publish – Exports the layout settings, including the Schedule, Sequence, and all the video content files in the current Layout to a CF Card, SD Card, USB Drive, etc. After inserting media into another computer, files may be played directly once AP3 has completed media path setup. Remote Publish –Transmits the layout settings, including the Schedule, Sequence, and all the content files belong to the current Layout, to remote target computer(s) via internet. Content will automatically play when publish has finished. (Applies to AP3 Server only) (Page.37) Copyright © 2008 DynaScan Technology Corp. 33 Edit Layout What is Layout and what is View? Layout refers to the total layout configuration of the video output. One DynaScan display can simultaneously contain several sub-pictures playing different content, and each of which is called a View. One layout can contain several views, depending on efficiency of hardware. Default Layout (Label 2) Seven commonly used layout templates have been provided by AP3. Left double-click the desired layout to load it in editing section. Once loaded into the editing section, the layout may be modified. Note: Default layouts cannot be deleted or overwritten. Creating a New Layout Establish, Modify and Delete View (Label 4) Using a premade layout template is not necessary to create a new in extended function section, and a layout. Click button “New” new layout (not view) will show in editing section. Then Click the “New” button on the left-hand side of the screen to insert a View that can be moved withing the layout and its size changed by using eight red points along the edges. The position and size of view may also be directly set up by inputting number in the “Region” area of the View Settings. To delete a View, click the view you wish to delete, and Click “Delete” button on the left side of the screen. New: to generate a new view in editing section. Delete: removes the selected view. Set Sound View / Clear Sound:Selects the view that will be the audio source for the layout, or may be used to remove audio from a view. Note: Flash and Power Point files will always produce audio, even if the view’s audio has not been selected. Undo: Returns to previous status from current editing condition and cancel current change. Redo is available up to five previous changes. Redo : Restore later status under current editing condition via retrieving cancelled changes. Copyright © 2008 DynaScan Technology Corp. 34 View Setting (Label 5) Set View Name: Assigns a Name to the selected view. Input new name and Click “Set View Name” to rename the view. Set Region: Modifies the position and size of the selected view. Coordinates of currently selected view are displayed in “Region”, with unit size of the screen based on a 10000 x 10000 scale, regardless of the size of the display equipment. After inputting view coordinates and clicking “Set Region”, the view will adopt the new set coordinates. Accelerator:Click button to individually assign the accelerator used by the selected View. Using the Default setting will apply default accelerator setting in “Option”. Accelerator setting will apply to the selected View only, no other Views will be affected, nor will Accelerator settings be changed in “Option”. Startup Run: Set the content to be played within the View. Click button to the right of “Startup Run” to launch ‘Startup Run Setup’; choose the type of content you wish to play for selected View in the left-hand side, choose the file on the the right-hand side, then confirm with OK. Set Played Contents for View A newly created View will not contain any default information; therefore, content must first be assigned to “Startup Run” for it to display content. First, select the View you wish to modify, and click button to the right of “Startup Run” to launch Startup Run Setup. Choose the type of content you wish to play for selected View in the left-hand side, choose the file on the the right-hand side, then confirm with ‘OK’. The file type and path will appear under the Startup Run button for reference, and a button will appear beside it should adjustment options be available. If content has not yet been assigned to a View, the button next to “Startup Run” will display “NONE.” Copyright © 2008 DynaScan Technology Corp. 35 Copyright © 2008 DynaScan Technology Corp. 36 Remote Publish (Server Only). Click the ‘Remote Publish’ button to show the Machine Select browser, which lists the target name, IP and ports of remote devices that have been set up in AP3 Config (see page 123 for more information about setting up remote devices). Select which targets you want to publish to; you may select individual machines by using the individual checkboxes, or use ‘Select All’ for all devices and ‘Clear Select’ to uncheck all devices. Publish can be set to specified View. Input the name of the View in “Frame Name” by dragging “Frame” from “Type”, e.g. default Views as Default, Region1, and Region2 etc. This Publish will play in the specified View, and not affect the playing in other Views. When the playing client is displaying multiple screens, the user can specify which screen to deliver the content to using the Screen ID. You may preset the date and time to begin playing the published content. The View will not play the new content until the preset playing time. If a future play time has not been specified, content will play immediately after remote publish has finished transferring. Click OK to begin transmitting. Note: Applies to AP3 Server only. Appoint only view with sound If a view has not been assigned as the single audio source of a layout, all views may play audio simultaneously. To avoid this, select the view and click “Set Sound” button to set as the only audio source and mute all other views. Two sources with the same Capture devices cannot be played simultaneously Copyright © 2008 DynaScan Technology Corp. 37 AP3 supports the use of multiple capture cards, and is capable of simultaneously playing multiple images and sound sources from different capture cards. For instance, sources from two capture cards, Capture A and Capture B, in one computer, may be played at the same time. Two different sources from the same capture card cannot be played simultaneously (e.g. playing Composite and S-Video). Startup of MultiScreen Function If MultiScreen is set as the Screen Type in “Option”, click to play content immediately or to set it as Startup Run. AP3 will display the dialog box shown below asking which screen you wish to display the layout. After selecting the screen, the layout will be then play on the chosen screen. [*Note]: Only Screen 1 can output audio for MultiScreen models, thus please allocate the content with audio on Screen 1. Playing Multiple MPEG 2 Files Simultaneously The ability to play multiple MPEG2 files simultaneously will depend on efficiency of computer hardware. For instance, a standard DynaScan Embedded IPC will achieve the best results when playing no more than two MPEG 2 video files simultaneously. Playing three or more MPEG 2 files simultaneously may require additional hardware upgrades. Copyright © 2008 DynaScan Technology Corp. 38 5.3 Sequence Introduction The Sequence Editor is used to create a playlist of several content files that will play sequencially. Once all content in the sequence has finished playing, the sequence will repeat from the beginning of the playlist. Configure layout Label 1 – Extended function section Label 2 – List of play item types. Currently 9 play item types are supported: Media File, Capture, Flash, Power Point, Web Page, Satellite, Picture, Plugin and Layout. Label 3 – Lists all playable files types found in the directory of “Default Path” seting in “Option”. Click to select a file (or select several files by pressing Shift or Ctrl while clicking) and drag it to Play List to add it. Label 4 – Play List area. Contains additional information on each play item: !:Represents a target file that is not playable. For instance, if the file has been deleted or moved to another location, AP3 cannot locate file target and play it. Copyright © 2008 DynaScan Technology Corp. 39 Type : Type of played item, e.g. Media File, Flash, etc. Name : Name of played item. Time : Time duration of play item. Play All(E):Sets play item to play in full without interruption. Resume : Sets how a play item should resume if interrupted. Comment : Remark or description column for play item. Label 5 – Editing section of played contents contains functions like Time Setup, Comment Column, Resume Setup of editing section, Modify Setup of play items, Deletion of play items, and Advanced Setup, etc. Function Buttons Extended function section New –Creates a new playlist for Sequential Play. Open – Open a previously saved Sequence File, with .seq as filename extension. Save – Saves changes to the current Sequence. Save as – Saves current Sequence as a new Sequence file. Export .csv – Exports information from current play list to an Excel file. Path – Open Path window to load content files from another directory. Play – Play content immediately, according to the sequence settings in the current play list. Set Startup Run – Sets Sequence as default startup play item. The system will confirm if the Sequence in editing section needs to be saved. Background – Set up background music. After creating sequence, the play list should first be saved as a sequence file (.seq as the filename extension), and then click Background button to set play list as background music. If the list is empty or has not been saved, pressing button will set up a new but invalid file of background music. Publish – Exports the Sequence, and all the video content files in the current Copyright © 2008 DynaScan Technology Corp. 40 playlist to a CF Card, SD Card, USB Drive, etc. After inserting media into another computer, files may be played directly once AP3 has completed media path setup. Remote Publish –Transmit the current play list, including all the content files belonging to the list, to the remote target computers via internet. The content will automatically play when publish finished. (AP3 Server only) See Page 37 for more information. Edit layout What is a Play Item? Play Items involve all items contained in the playlist. Each play item includes an action that refers to playing a media file, or executing a marquee message, and is determined by the Play Item type. Sequences may be regarded as a collection of play items, executing each item orderly. Types of Play Items Continuous Play Items Media Files, Capture, Flash, Power Point and Pictures file belong to continuous play items, requiring a specified play length. Th default play time of a Media File is the actual file length, while the default play time of Capture, Flash, Power Point and Picture file is 30 seconds. Triggerable Play Items Plugins and layouts are triggerable play items. When establishing new triggerable play item, a specified play time cannot be set. This type of item activates a status change that continues until the occurrence of the next status change. For example, a Plugin play item can change the status of a plugin device, such as displaying a specified marquee, while a Layout Play Item can change the layout configuration of a DynaScan display, such as adding additional views. Add, edit and Delete layout To establish a new play item, first select play type and files (click while pressing Shift or Ctrl key to create multiple selections) from the corresponding list, and then drag them to desired position on the play list. To adjust the sequence of play items, first select the item(s) on the play list, then click and drag it to the new position. A blue separator bar appears while moving an item, indicating the new position. Copyright © 2008 DynaScan Technology Corp. 41 To revise content of play item, first select the item from play list, revise the information shown in editing section, and then click “Modify” to save the new setting. To revert back to the original setting, click “Restore.” To delete play item, first select the item(s) from the play list, then press the Delete key or click the “Delete” button in editing section. General Setting of Play Item General information of a play item includes: Type: Specifies the file type of play item. (Cannot be modified). Name:. Most names represent the file name of the play item, with the exception of Capture, Plugin and Layout. All non-file names will be labeled with [ ] on the playlist. Capture name refers to video input from capture device, including [Default], [Composite], [S-Video] and [Tuner]. If selecting [Default], video input will be determined by Capture Setting in “Option”. Plugin name is determined by plugin device. For instance, marquee plugin will create option of [Marquee Plugin]. Please refer to 「Plugin Function Management」 for details. (Page.63) Layout refers to setup mode of layout, including [Start], [Change], [Assign] and [Remove]. [Start]: Stops currently playing content and Starts play of new layout. For instance, while playing a Sequence or Schedule, startup of appointed Layout will stop current play item and clear all contents scheduled behind the layout. [Change] : To change to a new Layout. If scheduling function is available to Sequential play or Scheduled play in one view of Layout, the position and size of the original view with the same name will be changed when using the Change function. A new view name will be established if original layout does not contain the new view; the existed view will be cleared if its name is not found in new layout. If a view with the same name in new layout has no appointed content, originally played content will be maintained, as well as current playing status, without interruption or replay. If content is appointed, the newly appointed content will be played. [Assign] : Adds view to Layout. A view with the same name as original one will have new position and size after change. Copyright © 2008 DynaScan Technology Corp. 42 View name will be added to the Layout if it does not yet exist. Does not remove other views. [Remove]: To remove a view from layout. The function can remove file name and corresponding view without adding any new one. Views with different names not be modified. Time: Display pattern is 「Hour:Minute:Second」. One-Time play may only be selected for Media Files, and playtime will equal the file length. If One-Time play is not selected, “*” will be added in before the time display. To change a playtime of an item, select the play item from in the playlist, deselect the One-Time play checkbox (for Media Files), then directly input desired time, in seconds, in the editing column. For instance, if the user inputs 180, playtime is change to 180 seconds. One or two separator characters 「 : 」 can be used as well. For instance, 「10:00」 represents 10 minutes, and 「1:00:00」 represents 1 hour. A blank number will be regarded as 0. Example:「1::」represents 1 hour. [*Note]: Time input is not available to triggerable play items or Media Files with One-Time Play selected. Play All (E) : During Sequence play, played content may conflict with scheduled play. The Play All “E” check box allows you to choose whether you will allow play items to be interrupted by scheduled play items. If the check box has not been selected ( ), the play item will be interrupted by the Scheduled play item (see first illustration below). If “E” has been selected ( ), an interruption will not occur (see second illustration below). A B B:沒勾完整播放“E" (可以被 打斷) interrupt B: “E” Not Selected (DD can D:定時播放 C B). D: Schedule Item. D A B D B C 時間軸 (單位秒) Time (Unit: Sec) A B B:有勾完整播放“E"(不可被 D 打斷) B: Entire Selected (Uninterruptible). D:定時播放 C D: Schedule Item. D A B D C 時間軸 (單位秒) Time (Unit: Sec) Resume from interruption: If a play item is interrupted by Schedule, there are three options to resume playback once the interruption has finished: “Continue” to continuing to play from interrupted point; “Abandon” to skip over interrupted content completely, Copyright © 2008 DynaScan Technology Corp. 43 and play the next item on the playlist; or “Replay” to replay the interrupted item from the beginning. The default resume setting is “Abandon” . Click the resume icon to cycle through each option and change setting. Note: Not available to triggerable play items. B: Resume (Continue from the stop moment) D: Schedule Item. Time (Unit: Sec) A B B:Resume (放棄播放) B: Resume (Skip D:定時播放 the item) D: Schedule Item. C D A B D C 時間軸(Unit: (單位秒)Sec) Time A B B:Resume (重頭播放) B: Resume (Replay) D:定時播放 C D: Schedule Item. D A B D B C 時間軸 (單位秒) Time (Unit: Sec) Comment: You may enter a personalized description by entering text in the comment section and pressing “Modify”. Label 1 – Set the play duration of a play item. This function is available for Media Files only if “One-Time” play (Label2) setting is not selected. Label 2 – To set as One-Time play. This function is available for Media File play types. This is selected by default, and play time of a Media File play item is equal to the length of media file. Label 3 –Comment may be added to play item by entering text in the comment section and pressing “Modify”. Label 4 – Restores previous settings. Reverts back to setting before modifying play time or entering comments. Not available after pressing “Modify” key. Label 5 – Applies current modifications to play item. After making changes, you must click “Modify” button to Copyright © 2008 DynaScan Technology Corp. 44 complete modification. Label 6 – Removing selected play item(s) from play list. Label 7 – Advance setup adjusts advanced parameter settings for play items and also provides preview function. Tip: Setting up several items at once To set up multiple play items at once, hold the Shift or Control key while clicking on all the play items in the sequence you wish to modify. Second, set a play time that will apply to all selected play items. Finally, click “Modify” button to apply play time to all selected play items. If all selected play items are Media Files, you may use this method to select or deselect the “OneTime” setting for multiple play items. Advance Setup of Play Item Click “Advance” button in editing section to set up special parameters for a play item. All modifications made in “Advance” will be applied to play items without the need to press the “Modify” button. Continuous Play Items will switch to a window similar to the AP3 preview player without options of play type and play mode. After setup, click OK (complete setup) or Cancel (cancel setup) to complete operation. Other parameter operate the same as preview player. (Page.14) Advance settings for Marquee selection: Active Object: Name of appointed marquee. (Page.63) Visible: Sets visibility of marquee. Back Image: Set up background picture for marquee. Message: Set up message displayed in marquee. Text Color: Show the color of text. Copyright © 2008 DynaScan Technology Corp. 45 Advance settings for Layout selection: Layout list : Lists all layout files in default layout path, excluding default layouts. Display: Select screen to display layout. If default is selected, layout will be set to the screen playing the sequence. This function applies to multi-screen display setups. Additional Information Can a Play Item be interrupted? Please refer to Scheduled Play Process (Page 49) for Schedule Play supported by AP3. When a play item is scheduled to play, the player will stop any content currently playing to play scheduled content. AP3 applies an interrupt priority system, to determine if interruption would occur at the time for scheduled play. An interruption will depend on Play All (E) property of 「interrupter (currently played item)」 and On-time Play property of 「interrupter (scheduled played item)」. (Page 52) A Sequence Play Item with Play All (E) checkbox not selected may be interrupted by Scheduled Play. If the Play All (E) checkbox is selected, it may only be interrupted by Scheduled Play that has been designated with On-time Play property (O). Once the interruption has completed, AP3 will resume content according to the Resume setting. If an interruption has not been allowed, the Scheduled play item will start playing after completing the currently played content. Notes for Layout Setup in Schedule The role of Layout is to change picture configuration. If the object of layout setup refers to the” display equipment” executing the schedule, schedule operation may cease and following items will not be played, because the Copyright © 2008 DynaScan Technology Corp. 46 view playing schedule is changed. Therefore, execution results may differ from expectation if above problem is not noticed in edition. Four layout options are available: Start, Change, Assign and Remove, (refer to 「General Setting of Play Item」). For instance, Start will stop all operations in progress, and should be avoided under the circumstance of maintaining schedule operation while changing the layout. To confirm view name. As layout change is identified via view name, after setup, new layout requires view with the same name to continuously execute the schedule. Check view for play content. In layout, Startup Run should be set as None to save original content. Even though the same content is appointed for play, appointment itself will cause replay from the beginning. Enable Multi-Screen Function (MultiScreen) If MultiScreen is set as Screen Type in “Option”, click to set the Sequence as Startup Run item. AP3 will confirm which screen will display the currently modified sequence as Startup Run setting. Once set, the sequence will be played on the selected screen on Startup. Use Shift or Ctrl to create Multiple Choices from Play Files Left click while pressing Shift key to select several consecutive files from file list; left click while pressing Ctrl key to select several inconsecutive files from file list. For instance, if Media File contains total 9 MPEG files from Demo01.mpg~Demo09.mpg, but play content only includes Demo01, Copyright © 2008 DynaScan Technology Corp. 47 Demo02, Demo03, Demo04, Demo06 and Demo09, left click Demo01 (selected items are highlighted in blue) first. Then left click Demo04 while pressing Shift key to select Demo01~04 (turn blue), and release Shift; finally, left click Demo06 and Demo09 respectively while pressing Ctrl key. Through above operation, all desired contents turn blue, representing selected status. Press left mouse button and pull selected items to play list. Play time of Flash and PowerPoint files in a schedule Default play time in AP3 is set as 30 seconds for Flash and PowerPoint files when adding to a play list. AP3 cannot acquire actual time length for these types of files, therefore the play time must be specified by the user. Copyright © 2008 DynaScan Technology Corp. 48 5.4 Schedule Introduction The Schedule Editor is used to create a play schedule of several content or sequence files that will play at predetermined times. You may also set a sequence to run as a background item that will automatically play during times when content has not been scheduled to play. Configure layout Label 1 – Extended function section Label 2 – List of play item types. Currently 10 play item types are supported: Media File, Capture, Flash, Power Point, Web Page, Satellite, Picture, Plugin and Layout. Label 3 – List of playable files of selected play type in the Default directory (set in “Option”). Click to select a file (or select several files by pressing Shift or Ctrl while clicking) and drag it to Play List to add item. Label 4 – Play List contains information of play content: !:Represents a target file that is not playable. For instance, if the file has been deleted or moved to another location, AP3 cannot locate file target and play it. Copyright © 2008 DynaScan Technology Corp. 49 Type: Type of played item, e.g. Media File, Flash, etc. Name: Name of play item. Start Time:Displays start time of play item. Time:Time duration of play item. On-time Play(O): Force content to play on time. Play All(E):Sets play item to play in full without interruption. Comment: Remark or description column for play item. The start time of the first play item from the list of played files is determined according to time setting in file schedule. To avoid interruption, the start time of subsequently added play items will be automatically calculated by adding time length to start time of last item. However, if a new play item is inserted into a Sequence play list, the start time of newly inserted item will automatically follow the last item in the list, and will cause an overlapped start time of original and inserted items. To resolve this issue, select the inserted and original items in the Schdule (hold Control while clicking), then click “Continue” button in editing section to automatically adjust start times. Label 5 – Editing section of played contents contains functions like Time Setup, play length adjustment, Comment Column, Deletion of play item, and detail adjustment of parameters, etc. Label 6 – Timetable shows a visual representation of the schedule. Label 7 – To set background sequence that will automatically play during times when content has not been scheduled to play. Function Buttons Extended function section New – Creates a new play list for Scheduled Play. Open – Open a previously saved Schedule File, with .sch as filename extension.. Save – Saves changes to current Schedule. Save as – Saves current Schedule as a new Schedule file (.sch) Export .csv – Exports information from current play list to an Excel file. Path – Open Path window to load content files from another directory. Copyright © 2008 DynaScan Technology Corp. 50 Play – Play content immediately, according to the schedule settings in the current play list. Set Startup Run – Sets schedule as default startup play item. The system will confirm if the schedule in editing section needs to be saved. Background – The function is disabled. Publish – Exports the Sequence, and all the video content files in the current playlist to a CF Card, SD Card, USB Drive, etc. After inserting media into another computer, files may be played directly once AP3 has completed media path setup. Remote Publish – Transmit the current play list, including all the content files belonging to the list, to the remote target computers via internet. The content will automatically play when publish finished. (AP3 Server only) See Page 37 for more information. Edit layout Difference between Scheduled Play and Sequential Play Scheduled Play refers to playing content at a predetermined, scheduled time. Sequential Play does not rely on a schedule to function; it repeatedly plays content in a playlist until stopped or interrupted by Scheduled Play. Modify Schedule Play List In Scheduled Play, just like Sequenced Play, you may add new items by dragging targets to play list, and change their order by dragging up or down to another position. After arranging the sequence of the play items in the list, click Continue (continuous play setting) button to count the total time of selected items. What is play sequence of background? A Scheduled playlist should also appoint a Sequence for background play. The user should click sequence in play type and pull sequence file from file list to the to appoint the Sequence directly. This may blank shown in Label 7, or click be cancelled by pressing the “Clear” button. During scheduled play, there may be times when no content has been scheduled to play. Now, background sequence starts to play appointed items until the next scheduled play item begins to play, interrupting the background sequence. When Copyright © 2008 DynaScan Technology Corp. 51 next vacancy occurs, background music will continue the sequence from interrupted point. Effective Date of Appointed Play Schedule The function of Start Time enables effective date of content. If the function not ticked, the status is disabled, not capable of appointing date; if the function ticked, the schedule will be played from the appointed date, before which all items will not be played. Start time of played item earlier than effective date will be played then, with play time outside the scheduled layout deducted from play length. The function of End Time enables end date of content. If the function not ticked, the status is disabled, not capable of appointing date; if the function ticked, the schedule should stop playing on the end date and not be played since then. If the end time of some items is later than the appointed end date, the operation will stop automatically then. General Setting of Play Item General information of a play item includes: Type : Type of played item, e.g. Media File, Flash, etc. Name : Refers to the name of the play item (see pg. 43 for more information). Copyright © 2008 DynaScan Technology Corp. 52 Start Time : Displays date and time when item will play: Full Date: Content will play on a specific date. e.g. Jan 1, 2000. Date of Year: Content will play on a specific day of the year, every year. e.g. Jan 1. Date of Month: Content will play on a specific day of the month. e.g. every 1st day in the month. Day of the Week: Content will play on specific days of a week. e.g. Tuesday, Wednesday, and Thursday. Everyday: Content will play everyday. Format of date: YYYY/MM/DD: Full date of play operation. MM/DD: To play on the date of year. DD: To play on date of month. Weekday: To play on day of the week. S 1 2 3 4 5 6: To play on day of the week. Everyday: Daily Play. Time pattern is as hh:mm:ss. If hh is displayed as **:mm: ss, the setting requires hourly playing. To modify Start Time, first select modified play item, then select type of start date in editing section, and appoint start date, because different date type enables different date content. Next, tick the option Every Hour based on needs before selecting start time 「Hour: Minute: Second」. If Every Hour is ticked, only 「Minute: Second」 need to be input, and click “Modify” button to change start time and complete setup operation. Play Time:Display pattern is 「Hour:Minute:Second」. One-Time play may only be selected for Media Files, and playtime will equal the file length. If One-Time play is not selected, “*” will be added in before the time display. To change a playtime of an item, select the play item from in the playlist, deselect the One-Time play checkbox (for Media Files), then directly input desired time, in seconds, in the editing column. For instance, if the user inputs 180, playtime is change to 180 seconds. One or two separator characters 「 : 」 can be used as well. For instance, 「10:00」 represents 10 minutes, and 「1:00:00」 represents 1 hour. A blank number will be regarded as 0. Example:「1::」represents 1 hour. [*Note]: Time input is not available to triggerable play items or Media Files with One-Time Play selected. On-Time Play: Forces Schedule play item to play On-Time. If the setting is not ticked( ), scheduled content will be delayed to completion of current contents; if the setting is ticked( ), scheduled content will not be Copyright © 2008 DynaScan Technology Corp. 53 delayed and will interrupt ay current playing content. Directly click the column to change setting. Not available for triggerable play items. If “Play All (E)”is set up in Sequence , and “On-time Play (O)”in Schedule is ticked as well, the latter is operated as the first priority. A B C B: Sequence item with “Entire” D: Schedule item without “O” –On Time B:完整播放的循序播放項目 (Unable to Interrupt B) (不能打斷 B) D:沒有勾準時播放“O"的定時播放項目 D A B D C 時間軸 (單位秒) Time (Unit: Sec) A B C B: Sequence item with “Entire” B:完整播放的循序播放項目 D: Schedule item with “O” –On Time D:有勾準時播放“O"的定時播放項目 (可以打斷 B) D (Able to Interrupt B) A B D B C 時間軸 (單位秒) Time (Unit: Sec) Play All: Under the mode of Scheduled Play, if played content conflicts with another schedule, the Play All (E) setting will determin if the waiting schedule will be allowed to interrupt the one currently playing. If selecting the setting ( ), the interruption is forbidden; if not ticking ( ), the interruption is allowed. Triggerable play items do not have the setup. Directly click the column can change settings. A B C B: Sequence item with “Entire” D: Schedule item without “E” –Entire B:完整播放的循序播放項目 (End on Time) D:沒有勾完整播放“E"的定時播放項目 (會準時結束) D A B D C 時間軸 (單位秒) Time (Unit: Sec) A B C B: Sequence item with “Entire” B:完整播放的循序播放項目 D: Schedule item with “E” –Entire D:有勾完整播放“E"的定時播放項目 (Play the whole item) (會延後結束) D A B D C 時間軸 (單位秒) Time (Unit: Sec) Comment: You may enter a personalized description by entering text in the comment section and pressing “Modify”. Copyright © 2008 DynaScan Technology Corp. 54 Editing Section of Played Content Label 1 – Interface layout 1, 2 and 3. Mode 1 reduces play list and enlarges expandable timetable. Mode 2 equally divides play list and expandable timetable. Mode 3 enlarges play list and reduces expandable timetable. Label 2 – To set start date. Upper box setes date type and lower box controls date. Label 3 – Every Hour sets the frequency as hourly operation. Label 4 – Duration Time sets time length of play content. One Time Play may be set for certain play types. Label 5 – Text box for entering comment. Label 6 – “Modify” functions to update settings, applying currently edited information to play item. Label 7 – “Restore” functions to revert to original settings. Cannot be restored after “Modify” button pressed. Label 8 – “Delete” removes selected items from play list. Label 9 – “Advance” functions for advance setting, adjusting detailed parameters of various types of play content and providing preview function. Label 10 – “Continue” button continues play settings, automatically calculating start time of selected items from play list. Start time will be calculated from the first play item. Second play item will be determined by adding its play time to the start time of the first item. Copyright © 2008 DynaScan Technology Corp. 55 Expandable Timetable Label 1 – Calendar displays timetable of one week starting from the first day of a week (Sunday), followed by separator bars for seven days per week. The user can left click the mouse to adjust date while moving mouse left and right, or press right button of the mouse to open the dialog of date appointment and directly select date here. Label 2 – Provides a quick reference of play items scheduled that day. A blue background represents scheduled play at the time. Orange represents a time conflict (overlapped) of two play items or more, and white displays expanded details. Label 3 – To select “Week” as display mode. If selecting this setting, play contents for seven days will be displayed simultaneously; if not selected, only scheduled content for one day is shown. Label 4 – Hour list represents half hour with each mark. A white separator separates two consecutive days. Label 5 – Visual representation of schedule by date. Play items with white background represent normal play scope and conflicting play items Copyright © 2008 DynaScan Technology Corp. 56 (overlapped) are highlighted with yellow. Advance Setup of Play Item Click “Advance” button in editing section to set up special parameters for a play item. All modifications made in “Advance” will be applied to play items without the need to press the “Modify” button. Continuous Play Items will switch to a window similar to the AP3 preview player without options of play type and play mode. After setup, click OK (complete setup) or Cancel (cancel setup) to complete operation. Other parameters operate the same as preview player. (Page.14) Please refer to the chapter of Sequence for advance setup of Plugin Play Item and Layout Play Item. Additional Explanation Can Play Item be interrupted? Interruption will depend on the “Play All” (E) setting and “On-Time” (O) of the play items. Play priority is set as: On-time Play may interrupt Play All (E), which may interrupt normal Scheduled Play items. Therefore, the “Play All” setting can reject interruption request form general Scheduled Play, and “Ontime” Play can interrupt “Play All” settings and normal Scheduled Play. Scheduled play items do not have resume settings that Sequential Play has. After interruption, restoration of the scheduled play is determined by selection of Play All (E) setting. With Play All (E) selected, play will resume from interrupted point and complete unfinished portion, prolonging the end time of Copyright © 2008 DynaScan Technology Corp. 57 the play item. Without Play All (E) selected, play will not resume from the interrupted point, but resume playing content at the point in time the Schedule would have been if the interruption had not taken place. Enable Multi-Screen Function (MultiScreen) If MultiScreen is set as Screen Type in “Option”, click to set the Sequence as Startup Run item. AP3 will confirm which screen will display the currently modified sequence as Startup Run setting. Once set, the sequence will be played on the selected screen on Startup. Copyright © 2008 DynaScan Technology Corp. 58 5.5 Shutdown Introduction With the Shutdown Editor, you may set a time schedule for automatic shutdown and rebooting of computer. Configure layout Label1 – Extended function section Label2 – Editing function section. Label3 –Action list provides scheduled items, priority setting of that can be reordered by dragging items up or down to desired position. An item higher on the list represents higher priority. State : Enables or disables a single action. Selecting the setting represents enabled action and no ticking represents disabled. Actions are enabled by default. Action Type:Displays action type: including Shutdown, Reboot, Restart, Not Shutdown and Start Play. Action Date: Displays date of action. Action Time: Displays time of action. Copyright © 2008 DynaScan Technology Corp. 59 Function Buttons Save – Saves settings. Shutdown settings will not be stored, nor will operation be executed without Saving. Edit layout What is Action Item? An Action Item consists of three parts: the type of Action Item, the date and time of execution, and the position in the list, or priority setting of the Action Item. Types of Action Item The type of Action Item includes Shutdown, Reboot, Restart AP3, Not Shutdown, Start Play and Stop Play. Shutdown: To execute Shutdown operation of the system. The ticked setting of Power Control Enable under Monitor System in the Option will send “Power Off” command to DynaScan display at the same time. Only one valid shutdown time is available per day. Multiple Shutdown commands on the same day will be determined by the highest priority (highest location) as the valid time. Reboot: Reboot operating system at designated time and date. Restart AP3:To restart AP3 at designated time and date. Not Shutdown: Disables all Shutdown settings on designated date without affecting Reboot settings. Start Play: To play contents at designated time and date. For instance, if the time of start play is set at 11am and shutdown time set at 9pm, the player will not start play at 9am when the computer is powered on, but will execute preset play content at 11am. Similarly, if the computer is powered off at 10pm, content will not be played. Stop Play: Stop all contents playing at the specified time and day. Append, Modify and Delete Action Item All action items are established, modified and deleted in edit functional section. Append: After setting up action type, action date and time, click “Append” to establish a new action item. Modify: First select modified action in list, modify content in edit section, then click “Modify” to complete operation. Delete: Select target action in list and click “Delete” to remove the action from the list. Copyright © 2008 DynaScan Technology Corp. 60 Label 1 : Shutdown Disable will disable all shutdown actions. If Shutdown Disable setting is not selected, all shutdown action will be executed according to set up time and date; if setting ticked, all shutdown actions in list will not be executed and the computer remains on. Label 2 : Six action types currently consist of Shutdown, Reboot, Restart AP3, Not Shutdown, Start Play and Stop Play. Label 3 : Sets action date and time. Currently action date provides following modes: Full Date, Date of Year, Date of Month, Day of the Week, and Everyday. Select mode to decide action date or day of the week. If the shutdown time is set at 00:30am everyday, earlier than boot time at 09:00am, selected ‘Next Day’ to ensure proper action of setting. If shutdown time is set as 23:30pm, later than boot time at 9:00am, Next Day setting should not be ticked. Label 4: Adds action to action list. Label 5: Modifies preestablished action. After modifying information of an action, you must click “Modify” button to save current modification of action to item, or changes will be lost. Label 6: Deletes action from action list. Label 7: Test action time. Considering complexity of action setup, AP3 provides the test function, enabling users to test validity after completing setup. Test Proper Operation of Action Item Action Items may vary significantly because of different locations or business premise of each display. Pure scheduled action everyday just requires simple process. However, if actions have different time settings, or temporary action is set up someday based on special needs, the user cannot ensure proper operation of action at set time, which causes emergence of test function. Copyright © 2008 DynaScan Technology Corp. 61 The user should first select test time and date. Only actions later than test date will be tested. Once Test key is pressed, the information box at the bottom will show the next coming action. If not detecting proper operation of action within 3 days, the test will report “Disable”. Click “Play?” button to test if current time point is the time for playing or the time stopping play operation. Additional Explanation Schedule Rule of Action Item Shutdown setting may be changed temporarily, but the temporary change will need to be removed or disabled once the temporary change has taken place in order to return to normal operating times. The Shutdown editor provides higher priority to action items that are higher on the list. For instance, if shutdown time is set as 10pm every night, and the temporary shutdown time is set at 11pm that night, the newly added item will show on top of list and AP3 will execute shutdown operation at 11pm that night, ignoring the usual shutdown time of 10pm. Why adopt Next Day setting? The “Next Day” setting enables a one day difference between the execution date and determination date, as shutdown setting only has one valid date per day. For instance, original shutdown time is 10pm every night, but X day requires shutdown at 1:00am because of special needs. If newly added shutdown is set at 1:00am on X+1 day, daily 10:00pm shutdown is valid on X day, and two settings are not compared regarding the same date. Two methods help to achieve purpose. The first refers to adding an action item of Not Shutdown to X day, in order to enable shutdown time on next day (X+1 day) because of no shutdown time set for X day. However, the best method is to directly add a shutdown item to X day at 1:00am of Next Day in front of everyday shutdown setting at 10:00pm. Copyright © 2008 DynaScan Technology Corp. 62 5.6 Plugin Introduction To display all plugin devices and files, enable or disable plugin function, as well as to add, delete and modify plugin device. Configure layout and operation Label 1 – Plugin Disable will disable or enable all plugin functions, with default set as selected (enable). Select Plugin Disable to disable individual plugin functions (marquee and light-number) in the screen and make them invisible. Label 2 – List of plugin types currently provides LightNum Plugin and Marquee Plugin. After selecting plugin type, add desired plugin to service list by left doubleclicking the mouse or dragging the plugin to the list. Label 3 – Plugin list provides all processed plug-in. !: Represents that the file target cannot be executed; AP3 has failed to locate target files that have been deleted or relocated. State: Enable or disable an individual plugin. The plugin will be invisible if the setting is not selected. Name: Plugin name. The program will provide a default name to added plugin which may be renamed. Copyright © 2008 DynaScan Technology Corp. 63 File: File source of the plugin. Target: Target area the plugin is displayed. Label 4 – Select modified plugin item by right clicking it to bring up modification window with Setup, Enable/Disable, and Delete functions. Parameter Setup: Click Setup to open parameter setup window. Please refer to following illustrations of marquee plugin and LightNum plugin for usage of setup window. Disable & Enable Plugin: The function is the same State, enabling and disabling plugin. Delete Plugin: Deletes the plugin from the list. (Stop All) to stop all play * If a file is played before adjusting plugin, please click action for following adjustment. Please ‘Restart’ AP3 after plugin adjustment, if player is Embedded IPC or changes will not be saved. Marquee setup * Marquee Parameter Setup Position (display position): Sets position of marquee in the target window. Speed (moving speed): Set scrolling speed of marquee information. The Copyright © 2008 DynaScan Technology Corp. 64 larger the number, the higher the speed. Space (information interval): Interval length between two paragraphs of information. The smaller the number, the narrower the interval. Offset Position (change display position): To change display position of marquee. If the slider is at left end, display position of marquee will be the farthest from screen center. Display position will move closer to screen center with the slider pulled towards right side. Offset Left or Top: To reduce left or upper display scope. Display scope will be reduced to the left of or in the upper part of marquee with slider pulled towards the right. Offset Right or Bottom: To reduce right or lower display scope. Display scope will be reduced to the right of or in the lower part of marquee with slider pulled towards right. Trans: To adjust transparency of marquee text and background. Function is not currently available. Name: To input name of the marquee. Target Window: To set the display area or View where the marquee will appear. Remote Comm: To appoint RS-232 communiation port for remote control and operation. Back Image: To set up marquee background. Message File: To select information source file. Click for path window, locate information file, and click “enable” button to complete path setup. Set Font: Select font, pattern, size, color, and other additional options. Back Color: Background color editor functions to edit background color of marquee. TextH: Displays pixel size of currently appointed text. Mode: The mode consists of Window Mode and Blend Mode. Blend mode not currently available. OK: To complete parameter setup. * Displaying Multiple Marquees AP3 allows multiple marquees to be shown simultaneously on screen. When creating a new marquee, the default position may cause the new marquee to overlap a previously created marquee. If a marquee has been covered, the Offset Position should be changed to adjust the display position of concealed marquee to make it visible. Copyright © 2008 DynaScan Technology Corp. 65 * Tip for detail adjustment Marquee parameter settings provide several sliders for adjusting different aspects of the marquee. Dragging the slider may generate a slight difference from the desired position. The user can left click the slider, and then use the arrow keys on the keyboard for a more detailed adjustment. LightNum Plugin * LightNum Parameter Settings Port: To select the communication port connected with announcer system. If an incorrect port is appointed, communication will be disabled. Position: To appoint display position with default at upper left part of the screen. User can set other positions for display, such as lower left, upper right and lower right area. Event Char: Because of announcer, two modes, C-Q & A-B are used to determine the key words in front of and behind the number, which should selected appropriately for light-number display. Name: To appoint and input the name of light-number. Target Window: To appoint object and goal of the light-number. Copyright © 2008 DynaScan Technology Corp. 66 Input Show Text: To input displayed information. Set Font: Text editor functions to edit font, pattern, size, color, and the like. Black Color: Background color editor functions to edit background color of light-number. OK: To complete parameter setup. * Proper hardware is required Proper operation of plugin function requires announcer with appointed specification and RS-232 transmission interface. Copyright © 2008 DynaScan Technology Corp. 67 5.7 Options Configure layout 1 2 Label 1 – Setup subject section provides setup list. Clicking a subject in Label 1 will switch Label 2 to the parameter setup of the subject. Label 2 – Detail Parameter Setup Section. Detail parameter setup of each subject will be described in following paragraphs. 5.7.1 Startup Setting Select Model To select model of display equipment, listing all DynaScan display models supported by AP3. The model setting will affect the size of the image in the output window as well as the communication protocol of Monitor System. Currently supported models consist of DS0616 series, DS0613 series, DS0612, DS0716, DS0808, DS1016, DS1508, DS1713, DS1713-3, DS2012, DS2012-3, DS3522 series, DS0706, etc. FULL SIZE will scale content to the output resolution of the graphic card, for use with a projector, traditional TV, plasma TV, LCD TV, etc. FULL SIZE should not be used with DynaScan displays, as the image will be cropped. Copyright © 2008 DynaScan Technology Corp. 68 Accelerator In first installation of AP3 accelerator, the default is set as VMR7. Accelerator should be selected to match hardware efficiency. The function requires restarting AP3 to validate setting after setup. Please see pg. 30 for more information on accelerator settings. Screen Type Screen types include single-view, dual-view and multi-view, dependant on the display mode of graphic card. Generally, the graphic card is set as clone mode, representing single-view display with the same output on two screens. When dual-view is adopted, one screen is enabled as control panel to display operations, and the rest work as independent screens. In this configuration, AP3 operation will not affect display of other played content. This function takes effect immediately. At maximum, there may be one control screen plus three independent screens for playing content with Screen Type set as Multi-Screen. Suboptions Screen 1, Screen 2 and Screen 3 appear under items of Startup Run and Display Position in left setup subject section. Each represent an independent screen for play content respectively. The user should click screens represented by sub-options for corresponding setup. With multi-screen selected, the right combo box illustrated below becomes multi-screen with 3 options of MS1:Default, MS2:Default and MS3:Default. MS1 represents play content of Screen1, MS2 represents Screen2, etc. Copyright © 2008 DynaScan Technology Corp. 69 Auto Startup Select this setting to automatically run AP3 when starting computer. By default, this setting is disabled ( ). VMR9_RL Frame Reversal If display equipment is installed upside down, the user can enable the setting to properly display content. Only VMR9_RL, CLONE and CLONE3 accelerators support this mode and should be setup as the accelerator while enabling the function. By default, this setting is disabled ( ). Power Point Offset Enable If the screen displays a scroll bar, you can enable this setting to move the scroll bar out of the screen. It is not necessary to enable this setting if no scroll bar is displayed. By default, this setting is disabled ( ). Billing Record Enable If the user requires actual play progress of content or billing record as receipt, the function should be enabled to record play progress after starting AP3. The default is set as (disable). 。 * The function takes effect after restarting AP3. * What is billing record and how to use it? Billing record is saved to the folder set by Billing Path. It will generate two files with filename extension as .rec and .cnt. Billing Report is a accessorial program and is required to transform original file to an Excel document. Please refer to introduction of accessorial program for the usage of Billing Report (page 151). Computer ID The user may operate several display equipment simultaneously and need to distinguish the billing record of each computer. This function is provided to enhance identification of each individual record, as the user can input a unique identification number for each computer. * The function takes effect after restarting AP3 once setup. Copyright © 2008 DynaScan Technology Corp. 70 Billing Write Frequency The user can independently determine interval between two times of billing write. The shorter the interval is, the more frequent the billing write is. Default is set as 5 sec. / time. Content in Sequence Preload If enabled, the Sequence play will preload next play content to reduce transition time. Three file types are supported: Media File, Capture, and Picture. VMR9_WL Accelerator supports the function that sets default as (disable). Content in Schedule Preload If enabled, the Schedule play will preload next play content to reduce transition time. Three file types are supported: Media File, Capture and Picture. Default is set as (disable). Background Sequences will not be preloaded when Schedule content ends. Sequence in Schedule Preload If enabled, the Schedule play will preload next play content to reduce transition time. Three file types are supported: Media File, Capture, and Picture. Default is set as (disable). Background Sequences will not be preloaded when Schedule content ends. External Browser Enable You can reduce the memory accumulation when playing Flash, Power Point or Web Page by enabling external browser. The default is set as (disable). Machine Description Input the description of the machine (computer). Description will be used when it sending an email to the users. It will also appear on the Caption of AP3. It will be valid immediately after press ‘Enter’ on keyboard. Copyright © 2008 DynaScan Technology Corp. 71 Copyright © 2008 DynaScan Technology Corp. 72 5.7.2 Startup Run Content The program will automatically play appointed play type when AP3 starts up. The default is set as None (automatic play disabled). Currently, the function provides four play types, including Capture, Sequence, Schedule and Layout. Setting will take effect after restarting AP3. Sequence, Schedule, Layout & Capture The Startup Run screen provides four play types with fields for automatic play for each type. If the column is empty, no setup content is available for the play type. If a play type is selected, but its corresponding field is empty, the program will not execute automatic play on startup. After editing a Sequence, Schedule or Layout, click in extended function section to complete setup and enable automatic play. The automatic play item will be shown on the Startup Run screen illustrated above. Click button to the right of Sequence, Schedule or Layout to remove content for automatic play. BGM Type The field will display filename set as background music, and display ‘None’ Copyright © 2008 DynaScan Technology Corp. 73 when no background music has been set. Background The field displays content with set background music under Sequence Editor. Click in extended function section of Schedule Editor to appoint background. Click button next to Background field to remove previously set background music. * What is Background Music Setup and what is that for? Background music refers to audio output with no image, suitable for content with no audio output (e.g. pictures) or requires a separate audio track. * MultiScreen If MultiScreen is set as Screen Type in Startup Setting, sub-options of Screen 1, Screen 2 and Screen 3 are shown under Startup Run column. The user should appoint content for automatic play in each playing screen. Multi-screen setup does not provide a background music setting. Copyright © 2008 DynaScan Technology Corp. 74 5.7.3 Display Position Even with the appropriate model selected in the Startup Setting, a slight error may exist in the position of the image on the display. Display Position allows for fine adjustment of the position of the output image. Move, Zoom Out and Zoom In Move Position – To move the position of whole layout by pressing corresponding icon. represents to move upward, downward, leftward, and rightward. Zoom Out – To enlarge layout with following direction icons. represents to enlarge upward, downward, leftward, and rightward. Zoom In – To reduce layout with following direction icons. reduce upward, downward, leftward, and Copyright © 2008 DynaScan Technology Corp. represents to rightward. 75 Directly input display position Aside from adjusting the display position with “Move”, “Zoom out” and “Zoom in”, you may also directly input a number to display columns of “Left”, “Right”, “Top” and “Bottom” for position adjustment. Pressing ‘Enter’ on keyboard will apply the adjustment of the display postion. Left, Top, Right & Bottom The text fields under fine adjustment buttons display the offset from original position. Default offset is 0 for “Left”, “Right”, “Top” and “Bottom” columns. Along horizontal axis, numbers greater than 0 represent position moving to the right, and less than 0 represent position moving to the left. Along the vertical axis, numbers greater than 0 represent position moving downward, and less than 0 represent upward. * MultiScreen If MultiScreen is set as Screen Type in Startup Setting, sub-options of Screen 1, Screen 2 and Screen 3 show under Custom Position column. The user should appoint content for automatic play in each playing screen. Copyright © 2008 DynaScan Technology Corp. 76 5.7.4 Monitor System AP3’s Built-in Monitor System works exclusively with DynaScan displays. All functions will take effect when making adjustment. 5.7.4.1 Operator Serial Port The computer controls the display equipment via COM Port. The Serial Port should be set as the corresponding RS-232 port connecting the computer to the DynaScan display. * How to disable built-in monitoring system of AP3 Select “Disable” in Serial Port setup. Select Model The default is set as Auto. If DynaScan display model has been set in Startup Setting, AP3 will adopt corresponding protocol version. Three protocol versions may be manually set: Version 2.0, Version 3.01 and Version 2003. Please confirm the version can properly function to monitor the DynaScan display before manually setting to prevent selected version from causing a display failure or improper monitoring state. AP3 will use the appropriate monitor application when the model has been set in ‘Startup Setting’. The selected model will be reflected in the “Select Copyright © 2008 DynaScan Technology Corp. 77 Model” drop down box illustrated above. You may only assign a model from the combo box when the display has been set as FULLSIZE in ‘Startup Setting’. Please ensure the right model is assigned to prevent an improper monitoring state. Spin Speed Adjust the spin speed of the image around the display. Select “Fixed” to disable image spin. Move the slider to the right to speed up the spin speed, and to the left to slow spin speed. [*Note]: The action may cause Monitor System Schedule to pause, unless released or AP3 restarted. Display Adjust Forward – To adjust screen position to the left when spin speed is “Fixed.” Reverse – To adjust screen position to the right when spin speed is “Fixed.” Save – To save screen offset position. Some DynaScan displays will save it automatically, please wait for 30 seconds to save the new settings after offsetting the position. Power Control Enable Automatic shutdown operation of the computer will cause display shutdown, and computer startup will start up AP3 and display. If the setting is not selected, above function will be disabled. Default is set as (enable). Power On / Off Power On – Start up display. Power Off – Shut down display. [*Note]: When Excool is disabled, click Power Off once to turn off the motor (LED modules remain on). The LED modules will automatically turn off when motor comes to a stop. Clicking Power Off a second time, with motor off but rotating, will cause the LED modules to turn off. [*Note]: When Excool is enabled, click Power Off once to start Excool function with LED modules off. Click Power Off a second time to skip Excool function and turn off the motor first with LED modules on. The LED modules will automatically be turned off when motor comes to a stop. Click Power Off a third time, to turn LED modules off. [*Note]: The action may cause Monitor System Schedule to pause, unless released or AP3 restarted. Copyright © 2008 DynaScan Technology Corp. 78 Force Power On After the display is manually powered off, a cool down countdown display and button will appear in the interface. The user can click “Force Power On” to start the display before the countdown has completed, but it is not recommended. [*Note]: Forcing Power On when the screen has not come to a complete stop can damage the display. The cool down time will vary depending on which model is in use. [*Note]: This action will cause the Monitor System Schedule to stay paused, until it is released or AP3 is restarted. Monitor System Schedule Suspend Some operations will conflict with the schedule settings. When a conflict happens, a warning message will be shown. When this happens, click the “Resume” button in the Schedule options to restart the schedule. The schedule will not continue until the “Resume” button is pressed, AP3 is restarted, or the computer is restarted. Outside Power Off Enable Once this function is enabled, the display can be shut down by hardware of software. This setting is disabled by default. Copyright © 2008 DynaScan Technology Corp. 79 Brightness Some DynaScan displays (DS0706, DS0716, DS1016, DS1713, DS1713-3 and DS3522) support the ability to control the brightness. Different models have different dimming levels. 100% represents the brightest level, when the percentage is lowered; the brightness is lowered as well. [*Note]: This action will cause the Monitor System Schedule to be paused, until it is released or AP3 is restarted. Display State This area displays information on the current state of the display. The fields are: Power Started, Motor Started, Motor Alarm, Tilt Alarm, Thermal Alarm, AC/DC1 Alarm, AC/DC2 Alarm, AC/DC3 Alarm, Preheat, Precool, Excool, and Thermal Warning. The AC/DC field varies depending on the model used. The color code is explained below. Represented Green status Dark Green Red Wine Grey Yellow Orange Power Started Enable Disable -- -- Not detecting -- -- Motor Started Enable Disable -- -- Not detecting -- -- Motor Alarm -- -- Abnormal Status In Not Abnormal Order detecting before -- Tilt Alarm (>15°) -- -- Abnormal Status In Not Abnormal Order detecting before -- Copyright © 2008 DynaScan Technology Corp. 80 Thermal Alarm (>60℃) -- -- Abnormal Status In Not Abnormal Order detecting before -- AC/DC1 Alarm -- -- Abnormal Status In Not Abnormal Order detecting before -- AC/DC2 Alarm -- -- Abnormal Status In Not Abnormal Order detecting before -- AC/DC3 Alarm -- -- Abnormal Status In Not Abnormal Order detecting before -- Preheat -- -- -- -- -- -- Preheat Precool -- -- -- -- -- -- Precool Excool -- -- -- -- -- -- Excool Thermal Warning -- -- -- -- -- -- Warning Preheat / Precool / Excool This shows the status for “Preheat”, “Precool”, and “Excool” Preheat: If the temperature of the drum is below 5℃ when the display is started, (yellow)), the screen will not spin. Preheat mode will be activated (showing The Preheat state will be deactived when the drum’s temperature is greater than 5℃ (or about 8 minutes). (Certain models only) Precool: If the temperature of the drum is above 35℃ when the dispay is started, Precool mode will be activated (showing (blue)), the screen will spin and LED’s will be turned off. The Precool state will be deactived when the drum’s temperature is below 35℃ (or about 5 minutes). (Certain models only) Excool: When the display is shutting down, Excool mode will be activated (showing (blue)), the display will be spinning and black for about 6 minutes. It will power off the display automatically and the content will stop. (Certain models only) Thermal Warning Copyright © 2008 DynaScan Technology Corp. 81 If the drum temperature is above 50℃ but less than 60℃, Thermal Warning will be activated. This will cause the display’s brightness to be reduced by 50% of the highest brightness. It will be deactivated after the temperature is below 45℃. (Currently, only for model DS1016) [*Note]: If the brightness is already less then 50% of the highest brightness, no change will occur. Air Conditioner State This field show the current state of the Air Conditioning. Green is for no detected problems, Red is for a dectected problem, and Grey is for no detection at all. MCB A Status The function is disabled. MCB B Status The function is disabled. DVI Status The function is disabled. Encoder Status The function is disabled. If detecting any incorrect information in monitoring panel, please contact DynaScan agents or engineering department. Copyright © 2008 DynaScan Technology Corp. 82 5.7.4.2 Functions of Advance Control Panel Temperature Number of temperature fields varies for different models. The temperature field option can be changed if the model has more than on temperature sensor and allows multiple fields. Drum: This is located at the bottom in the drum in the display. (For all models) Base: This is located in the power control chamber of the display. (For some models) Environment: This is located in the base of the display to detect the environment temperature. (For some models) Copyright © 2008 DynaScan Technology Corp. 83 Active Virtual Encoder This feature is used to replace the hardware encoder with a software encoder. This tool is made to be used only by technicians. All Off / All On This function allows all of the LED Modules to be turned on/off all at once. [*Note] This feature is only available on some models. LED Scan This function is used to select how long to turn the individual LED Module on/off in sequence. The editable fields allow options from 1-10 seconds. Click the “Scan” toggle button to start the operation and click the “Stop” button to stop, click the “Pause” button to pause the operation and click it again to continue the operation. All the LED Moduls will turn on after the “Scan” button is pressed. The sequence will turn on all of the LED Modules one at a time, and then turn off all the LED Modules, one at a time. This process will repeat until the “Stop” button is pressed. The selected time acts as the interval between turning the LED Modules on and off. [*Note] Not all models support this function. LEDM Control Click on the LED Module number to turn that actual LED module on/off. * Comment: Green = On, Black = Off, Grey = Not Detected Copyright © 2008 DynaScan Technology Corp. 84 Running Time This shows the time of the displays running history. Power On Safe Time The default amount of time is 360 seconds. The user cannot restart power within the set safe time after the display is off. This restriction is made to help protect the DynaScan display. To have a valid time, enter the appropriate time in seconds and press “Enter”. * This parameter can be adjusted by the user. DynaScan Company is not responsible for any damaged caused to the Display by overshort safe time set by the user. Excool Enable This is a function to cool the display after it has been turned off. Some models do not support the function and are grayed out. [*Note]: Support for models: DS0706, DS0716, DS1016, DS1713-3, DS2012-3 and DS3522. Information S/N: Display serial number DVI Version: F/W version of DVI board。 MCB A Version: not available MCB B Version: not available Display Mode Not available Copyright © 2008 DynaScan Technology Corp. 85 Force Power Off This will manually power off the display and motor. The only supported model is DS1016. Motor Off This will manually power off the motor. The only model supported is DS1016. Clear Alarm Record This status sign will be shown in yellow to remind the users if the display has had abnormal conditions. Click it to clear the alarm record, and the sign will be returned to normal. The only model supported is DS1016. Thermal Warning This enables the Thermal Warning function. It will reduce the brightness when the temperature is too hot (refer to Thermal Warning for more information). By default, thermal warning is enabled. Thermal warning can be disabled by unchecking the box. When the display is restarted, it will become enabled as default. The only model supported is DS1016. Auto Virtual Encoder This enables the Auto Virtual Encoder function. It will automatically use the Virtual Encoder when the hardware encoder malfunctions if enabled. This feature can be disabled, but when the display is restarted, it will become enabled as default. The only model supported is DS1016. Auto Brightness When this option is enabled, the display will automatically adjust its brightness according to the ambient luminance. The display will be brighter when the ambient luminance increases, and the display will be dimmer when the ambient luminance decreases. Only available on DynaScan display DS1016. Copyright © 2008 DynaScan Technology Corp. 86 5.7.4.3 Monitor System Schedule This option enables the users to edit the schedule of the display for; Power-on/ off, Brightness settings and Screen spin speed, all independently. Disable Schedule It enables or disables the schedule function. Resume It resumes the schedule in use. It is disabled in general. Once users selected specific operations in the Operator options, Schedule will be suspend automatically. This button is enabled and needs to be clicked to reactive the schedule. Save It will save any of the Schedule changes. A modified schedule needs to be saved for it to work properly. Append It adds a new Action. An Append Dialog box will appear when clicked. The new action will be added to the top of the list. Copyright © 2008 DynaScan Technology Corp. 87 Modify It modifies the selected Action. A Modify Dialog will appear when clicked. Delete It deletes the selected Action. Append / Modify Dialog: Action: Here, the user selects the action to be executed. There are three types of Actions: Power Control: It sets the time the display turns on/off. Brightness: It sets the displays brightness level. Spin Speed: It sets the displays spin speed. Start Time: specifies the start time of the Action. 『Type』indicates the type of time to be used. The types are: Full Date: It specifies a specific year with a month and date. Date of Year: It specifies the month and date of every year. Date of Month: It specifies the date of every month. Day of the Week: It specifies the day of the week or certain days. Everyday: It specifies everyday. 『Date』indicates a date to be used. The date types are: Full Date: YYYY/MM/DD, it specifies the exact year, month and date. Date of Year: MM/DD, it specifies the month and date of every year. Date of Month: It specifies the date of every month. Day of the Week: It shows 7 days in the week. S 1 2 3 4 5 6 will appear for multiple selections. Everyday: It is disabled. 『Time』indicates a specified time in the expression of “hour:minute:second” in 24-hour system. To modify the start time, select Type first and then Date. The lower right fields vary depending on the Action selected. Copyright © 2008 DynaScan Technology Corp. 88 “Power Control”: The user can edit Duration and End Time. Duration is the Power On time length in the format “hour: minute: second”. Users can input hh:mm:ss to specify the playing length. There is no restriction on the wat to input time, for example 3: or 180 will both play for 3 minutes. End Time will display the power off time computed by Start Time and Duration. “Brightness”: It displays the Brightness Level options. Different display has different brightness levels in this selection. The Level options will be disabled if the display is unable to adjust the brightness. “Spin Speed”: It displays Speed options. The “Append / Modify” button at the lower left corner will save the changes. Click “X” at the upper right to the abort editing. Test Click “Test” to open the test dialog. Input the date and time to check the action in use and the next action to be used. When Schedule edititing is finished, the Test function can be used to test the Schedule before saving. Click Save if the test result is correct. Click Test will show the following Dialog. First, specify the test date and time, then select the Action Type for the test. Click “Next Action” and the test results will appear in the column on the right. Under the specified conditions, the Schedule lists the time and action to be executed next time. As the figure shows above, the specified test date is 2008/02/26 Tuesday, the test time is 09:20:11and the test action type is Power Control. Click “Next Action” and the test will run Set Power Off at 2008/02/27 Wednedsay 04:00:00 after previous test is executed. Copyright © 2008 DynaScan Technology Corp. 89 Click “Last Action” to show the test result with the time specified and the status in the Schedule list. The figure below shows the test date is 2008/02/26 Tuesday, the test time is 09:20:11, and the test action type is Power Control. Click “Last Action” to see the test is running Set Power On. Schedule List It displays all the set Actions. Each Action has 4 columns. Index number: The smaller the number is the higher priority. The position can be changed by dragging the action to the appropriate number. means the Action is valid, while means State: Shows the Action status, the Action is invalid. Action Type: The Action that is to be executed. The user can click on the Action Type title bar and it will re-arrange the list based on Action Type without losing the order. Copyright © 2008 DynaScan Technology Corp. 90 Action Time: The time the action will be executed. It will include the end time if the Action type is Power Control. Rule of Priority When there are two or more actions with the same Action Type, the one with highest priority (on the top) will be activated when the time is overlapped. Ex. A is Power Control, 8am every Sunday and valid for 14 hours (10pm.) B is Power Control, 10am everyday and valid for 10 hours (till 8pm.) Since A is above B, the scheduled action is to turn the display on every Sunday at 8am and turn it off at 10pm, while turning the display on at 10am and off at 8pm for the other days. Copyright © 2008 DynaScan Technology Corp. 91 If B is above A then it turns on 10am and off 8pm everyday. If the time in the above two examples does not overlap; for instance the time of A changes to Sunday at 2am to 8am, both A and B will be active. Some Action Types like Power Control and Brightness have no priority issue. Priority judgment only takes place when the start time of Brightness or Spin Speed’s start time is available is exactly the same. Power On Failed When the scheduled Power Control sends out the Power On message to the display, and the device reports that the status does not fit in the schedule, a power error will be shown in the status area. Copyright © 2008 DynaScan Technology Corp. 92 5.7.4.4 Event Log This operation will create a system log for professionals to help tourbleshoot. Disable Event Log If the function is disabled (checked), event log will not be recorded, and log display does not update any more. Default is set to (disabled). Clear Log This will delete all the information in the event log. Once the event log is cleared, it cannot be restored. Load Log File This will save log files. Restore This will restore the log files that have been saved Export It exports the event log to an Excel file. Hide Info It hides the Information type messages in the display box. Copyright © 2008 DynaScan Technology Corp. 93 Hide Warning This will hide the Warning type messages in the display box. Event Log Area Each item indicates an event and the columns are: “Type” is the event type, which has Information, Warning and Error. “Time” is the time the event occurred. “Source” is the source of the event. “ID” is invalid at present, always 0. “Desc” is the description of event. Copyright © 2008 DynaScan Technology Corp. 94 5.7.4.5 Recording This option records the displays temperature for assessment by professionals. Disable Recording This will not record the displays temperature until deselected. Min. / Pixel The temperature in the display area is shown as a curve; users can adjust the display range of each pixel. The default is 1 Min. / Pixel. Users can slide the bar to adjust the curve to a range subitable for observation. The maximum value is 48 Min. / Pixel. Option This button shows the following option settings. Curve View: The record display area shows in curve. List View: The record display area shows in list. Load Record File: It loads the storted temperature record. Restore: It restores the temperature record of the display. Clear Record: It clears the temperature record of the display. Export Record: It exports the record of the display to an Excel file. Go to Date: It moves the record's display area to the selected date. Go to Now: It moves the record's display area to the current date. Copyright © 2008 DynaScan Technology Corp. 95 Date Dialog: Clicking Go to Date in the function menu will prompt this Dialog. Select the date and click . The curve in record display area will be set with the selected date in the center. Record Display Area: The record can be displayed in two ways, one is a “Curve” and the other is a”List”. The curve follows the time bar to draw the temperature graph. When moving the slider on the curve, the temperature recorded at that time will be shown. In the list display, the first column (Time) is for temperature record. The model specified determines the temperature measurement. It varies depending on model. The one that is specified in Advance control determines the position name of each temperature measurement. Copyright © 2008 DynaScan Technology Corp. 96 5.7.5 ISC Control This option provides the user with control of the ISC. Connect the computer to the ISC RS-232 line. Set the appropriate RS-232 COM Port of the computer in Serial Port field. AP3 will gather the settings in the ISC, and then allow the user to control the ISC by using function buttons similar to ISC remote controller. Please refer to ISC documents for a guide on each of the functions. Copyright © 2008 DynaScan Technology Corp. 97 5.7.6 Default Path The AP3 software allows users to change default paths to help with better orginizatoin. For automatic startup, the content/schedule/layout should be in the specified default path. Content Path Click the button for a path window to change the content default path. Click the OK button to complete path setup. Copyright © 2008 DynaScan Technology Corp. 98 Schedule Path button for a path window to change the schedules default path. Click the Click the OK button to complete path setup. Layout Path Click the button for a path window to change the layouts default path. Click the OK button to complete path setup. Billing Path Click the button for a path window to change the billing default path. Click the OK button to complete path setup. Copyright © 2008 DynaScan Technology Corp. 99 5.7.7 Capture Setting List Capture Device Click this button to list all the capture devices available. ID: The device serial number, “00” acts as the default capture device. IS (Internal Sound): The audio source can be outputted to sound card internally, though this is not necessarily for external audio source connections. (Only capture device that support this function can be selected.) AD (AVI Decompressor): This function will add the Filter of AVI Decompressor automatically. Users can sometimes use this function to help playback problems. RC (Render Capture): This function specifies that the Capture Device is in Preview or Capture Pin. Users can sometimes use this function to help playback problems. DI (De-Interlace): This funtion will automatically add the De-Interlace filter. This function is to help enhance the definition; however, it is not valid to all devices. CS (Color Space Convert): This funtion will automatically add the Color Space Converter. Users can sometimes use this function to help playback problems. Copyright © 2008 DynaScan Technology Corp. 100 Volume: This is for volume control. Name: This is the name of the capture device. TID (Tuner ID): Identification number of the Tuner. (Do not change this setting.) CID (Crossbar ID): Identification number of the Crossbar. (Do not change this setting.) Clear Click this button to remove all capture devices in the list. Device Description First, specify the device from the Device ID list. The parameter area underneath will load the devices value. Input the text description of the device in the filed and press “Enter”. The input description will show in the Device ID menu and Layout editing area (when users specify the Device ID as the source.) For example, when the “VGA Capture” is set to Device ID 02, it will appear in the figure as shown below to give users a better understanding of the device being selected. Copyright © 2008 DynaScan Technology Corp. 101 Original Volume Setting Volume adjustment will affect the general volume of the Capture input. However, individual capture settings can be adjusted to balance volume difference of various capture inputs. * Volume adjustment procedure to First click the “Begin Adjust” button, pull the current time indicator adjust volume with the corresponding values displayed in the column in the lower left corner, and click the “End Adjust” button. Tuner Setting Country Code: Input the correct country code of your location Input Pin: Use “1” as the default pin. Input Type: Set up cable or antenna according to the input source. TV Channel: Channel options of TV signal Default Setting When the user adds a new capture, any adjustment of the default setting will affect the original capture setting. Use Quality Setting: When this function is not selected, the content uses the devices Default Quality setting. If this function is selected, high definition video quality will be used. Copyright © 2008 DynaScan Technology Corp. 102 Capture Default Quality: High definition video quality will return to the devices Default Quality setting when clicked. This function can only be used when the function “Use Quality Setting” is enabled. *All playing contents will be suspended at the same time the button is clicked. Copyright © 2008 DynaScan Technology Corp. 103 5.7.8 Volume Control The AP3 volume controller is attached with the system volume control in the operating system. The user does not need to start the volume control of the system, just use the AP3 volume controller. Master Provides 3 functions including volume adjustment (Volume), volume balance (Balance), and mute (Mute). Wave Provides 3 functions including volume adjustment (Volume), volume balance (Balance), and mute (Mute). Line In Provides 3 functions including volume adjustment (Volume), volume balance (Balance), and mute (Mute). This item usually functions to adjust the sound of the Capture input, like DVD Player, TV Tuner, etc. * Adjustment of audio signal input is just temporary Copyright © 2008 DynaScan Technology Corp. 104 5.7.9 Color Adjust This function is to adjust the output color. The user can adjust Red, Green, Blue or all. Click Default Setting to restore factory setting. Copyright © 2008 DynaScan Technology Corp. 105 5.7.10 Network Setting This option provides network related settings for AP3’s DSPlayer, including; the setting of port, remote publish, login user name, ECU firewall and Dynamic IP. 5.7.10.1 General Network Control Enable It enables or disables the network control function. The default is set to enable. If disabled, the network control functions will be unusable. Listen Port Remote State: This port needs to be connected to grant viewable remote access to the state of the player. The default is 2266. ECU Function: This is the communication port for the ECU function. The default is 2267. Remote Publish The function sets the DSPlayer to execute remote publish and connects to the Server for file transfers. It also sets up the Client connection for executing file reception and file transfer. Client IP: It sets the IP address used by Client for file transfer. 127.0.0.1. Copyright © 2008 DynaScan Technology Corp. The default is 106 Client Port: It sets the port used by Client for file transfers. 8766. The default is Server IP: It sets the IP address used by the Server for file transfers. The is default is 127.0.0.1. Server Port: It sets the port used by the Server for file transfers. The default is 8767. FDT Port: It sets the port to be used by the FTP. The default is 8768. Register Name The DSPlayer registers the path name to FDT for data storage. When the remote user and client are doing a FDT transfer, the client FDT will provide a shortcut to the remote user to save time on file searches. Billing: It is the file storage path for billing that set up during registration. The default is billing. Message Log: It is file storage path for Message.log that set up during registration. The default is MessageLog。 Event Log: It is the file storage path for AP3Event.log that is set up during registration. The default is EventLog。 Common Path: It is the storage path for common data that is set up during registration. The default is CommonPath. It is in a hidden state. Content Path: It is the storage path for Content that is set up during registration. The default is ContentPath. Firewall Set It connects to the open port of ECU and manages the firewall through ECU. ECU Port: It sets the port used by ECU. The default is 2267. Dynamic IP This setting is required when the client IP address is dynamic. The input IP, Port and Name have to be the same as the settings on DynaNet server for proper login. Is Dynamic IP: It enables/disables being able to use dynamic IP. Ensure it is a dynamic IP before enabling it. The default setting is disabled. Login Server IP: It sets the IP address used by the DynaNet login server. Login Server Port: It sets the port used by the DynaNet login server. The default is 2268. Machine Name: It sets the machine name on the DynaNet server. Ethernet Adapter: It sets the MAC Address of the network card used. ※NOTE: The Dynamic IP function is only applicable for the DynaNet environment. Copyright © 2008 DynaScan Technology Corp. 107 Soft Watchdog Enable It enables or disables the Watchdog software. When enabled, the Watchdog software will monitor the operation of AP3 DSPlayer and if there is no response from the DSPlayer for 5 minutes, Watchdog will reset the Embedded IPC. By default, this is disabled. Restore It restores the settings to the previously saved state and aborts the changes made. Save and Restart It saves all settings and restarts the AP3 DSPlayer. The new settings are applied after the reboot. ※NOTE: The value or name set in the network must be the same as the one on the server for proper connection. Copyright © 2008 DynaScan Technology Corp. 108 5.7.10.2 SMTP Setting If the SMTP (Simple Mail Transfer Protocol) settings are enabled, the program will send an e-mail to the specified mailbox to notify the user when the device is encountering errors or the problem is resolved. Use auto alarm e-mail It enables/disables the auto alarm E-mail feunction. By default, this is disabled. SMTP Setting These are the SMTP (Simple Mail Transfer Protocol) settings. Mail Server: It sets the host name or IP address used by the mail server. Server Port: It sets the port used by the mail server. Use authentication to log in to this server: It sets the User name and Password to login to the mail server. User name: It sets the user name for logging into the mail server. Password: It sets the password for logging into the mail server. Use SSL: It sets up the SSL (Secure Socket Layer) function. SSL Method: It sets up the SSL method. From email address: It sets the e-mail address of the sender. Copyright © 2008 DynaScan Technology Corp. 109 Send email to It sets the e-mail address of the receiver. Send test email It sends out an E-mail to the receiver's e-mail address to test if the settings are correct. Save It saves the settings. Restore It restores all of the settings to the last saved setting. Copyright © 2008 DynaScan Technology Corp. 110 5.7.11 Power Control This option provides three functions: Shut Down, Reboot, and Restart. Click the button to enable AP3 to execute the corresponding function. Shut Down: Shuts down the computer, similar to shutdown function of the Reboot operating system. : Restarts the computer, similar to reboot function of operating Restart system. : Restarts AP3. Copyright © 2008 DynaScan Technology Corp. 111 5.7.12 Monitor Computer Resource This function of the computer is resource management, to prevent computer problems caused by an over-consumption of resources. If it is not necessary, do not change any of the monitoring values. Enable Resource Monitor By default, this is disabled. The resource monitoring system will be loaded after it is enabled. Label 1: Current value of resources being used. Label 2: Monitor setting can be modified by operators based on personal needs. Label 3: There are four different options for the computer to perform if too many resources are being consumed. Disable:No action will be taken. Restart:Restart AP3. Reboot:Restart the computer. Shutdown:Shut down the computer. AP3 will execute the appropriate action when the numerical value reaches the current setting. Copyright © 2008 DynaScan Technology Corp. 112 Enable the Auto Report Resource function to have the program record monitored data for future reference. All saved data will be in Message.log. For the settings to take effect and be saved, be sure to click SET. Click Cancel to abandon setting. * The Default Running Time is set to 24 hours, then the computer will restart automatically. Users are recommended to enable this feature when constant play is expected, in order to avoid the computer going down, content termination or unpredictable issues caused by over-consumption of resources. Copyright © 2008 DynaScan Technology Corp. 113 5.7.13 Test Pattern The Test pattern is for users to conduct color quality adjustments. Pure Color After the output color is selected, the display shows a pure color pattern of the selected color. The color options available are White, Red, Green, Blue, Cyan (No Red), Purple (No Green), Yellow (No Blue), and Black. Level Color After the output color is selected, the display shows a gradient level of color. The color ranges from light to dark on the screen from the top to the bottom, with numbers in the pattern representing the value of brightness of each grid. The color options available are White, Red, Green, Blue, Cyan (No Red), Purple (No Green), Yellow (No Blue), and Black. Copyright © 2008 DynaScan Technology Corp. 114 5.7.14 About The function provides the AP3 version and DynaScan information like contact phone, fax, website, etc. Copyright © 2008 DynaScan Technology Corp. 115 6. Introduction of Accessorial Programs 6.1 AP3 Register Functions It installs the serial number and authorization number. Input AP3 Standard Server Serial Nubmer Input the AP3 Standard Server serial number in the Serial Number field, or to import the serial number. Click Install when done. The click authorization status of AP3 can be queried in the message field. “Install Success” will appear if the serial number was accepted, and the message field will update with a validation period of 30 days (Trial Mode). Input the authorization number within 30 days to release the full version. Copyright © 2008 DynaScan Technology Corp. 116 Get and Input AP3 Standard Server Authorization Number Server version has two ways to input the authorization numbers. One is to do it manually. Click the first button under Register File to open the .register file containing the register code (or directly search in C:\Program Files\DynaScan AP3). Locate the register file with the same register code shown in button (the filename of register code consists of combination of 14 alphanumeric characters, with the filename extension .register). E-mail the register code back to relevant department of DynaScan for an authorization number. DynaScan will provide a set of authorization numbers after receiving the register code. Copy the authorization number to the computer generating register code, and then click the button of “Import License File” to open the location of the authorization number and enable the number. A prompt of “Register License Success” will be shown if the authorization Copyright © 2008 DynaScan Technology Corp. 117 number is checked OK. The message field will change to Release version as well and show the authorization period if any. Valid period will not appear if there is no authorization period. DynaScan will generate a corresponding authorization number according to the received register code, so that the authorization number is not valid in other computers, because the register number is generated according to computer hardware. The second way is to input them online. It needs to access the server directly via the internet to get the authorization number. Input the IP address of the registered server and click Register Server to complete the authorization procedure. “Register License Success” will appear if the authorization number is checked as valid. The message field will update to Release version and the authorization valid period will appear as well. Copyright © 2008 DynaScan Technology Corp. 118 Warning! Trying to extend the licensing period by adjusting the time on your computer might invalidate the license. Copyright © 2008 DynaScan Technology Corp. 119 6.2 AP3 Config (Client) Introduction When the AP3 Client has finished installing, run AP3 Config to configure AP3 before executing the AP3 DSPlayer for the first time. Note, that everytime AP3 Config executes the values and settings are shown in as the programs defaults without loading the previous settings. Be sure that the internet is connected before executing AP3 Config. Network Speed Download: It sets the maximum bandwidth on the network for downloading. The unit is KBits and the default value is 102400KB (100MB). Upload: It sets the maximum bandwidth on the network for uploading. The unit is KBits and the default value is 102400KB (100MB.) Content Path Path: It sets the path for storing the playing content. First click Path and enter the path (such as D:\Content) into the field, or click to prompt the Content Path window (as the figure shown below) and specify the path for storage. Ex. the figure below specifies the path to be the file Copyright © 2008 DynaScan Technology Corp. 120 folder “Content” in Drive D. Device: It sets the removable drive to be the path for storing the playing content. The program will first check if the removable drive is supported and is available for selection. The device will show in gray and is unable to be selected if the device does not exist. Click Device to pull down the menu and select the device to store the playing content. The supported devices are CF/Micro Drive, SD/MMC, MS/MSPRO and Smart Media. ※NOTE: Only one Path and Device can be set. Connect Setting Client IP: It sets the IP address of the client. Please connect the internet cable before executing AP3 Config so that the field will show the PC’s correct IP address. If executing AP3 Config without connecting the internet, it shows the default IP address 192.168.1.101. Client Port: It sets the port used by the client. The default is 8766. FDT Port: It sets the port used for the FDT service. The default is 8768. Server IP: It sets the IP address of the server. The defaut is 192.168.1.100. Server Port: It sets the port used by the server. The default is 8765. Dynamic IP Setting This setting is required when the client IP address is dynamic. The input IP, Port and Name have to be the same as the settings on DynaNet server for proper login. Use Dynamic IP: It sets up a dynamic IP. The default is disabled. Copyright © 2008 DynaScan Technology Corp. 121 Login Server IP: It sets the IP address used by the DynaNet login server. Login Server Port: It sets the port used by the DynaNet login server. The default is 2268. Machine Name: It sets the machine name on the DynaNet server. Ethernet Adapter: It sets up the MAC Address of the network card. ※NOTE: The Dynamic IP function only applicable for DynaNet environment. AP3 Auto Starup Run It sets up AP3 to run automatically when the PC starts. The default is Auto Run (enabled). Use XP Firewall It sets up the firewall built-in by Windows XP. The program will create the settings to work with the ports within XP firewall automatically when enabled. The default is enabled. Soft Watchdog It sets up the Watchdog software function. When AP3 has no response or the system is down, Watchdog will reboot the PC and try to resolve the failure. The default is enabled. Restore Default Setting It restores the settings to the program default. Load Current Setting It loads the settings saved in the current program. Save and Exit It saves the settings and exits AP3 Config. Copyright © 2008 DynaScan Technology Corp. 122 6.3 AP3 Config (Server) Introduction When the AP3 Server has finished installing. Then run AP3 Config to execute it before running AP3 DSPlayer for the first time. Note, that everytime AP3 Config executes the values and settings are shown in as the programs defaults without loading the previous settings. Be sure that the internet is connected before executing AP3 Config. Machine List IP Address: It sets the IP address used by the new device. Port: It sets the port used by the new device. Name: It sets the name used by the new device. Append Machine: It appends the above 3 settings to the device list. Remove Machine: It removes the selected device from the device list. Network Speed Download: It sets the maximum bandwidth on the network for downloading. The unit is KBits and the default is 102400KB (100MB.) Upload: It sets the maximum bandwidth on the network for uploading. The unit is KBits and the default is 102400KB (100MB.) Copyright © 2008 DynaScan Technology Corp. 123 Connect Setting IP Address: It sets up the IP address. Please connect the internet cable before executing AP3 Config so that the field will show the PC’s correct IP address. If executing AP3 Config without connecting the internet, it shows the default IP address 192.168.1.101. File Trans Port: It sets up the port used for file transmission. The default is 8765. Publish Port: It sets up the port used for file publish. The default is 8767. FDT Port: It sets the up port for FDT service. The default is 8768. Restore Default Setting It restores the settings to the program default. Load Current Setting It loads the settings saved in the current program. Save and Exit It saves the settings and exits AP3 Config. Copyright © 2008 DynaScan Technology Corp. 124 6.4 File Transmit Client Open Operation Interface When a icon located at lower right corner of screen of the operating system (system tray), it means File Transmit Client is already activated. Right click the mouse to show the option when the cursor moves over the icon. Select FT Client to enable the operation interface as well as select Exit to disable the program. ※Note: The program only supports the versions of AP3 Standard Client and AP3 Embedded. Operation Interface Description: There are five parts on operation interface. 1. Fie Transmit List 2. Message Display Area 3. Network Transfer Speed Display 4. Network Transfer Speed Setting 5. Related Function Setting Copyright © 2008 DynaScan Technology Corp. 125 1. File Transmit List Index: Number Filename: The file name being transmitted State: The current state of the file being transmitted. The states consist of Empty, Transmit, Complete, Final and Pause. Percent: The completed percentage shows 0% ~ 100%. The users can read the status from this field. Progress: Transfer state graph. It is displayed by color, which integrates the information of file block state and completed percentage. Black: This block means, has not start to download. Pink: This block means, loading data. Red: This block means, download completed but the file is incompleted. Green: This means, the file is already completed and can be broadcasted. Blue: The block means, is uploading data. White: This means, there is not enough storage space to save the file. 2. Message Display Area The transferring message will be shown on this area. the message by scrolling the right bar of the window. Check the rest of 3. Network Transfer Speed Display This area shows the transfer speed for the current uploads and downloads. The unit is kbs. 4. Network Transfer Speed Setting Upload Speed: It is for setting bandwidth ratio when uploading. Max: Using 100% bandwidth Middle: Using 50% bandwidth Min: Using 25% bandwidth Download Speed: It is for setting bandwidth ratio when downloading. Max: Using 100% bandwidth Middle: Using 50% bandwidth Min: Using 25% bandwidth 5. Related Function Setting Be able to perform the related function settings. Copyright © 2008 DynaScan Technology Corp. 126 Remove File Remove the selected file in file transfer list. Be aware that the program will stop transfering at any time and delete the file if selected during a file transfer. Refresh File List Refresh real time information in file transfer list. Command Manager 1. Refresh Command List Refresh the information in command list (area 2). Clear Invalid Command Clear invalid or discontinued commands and include error and belated commands. Clear Failed Command Clear the error commands, which are unable to be completed. Clear Belated Command Clear the belated command 2. Command List State: There are five states, these consist of Downloading, Completed, Done, Failed and Belated. Main File: The transfer file may be Sequence or Schedule for better performance. This area only shows the main file. Copyright © 2008 DynaScan Technology Corp. 127 Time: It shows the performing deadline of the file. The command regarded as belated command beyond the perfomed deadline. Key: The checking base is for performing the command. 3. Command Description List State: The transfer state of the file currently includes Empty, Transmit, Complete and Final. Filename: The name of the file Local Filename: The file name that is included in the local directory. Machine List Clicking the Machine List button will show the machine list window, users can view related information about other Client terminal in this list. Name: The representative name of machine IP: IP address of the machine Port: The used Port of machine Type: The type of machine Copyright © 2008 DynaScan Technology Corp. 128 Option Setting 1. Local IP: It sets the IP address of the machine used. The default value is 127.0.0.1. Local Port: It sets the port of the machine used. The default value is 8766. 2. Use Virtual Server: It selects whether to enable virtual server. The default value is enabled. Virtual Server IP: It sets the IP used in the virtual server. This IP is the value that AP3 Config sets for the Client IP. Virtual Server Port: It sets the port of the virtual server used. 3. Use Dynamic IP: It chooses whether to use dynamic IP. Enable this function after confirming it has a dynamic IP. The default is disabled. Machine Name: The machine sets the name of the DynaNet server. Ethernet Adapter: It selects the MAC Address of the network card. ※Note: The function of Dynamic IP is only suitable for the DynaNet environment. 4. Network Speed Download: It sets the maximum bandwidth when downloading. The unit is KBits. Copyright © 2008 DynaScan Technology Corp. 129 Upload: It sets the maximum bandwidth when uploading. KBits. The unit is 5. Content Path Path: It sets the access path of broadcasting content, which can input a path into the field or click to show the window of path. Click the OK key to complete the path setting. Device: It selects the device for saving content. The drop-down list is for selecting the device to place the file. The devices supported memory cards include CF/MicroDrive, SD/MMC, MS/MSPRO and SmartMedia. The program will auto detect if there is a supported USB drive plugged in. This option can be set when the hardware is in use, the gray scale can’t be set when the hardware is not in use. *Note: Only one Path and Device can be used. 6. Auto Startup: It selects whether to enable the startup function of File Transmit Client auto run. The default is enabled. Soft-Watchdog Enable: It selects whether to enable the function of software Watchdog. The function of Watchdog will restart the computer for troubleshooting after starting File Transmit Client stops responding. The default is enabled. Firewall Server Port: It sets the Firewall Server ports used to perform the operation for firewall via Firewall Server. If there is no setting for the port, it will cause the firewall to block the outside connecting of File Transmit Client. The default value is 2267. FDT Port: It sets the port of single point transmit. The default value is 8768. 7. Save and Restart: It saves the current setting state and restarts File Transmit Client. Cancel: Cancels any unsaved settings 8. Server Setting IP: It sets IP address of the server. Port: It sets Port of the server. Copyright © 2008 DynaScan Technology Corp. 130 6.5 File Transmit Server Open Operation Interface When the icon is in the lower right corner of screen of the operating system, it means File Transmit Server is already activated. Click the right mouse button to show the option when the cursor moves over the icon. Select FSServer to open the program and click Exit to close the program. *Note: This program only supports the AP3 Server version. Command The users can view the machine publishing the command, the machine receiving the command and command included in the page. The users can also cancel, stop or deletion the command. Delete: This deletes the selected command in item 1’s Command List. button will be grayed out if the commands can’t be deleted. Copyright © 2008 DynaScan Technology Corp. The 131 Cancel: Cancel the selected commands (uncompleted commands) in the command list. The Client terminal will delete the commands after the Server terminal commands are cancelled. The file that is transmitting this command will be deleted simultaneously if no other commands are used. The files used in other commands will remain unchanged. * Note: The commands that are not completed with the following states can be deleted. Publish, Complete, Pause, Pausing, Paused, Continue and Continuing. Pause: Pause the selected commands (uncompleted commands) in the command list. The Client terminal that receives this command will pause the file transmission after the Server terminal has paused the selected commands. The Server and Client terminals show the current state of paused commands. * Note: The commands that are not completed with the following states which can be paused. Publish, Complete, Continue and Continuing. Continue: Use continue to unpause the transfer. When the Client terminal receives this command, it will restore the file transfer. Just Show Transmitting Command: When this function is enabled , the command list shows the states of Publish, Complete, Error, Loss File and Client Error. Show Detail: When this function is enabled, the right side of window will (item 3) will be activated. The detailed file information of selected commands in the command list will be shown in this area. 1. Command List: The list will show basic information of all commands. All commands include Done, Transmitting, untransmit and Invalid. When the function Just Show Transmitting Command is activated; the transmitting command will only be shown. The colors show the command’s current transmitting state. Black: The command is already completed Red: The command is transmitting or untransmitting Gray: The command has an invalid state List contents are as follows: Copyright © 2008 DynaScan Technology Corp. 132 Index: Number Filename: The name of the command Publish Time: The publish time of the command Done Time: The done time of the command State: The current command transmitting state. The state includes Publish, Complete, Pause, Pausing, Paused, Continue, Continuing, Cancel, Cancelling, Canceled, Done, Error, Loss File, Belated and Client Error. Progress: The current transmitting progress of the command File Num: The file number included in the command. Target Num: The target number of the received command. 2. Machine List for Transmitting Command: The machine list will show all machines transmitting the command after selecting command from the command list. The colors show the current command transmitting state of the machine. Black: The machine has already completed the command Red: The machine is transmitting the command or the command has not been transmitted Gray: The machine transmitting command has an invalid state The information displayed as follows: Index: Number Machine: The name of performance facility Got Time: The time for getting the command Complete Time: The time for completing the file transfer Done Time: The amount of time until the file will be done State: The current performing state. The states divided as below. Common States Wait for Get, Getting, Got, Trans, Complete and Final. Performing States for Cancelling the Command Cancel Waiting Cancel Got Cancel Done Performing States for Pausing the Command Pause Waiting Pause Got Pause Done Performing States for Continuing the Command Continue Waiting Continue Got Copyright © 2008 DynaScan Technology Corp. 133 Error States Error, Belated, OpenFile Failed and Command Error. Progress: The current performing progress 3. File Information Display Area: This display area occurs only when the function of Show Detail is activated. This area will show the detailed file information after selecting the command in command list. 4. Message Display Area: The related message will show on this area. Be able to view more messages by scrolling the Bar at right side of window. 5. Network Transfer Speed: The networks current upload and download transferring speed. Command File State Double click the left mouse button on the machine performing the file transmission of the Area 2 Machine List. The screen will show the list window of the Command File State. The list will show the file information of the transferring machine. The messages shown are Index, Filename, State, Size, Percent and Progress. Filename: The name of the file being transfered State: This is the files current transmitting state. The state includes Empty, Transmit, Complete and Final. Copyright © 2008 DynaScan Technology Corp. 134 Size: The capacity size of the file Percent: The completed percentage shows 0% ~ 100%. The users can read the status from this field. Progress: This graph displays the transfer state. It is displayed by color, which integrates the information of the file block state and completed percentage. Black: This block shows the downloads that have not started. Pink: This block shows the loading data. Red: This block means the download completed but the file was not completed. Green: It means the file has already completed and can be used. Blue: This block is uploading data. White: There is no sufficient capacity in storage site can to download the file. Publish The users can process the publishing file and upgrade AP3 in this page. 1. Machine List: It shows all the facilities that are registered in the Server. The information includes name of facility, IP address and ports used. The user will be able to select a single or multiple machines and select the Copyright © 2008 DynaScan Technology Corp. 135 files to publish to the set of machines. Press Ctrl or Shift on the keyboard then left click on the mouse to select multiple machines. 2. File List Ready to Publish: The list will show all files ready to publish. Add File: To add a file to the publish list, click the “Add File” button to open the window to add a file. Find the file then select the file and click the open button, the file will then be added to the list. Remove File: Removes the selected file from the publish list. OK: To publish all the files in file list, click the “OK” button to start transmitting. Update Command: The update option is for publishing in AP3. Click this button to open the window for opening files. The program publishes the files of the selected machine in themachine list after files are selected and the Open button is pressed. The selected machine will auto update AP3 after the file transfer is complete. FDT Local Server Copyright © 2008 DynaScan Technology Corp. Remote Facility 136 Users can perform a FDT connection with selected remote machines. After connecting, upload the file from local server to the remote server or download file remotely. The functions and list of local servers are on the left side of the page (the range below figure in solid line). The functions and the list of remote servers are on the right side of the page (the range below figure in dash line). to drop-down the list of all registered servers. 1. Machine List: Click After selecting the server, a FDT connection with the server will occur. 2. Stop: Clicking the “Stop” button will stop the current FDT connection with the server. 3 & 7. Choose Drive: Click drive. to drop-down a list for choosing another ※Note: The functions on right side of the page and can be run after connecting to the remote server. 4 & 8. Path Display: Display the current path in the field. New Folder: Clicking Delete: Clicking 5). will create a new folder under the current path. will delete the selected file or folder in the file list (area *Note: Clicking of right area at page will delete the selected file or folder (area 9). Up Folder: Clicking Refresh: Clicking will move the current path up one level. will refresh the display in file list. Upload: Clicking will upload the selected file in the file list from the Local server to the Remote server. The other method for FDT uploading is to drag the selected file from the file list of Local server to the file list of the Remote server. You can also drag or send multiple files at the same time. * Note: Clicking (DownLoad) of right block in area 9 is for transfering items from the Remote server to the Local server. 5 & 9. File List: The two areas display all the files and folders located in the Copyright © 2008 DynaScan Technology Corp. 137 current path. 6 & 10 Drive Free Space Display: Display the drives free space. FDT Manager The users can view the state of the FDT command in the main window. This page is designed for technical personnel. 1. State List: The list displays the state of the FDT command. It consists of three types of commands – Action, Download and Upload. This list is designed for technical personnel. 2. List Content Option: Right click the mouse (on a blank portion of the screen) to display the list content. The user can click the item, which they desire to display in the list. The items include Show Action, Show Download, Show Upload, Show Done and Show Failed. Copyright © 2008 DynaScan Technology Corp. 138 Machines The user can Append, Modify and Remove the remote machines. 1. Machines List: The list will show the registered machine in the Server. The information displayed includes Index, Machine Name, IP, MAC, MPT Port, FDT Port, Upload and Description. 2. List Content Option: Right click on the list to display the List Content Option Menu. The user can perform remote device management and whether to show the Auto Check option in the List. Append: This will show the appended machines. (Area 1) Name: It enables the name of the machine to be edited. Copyright © 2008 DynaScan Technology Corp. 139 IP Address: It sets the IP address of the machine being used. MPT Port: It sets the Port of the machine being used in the multiple point transmit protocol. FDT Port: It sets the the Port of machine being used in the single point transmit protocol. MAC: It inputs the network card’s physical address of the machine. * Note: This field is currently not in use. Description: This will show the description of the machine. Upload: This will enable/disable the upload feature. The default is enabled. Modify: Modifies the settings of the machine. Remove: Removes the selected machine from the machine list. Auto Check: Enables automatic checking of the connection status between the Server and the media playing devices. The symbol (X) means that this machine does not connect with Server, the reasons may be the machine has shut down or is not connected to the network. The symbol (O) means this machine is connected to the Server. The symbol (?) means the Server is trying to connect with the machine but is unable to. The symbol (N) means the machine is not set up on this Server. Remote Function: The following window will be displayed when the Server is trying to establish a connection with the selected device. The following window will be displayed when the connection between the Server and the selected device has been established. The status has two states: Normal and Server Failed. Reset Server: It sets the connecting Server of the selected remote Copyright © 2008 DynaScan Technology Corp. 140 machine to the appropriate server. This button is only enabled when the status is in the Server Failed state. Set Speed Max: It sets the selected remote machine’s bandwidth to the maximum setting. Set Speed Min: It sets the selected remote machine’s bandwidth to the minimum setting. Connections Users can check the number of remote devices connected to server. Connection No. / Time List: The entire list will continue to scroll to the right as the time goes by. Move the slider to check previous information. The X-axis represents the time while the Y-axis represents the connections, which indicate the number of remote devices connected to the server. Display Level: It sets the level of connections. Level 1: Level 1, 1 per grid. Level 2: Level 2, 10 per grid. Copyright © 2008 DynaScan Technology Corp. 141 Option (Setting Management Page) Users can adjust the network management function such bandwidth, usage and settings etc. Upload Speed: It sets the maximum bandwidth for uploading. Max: It uses 100% bandwidth. Middle: It uses 50% bandwidth. Min: It uses 25% bandwidth. Download Speed: It sets the maximum bandwidth for downloading. Max: It uses 100% bandwidth. Middle: It uses 50% bandwidth. Min: It uses 25% bandwidth. Auto Start Up: It sets the File Transmit Server to run automatically at startup. The default is Auto Startup Version: It shows the version number of the current File Transmit Server. Monitor Page Setting: It sets the Monitor function. Copyright © 2008 DynaScan Technology Corp. 142 Count: It sets the device number for every update. The default is to update one device a time. Time: It sets the time interval for every update. The unit is millisecond and the default is 1000 millisecond (= 1 second.) Stop Transfer: When selected the Server will stop the file transmission in between all Clients. The affected item is only limited to the transfer between the Server and Client. The transfer between Client and Client is not affected. The default is disabled. Hide Final: It hides the transferred files from the list in the Monitor menu. Net Setting Click Net Setting to show the following settings. Local IP: It sets the IP address used by the local device. The default is 127.0.0.1. Local Port: It sets the port used by the local device. The default is 8765. Use Virtual Server: It sets enable/disables the virtual server. default is enabled. The Virtual Server IP: It sets the IP address used by the virtual server. Virtual Server Port: It sets the port used by the virtual server. Network Speed Download: It sets the maximum bandwidth for downloading. The unit is in KBits. Upload: It sets the maximum bandwidth used for uploading. The unit is in KBits. Publish Port: It sets the port used for publishing. Copyright © 2008 DynaScan Technology Corp. The default is 8767. 143 FDT Port: It sets the port used for the FDT service. The default is 8768。 Save and Restart: It saves the current status and restarts the File Transmit Server program. Cancel: It cancels all altered settings. Copyright © 2008 DynaScan Technology Corp. 144 6.6 ECU Open Operation Interface icon at the lower right corner on the OS desktop indicates that ECU The is running. Move the mouse to the icon and click the right mouse button to prompt the menu shown below. Setting: It opens the ECU operation interface. Disable Watchdog: It disables or enables the Watchdog function. When the AP3 program stops responding, Watchdog will reboot the system after waiting for 5 minutes. If it is necessary to shut off AP3, remember to select “Disable Watchdog” to avoid rebooting. “Disable Watchdog” is a one time only setting. Watchdog Dialog When the AP3 program does not respond, Watchdog will wait for 5 minutes then exit the window and wait another 30 seconds for users to decide to “Stop” or “Always Stop” as described below. The system will reboot if nothing is selected. Stop: If Stop is clicked, Watchdog will wait for 5 minutes and ask again. Always Stop: If Always Stop is clicked, the Watchdog function is disabled and the program will select “Disable Watchdog” automatically. Exit: It quits the ECU program. Copyright © 2008 DynaScan Technology Corp. 145 ECU Operation Interface Message Display Area: The message will be shown when connecting to ECU and AP3 or File Transmit Client. LCM Sim: It opens the operation interface of the LCM simulator. ※NOTE: Please see Embedded IPC Operation Manual for details on the LCM operation. Use Soft Watchdog: When enabled, the soft Watchdog function will monitor the operation of AP3, DSPlayer and File Transmit Client. When one of the programs stops responsding for 5 minutes, Watchdog will reset the computer to resolve the problem. The default is enabled. Auto Run: It enables ECU to automatically start running when the computer starts up. The default is enabled. Use XP Firewall: It automatically enables the XP firewall. The default enabled. Copyright © 2008 DynaScan Technology Corp. 146 6.7 Message Editor Functions The user can edit text in the marquee message editor, as well as appoint text color, insert and play pictures in front of text, and the like. Configure layout 1 2 3 Label 1 – Function button section New: This will clear all marquee messages in the edit section for a new message. Open: This will load save files. Save: This will save the current message. Save As: This will save the current message to a new file. Delete: To delete selected marquee from message edit section. Clear Image: To clear the selected marquee image from the message edit section . Label 2 – Message edit section Level: Level of message. Color: Font color. Image: Picture setting. Message: Text edition. Label 3 – Distant control edition The user at a remote computer terminal can send a control order and edit messages via a RS-232 connection. Visible: Visibility of message. Copyright © 2008 DynaScan Technology Corp. 147 Speed: Speed of message. Space: Interval between two messages. Update Message: Modify message. RS-232 Port: Select the proper RS-232 port to send commands to another computer. Comment: The remote computer should install Message Editor. Operational Directions Create a new marquee message 「Double click here to add a new message」, the reminding message always shows at the bottom of the Message column in the message edit section. Double left click the reminding message to enable the text input box, input message, and press the “Enter” key to add a new message. (Message list should be properly saved. Please refer to instruction in the section “Marquee Plug-in” for utilizing message list.) Content of marquee message A marquee message includes belonged level (Level), message string (Message), text color (Color) and prepositive image (Image). Marquee message will play as a cycle according to the sequence. To change the message sequence, users can click the left mouse button in the Message column and pull the message to a desired position. Messages in different levels will not cross the line, and are separated automatically. Message level: Messages will be differentiated in the Level Column with . Messages with and those without can be regarded as two groups. The smaller one has a higher exposure frequency. A message inserted in the smaller group may have a frequent exposure in the marquee. For instance, before edition the setup in the above picture, a messages will be played repeatedly according to the sequence one-two-three. However, once the user sets up a level to the marquees in the first and second line (but not setting a level to those in the third line), will play the sequence changes to one-threetwo-three. Double left click the Level Column to modify the marquee level and the message sequence will change accordingly. Message string: This refers to the text shown in the marquee. The user can double click the text column to show the text input box, input Copyright © 2008 DynaScan Technology Corp. 148 message, and press the Enter key to complete the operation. Text color: A selected color is represented by the color pieces in the Color Column. Double left click for Color List, select the color and press Enter to complete the modification. Prepositive Image The image column will show the filename of the prepositive image set to the current message. When the marquee displays the message, an appointed image is shown in front of the text and is automatically zoomed in/out with geometric proportion to fit the marquee display window. The function only supports the .BMP files currently. Double left click the picture for the Image Selection Dialog Box, and select the desired file to change the image. The set image should not to be oversize compared to the marquee display window. Instantly modify marquee content remotely There are two ways to modify the marquee content remotely. They are through an internet connection and RS-232 Serial connection. The marquee message can be modified during operation. The updated message file will immediately apply the addition of a new message to the marquee, but not immediately cause change in display. Change shows in the display when the new message is reeled in, and the old message will not show anymore after reeled out. Therefore, distant modification of the marquee content can be completed through replacing old file with a new one via the file transmission functions (shared directory, FTP, etc.) Copyright © 2008 DynaScan Technology Corp. 149 Modify marquee content via RS-232 (COM Port) The user can set up a group of marquees in the playing terminal Plugin, setup the RS-232 communication port like COM 1 or COM 2 (the COM Port receiving the data) of the Remote Comm in “Marquee Parameter Setter” serving the group of marquees. Start up Message Editor v3.0, set the RS-232 communication port (the COM Port transmitting data), and connect the two ends of a RS232 “Jumper” with the COM Port. When the signal has successfully connected at both ends, a light in the left lower corner of Message Editor v3.0 will turn green from red. Editing terminal can adopt three functions to adjust the marquee, including Visible, Speed, and Space. Click “Update Message” to send out the message after editing has completed. Copyright © 2008 DynaScan Technology Corp. 150 6.8 Billing Report Functions This is to summarize and display the billing recorded files, provide a function for quick searching, and export .csv file to be exported to an Excel file. Configure layout Main function buttons Content: Displays the page of material list. Option: A page of environment settings. Label 1 – Function Button Section Start/Stop Date: Sets a start/end date of the displayed enquiry. Machine List: Selects play equipment. Identify List: Selects play image. Query: Enquires information. Export File: Exports Excel files. Detail: Displays a detailed list of billing records regarding play material. Copyright © 2008 DynaScan Technology Corp. 151 Label 2 – List of Play Material Index: Index of Play Material !: Indicate abnormal play records. Filename: Name of the play material, including type and content. Play Time: Play time of material. Play Count: Total play times of selected material. Total Time: Total play time of all material. Start Time: Startup Time & Date of first play. End Time: End Time & Date of last play. Detail of billing report Show Space Time: The list will show the space time without play material. Export File: To export Excel files. Exit: To return to list of play material. Index: Index of play material. Filename: Name of play material. Start Time: Start Time & Date of play End Time: End Time & Date of play. Len: Actual play time. Diff: Time difference between actual and appointed play length. + shows that the actual length is “longer” than appointed one. - shows that the actual length is “shorter” than appointed one. Copyright © 2008 DynaScan Technology Corp. 152 Closed: Shows that the play ended properly. Section: Belonged Schedule or Sequence. Identify: Name of played image. (The setting identifies the play screen of the corresponding record in multi-picture play.) Computer: Name of playing computer. Environment Option Work Directory: Directory name containing Billing report and the button to change the path. Ignore Content Path: Once the Content Path is ignored, the file in the same filename is placed under a different directory that will be treated as the same file. The default is enabled. * Appoint Destination Directory of Billing Report Click the Work Directory button in Options to display the path dialog box, select the directory saving billing records, and click OK to complete the setting. The new path will immediately be shown in the column. Operational Directions Appoint Date Layout for Query Click the selection box in front of the Start Date and Stop Date. This will select the desired start and end date of the query. Click “Query” to list billing records within a selected time layout. * Without appoint, it may be… To be efficient during play, a special compressing method is used by the billing records to record information, featured as fast and space saving. Therefore, a complex unscramble program is required to read records, and the quantity of unscrambled material is much larger than Copyright © 2008 DynaScan Technology Corp. 153 compressed originals. If one query involves too many materials, the operation may last rather long and use a large size of resources. Therefore, users are recommended to set the time layout in the billing record query and only check necessary materials. Select play equipment Select the equipment target from the Machine List in the query. If only a set of information related to the play equipment exists in the directory of billing records, the Machine List will display “Local”. Select Image Select the played image from Identify List that contains the names of played images and two special options as follows. ﹝All﹞: To show billing records of all played image. ﹝Unknow﹞: To show billing records of unknown images. Select Query Content (List of Played Content) All names of play content will be shown in the content list after the “Query” button pressed, providing the options, Single Content, Multiple Contents or All Contents. Click Single Content option to turn it blue and click “Detail” to check records of the play content, or directly double click the option. 「Ctrl」 or 「Shift」 keys helps to select multiple contents, and only billing records of the selected content will be listed in the billing report. Option [ALL] enables to view billing records of all the content. Export List Click “Export File” to show file saving dialog, and input a filename to complete the list export as the result of the query. * Exported .csv file includes following columns Summary of Played Content (Played Content List) File Name: Name of Content, including type and content. Play Time (sec.): Time length for playing the content, the unit is in seconds. Play Count: Number of times the content will be played. Total Time (sec.): Total time for playing the content, the unit is in seconds. Start Time: Start Time & Date of first play. End Time: End Time & Date of last play. Copyright © 2008 DynaScan Technology Corp. 154 Detail of Played Content (Played Content List) File Name: Name of Content, including type and content. Play Time (ms): Appointed play time, with the unit in milliseconds. File Time (ms): File length, with units in milliseconds. Identify Name: Name of the played image. (The setting identifies the play screen of the corresponding record in multi-picture play.) Section Name: Belonged Schedule or Sequence files. Start Position: Position at Start Time Play Position: Position at End Time Start Time: Start time of play (year, month, day, hour, minute, second) End Time: End time of play (year, month, day, hour, minute, second) Length (ms): The actual playing length. The units in milliseconds. Difference (ms): The difference between actual playing length and specified playing length. The units in milliseconds. Closed: Does the play end properly? “No” refers improper end of play, usually because of computer down or power failure. Computer: The computer containing the billing records. * How to use these materials A file with the text separated by commas can be read in any version of Excel. Copyright © 2008 DynaScan Technology Corp. 155 6.9 Decoder Installation 1. Left double-click DynaScan Decoder 0.1.0.2R.exe (*Note) to install executive file, and click ‘Next’ after entering installing interface. [*Note]: [0.1.0.2] in the name of installation executive file refers to the released version. Please refer to the actually installed version of Decoder. 2. Select destination directory. Default directory is C:\Program Files\DynaScan AP3\Decoder. Select ‘Next’. 3. The Setup Dialog box asks if you want to create a new directory. Select ‘Yes’ to create directory and ‘No’ to return back to modify the directory. Copyright © 2008 DynaScan Technology Corp. 156 4. Select program folder: Default folder is ‘DynaScan Decoder’ . Renaming is not recommended, click ‘Next’. 5. Verify the installation information, then select ‘Next’ to continue. 6. Click ‘Next’ to complete installation. Copyright © 2008 DynaScan Technology Corp. 157 Appendix DynaScan Models Resolution List Model DS0706 DS0808 DS3522 DS3522D DS0616 Display Width 1092 1366 840 912 480 Display Height 304 384 482 540 720 DS0616A DS0612 DS0613 DS1508 DS2012 Display Width 960 402 744 864 864 Display Height 720 480 592 512 480 DS2012-3 DS1713 DS1713-3 DS0716 DS1016 Display Width 864 792 792 1092 1530 Display Height 480 600 600 768 768 Model Model Copyright © 2008 DynaScan Technology Corp. 158