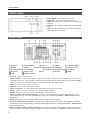
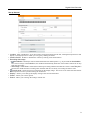
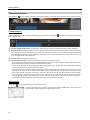
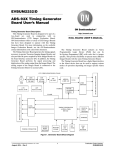
1
Digital Video Recorder WARNING RISK OF ELECTRIC SHOCK DO NOT OPEN WARNING: TO REDUCE THE RISK OF ELECTRIC SHOCK, DO NOT REMOVE COVER (OR BACK). NO USER-SERVICEABLE PARTS INSIDE. REFER SERVICING TO QUALIFIED SERVICE PERSONNEL. The lightning flash with arrowhead symbol, within an equilateral triangle, is intended to alert the user to the presence of uninsulated "dangerous voltage" within the product's enclosure that may be of sufficient magnitude to constitute a risk of electric shock. The exclamation point within an equilateral triangle is intended to alert the user to the presence of important operating and maintenance (servicing) instructions in the literature accompanying the appliance. COMPLIANCE NOTICE OF FCC: THIS EQUIPMENT HAS BEEN TESTED AND FOUND TO COMPLY WITH THE LIMITS FOR A CLASS A DIGITAL DEVICE, PURSUANT TO PART 15 OF THE FCC RULES. THESE LIMITS ARE DESIGNED TO PROVIDE REASONABLE PROTECTION AGAINST HARMFUL INTERFERENCE WHEN THE EQUIPMENT IS OPERATED IN A COMMERCIAL ENVIRONMENT. THIS EQUIPMENT GENERATES, USES, AND CAN RADIATE RADIO FREQUENCY ENERGY AND IF NOT INSTALLED AND USED IN ACCORDANCE WITH THE INSTRUCTION MANUAL, MAY CAUSE HARMFUL INTERFERENCE TO RADIO COMMUNICATIONS. OPERATION OF THIS EQUIPMENT IN A RESIDENTIAL AREA IS LIKELY TO CAUSE HARMFUL INTERFERENCE, IN WHICH CASE USERS WILL BE REQUIRED TO CORRECT THE INTERFERENCE AT THEIR OWN EXPENSE. WARNING: CHANGES OR MODIFICATIONS NOT EXPRESSLY APPROVED BY THE PARTY RESPONSIBLE FOR COMPLIANCE COULD VOID THE USER’S AUTHORITY TO OPERATE THE EQUIPMENT. THIS CLASS OF DIGITAL APPARATUS MEETS ALL REQUIREMENTS OF THE CANADIAN INTERFERENCECAUSING EQUIPMENT REGULATIONS. The information in this manual is believed to be accurate as of the date of publication. We are not responsible for any problems resulting from the use thereof. The information contained herein is subject to change without notice. Revisions or new editions to this publication may be issued to incorporate such changes. The software included in this product contains some Open Sources. You may obtain the complete corresponding source code from us. See the Open Source Guide on the software CD (OpenSourceGuide\OpenSourceGuide.pdf) or as a printed document included along with the User's Manual. i User’s Manual Important Safeguards 1. Read Instructions All the safety and operating instructions should be read before the appliance is operated. 2. Keep Instructions The safety and operating instructions should be kept for future reference. 3. Cleaning Unplug this equipment from the wall outlet before cleaning it. Do not use liquid aerosol cleaners. Use a damp soft cloth for cleaning. 4. Attachments Never add any attachments and/or equipment without the approval of the manufacturer as such additions may result in the risk of fire, electric shock or other personal injury. 5. Water and/or Moisture Do not use this equipment near water or in contact with water. 6. Accessories Do not place this equipment on an unstable cart, stand or table. The equipment may fall, causing serious injury to a child or adult, and serious damage to the equipment. Wall or shelf mounting should follow the manufacturer's instructions, and should use a mounting kit approved by the manufacturer. This equipment and cart combination should be moved with care. Quick stops, excessive force, and uneven surfaces may cause the equipment and cart combination to overturn. 7. Ventilation Slots and openings in the cabinet and the back or bottom are provided for ventilation, and to ensure reliable operation of the equipment and to protect it from overheating. These openings must not be blocked or covered. Do not block these openings or allow them to be blocked by placing the equipment on a bed, sofa, rug, or bookcase. Ensure that there is adequate ventilation and that the manufacturer’s instructions have been adhered to. 8. Power Sources This equipment should be operated only from the type of power source indicated on the marking label. If you are not sure of the type of power, please consult your equipment dealer or local power company. 9. Power Cords Operator or installer must remove power and other connections before handling the equipment. 10. Lightning For added protection for this equipment during a lightning storm, or when it is left unattended and unused for long periods of time, unplug it from the wall outlet and disconnect the antenna or cable system. This will prevent damage to the equipment due to lightning and power-line surges. 11. Overloading Do not overload wall outlets and extension cords as this can result in the risk of fire or electric shock. 12. Objects and Liquids Never push objects of any kind through openings of this equipment as they may touch dangerous voltage points or short out parts that could result in a fire or electric shock. Never spill liquid of any kind on the equipment. 13. Servicing Do not attempt to service this equipment yourself. Refer all servicing to qualified service personnel. ii 14. Damage requiring Service Unplug this equipment from the wall outlet and refer servicing to qualified service personnel under the following conditions: A. When the power-supply cord or the plug has been damaged. B. If liquid is spilled, or objects have fallen into the equipment. C. If the equipment has been exposed to rain or water. D. If the equipment does not operate normally by following the operating instructions, adjust only those controls that are covered by the operating instructions as an improper adjustment of other controls may result in damage and will often require extensive work by a qualified technician to restore the equipment to its normal operation. E. If the equipment has been dropped, or the cabinet damaged. F. When the equipment exhibits a distinct change in performance — this indicates a need for service. 15. Replacement Parts When replacement parts are required, be sure the service technician has used replacement parts specified by the manufacturer or that have the same characteristics as the original part. Unauthorized substitutions may result in fire, electric shock or other hazards. 16. Safety Check Upon completion of any service or repairs to this equipment, ask the service technician to perform safety checks to determine that the equipment is in proper operating condition. 17. Field Installation This installation should be made by a qualified service person and should conform to all local codes. 18. Telnet Communication Cable Caution: To reduce the risk of fire, use only No. 26 AWG or larger telecommunication line cord. 19. Danger of explosion if battery is incorrectly replaced. Replace only with same or equivalent type recommended by manufacturer. Discard used batteries according to the manufacturer’s instruction. 20. Elevated Operating Ambient If installed in a closed or multi-unit rack assembly, the operating ambient temperature of the rack environment may be greater than room ambient. Therefore, consideration should be given to installing the equipment in an environment compatible with the maximum ambient temperature (Tma) specified by the manufacturer. 21. Reduced Air Flow Installation of the equipment in a rack should be such that the amount of air flow required for safe operation of the equipment is not compromised. 22. Mechanical Loading Mounting of the equipment in the rack should be such that a hazardous condition is not achieved due to uneven mechanical loading. 23. Circuit Overloading Consideration should be given to the connection of the equipment to the supply circuit and the effect that overloading of the circuits might have on overcurrent protection and supply wiring. Appropriate consideration of equipment nameplate ratings should be used when addressing this concern. 24. Reliable Earthing Reliable earthing of rack-mounted equipment should be maintained. Particular attention should be given to supply connections other than direct connections to the branch circuit (e.g. user of power strips). Digital Video Recorder WEEE (Waste Electrical & Electronic Equipment) Correct Disposal of This Product (Applicable in the European Union and other European countries with separate collection systems) This marking shown on the product or its literature, indicates that it should not be disposed with other household wastes at the end of its working life. To prevent possible harm to the environment or human health from uncontrolled waste disposal, please separate this from other types of wastes and recycle it responsibly to promote the sustainable reuse of material resources. Household users should contact either the retailer where they purchased this product, or their local government office, for details of where and how they can take this item for environmentally safe recycling. Business users should contact their supplier and check the terms and conditions of the purchase contract. This product should not be mixed with other commercial wastes for disposal. iii User’s Manual iv Digital Video Recorder Table of Contents Chapter 1 — Product Information .....................................................................................................1 Features ......................................................................................................................................1 System Diagram ..........................................................................................................................1 Front Panel ..................................................................................................................................2 Rear Panel ..................................................................................................................................2 Turning On the DVR ....................................................................................................................3 Turning Off the DVR ....................................................................................................................3 Chapter 2 — SmartGuard ................................................................................................................5 Overview .....................................................................................................................................5 Features ......................................................................................................................................5 Main GUI .....................................................................................................................................5 Screen Group Edit ..................................................................................................................7 Instant Play .............................................................................................................................7 PTZ .........................................................................................................................................7 SmartGuard Setup.......................................................................................................................8 Setting Up the System ............................................................................................................8 Set up General ...................................................................................................................9 Network ............................................................................................................................10 System alert .....................................................................................................................11 Time sync.........................................................................................................................13 OSD .................................................................................................................................14 Archive .............................................................................................................................15 System authority ..............................................................................................................16 Setting Up the Camera .........................................................................................................17 Setting Up the Alert...............................................................................................................18 Alarm Out .........................................................................................................................19 Remote Alarm Out ...........................................................................................................20 Email ................................................................................................................................21 Callback ...........................................................................................................................22 Setting Up the Event .............................................................................................................23 Motion ..............................................................................................................................25 Object ..............................................................................................................................26 Video Loss .......................................................................................................................27 Alarm In ...........................................................................................................................27 Remote Alarm In ..............................................................................................................28 Text In ..............................................................................................................................28 Setting Up the Schedule .......................................................................................................29 Recording Setup ..............................................................................................................30 Schedule Setup................................................................................................................31 Setting Up the SPOT ............................................................................................................32 Multi Channel ...................................................................................................................33 Sequence .........................................................................................................................34 Setting Up the User ..............................................................................................................35 Chapter 3 — SmartSearch .............................................................................................................37 Overview ...................................................................................................................................37 Features ....................................................................................................................................37 Main GUI ...................................................................................................................................37 Search and Playback of Recorded Video ..................................................................................39 Condition Search ..................................................................................................................39 v User’s Manual Time-Lapse Search ..............................................................................................................42 Saving of Recorded Video .........................................................................................................43 Save As Clip File ..................................................................................................................44 Clip Player ............................................................................................................................44 Audio Playback ..........................................................................................................................47 Checking Audio Recording Configuration .............................................................................47 Playing Recorded Audio .......................................................................................................47 External Saving .........................................................................................................................48 Appendix 1 — Network Setup (LAN) ..............................................................................................49 Appendix 2 — WebGuard ..............................................................................................................51 Appendix 3 — Text-In Query ..........................................................................................................55 Appendix 4 — Connector Pin Outs ................................................................................................57 Appendix 5 — Troubleshooting ......................................................................................................59 Appendix 6 — Specifications ..........................................................................................................60 vi Digital Video Recorder Chapter 1 — Product Information FEATURES Compatible with color cameras and other standard video sources H.264 codec Video synchronization not required Simultaneous recording, multi-screen viewing, playback, remote monitoring and archiving Video recording and archiving via eSATA interface Versatile display formats for convenient user interface Main and Spot monitor outputs On-screen graphic display including camera title, time and event detection block Sequence mode available in all screen formats Hardware watchdog timer function Programmable motion detection for each camera input using graphic user interface Various image enhancement functions Remote monitoring, playback and control by using a remote program User-friendly interface 16-channel alarm input and 16-channel alarm output NOTE: Refer to Appendix 6 — Specifications for the system specifications. SYSTEM DIAGRAM 1 User’s Manual FRONT PANEL Power Button: Turn the system on or off. Power LED: Is lit when the unit is turned on. HDD LED: Flickers when the unit accesses to the hard disk drive. DVD RW: Use to export recorded data to the DVD RW media. USB: Connect USB devices such as a mouse, keyboard, USB storage device or printer. REAR PANEL ① Power In ② Video In (BNC) ③ Audio In ④ Alarm In ⑤ Alarm Out (Relay) ⑥ RS232 ⑦ RS485 ⑧ SD SPOT (BNC, Multi-Channel Display) ⑨ Alarm Out (TTL) ⑩ HD SPOT (Multi-Channel Display) ⑪ SD SPOT (D-Sub 8 BNC, Sequence Display) ⑫ Audio Out HDMI ⑬ VGA (D-Sub) ⑭ DVI ⑮ E-SATA USB Network (RJ-45) Power In: Connect a power cord. Video In (BNC): Connect BNC cameras. If you want to connect video source to another device, you can use the Loop BNC connectors. The Loop BNC connectors are auto terminated. Do NOT connect a cable to the Loop BNC unless it is connected to a terminated device because it will cause poor quality video. Audio In: Connect audio sources (Line-in). Alarm In: Connect external alarm-in devices. Alarm Out (Relay): Connect external alarm-out devices such as buzzers or lights. RS232: Connect a remote control device for RS232 communication. RS485: Connect a remote control device for RS485 communication. SD SPOT (BNC, Multi-Channel Display): Connect a spot monitor which supports a BNC interface for the multi-channel display. The multi-channel display settings are available at the SPOT – Multi Channel menu of SmartGuard. Alarm Out (TTL): Connect external alarm-out devices such as buzzers or lights. HD SPOT (Multi-Channel Display): Connect an HD (high-definition) PC monitor which supports an HDMI interface for the multi-channel display. The multi-channel display settings are available at the SPOT – Multi Channel menu of SmartGuard. SD SPOT (D-Sub 8 BNC, Sequence Display): Connect a spot monitor which supports a BNC interface for the sequence display. The sequence display settings are available at the SPOT – Sequence menu of SmartGuard. 2 Digital Video Recorder Audio Out: Connect an amplifier (Line-out). The DVR does not have amplified audio output, so you will need a speaker with an amplifier. VGA (D-Sub): Connect an HD (high-definition) PC monitor which supports a D-Sub interface. Connect a monitor before turning on the system. Video might not be displayed on the monitor when connecting a monitor after turning on the system. DVI: Connect an HD (high-definition) PC monitor which supports a DVI interface. E-SATA: Connect an external hard disk drive which supports an eSATA interface. HDMI: Connect an HD (high-definition) PC monitor which supports an HDMI interface. USB: Connect USB devices such as a mouse, keyboard, USB storage device or printer. Network (RJ-45): Connect a Cat5 cable with an RJ-45 connector. The network settings are available at the SYSTEM – Network menu of SmartGuard. NOTE: The location of ports in slots can be different from the image above. Refer to Appendix 4 — Connector Pin Outs for connection of the ports located in slots. NOTE: VGA, DVI and HDMI main out supports dual display (SmartGuard on the primary display and SmartSearch on the additional display) and not triple display. NOTE: Windows may not operate properly when using the USB connectors on the front panel of the DVR, depending on the model type of the USB device. In this case, connect the USB device after Windows boots properly or use the USB connectors located on the rear panel. NOTE: When mounting the DVR on a rack, comply with the following instructions. − Ensure that the rack inside is not sealed. − Ensure the air is circulated through the inlet/outlet. − If you pile up DVRs or other rack-mount devices, secure room for ventilation or install a vent. − For natural air convection, place the inlet at the bottom of the rack and the outlet on top. − It is strongly recommended that a fan motor is installed at the inlet and the outlet for air circulation and fit a filter at the inlet to screen dust or foreign substances. − Maintain the temperature inside the rack or surrounding areas between 41°F to 104°F (5°C to 40°C). TURNING ON THE DVR Press the power button located on the front panel to turn the system on. The system goes into the SmartGuard mode as soon as it finishes its boot process. NOTE: Connect a monitor before turning on the system. Video might not be displayed on the monitor when connecting a monitor after turning on the system. CAUTION: The DVR requires 1920 x 1080 resolution. The system will not boot if the monitor does not have 1920 x 1080 resolution. TURNING OFF THE DVR Click the (Menu) button and System Shutdown menu of SmartGuard or press the power button on the front panel to turn the system off. NOTE: When turning off the system, you must confirm that you want to turn off the unit. Turning off the system is allowed to only authorized users for the Shut down option during the at the USER menu of SmartGuard. CAUTION: The system can be shut down by force by pressing the power button on the front panel over 10 seconds. However, follow the normal shutdown procedures as mentioned above when the system is operating normally. Turning off the DVR without shutdown procedures can cause damage to the system. 3 User’s Manual 4 Digital Video Recorder Chapter 2 — SmartGuard OVERVIEW SmartGuard is powerful surveillance software. It provides multiplexer functions, digital time-lapse recording and event-driven recording. SmartGuard also provides motion detection, PTZ control and various image enhancement functions. NOTE: The first time you turn on the system, it will immediately begin recording. If you have less than 16 cameras, you must disable cameras which are not connected (SYSTEM – Set up General menu of SmartGuard); otherwise, the recording speed might be decreased somewhat. FEATURES Max. 16 channels Max. 480 images/sec recording (400 images/sec PAL) User-friendly interface Scheduling by camera and time Time-lapse or event-driven recording Motion detection and object detection function Audio recording PTZ control MAIN GUI ① Monitoring Screen ⑤ PTZ Control Panel ⑨ Log Panel ② Menu Button ⑥ Alarm Control Panel ⑩ POS Panel ③ System Status ⑦ Screen Mode Buttons ④ Utility Buttons ⑧ Camera Buttons 5 User’s Manual Monitoring Screen: Displays monitoring video. – OSD Display: Go to System – OSD menu of SmartGuard, and enable OSD display to display the OSD information. / / : Recording schedule (time-lapse recording / event recording / time-lapse and event recording) : A motion detection, object detection or video loss event has been detected. / / : Recording status (time-lapse recording / pre-event recording / event recording) : PTZ enabled. – Hover Menu: Controls each camera. Selecting a camera screen displays the button beside the camera title. button displays the hover menu. Clicking the (Zoom): Zooms in the image. (Color Control): Adjusts the brightness, contrast, saturation and hue of the current video. Clicking the button cancels the adjustment and reloads the original image. / (Audio Out): Controls audio out. (Instant Play): Allows you to play back video on the camera screen. See the Instant Play section (p. 7) for details. (PTZ Control): Controls PTZ. / (Fit to screen / Original ratio): Changes the image aspect ratio. Menu Button: Displays the SmartGuard menu. – Login/Logout: Logs in or logs out the system. When Use local login is disabled in the SmartGuard program (SYSTEM – System Authority menu), the DVR does not ask login procedure. When you forgot the password, ask your dealer or distributor. When Use password expire is enabled in the SmartGuard program (SYSTEM – System Authority menu), you will be asked whether or not to renew the password when you log in if the password has not been changed during the password expiration period. – Search: Runs the SmartSearch program. This function will be disabled during dual display. – Setup: Displays a SmartGuard Setup screen. It allows you to change the settings of SmartGuard program. – About: Displays the information of the installed cards, driver, software, hard disk drive, OS and MAC address on the system. – Help: Displays the electronic file of user’s manual. – Log: Displays system log list. – System shutdown: Shuts down the system. System Status: Displays user ID, date and time, the remaining hard disk space and the type of hard disk usage. Clicking the right mouse button allows you to change the time. If you change the time, the SmartGuard program restarts and recording stops during the time. Utility Buttons – (Panic Recording): Starts recording video from all cameras regardless of the recording schedule. It may be used when you want to record manually during monitoring. Clicking the button again releases the panic recording. Recording speed for the panic recording is the same as that of the time-lapse recording. – (Manual Alarm Output): In general, the alarm out is activated automatically when any event is detected if the event is associated with alarm out. However, the user can activate all the alarm out manually by clicking this button while it is released or deactivate all the alarm out by clicking this button while it is pressed. – (Auto Sequencing): Allows you to select a sequence dwell time and starts sequencing the cameras in order. Clicking the button again releases the auto sequencing. (SmartSearch): Runs the SmartSearch program. This function will be disabled during dual display. – PTZ Control Panel: Displays a PTZ control buttons. Refer to the PTZ section (p. 7) for details. Alarm Control Panel: Displays alarm control buttons. You can check the alarm status and control the alarm out. The user can activate or inactivate alarm out manually by clicking the button when it is released or pressed. You can change the alarm out setting values at the ALERT – Alarm Out menu of SmartGuard. Screen Mode Buttons: Click the desired screen mode. Double clicking the left mouse button over a camera screen displays video from the camera in the single-screen mode and double clicking the left mouse button again returns to the previous screen mode. You can change the camera arrangement manually for each screen mode. Refer to Screen Group Edit section (p. 7) for details. Camera Buttons: Clicking a individual camera button displays video from the camera. Log Panel: Displays system log list. POS Panel: Displays text-in data from a text in device. 6 Digital Video Recorder Screen Group Edit You can change the camera arrangement manually for each screen mode. Changing the location of two channels on the monitoring screen: Clicking a camera screen and dragging it over another camera screen switches the location of the two camera screens. Changing the location of the channel hidden from the mongering screen: Clicking a camera button of the hidden channel and dragging it over a camera screen on the monitoring screen switches the location of the hidden channel and the previously displayed channel on the camera screen. Instant Play It allows you to play back video on the camera screen. Instant Play: Allows you to play back recently recorded video if there are any video recorded. Instant Remote Watch: Allows you to watch live video of another DVR. Instant Remote Play: Allows you to play back recently recorded video of another DVR. PTZ The DVR provides transmission functions, and you can control popular PTZ devices and cameras. Clicking the PTZ button displays the PTZ control buttons as shown below. panel (Auto Panning, Menu, Wiper, Pump, Light, Aux): Displays the On/Off status of each function. Hovering the mouse cursor over any button displays a setup screen and allows you to enable or disable each function and change the advanced settings of the PTZ camera. (Direction Control): Controls the direction of the PTZ camera. (Set Preset), (View Preset): Saves camera directions as a Preset so that you can move the camera directly to a saved direction. (Zoom In/Out): Zooms the camera lens in or out. (Iris Close/Open): Closes or opens the iris of the camera lens. (Focus Near/Far): Focuses on near or far objects. NOTE: Up to 128 presets can be set, depending on the specification of installed PTZ devices or PTZ cameras. Make sure available preset numbers first to make the PTZ preset function work properly. 7 User’s Manual SmartGuard SETUP Setting Up the System Load: Loads a saved setting and apply it to the DVR. Save: Saves the current setting. Default: Loads the factory default setting and apply it to the DVR. 8 Digital Video Recorder Set up General Location: Enter a DVR name. If you do not have a keyboard connected to the unit, clicking the keyboard icon will display a virtual keyboard on which you can type by clicking the letters. Camera On/Off: Enables or disables the camera by clicking each camera button. Recording data usage – Auto deletion: Deletes the video recorded earlier than user-defined period. e.g. If you check the Auto deletion box, and set 30 days in the Period box, the DVR will automatically delete the video which is older than 30 days from the current day. – HDD usage: When Once is selected, the DVR stops recording when the hard disk drive is full. When Recycle is selected, the DVR continues recording when the hard disk drive is full by overwriting the oldest video. Screen saver: Set the screen saver dwell time for the display image. The screen saver will be activated if there is no keyboard or mouse operation during the dwell time. Display: Allows you to change the display setting of the connected monitors. Printer: Allows you to add a printer. Sound: Allows you to change the settings of audio out. 9 User’s Manual Network Transmit Method – Frame Rate, Image resolution: Set the transmit speed and resolution of video to be transferred to remote system from the DVR. Transmit speed is the number of images transferred during one second. The higher the transmit speed is, the more images are transferred. For example, 30 means 30 images will be transferred during one second, and 5 means 5 images will be transferred during one second. – SSL: Using the SSL function enhances the security of outgoing data from the DVR by using the SSL (Secure Sockets Layer) protocol when connecting to the DVR remotely. When using the SSL function, the DVR cannot be connected with a program or a system that does not support the SSL function. Selecting Standard does not use the SSL protocol for video and audio data, selecting High uses the SSL protocol for all data. NOTE: The remote setup to the DVR will be released when changing the SSL setting. NOTE: Using the SSL function might cause congestion in the system receiving data from the DVR depending on the security level. NOTE: This product includes software developed by the OpenSSL Project for use in the OpenSSL Toolkit (http://www.openssl.org/). Network Service Use FEN: Enables the FEN function. – FEN Manager: Enter the IP address (or domain name) and port number of the FEN server. DVR: Enter the DVR name to be registered on the FEN server. Click the Name Check button to check if the name you entered can be used. 10 Digital Video Recorder NOTE: The FEN (For Easy Network) function allows you to connect to the DVR from remote sites using either the dynamic IP addresses or the domain name. For the FEN function to work properly, the DVR should be registered on the FEN server, and the FEN server settings should match the settings registered on the FEN server. Any changes on the FEN server might cause improper operation. NOTE: The FEN registration is limited to only one FEN server. The DVR cannot be registered to multiple FEN servers. NOTE: When FEN function is enabled, it is not necessary to set up port forwarding manually. However, remote connection to the DVR might not be available depending on the network connection environment of the DVR or remote system when the FEN function is enabled. If it is the case, you should set up port forwarding for the DVR manually in the NAT (Network Address Translation) device to which the DVR is connected. – Use RTSP: Enables the RTSP service. Set up network port: Click the button and set up network port number. Internet Protocol (TCP/IP) properties: See Appendix 1 — Network Setup. System alert Clicking each tab of S.M.A.R.T., Stop recording and Login Fail (3 times) and enabling each function causes the system alert as follows: S.M.A.R.T. tab – Set up alert, S.M.A.R.T. Log: Causes the system alert when S.M.A.R.T. log occurs. This is supported only when the installed hard disk drives support S.M.A.R.T. (Self-Monitoring, Analysis and Reporting Technology) Monitoring program (Internal hard disk drives only) – Delay time for the first inspection after system starts: Set the standby time until the system performs the first inspection after the system starts. – Inspection Interval: Set the inspection interval. – Threshold temperature for alert: Set the threshold temperature of hard disk drives. The DVR leaves S.M.A.R.T. log when the temperature of hard disk drives exceeds the defined threshold. – S.M.A.R.T. Log: Displays the list of S.M.A.R.T. log. 11 User’s Manual Stop recording tab – No recording during specified time: Causes the system alert when panic recording has been stopped by clicking the panic recording button or when recording has not been made during the predefined time. Login Fail (3 times) tab: Causes the system alert when login fails 3 times. S.M.A.R.T. / Stop recording / Login Fail (3 times) tab – Action association – Email: Sends an email when system alert occurs. Select a sender and recipient from the drop-down menu below the Set up... button and enter the message. If any sender or recipient is not registered, click the Set up... button. Sender address book: Enter the email address and SMTP server address and port number. Select a type if the SMTP server uses the type of encrypted connection. Check the Login box if you want to connect to the SMTP server that requires login procedure, and enter the ID and password for login. Clicking the Add button adds the sender to the sender address book. Recipient address book: Enter the email address. Clicking the Add button adds the recipient to the recipient address book. 12 Digital Video Recorder – Callback: Sends a message to predefined callback servers when system alert occurs. Select a callback server from the drop-down menu below the Set up... button. If any callback server is not registered, click the Set up... button. Enter the IP address of the callback server and click the Add button. A maximum of three servers can be registered. – – Activate alarm: Sounds beep through the connected speaker when system alert occurs. Display a message box: Displays a message box in SmartGuard when system alert occurs. Time sync In general, each DVR system may have a different time because of the accuracy of its internal clock. The Time Synchronization function synchronizes the time between a DVR and any time server when they are networked. Any DVR can run as a time server. Also you can use a standard time server provided by each country. CAUTION: The time synchronization might not be done properly depending on the time server or network conditions. Check the time server and network conditions, first. NOTE: Visit http://www.eecis.udel.edu/~mills/ntp/clock1.htm for finding a standard time server. Run as a server: Runs the DVR as a time server. As a client: Synchronizes the time between a DVR and a time server when they are networked. – Server: Enter the IP address (or domain name) of target time server. – Check Time Server: Tests the synchronization with the time server. – Automatic: Synchronizes the time automatically at the predefined interval. – Sync now!: Synchronizes the time when you click the button. 13 User’s Manual NOTE: When setting up time synchronization for the first time, set the time between the DVR and the time server manually because the DVR and the time server might have wide time gap. OSD You can set up to display OSD information on the image when monitoring video on a main monitor. OSD (On Screen Display) information includes camera title, time, event detection block, etc. Enable all camera’s OSD: Enables OSD display for all cameras. If you disable it, you can enable or disable OSD display for each camera by clicking each camera button. Camera OSD: Enables or disables camera OSD display. – Camera Description: Displays a camera name which is set at the Location setting of the CAMERA menu. – State: Displays the recording schedule, event detection, recording status, and PTZ on or off. – Hover Menu: Displays the hover menu. Time: Displays the recorded time of playback video. – – Text In: Displays text-in data from a POS. Event: Enables or disables event detection area display. – Show motion detection event block: Displays motion detection area when a motion detection event occurs. – Show object detection event block: Displays object detection area when an object detection event occurs. 14 Digital Video Recorder Archive You can back up recorded video to a hard disk drive and eSATA. NOTE: Use a hard disk drive formatted beforehand when you back up data to hard disk drives. Archive method: Manual and automatic archives are supported. – Archive status: Displays backup status. – Manual Archive: Set the date and time period of recorded video to back up. Clicking the Start button starts backup manually. – Automatic Archive: Starts backup automatically at the predefined time. Set up Archive storage: Click the Set up... button and set up the storage for archiving. Enabling Overwrite makes the DVR continue recording when the hard disk drive is full by overwriting the oldest video. Disabling Overwrite makes the DVR stop recording when the hard disk drive is full. – Storage List: Displays a list of connected storage devices that is available for archiving. Drive: Displays a name of the device. Total Capacity: Displays the total capacity of the device. Available Storage: Displays the number of storages that is available for archiving. The storage is the basic unit of 256MB for the database used by the DVR. New Available Storage: Displays the number of storages to be allocated for archiving. Assigned Storage Count: Displays the number of storages currently allocated for archiving. 15 User’s Manual Scope of Archive: Displays the date and time period of recorded video to be archived. – Storage Info: Displays a list of connected storage devices that is available for archiving. Set up Storage for selected Drive: Set the number of storages to be used for archiving in the selected device. Storage in use: Displays the total number of storages allocated to all devices in Storage List. Set up Storage: Displays the total number of storages to be allocated to all devices in Storage List. Total Storage: Displays the total number of storages allocated and to be allocated to all devices in Storage List. Create/Resize: Clicking the button creates or adds storage depending on the number of storages to be allocated in the selected device. Format: Clicking the button deletes archived video saved in the selected device. Remove: Clicking the button deletes all storage folders allocated in the selected device. Archived video will be deleted when the storage folders are deleted. Exit: Clicking the button closes the setup screen. NOTE: The user can archive recorded video when the user has an authority for Archive. The Archive option should be selected at the USER menu. System authority Use local login: Login procedure is required to run SmartGuard program. Monitoring Without Login: It is allowed to monitor video even while you are logged out. Use password expiration: Set the password expiration period. If the password has not been changed during the password expiration period, you will be allowed to change the password after you log on. The changed password will be used from the next login. This function is supported only for the users under the authority level of Administrator (the default user ID is admin and password is 12345678 under the authority level of Administrator). Auto logout: Logs out the DVR automatically when there is no keyboard or mouse operation during the – predefined dwell time below. – – 16 Digital Video Recorder Setting Up the Camera Channel 1 to Channel 16: Indicates the camera number. Description: Enter a camera name. Hide Image: Hides the image of the selected camera on the monitor. The selected camera will not be displayed on the monitor, however, the images from the camera will be recorded while in the record mode. PTZ: Click the Set up... button if the camera is a PTZ camera. – Device ID: Set the device ID number using the slide bar. – COM port: Select the COM port to use. When using the RS232 port, select COM 1. When using the RS485 port, select the given COM port number. To check the given COM port number, please refer to the installed card information displayed on the About dialog box by clicking the (Menu) button of SmartGuard. – Baud rate, Parity, Data bit, Stop bit: Set the baud rate, parity, data bit and stop bit. Set Privacy Area: Set up the privacy area on the image. The selected area set as Privacy Area will NOT be displayed either in the live mode or playback mode. The DVR will display the selected areas in black, and also does NOT react to events detected within the area set as Privacy Area. Click the Set up... button and then set the privacy area zone. 17 User’s Manual Enable Enable option. The setup screen is made up of a grid. First, click the Draw or Erase radio button and select a tool to use, and then set up the privacy area on the image. Use the tools as follows: – (Point): Place the cursor on the image and click the left mouse button. A single box appears where the cursor is. (Line): This tool can be used to draw irregular – shapes. Place the cursor where you want to start the line. Hold down the left mouse button and drag the cursor to where you want the end of the line. Release the mouse button and a group of boxes appears along the line you drew. You can draw lines around shapes by repeating this process. (Rectangle): Hold down the left mouse button – and drag the cursor in any direction. A rectangle appears. Once the rectangle is the size you want, release the mouse button and the rectangle fills with boxes. (Fill): When using the fill tool, clicking the mouse will fill that area of the image with boxes. If a shape has – been drawn with the line tool, clicking inside will fill the area with boxes. Clicking outside the area will fill the outer area with boxes. If no shapes have been drawn, the entire screen will fill with boxes. Setting Up the Alert 18 Digital Video Recorder Alarm Out You can set up the DVR to activate alarm out of the device connected to the DVR’s alarm out port. 1 to 16: Displays alarm out number. See Appendix 4 — Connector Pin Outs for details about the alarm out number. From, To: Set alarm out activation period. Alarm out is activated during the period only. If the From time is later than the To time, the alarm out will be activated at the From time of the current date until next day's To time. If you set To: 08:00 and From: 18:00, this means the alarm will be activated over night from 6:00 p.m. until 8:00 a.m. the following day. Dwell time: Set the alarm out duration. Use audible alert: The DVR sounds beep through the connected speaker during alarm output. 19 User’s Manual Remote Alarm Out You can set up the DVR to activate alarm out of the device connected to the DVR via TCP networking. 1 to 16: Displays alarm out number. IP address, Port: Set the IP address and port number of the device connected to the DVR via TCP networking. Click the Test connections button to test the connection to the device. From, To: Set alarm out activation period. Alarm out is activated during the period only. If the From time is later than the To time, the alarm out will be activated at the From time of the current date until next day's To time. If you set To: 08:00 and From: 18:00, this means the alarm will be activated over night from 6:00 p.m. until 8:00 a.m. the following day. 20 Digital Video Recorder Email You can set up email address book. Sender address book: Enter the email address and SMTP server address and port number. Select a type if the SMTP server uses the type of encrypted connection. Check the Login box if you want to connect to the SMTP server that requires login procedure, and enter the ID and password for login. Clicking the Add button adds the sender to the sender address book. Recipient address book: Enter the email address. Clicking the Add button adds the recipient to the recipient address book. 21 User’s Manual Callback You can set up callback address book. Server address: Enter the IP address of the callback server and click the Add button. 22 Digital Video Recorder Setting Up the Event Ignore time to event: Only the first detected event is considered as an event and the same type of other events detected during the dwell time will not be considered as an event and will be ignored. Channel association: Records video from multiple cameras when an event occurs at the selected camera or other device. Action association: Displays actions to be done when an event occurs. Clicking the Set up... button allows you to change the settings. 23 User’s Manual – – – – – – 24 Email: Sends an email when an event occurs. Select a sender and recipient from the drop-down menu below the Set up... button and enter the message. Enabling Attach the event image file attaches an event detected image file (.JPG) to the email. Clicking the Set up... button loads the email address book set at the ALERT – Email menu. Callback: Sends a message to predefined callback servers when an event occurs (not supported for remote alarm in events). Select a callback server from the drop-down menu below the Set up... button. Clicking the Set up... button loads the callback address book set at the ALERT – Callback menu. Event monitoring: Displays the event-detected video during the dwell time on the monitoring screen when an event occurs. If other events occur during the minimum dwell time of the first event, the other events will be ignored and the latest event will be displayed once the minimum dwell time of the first event expires. Move to preset: Clicking the Set up... button displays the list of saved Preset and you can select a Preset. The PTZ camera moves to the position of the selected Preset when an event occurs. You can save Preset in the PTZ control panel of SmartGuard. This function is supported for the camera that supports the PTZ function. Alarm association: Activates selected alarm out when an event occurs. Remote alarm association: Activates selected remote alarm out when an event occurs. Digital Video Recorder Motion You can set up motion detection event. 1 to 16: Displays camera number. Clicking each button allows you to change motion detection event settings for each camera. Enable: Enables motion detection event function. When the DVR detects a motion in a configured motion detection zone, it considers the motion as an event. Set up motion detection – Set up zone...: Set up the motion detection zone. The setup screen is made up of a grid. First, click the Draw or Erase radio button and select a tool to use, and then set up the privacy area on the image. Using the tools is identical to that of Set Privacy Area at the CAMERA menu. Sensitivity: Set the motion detection sensitivity. The higher the number is, the more sensitive it is. Min. size: Adjust the minimum number of detection blocks that must be activated in order to be considered as a motion detection event. If you set to 10, the DVR will only react to the motion when it detects motion (activity) in at least 10 connected blocks within the selected detection zone. The minimum number of blocks (Min. size) should not exceed the selected block numbers for detection. When selecting multiple detection area groups, the minimum number of blocks (Min. size) should not exceed the block numbers of the smallest detection area. Max. size: Set the maximum number of blocks (no less than the Min. size block). If you set the Max. size value to 100, the DVR will ignore the motion which is detected in more than 100 blocks. 25 User’s Manual Object You can set up object detection event. 1 to 16: Displays camera number. Clicking each button allows you to change object detection event settings for each camera. Enable: Enables object detection event function. When the DVR detects the changes on the image compared to the reference image in a configured object detection zone, it considers the changes as an event. Set up object detection – Set up zone...: Set up the object detection zone. The setup screen is made up of a grid. First, click the Draw or Erase radio button and select a tool to use, and then set up the privacy area on the image. Using the tools is identical to that of Set Privacy Area at the CAMERA menu. Sensitivity: Set the object detection sensitivity. The higher the number is, the more sensitive it is. Min. size: Adjust the minimum number of detection blocks that must be activated in order to be considered as a object detection event. If you set to 10, the DVR will only react to the changes when it detects changes (activity) in at least 10 connected blocks within the selected detection zone. The minimum number of blocks (Min. size) should not exceed the selected block numbers for detection. When selecting multiple detection area groups, the minimum number of blocks (Min. size) should not exceed the block numbers of the smallest detection area. Max. size: Set the maximum number of blocks (no less than the Min. size block). If you set the Max. size value to 100, the DVR will ignore the changes which are detected in more than 100 blocks. Activation times: Set the dwell time to detect changes. The DVR will detect the change only when the change lasts over the preset dwell time. Reference Image: Shows the reference image. Current Image, Get Reference: Shows the current image. Clicking Get Reference button sets the current image as a reference image. 26 Digital Video Recorder Video Loss You can set up video loss event. 1 to 16: Displays camera number. Clicking each button allows you to change video loss event settings for each camera. Set up video loss detection Detect Obscuration: The DVR checks the obscuration of the lens and considers the obscuration on the images – as a video loss event (for example, the lens is sprayed, lens is blocked, etc). Set the obscuration level by holding down and dragging the pointer. The higher the percentage, the more sensitive it is. Detect Flare: The DVR checks the brightness of the lens and considers the flare on the images as a video loss – event (for example, light is flashed at the lens). Set the flare level by holding down and dragging the pointer. The higher the percentage, the more sensitive it is. Alarm In You can set up alarm in event. 1 to 16: Displays alarm in device number. Clicking each button allows you to change alarm in event settings for each camera. Enable: Enables alarm in event function. When the DVR detects alarm in from the device connected to the DVR’s alarm in port, it considers it as an event. Set up alarm in – Description: Enter an alarm in device name. Alarm in type: Enter a signal type of the alarm in device. If the signal type of the alarm in device is NC (Normally Closed), select Normally open. If the signal type is NO (Normally Open), select Normally closed. 27 User’s Manual Remote Alarm In You can set up remote alarm in event. 1 to 16: Displays remote alarm in device number. Clicking each button allows you to change remote alarm in event settings for each camera. Enable: Enables remote alarm in event function. When the DVR detects alarm in from the device connected to the DVR via TCP networking, it considers it as an event. Set up remote alarm in – Description: Enter a remote alarm in device name. Port: Enter the port number of the device connected to the DVR via TCP networking. Text In You can set up text in event. 1: Displays text in device number. Up to 16 text-in channels are available when connecting the WIBU key (USB 2.0 port). Ask your dealer or distributor about purchasing the WIBU key and details about it. Clicking each button allows you to change text in event settings for each camera. Enable: Enables text in event function. When the DVR detects text in data from a text in device, it considers it as an event. For Each Text-in Controller: Click the Select Text-In System button and select the text-in product from the list. Syntax Case Sensitive: Text strings are case sensitive. Refer to the text-in product manufacturer’s user manual to – determine if the text strings are case sensitive. If the text-in product distinguishes between upper and lower case letters, make certain this is enabled. – Transaction Start: Enter the transaction start text string. The DVR considers that a transaction starts when the start text string is entered. If Any character is enabled, you will not be able to enter a text string, and the DVR considers that a transaction starts when any text string is entered. 28 Digital Video Recorder – Transaction End: Enter the transaction end text string. The DVR considers that a transaction ends when the end text string is entered. Enter the number of additional text lines to be displayed after the end of the transaction in the More Lines option. – Line Delimiter: Enter the character(s) that the text-in product uses to indicate the end of a line. Special characters can be created using ^ and a capital letter;e.g., ^J for NL (New Line), ^M for CR (Carriage Return). Refer to the text-in product manufacturer’s user manual for Line Delimiter character(s). – Ignore String: Enter any text strings to be ignored. Refer to the text-in product manufacturer’s user manual for text strings that the text-in product sends during normal transactions so that those text strings will not be considered as text-in. Dwell Time – Display Dwell: Set the dwell time to display the text-in information. – Transaction Timeout: Set the length of time to wait for a new text string. The DVR will consider a transaction complete if no new text is entered during the time-out period after the last text input even though the transaction end text string is not entered. Setting Up the Schedule Clicking Apply all applies the settings to all cameras identically. 29 User’s Manual Recording Setup You can set up recording for each camera. Record audio: Records audio while the DVR records video. The DVR provides two types of audio input, M icrophone and Line-in. Microphone is for an unamplified source while Line-in is for an amplified source. Time-lapse recording: Records video in time-lapse recording mode. In time-lapse recording mode, DVR records continuously based on this setting for the scheduled time. – IPS: Sets recording speed. When the recording speed is set to lower than 2 ips, recorded audio will NOT be played. Recording speed is the number of images recorded during one second. The higher the recording speed is, the more images are recorded. For example, 30 means 30 images will be recorded during one second, and 5 means 5 images will be recorded during one second. – Quality: Sets the record image quality. Higher quality images require more storage space and will reduce the recording capacity of the hard disk drive. – Resolution: Sets the record image size. Higher resolution images require more storage space and will reduce the recording capacity of the hard disk drive. Pre-event recording: Records video prior to event detection when predefined events are detected. Enable: Enables pre-event recording. – – IPS: See the explanation of Time lapse recording. – Dwell time: Sets the duration of recording. The DVR records video for the duration prior to event detection. – Quality: See the explanation of Time lapse recording. – Resolution: See the explanation of Time lapse recording. After hour: Sets the after hour recording schedule. The DVR records video with different settings during the hours. – Enable: Enables after hour recording. – IPS: See the explanation of Time lapse recording. – Quality: See the explanation of Time lapse recording. – Resolution: See the explanation of Time lapse recording. 30 Digital Video Recorder Event recording: Records video when predefined events are detected. – Event type: Displays the list of event types. The DVR detects events according to the each event setting at EVENT menu. – IPS: See the explanation of Time lapse recording. – Resolution: See the explanation of Time lapse recording. – Quality: See the explanation of Time lapse recording. – Dwell time: Sets the duration of recording. The DVR records video for the duration from the time an event is detected. NOTE: Make certain you comply with all local and federal laws and regulations when recording audio. Schedule Setup You can set up recording schedule for each camera. View only (), Time-lapse (R), Event-driven (E), Time & Event (R/E): Enables or disables recording and sets the recording mode by clicking the button. When the recording is enabled, the recording mode is displayed in the timetable below. Work hour, After hour: Enable or disable after hour recording by clicking the button. When the after hour recording is enabled, the DVR records video according to the after hour recording setting. Event recording: Enable or disable event recording. When the event recording is enabled, the event type is displayed in the timetable below (m: motion detection, o: object detection, v: video loss, a: alarm in, n: network alarm in, t: text in). – (Motion Detection): Enables motion detection event recording. – (Object Detection): Enables object detection event recording. – (Video Loss): Enables video loss event recording. – (Alarm In): Enables alarm in event recording. – (Remote Alarm In): Enables remote alarm in event recording. – (Text In): Enables text in event recording. Set up holiday: Set up holidays. The DVR records video according to the after hour recording setting. 31 User’s Manual Setting Up the SPOT 32 Digital Video Recorder Multi Channel You can set up the multi-channel SPOT display. The DVR displays video sequentially or displays monitoring video of SmartGuard. Set up HD multi spot: Set the display on the monitor connected to the HD SPOT (Multi-Channel Display) port of the DVR rear panel. Set up SD multi spot: Set the display on the monitor connected to the SD SPOT (Multi-Channel Display) port of the DVR rear panel. Use spot OSD: Displays OSD. – – Use S/W underscan: Reduces the image size to fit images within the monitor screen size when the image size is bigger than the monitor screen size and some parts of the image is cropped. – Monitoring Without Login: Displays video even while you are logged out. 33 User’s Manual Sequence You can set up the sequence SPOT display. The DVR displays video sequentially. 1 ~8: Displays the number of monitors connected to the SD SPOT (Sequence Display) port of the DVR rear panel. Clicking each button allows you to change the settings of sequence display on the monitors. Spot Sequence: Set the sequence order on each monitor. Spot operation Hold spot during single-screen mode: Video is not sequenced while the screen mode of SmartGuard is – set to the single-screen mode. – Include event display: Displays event detected image in the single-screen mode when an event occurs. – Show video loss: Displays video of the camera that video loss event is detected. – Monitoring Without Login: Displays video even while you are logged out. – Spot sequence dwell: Set the sequence dwell. 34 Digital Video Recorder Setting Up the User Add user, Edit user: Allows you to add or edit user information. Up to 256 users can be registered. Only the administrator level user can edit the user’s information and their authority setup. – User ID, Password, Confirm password: Set the user ID and password. – Authority level: Select the authority level. Only the administrator level user can edit the user’s information and their authority setup. The authority setup of the Administrator cannot be edited. Delete user: Deletes the selected user from the user list. Only the administrator level user can delete the user. Authority: Set the authority of the selected user. Apply all users in same level: Clicking the button applies the current authority settings to all users in the same authority level. 35 User’s Manual 36 Digital Video Recorder Chapter 3 — SmartSearch OVERVIEW SmartSearch is a powerful tool for SmartGuard. It features playback and search functions for recorded data and consists of Playback Screen, Timetable, Status Window and Utility Buttons. Each area displays or controls recorded information. (Menu) button and SmartSearch menu of SmartGuard to get into the SmartSearch mode. To return to Click the (Menu) button and SmartGuard menu of SmartSearch. the SmartGuard mode, click the FEATURES Searches by camera and time Provides recording status table Various search functions Zoom in/out function Print function Remote playback function Bookmark function Saves to video file Audio playback MAIN GUI ① Playback Screen ⑤ Panorama Playback Panel ⑨ Data Source ⑬ Calendar Panel ② Menu Button ⑥ Event Search Panel ⑩ Jog Shuttle ⑭ Bookmark Panel ③ System Status ④ Playback Panel ⑧ Screen Mode Buttons ⑦ Utility Buttons ⑪ Playback Buttons ⑫ Device Buttons ⑮ Search Buttons Timetable 37 User’s Manual Playback Screen: Displays the current playback image. Selecting a camera screen displays the button beside button displays the camera screen menu. the camera title. Clicking the – (Zoom): Zooms in the image. – (Audio Playback): Plays back audio. – (Aspect Ratio): Changes the image aspect ratio. Menu Button: Displays the SmartSearch menu. – Login/Logout: Logs in or logs out the system. When Use local login is disabled in the SmartGuard program (SYSTEM – System Authority menu), the DVR does not ask login procedure. When you forgot the password, ask your dealer or distributor. – Guard: Runs the SmartGuard program. This function will be disabled during dual display. – About: Displays the information of the days of recorded dates, software version, etc. – Help: Displays the electronic file of user’s manual. – System shutdown: Shuts down the system. System Status: Displays user ID and the recorded time of playback video. Playback Panel: Displays the current playback image. Panorama Playback Panel: Displays the panorama playback image. It displays images from one camera image by image in multi-screen mode. Event Search Panel: Allows you to set up search condition for event search. Utility Buttons – (Save Image): Saves the images currently displayed on the screen as an image file. The image can be saved only under the C:\IDR-Series\temp directory or on the USB storage. – (Print Image): Prints the images currently displayed on the screen. – (External Saving): Saves the recorded data on the CD or DVD using the CD/DVD burning program. Refer to the Saving of Recorded Video section (p. 43) for details. – (SmartGuard): Runs the SmartGuard program. This function will be disabled during dual display. Data Source: Selects the data source to be searched. – Local: Searches video saved in the current DVR. – Remote: Searches video saved in the other DVR. – Archive: Searches video saved in the archive storage set up in the SmartGuard program (SYSTEM – Archive menu). Jog Shuttle: You can adjust the playback direction and speed by using the jog shuttle. The icon in the jog shuttle icon is to the left of center indicates the current playback direction and speed. Video is played backward when the and video is played back forward when the icon is to the right of center. The farther the position is from the center, icon and dragging it to the desired position on the jog shuttle and the faster video is played back. Clicking the holding it plays video at a constant speed. Releasing the mouse button causes the icon to return to the center (Play) button plays video at normal speed. Clicking the (Shuttle Lock) button and dragging position. Clicking the and dropping the icon to a desired position fixes the icon in that position. Playback Buttons: Controls playback of recorded video. Go to First Image Forward One Image Rewind One Image Go to Last Image Play Screen Mode Buttons: Click the desired screen mode. Select a camera button and select a desired screen mode for multi-screen playback. Then click any playback-related button. Device Buttons: It indicates a camera number when in playback panels and a device number when in an event search panel. Calendar Panel: Goes to the specific dates and times by using the calendar. Select recorded data from the calendar. The calendar provides access to single day recorded data. Click the date you want to search. Scroll through the and . months by clicking Bookmark Panel: You can review the specific image fast and easily by adding bookmarks for recorded images. button to bookmark the currently displayed image. If you want to delete the bookmark, select the target Click the information and then click the button. A bookmark lists the camera number, date and time, and bookmark description. The bookmark description will be shown automatically when the mouse cursor is not moving on a bookmark data for a while. 38 Digital Video Recorder Search Buttons – (Go To): Displays a time setup window. Entering a specific time moves to the image for that time. – (Export Video File): Saves recorded video as a clip file (.exe). Refer to the Saving of Recorded Video section (p. 43) for details. (Partial Delete): Deletes recorded data for a specific period. – – (Reload): Reloads data. Timetable: The timetable window consists of a record timetable, camera label. Various functions of the timetable window enable fast searches. SEARCH AND PLAYBACK OF RECORDED VIDEO Condition Search Select the Event Search tab. The following setup screen appears. Designate the find range and set up the search condition in the Motion Detection, Event, Text-In or Alarm-In tab. Motion Detection / Event / Text-In / Alarm-In: Set up the search condition. Refer to the Motion Detection, Event, Text-In, and Alarm-In sections for details. Search Range: Set the time range for the search of motions for the Motion Detection search or event logs for the Event, Text-In or Alarm-In search. – From, To: Searches motions or event logs between user-defined periods. Set the desired find beginning and ending date/time in the From and Until boxes. – From the first day of month: Searches motions or event logs from the first day of this month. – From the first day of week: Searches motions or event logs from the first day of this week. – From one day ago: Searches motions or event logs from one day ago. – One day: Searches motions or event logs for one day. (Find): Searches all event results within established find conditions and then display them in the result list box below. Result: Displays the search result. – Save Image: Saves the current image of the result as an image file such as bitmap. – Video Screen: Displays the searched video at the top left in the Event Search panel. The image of the result can be displayed by clicking the target event in the Result list. You can play back searched video on the Play panel. – Result List: Displays the search result list below the Search Range. 39 User’s Manual – Clear All: Removes all results in the result list. – Clear all before apply find all: Removes the previously searched results when clicking the (Find) button. Motion Detection Select the Motion Detection tab and then a camera button. Clicking the condition displays the list of recorded video of the selected camera. (Find) button after setting up the search Motion Detection Zone: Set up the detection zone using the area setup icons. First, click the Draw or Erase radio button and select one of four tools to use, and then set up the detection area on the video screen. Use the tools as follows: – (Point): Place the cursor on the image and click the left mouse button. A single box appears where the cursor is. – (Line): This tool can be used to draw irregular shapes. Place the cursor where you want to start the line. Hold down the left mouse button and drag the cursor to where you want the end of the line. Release the mouse button and a group of boxes appears along the line you drew. You can draw lines around shapes by repeating this process. (Rectangle): Hold down the left mouse button and drag the cursor in any direction. A rectangle appears. Once – the rectangle is the size you want, release the mouse button and the rectangle fills with boxes. (Fill): When using the fill tool, clicking the mouse will fill that area of the image with boxes. If a shape has – been drawn with the line tool, clicking inside will fill the area with boxes. Clicking outside the area will fill the outer area with boxes. If no shapes have been drawn, the entire screen will fill with boxes. Find Method: Select either Change or Object. – Change: Detects changes at the user-defined motion detection zone between two consecutive images which are usually motion. For example, if you want to detect if anyone passes through a door, you can draw a Change detection around the door. The system will search through recorded data for any motion in the doorway. – Object: Detects changes at the user-defined motion detection zone as compared with the image displayed currently on the Video Screen when an object is removed or moved in an area where there is normally motion. For example, you can draw a box around a painting hanging in a hallway. People walking by the painting will not be listed as an event. However, if the painting is removed, this will be listed as an event. Sensitivity: Set the sensitivity of the motion detection by holding down and dragging the pointer. Min. Blocks: Set the minimum number of blocks. NOTE: The number of minimum blocks should be set less than the number of blocks within the motion detection zone. If the user draws a rectangle with 25 blocks and sets the minimum blocks to 30, nothing will be detected even though there is motion. 40 Digital Video Recorder Event Select the Event tab and then a camera button. Clicking the (Find) button after setting up the search condition displays the list of event recorded video of the selected camera. Target Event: Select a desired event type. Text-In Select the Text-In tab and then a device button. Clicking the (Find) button after setting up the search condition displays the list of recorded video which are associated with the selected text-in device. Case Sensitive: Distinguishes between capital letter and small letters entered in the Name box. Name: Enter the text to find. Comp: Enter the comparison operator. Value: Enter the comparison value. NOTE: The tab and line can be used for more specific search of the text-in data. Use a symbol ‘^’ indicating the location of each individual category, and ‘]’ indicating the line where the category is located. Refer to Appendix 3 — Text-In Query for details. Tab size: Enter the tab size. Up to eight tabs can be set. Save Config: Saves the current text-in related settings. Load Config: Loads the saved text-in related settings. Alarm-In Select the Alarm-In tab and then a device button. Clicking the (Find) button after setting up the search condition displays the list of recorded video which are associated with the selected alarm-in device. 41 User’s Manual Time-Lapse Search (Go To) button, calendar and bookmark allows you to search for recorded video on the time basis. The timetable, Timetable Search The timetable displays the recording information for each camera. Clicking the button reloads data. (Reload) in the right of the timetable ① Current Playback Date/Time: Indicates the video time for the current playback location on the timetable. ② Recorded Period: Displays the date and time period of the recorded data. Clicking anywhere in the empty space and dragging it to the left or right moves to the earlier or later date or time. Every clicking the right mouse button on the timetable zooms the record timetable in with three levels; one time in the first level, four times in the second level, and eight times in the third level. ③ Camera Title: Displays the camera title. ④ Recorded Data: Displays the recorded data by time in one minute segments. Red vertical line: Indicates the current playback location of video on the timetable. Clicking the mouse on the desired time displays the first image recorded within the time. Yellow separation line: Separates segments when time overlap occurs. In this case, the recorded data in the time range located after the separation line is the latest. The color of the bar: Indicates different recording modes (sky blue (R,G,B: 41,144,229) for time-lapse, violet (R,G,B: 203,41,229) for Pre-event, black (R,G,B: 0,0,0) for audio detection, red (R,G,B: 255,0,0) for alarm-in, dark violet (R,G,B: 129,0,229) for motion, dark green (R,G,B: 49,183,42) for object detection, lime (R,G,B: 0,255,0) for video analytics, dark gray (R,G,B: 50,67,89) for text-in, blue (R,G,B: 0,0,255) for network alarm, maroon (R,G,B: 171,24,0) for video loss on, brown (R,G,B: 146,79,21) for video loss off, dim gray (R,G,B: 105,99,93) for video blind, and crimson (R,G,B: 218,26,75) for panic recording). Go To Search Clicking the (Go To) button displays the following screen. Enter the date and time of video to search for and click the OK button. The video of the date and time will be displayed on the playback screen. 42 Digital Video Recorder Calendar Search Clicking a date in the Calendar panel displays video of the date on the playback screen. Clicking the or button moves to the previous or next month. The date with recorded video will be displayed in black color, and the date currently displayed on the timetable will be displayed in orange color. Bookmark Search Bookmarking a specific time in the Bookmark panel makes it easier to search for video of the specific time in the future. Clicking the button allows you to bookmark the current playback time and clicking the button deletes the bookmark. Clicking a bookmark and hovering the mouse cursor over the bookmark displays the bookmark information (camera number, time, etc.). Clicking the or button moves to the previous or next list. SAVING OF RECORDED VIDEO NOTE: The user can save recorded video when the user has an authority with External Save. The External Save option should be selected during the SmartGuard – USER menu. Refer to Chapter 2 — SmartGuard, Setting Up the User for details. Clicking the (Export Video File) button in the right of the timetable displays the following menu. A-B Export Clip File: Sets up the section of video to be exported by using the timetable. Select A-B Export Video File from the export menu. Click the starting point in the timetable and drag to the ending point. The Export Video File window appears and allows you to export video of the selected period as a clip file (.exe). The user can save recorded video when the user has an authority for External Save. The External Save option should be selected at the USER menu. Export Clip File: Saves recorded video as a clip file (.exe). The user can save recorded video when the user has an authority for External Save. The External Save option should be selected at the USER menu. 43 User’s Manual NOTE: The video file can be saved only under the “C:\IDR-Series\temp” directory or on the removable disk including CD-RW, DVD RW and USB storage. NOTE: If you save video in C:, it must have 5GB or more free space excluding the video file size. For example, it must have 8GB or more free space when you save a 3GB video file. NOTE: When the total file size reaches 4GB, you will be asked to continue saving by creating multiple files in 4GB units. If you click the OK button, the system will continue saving by creating multiple files in 4GB units. Save As Clip File Camera: Select the camera number to save. Audio will be saved together. Text-In: Saves text-in data with video. Save Password, Password: Asks the password when you try to play back the saved video. Set up the password. Write to CD/DVD: Saves the video on the CD or DVD directly. Save Range: Set the period of video to save. Save path: Designate the folder path to save the video. Calc Size: Calculates and preview the size of file to save. Clicking the Start button starts saving. NOTE: Refer to the Clip Player section (p. 44) for playing back the saved video. Clip Player You do not need to install any special software on your personal computer to play back saved video. The file contains a Player program. Double-clicking the target file starts the Player program. NOTE: It is suggested that the computer used for the Player program has at least an 800MHz Pentium III (Intel Pentium Dual Core 2.2GHz recommended). If your CPU is slower than this, saved video recorded at maximum speed with very high image quality will be played back slowly. NOTE: You will be asked to enter the password to initiate the Clip Player program if you select Save Password option when saving recorded video. 44 Digital Video Recorder NOTE: Proper image display depends on the display settings of your PC. If you are experiencing display problems, click the right mouse button on the background screen and select Properties → Settings then set the Color quality to “32 bit”. Then select Advanced → Troubleshoot, and then set the Hardware Acceleration to “Full”. Please make sure that DirectX version 9.0 or higher has been installed if the display problem continues. To check the version of DirectX, click Start → RUN and type “dxdiag” then hit the enter key which will display DirectX Diagnostic Tool dialog box. Then move to the Display tab and make sure DirectDraw Acceleration is set to “Enabled”. Test DirectDraw by selecting the DirectDraw Test button. Please check the driver version of the video card and update it to the latest version available. If you still have display problems after changing all display settings as described above, try replacing the video card. Video cards with an ATI chipset are recommended. Clicking exits the Player program. Playback Buttons: Plays back the current video on the screen. Goes to the beginning of the video clip. Goes back one frame of the video clip. Goes forward one frame of the video clip. Goes to the end of the video clip. Plays the video clip in fast reverse. Plays the video clip. Plays the video clip in fast forward. : Shows the previous camera group if there is recorded video in the previous camera group in the current screen mode. : Cycles through the screen modes. It cycles through 2x2, 1+7, 3x3, 4x4, 4x5, 5x5 and 1+32. NOTE: 4x5, 5x5 and 1+32 screen modes might not be supported depending on the number of saved camera channels. : Shows the next camera group if there is recorded video in the next camera group in the current screen mode. 45 User’s Manual − − − − : Sets up the Clip Player properties. − Print: Prints the current image. − Frame Info.: Displays Channel, Title, Time, Type, Size and Resolution information about the image. − Image Processing: Controls brightness, blur and sharpness of playback images. (Single Screen Mode and Pause Mode Only) − Play Speed Control: Changes the playback speed (Play) or fast forward/backward playback speed (FF/RW). − Drawing Mode: Selects the draw mode level. If you are not sure about the best draw mode level for your system, try each level until the image displays properly. − Screen Size: Changes the Clip Player screen size. − Aspect Ratio: Changes the image aspect ratio displayed on each camera screen. OSD Setup…: Selects options to display on the screen. Enable Audio: Plays audio while playing back recorded video that has recorded audio. (Single Screen Mode Only) Anti-Aliasing Screen: Enhances image display quality on the screen by smoothing stairstepping (aliasing) effects in the enlarged image. If video plays slow because of your CPU’s slow speed, releasing the Anti-Aliasing Screen option might improve playback speed. Show Text-In: Displays video with text-in data if the video was recorded with text-in data. (Single Screen Mode Only) : Saves images. − Save as Image: Saves the current image as a bitmap or JPEG file. − Save as Image (Actual Size): Saves the current video frame as a bitmap or JPEG file in its actual size. (Single Screen Mode Only) − Save as Clip-Copy: Saves video of desired time range as an executable file. − Save as Video: Saves video of desired time range as an AVI file. − Clip-Copy Log: Saves the clip copy log information as a text file. The user information about Save As Clip Copy will be logged as “Internal-Copy.” : Select from Normal and Double screen views (Single Screen Mode Only). You can move the enlarged image by clicking the left mouse button and dragging. : Displays the image full screen. Encryption icons display in the bottom-right corner. displays when the clip file has not been tampered with, and displays and playback stops when the system has detected tampering. NOTE: If the VGA card or monitor does not support 800x600 video resolution, Full Screen might not display properly. If this happens, press the ESC key on your PC keyboard to return to the normal screen mode. Click the slider bar and move it left or right to move through the video clip. Placing the mouse cursor on an image and clicking will cause that image to display full frame. 46 Digital Video Recorder AUDIO PLAYBACK Checking Audio Recording Configuration 1. Click the SCHEDULE menu on the main GUI of SmartGuard. 2. Click Recording Setup tab. 3. Check that Record Audio is enabled for each camera. Playing Recorded Audio 1. Selecting a camera screen in the playback screen displays the button displays the camera screen menu. 2. Clicking the 3. Click the (Audio Playback) button. button beside the camera title. NOTE: Audio of one camera at a time is played back. NOTE: Audio will NOT be played when the target camera was recorded less than 2 ips of recording speed. 47 User’s Manual External Saving Click the (External Saving) button at the top right of the SmartSearch. Eject, Close: Ejects the disk from the drive or closes the drive door. Add File, Add Folder: Adds a file or folder to burn on the CD/DVD. Option: Sets options. − Session Close: Completes the burning on the CD/DVD. − Rewrite: Deletes previously saved files and burns newly added files only. Enabling Quick Erase deletes previously saved files more quickly. − Eject When Finished: Ejects the CD/DVD automatically after completing burning or erasing. Erase Disc: Deletes all data on the CD/DVD. Burn: Starts burning the selected files and folders on the CD/DVD. NOTE: The burning might not be successful if the remaining space of the disk is not enough when saving the new data subsequently after adding files and folders. NOTE: Starting CD/DVD burning during recording might interrupt the recording. 48 Digital Video Recorder Appendix 1 — Network Setup (LAN) Run the SmartGuard program and click the main GUI. (Menu) button → Setup menu → SYSTEM – Network menu on the Setting Internet Protocol (TCP/IP) Properties Select Obtain an IP address automatically or Use the following IP address depending on your network environment. – When selecting Obtain an IP address automatically, the DNS server address is set up automatically. – When selecting Use the following IP address, enter the IP address, Subnet mask, Default gateway and DNS server address acquired from your network administrator. Setting FEN Function When FEN function is enabled, it is not necessary to set up port forwarding manually. However, remote connection to the DVR might not be available depending on the network connection environment of the DVR or remote system when the FEN function is enabled. If it is the case, you should set up port forwarding for the DVR manually in the NAT (Network Address Translation) device to which the DVR is connected. 49 User’s Manual Enable Use FEN function in the Network Service setting and click the Set up… button. FEN Manager: Enter the IP address (or domain name) and port number of the FEN server. DVR: Enter the DVR name to be registered on the FEN server. Click the Name Check button to check if the name you entered can be used. NOTE: The FEN (For Easy Network) function allows you to connect to the DVR from remote sites using either the dynamic IP addresses or the domain name. For the FEN function to work properly, the DVR should be registered on the FEN server, and the FEN server settings should match the settings registered on the FEN server. Any changes on the FEN server might cause improper operation. NOTE: The FEN registration is limited to only one FEN server. The DVR cannot be registered to multiple FEN servers. 50 Digital Video Recorder Appendix 2 — WebGuard WebGuard allows you to access a remote DVR, monitor live video images and search recorded video using Internet Explorer web browser anytime from virtually anywhere. Computer system requirements for using the WebGuard program are: ® ® ® ® Operating System: Microsoft Windows XP (Service Pack 3), Microsoft Windows Vista (Service Pack 1), ® ® ® Microsoft Windows 7 (Home Premium, Professional, Ultimate) or Microsoft Windows® 8 (Pro, Enterprise) CPU: Intel Pentium III (Celeron) 600MHz or faster RAM: 128MB or higher VGA: 8MB or higher (1024x768, 24bpp or higher) Internet Explorer: Version 6.0 or later 32-bit Start Internet Explorer on your local PC. You can run the WebGuard program by entering the following information in the address field. – “http://IP address” (The DVR IP address) – Or, “http://DVRNS server address/DVR name” (The DVRNS server address and the DVR name registered on the DVRNS server) – Or, “http://www.dvronline.net” (Entering the DVR IP address or the DVR name will be required when logging in) NOTE: You will need to get the appropriate IP address for the DVR you want to connect from your network administrator. NOTE: WebGuard only works with Microsoft Internet Explorer and will NOT work with Netscape or other web browsers. NOTE: WebGuard does not work with Microsoft® Windows® 8 metro UI. Select between the WEBWATCH (Web monitoring) and WEBSEARCH (Web search) modes. Enter ID and PASSWORD and click the [LOGIN] button. You will need to enter the DVR IP address in the DVR ADDRESS field when running the WebGuard program by entering http://www.dvronline.net. Selecting the Use DVRNS option allows you to enter the DVR name registered on the DVRNS server instead of the IP address. It is required to enter the DVRNS server address and port number during the SETUP setting when selecting the Use DVRNS option. NOTE: When running the updated WebGuard for the first time, Internet Explorer might occasionally load the information from the previous version. In this case, delete the temporary Internet files by selecting Tools → Internet Options → General tab, and then run WebGuard again. NOTE: Do NOT close the LOGIN window during the WebGuard operation, otherwise, it will cause a script error when switching between Web monitoring and Web search modes, and you will need to restart the WebGuard program. NOTE: There might be a problem with the bottom of WebGuard page being cropped caused by the address or status bars. In this situation, it is recommended that websites open windows without address or status bars by changing Internet setting. (Go to Tools and Internet Options, and then the Security tab → Click the Custom level… button → Select Enable for the Allow websites to open windows without address or status bars option). 51 User’s Manual NOTE: When running WebGuard in the Microsoft Windows Vista or later operating system, it is recommended to start Internet Explorer with elevated administrator permissions. Click the right mouse button on the Internet Explorer icon and select the Run as administrator option from the context menu. Otherwise, some functions of the WebGuard might be limited to use. NOTE: There might be a problem with screen display or screen update due to low image transmission speed when using the Microsoft Windows Vista or later operating system. In this situation, it is recommended that you disable the Auto Tuning capability of your computer. Run the Command Prompt with elevated administrator permissions (Go to the Start Menu and Accessories, and then Command Prompt → Click the right mouse button and select the Run as administrator option). Then enter “netsh int tcp set global autotuninglevel=disable” and press the enter key. Restart your computer to apply the changes. If you want to enable the Auto Tuning capability again, enter “netsh int tcp set global autotuninglevel=normal” after running the Command Prompt with elevated administrator permissions. Restart your computer to apply the changes. Web Monitoring Mode WebWatch is a remote web monitoring program that allows you to monitor live video transmitted in real-time from the remote DVR. ① : Click to log out the WebGuard program. ② : Click to access to the web search mode. ③ Position the mouse pointer on the WebWatch logo to see the version of the WebGuard program. ④ The DVR information window displays the login information of WebGuard. ⑤ Click the screen format to select the desired display mode. When changing the screen format, the selected camera on the current screen will locate at the first cell of the layout to be changed. ⑥ Click the camera button to select the camera to be viewed. ⑦ : Click to adjust the brightness, contrast, saturation and hue of monitoring image. ⑧ : Click to control pan, tilt and zoom of the camera from a remote site. ⑨ : Click to control alarm out devices at the remote site. 52 Digital Video Recorder ⑩ : Click to set up the image drawing mode and OSD display. You can adjust the display speed by changing the image drawing mode, and select OSD information to be displayed on the screen. ⑪ : Click to save the current image as a bitmap or JPEG file format. ⑫ The event status window at the bottom displays a list of events that were detected from the remote site. ⑬ Selecting a camera on the screen and clicking the right mouse button displays the text menu screen. Change Camera Title: Changes the camera name. Enable Audio: Enables audio communication with the remote site. When the audio control panel displays, click the button to send audio to the connected remote site and click the button to monitor live audio from the button again to stop sending audio. Click the connected remote site through the attached speaker and click the button again stop monitoring live audio. Clicking both button and button allows two-way communication. Clicking the button disables audio communication. Aspect Ratio: Changes the image aspect ratio. Anti-Aliasing Screen: Enhances image display quality by eliminating stair stepping (aliasing) effects in the enlarged image. NOTE: A camera name change in the Web Watch mode does not affect the camera name set up on the remote site. Leaving the Camera Title blank causes the camera name set up on the remote site to display. Web Search Mode WebSearch is a remote web search program that allows you to search recorded video on the remote DVR. NOTE: The remote site connection on the Web Search screen will automatically be disconnected if there is no activity for 30 minutes. ① : Click to log out the WebGuard program. 53 User’s Manual ② : Click to access to the web monitoring mode. ③ Position the mouse pointer on the WebSearch logo to see the version of the WebGuard program. ④ The DVR Info. window displays the time information of recorded data on the remote DVR and login information of WebGuard. : Click to blur, sharpen, equalize and interpolate playback images. ⑤ : Click to zoom out or zooms in the recorded image. : Click to adjust the brightness of the recorded images. NOTE: Image processing works only in the pause mode. ⑥ The playback function buttons include fast backward, pause, play, fast forward, go to the first image, go to the previous image, go to the next image, and got to the last image. ⑦ Click the screen format to select the desired display mode. ⑧ : Click to enter the time-lapse search mode which allows you to search for recorded data by time and then play back images found within the time parameters. The Timetable window located at the bottom displays the time information for the image of the date selected on the calendar. Clicking a specific time displays the image recorded at that time on the screen. Selecting allows you to display an image from a specific time. ⑨ : Click to enter the event search mode which allows you to search for event log entries using specific conditions and play back the images associated with those event entries. : Click to set up the image drawing mode and OSD display. You can adjust the display speed by changing the ⑩ image drawing mode, and select OSD information to be displayed on the screen. ⑪ : Click to save any video clip of recorded data as an executable file. : Click to save the current image in a bitmap or JPEG file format. ⑫ ⑬ : Click to print the current image on a printer connected to your computer. ⑭ : Click to reload the recording data. ⑮ The Timetable displays recorded data of the selected camera by time (in hour segments). Selecting a camera on the screen and clicking the right mouse button displays the text menu screen. Change Camera Title: Changes the camera name. Aspect Ratio: Changes the image aspect ratio. Anti-Aliasing Screen: Enhances image display quality by eliminating stair stepping (aliasing) effects in the enlarged image. NOTE: A camera name change in the Web Search mode does not affect the camera name set up on the remote site. Leaving the Camera Title blank causes the camera name set up on the remote site to display. 54 Digital Video Recorder Appendix 3 — Text-In Query Set up the find condition of text-in. Case Sensitive: Distinguishes between capital letter and small letters entered in the Name box. Name: Enter the text to find. Comp: Enter the comparison operator. Value: Enter the comparison value. NOTE: The tab and line can be used for more specific search of the text-in data. Use a symbol ‘^’ indicating the location of each individual category, and ‘]’ indicating the line where the category is located. See the following examples for details. Tab size: Enter the tab size. Up to eight tabs can be set. Query Example I 1 2 3 4 5 6 123456789012345678901234567890123456789012345678901234567890 Item Unit price Qty amount ================================================== Coke | $ 2.20 | 1(s) | $ 2.20 Fanta | $ 2.20 | 1(s) | $ 2.20 Hotdog | $ 3.50 | 3(s) | $ 10.50 Pepsi | $ 1.95 | 1(s) | $ 1.95 ================================================== total : $ 16.85 Thank you~~ In the above text-in data, you can find that the comparison value is located at 17th (Unit price, $ mark will be ignored automatically), 28th (Qty) and 40th (amount) characters (including spaces) from the left. In this case, you can enter “17”, “28” and “40” in each Tab size box, and enter the tab symbol “^” in the Value box (^ for Unit price, ^^ for Qty, and ^^^ for amount). For example, if you want to search for Coke with a Qty(Quantity) of more than 1 and Hotdog with an amount totaling over $8, the following find condition can be set. and Coke Hotdog > > ^^1 ^^^8 55 User’s Manual Query Example II 1 2 3 4 5 6 123456789012345678901234567890123456789012345678901234567890 Item Unit price Qty amount ================================================== Coke | $ 2.20 | 1(s) $ 2.20 Fanta | $ 2.20 | 1(s) $ 2.20 Hotdog | $ 3.50 | 3(s) $ 10.50 Pepsi | $ 1.95 | 1(s) $ 1.95 ================================================== total : $ 16.85 Thank you~~ In the above text-in data, you can find that the comparison value is located at 17th (Unit price, $ mark will be ignored automatically), 28th (Qty) and 40th (amount) characters (including spaces) from the left, but the value of amount category is located at the different line from Item. In this case, you can enter “17”, “28” and “40” in each Tab size box, and enter the tab symbol “^” and line symbol “]” in the Value box (^ for Unit price, ^^ for Qty, and ^^^ for amount / ] for the next line). For example, if you want to search for Coke with a Qty(Quantity) of more than 1 and Hotdog with an amount totaling over $8, the following find condition can be set. and 56 Coke Hotdog > > ^^1 ]^^^8 Digital Video Recorder Appendix 4 — Connector Pin Outs SPOT Monitor Output (Sequence Display) Alarm Input No. 1 2 3 4 G 5 6 7 8 G Connector S1 (Sensor 1) S2 (Sensor 2) S3 (Sensor 3) S4 (Sensor 4) G (Ground) S5 (Sensor 5) S6 (Sensor 6) S7 (Sensor 7) S8 (Sensor 8) G (Ground) No. 9 10 11 12 G 13 14 15 16 G Connector S9 (Sensor 9) S10 (Sensor 10) S11 (Sensor 11) S12 (Sensor 12) G (Ground) S13 (Sensor 13) S14 (Sensor 14) S15 (Sensor 15) S16 (Sensor 16) G (Ground) Alarm Output Relay Output No. NC NO COM G Connector NC (Normal Close) NO (Normal Open) COM (Common) GND (Ground) TTL Output No. 1 2 3 4 5 6 7 8 9 10 11 12 13 Connector AOUT1 (Alarm Out 1) AOUT3 (Alarm Out 3) AOUT5 (Alarm Out 5) AOUT7 (Alarm Out 7) GND (Ground) AOUT9 (Alarm Out 9) AOUT11 (Alarm Out 11) AOUT13 (Alarm Out 13) AOUT15 (Alarm Out 15) GND (Ground) DO NOT CONNECT DO NOT CONNECT GND (Ground) No. 14 15 16 17 18 19 20 21 22 23 24 25 Connector AOUT2 (Alarm Out 2) AOUT4 (Alarm Out 4) AOUT6 (Alarm Out 6) AOUT8 (Alarm Out 8) GND (Ground) AOUT10 (Alarm Out 10) AOUT12 (Alarm Out 12) AOUT14 (Alarm Out 14) AOUT16 (Alarm Out 16) GND (Ground) DO NOT CONNECT DO NOT CONNECT 57 User’s Manual Remote Control Device (RS-485) No. + – 58 Connector TRX+ TRXGND (Ground) Digital Video Recorder Appendix 5 — Troubleshooting Following are some frequent problems and solutions related to the DVR. Read this section before calling the dealer or installer. Problem: There is no image on the screen. Solution: Check the camera cables. If the Video Loss image is displayed, something is wrong with the camera cable or power. Solution: Video might not be displayed on the monitor when connecting a monitor after turning on the system. Reboot the DVR. Problem: How do I access Windows? Solution: To protect unnecessary system crashes, Windows is blocked. Ask your dealer or distributor. Problem: The logo appears and then freezes. Sometimes the screen is black. Solution: There is a problem with the Main Board. Reboot the DVR. If it happens often, call your dealer or installer. Problem: The USB-serial converter has been connected to the DVR for the POS installation, however, the dialog box asking the device driver appears. Solution: When connecting the POS device to the DVR using the USB-serial converter, connect the converter while the DVR is operating. If not, the converter driver may not be operating properly and display the dialog box asking the device driver during the system boot. However, it does not have any effect on the DVR operation. Remove the converter, and reboot the DVR and then connect the converter again. 59 User’s Manual Appendix 6 — Specifications VIDEO Signal Format Video Input Monitor Outputs i Recording Resolution Decompression Display / Record Speed (images per second) NTSC or PAL (programmable) Composite: 1 Vp-p, 16 looping, auto-terminating One HDMI, One DVI, One VGA, 10 SPOT (One HD SPOT, 9 SD SPOT) 704x480 (4CIF), 704x240 (2CIF), 352x240 (CIF) (704x576, 704x288, 352x288 for PAL) H.264 max. 480ips / 480ips @ 4CIF (400ips / 400ips for PAL) i VGA, DVI and HDMI main out supports dual display (SmartGuard on the primary display and SmartSearch on the additional display) and not triple display. INPUTS/OUTPUTS Alarm Input Audio Input Audio Output 16 TTL, NC/NO programmable 1 relay, 1A@5V 16 TTL, 25mA@5V 16, “line in”, 1 Vp-p One, “line” Video Input Monitor Output Audio In Audio Out Alarms Ethernet Port ii eSATA Port RS232 Serial Port RS485 Serial Port USB Port Composite: 16 BNC 1 HDMI, 1 DVR, 1 VGA, 10 SPOT (1 HD SPOT, 9 SD SPOT) Line in: 16 RCA Line out Terminal block Two RJ-45 (1 Gbps Ethernet) eSATA DB9 (P) 1 Half Duplex 6 USB 2.0 connectors, 2 USB 3.0 connectors Alarm Output CONNECTORS ii The network connector is not designed to be connected directly with cable or wire intended for outdoor use. STORAGE Primary Storage Secondary Storage Backup Storage SATA hard disk drive (Expandable up to 5) eSATA HDD DVD RW Dimensions (W x H x D) Unit Weight Shipping Weight Shipping Dimensions (W x H x D) Operating Temperature Operating Humidity Power Approvals 17.3" x 7.0" x 18.2" (440mm x 177mm x 462mm) 38.1 lbs. (17.3kg) 46.1 lbs. (20.9kg) GENERAL 23.2" x 13.7" x 27.6" (590mm x 350mm x 700mm) 41°F to 104°F (5°C to 40°C) 0% to 90% AC 100-240V~, 50/60 Hz, 3.0-1.5A FCC, CE, CB, ULiii iii CAUTION: Risk of Explosion if Battery is replaced by an Incorrect Type. Dispose of Used Batteries According to the Instructions. This equipment is indoor use and all the communication wiring are limited to inside of the building. Specifications are subject to change without notice. 60 V1.0