1
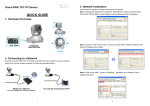
INDEX GRAND IP VIDEO SERVER PRO Video & Audio Transmission/ iPhone Web Browser Support User’s Manual ISSUE:1112, 2009 1. 2. 3. 4. 5. Package Contents……………………………..………….. Introduction………………………………….……………... System Requirements...………..………….……………… Product Features…….……….……………….…………... Hardware & Software Installation……..…..……..……… 5.1 Hardware Installation……….....….………………..…. 5.2 Software Installation.............…….…………………… 5.3 Internet Browser Settings….…….…………………… 6. Network Installation…….………..………………….….… 7. Using the Built-In Web for Configuration………....…….. 7.1 Language Select…………..………………………..…. 7.2 Display……..……………....…………………………… 7.3 Video Settings….….……..…….……………………… 7.4 Audio Settings…………………….……………………. 7.5 Network Settings…...………………………………… 7.6 PPPoE Configuration……..………………………..…. 7.7 Dynamic DNS..…………....…………………………… 7.8 SMTP Settings…….……..…….……………………… 7.9 FTP Settings……………..……….……………………. 7.10 Date and Time Settings……………………………… 1 1 1 2 3 3 4 6 7 10 10 11 12 15 16 17 18 19 20 21 7.11 Motion Detection Settings…………………………… 7.12 Authentication Settings…….…...…………………… 7.13 Account Management….…….……………………… 7.14 Port Settings………….…..………………………..…. 7.15 UPnP Services..………....…………………………… 7.16 Video Connection Status….….……………………… 7.17 Firmware Update……………….……………………. 22 23 24 25 26 27 28 7.18 Reset Configuration…..……………………………… 7.19 Reboot the Camera………..………………………… 8. Connecting Multiple Video Servers to a Router……….... 9. Using UPnP to Connect the Video Server……..………... 10. Surveillance Software…….……..………………………. 10.1 Using the Mega Pixel IP Camera Viewer.........…… 10.2 Play the Recorded Files...…………………………… 11. Troubleshooting………..………..………………………. 29 30 31 32 33 33 38 39 1. Package Contents Grand IP Video Server Pro Quick Guide RJ-45 Cable Power Adapter (DC 5V, 2A) Video Cable CD Driver with user manual/ software (IP Detect)/ Surveillance software 2. Introduction Grand IP Video Server Pro allows you to remotely view the video and listen in the audio over the network (supports iPhone Web Browser). The surveillance software allows you to record the video in AVI format onto remote PC for future viewing and motion detection function for sending detected images to present email address. With the Grand IP Video Server Pro, you can share your DVD program or TV Program in your Internet web site or connect to a Video Camera to monitor your home or baby room in internet from anywhere 3. System Requirements Router ( with DDNS or PPPoE function ) is required 10Base-T Ethernet or 100Base TX Fast Ethernet Processor: IE Remote View: Intel Pentium4 2.4GHz or higher Surveillance Software: 1 channel: Intel Pentium4 2.4GHz or higher 2~7 channel: Intel Pentium Core 2 Duo 2.4 GHz or higher 8~16 channel: Intel Pentium Core 2 Quad 2.83 GHz or higher RAM: 1GB or higher Web browser: Microsoft Internet Explorer V6.0 or higher 1 4. Product Features Support one video and audio Input. Supports one video and audio output. High Resolution Image Processor 5. Hardware & Software Installation 5.1 Hardware Installation 5.1.1 Hardware Connection - Support NTSC Video Resolution (176x120/352x240/720x480) - Support PAL Video Resolution (176x144/352x288/720x576) High Performance Image Compression Supports TCP/IP / HTTP / FTP / SMTP / DHCP / PPPoE / DDNS / UPnP / NTP service Supports Motion detected Mail Function Remote view through the IE browser, simply type in the IP address Supports iPhone Web Browser (in MJPEG format). IP Address Auto Detect Setup Compatible with Windows XP/ Vista/ Linux OS. Multi-Languages OSD: English / French / Portuguese / German / Italian / Netherland / Spanish/ Russian / Japanese / Traditional Chinese Ethernet RJ-45,10/100 Base-T auto-sense Bundle Surveillance Software: - - - Default Button: Reset all settings to the original (factory) setting. (Default IP Address: 192.168.1.100, Default User Name: root, Default Password: admin) Video File Management: Video file database and playback control. Storage Recyclable: When running out of disk space, files with the earliest date will be Reboot Button: Press the button to restart the video server. overwrite automatically. Video & Audio Input: Connect to video source (DVD player or CCD camera). Motion Detection: Detect any movement in the mask area and invoke the alarm as soon as DC Input: Connects to the power adapter. (5VDC, 2A) movement is detected. RJ-45 Ethernet Connector: For connects to 10Base-T Ethernet cabling or 100Base-TX Fast Ethernet cabling. Supports up to 16 cameras remote view and record simultaneously. NOTE: When remote view and record 16 cameras simultaneously, a system with higher Video & Audio Output: Connect to display device (monitor or TV) CPU performance is recommend - - Multi-Languages OSD: English/ French/ German/ Italian/ Dutch/ Spanish/ Russian/ Japanese/ Traditional Chinese. 5.1.2 Connecting to a Network Supports scheduled recording function. Connect the IP Video Server Pro to an Ethernet hub or switch by using a standard cable. You can also connect directly to a computer by using the cross-over wire provided. 2 3 Step2: Press the Install Mega Pixel IP Camera Viewer to install the surveillance software. 5.2 Software Installation Insert the driver CD into your CD-ROM drive, then the autorun function will start up the shell program. If the autorun window does not display, please execute the Autorun.exe program to bring out the autorun screen. Follow the below steps to install the software program: Step1: Press the Install Audio and Video Codec to install the audio and video codec. click Next to continue select the installation folder and click Next to continue select the DirectX patch and click Next to continue click Next to continue click Install to start the installation click Finish to complete the installation click Next to continue select the installation folder and click Next to continue select the start menu folder and click Next to continue click Install to start the installation Installing click Finish to complete the installation Step3: Press the Install IPCam Setup to install the IPCam Setup program. click Next to continue select the installation folder and click Next to continue Create a desktop icon and click Next to continue click Install to start the installation Installing click Finish to complete the installation Step4: The shortcut icons ( Mega Pixel IP Camera Viewer and your desktop after installing. 4 5 IPCamSetup) will be shown on 5.3 Internet Browser Settings (IE 6.0) 6. Network Installation NOTE: Your browser must be enabled the ActiveX for connect to the V first time. Step 1: Double click on ( ) IPCam Setup’s execution file on the desktop, and the following screen will appear. Step 1: Start the internet browser. Step 2: Click the “Tools” at the top of the screen, and select “Internet Options…”. Step 3: Select the “Security” tab, and click the “Custom Level”. Set to “Enable” or “Prompt” on the “Download unsigned ActiveX controls” and “Initialize and script ActiveX controls not marked as safe” items. Step 2: Click the “Auto Detect” button, and your video server’s MAC and default IP Address will be listed. 6 7 Step 3: Click on the “MAC”, and the “IP”, “Net Mask”, “Gateway”, “Port Number 1” and “Camera Name” Step 5: Click the “Auto Detect” button again, and the new network information will be shown. will be displayed in the “Network Setting” area. NOTE: The IP Address, Net Mask and Gateway must be corresponding with your network settings for Step 6: Select the “MAC” and click the “Connect” button to connect the IP Video Server Pro. you to access the video server. You can follow the steps below to get your network information. - Click “Start” → “All Programs” → “Accessories” → “Command Prompt”. A MS-DOS window will appear. Type “ipconfig” and then press “Enter” to get your network information. Step 7: When the login screen appears, enter the user name and password (default user name: root, - Assign IP Address, Netmask (Subnet Mask) and Gateway (Default Gateway) for the IP Video default password: admin), and click the “OK” button to login your video server. Server Pro. (You must use the same Net Mask (ex. 255.255.255.0) and Gateway (192.168.2.254). You can use any IP address between 192.168.2.1-254, but make sure that the IP Address has never been used or is used by another IP addressable device.) Step 4: Directly modify the “IP”, “Net Mask” and “Gateway”, and click “Setup” to save. 8 9 7. Using the Build-In Web for Configuration 7.2 Display IP Video Server Pro provides a way for users to administrate the video server, a build-in web for User can view the video by clicking on the “Display” in the Menu List. The live stream will show up in the accessing the video, setting up the video parameter, configuring the network address etc. After login the Display area. video server, the page as below will appear. There are two areas in the page: the Menu List and the Main Display area. Digital Zoom In/ Out Function: Click left/ right mouse buttons to change the zoom. Zoom In: Move your mouse cursor to the video display area, and click left mouse You might access the video stream or select what you want to configure through the Menu List. The video - or the details of corresponding configuration will show up in the Main Display area. button to zoom in (The screen can be zoomed in 5 steps). - Zoom Out: Move your mouse cursor to the video display area, and click right mouse button to zoom out. 7.1 Language Select You might choose the language used in the build-in web from the draw down list in the top of the Menu List. IP Video Server Pro supports multi-languages: English, Chinese (Tri), Italian, Russian, French, Japanese, Spanish, Portuguese, Netherlands and German. 10 11 7.3 Video Settings 7.3.2 iPhone User User can adjust the parameters of the video stream by clicking on “Video” in the Menu List. The details of IP Video Server Pro supports iPhone’s browser, Safari. If user uses an iPhone to access to the IP Video video setting should appear in the Main Display area. Server Pro, the Video Setting page should appear as below. 7.3.1 IE User Resolution: Select the video resolution. QMax/QMin: The quality range supported by video server is from 0 to 51. - NTSC: 176x120/ 352x240/ 720x480 Resolution: Select the video resolution. - PAL: 176x144/ 352x288/ 720x576 - NTSC: 176x120/ 352x240/ 720x480 Framerate: Select the frame rate of the video. - PAL: 176x144/ 352x288/ 720x576 Audio Input: Enable/Disable the audio input of video server. Framerate: Select the frame rate of the video. The range of frame rate supported by video server Brightness: Set the video brightness (0~15). is from 1 to 30 fps. Contrast: Set the video contrast (0~50). IPInterval: Select the interval between two I-Frames in the video stream. The higher this value, Sharpness: Set the video sharpness (0~15). the easier the video is vague. Save button: Save the configuration. All configurations should be available after the Audio Input: Enable/Disable the audio input of video server. Brightness: Set the video brightness (0~15). Contrast: Set the video contrast (0~50). Sharpness: Set the video sharpness (0~15). Camera are from 1 to 100. Fixed Quality: User might decide the video quality by selecting the degree of the video quality. Mega Pixel IP Camera supports up to 11 degrees of video quality. Quality: Select the video quality. The degrees of the video quality supported by Mega Pixel IP configurations are successfully saved. Save button: Save the configuration. All configurations should be available after the configurations are successfully saved. 12 13 View the Camera from iPhone 7.4 Audio Settings Step 1: Assign your video server an IP address and make your video server accessible through User can adjust the parameters of the audio stream by clicking on “Audio” in the Menu List. The details of the Internet. audio setting should appear in the Main Display area. Step 2: Connect your iPhone to the network via 3G or Wi-Fi (refer to your user’s manual of iPhone for detail about network setting). Step 3: Open the Web browser (Safari) and enter the URL that you assign to your IP Video Server Pro (we use IP in this case). Then the video server will ask you user name (default user name: root) and password (default password: admin) for authentication. open the Web browser enter the IP adress Audio Channels: Select the audio channel. IP Video Server Pro supports mono and stereo audio. Sample Rate: Adjust the audio quality by selecting the sample rate of the audio. The sample rates Save button: Save the configuration. All configurations should be available after the enter the user name and password supported by the IP Video Server Pro are: 16000, 32000 and 48000. configurations are successfully saved. Video Server’s Web page 14 15 7.5 Network Settings 7.6 PPPoE Configuration User can configure the network setting by clicking the “Network” in the Menu List. The details of network IP Video Server Pro supports PPPoE dial-up function that let it directly connect to the Internet through a DSL modem. Please click on the “PPPoE” in the Menu List for further setup. setting should appear in the Main Display area. Ethernet Interface: -DHCP Client: Enable/Disable the DHCP Client function. If the user wants to use dynamic IP PPPoE User/Password: User might enter the PPPoE user name and password here. Auto start after reboot: If this function is selected, the PPPoE function will auto start after the IP Apply button: Apply the configuration. All configurations should be available after the Video Server Pro reboot. address for IP Video Server Pro, please select “On” here. -IP Address, Subnet Mask and Gateway: If the user wants to use a static IP address for IP Video Server Pro, please enter the IP Address, Subnet Mask and Gateway configurations are successfully saved. -DNS Settings: Enter the DNS servers to IP Video Server Pro for name resolution. Save button: Save the configuration. All configurations should be available after the configurations are successfully saved. 16 17 7.7 Dynamic DNS 7.8 SMTP Settings Dynamic DNS is a network service that provides the domain name resolution for dynamic IP address. IP Video Server Pro supports a build-in SMTP client for sending alarm e-mail. When the motion detection After creating an alias on the service provider’s web site, user might use this alias to access video server function (see 7.11, Motion Detection Settings) is enabled, user might choose to receive alarm e-mail on the Internet. For further configure this function, please click on the “DDNS” in the Menu List. when motion is detected. Please click on “SMTP” in the Menu List for further configuration. Dynamic DNS: Enable/Disable the DDNS function. SMTP Server: Enter the mail server’s address that the user wants to use for sending e-mails. DDNS Service: Select the DDNS service provider the user wanted to use. Recipient: Enter the e-mail address for receiving the alarm e-mail. Interface: Select the network interface for registering. If video server connects to the Internet via a Username/Password: Enter the account information for logging in the mail server. PPPoE connect, please use the ppp0 interface. Authentication Method: Select the authentication method for the delivering e-mail account. Host Name: In put the host name (alias) that the user creates on the service provider’s web site. Save button: Save the configuration. All configurations should be available after the User Name/Password: Enter the account information for login the DDNS service. OK button: Press “OK” button for apply the configurations. 18 configurations are successfully saved. 19 7.9 FTP Settings 7.10 Date and Time Settings IP Video Server Pro supports a build-in FTP client for uploading image or video. When the motion User could click on the “NTP” in the Menu List for configuring the time of video server. detection function (see 7.11, Motion Detection Settings) is enabled, user might choose to upload video or image when motion is detected. Please click on “FTP” in the Menu List for further configuration. Synchronized with Time Server: Use a NTP server to configure the time of video server. -NTP Server: Enter the NTP server the user wants to use. -Time Zone: Enter the Time Zone in which IP Video Server Pro is located. FTP Server: Enter the FTP server’s address that the user wants to use for uploading files. Manual Update: Configure the time of IP Video Server Pro manually. FTP Port: Enter the FTP port number. The default port used in FTP is 21. -Date: Specify the date here. User Name/Password: Enter the account information for logging in the FTP server. -Time: Specify the time here. Remote Folder: Enter the remote folder on the FTP server for uploading files. Passive Mode: If the FTP server supports passive mode, user might enable this function for Save button: Save the configuration. All configurations should be available after the utilizing this mode. Synchronized with PC: When this function been selected, IP Video Server Pro will synchronize its time with the PC that is browsing it. Save button: Save and apply the configuration. configurations are successfully saved. 20 21 7.11 Motion Detection Settings Alarm Action: Enable/Disable the Mail/FTP upload function. IP Video Server Pro supports the motion detection function. When this function is enabled, IP Video -Alarm Mail: Enable/Disable the alarm e-mail function. Before enabling this function, please Server Pro will monitor the video captured by it. And IP Video Server Pro will send alarm e-mail with configure the SMTP configuration first. (refer to section 7.8) image/video or upload the image/video to a FTP server when some object moves in the video. -Alarm Ftp: Enable/Disable the FTP upload function. Before enabling this function, please configure the FTP configuration first. (refer to section 7.9) Save button: Save and apply the configuration. 7.12 Authentication Settings IP Video Server Pro provides video stream authentication. If this function is enabled, users need to be authenticated for accessing the video stream. For further configure this function, please click on the “Authen” in the Menu List. Detect Frame Interval: Define the detection frame interval here. Window: Define the detection area which needs to be monitored in the video. User could draw this area by using the x and y coordinates. -Motion Detection On/Off: Enable/Disable this detection area. The lower this value, the easier the motion detection is triggered. -Sensitivity: Defines a value of the changes. It compares the last image and the current image and counts changes. A small value means more sensitivity. -Threshold: Set the threshold of the motion detection function. -Start/Stop Coordinate: Using the X, Y coordinate to draw the scope of the detection area. Alarm Picture: Configuring the alarm picture here. The pictures will be sent with the alarm e-mail or upload to the FTP server when motion is detected. -Enable: Enable/Disable the alarm picture function. Authentication On/Off: Enable/Disable video authentication. -Filename: Set the name of the pictures sent along with the e-mail or uploaded to the FTP server. Number of Connections: User might specify the maxima of connections here. IP Video Server Pro could support up to 20 connections simultaneously. Alarm Video: Configuring the alarm video here. The video clips will be sent with the alarm e-mail or upload to the FTP server when motion is detected. Save button: Save and apply the configuration. -Enable: Enable/Disable the alarm video function. -Pre-Alarm I Frame Number: Set the I frame number the user wants to capture before the motion happened. -Post-Alarm I Frame Number: Set the I frame number the user wants to capture after the motion happened. -Filename: Set the name of the video clips sent along with the e-mail or uploaded to the FTP server. 22 23 7.13 Account Management 7.14 Port Settings User could change the password of the root account through the Account Management. Click on User could change the port number that used by the video stream. The video stream utilizes the “Account” in the Menu List and follow the steps below for changing the password: RTP/RTSP protocol for delivering through the network. Click on “Port” in the Menu List for further settings. Step 1: Enter the user name and current password twice. Then press the “OK” button for getting into the “Change Password” page. Step 2: Enter the new password twice. And then press “SET PASSWORD” button for changing the RTSP Port: Specify the port number the user wants to use for RTSP. The default port is 554. Control Port: Specify the control port the user wants to use for sending controlling message to IP Video Server Pro. The default port number is 21. password. RTP Range Low/High: User might specify the range of the random port that used by RTP protocol. The default range is from 50000 to 60000. HTTP Port: User might change the default port used by HTTP protocol here. The default port number is 80. 24 RTSP Over: Select the transferring protocol from AUTO, UDP or TCP. Save button: Save and apply the configuration. 25 7.15 UPnP Services 7.16 Video Connection Status IP Video Server Pro supports UPnP function. Using this function, user could find IP Video Server Pro by User could view the video connection status of IP Video Server Pro by clicking on the “Status” in the just one click on “My Network Place” (Windows XP and later version). For further setting the UpnP Menu List. function, please click on the “UPnP” on the Menu List. ON: Enable the UPnP function. Discovery Enable: If this function is checked, a Windows user could find IP Video Server Pro in the My Network Place. About how to enable the UPnP function in the Windows, please refer to “Section 9 Using UPnP to Connect to the Video Server” UPNP HOSTNAME: Specify the host name for the UPnP function here. NAT Traversal Enable: Enable/Disable NAT Traversal function. If IP Video Server Pro is located behind a router (uses a NAT network technology), and the router supports NAT Traversal function, user might enable IP Video Server Pro to negotiate with the router about the port configuration via this function. Off: Disable the UPnP function. 26 27 7.17 Firmware Update 7.18 Reset Configuration User could update the firmware of IP Video Server Pro when upgrade is needed. Please follow the steps User could reset the configuration of IP Video Server Pro. Please follow the step for resetting the video below for updating your firmware. server. Step 1: Get the new firmware and save it in the hard disk. Step 1: Log in IP Video Server Pro and click on the “Reset” button in the Menu List. Step 2: Log in the IP Video Server Pro. Click on the “Upgrade” in the Menu List. Step 2: Select which kind of configuration or “ALL” for all configurations to reset. Step 3: Click on the “Browser” button in the Main Display area and a dialogue box will pop up for the user Step 3: Click on “OK” button for resetting the configuration. to choose the new firmware file (the file saved in Step 1). Step 4: Click on “Upgrade” button for starting the upgrade process. NOTE: The upgrading process should not be interrupted, that is user should not turn off the power of or reset the IP Video Server Pro when upgrading, for that will cause a hardware damage of IP Video Server Pro. 28 29 8. Connecting Multiple Video Servers to a Router 7.19 Reboot the Camera User could reboot IP Video Server Pro via the browser. Please follow the steps below for rebooting the video server. Step 1: Log in IP Video Server Pro and click on the “Reboot” in the Menu List. Step 2: Click on the “Reboot” button in the Main Display area for rebooting the video server. Step 1: Assign a local IP Address and Http Ports for your video servers (confirm the cameras settings corresponding to your network settings; you must use the same gateway and Subnet Mask). Step 2: Set up the router to open the ports of video servers for remote access the video servers via internet (refer to your router’s user manual for how to open up ports). Step 3: Accessing your video servers. - Access on local network Enter “http:// 192.168.1.100” to access the Video Server Pro 1; Enter “http:// 192.168.1.101” to access the Video Server Pro 2. - Access from the internet Enter “http:// 61.30.13.40:80” to access the Video Server Pro 1; Enter “http:// 61.30.13.40:81” to access the Video Server Pro 2. 30 31 9. Using UPnP to Connect to the Video Server 10. Surveillance Software NOTE: If your operating system is Windows 98/ 2000, UPnP is not available. 10.1 Using the Mega Pixel IP Camera Viewer Step 1: Confirm the UPnP function of video sever has been enabled (refer to section 7.15). Step 2: Follow the steps below to enable UPnP for Windows ME/ XP. - Click “Start” → “Setting” → “Control Panel” → “Administrative Tools” → “Services”. - In the “Services” window, double-click the service “SSDP Discovery Service”. Double click on ( ) Mega Pixel IP Camera Viewer’s execution file on Windows Desktop or in the Mega Pixel IP Camera Viewer folder of the Start menu. When the program is executed, the following screen will appear (refer to section 5.2 Software Installation). - Select “Automatic” in the “Startup type” item, and click “Start” to start the service. Click “OK” to quit. 10.1.1 Date/ Time Info. - Repeat the steps above to start the “Universal Plug and Play” service. Display local date and time. Step 3: Open the “My Network Places” on the desktop, click the “host” to connect directly the video server. (The host is the default UPnP host name) 10.1.2 Screen Split Button Selects screen layout for viewing live video from multiple cameras: 1/ 4/ 8/ 9/ 13/ 16. 32 33 10.1.3 System Setup 10.1.3.2 Record All Channels System Setup include: Global Parameters, Record All Channels, Account Manager, Login and Press the button to record all of the available channels according to the scheduler setting. Press Language. the button again to stop recording. 10.1.3.3 Account Manager Press the button to open the Passwords Setting window. You can set a user’s password and an administrator’s password. 10.1.3.1 Global Parameters Setting Press the If the Check Password is selected, the users must enter the passwords when login. button and the Global Parameters Setting window will be displayed. 10.1.3.4 Login: Enter the passwords of User or Administrator to switch between user and administrator accounts. (1) (2) Video Disk Reserved (GB): Set the free space reserved in each HDD. File Package (min): To separate the recording file by minutes (30 as default). Device Max: The maximum devices supported from 1 to 16 up to the device installed. Save snapshot as: Select the snapshots in BMP or JPEG format. 10.1.3.5 Language: Select the OSD language. File Press the Folder… button to select the folder which stores the snapshots or recording files. NOTE: Press the OK button to save and apply the configuration. 34 35 10.1.4.3 Refresh: To refresh the videos, the recording process will be stopped and restart again. 10.1.4 Camera Setup If the video is unstable after some high CPU resource programs, CPU usage may come to 100% and all The buttons in the bottom of each channel are the functions for current channel only. the resources are taken. In that case, the system may run in slower mode than ever. Please click “Refresh” to renew the system and get it backs to higher performance. 10.1.4.4 Record: Record the current channel only. 10.1.4.5 Snapshot: Take a snapshot of live video. 10.1.4.6 Scheduler: Set the recording mode based on the weekday hour. 10.1.4.1 Setup Press the button and the TSVideo Parameters window will be displayed. (1) CH. Name: Enter the channel name. (2) Login: Enter the User ID of the video server (default login: root). (3) Password: Enter the password of the video server (default password: admin). (4) (5) (1) port: 80). (6) (8) (9) (2) Enable Motion Detection: Enable/ Disable the motion detection function. (3) Post-Alarm Recording: Enter the recording duration (seconds) after motion is detected NOTE: If you want to use the motion detection recording function, be sure to enable the Motion Dev. Name: Select the connected device (select to the Video Server). (7) weekday hour block. Encorder IP: Enter the IP address of the video server. CGI Port: Enter the CGI port of the video server (default CGI Please click on the weekday hour block to change the recording mode or just drag the mode to the Detection function and set the Post-Alarm Recording, and confirm the Motion Detection (refer to section 7.11) and the Alarm Picture (refer to section 7.11) have been enabled. Resolution: Select the resolution (NTSC: 176x120/ 352x240/ (4) Please save the file before exiting the setting dialog. 720x480, PAL: 176x144/ 352x288/ 720x576). (5) Press the Apply button to update the current scheduler, and press the SAVE or Save As button to save the configuration. Press the QUIT button to exit. Flip: Vertically rotate the video. Mirror: Horizontally rotate the video. (6) Repeat the above steps to set up the other channels. (7) After setting, press the Record button on the right side of the screen to start scheduled recording. (10) I-Frame Only: Enable/ disable the I-Frame function. (11) Audio Enable: Enable/ disable the audio function. (12) More…: Directly open the build-in Web for more configurations. NOTE: Press the OK button to save and apply the configuration. 10.1.4.2 Connect: Click the button to connect the video server directly, the image of video server will display in the preview window. 36 37 10.1.5 Hard Disk Info. 11. Troubleshooting File package and disk free space amount. Situation No images available through Web browser 10.1.6 Channels 16 channels indicators to control the function buttons. Can’t connect externally (can work locally) Check Point 1. Confirm the ActiveX has been enabled. 2. Confirm the version of your Internet Explorer. If the version number lower than 5, you need to upgrade it. 1. This might be caused by the firewall protection. Check the internet firewall with your system administrator. 2. Refer to section 8 for more information about connecting multiple video servers to a router. 1. Restore the Factory Default Settings: Press continuously the Default button on the top of the Forgot the login user name and password video server for 10 seconds. Default IP Address: 192.168.1.100 10.2 Play the Recorded Files Default User Name: root The recorded files can be played by Windows Media Player program. Default Password: admin Step1. Open the Windows Media Player and select Now Playing. Step2. Drag the recorded files to the list on the right side of the window. Step3. Simply double-click the recorded file on the list and it will begin to play. 38 39